2N® PICard Commander – MIFARE DESFire EV2/EV3 - How to install and program cards
Product Description
2N® PICard Commander is a software used for the encryption of access card credentials. The app creates projects which generate a set of encryption and reading keys. The reading keys from these projects can then be imported into a 2N device or 2N® Access Commander which will then take care of the distribution into 2N devices connected to the 2N® Access Commander.
The 2N® PICard Commander technology is used to encrypt the MIFARE® DESFire® EV2 and MIFARE® DESFire® EV3 cards.
Requirements
The main requirements are installed 2N® PICard Commander, RFID USB reader and writable Mifare Desfire EV2 or EV3 cards (either existing or purchased from 2N).
Detailed information can be found in the 2N® PICard Commander manual.
Licensing
You need to install 2N® PICard Commander first.
Once installed you will need to add the license. The license is tied to the USB reader. You will need the Device key which can be found under Help/License:
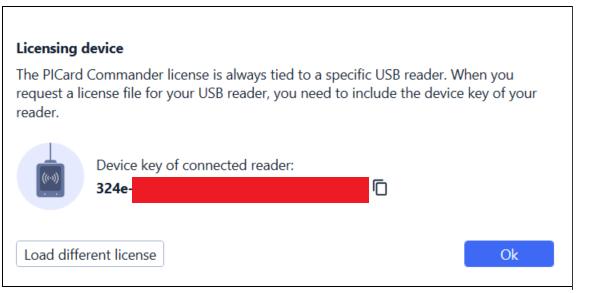
At the bottom, you will see the Device key of the connected USB reader (the USB reader has to be connected to the PC where the 2N® PICard Commander is running).
Once the license file is loaded it will be confirmed in the 2N® PICard Commander app.
If you connect a USB reader other than the licensed one, you will be notified in the app as the new reader would have to be licensed as well.
Getting started
By creating new projects you can encrypt access card groups in different modes. Each project can be set up for a specific use of these cards.
Each project generates unique encryption and reading keys. Only one key can be imported into a 2N device or 2N® Access Commander.
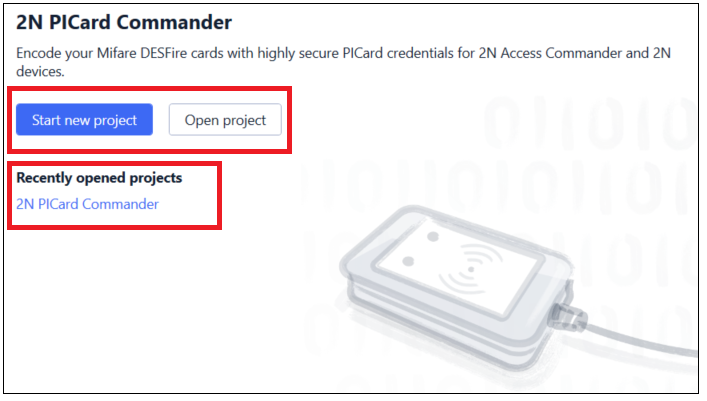
To start a new project select the Start new project button or File/New project (CTRL + N).
To open an already existing project you can select it at the bottom of the application or select the Open project button and open it from a file. Alternatively, select File/Open project (CTRL + O).
Setting up a new project
When you start a new project you need to set these parameters:
- Project name – Name of the project
- Project description – Any notes you would like to mention

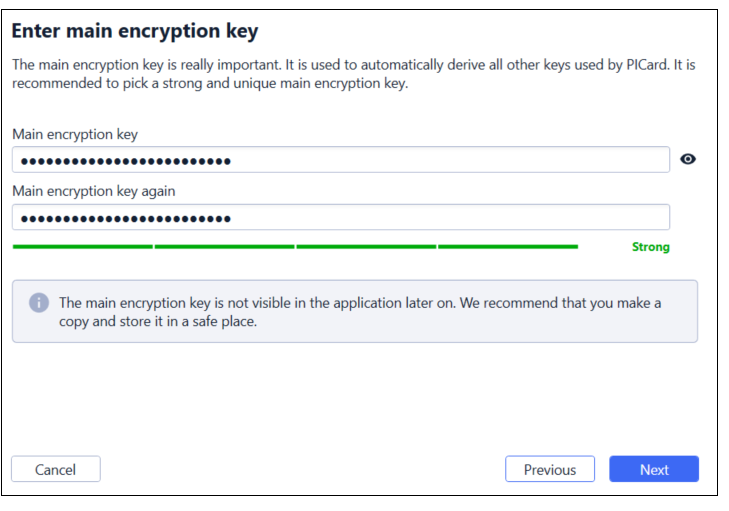
Next, you need to select a main encryption key (MEK). Make sure it is unique and strong enough. The 2N® PICard Commander app uses the MEK to generate key sets for card encryption. If you lose the project, a new one can be created with this MEK to access the encrypted cards since the key sets are generated based on this MEK. This means that two projects with the same MEK will have the same key sets.
MEK cannot be shown nor changed later!
Mode selection
There are 3 modes to choose from for the project.
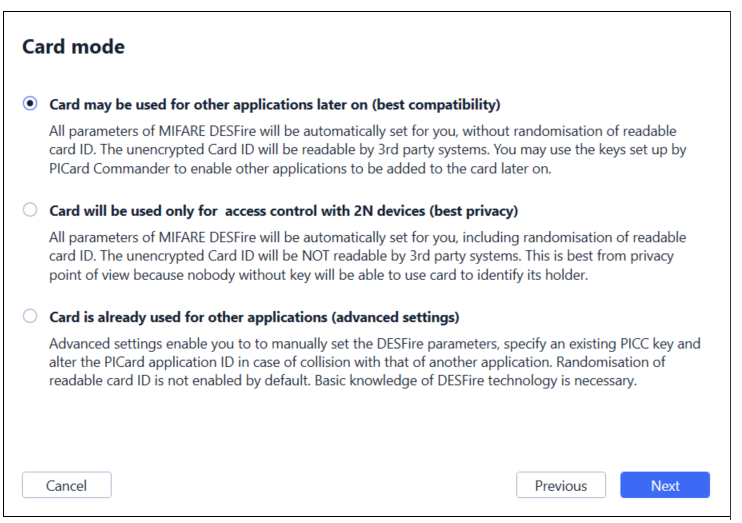
Selecting Card will be used only for access control with 2N will enable Random ID which cannot be disabled afterwards!
Selecting Card is already used for other applications is irreversible
Once you have completed previous steps you will be able prompted to save your project.
The file will be saved as projectname.picprj.
You also have the option of protecting the project file with a password.
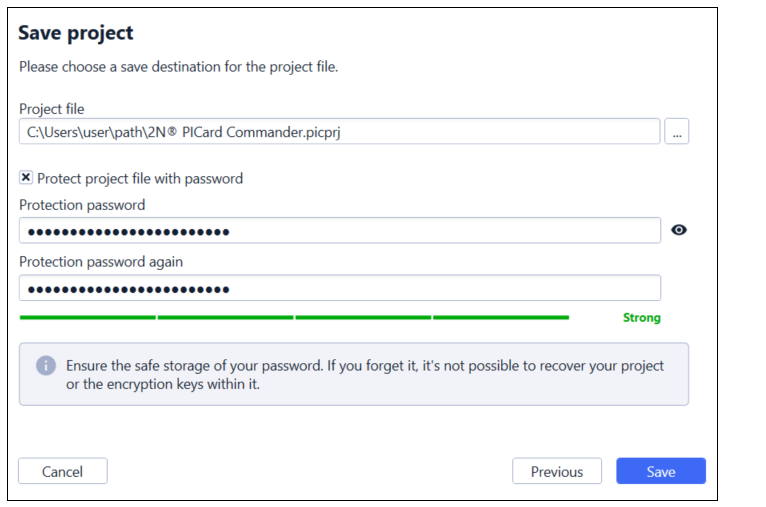
A forgotten password cannot be viewed or changed at a later date
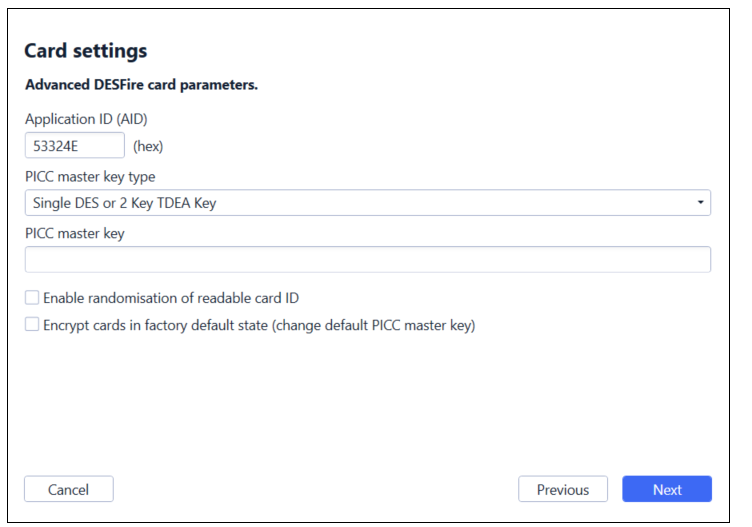
Advanced settings
Encrypting cards
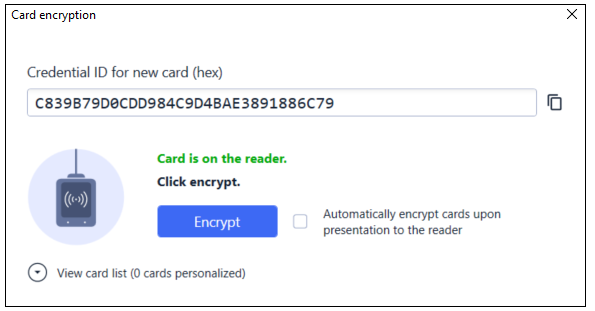
Once the project is set up you can start encrypting cards.
Start by selecting Add card button under Card encryption.

This will show you a prompt to place the card on the reader and leave it there. Once you do so you should see the change in the window. If the card is compatible, you can click on the Encrypt button.
In case there is some issue with the card you will also be notified:
The card cannot be personalized – 2N® PICard Commander doesn’t have access to the MEK of the presented card.
Not enough free space on the card – There is not enough space on the card to upload the 2N® PICard technology.
Unsupported card – The program doesn’t support the presented card’s type
Only Mifare DESFire EV2 or EV3 are supported – The presented card is MIFARE DESFire EV1
Communication failure with card – The reader couldn’t read the card. Place the card on the reader and do not remove it before the encryption process is complete.
Once the encryption process is completed you will get confirmation on the screen

Read keys export
In order for the 2N readers to access the data on the card they need to know the read key of the project.
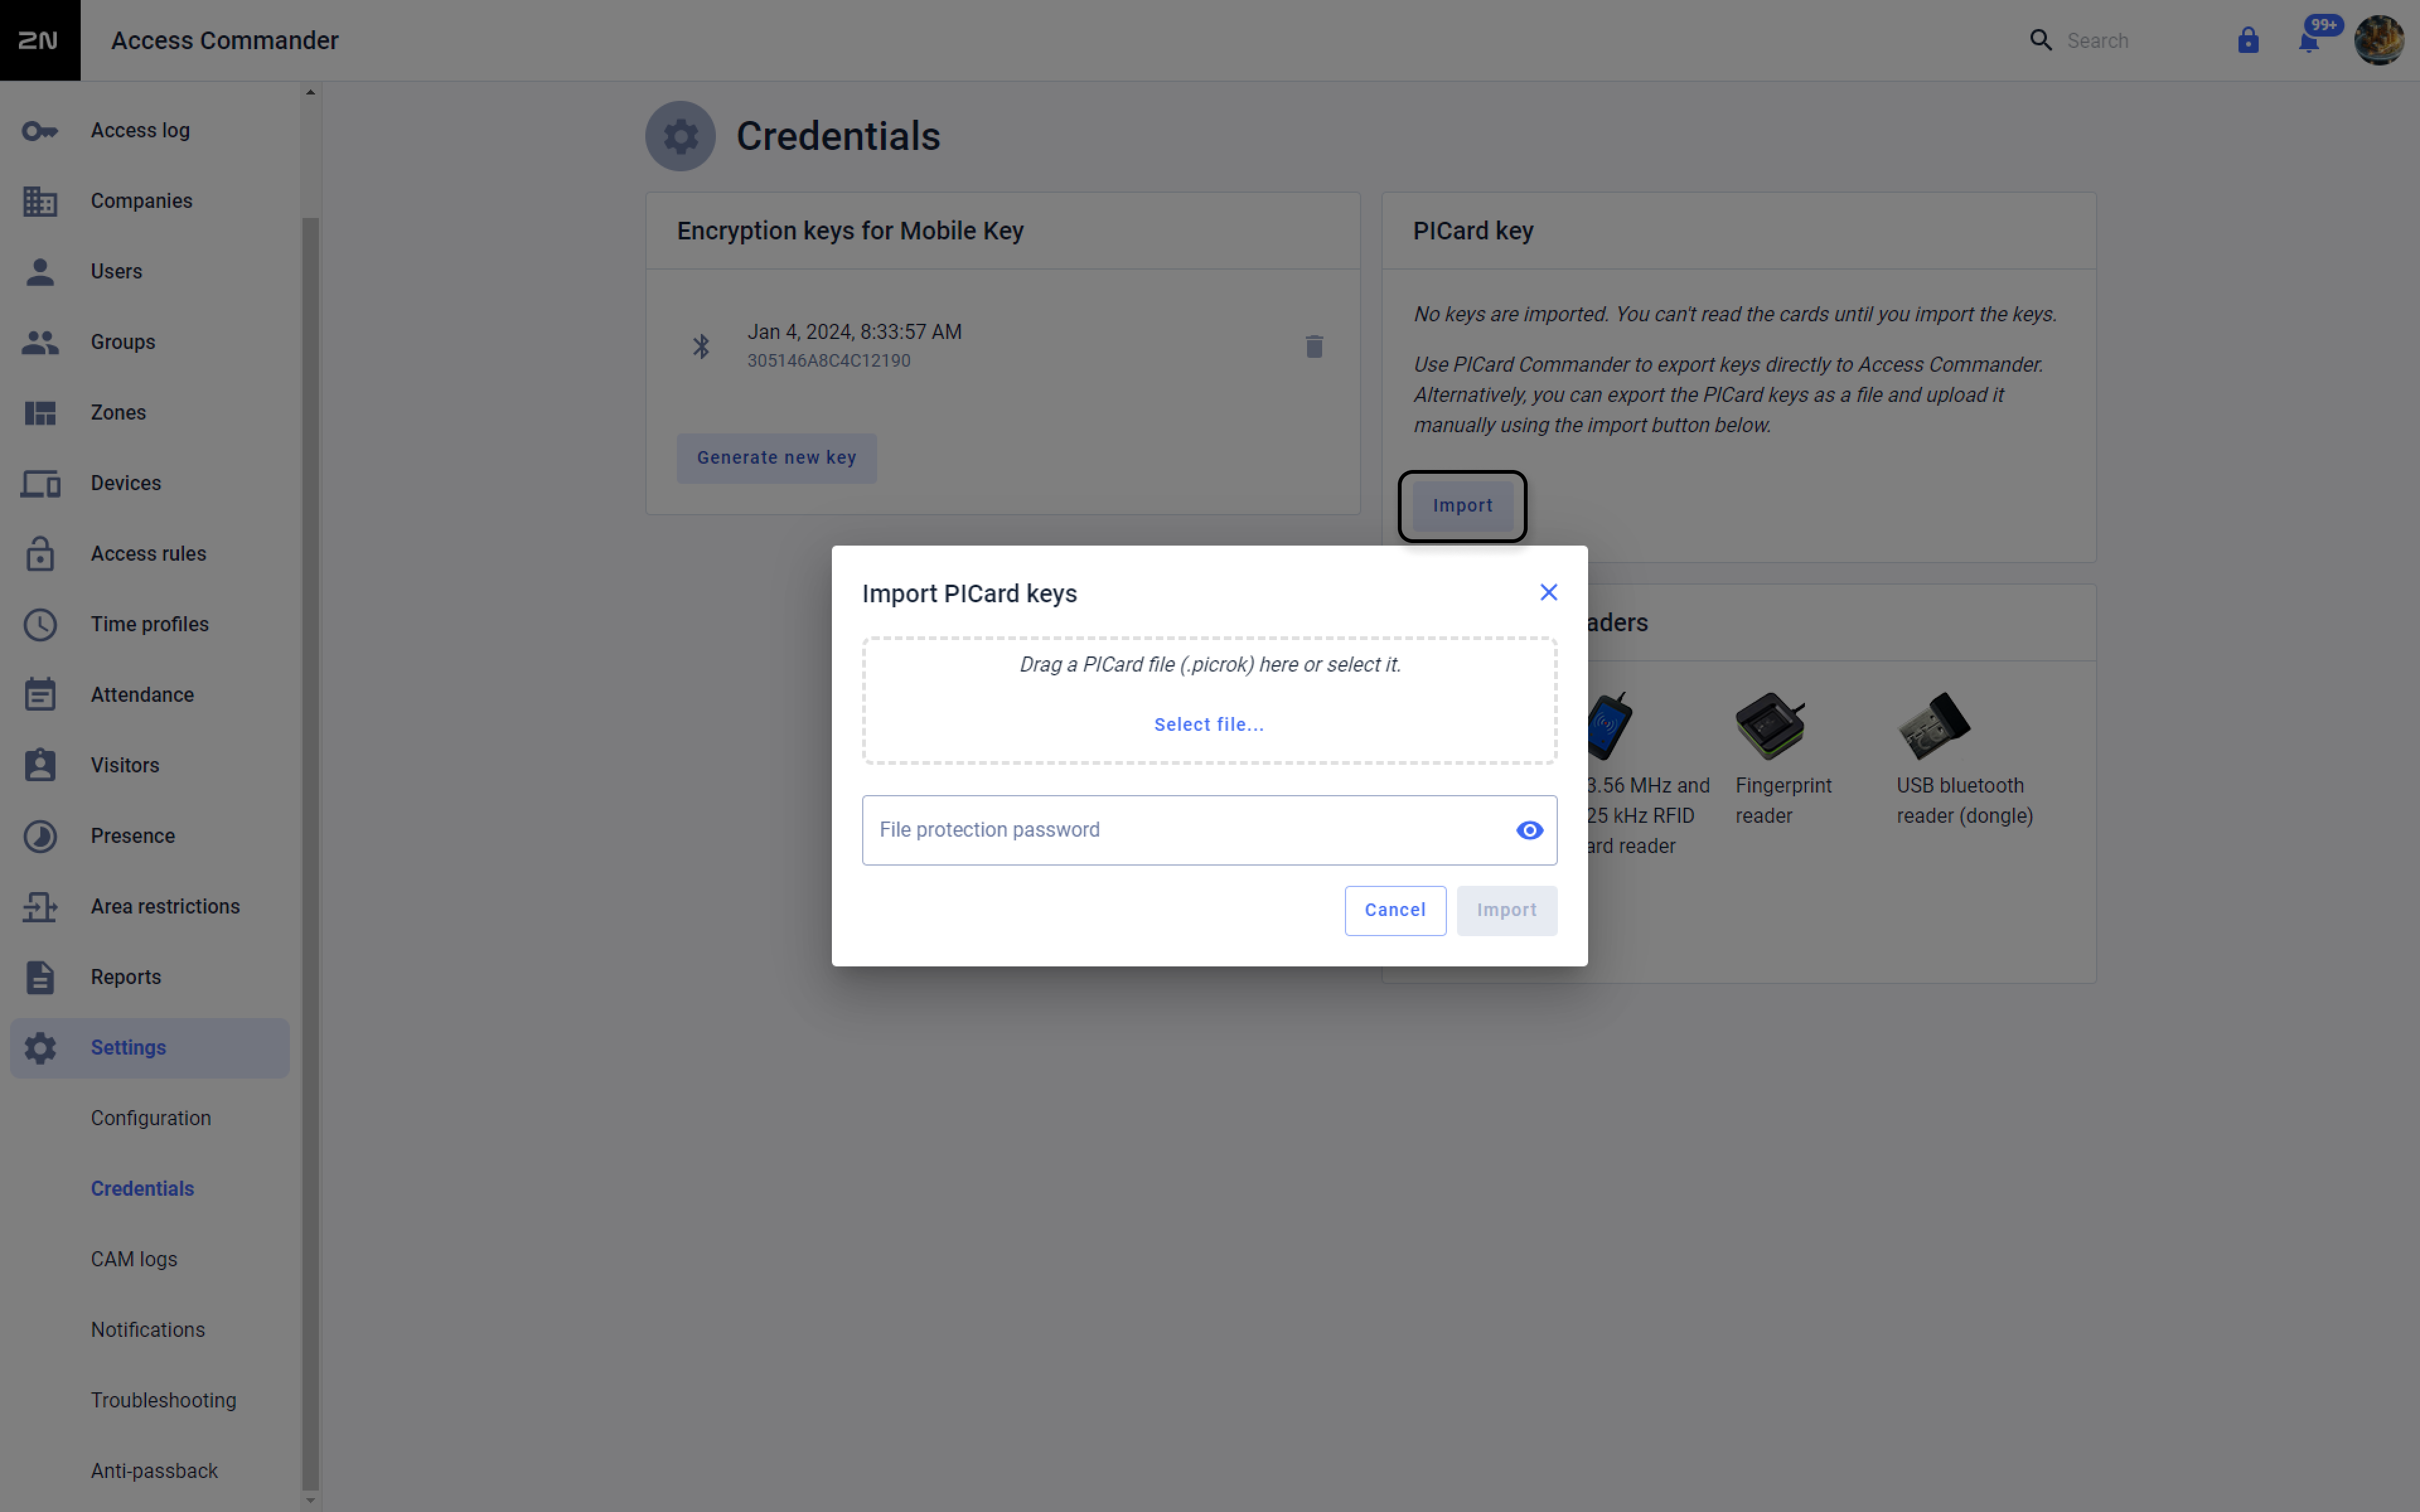
You can either export the read keys for a 2N device as a file or into the 2N® Access Commander which will then distribute them to devices connected to it.
To export the keys, press the Export button on the main screen (or Project/Export reader keys)
This will open a window where you can select how you want to export the keys.
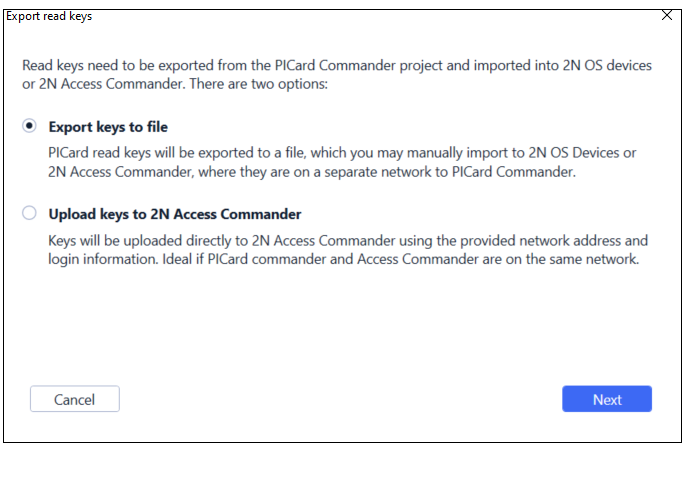
To export the read keys as a file, select where the file should be saved and choose a password.

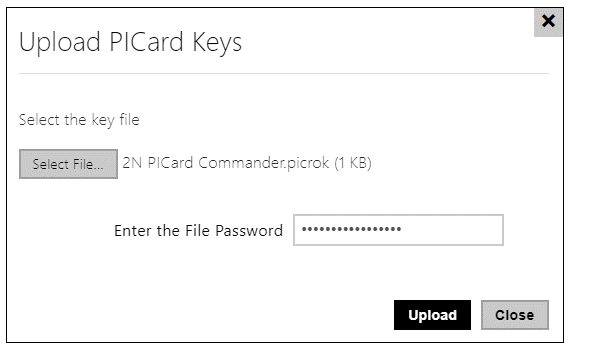
Once exported, you can upload the file into the 2N unit

Select the .picrok file and fill in the password.
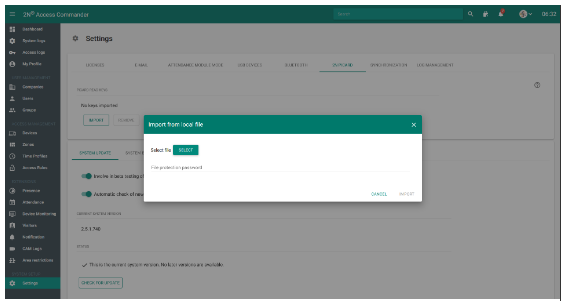
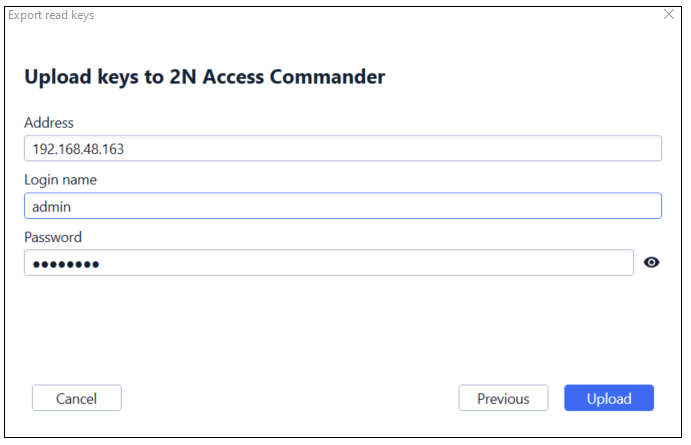
Or you can upload the file to Access Commander:
Version 3.0+
Version 2.7.1 or older
Alternatively, you can export the read keys directly into the 2N® Access Commander by filling Access Commander's IP address and admin account credentials.
Once the keys are imported, make sure to also pair the reader on the 2N device.
This function is found under Hardware/Extenders:
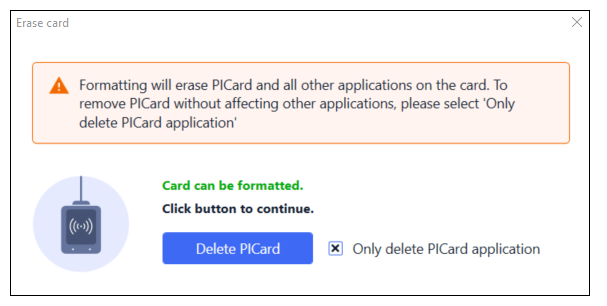
Formatting the card
To format the whole card or delete the 2N® PICard application open the Project/Format card.
Here you can choose whether you want to completely format the card or only delete the app.
Practical tips
Here you will find some practical tips and situations you can encounter while using 2N® PICard Commander.
What if I lose the project file?
You need to know the Main Encryption Key. If you lose a project file, you can create another one with the same MEK and you will be able to edit the existing cards within that project or add new ones.
As mentioned above, the encryption keys are based on the MEK so as long as the MEKs in different projects match you are able to add and/or edit cards.
How to solve a situation when there are both Picard-compatible and Picard-incompatible readers on the site?
In this situation you will need to use two parts of one card – one using the 2N® PICard Commander application and the other using a format readable by a reader incompatible with 2N® PICard Commander – a public one (i.e. card's serial number, etc..)
This way you will make sure the user has correct access with one card.
How do I ensure the best security using 2N® PICard Commander?
The most secure way is to use only 2N® PICard cards. To further support this it is recommended to disable all the other card types on the reader (Hardware/Extenders) and use a project using ID randomization.
Along with a strong MEK and the project file safely stored you ensure the best security.
How can I write a PICard credential on a card already being used by a customer?
First, you need to know the PICC master key of the respective card. The card must be also set in a way that it requires the PICC master key to be entered to write a 2N® PICard application on it. Then you may create a new project in a standard way as described above. When selecting the card mode, select the “Card is already used for other applications (advanced settings).