Anti-passback - how to configure in 2N® Access Commander
The Anti-passback function enhances the access control system with monitoring of unauthorised re-entering of a reserved space.
Requirements
Anti-passback requires:
- Access Commander 1.11 and later
- IP intercoms / Access Units with firmware 2.24 and later
- Enhanced Security or Gold license in your device (Access Units come with Gold licence from factory)
- At least two access readers (RFID / bluetooth / fingerprint / keypad)
- No one can enter/exit area without authorization, there is no REX button etc.
- Permanent operation of Access Commander. Connection between Access Commander and devices must be ensured.
STEP 1: Configure basic access for users.
Follow this video to configure a common access for users.
*Video - Basic setup - 2N® Access Commander
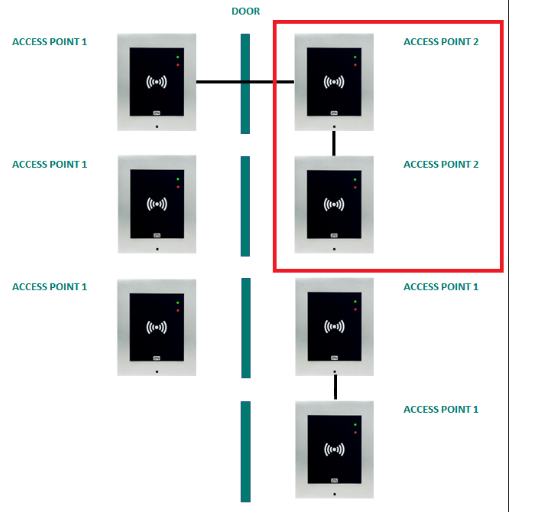
STEP 2: Explanation of ACCESS POINT 1 and ACCESS POINT 2.
There are two ACCESS POINTS (directions) - ACCESS POINT 1 and ACCESS POINT 2.
Access Units and IP Intercoms with one reader, please set as ACCESS POINT 1 (follow STEP 3).
If there are connected extension modules as well:
a) All extension readers that are on the same door side as the main unit please set as ACCESS POINT 1 (the same as the main unit, follow STEP 3).

b) All extension readers that are on the opposite door side than the main unit please set as ACCESS POINT 2 (follow STEP 3).
STEP 3: Configure ACCESS POINT 1 and ACCESS POINT 2 in devices.
Go to device´s web management. You can use Access Commander feature:
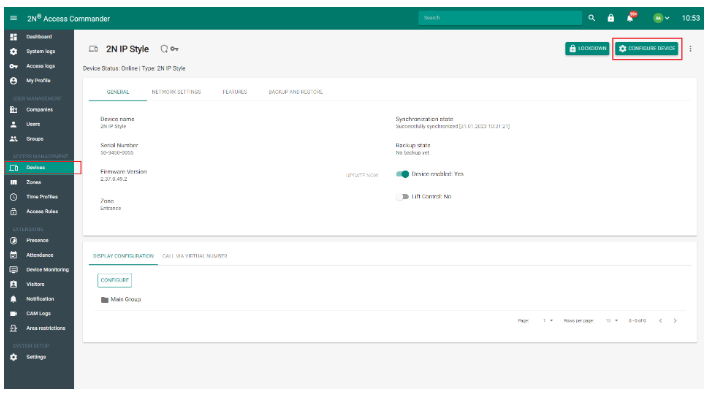

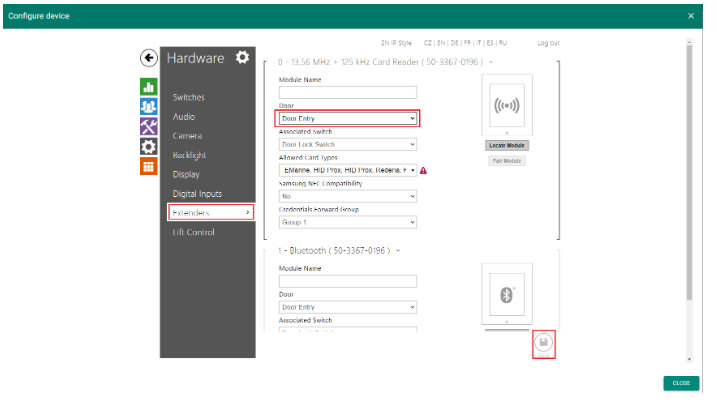
Go to section Hardware - Extenders and select ACCESS POINT 1 or ACCESS POINT 2 for access modules.
ACCESS POINT 1 is substituted by "Door Entry" value, ACCESS POINT 2 is substituted by "Door Exit" value.
Door Entry, Door Exit
"Door Entry" = ACCESS POINT 1
"Door Exit" = ACCESS POINT 2
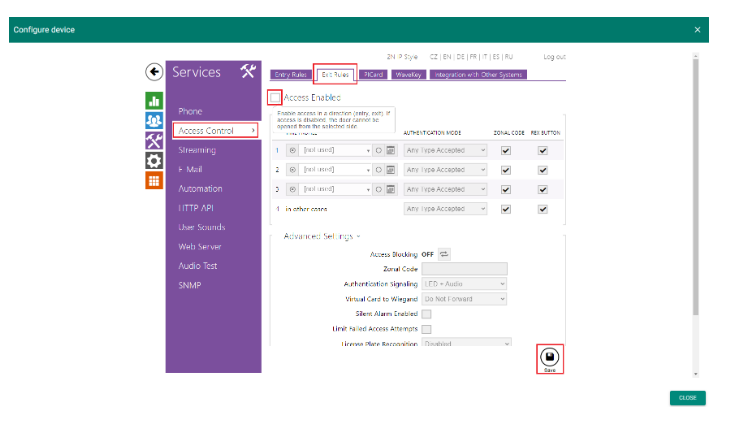
If there is only ACCESS POINT 1, please go to section Services - Access control - Exit rules, enable ACCESS POINT 1 (Entry Rules) and disable ACCESS POINT 2 (Exit Rules).
If both ACCESS POINTS are used in the device, then please enable both ACCESS POINTS (Entry Rules and Exit Rules).
If both ACCESS POINTS (Entry Rules & Exit Rules) are disabled, device can´t be added to Anti-passback area in STEP 5.
STEP 4: Configure Area Restriction (Anti-passback area)
Go to Access Commander - section Area restriction - Area list and create area for Anti-passback rule.
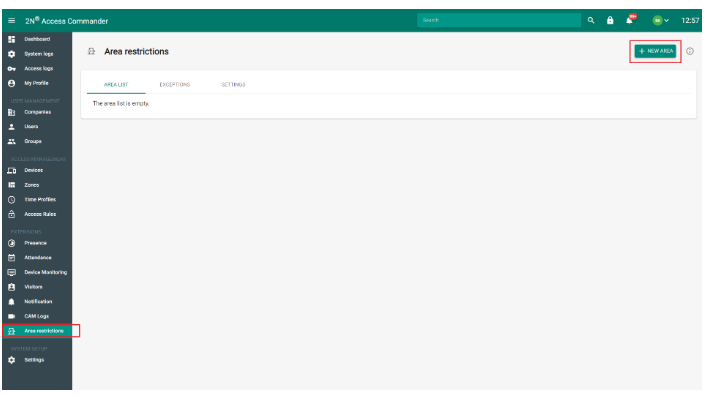
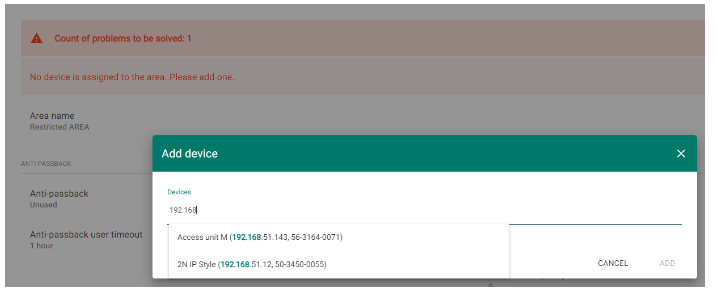
STEP 5: Add devices to Restricted AREA.
In the created Restricted area click on ADD DEVICE button.

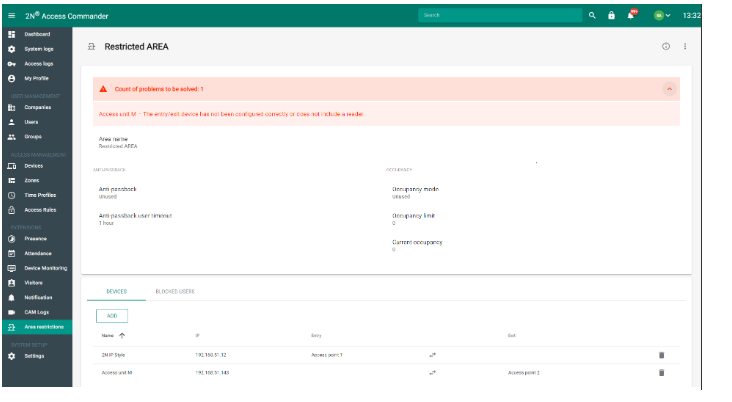
Device can´t be added or there is an error message
- If a device can´t be added to the Anti-passback area, please check in STEP 3 that at least one ACCESS POINT (Entry Rules or Exit Rules) is enabled.
- If there are "problems to be solved" as in the picture below, please go back to STEP 3 to check configuration of ACCESS POINTS ("Entry rule", "Exit rule" in devices).
After resolving the issue we recommend to delete the device from the Anti-passback area and add it again.
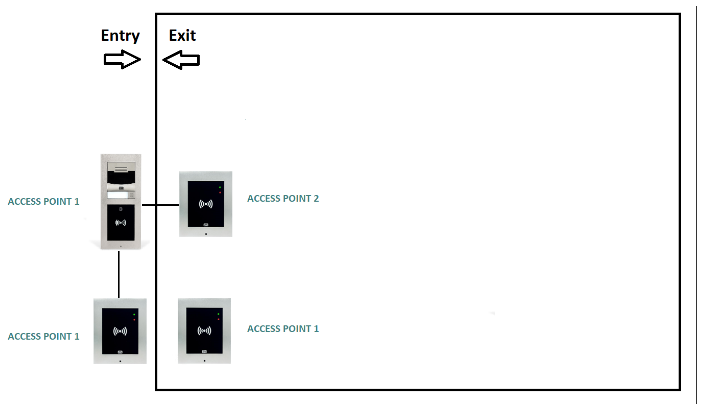
STEP 6: Set which ACCESS POINT is for Entry and which ACCESS POINT is for Exit.
Click on two-arrows button and select which ACCESS POINTs (readers) are used for Entry to the area and which ACCESS POINTs (readers) are used to Exit the area.

Example:

STEP 7: Select the Anti-passback mode.
Go to Access Commander - section Area restrictions - choose your area, you want to set - "restricted AREA" (in my case)
- Log violatins only – no Anti-passback area access is limited if the rules are broken; the event is only logged with an optional administrator notification.
- Deny access – the Anti-passback area access is limited temporarily or permanently and unblocked as a result of the time limit, system administrator's instructions or exit passage.

STEP 8: Anti-passback is configured.
This feature requires a permanent operation of Access Commander. Connection between Access Commander and devices must be ensured.
