Display - How to set up display of an device in 2N® Access Commander
If an 2N IP intIf an 2N IP intercom equipped with disprcom equipped with display ay iss added inadded in Access Commander, the contacts, the contacts oon thehe gigiven displayay arere set dirrectlyctly inin thethe Access Commander forfor tthee givgiven device device.
Requirments
- InteIntercomcom IP Vario withwith display,ay IP Verso withwith display module or IP Style
r - It is always It is always recommecommendeded tto use se thehe ccurrerrentt verssion ofon of Access Commander to eo ensuresure fulfull functtionality andnd susupportt foor Athhe lalatest ffirrmwwarre onIn thhe ddevicce ccontact frfrom a gra group oththerr thhan thhe onee thhat hass aaccess tto the zonne iin which thhe devivice wwithth ththe givgiven displayay iss lococatedd isis not syynchronised wwith thhe device.
A tthisis ccasse,, itt is necnecessarary tto crcreate thhat ccontactct iin duplicuplicate, buut aaddd itt too thhe grgrouup ththatt hhas acccessss to thehe zozone w wheree tthe device is lloccated, annd ffilll inin onlyly thhe pphonne numbnumber ((not thhe accccessss ddatata).tthwhichchroce.
Insde
Version 3.0+
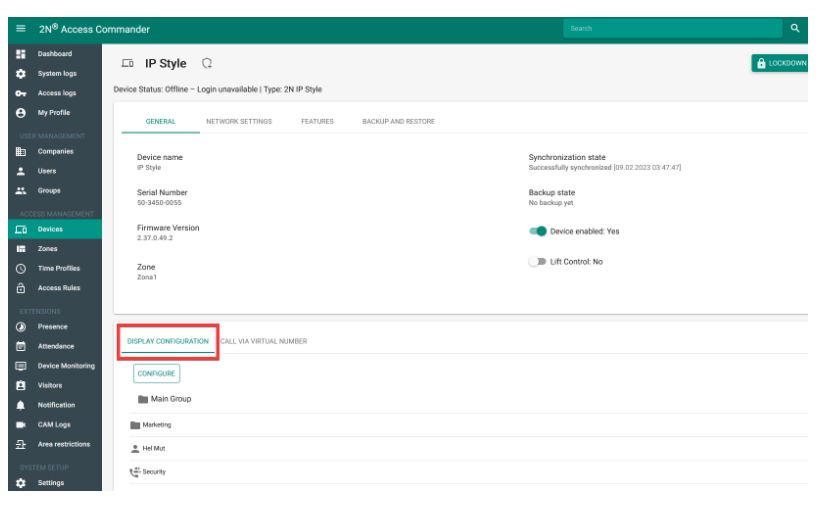
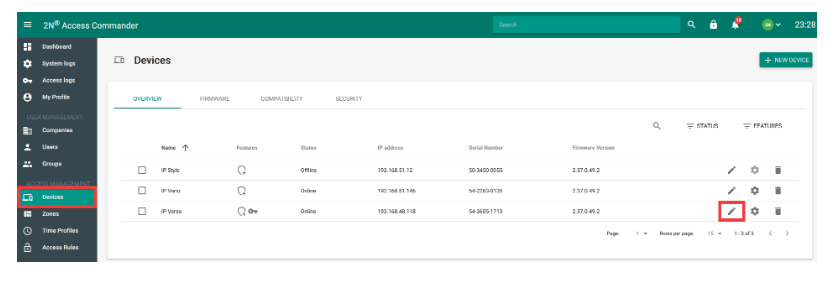
In the web interface of Access Commander, go to the Devices section and select the device
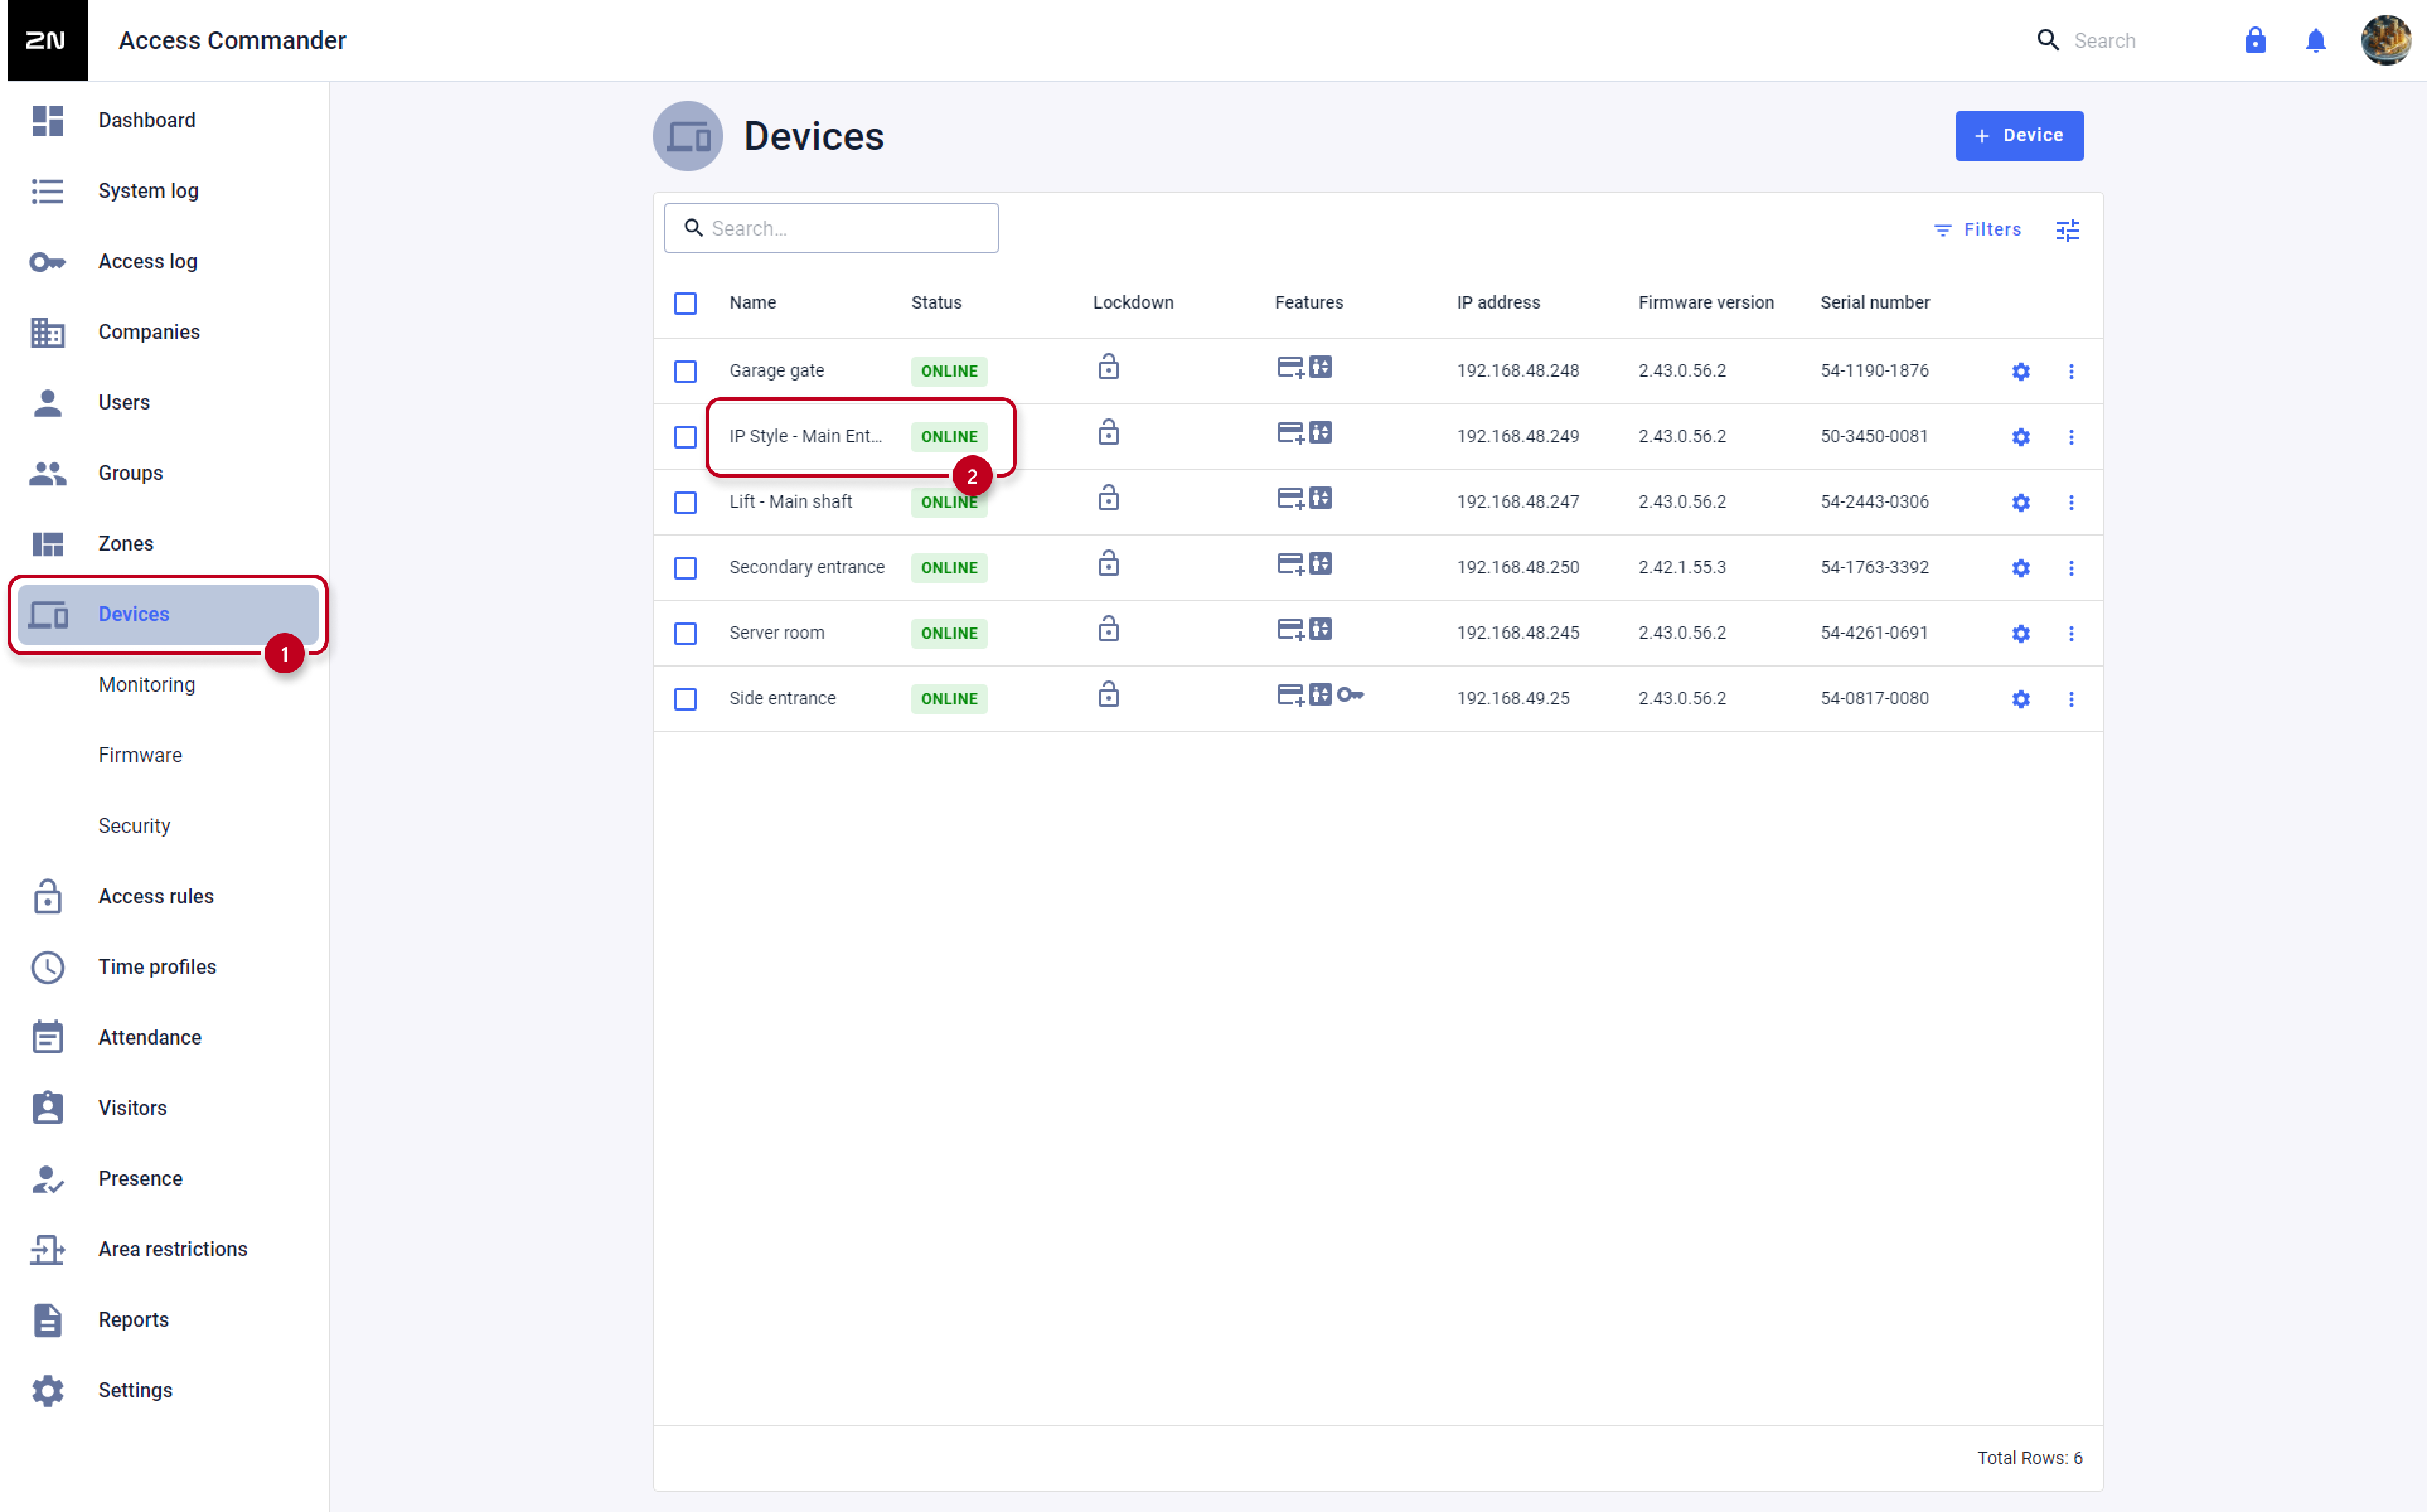
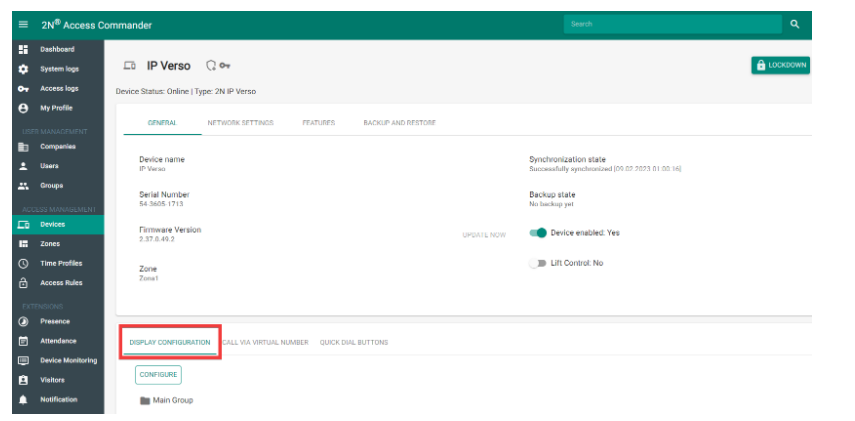
- Next: Administration > Display Configuration > Configure (see image below with the red box below).
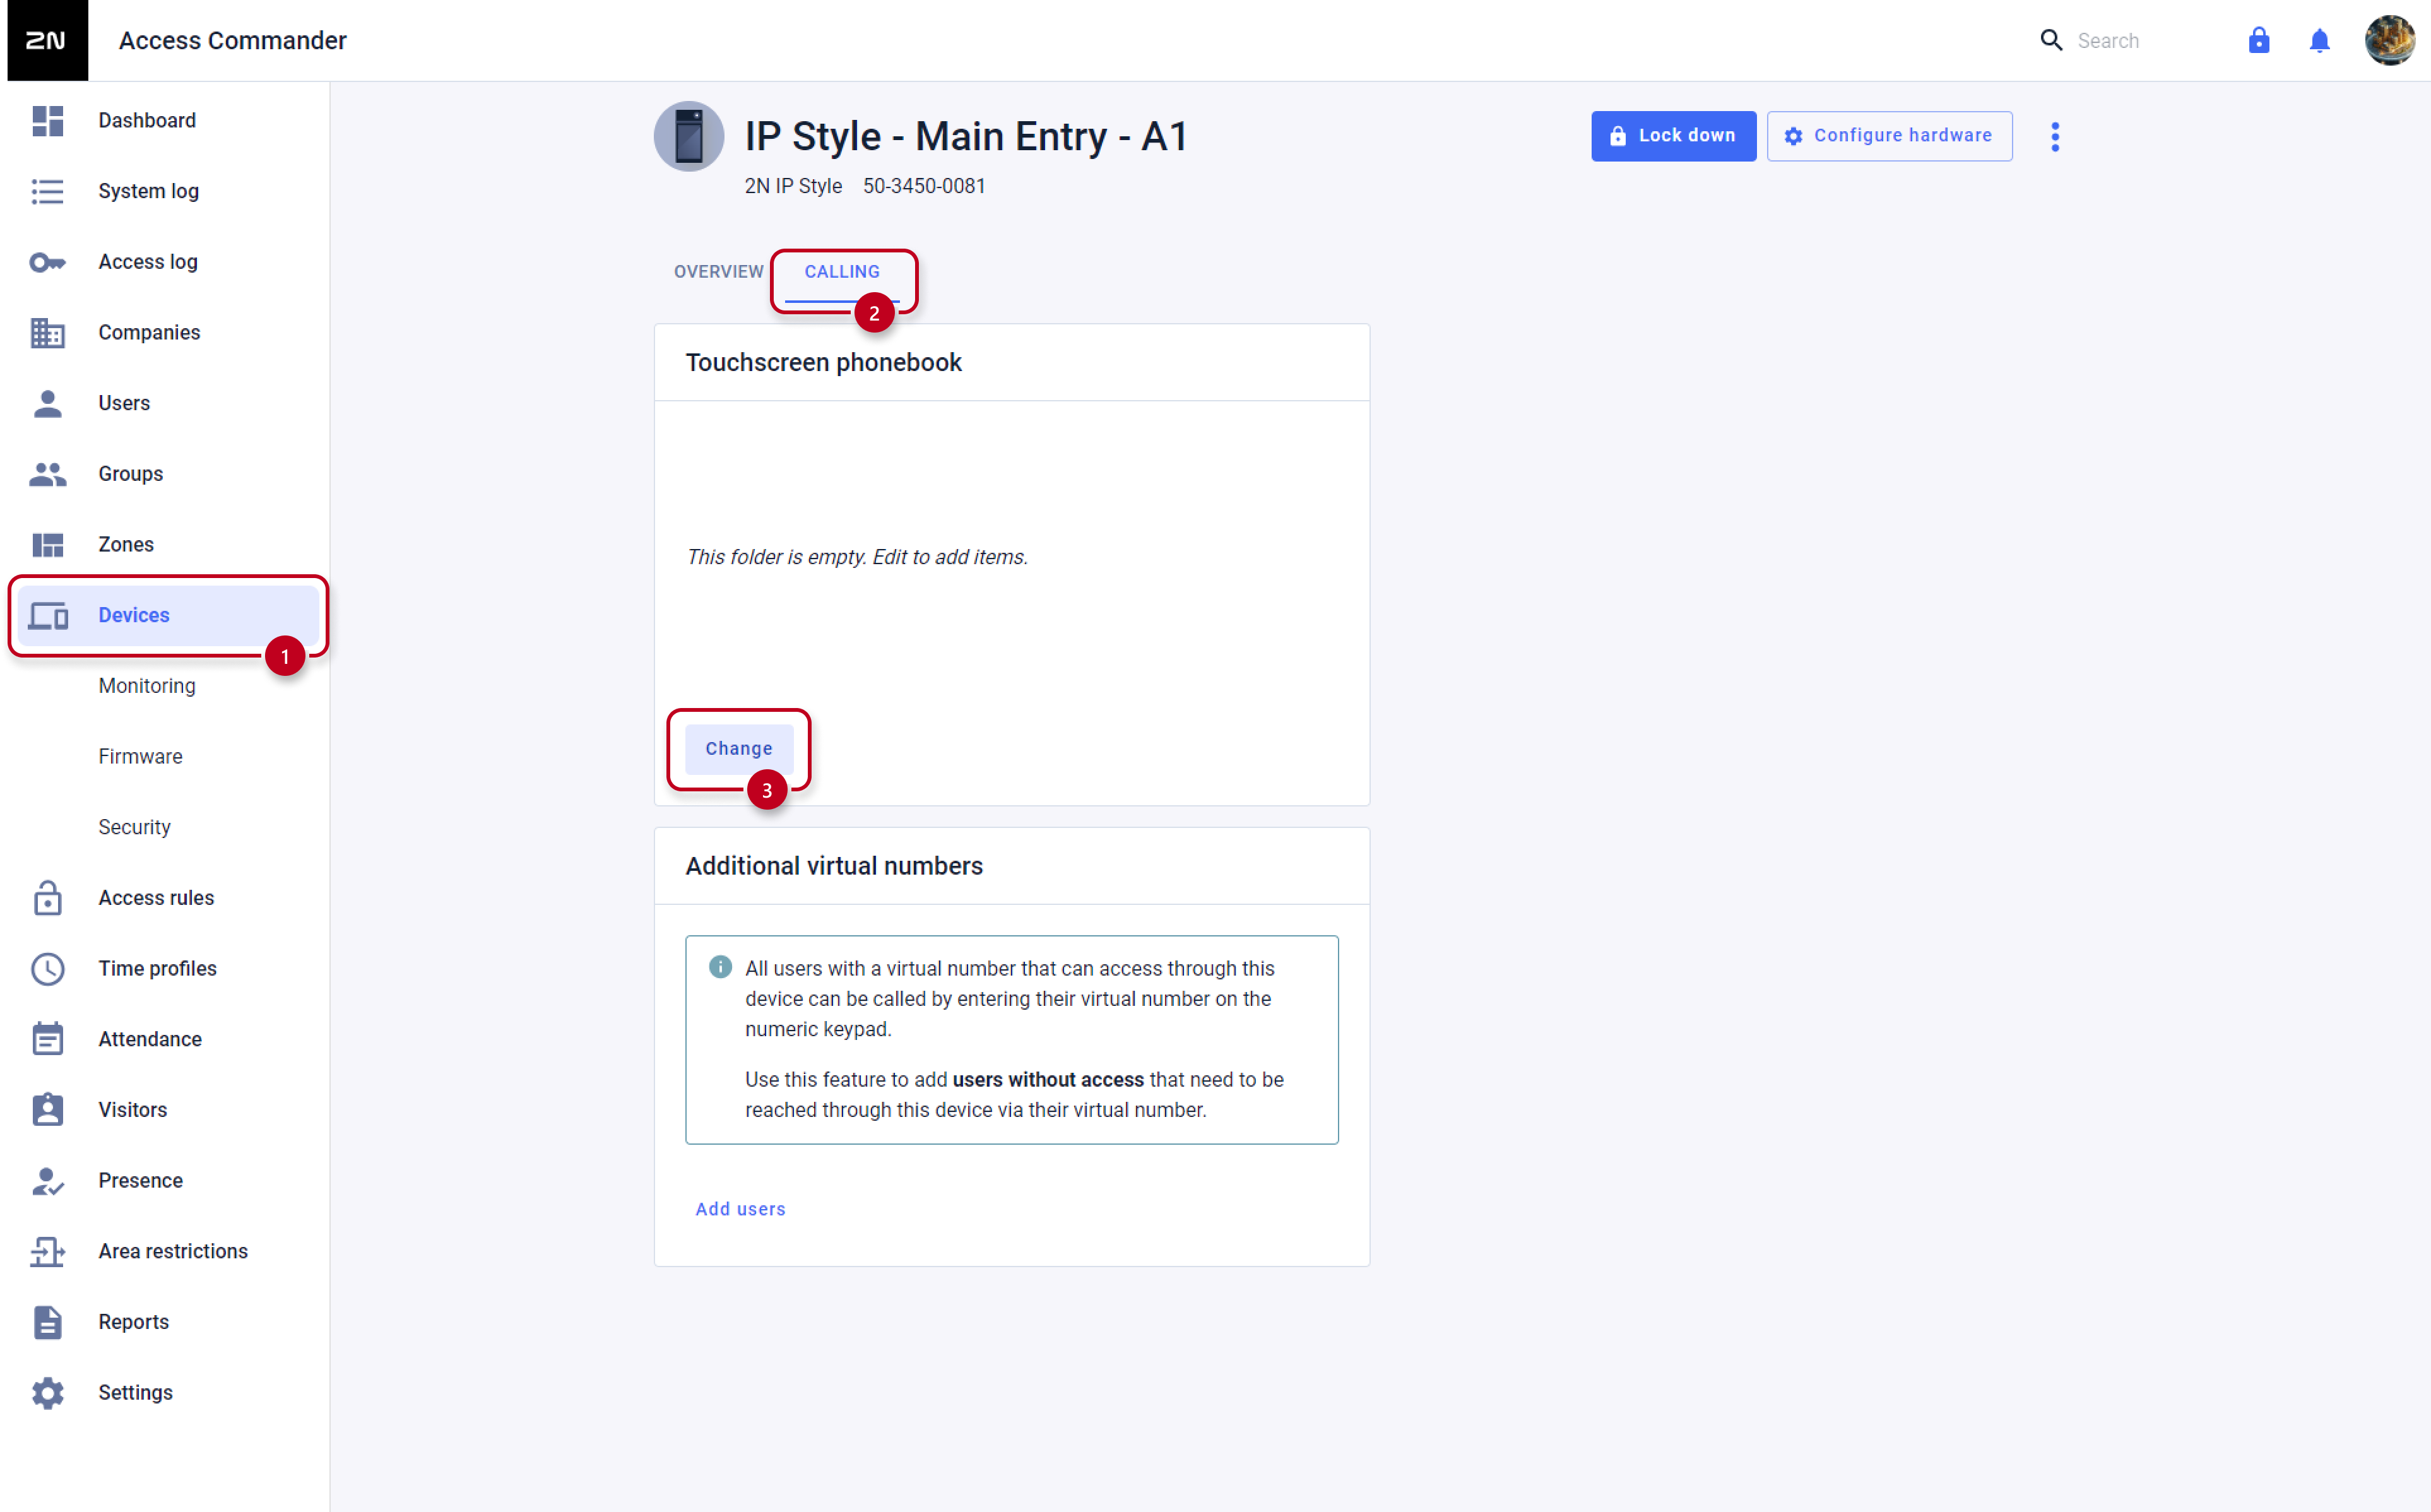
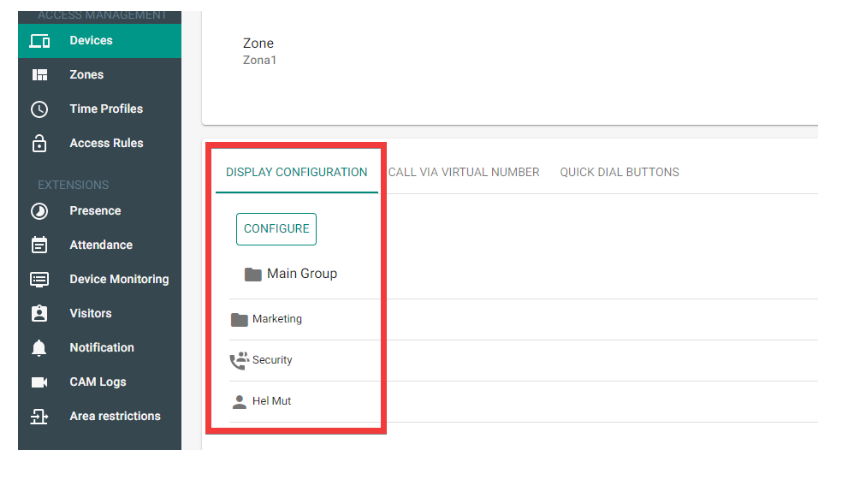
Here we can add individual items to the display depending on which button we will use here. In order for the changes to take effect on the device's display, it is necessary to click on the Save button (see the red box on the picture below).


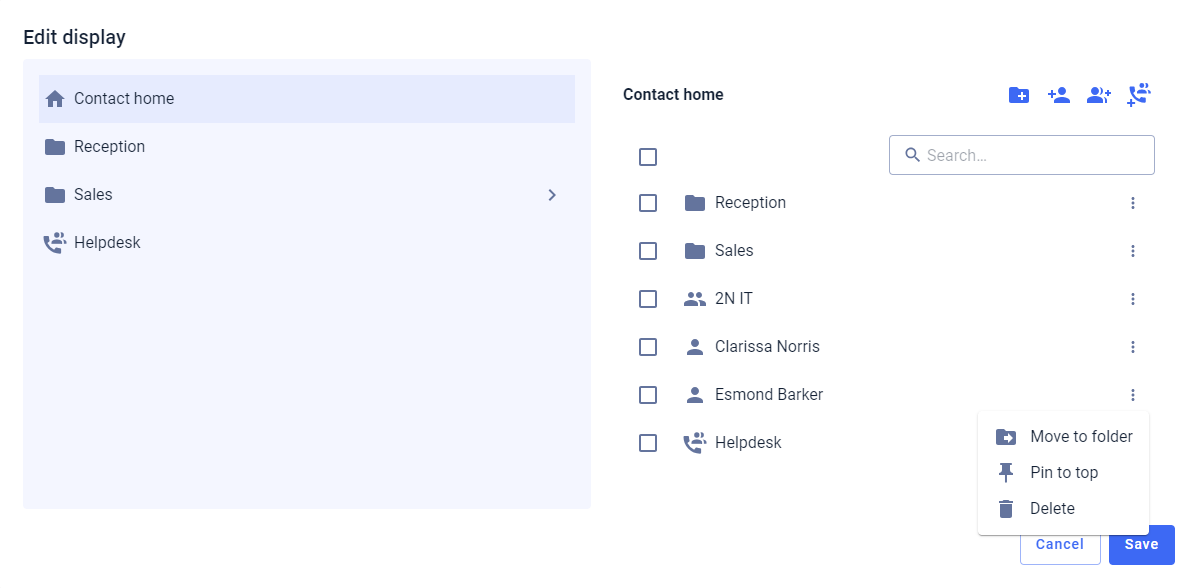
 Create a folder (by clicking on the name of the folder you will get to it so that you can add users or a call group or another sub-folder here,
again using the following buttons  on the screen top right).
 Create a call group (by clicking on the name of the call group you will get to it so that you can add users here - again with the given button
![]() top right).
top right).
Users within such a call group will then be dialled in parallel (at once).
 Add a user who is already created in the Access Commander
 Add a group already created within Access Commander. Users from the given group will be displayed individually.
 Click on this button to edit the folder name, resp. calling group.
 By checking these stars on the right, you can give priority for the contacts
 Click on this button to remove the contact from the display configuration.
- Then you can see the display configuration directly in the device's detail - see the picture below.

- In case of the IP Vario, the contacts of the display buttons are also configured in Access Commander - see the tab in the red box in the device's detail in the picture below.
(just one contact can be selected for buttons 1 - 4, again using the button ; by the button we can remove the contact then)
Version 2.7 or older
In thehe wwebb innterfaface ofe of Access Commander, go, go too thethe DeviccesDev section ((seee ththe rred b boxx onon thethe lefeft iin thehe imimagge bbelow)w) > seeleectt thethe ggiveven dedeviicee
- sesee the red bhe red boxx on thehe righght on thehe pictpicturere bellow.w.-
- Next:Next: AdmIninisistrratiionn > Disp> Displayysect CConfiguratti>on >> CConfiguree (see iimage belage beloww withwith thehe rredd boxbox below).low).
HeAdmr(e wewe can ad add iinddividvidualal itemsms to o thehe displayy ddeppendingg on which which buuttton wewe wilwill useuse herehere ((seee ttop rrighght inin thhe picicturure below)low) -- see tthe descriptriptionss belloww ththe ppictucture.H.
In oordder ffor ththe ch changes to tatake effffect oct on ththe devicvice's's display,ay, it iss nneccessassaryy to clclickck on t the CHANGECHANGE buttotton (s(see thethe redred bboxx onn ththe pictuicture bebelow).Ioow).

 Creatte aa fofolderer (by cclicckiing g on thehe naame ofof the fthe foldelder Cryou wu wil (byl ggett tto it it so thhat yyouu cacan addd us usersrs orr a ccalll grgrouup or r anothernother sub-f-folder hereer here,
againgain uusingng thehe follfollowwingng buttobuttons on thhe sc onscreen teen topp rigrightt).
 CreaCreatee a callall grogroup (by cby clicckiing on g on thehe namme of the calf the call grogroup you w you willll ggett tto it it so o thhat yyouu cacan add udd usersrs herhere - aga- againn wwithh the gthe given bubuttonon
![]() ttopp rigrightt).
ttopp rigrightt).
Ussersrs withinwithin susuchh a callall grogroup w will thell then be e diallialled id in paralllel (at oncet once).
 AdAdd a usserr orr grogroup alreadyalready creacreatedd withwithinn Access Commander. Ussersrs fromfrom the givethe given grogroup w willll bee displayyed id inddivividualuallyy.
 CClicck o on this b this button nto ediedit thehe folder namefldern, resp. cacallingling grogroup.
 By chec kiingg these sese stars ars onn tthe right,By checight, you ccanyou gigivee priority for the contcontactsy for the andcts and cclicckiing on g on thehe listlist symbol
 ![]() att tthe topop righright,
att tthe topop righright,
ththe coconttacts arcts are sortesorted as as thatthat thehe oneones with with priority will be at the ty will be at the topp.
![]() CClicck oon thishis bubuttonn to remove the cto remove the contacct from the displayfrom the display cconfiguration.
CClicck oon thishis bubuttonn to remove the cto remove the contacct from the displayfrom the display cconfiguration.
- Then you tion.can see than see the displayyThen you cconfigurattionon dirrectlyctly in thein the dedevice'sice's detail - se- see thethe ppictucture bbelowlow.
- InIn ccase of these of the IP Varioo or IP StyleorIP Styl,, thethe contaontacts of thts of the di display buttonplay buttons aree also calso configureded in Access CAccess Commanmmanderr -- see thethe ttabb inin ththe red box id box in ththe dedevice'sice's detail iin thethe pictupicturee bbe(juslow.ow.
(just oonee ccontacct can be selected fcan be selected forr bubuttonsons 1 - 4, againgain uusingng thehe bbuttonon ; by by thhe we c buttbutton
 we cann reremovove th the ccontntact ct thenhen)