Static IP address - How to set up static IP address for 2N SIP Audio products
To be able to set up static IP address of 2N® SIP Speaker Horn or 2N® SIP Audio Converter we need to find this device in the network first. For this purpose, we can use 2N® Helios IP Network Scanner which you can download from the link below. The successful installation requires Microsoft .NET Framework 2.0.
Link: http://www.2n.cz/download/7/0/2/3/2n_network_scanner_3.0.4.zip
After successful installation of 2N® Helios IP Network Scanner run the application and let it scan the network.
Note: In default settings, the DHCP client is active which means that 2N® SIP Speaker Horn is waiting for the IP address of a DHCP server in your local network. if there is no DHCP server then 2N® SIP Speaker Horn won't get any IP address, nevertheless, the device will still show up in the list of results with IP address 0.0.0.0. To be able, set up static IP address we will need a DHCP server at least at the beginning.
When double click to 2N® SIP Speaker Horn or 2N® SIP Audio Converter or when click on "Browse" button you will be redirected to IP address of the device in your web browser where you can change network settings. Login credentials are in default: Admin/2n
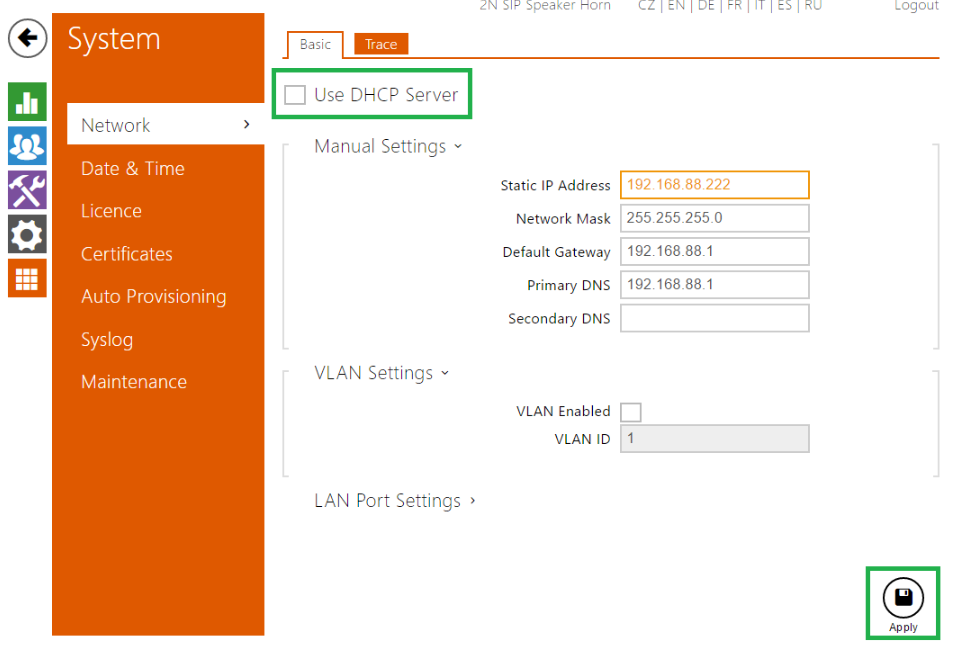
After login go to System / Network / Basic where you need to deactivate the checkbox "Use DHCP Server" and fill required static network information. Save changes by pressing "Apply" button. From this moment the web interface of 2N® SIP Speaker Horn or 2N® SIP Audio Converter is available on the IP address which corresponds to your settings.