MY2N - How to call via Proxy
Devices connected true the 2N® LiftGate can be also added to the MY2N and make calls:
How to add a 3rd party SIP device/application
Or examples:
1) How to register a 2N® LiftIP to MY2N
- We will add 2N® LiftIP within the MY2N-account as a 3rd party device - more here: How to add a 3rd party SIP device/application.
- In the detail of the My2N device, you will then have SIP registration data for entering into the 2N® IP LiftIP Service Tool - see the red box in the figure below.
- In the 2N® LiftIP Service Tool interface, go to the VoIP setting section and fill in it directly (see the figure below) in the category
Register Settings: SIP registrar -possible domain name of the proxy-server (in our case proxy-21.my2n.com)
User - the number is given by the exchange (in our case 7635135304)
Password - (in our case Mtf9WzEa)
SIP registar port + Outgoing proxy port is 5060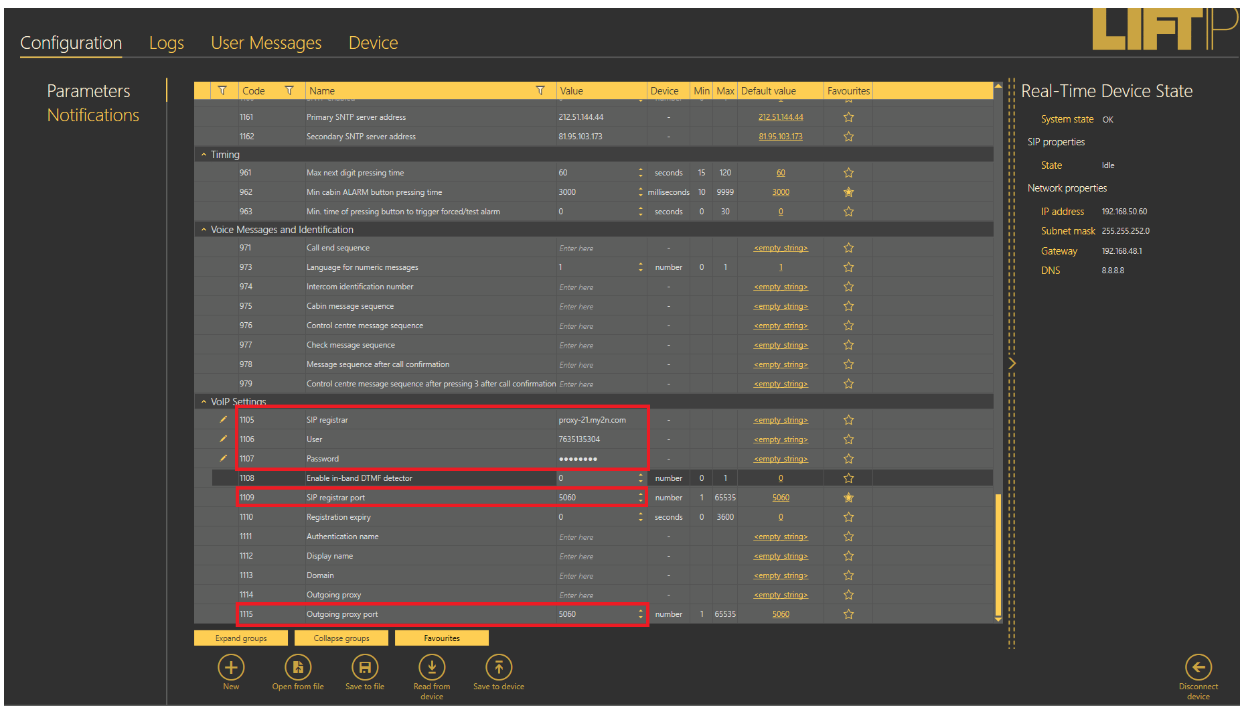
2) How to register a 2N® IP Handset to MY2N
- We add 2N® IP Handset within the MY2N account as a 3rd-party device - more here: How to add a 3rd party SIP device/application.
- In the detail of the My2N device, you will then have SIP registration data for entering into the web interface of the 2N® IP Handset device - see the red box in the picture below.
- In the web interface of the 2N® IP Handset device go to the Line section and you will immediately get to the SIP tab, where you fill in (see the picture below) in the category
Register Settings: Username - number given by the PBX (in our case 2524346736)
Realm - possible domain name of the proxy-server (in our case proxy-7.my2n.com);
SIP Server 1: Server Address - proxy server address (in our case again proxy-7.my2n.com)
We leave the server Port and Transport Protocol default 5060 and UDP (unless the control panel requires otherwise)
further: Proxy Server Address - here again proxy-7.my2n.com
Proxy Server Port - standardly we leave the default again
Proxy User - again the number given by the PBX (here 2524346736)
Proxy Password - given by the PBX (in our case gSFiJh2q)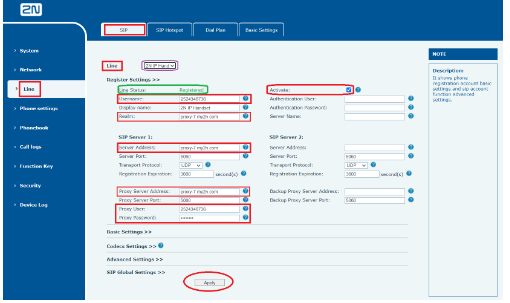
- At the top right check the Activate box (see the image above) and click Apply (see the red oval in the image above) to save the settings.
- Line Staus will then show us whether the device is successfully registered - see the green box in the picture above (Registered).
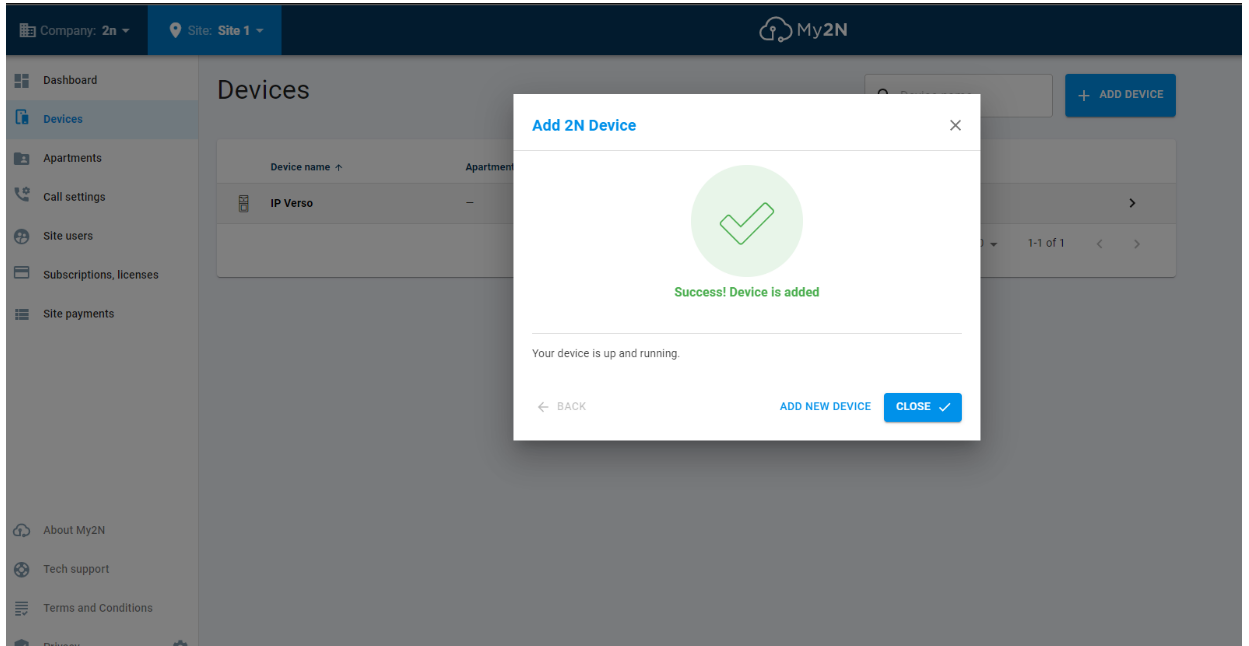
3) How to add 2N® IP Verso to MY2N
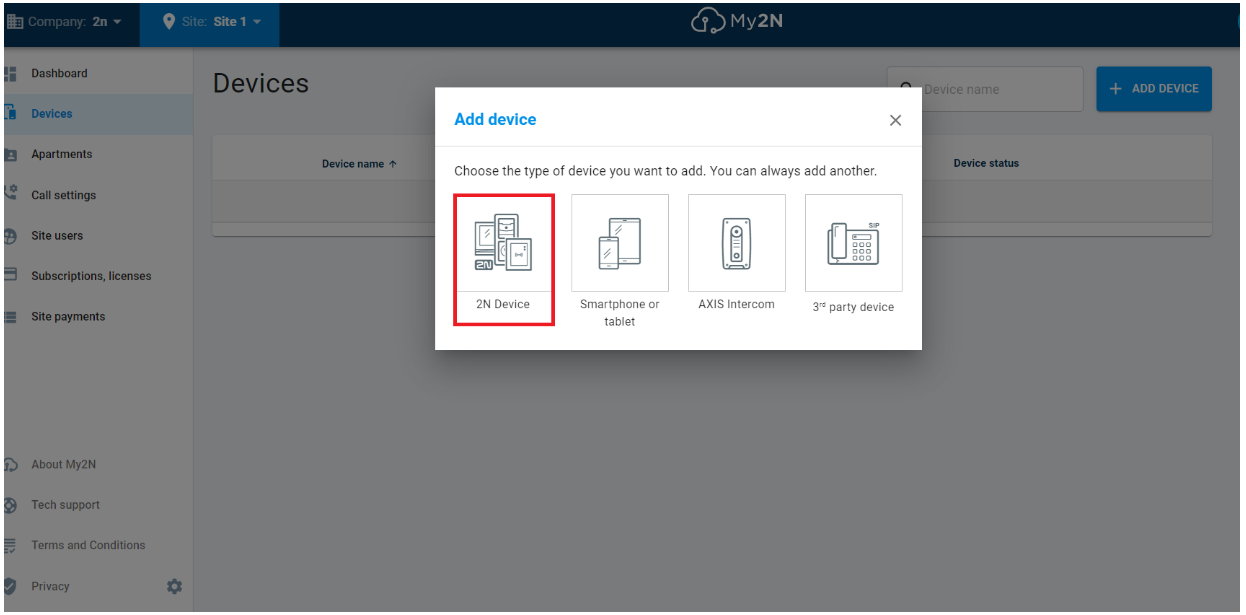
- Open the MY2N account / Devices and click on + ADD Device and select 2N Device
- Fill in the Serial number and Security code of the device (both of these values can be found in the intercom with the section: System / Updates / MY2N (see figure point 5)

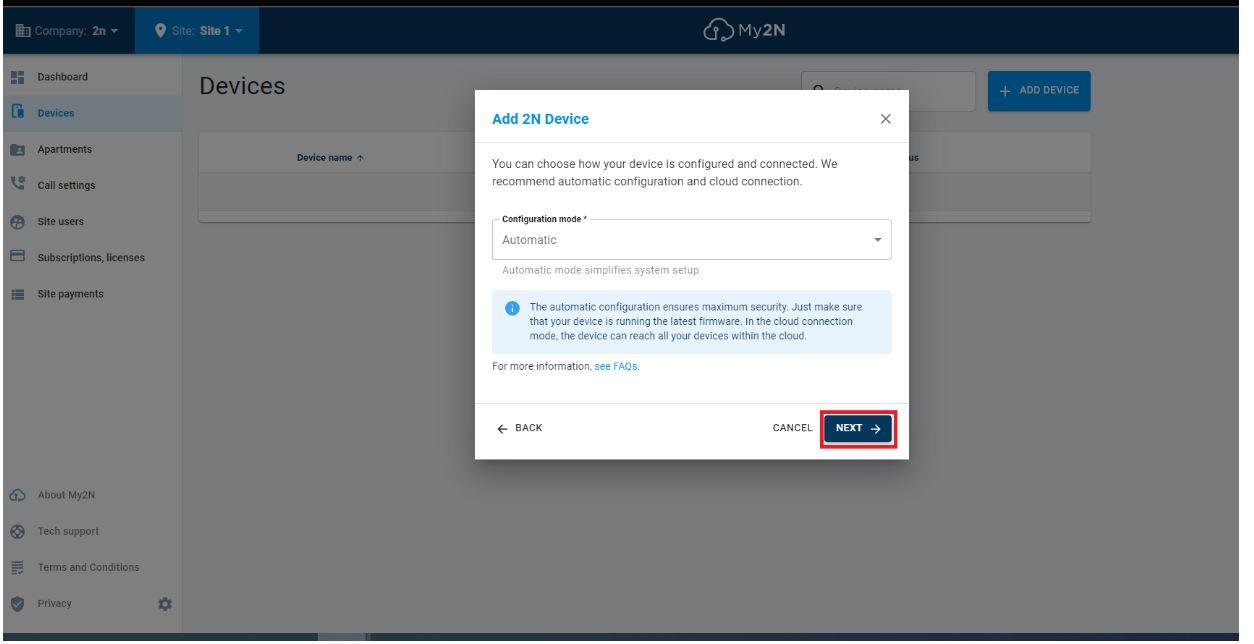
- Then it will be displayed if we want to control the device Automatic or Manual
- Success! Device is added
- Serial number, Security Code
