2N Answering Units - How to configure more unlock buttons
You can set the 2N answering units to unlock up to multiple locks either during a call or without a call.
2N IP Intercom configuration
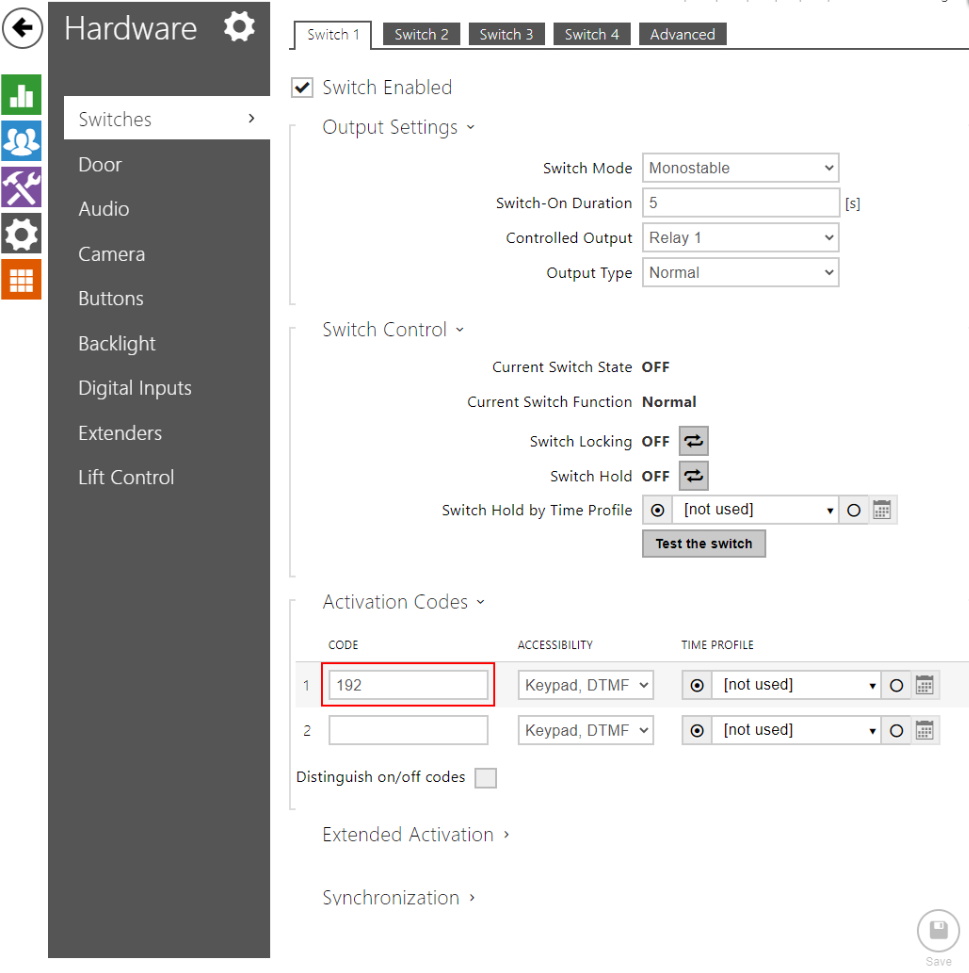
First, you need to set activation codes for switches in the intercom. Go to the “Hardware -> Switches” section in the web interface and set different codes for each switch. You can also choose desired controlled output or set the HTTP command for each switch.
2N® Indoor Talk configuration
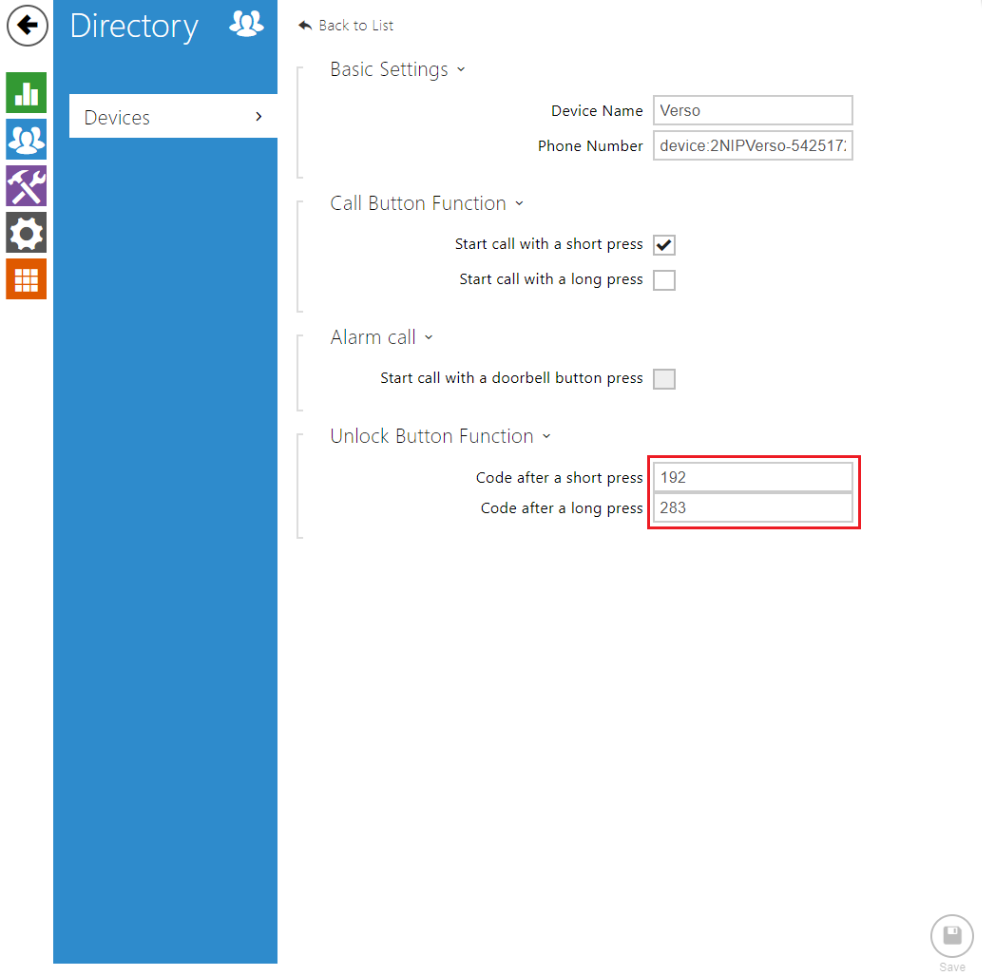
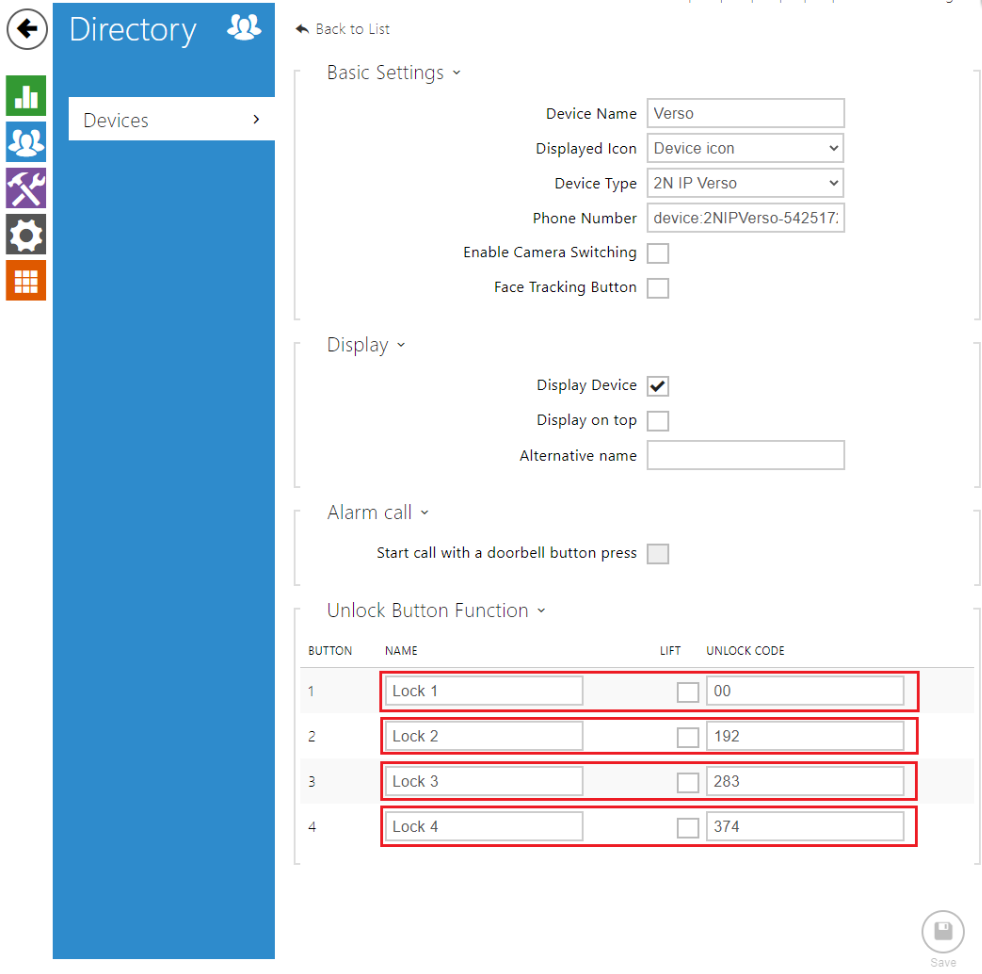
After setting the Activation codes in the IP intercom, go to the web interface of the 2N® Indoor Talk. Then go to the “Directory -> Devices -> “Added intercom” -> Unlock Button Function” section and fill in the Switch activation codes there.
After that everything is set correctly, and you can open the first lock/switch on the 2N® Indoor Talk by short-pressing the Lock symbol and by long-pressing the lock symbol you open the second lock.
2N® Indoor Compact configuration
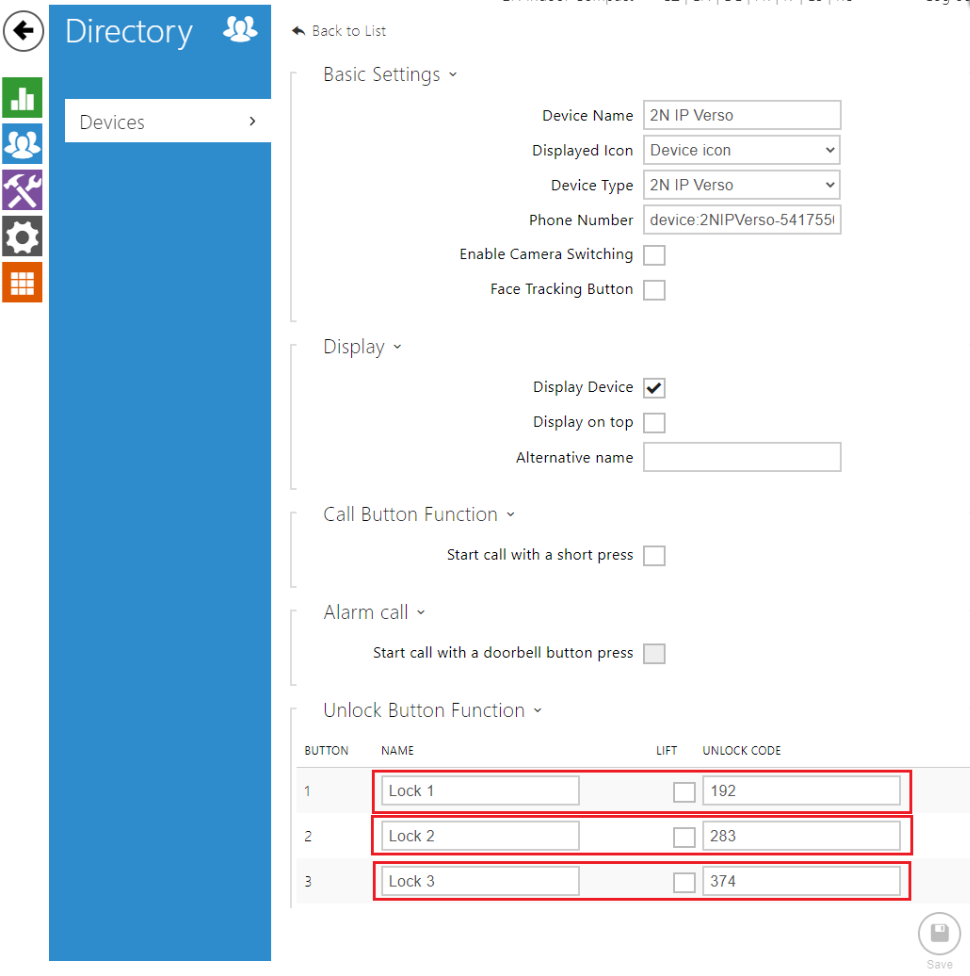
After setting the Activation codes in the IP intercom, go to the web interface of the 2N® Indoor Compact. Then go to the “Directory -> Devices -> “Added intercom” -> Unlock Button Function” section and fill in the Switch activation codes there.
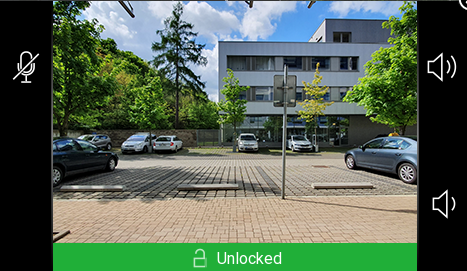
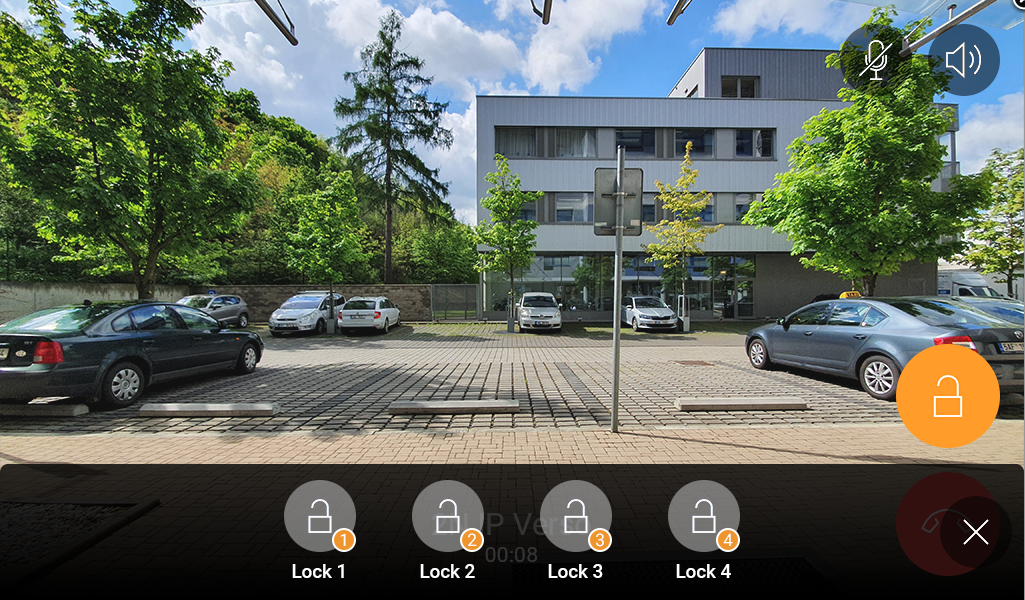
After that everything is set correctly, and you can open desired lock/switch on the 2N® Indoor Compact by clicking on the Lock symbol and choosing the lock.
2N® Indoor View configuration
After setting the Activation codes in the IP intercom, go to the web interface of the 2N® Indoor View. Then go to the “Directory -> Devices -> “Added intercom” -> Unlock Button Function” section and fill in the Switch activation codes there.
After that everything is set correctly, and you can open desired lock/switch on the 2N® Indoor View by clicking on the Lock symbol and choosing the lock.
Last update
- 2023-01-05
Devices Used
- 2N® IP Verso (FW v2.32.2.41.22)
- 2N® Indoor Talk (FW v2.32.1.41.12)
- 2N® Indoor Compact (FW v2.32.1.41.12)
- 2N® Indoor View (FW v2.32.1.41.12)
Licences required
- License is not needed – standard function

