2N® Indoor Compact – HTTP Commands – How to configure it
From firmware version 2.34 the 2N® Indoor Compact answering unit can send HTTP commands by long-pressing the unlock button on the device.
You can set up to 3 different HTTP commands. In case there is only one HTTP command set, the 2N® Indoor Compact will send the HTTP command immediately after the long press of the unlock button. But if there are 2 or 3 HTTP commands set they all will be shown on the 2N® Indoor Compact's screen and you can choose the desired HTTP command to be sent.
Here’s an example of how to set commands for triggering Switch 1 and for holding Switch 2 open on 2N® IP Verso.
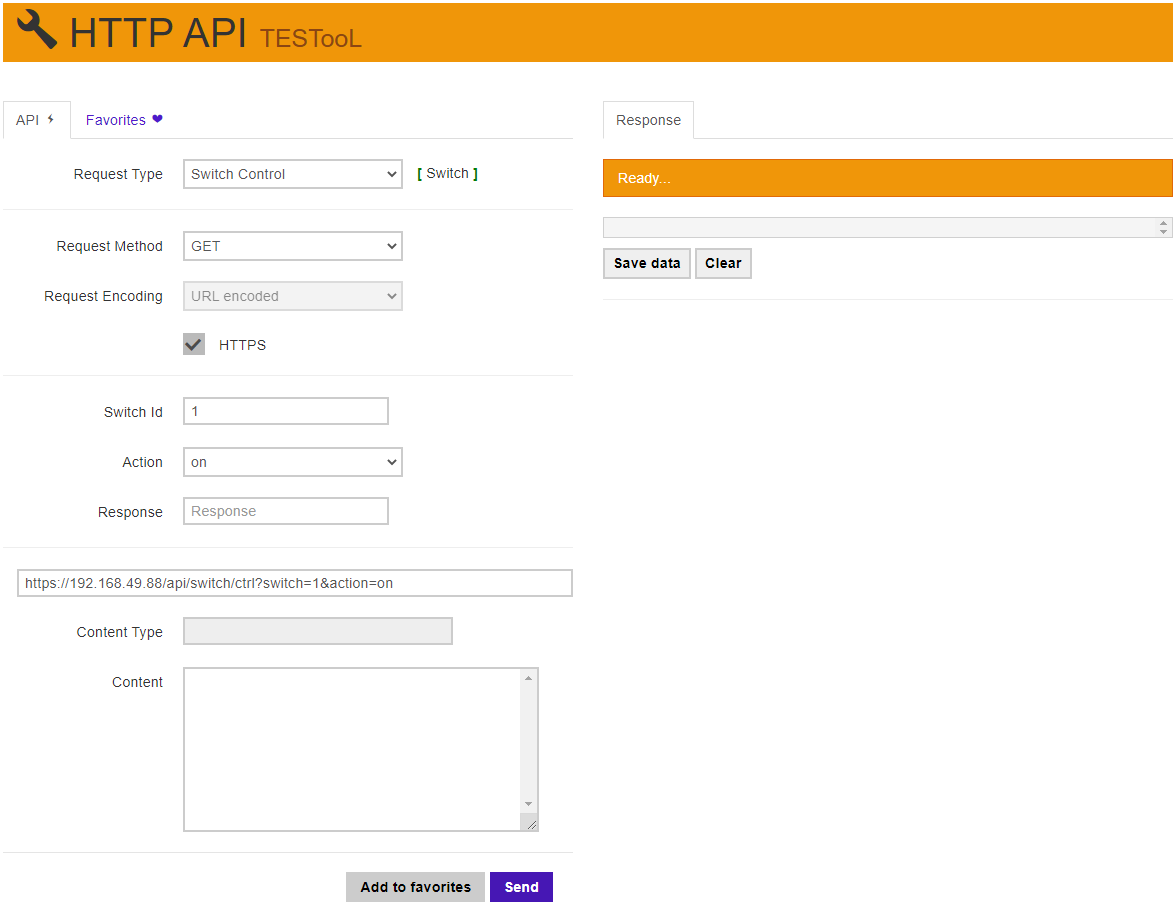
The HTTP command for triggering Switch 1 on the 2N® IP Verso is https://IP_address/api/switch/ctrl?switch=1&action=on and for holding the Switch 2 open is https://IP_address/api/switch/ctrl?switch=2&action=hold. You can find the HTTP commands in the HTTP API manual or by accessing the HTTP API TESTool which is part of every 2N IP Intercom and can help you create valid HTTP commands for the desired request type. You can access the TESTool by entering the intercom’s IP address and writing /apitest.html at the end (for example https://192.168.49.88/apitest.html).
After you get the correct HTTP commands go to the “Services -> HTTP Command” section of the 2N® Indoor Compact’s web interface and fill in the required credentials.
URL - the HTTP command
Icon - Choose an icon that will be shown on the 2N® Indoor Compact's screen
Name - Fill in the name of the HTTP command
Username - required username in case of the HTTP API account for authorisation is set in the command receiving device
Password - required password in case of the HTTP API account for authorisation is set in the command receiving device

After that simply save the settings and you will be able to send the HTTP command by long-pressing the unlock button on the 2N® Indoor compact answering unit.
