2N® Indoor Compact - Communication via Device ID of 2N® IP intercom
This FAQ describes advantages of communication between 2N® Indoor Compact and 2N® IP intercom via Device ID and how to configure it properly.
How to communicate via IP address is described in this FAQ: How to setup call from/to 2N® IP Intercom
The aim of this page is to introduce how to communicate via 2N® IP intercom’s Device ID.
Recommendation - use the latest firmware
We recommend using the latest firmware in 2N® Indoor Compact and also 2N IP intercoms to ensure that all functions are available.
Firmware upgrade - How to do firmware update on 2N IP intercoms
Why to use 2N® IP intercom’s Device ID in 2N® Indoor Compacts’s configuration
Communication via Device ID is a proprietary way and thanks to that you can activate 2N® IP intercom's switch by 2N® Indoor Compact when there is no call.
How to configure a 2N® IP intercom?
Setup Intercom's Device ID
Go to 2N® IP intercom’s web management - section Services - Phone - Local Calls and set the Device ID.

Setup Local Call receiving mode
Go to 2N® IP Intercom's web management - section Services - Phone - Calls and there you set
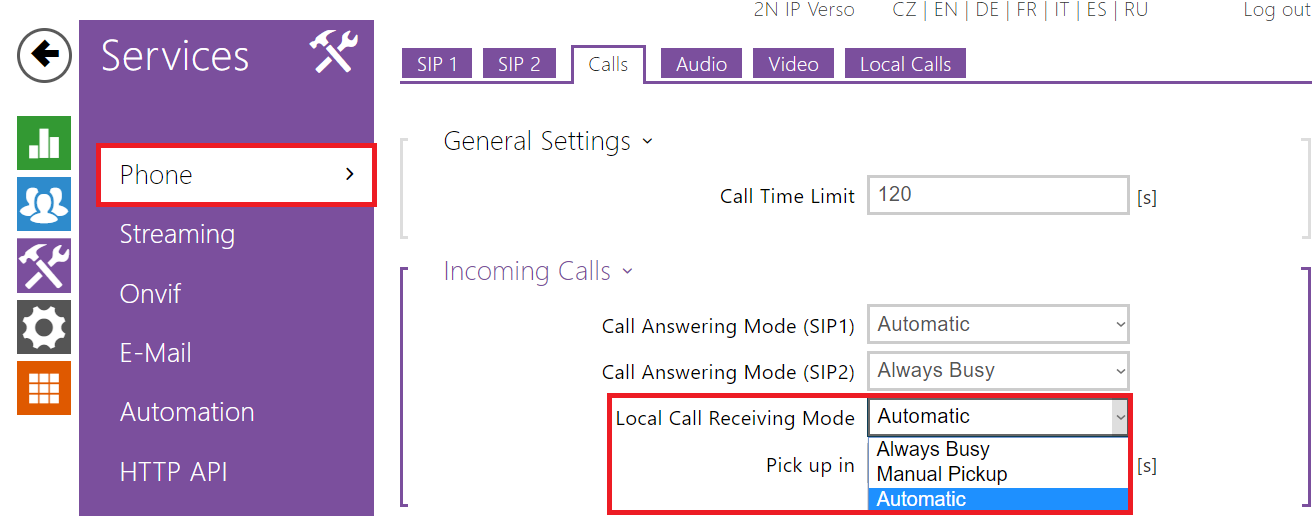
Local Call Receiving Mode
- Always Busy - no calls allowed
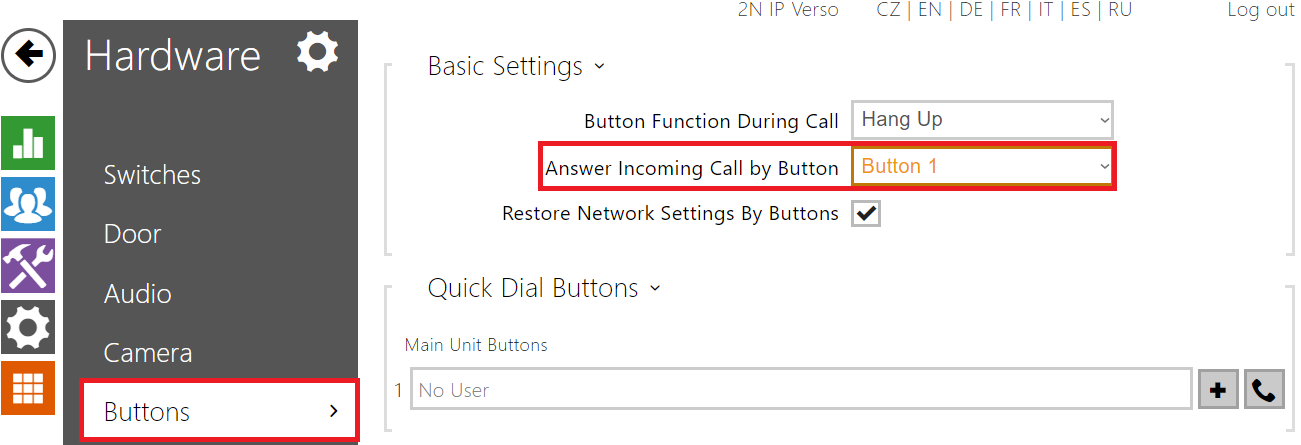
- Manual Pickup - pickup call manually by press of a button, you must define which button picks the call (picture below)
- Automatic - Intercom automatically picks up the call
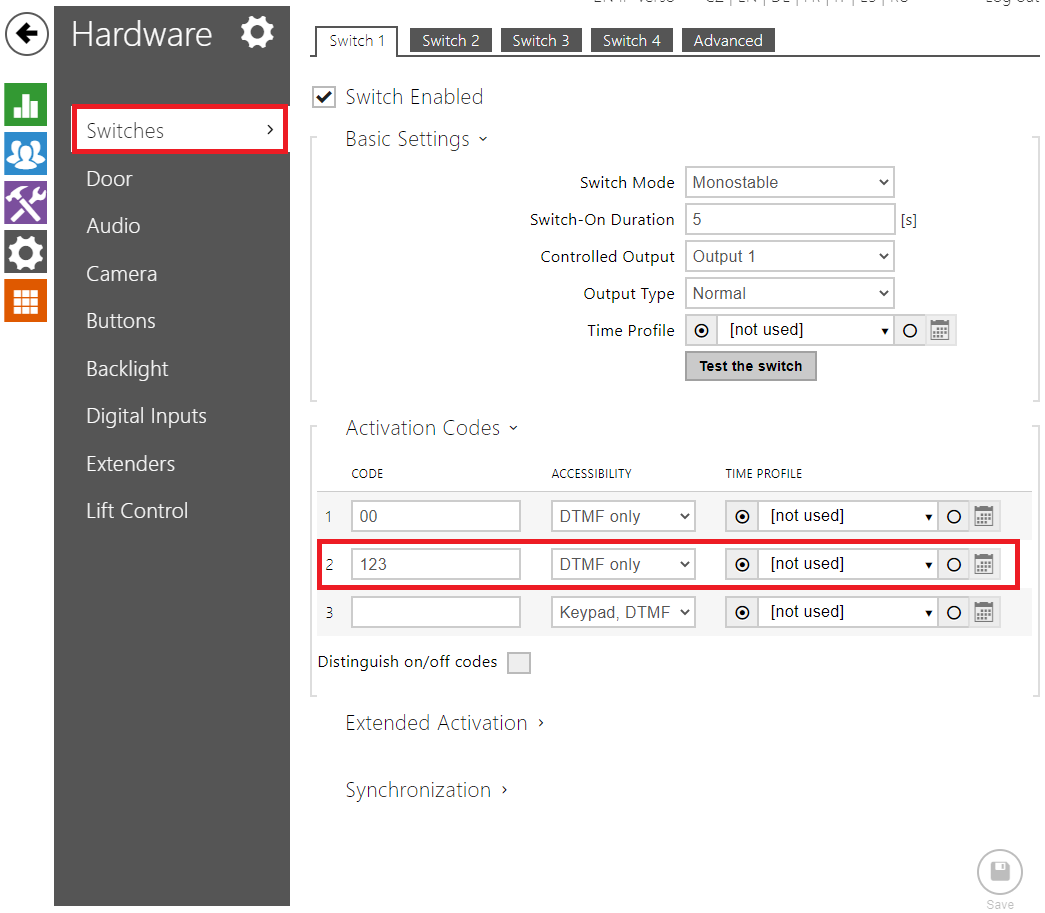
Setup Intercom's Switch code
Go to 2N® IP Intercom's web management - section Hardware - Switches and set the Switch code you want to use for activating the switch from 2N® Indoor Compact
Make sure that the electric opener/lock is always connected to the intercom's 12V output using a security relay to make the installation safe. The motherboard relay is used for switching lights or other peripherals that do not have to be secured.
It is always recommended that the 2N® Security Relay (Part No. 9159010) is used for increased security.
How to configure a 2N® Indoor Compact?
Go to 2N® Indoor Compacts’s web management - section Directory - Devices click on Search registered devices and choose the device you want to add.

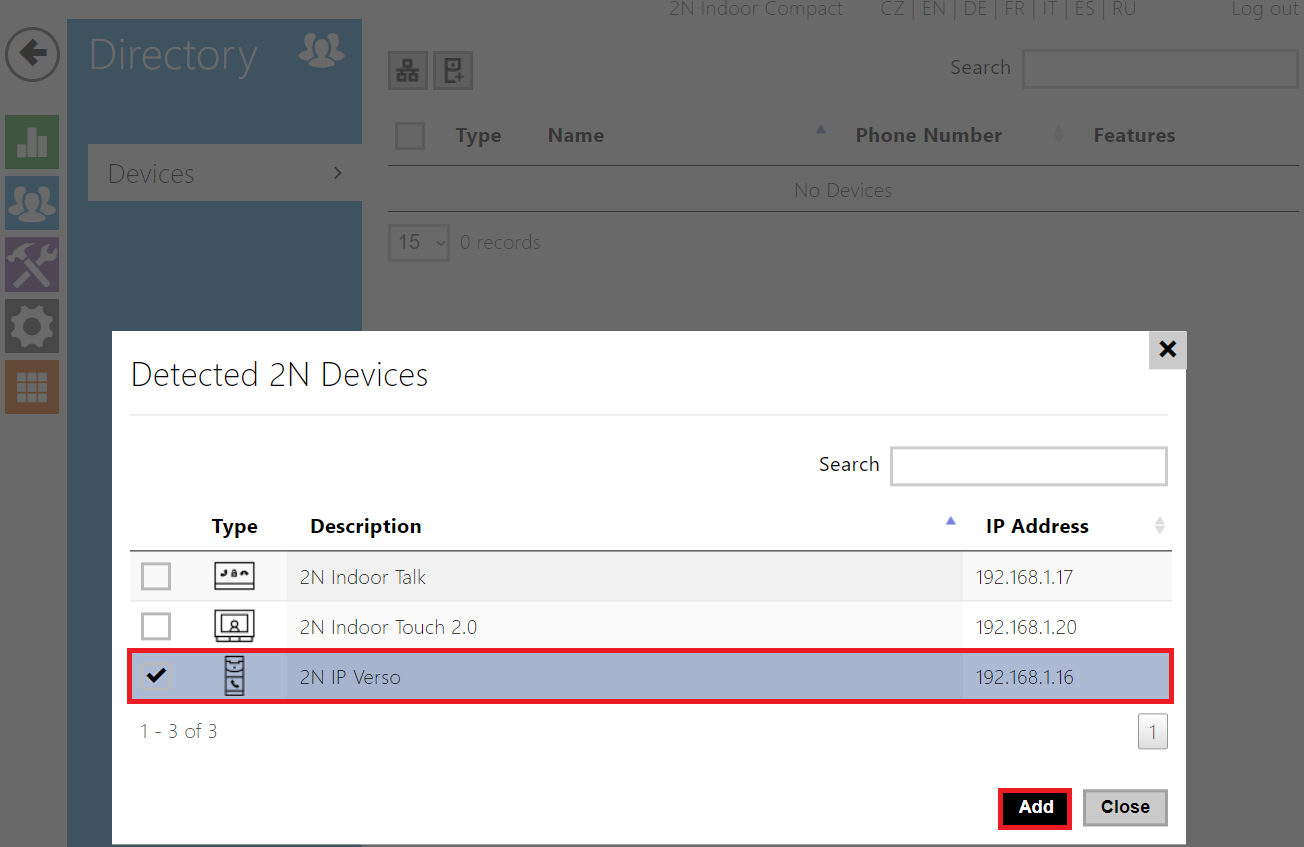
After you have added the device, the Device Name and Phone Number are automatically filled.
You may then set your DTMF codes that you want to send to the intercom during the call, you can set up to 3. When you have more than 1 code set, a press of a padlock button during a call will show other 2 codes that you can choose from
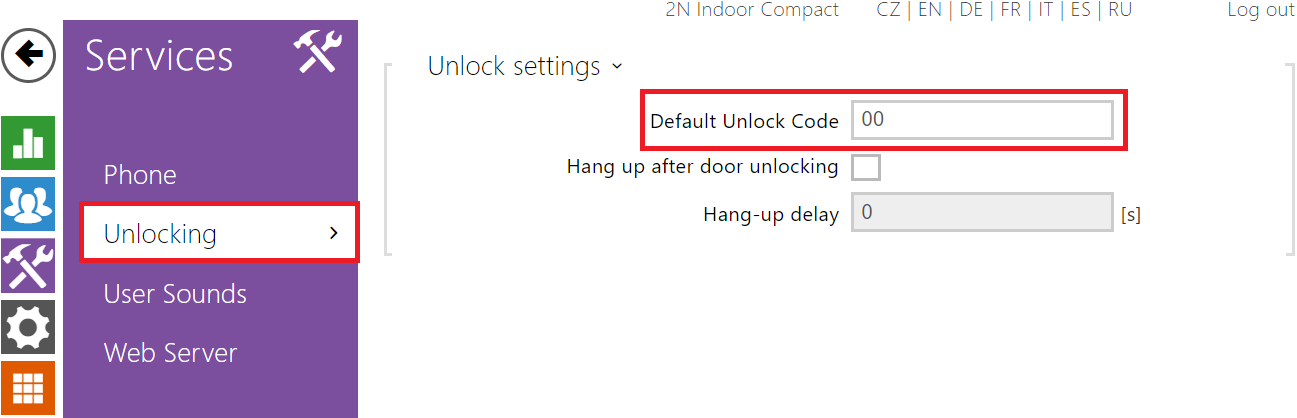
Unlock Button Function
- Button 1,2,3 Code: Defines DTMF code to be sent to the 2N® IP intercom during call

If no Button 1,2,3 Code is defined than Default Unlock Code will be used for unlocking. This code is also used to unlock the device outside the call.