2N® Indoor Touch - How to switch between the internal and external camera
This FAQ describes how to switch between the internal and external camera of 2N IP Intercoms. This feature is not supported by default in this version of the application, however, there is a workaround that allows you to do so. Below you will find step by step description of 2N IP Intercom configuration and connection with some illustrative images. The workaround uses one of the switches in the 2N IP Mobile application. Please keep in mind that it is necessary to have an Enhanced integration or Gold license for this workaround as you have to create an automation function! Up to version 2.34 (inclusive) you need the license/feature or Gold (if it includes it), and from version 2.35 onwards they are part of the Gold license.
How to configure 2N IP Intercom
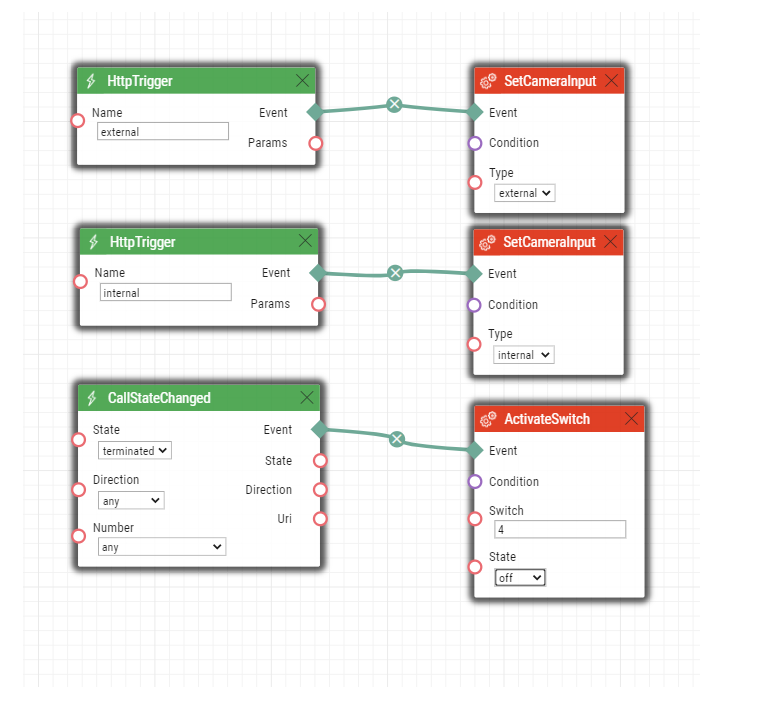
- First of all, you have to configure the switch, you chose for the control of the cameras. We chose Switch 4. Parameter "Switch mode" has to be set to "Bistable". This ensures the switching between cameras. You can set "Controlled Output" to "None" if you want to use the switch icon only for the camera switching. This ensures that once you tap on the switch icon in the app, only the cameras will be switched and no physical output will be triggered. Then you have to set "Switch-On Command" (https://127.0.0.1/api/automation/trigger?triggerId=external) and "Switch-Off Command" (https://127.0.0.1/api/automation/trigger?triggerId=internal). These commands are sent when you tap the switch icon in the app. The intercom sends an HTTP command to itself to control the cameras, once it is received the intercom switches the camera according to the automation below.

Now you have to create an automation function that will control the cameras switching. Camera switching is based on HTTP commands as mentioned above. The function also ensures, that once the call is terminated, the camera is always switched back to the internal one.
How to switch the cameras from 2N® Indoor Touch?
Now you have to tap and hold the padlock icon in the application until the 4 locks representing 4 switches in the 2N IP Intercom appears. After that, you can easily switch between the cameras by tapping on a particular switch you've used in the first step of the 2N IP Intercom configuration.
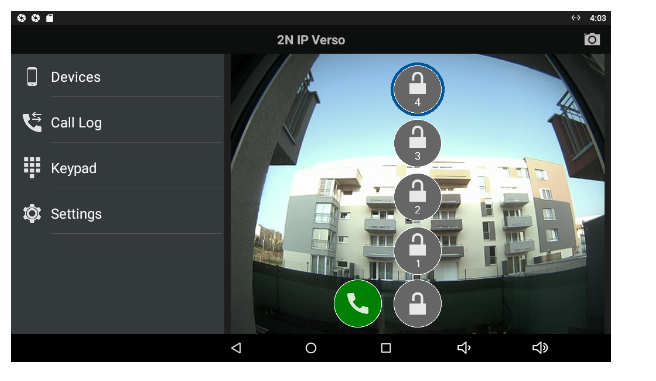
The camera could be switched only during an active call!