2N® Indoor View - How to set up calling via My2N
There are two modes of adding 2N® Indoor View unit to the My2N portal:
- Local - allows you to use 2N® Indoor View in your local network. The reason for adding the device to My2N as local is to facilitate the configuration of the device so that it is not necessary to deactivate the automatic configuration of the intercom and simply add 2N® Indoor View as a contact under the intercom button directly in My2N.
In this mode, 2N® Indoor View has to be located in the same LAN as the intercom. - Cloud – this mode allows, for example, to make calls from 2N® Indoor View to the 2N® Mobile Video application and vice versa. 2N® Indoor View does not have to be in the same network.
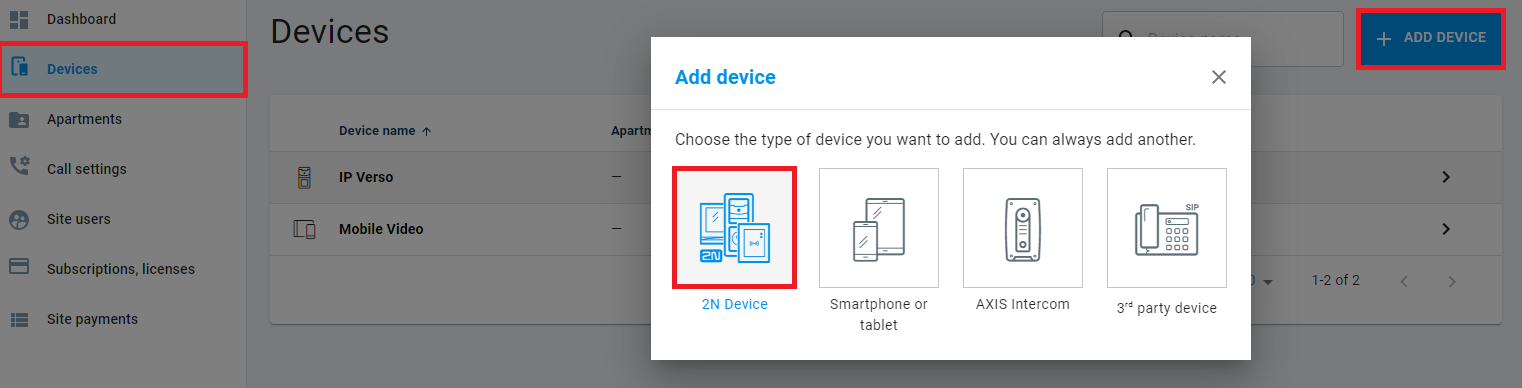
1. Adding device to My2N
- You can add 2N® Indoor View by clicking on the button ADD DEVICE, and then choosing "2N Device" (see picture below).
- A new window will appear asking you to enter the serial number and My2N Security Code to add the device.
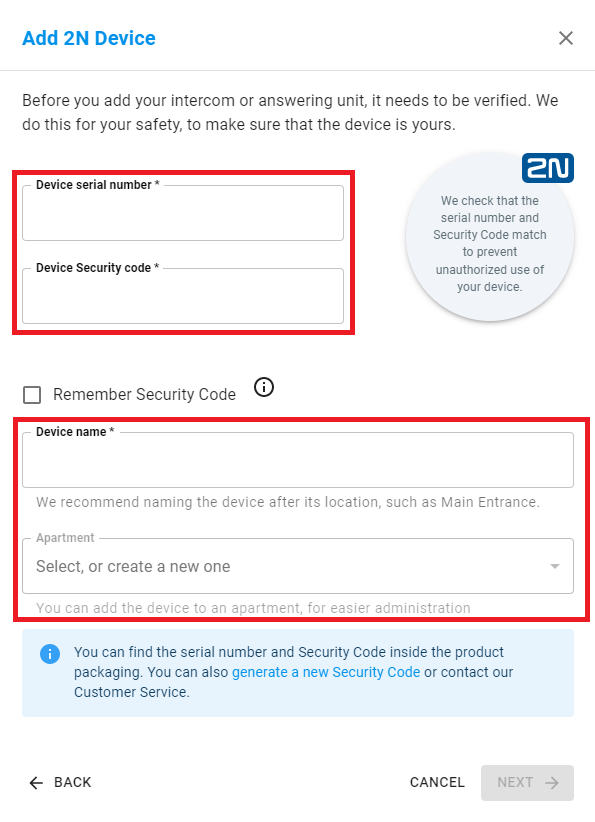
Security code
- My2N Security Code on the card that comes with the device.
Another way to get the security code is to go to the web interface: System > Auto Provisioning > My2N.
Please note that the security code is listed in firmware version 2.26 and higher (if you do not see it here, please upgrade the device: System > Auto Provisioning).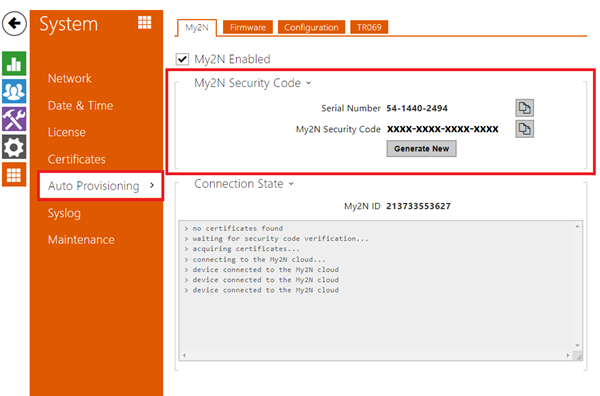
- After successfully adding the device, you can see it in the My2N portal in the Settings section – see the picture below:
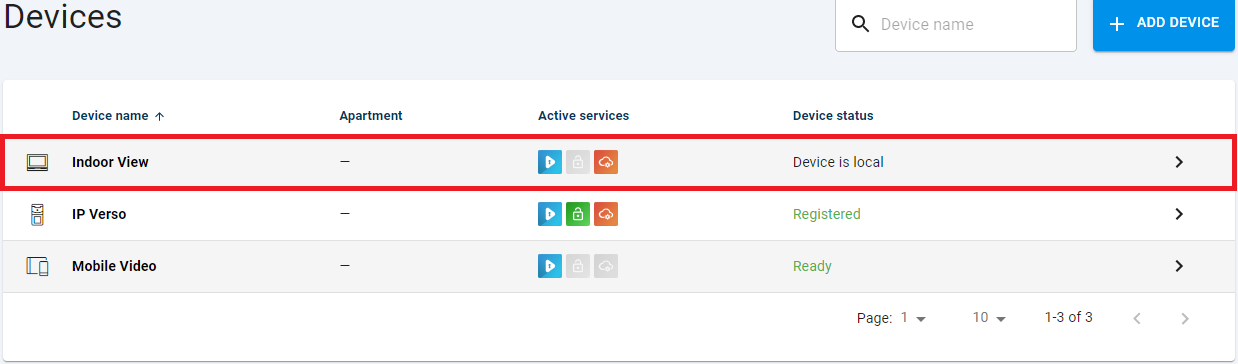
In the case of cloud mode, you will see "Online" instead of "Device is local".
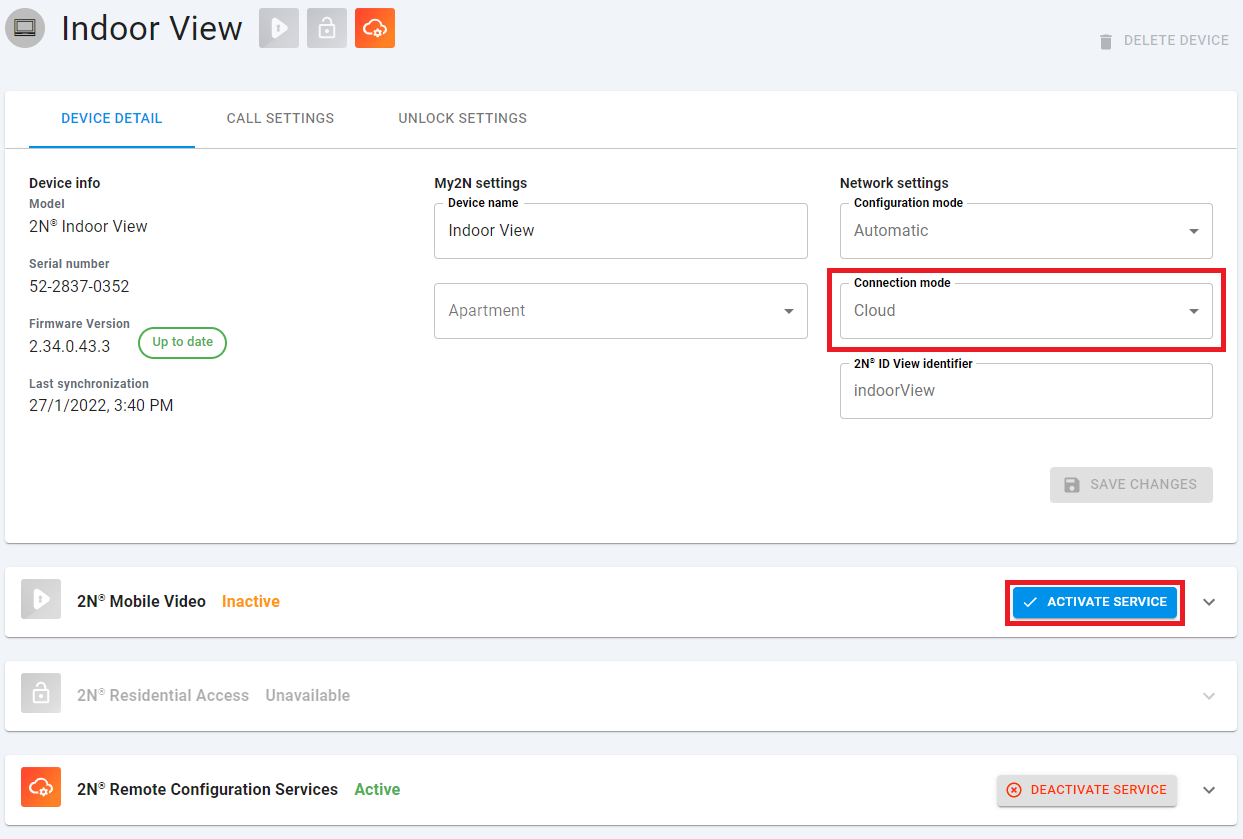
2. Registration to My2N (possible in cloud mode)
- In the DEVICE DETAIL you need to switch to the cloud mode. Then in the Mobile Video tab, you need to activate the service. Upon activating the device will automatically try to register to the SIP Proxy. If successful, you will see the status Registered in the Devices section.
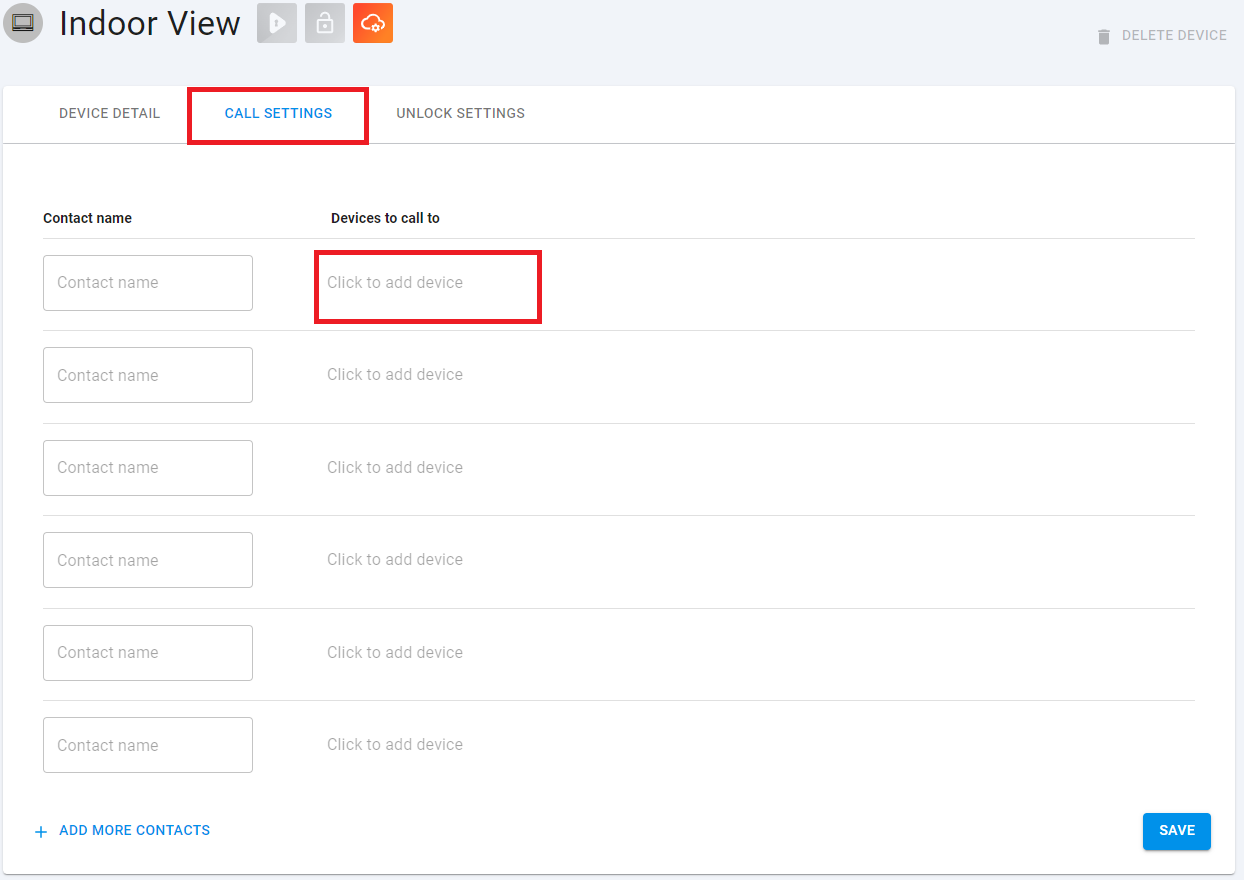
3. Call settings
- On the 2N® Indoor View side, we will create a contact within the My2N portal for calls to the 2N IP Intercom if it is in automatic mode.
Directly in the detail of the given 2N® Indoor View in the CALL SETTINGS section under the appropriate button, where we select the called device.
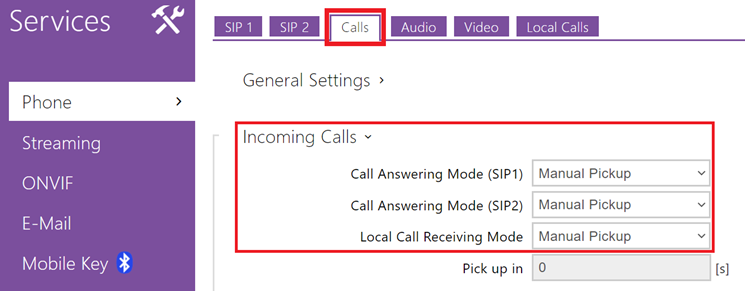
If you want to call the 2N IP Intercom, the Answering Mode of the incoming calls have to be set to Automatic or Manual Pickup for SIP 2:
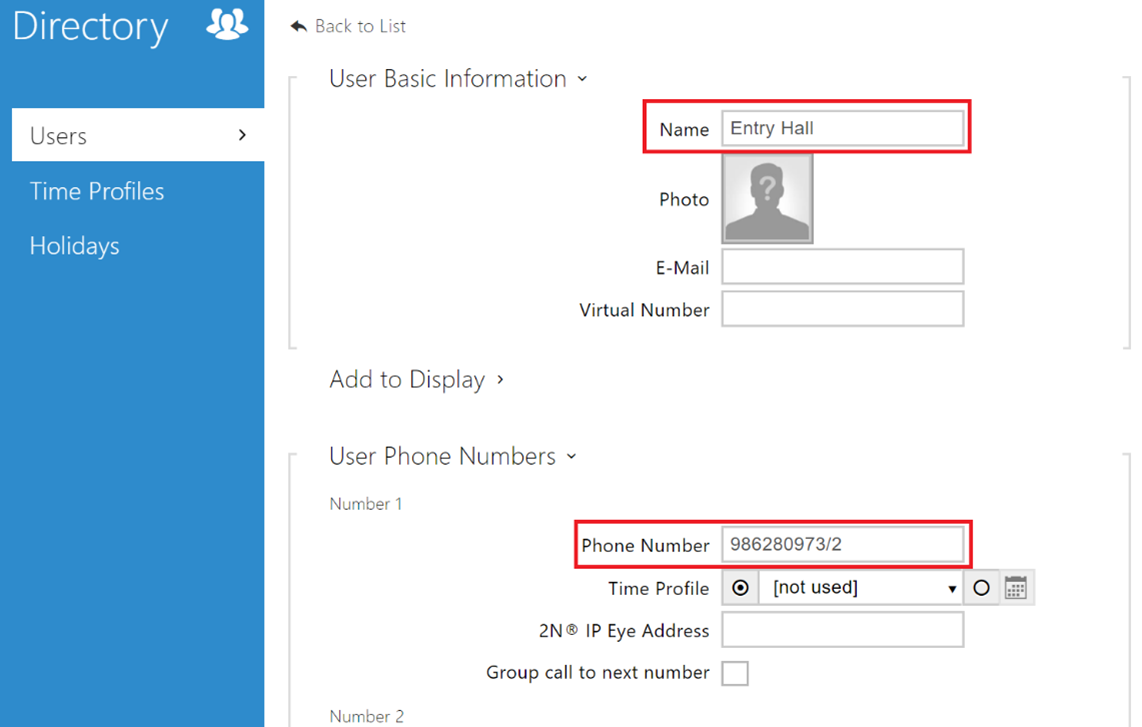
If you have selected "manual" Configuration mode for 2N® Indoor View, you have to set the contact directly in the 2N® Indoor View's interface
by creating a user in the Directory - see the pictures here:
(Phone number will be My2N Device ID - followed by "/ 2" if the unit is registered to My2N correctly via the SIP 2 account.)
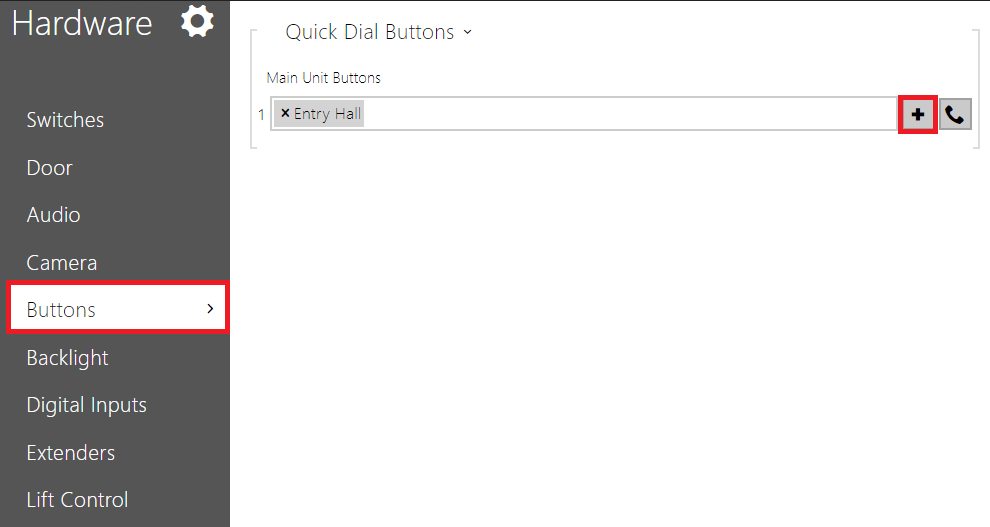
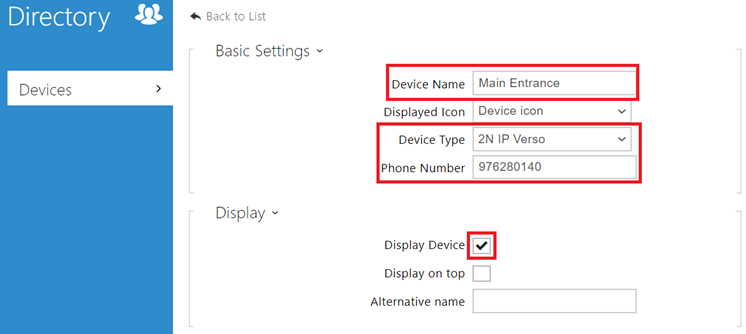
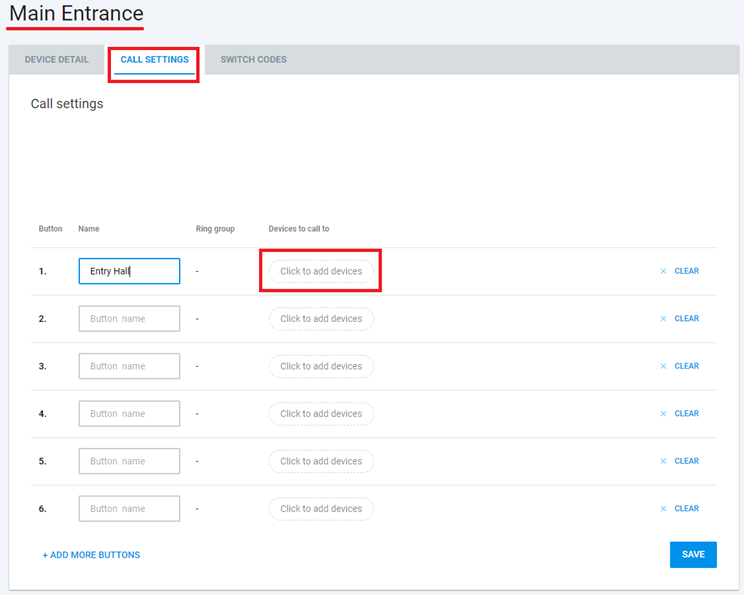
- On the 2N IP Intercom's side, we will create a contact for calling the 2N® Indoor View if it is in automatic mode.
Namely in the detail of the intercom under the appropriate button within the My2N portal, where we select the called device.
Icon
If you have selected the "manual" Configuration mode for the intercom, it is necessary to set the given contact under the given button directly in the intercom's interface:
- Create the user in the Directory:
(Phone number will be My2N Device ID – followed by "/ 2" if the intercom is registered to My2N correctly via the SIP 2 account.)
- Add the user under the button: