Certification - How to insert certificate into 2N IP Intercom for web authentication
Certificates
Certificates are commonly used to identify server or device to which we are trying to connect. Certificate helps us to authenticate the device to which we are connecting to and to confirm that it is really the desired device. Certificate assigns public key to either domain name or IP address. If certificate is issued for different IP address or domain name, than the destination really has, modern web browser will usually inform us that the web page can be forged.
Usually the certificate is issued by some trusted issuer or Certification Authority (also shortened to CA). It is possible to find many CAs on the web, most of them offer trusted certificates that are issued on the domain name. Many of these CAs will be assigned to trusted root CAs in your browser configuration. It is possible to create your own CA, it is however needed to import certificate of such CA in to the web browser.
Nowadays digital certificates for web application are used according to the ITU X.509 standard.
Important fact about certificates is that they are issued on limited time (for security reasons), after this time it is needed to renew validity of the certificate (often a year for server and client applications with reserve of a few days). After the expiration of a certificate web browsers will point out that the certificate is invalid because of authentication fo server will not pass.
Options of 2N IP Intercom
2N IP Intercom device support uploading user certificates into its memory for different purposes. Uploaded certificates can be assigned to web interface to authenticate the 2N IP Intercom device in network through web interface.
The procedure for creating a CA certificate using OpenSSL
Certificate of certification authority and server certificate with all keys can be created with a few commands using OpenSSL program. For certificate created by web trustworthy certification authority this section can be skipped. This how-to is a bit straightforward so for simplicity reasons for more complex, elegant and secure solution of Certification Authority manual on following link can be used : https://jamielinux.com/docs/openssl-certificate-authority/introduction.html
In the first step creation of CA is made. Following command will create certificate ca.pem which will be Self-Signed (x509 parameter) and key file specified in openssl configuration file.
admin@ubuntu:~$ openssl req -out ca.pem -new -x509
During command processing you will be prompted for password creation and verification. This Password will be used to protect your private key so the key file cannot be used to issue assign unauthorised certificates with your private key.
Generating a 2048 bit RSA private key
.+++
................+++
writing new private key to 'privkey.pem'
Enter PEM pass phrase:
Verifying - Enter PEM pass phrase:
After the password creation and verification you will be prompted to fill in important data about your CA:
-----
You are about to be asked to enter information that will be incorporated
into your certificate request.
What you are about to enter is what is called a Distinguished Name or a DN.
There are quite a few fields but you can leave some blank
For some fields there will be a default value,
If you enter '.', the field will be left blank.
-----
Country Name (2 letter code) [AU]:CZ
State or Province Name (full name) [Some-State]:Prague
Locality Name (eg, city) []:Prague
Organization Name (eg, company) [Internet Widgits Pty Ltd]:2N
Organizational Unit Name (eg, section) []:TestTeam
Common Name (e.g. server FQDN or YOUR name) []:autorita-test-2
Email Address []:
This process should create two files first is file ca.pem containing certificate for our CA, and the second file privkey.pem which contains private key of our CA. This key is needed to sign and issue new certificates. Whoever whit possession of your private key can create new certificates signed by this CA.
In next step rsa private key for new certificate will be created. Following command will use openssl genrsa application and moreover will create HELIOS-KEY.pem file containing new key with length of 2048 bits. Name of the file is not important and can be changed accordingly.
admin@ubuntu:~$ openssl genrsa -out HELIOS-KEY.pem 2048
Output of command should look similar to following:
Generating RSA private key, 2048 bit long modulus
..+++
.........................+++
e is 65537 (0x10001)
Program should create new key file with name HELIOS-KEY.pem.
In next step we will create new certificate request. Request is created by command openssl req and in this case it will use HELIOS-KEY.pem and the request will be signed with sha-256 method. Output file will be named HELIOS.req, again the name of certificate request file can be changed.
admin@ubuntu:~$ openssl req -key HELIOS-KEY.pem -new -sha256 -out HELIOS.req
The ouptut of the openssl req command should be similar to dialog for creation of CA. These data will specify the certificate and owner of the certificate. Very important item is Common Name which must contain IP address or Domain Name under which 2N IP Intercom device can be accessed. Output should look similarly to following:
You are about to be asked to enter information that will be incorporated
into your certificate request.
What you are about to enter is what is called a Distinguished Name or a DN.
There are quite a few fields but you can leave some blank
For some fields there will be a default value,
If you enter '.', the field will be left blank.
-----
Country Name (2 letter code) [AU]:CZ
State or Province Name (full name) [Some-State]:Prague
Locality Name (eg, city) []:Prague
Organization Name (eg, company) [Internet Widgits Pty Ltd]:2N
Organizational Unit Name (eg, section) []:TestTeam
Common Name (e.g. server FQDN or YOUR name) []:10.27.20.10
Email Address []:
Please enter the following 'extra' attributes
to be sent with your certificate request
A challenge password []:HESLO
An optional company name []:2N
Now file named HELIOS.req should be created.
Note
Common Name is very important item, without this correct parameter authentication won't be made correctly and web browser will inform you that this web page is untrustworthy.
In final step it is needed to create new certificate from the previously made request, which will be added to 2N IP Intercom. This can ve done with command openssl x509, where request HELIOS.req will be specified, that we will use CA ca.pem with private key privkey.pem and that password PASSWORD for this CA (created with creation of ca.pem in first step) will be used. Moreover the expiration time will be set on 365 days and name of the certificate will be HELIOS-CERT.pem. Name of the certificate file can be changed.
admin@ubuntu:~$ openssl x509 -req -in HELIOS.req -CA ca.pem -CAkey privkey.pem -passin pass:HESLO -CAcreateserial -sha256 -out HELIOS-CERT.pem -days 365
Output of this command should look similarly to following.
Signature ok
subject=/C=CZ/ST=Prague/L=Prague/O=2N/OU=TestTeam/CN=10.27.20.10
Getting CA Private Key
Note that CN=10.27.20.10 should be your Common Name set with issuing certificate request. Now you cen insert HELIOS-KEY.pem and HELIOS-CERT.pem into your 2N IP Intercom device.
Loading certificate into browser
This is step needed for certificates created by your own CA, in case of trustworthy CA from web you can pass this section.
Mozilla Firefox
In Mozilla Firefox, go to Options> Advanced> Certificates and just import certificate authority with import button (in this case file ca.pem created by above procedure).
Google Chrome
In Google Chrome, go to Settings> Advanced Settings> HTTPS / SSL> Manage Certificates> tab Trusted Root Certification Authorities, and here it is possible to import certificate authority with import button (in this case file ca.pem created by above procedure).
Internet Explorer
In Internet Explorer web browser go through the "gear" menu > Internet Options > Content tab > Certificates, here it is possible to import certificate authority (in the case file ca.pem creation using the procedure above). .pem file is not enlisted between displayed therefore it is necessary to select the Show All Files.
Loading certificate into 2N IP Intercom
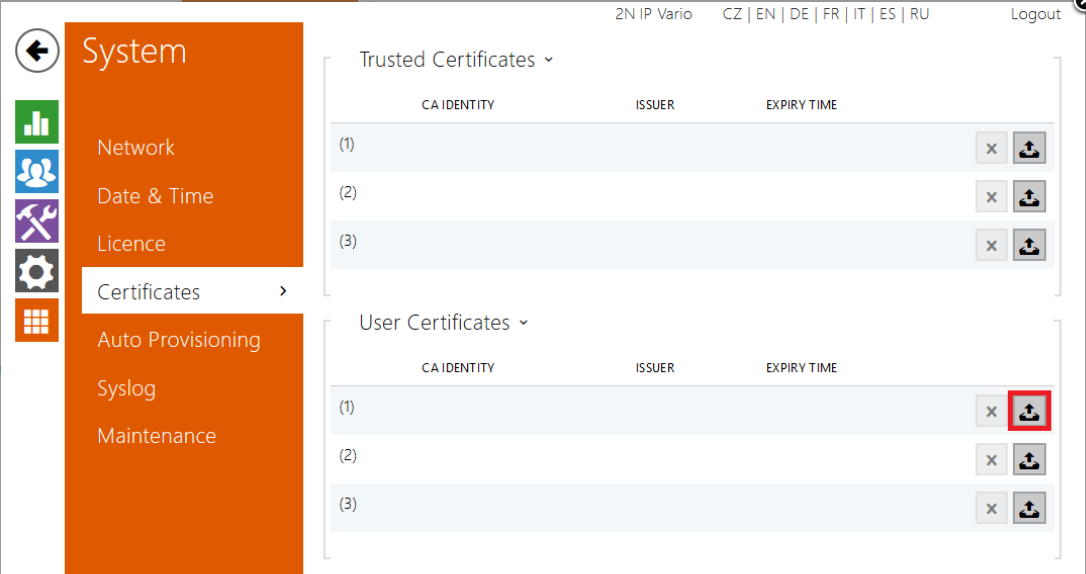
Certificate either created by created Certification Authority (CA), or certificate created by trustworthy web CA can be uploaded through System / Certificates in User Certificates section with appropriate button, as highlighted in next picture.
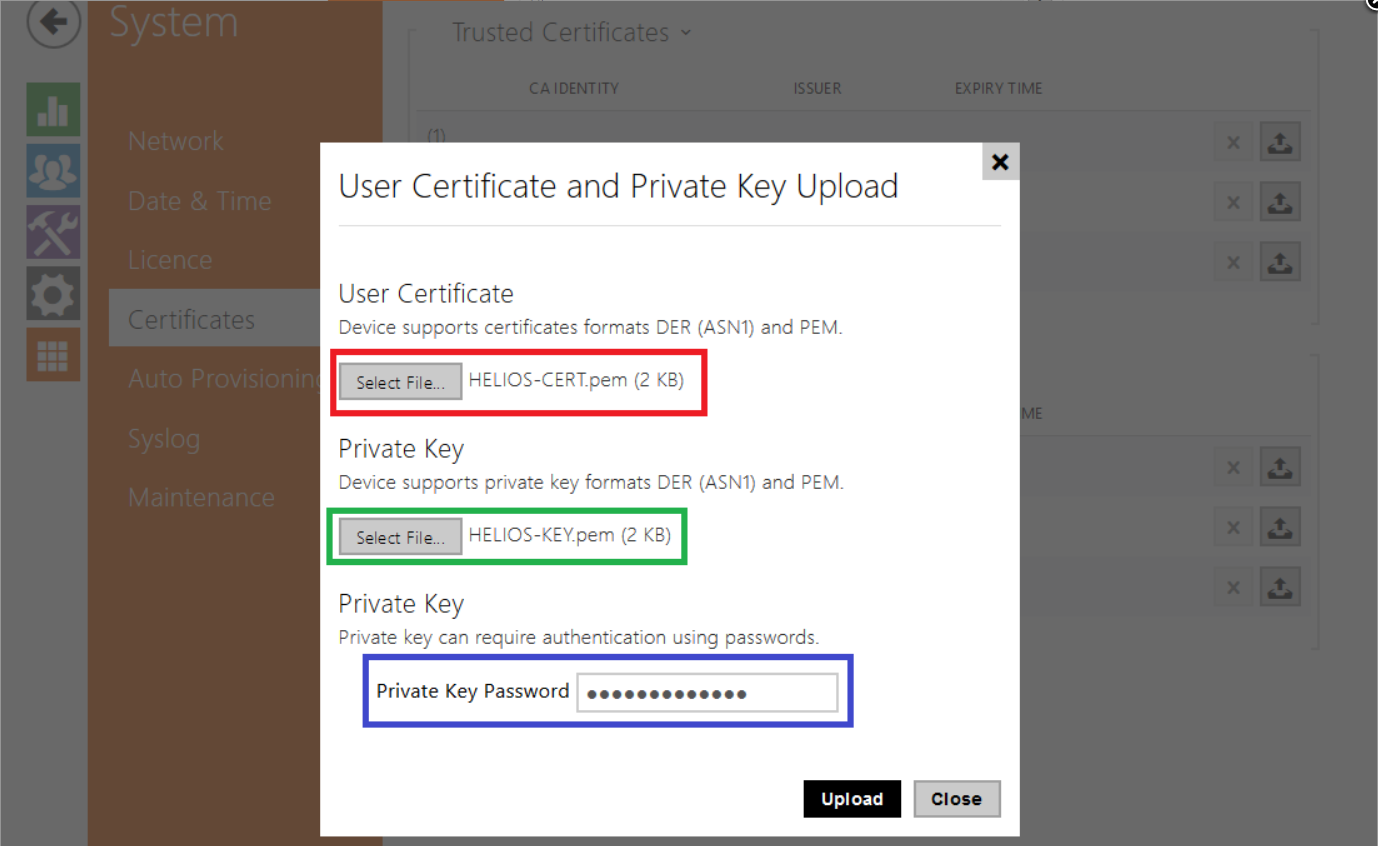
 In popup window upload file with server certificate, with private key and password protecting private key, as highlighted in following picture.
Note
It is possible that some web Certification Authorities will give you just one file containing both certificate and private key. This file must be then uploaded in both User Certificate and Private Key boxes.
In next step it is needed to assign this certificate for web interface. Assignment can be done in Services / Web Server in Advanced Settings section in HTTPS User Certificate item. On following picture certificate [1] is assigned, because certificate was uploaded into the first position.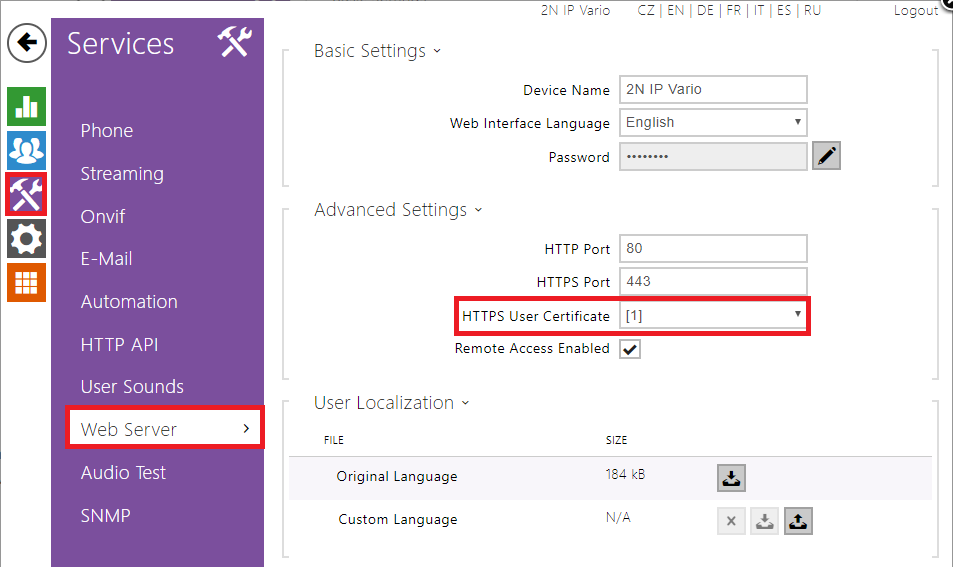
In final step it is needed to restart 2N IP Intercom. With new start of the 2N IP Intercom device new certificate and key will be used for HTTPS communication. Restart can be done in section System / Maintenance with Restart Device button.
