Factory reset - How to do factory reset on 2N IP Intercoms
There are two options how you can perform a factory reset on 2N IP Intercoms.
Software reset
Navigate in the web configuration interface to System->Maintenance and press "Reset Configuration" as shown in the picture below.
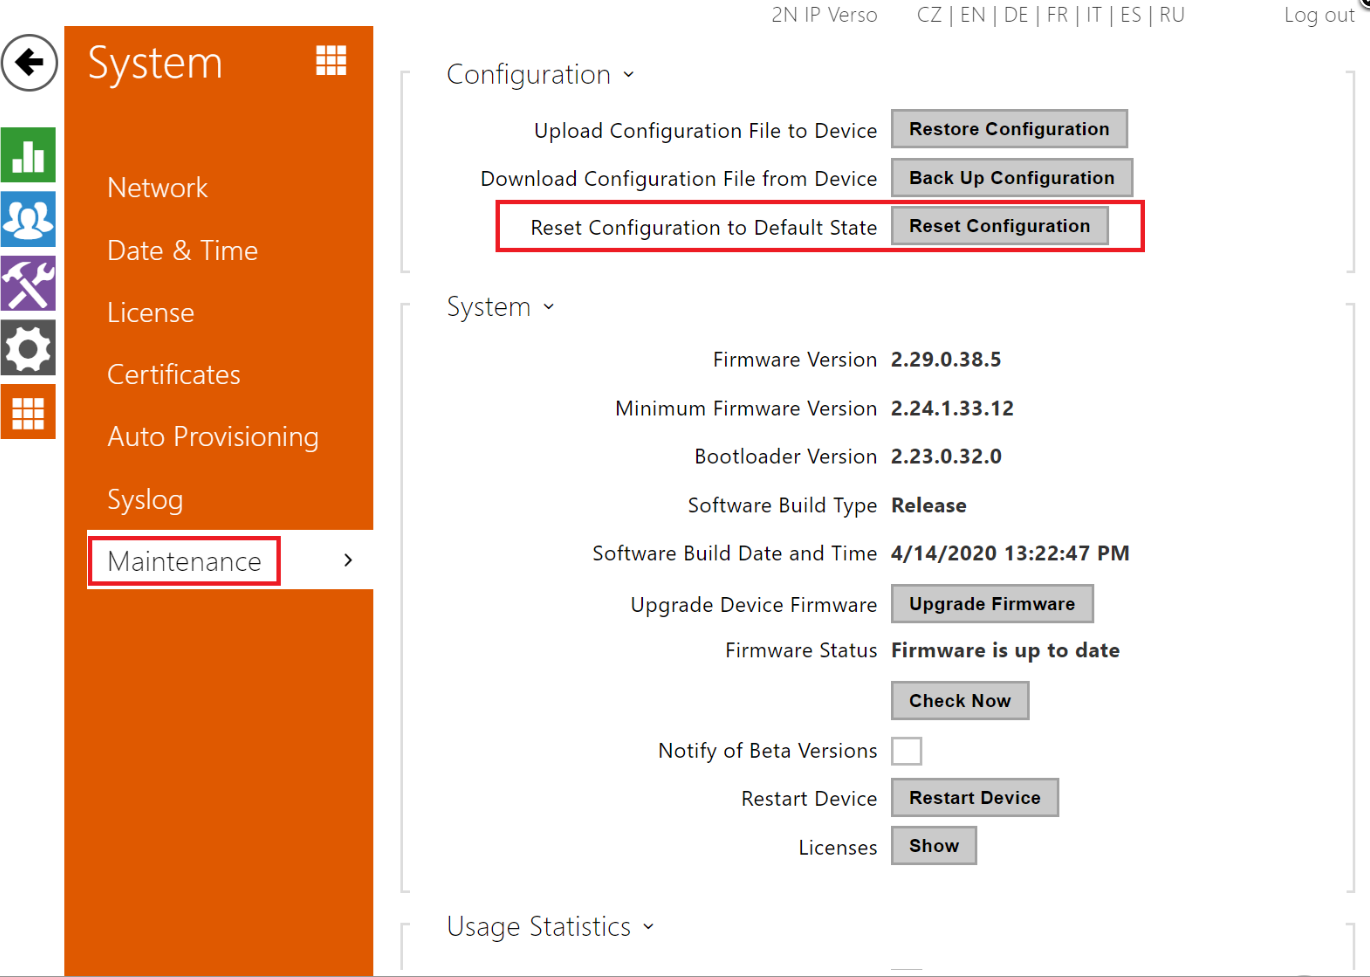
- Reset Configuration – reset default values for all the intercom parameters except for Network Settings. Use the respective jumper or press the Reset button to default all the intercom parameters; refer to the Installation Manual of your intercom.
Caution:The factory reset erases the licence key as well if entered, hence we recommend you store it for later use.
HW reset
2N® IP Vario
- Switch 2N® IP Vario off.
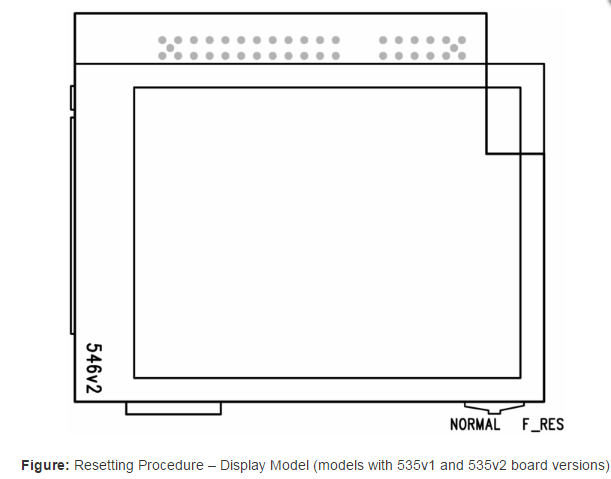
- Connect the jumper into the resetting (default setting) position (put the display switch into the F_RES position in the display-equipped models with 535v1 and 535v2 board versions).
- Switch 2N® IP Vario on and wait for the start signalling sound.
- Switch 2N® IP Vario off.
- Remove the jumper from the resetting (default setting) position (put the display switch into the NORMAL position in the display-equipped models with 535v1 and 535v2 board versions).
- Switch 2N® IP Vario on.
PCB version 535v8 has the RESET button, the procedure is the same as on 2N® IP Verso below.

2N® IP Verso
Firmware 2.26 and later:
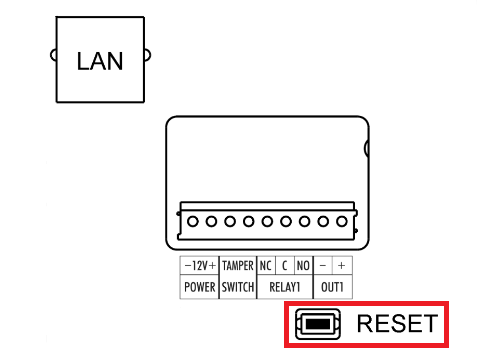
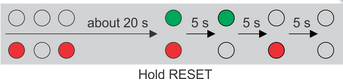
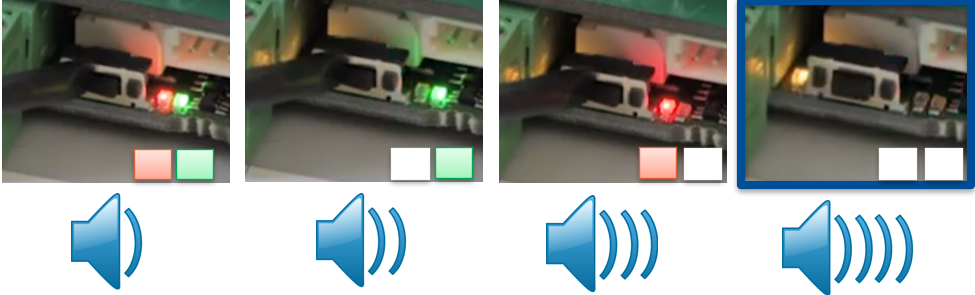
- Press the RESET button.
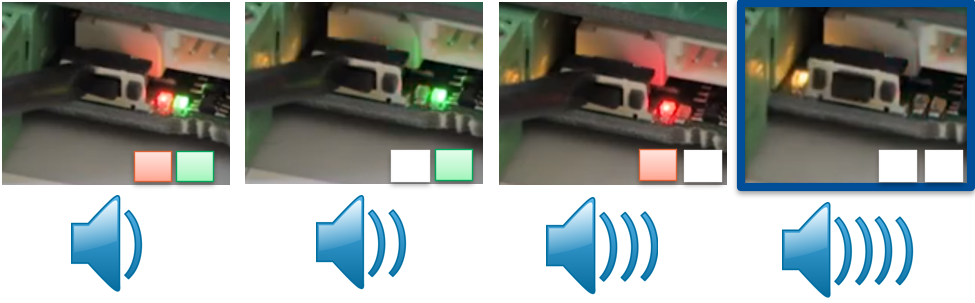
- Wait until the red and green LEDs on the device come on simultaneously (approx. 20 s). + SOUND SIGNALISATION - release the button after 4 short beeps immediately
- Wait until the red LED goes off (approx. 5 s).
- Wait until the green LED goes off and the red LED comes on again (approx. 5 s).
- Wait until the red LED goes off (another 5 s).
- Release the RESET button.
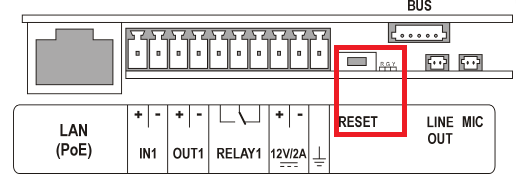

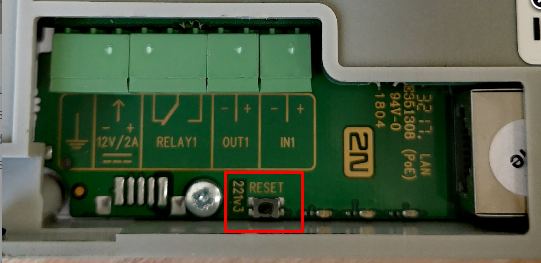
2N® IP Solo
The reset button is located on the back of the unit.
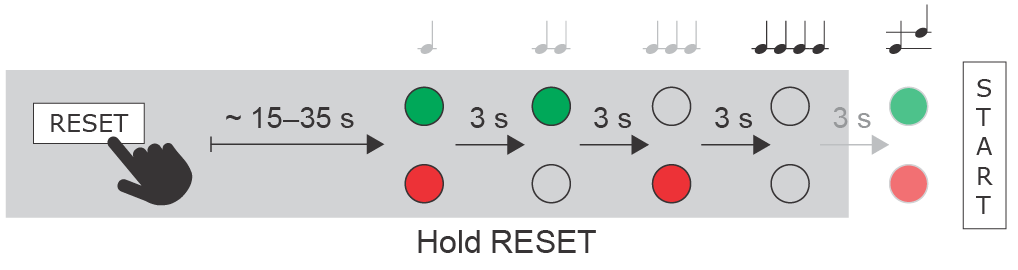
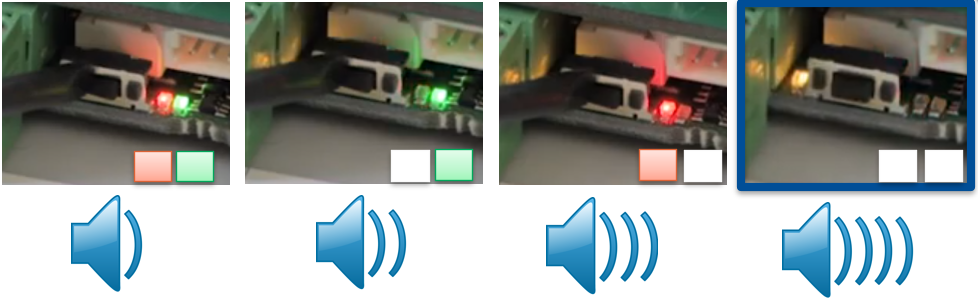
- Press and hold the RESET button.
- Wait until the red and green LEDs go on simultaneously and the acoustic signal can be heard (approx. 15–35 s).
- Wait until the red LED goes off and the acoustic signal can be heard (approx. for another 3 s).
- Wait until the green LED goes off and the red LED goes on again and the acoustic signal can be heard (approx. for another 3 s).
- Wait until the red LED goes off and the acoustic signal can be heard (approx. for another 3 s).
- Release the RESET button.
2N® IP Force/Safety
Factory Default Resetting (PCB version 555v5)
Firmware 2.26 and later:
- Press the RESET button
 .
. - Wait until the red and green LEDs on the device come on simultaneously (approx. 20 s). + SOUND SIGNALISATION - release the button after 4 short beeps immediately
- Wait until the red LED goes off (approx. 5 s).
- Wait until the green LED goes off and the red LED comes on again (approx. 5 s).
- Wait until the red LED goes off (another 5 s).
- Release the RESET button.

Figure: 2N® IP Force LED2 checking, PCB Version 555v5
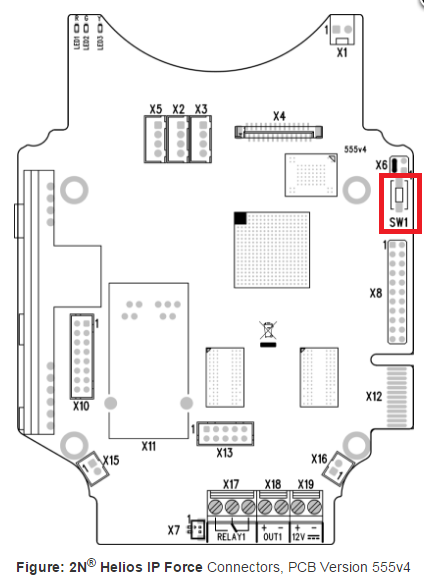
Factory Default Resetting (PCB version 555v3 )
For resetting the device to default settings press and hold the SW1 button. Wait for the first sound signalization and then release the button. If you press the button for a short time device will reboot only. SW1 button is available in devices with PCB version 555v3 and higher. For devices with the PCB version 555v2 see procedure below.

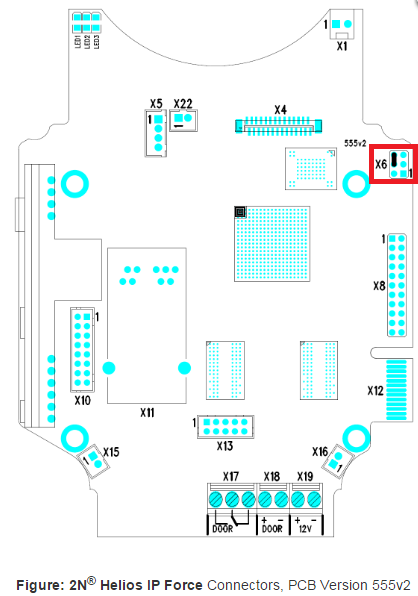
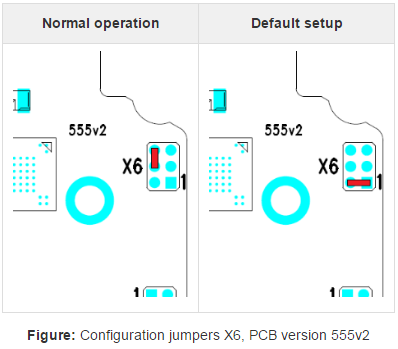
Factory Default Resetting (PCB version 555v2)
- Disconnect the device from the power supply.
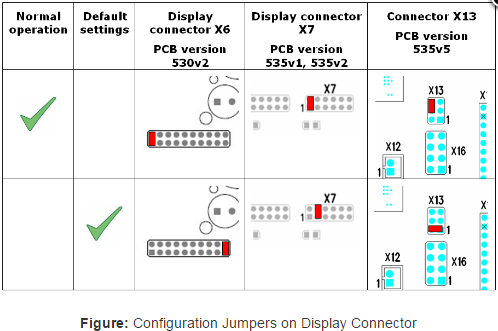
- Move the short-circuit jumper on connector X6 into the Default setup position. Configuration jumpers (X6) are located in the right-hand upper corner of the PCB.
- Reconnect the power supply and wait to start signalling sound.
- Disconnect the device from the power supply.
- Move the short-circuit jumper on connector X6 into the Normal operation position.
- Reconnect the power supply. The device will be reset to factory default.
2N® IP Uni
2N® IP Uni is equipped with a RESET button. Press the button for more than 20 s to reset the factory default values and delete all the data stored in the device. Press the button shortly
(< 1 s) to restart the device without changing its configuration. If it is not helpful, push it for 35 - 40 seconds (for firmware v2.19).
2N® IP Base
Follow the instructions below to reset the factory default values:
Firmware 2.26 and later:
- Press the RESET button.
- Wait until the red and green LEDs on the device come on simultaneously (approx. 20 s). + SOUND SIGNALISATION - release the button after 4 short beeps immediately
- Wait until the red LED goes off (approx. 5 s).
- Wait until the green LED goes off and the red LED comes on again (approx. 5 s).
- Wait until the red LED goes off (another 5 s).
- Release the RESET button.

2N® IP Audio/Video Kit
Firmware 2.26 and later:
- Press and hold the REST button.

- Wait until the red and green LEDs on the device come on simultaneously (approx. 15 s). + SOUND SIGNALISATION - release the button after 4 short beeps immediately
- Wait until the red LED goes off (approx. 5 s).
- Wait until the green LED goes off and the red LED comes on again (approx. 5 s).
- Wait until the red LED goes off (another 5 s).
- Release the RESET button.

2N® IP Style
Located among the main unit connectors, the CONTROL button helps you reset the factory default values.
Follow the instructions below to reset the factory default values:
- Disconnect the device from the power supply.
- Press and hold the CONTROL button.
- Connect the device to the power supply.
- Keep holding the button for a few seconds and then release it.
