KNX - Connection of 2N IP Intercoms and KNX system
Functionality:
- Signalization of pressed button on the HIP device into the KNX system
- Activation of the door lock connected into the HIP device via the KNX system
This guide leads you through the configuration of connecting 2N IP Intercom with home automation systems of different vendors.
Requirements
This configuration is possible only for 2N IP intercoms with an Input:
- 2N® IP Verso
- 2N® LTE Verso
- 2N® IP Vario with a card reader
- 2N® IP Force with a card reader or an additional switch with input
- 2N® IP Safety with an additional switch with input
- 2N® IP Base
We recommend having the latest firmware:
Firmware upgrade - How to do firmware update on 2N IP intercoms
KNX configuration:
- On the KNX site of installation is used KNX actuator with, at least, one input. The connection diagram is shown in the Pic. 1. You can activate the actuator when the button of the HIP is pressed at the same time as the outgoing call is made and also send a information about this to the KNX system and activated for example lights on your driveway etc. The KNX system than send the information to IN1-setting is shown in the Pic.3. The lock itself is control by the OUT1
Connection diagram:
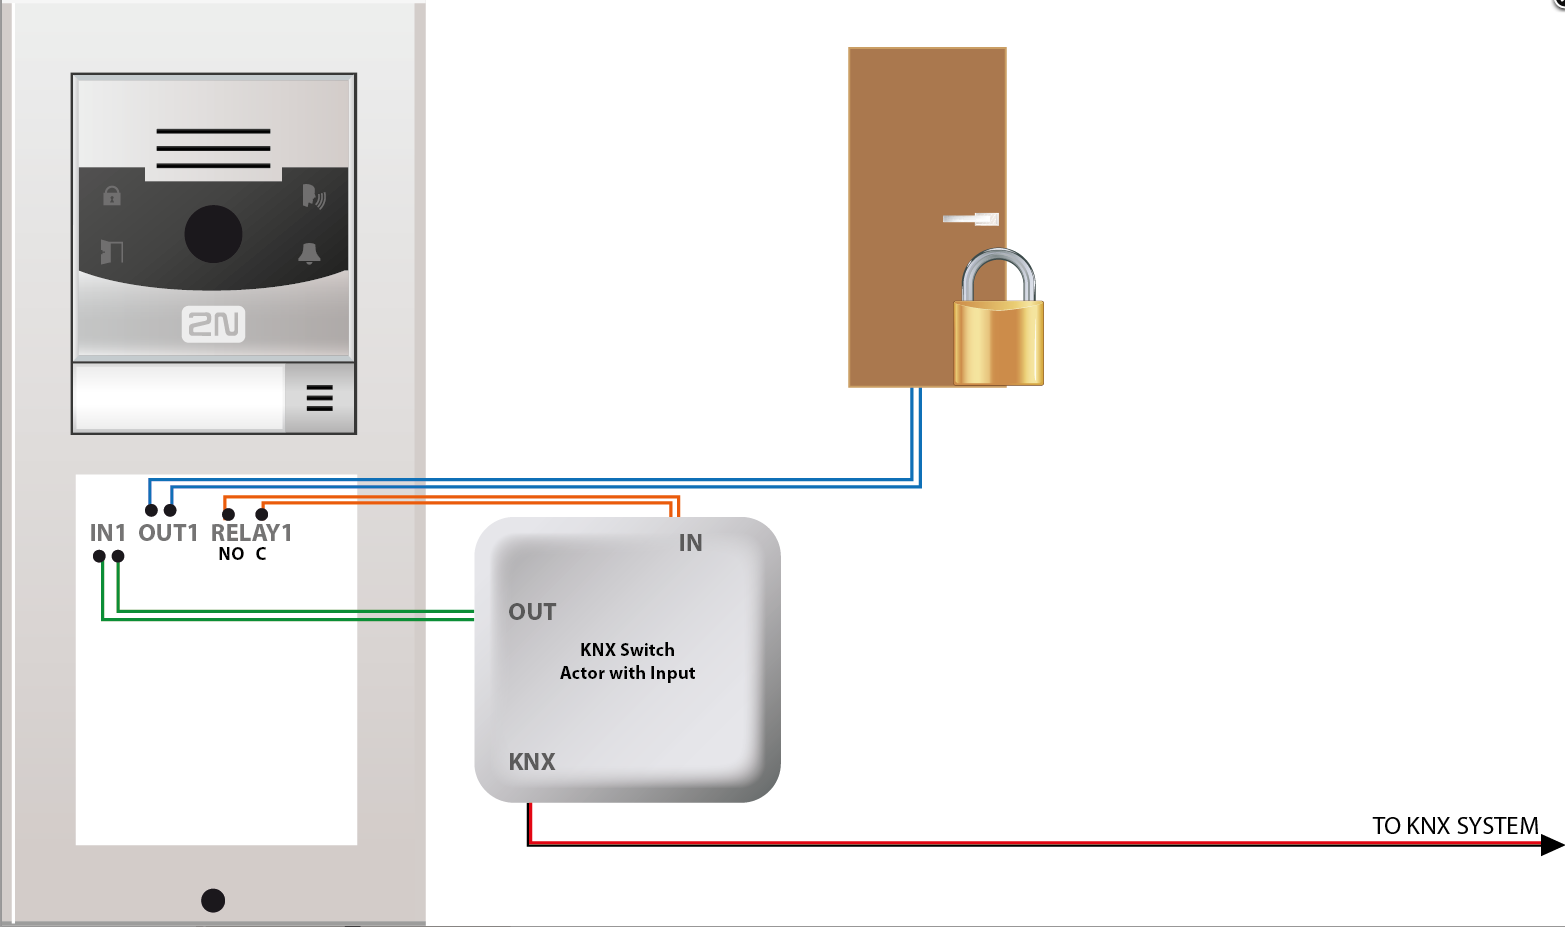
Pic. 1
2N IP Intercom configuration:
- Please set up all the other setting as usually
- In case you are using the 2N® IP Force install and allow the card reader in the configuration of the device
- Set the Automation API inputs and outputs for the communication with the KNX actuator, follow the setting in the Pic. 2, When the button is pressed the Relay 1 is activated
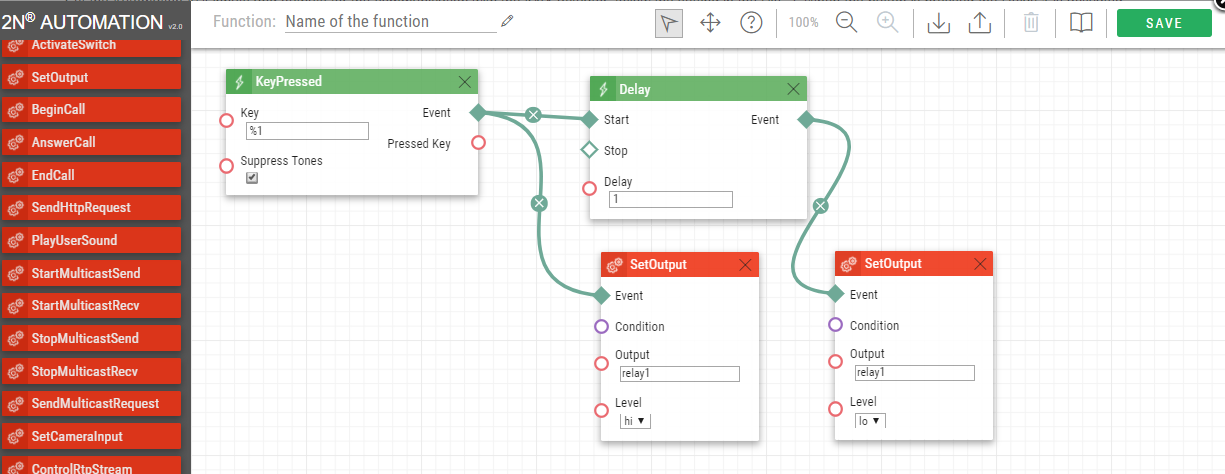
Pic. 2
- In the Menu Hardware - Door - REX Input Control follow the setting in the Pic. 3
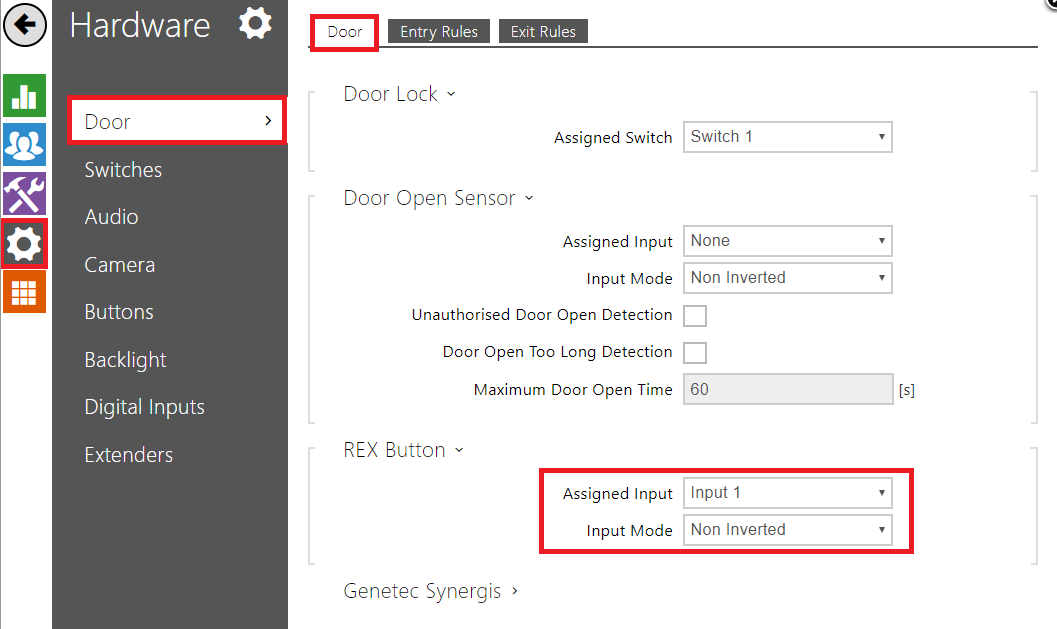
Pic. 3
- As a last step activate Switch 1 as is shown in the Pic. 4

Pic. 4