Milestone Corporate - How to connect it to 2N® IP Intercom? How to control gatekeeper outputs and enable two-way audio via ONVIF protocol and how to enable video recording?
This FAQ describes how to interconnect 2N® Helios IP intercoms with Milestone server. First part describes how to configure "Onvif" in 2N® Helios IP intercom and then how to find this intercom in the network by Milestone Xprotect. Second part describes how to control outputs and how to configure double way audio via Milestone management application. This FAQ is made for FW version 2.15.2 for 2N® Helios IP intercom and for Milestone server 2016 with Xprotect Device Pack 8.3. If you have older version of XProtect Application, then your Device Pack has to be version 7.3 or higher!
How to add 2N® Helios IP intercom to the Milestone server
How to configure 2N® Helios IP intercom
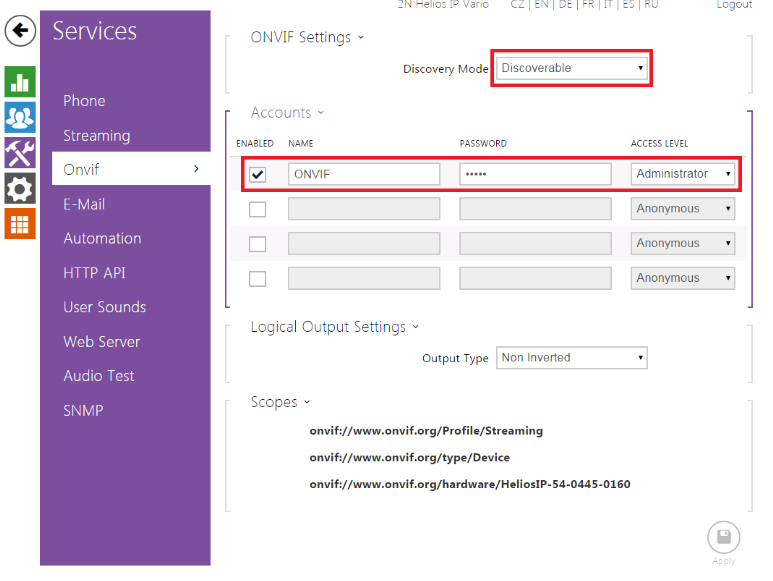
As a very first step you have to do a configuration under the section Onvif. Please keep in mind that the Onvif protocol is licensed, for full functionality you need to have a "enhanced video" license for 2N® Helios IP unit. Set discovery mode to "Discoverable" and create user with Administrator right. We used credentials ONVIF/ONVIF for this FAQ.
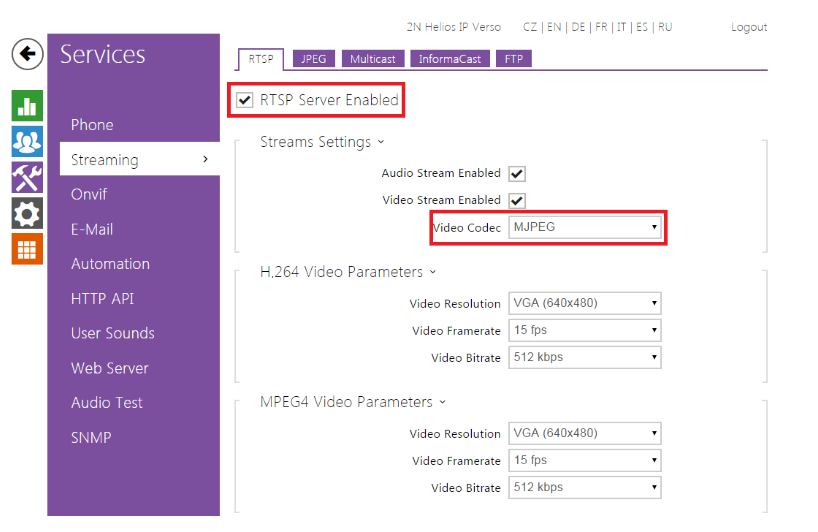
Enable RTSP Server and Audio/Video Streams. Then choose video codec.
Make sure that UDP Unicast Eneblad is checked.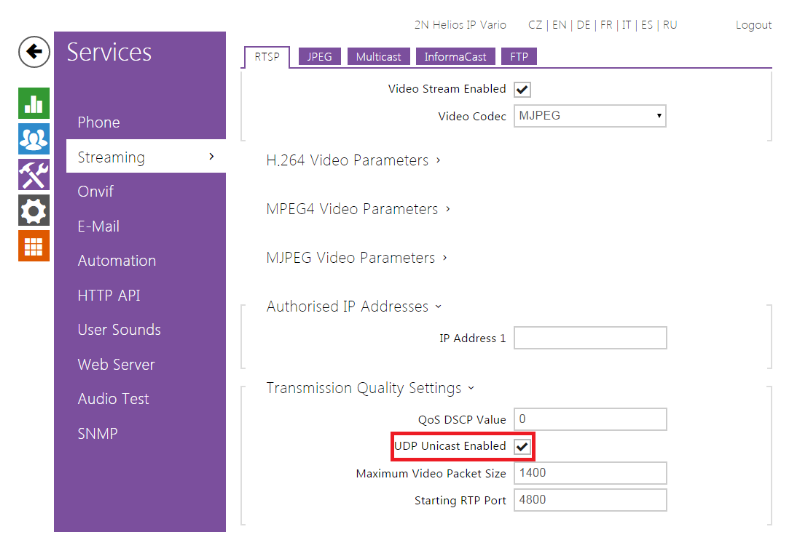
How to setup Milestone VMS system
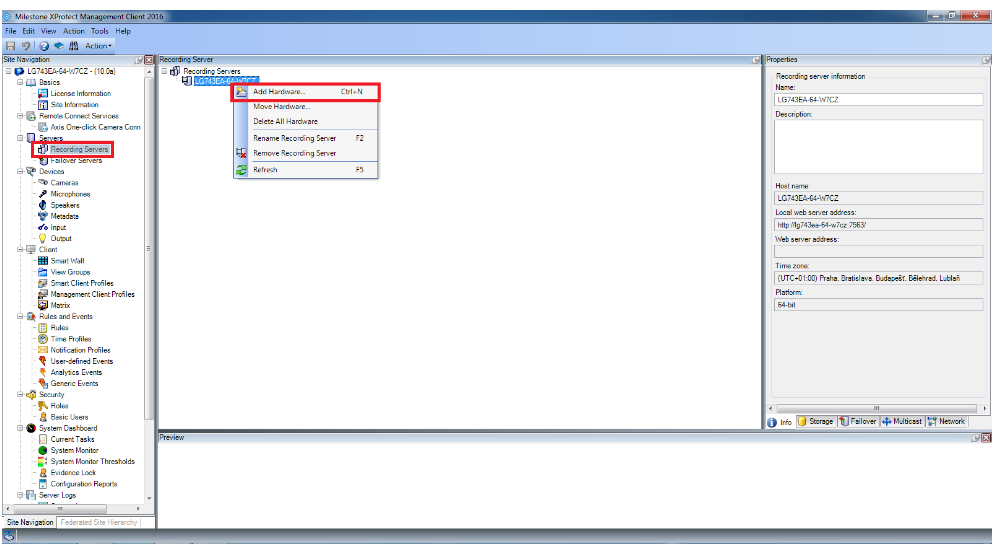
On the side of Milestone server go to section "Servers->Recording servers". Do a righ click on your recording server and choose "Add Hardware" (if server is not authorized yet, then you have to click on "Authorize first")
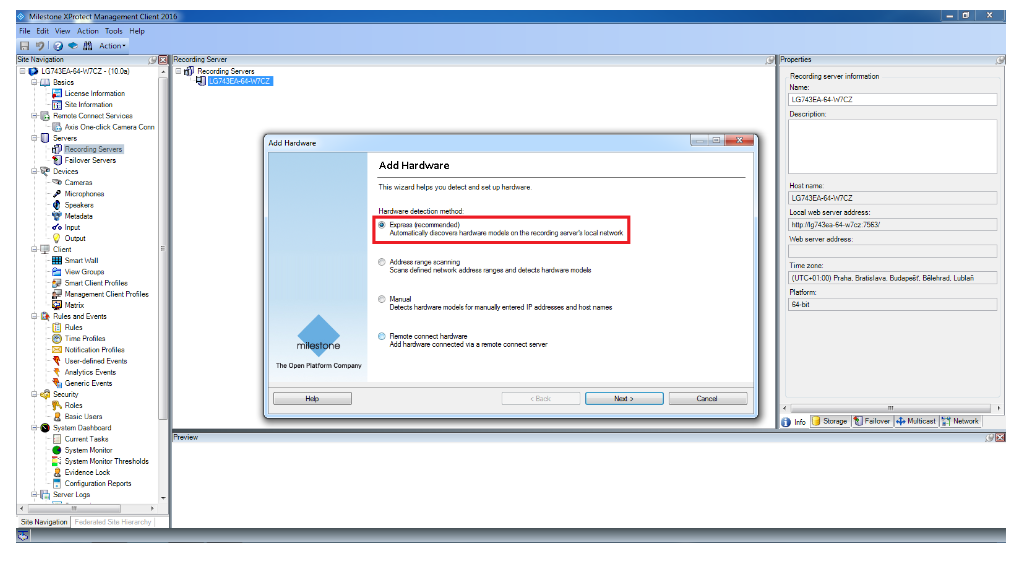
In next step you can choose how you want to add the device, we recommand to choose option "Express" and then click on "Next".
Now click on "Add" to add a new device fill credentials that you choosed for Onvif account in the intercom (in our case it is ONVIF/ONVIF). Then click on next.

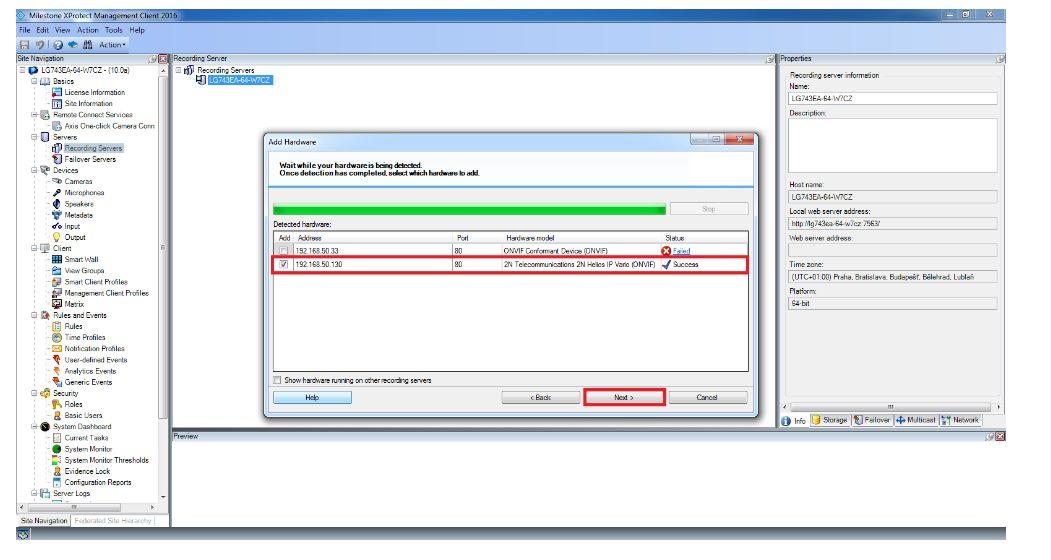
Now Milestone will search for ONVIF devices in your network, once the intercom will be found, it will appear with label "Successfull". If intercom is not checked, then please do so and click on "Next".
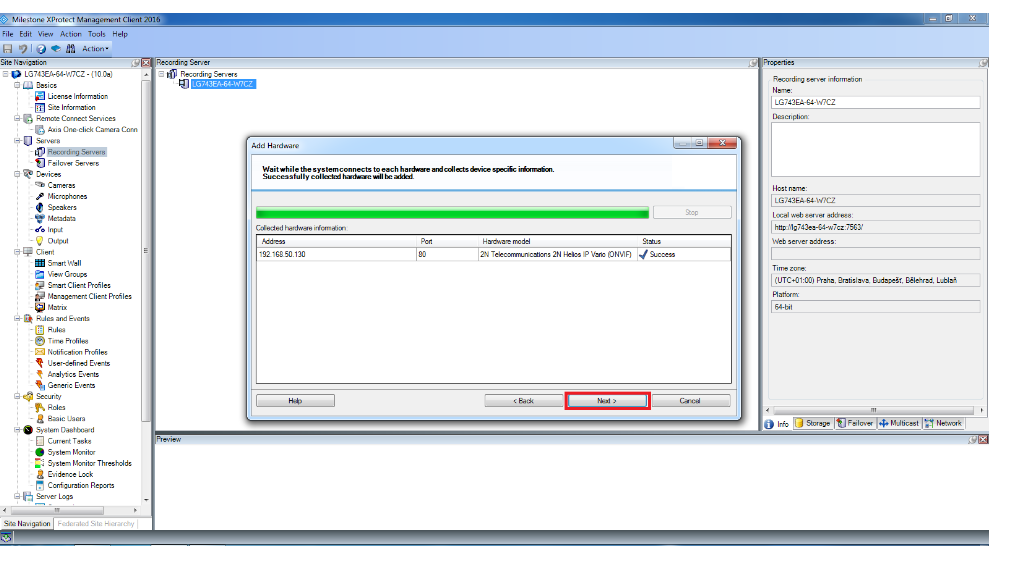
On next screen you will see successfully added devices, just click on "Next" again.
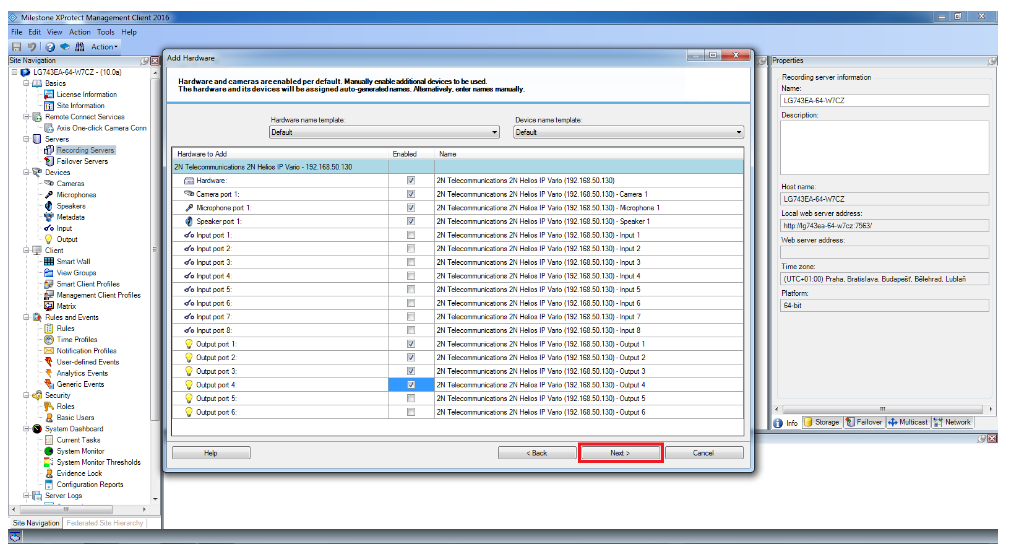
Now you have to choose HW from available peripheries of the intercom by checking the items. Typicaly you will use camera, microphone, speaker and some outputs (active ouput, relays). So just check desired HW and click on "Next".
In next step, you have to add the choosed HW to groups. If you did not create the groups yet, you have to do it now. Click on folder of particular group and then click on plus. Group will be added with defautl name, you can change it once you will add it. Once you will add the group, make sure that you marked it with cursor (it has to be blue) and then click on ok. This will set the group as default group for this type of HW. Do the same for all groups.

Once you will create new deafult groups just click on "Finish".

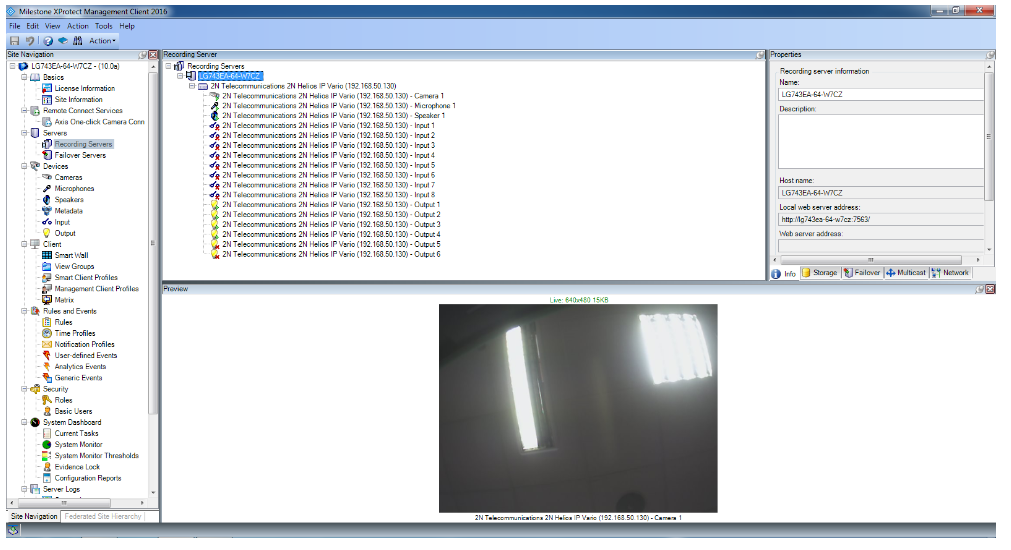
Once the procedure is finished, you will see added devices and their peripheries. You can also add the peripheries you did not add before to groups (not added peripheries are marked with red cross). Optionaly you can rename the device and also the peripheries here. Also you will see video from camera here. If Milestone is not able to connect to the camera, then please check your firewall settings!
How to control outputs and enable double way audio via ONVIF protocol?
Right now you can start "Milestones Smart Client" which is surveillance window for video monitoring (for security guys). Once you run this application for the first time you will see several sections on the left side (added cameras, created outputs, detected audio devices) but there will be no video preview on the right side of the screen. You can very easily drag selected camera and drop it into any window on the right side (this is settings only for actual login). You can also activate selected output from this client – choose appropriate output (relay) and click on the “Activate” button as shown in the picture below. Finally you can also enable double way audio – you can set microphone for listening-in and also select appropriate speaker to which you want to talk (you have to press and hold button "Talk").

If you want to create different preview, add cameras permanently into the active area on the right side and add there some special buttons for relay activation or for talking to the speakers then you have to go to the setup mode. Click on the "Setup" button on the top right corner as shown in the next picture. Everything is based on drag and drop principle. You can move there camera, button for output activation or button which will allow you to talk trough the speaker of the device.

Finally you have to click on the "Setup" button again. You will move back to the live preview and you can monitor selected cameras, you will see extra added buttons in the preview and also windows layout will be modified based on your settings. Buttons for talk to speaker and for output activation will be visible, when you will stay on the camera window with cursor of your mouse.

How to enable video recording
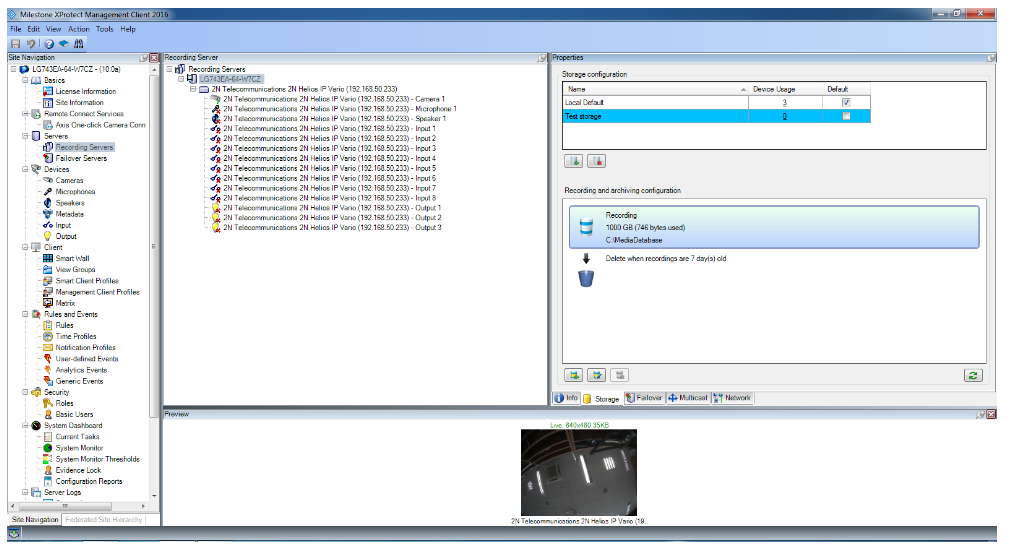
Go to section "Servers->Recording servers" and choose your recording server. Go to section "Storage" and click on add button (marked in picture below).

Now you can set the storage - fill its name, choose a path where the recorded video will be safed and choose for how long it will be safed before it will be deleted ("Retention time"). Also you can choose maximum size of recorded file. Once you will set up the storage, press ok.

After you will create the storage, then it will appear between available storages and you will be able to see how many devices are using this storage, its current size and also you will be able to delete current records.
Now you can start recording. Stay in same section (your recording server) and choose desired camera. Then open section "Record". Check recording and adjust other settings as needed. If you will click on "Select" then you can select what storage you want to use.

Once you will click on "Select" new pop-up window will appear and you can simply choose from available storages. Just choose desired storage and press ok.

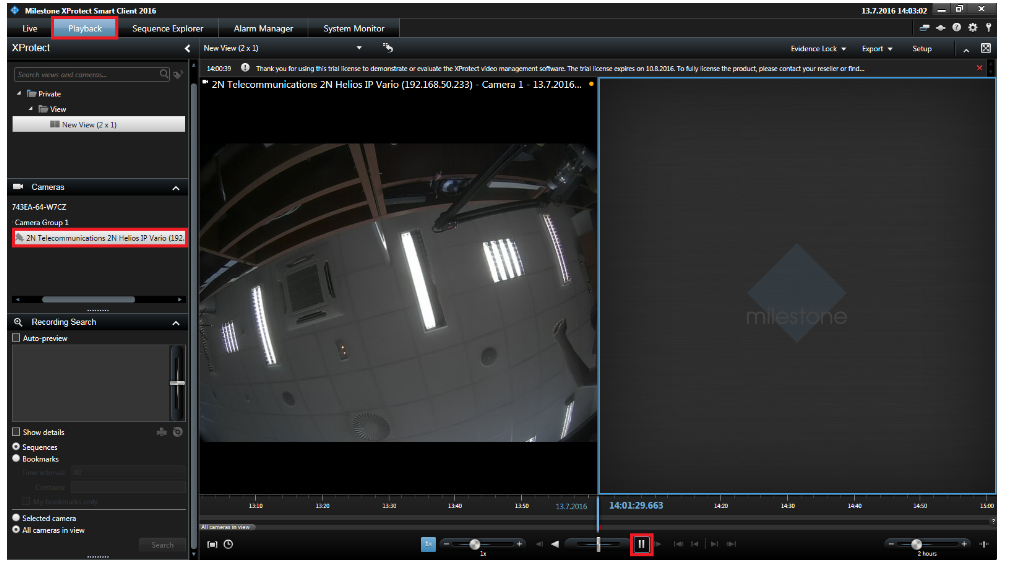
Now you are recording video from the camera to your storage. When you want to play the record, then open Xprotect Smart Client and go to section "Playback" choose the camera and then you can control playback on control bar on the bottom of the screen (Play, Pause, Stop, Fast forward/reverse, Speed etc.)