Relay - How to use external notifications and connect with relay on the 2N® Indoor Touch?
This FAQ describes how to connect external LED diode, alarm light to the 2N® Indoor Touch and how to configure 2N® IP Mobile (Intercoms) application. With relay it is possible to connect external ringing notification that is powered from the 2N® Indoor Touch.
Function external ringing notification ON/OFF activates external notification thanks to relay 1, 2. Activate relays is possible either by bell button or incoming call.
Make sure that the electric opener/lock is always connected to the intercom's 12V output using a security relay to make the installation safe. The motherboard relay is used for switching lights or other peripherals that do not have to be secured.
It is always recommended that the 2N® Security Relay (Part No. 9159010) is used for increased security.
Requirement
- 2N® Indoor Touch
- 2N® IP Mobile (Intercoms)
- Accessories for Relay
- 2-wires cables
How to connect bell button to the 2N® Indoor Touch
2N® Indoor Touch contains, on the rear side, ports to connect 3rd party devices to the relay and control them from application. As you can see in pictures there are relay1, relay2.

Pic.1
How to connect bell button to 2N® Indoor Touch:
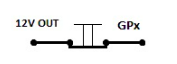
Connect 2-wires bell button to the 2N® Indoor Touch. Use ports IN1 or IN2, DC12V+ OUT. In the picture (3) is shown IN1, DC12V+ OUT.
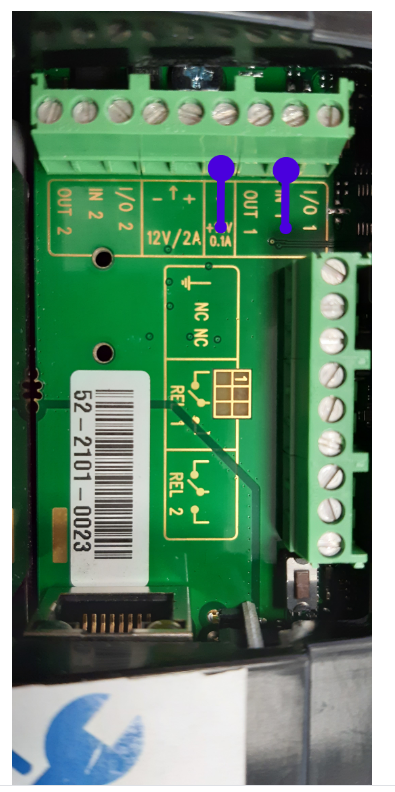
Pic.2
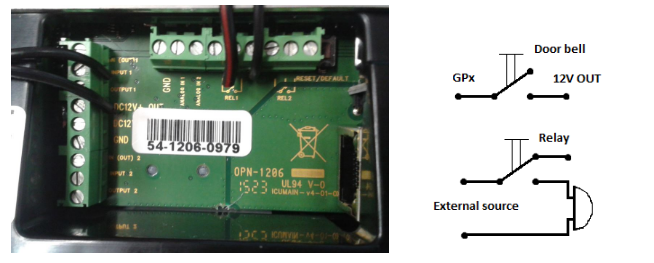
How to connect external ringing notification to 2N® Indoor Touch:
Connect 2-wires external LED diode to the 2N® Indoor Touch 2.0 . Use ports DC12V+ OUT, Relay1, Relay2, GND . In the picture (4) is shown DC12V+ OUT, Relay1, GND.
Pic.3
How to connect external ringing notification and door bell button to 2N® Indoor Touch:
In pictures (5, 6) there are 2-wires bell button and relay connected together. LED diode is powered from the 2N® Indoor Touch.
|

Pic.4
In picture 5 there are 2-wires bell button and relay connection. External bell as external ringing notification is powered from the external power source.
Pic.5
How to configure 2N® IP Mobile (Intercoms) for bell button:
Open 2N® IP Mobile, go to Settings and turn on the Doorbell button
|

Pic.6
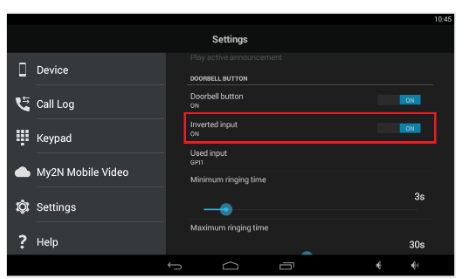
Select the desired input for the door bell button. In our case we have to set up the interface for GPI1.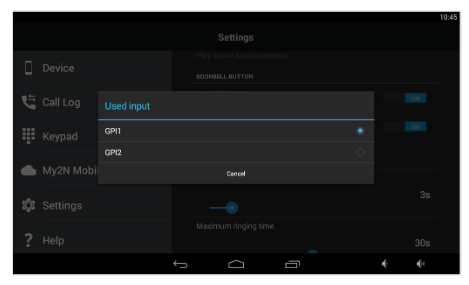
Pic.7
Inverted/ Non-inverted Input – In this section it is possible to change the logic of the button. GPI1,2 are by default in logical 1
Non-inverted Input – The application is not ringing once the button is pressed. Once you release the button the application starts to ring. The time for ringing is defined in section Maximal ringing time.
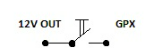
Inverted Input – Application is ringing during the time you are holding the button. If you only press the button, the application will be ringing minimal ringing time. You can set up the value of the minimal ringing time in the application- Section Minimal ringing time.
Pic.8
How to setup external ringing notification in 2N® IP Mobile (Intercoms)
- For relay is the external ringing notification section
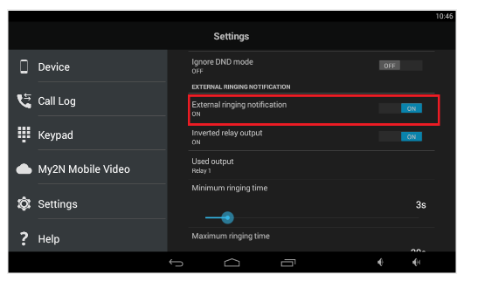
Pic.9- Inverted relay output ON – Relay (external notification) works as normally open contact.
- Inverted relay output OFF – Relay (external notification) works as normally close contact.
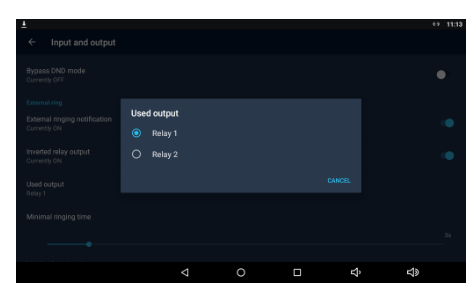
Select the desired relay for the 2N® Indoor Touch. In our case we have to setup the interface for Relay1
Pic.10Manual
For more information please follow the user guide here.
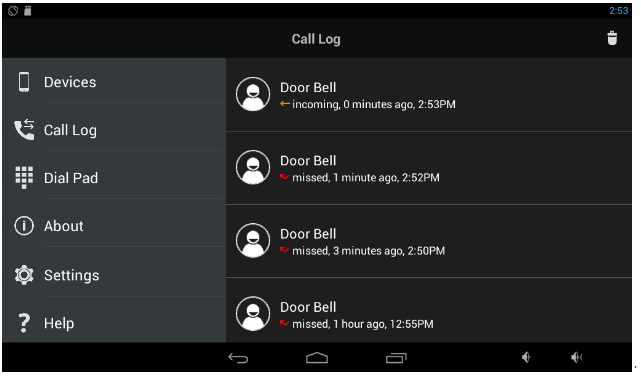
Call Log
- Call Log (11) saves all calls done by bell button
 .
.Pic.11