Tamper switch - How to install and use it
This manual is valid for 2N® IP Force, Safety, Verso, Access Unit.
In the first part we will show where is the tamper switch located or where it should be installed and in the second part we will see how to use it.
Physical installation / location of the tamper switch
2N® IP Force
In order to mount the tamper switch to the 2N® IP Force you need to also install the Additional switch (9151010) or the RFID reader (9151011, 9151031, 9151031S)
With an additional switch
If the Additional Switch is installed, it is not possible to install Internal RFID Card Reader.

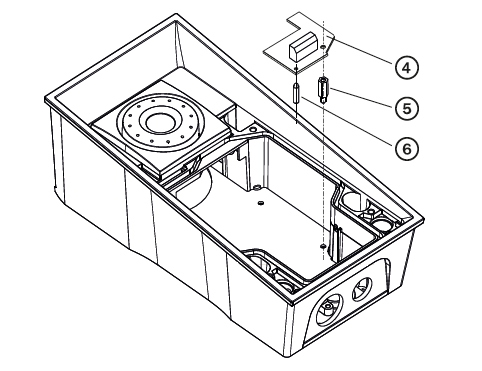
First install the additional switch (4) to the intercom
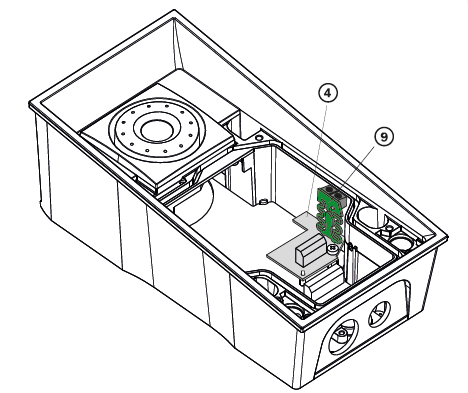
Now mount the tamper switch (9) on the additional switch (4)
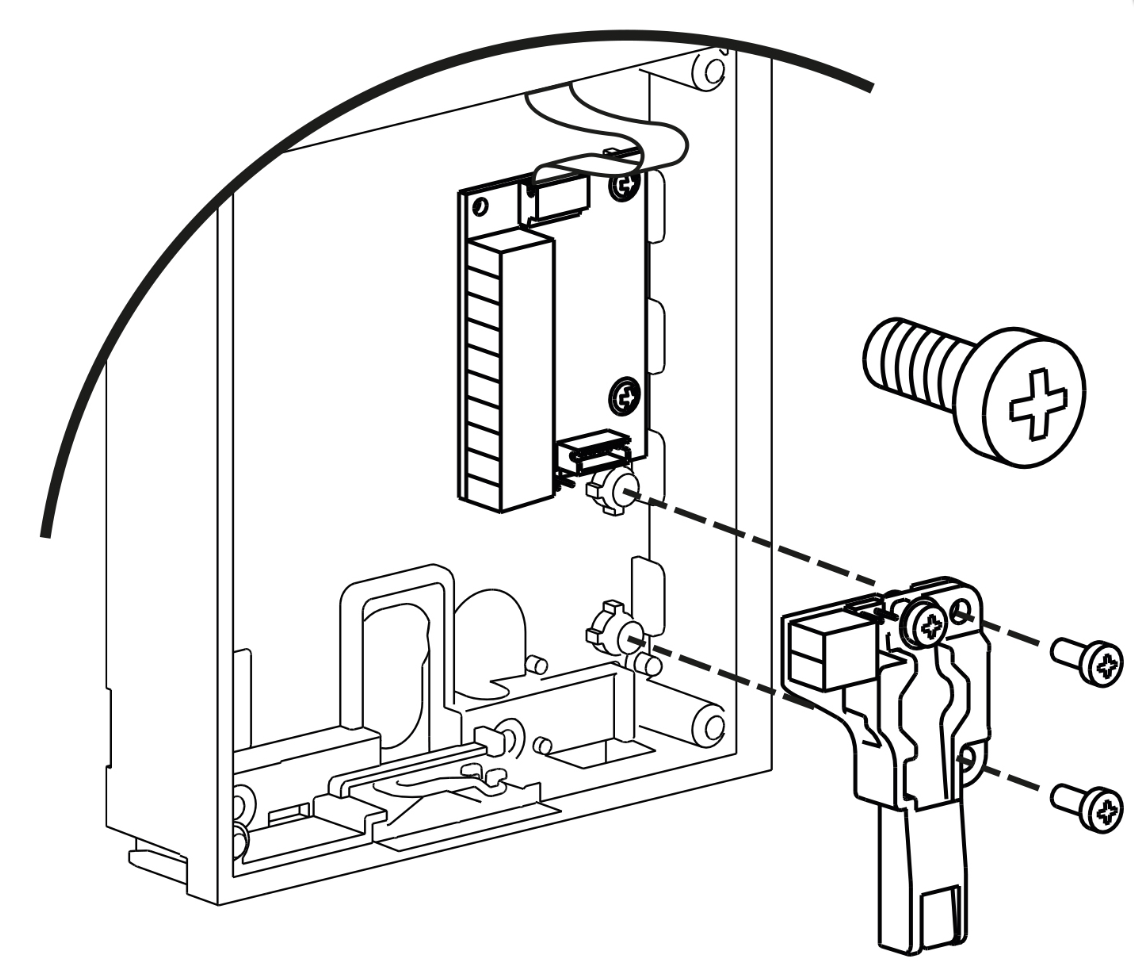
With RFID card reader
Keep in mind as the tamper switch shares the relay output (NO and NC) terminals, you cannot use the RELAY2 output with the tamper switch at the same time.
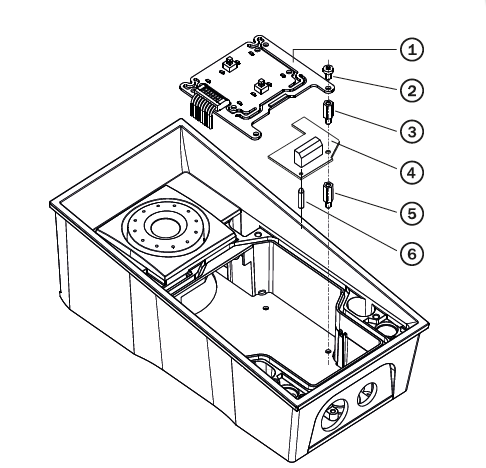
First install the RFID reader board (4) to the intercom
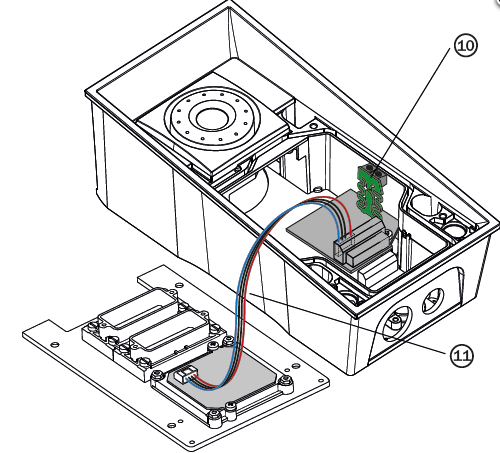
Now mount the tamper switch (10) on the RFID reader board
Once you will cover the front plate, two black buttons will be pressed and it will switch on NO and C of the terminal block and close the circuit. Afterwards if somebody tries to entry the 2N® IP Force, it will undo the circuit and trigger the tamper switch event.
2N® IP Safety
In order to mount the tamper switch to the 2N® IP Safety you need to also install the Additional switch (9151010)
With an additional switch
The additional switch is the only way to install the tamper switch, as 2N® IP Safety does not support any internal RFID reader.
Keep in mind that it is not possible to connect this module to main unit Part No. 9152102W. (two buttons)
First install the additional switch (4) to the intercom.

Now mount the tamper switch (9) on the additional switch (4)
Once you will cover the front plate, two black buttons will be pressed and it will switch on NO and C of the terminal block and close the circuit. Afterwards if somebody tries to entry the 2N® IP Safety, it will undo the circuit and trigger the tamper switch event.
2N® IP Verso
You are able to mount the tamper switch to the 2N® IP Verso with usage of I/O (9155034) or Wiegand module (9155037) in order to be used via Automation.
It could be also installed alone and wired directly to the security control panel.
With an I/O module
In order to control events of the temper switch in the Automation (Event - “InputChanged”) the input Tamper is addressed as follows: <module_name>.<tamper>, e.g. module2.tamper.

I/O module with Tamper switch contacts
Tamper switch mounting
With a Wiegand module
In order to control events of the temper switch in the Automation the input Tamper is addressed as follows: <module_name>.<tamper>, e.g. module2.tamper.
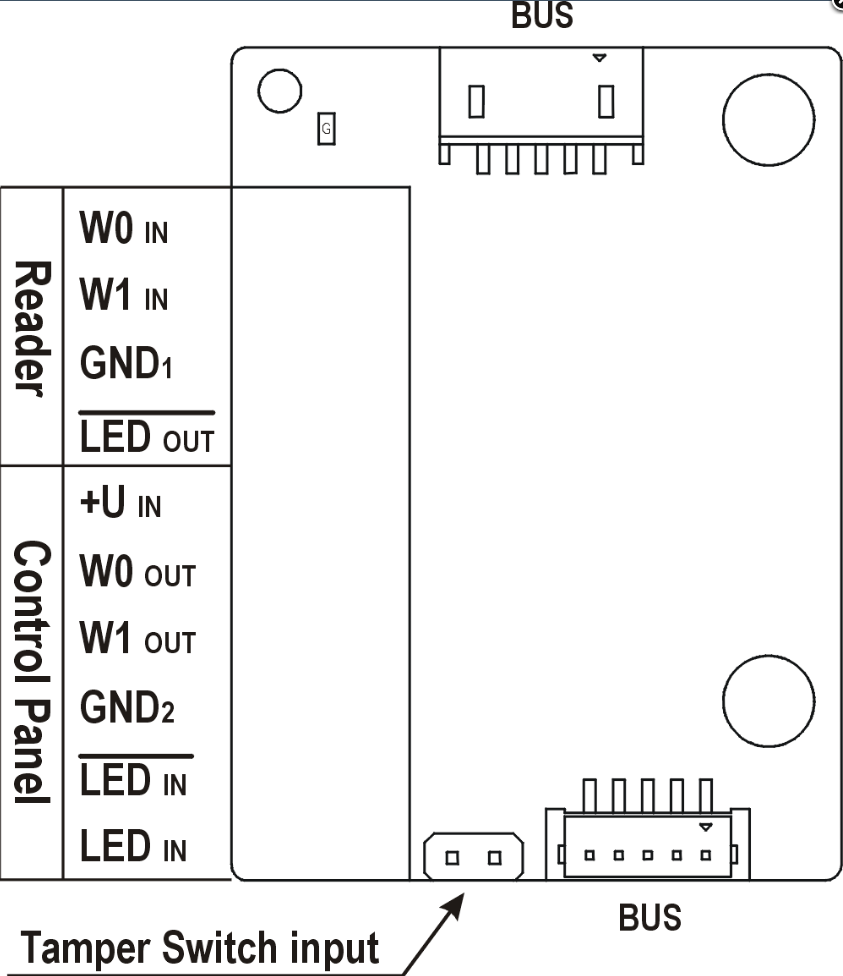
Wiegand module with Tamper switch contacts

Tamper switch mounting
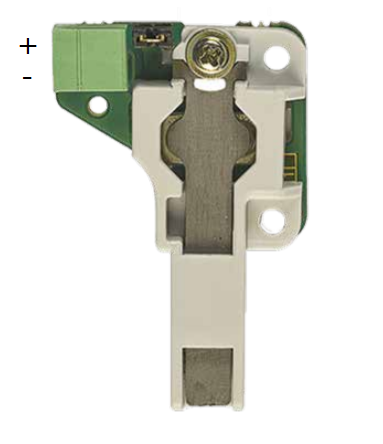
Standalone
The switch leads directly to the terminal board and is designed for connection to an external security exchange (32 V DC / 50 mA max).
This module is not connected to the bus.
2N® Access Unit 2.0
2N® Access Unit
The tamper switch is already installed as mechanical sensor that can determine if anyone has removed the frame from the device.
Location of the tamper switch on the unit
2N® IP Base
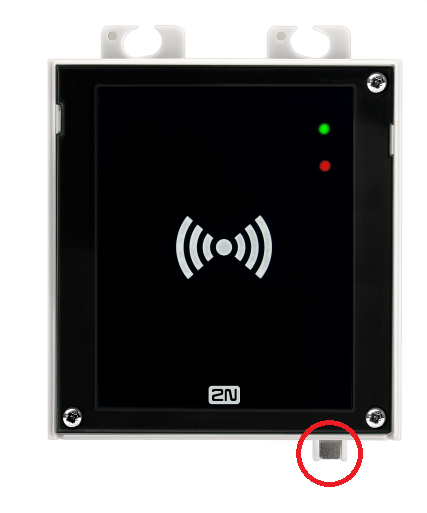
The tamper switch is already installed as mechanical sensor (button) under the front cover that can determine if anyone has removed it.
Location of the tamper switch on the unit
2N® IP Uni
The tamper switch is already installed as mechanical button under the front cover, if anyone tries to undo the cover it will trigger the Tamper switch.
This Tamper switch cannot be controlled via Automation as the 2N® IP Uni does not support any licenses.
Tamper switch contacts are available on terminal block TAMPER SWITCH on the back of the unit.
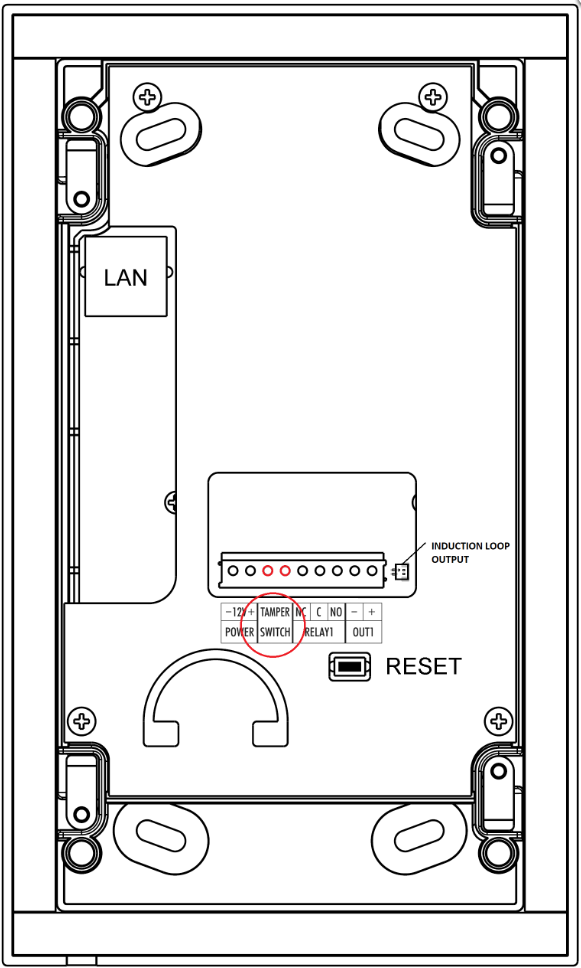
Location of the terminal for tamper switch
Using the tamper switch
The tamper switch could be controlled via Automation feature — GOLD license required.
You can configure that after activation of tamper switch the e-mail, HTTP command can be sent to some 3rd party device, silent alarm or local alarm can be triggered, etc. You can see simple example in the picture below where the intruder is photographed (from 2N IP Intercom itself) after activation of tamper switch - somebody opens the front panel and e-mail with snapshots is sent to selected user.
