Vega LPR integration with 2N IP Intercoms / Access units
2N devices can now use recognized license plates as another credential for entry or exit. This function can be enabled on any device that supports “Door” functionality. License plates may be assigned to a user and their validity is controlled by the same access rules as their other credentials.
License plate recognition (LPR) works outside of Access Profiles set in Hardware>Door>Entry or Exit Rules, and as such can’t be combined with other credentials for combined authentication.
Prerequisites
- Suitable Vega - Automatic Number Plate reader with following firmware or newer
Firmware version = VEGA BASIC 12.68.1 ITA-EU Sep 14 2021 15:16:04
Plate Reader lib = Tattile Plate Reader Ver.3.170.000
Traffic Interface lib = 1.135
TOS version = 4.38.1
Boot version = 2.40
- 2N device with FW 2.33+
- 2N IP/LTE Intercoms (apart from 2N® IP Uni)
- 2N Access Units
Vega camera configuration:
- Enable Template Message Action for OCR Read Event
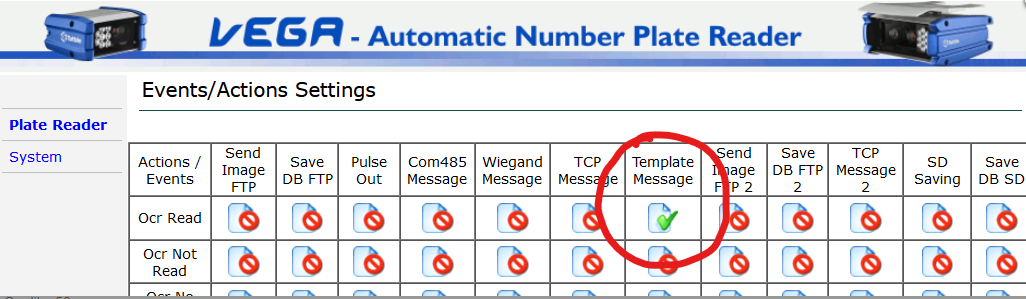
- Configure Template with following parameters:
Enable: Yes
Server IP: 2NdeviceIP
Server Port: 2NdevicePort (default 80)
Protocol: HTTP_post
Content Type: application/json
Url: api/lpr/licenseplate
Authentication: AUTH_DIGEST
Username: Yourusername
Password: Yourpassword
Jpeg Quality: 50
Crop Image: 640x480
Context Jpeg Quality: 50
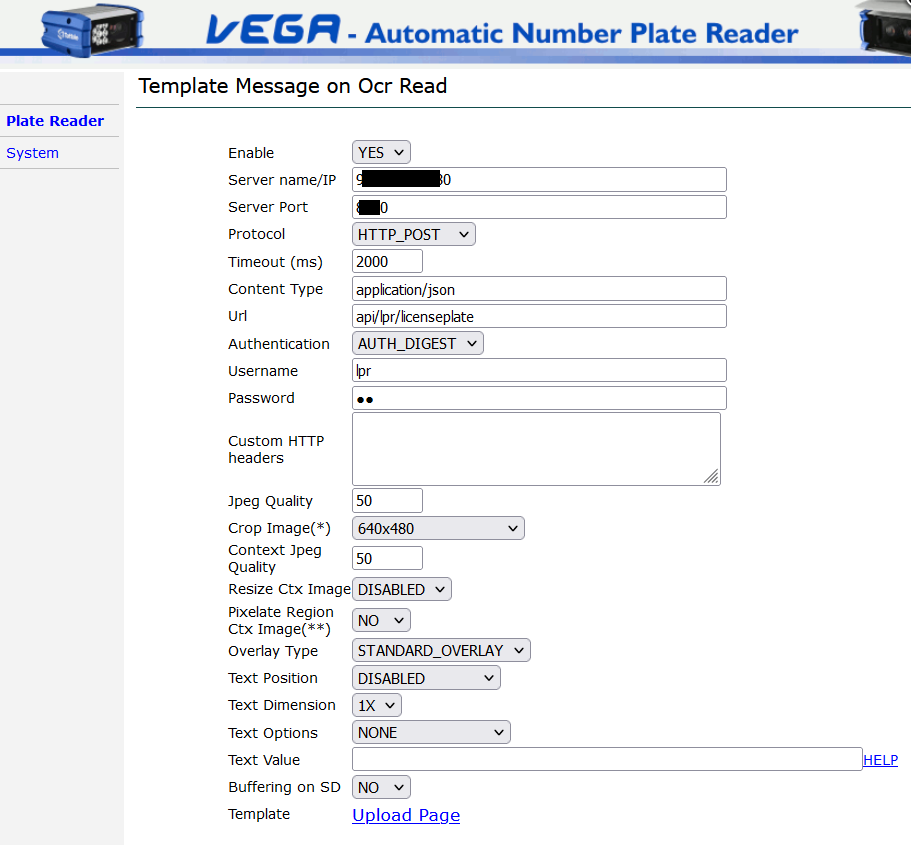
Upload template of JSON body

use following format:{ "lprUuid": "${YEAR}-${MONTH}-${DAY}-${HOUR}-${MIN}-${SEC}", "accessPoint": 0, "plateText": "${PLATE_STRING}", "plateImage": "${IMAGE_OCR}" }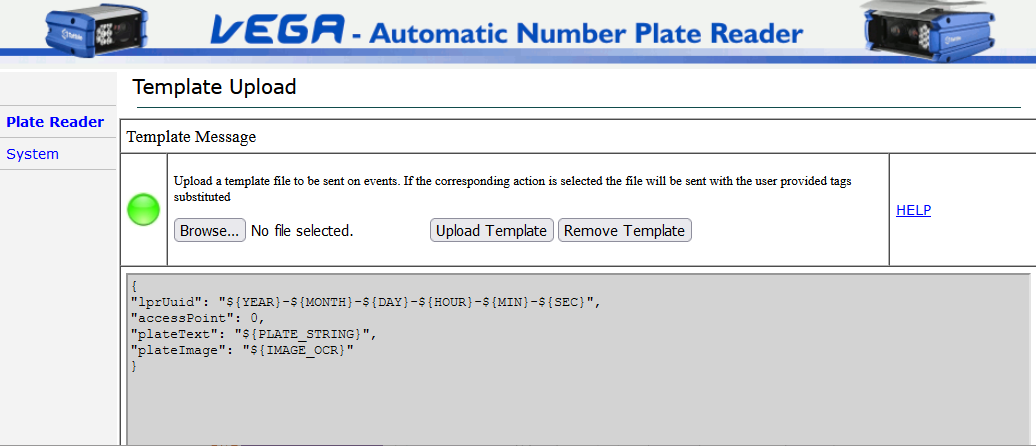
2N device configuration
- Set Camera HTTP API to Unsecured (TCP) Digest

- Set Account 1 to match credentials used in Vega camera and enable Access Control privilege
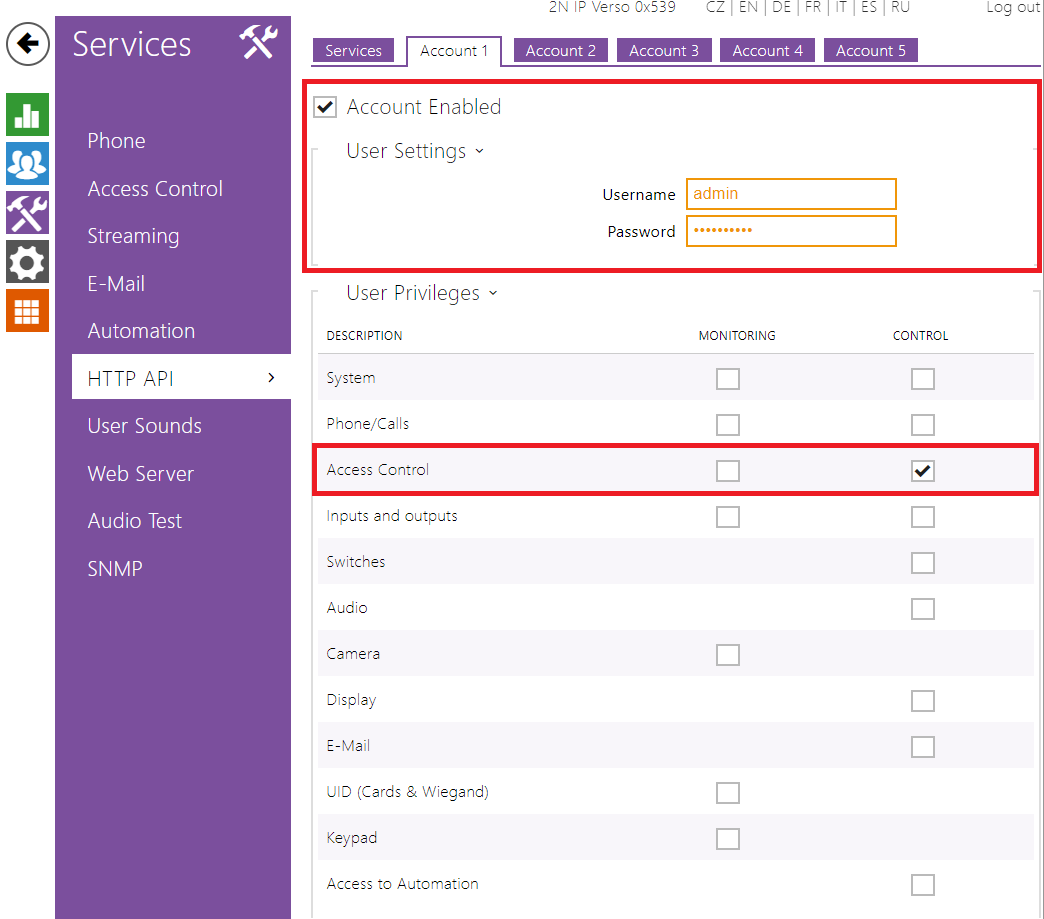
- Enable License Plate Recognition on 2N device

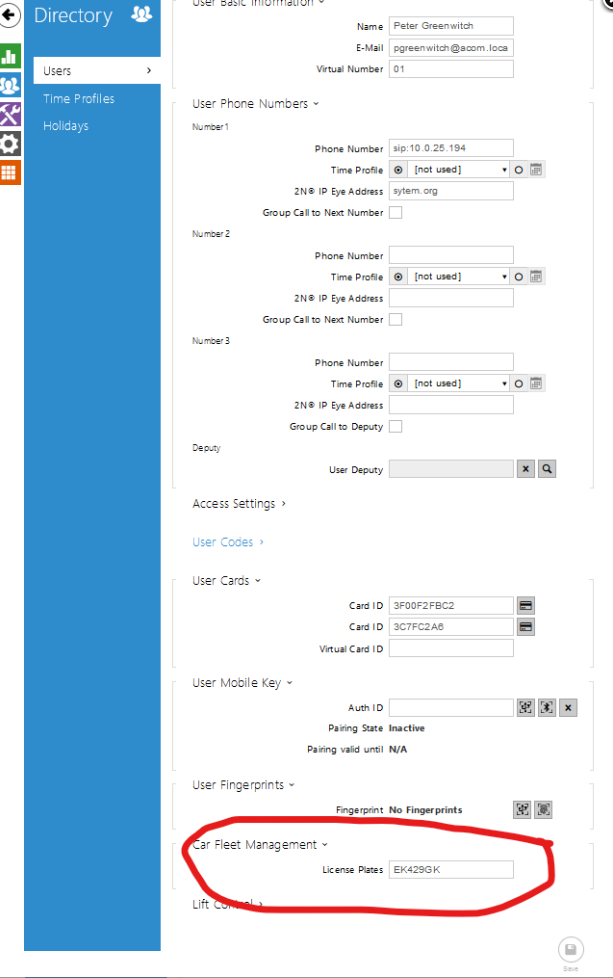
- Add user and enter LP of car as an access credential in to Car Fleet management
2N® Access Commander configuration (optional)
When a 2N device is connected to 2N® Access Commander, then most of its settings are managed by it. Thus, LPR settings will be managed by 2N® Access Commander, but still you have to configure the device’s HTTP API credentials as those are device dependent.
- Configure your 2N® Access Commander as you normally would. Then open details of the device you already prepared for LPR

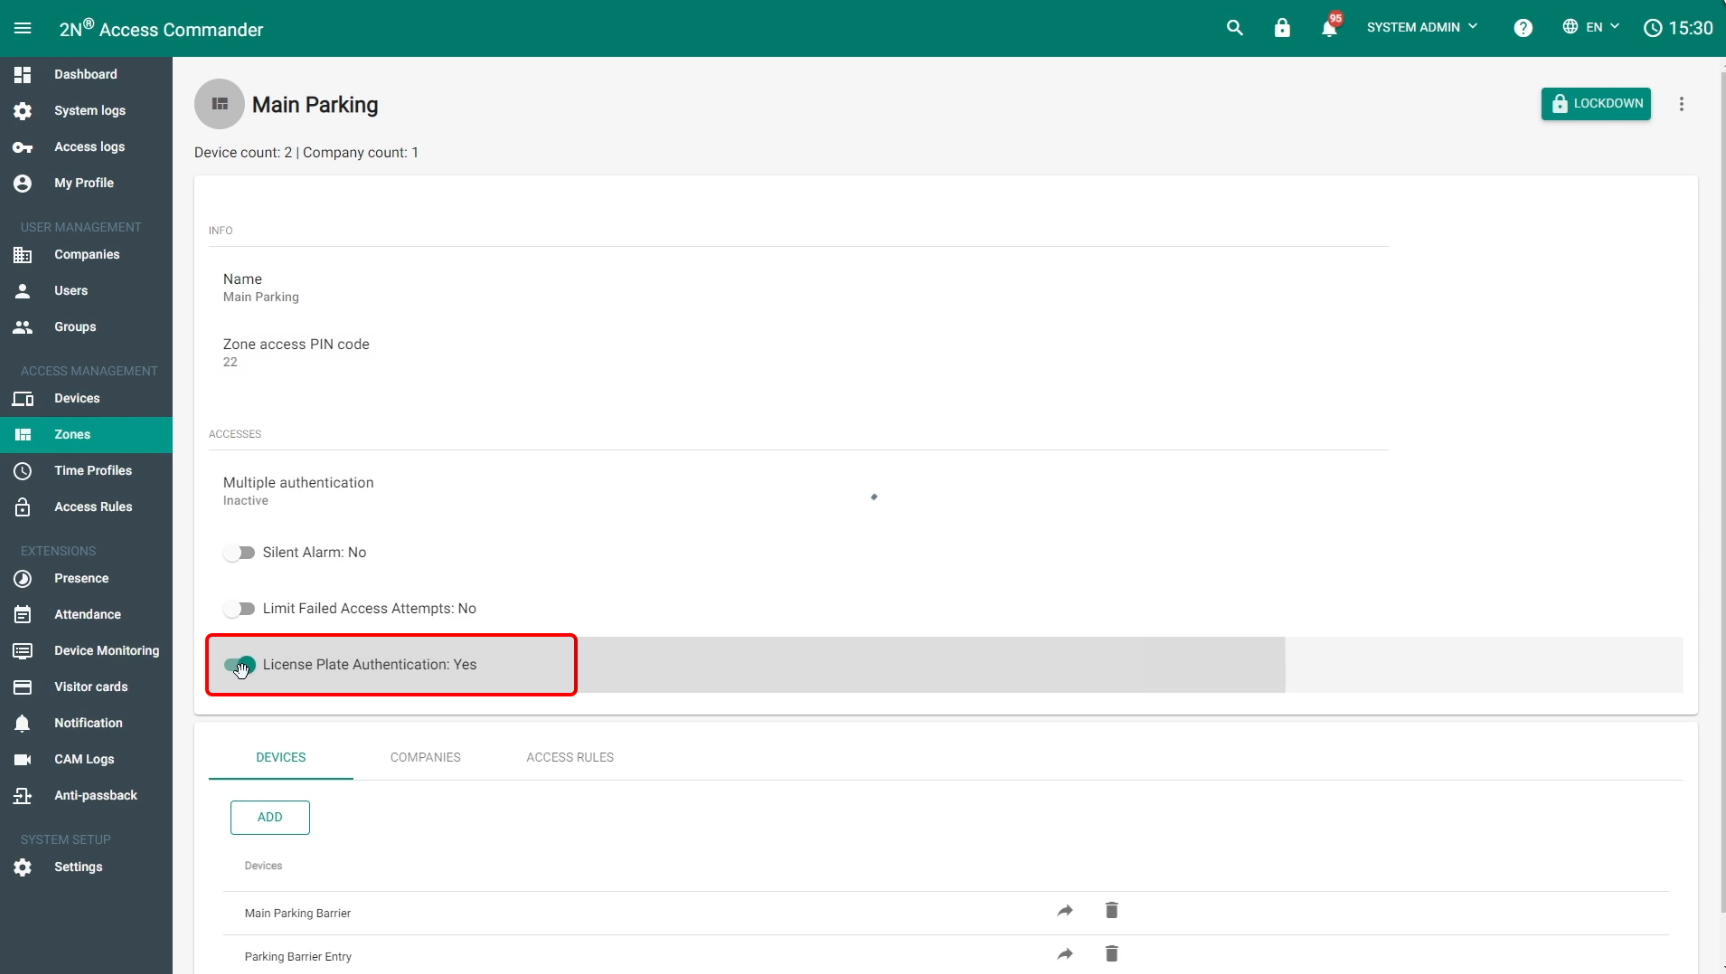
and make sure it has Lift Control turned off and that it’s assigned to the proper zone.
- Then go to this Zone’s detail and enable License Plate Authentication.
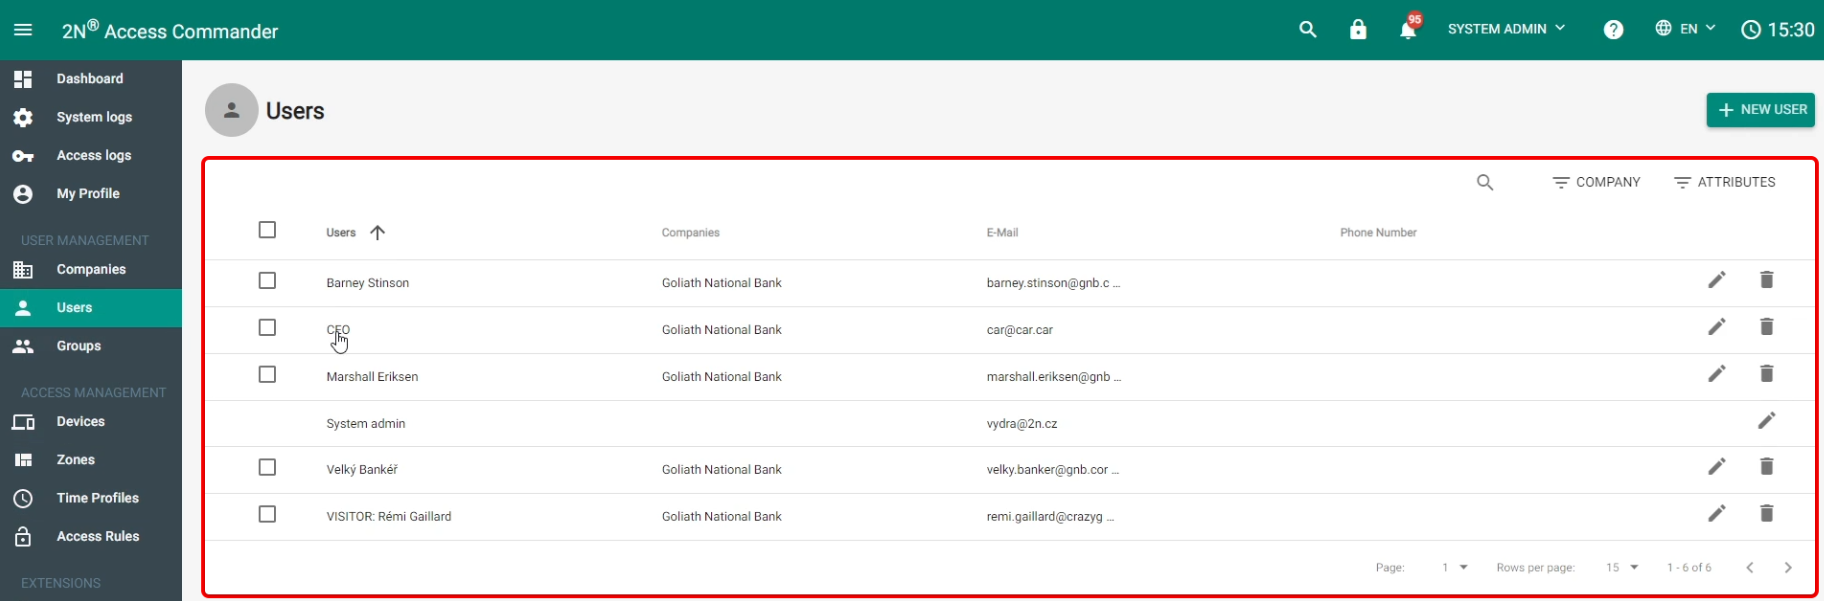
- Users can have their license plates assigned
under Accesses>Car License Plates, click ADD, enter one or more license plates, and confirm by clicking create.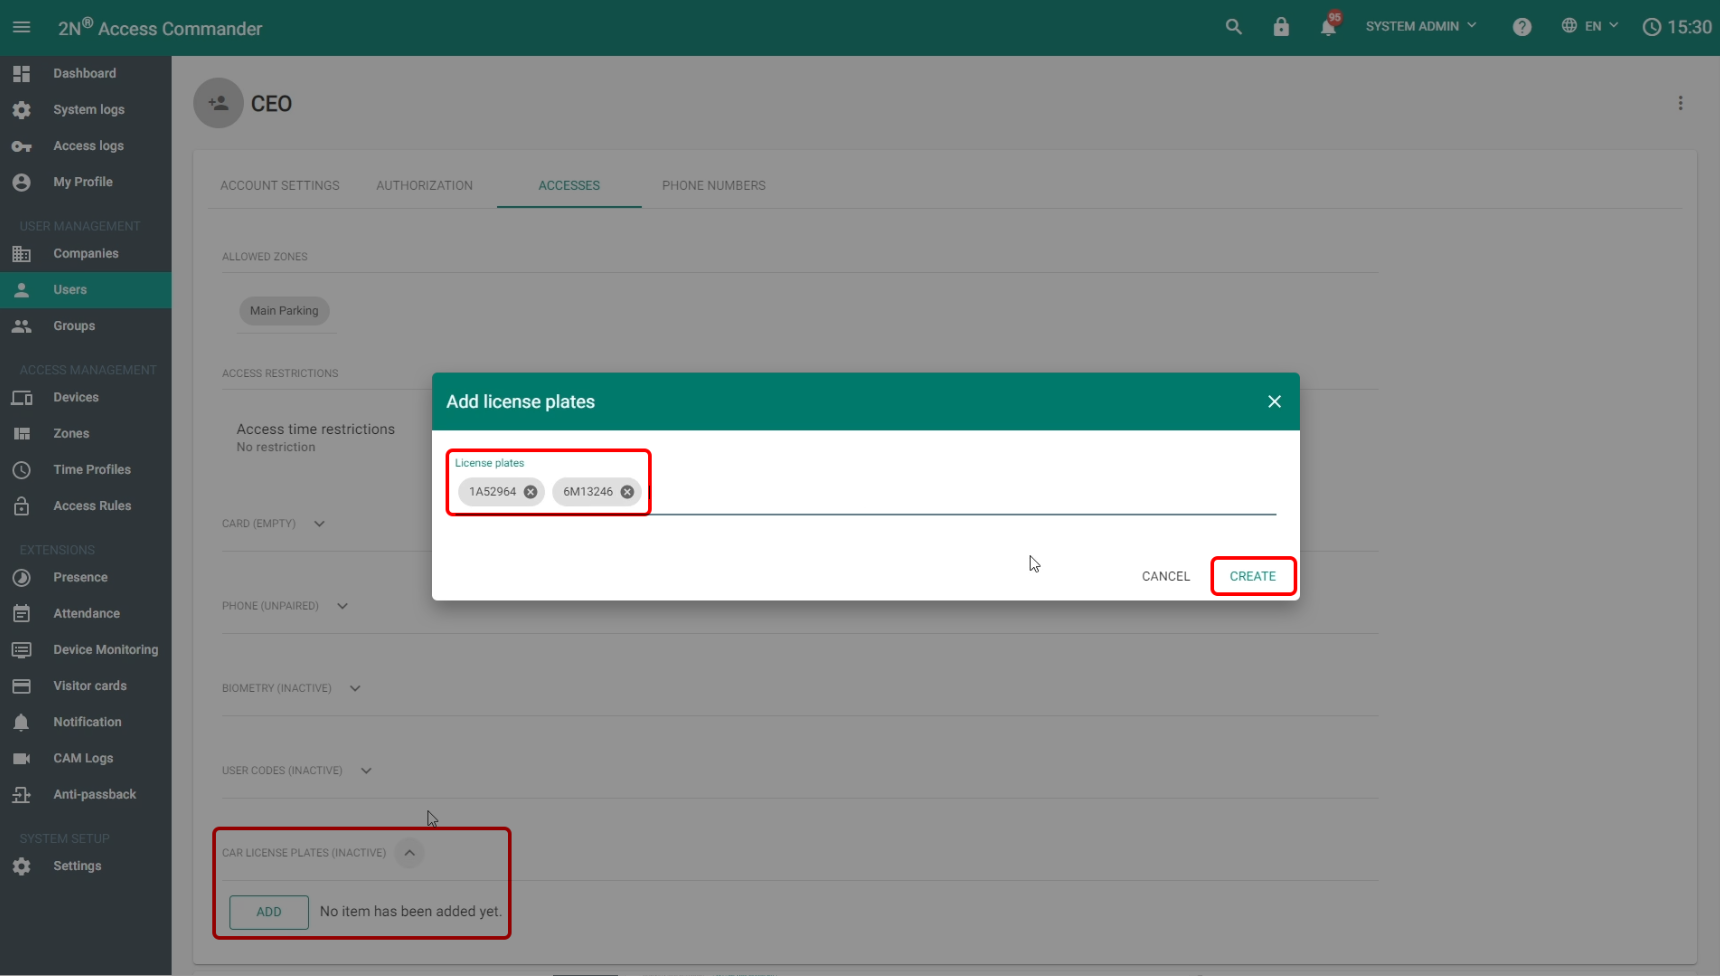
- Verify that this user is assigned to the correct group

and create an Access Rule for it.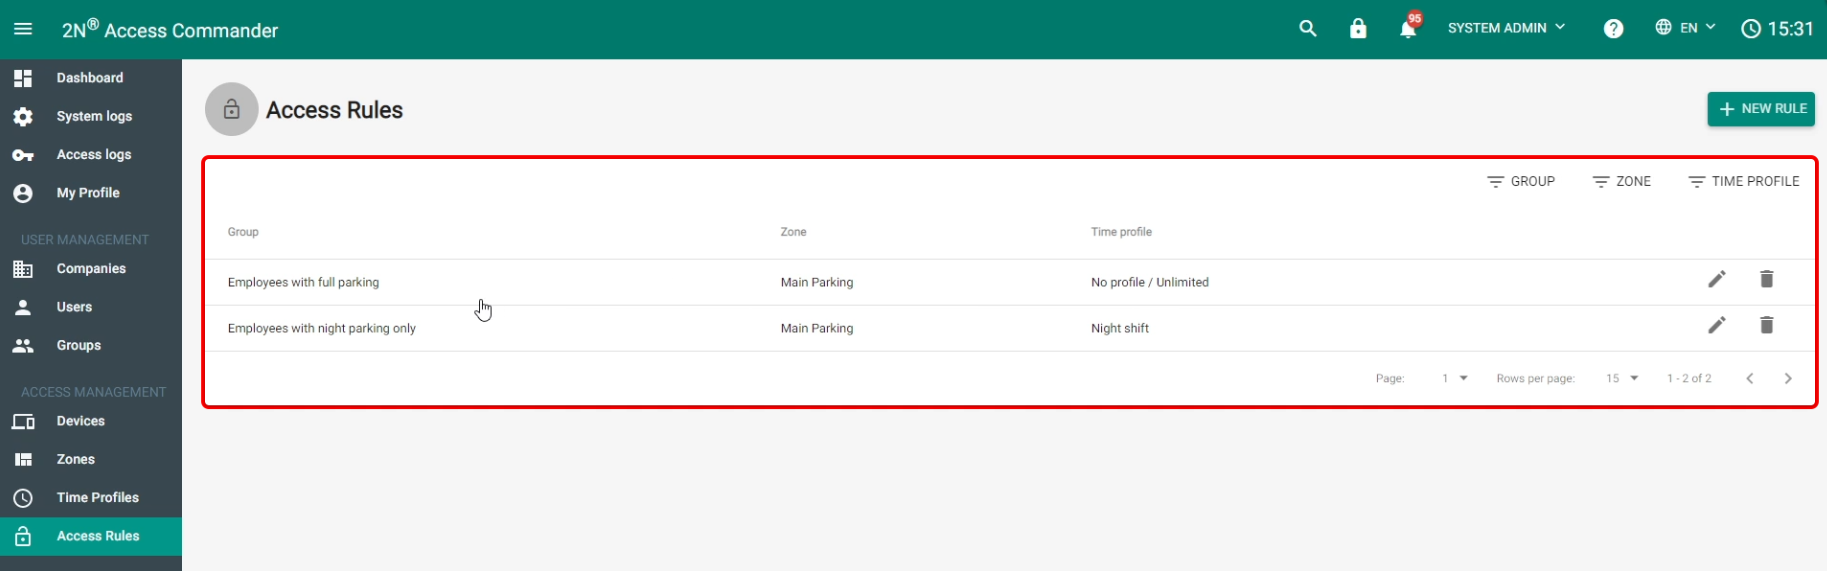
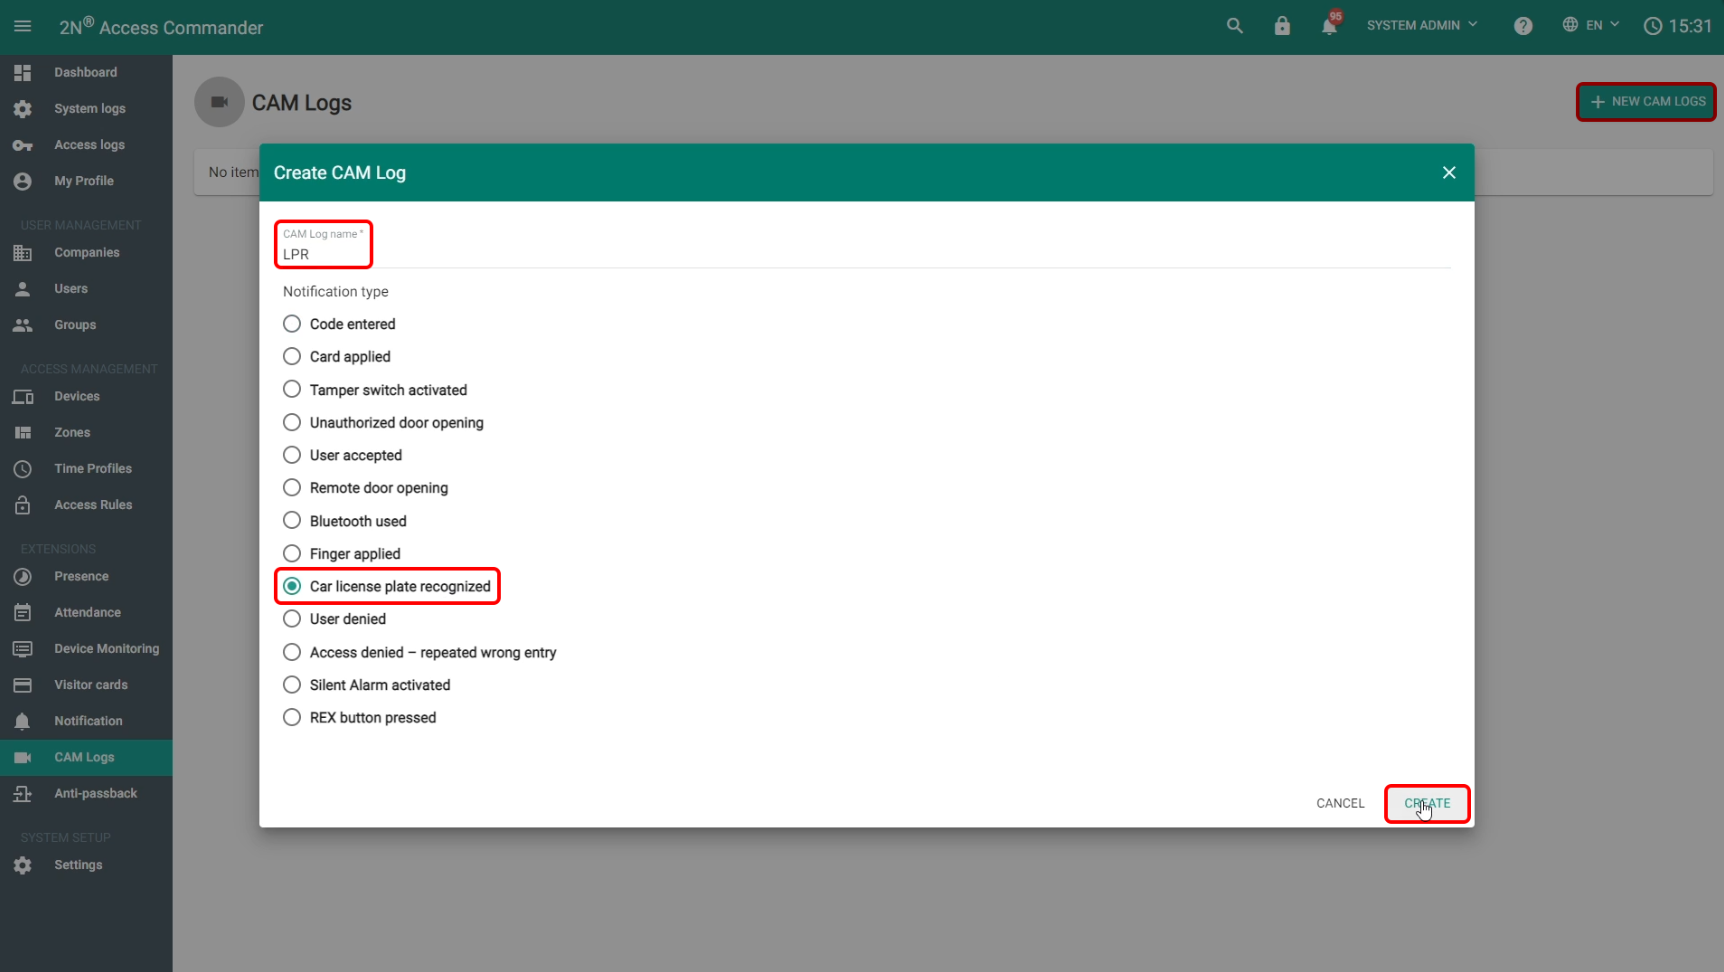
- Optionally, if you’d like to get photos of recognized license plates, you can create + NEW CAM LOGS. Name the log accordingly, select “Car license plate recognized” and click create.
Then ADD all devices you want to receive photos from to this CAM Log.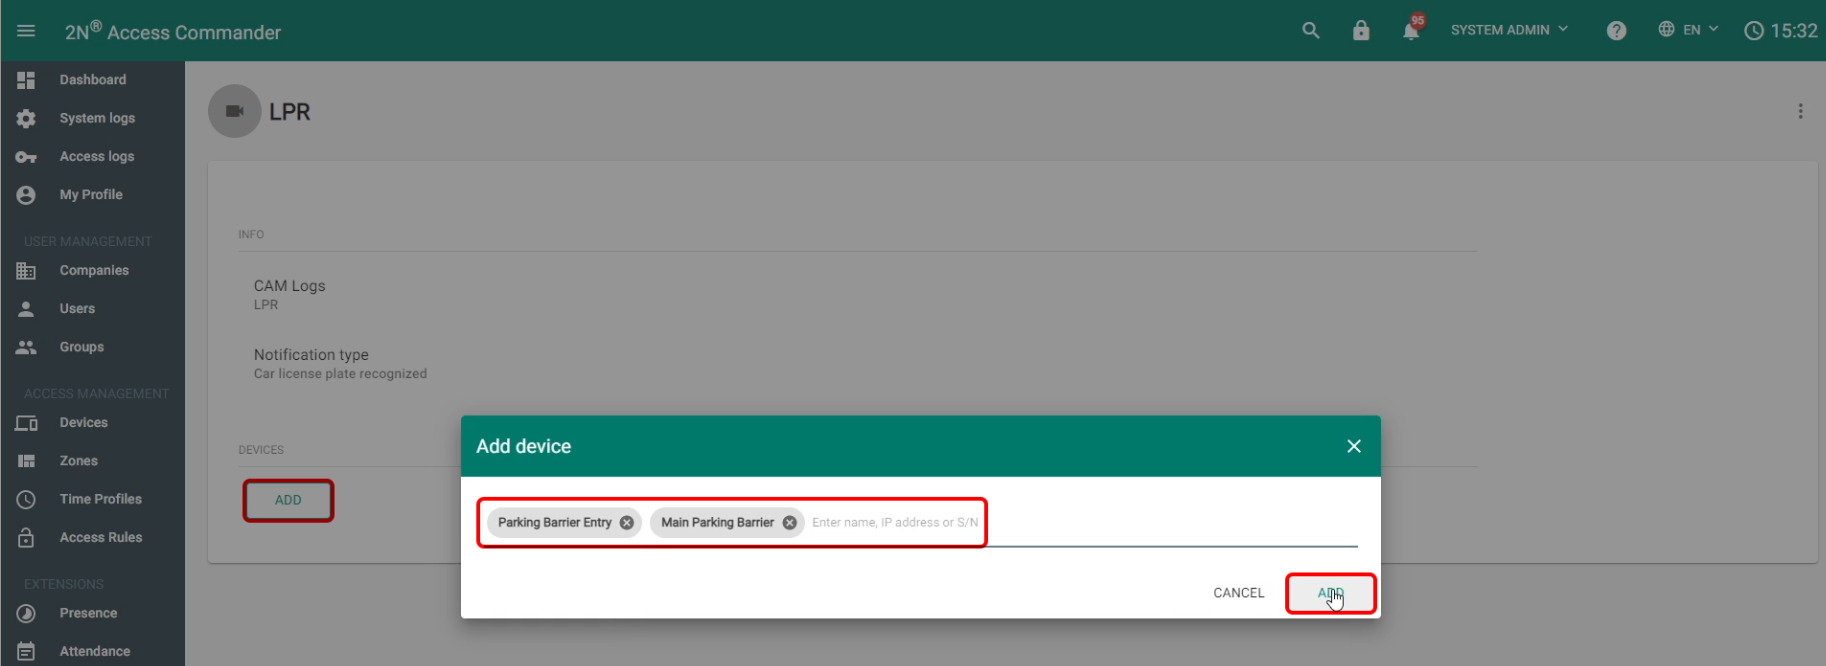
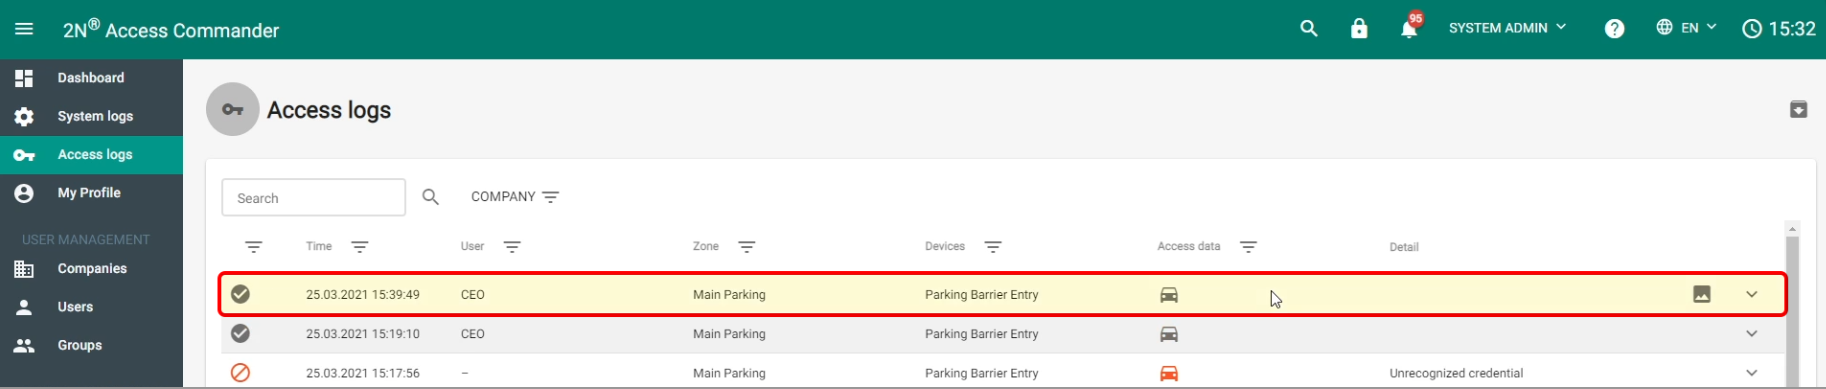
- Once everything is configured, Access Logs will show up once a license plate is recognized.
Access logs entries
In 2N IP device you can see that user has been authenticated by LPR:

Similarly you can see Access Log entry in Access Commander if used:
