2N® Indoor Touch 2.0 - how to configure to make and receive calls through My2N2.0
There are two modes of the SIP registration of the 2N® Indoor Touch 2.0 unit to the My2N portal, 2N® Indoor Touch 2.0 does not require any further subscription:
- Local - and allows you to use the 2N® Indoor Touch 2.0 in your local network. The reason why you can choose this mode is to make the configuration of the intercom easier so it is not necessary for you to disable the automatic configuration and you can just simply add the 2N® Indoor Touch 2.0 in your local mode and the intercom will be configured automatically. In this mode, the 2N® Indoor Touch 2.0 has to be placed in the same LAN as the intercom.
- Cloud - and allows you to make the calls from the 2N® Indoor Touch 2.0 to the 2N® Mobile Video application and vice versa. You can use this mode in situations where the unit is placed in a different LAN than the intercom.
Caution
2N® Indoor Touch 2.0 require firmware version 4.7 or higher
1. Local mode
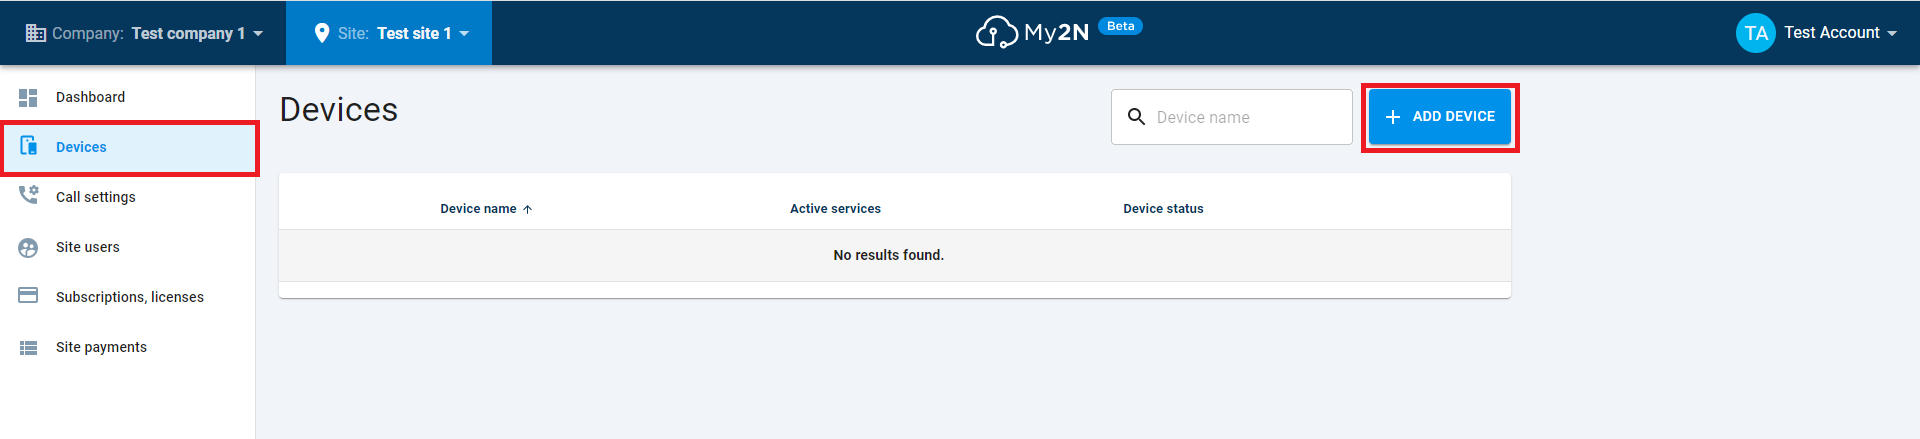
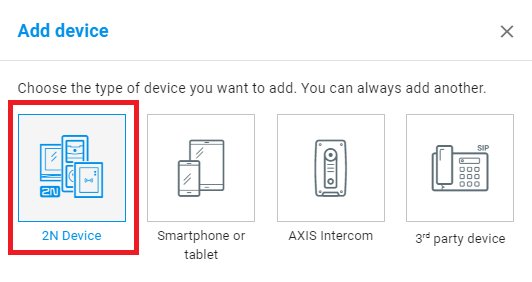
- You can add the 2N® Indoor Touch 2.0 by clicking on the Devices button and then the ADD DEVICE button. Then choose the 2N Device option.
- In the next step, you will be asked for putting the serial number of the device, then you will name it and put the 2N® Indoor Touch 2.0's ID.
Finally, you will confirm it by clicking on NEXT below right (and also on one upcoming window).
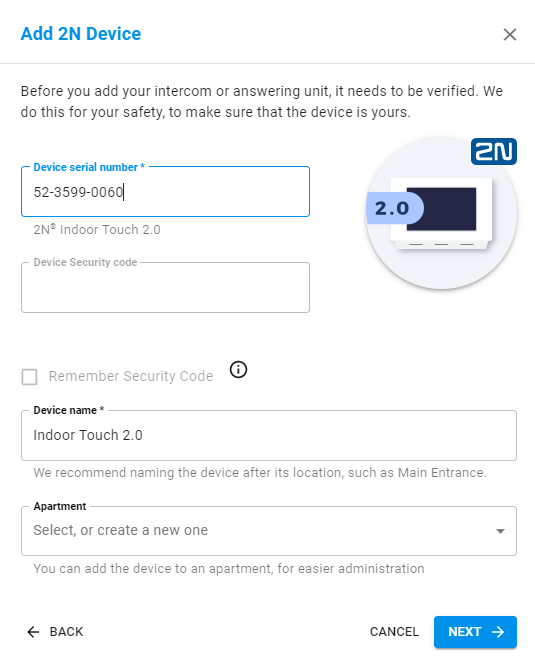
- Device name - this is a name that will be shown in your My2N account (in this example the name of the device is Indoor Touch 2.0)
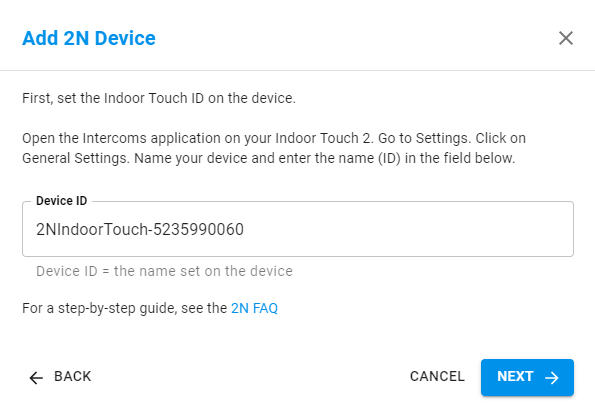
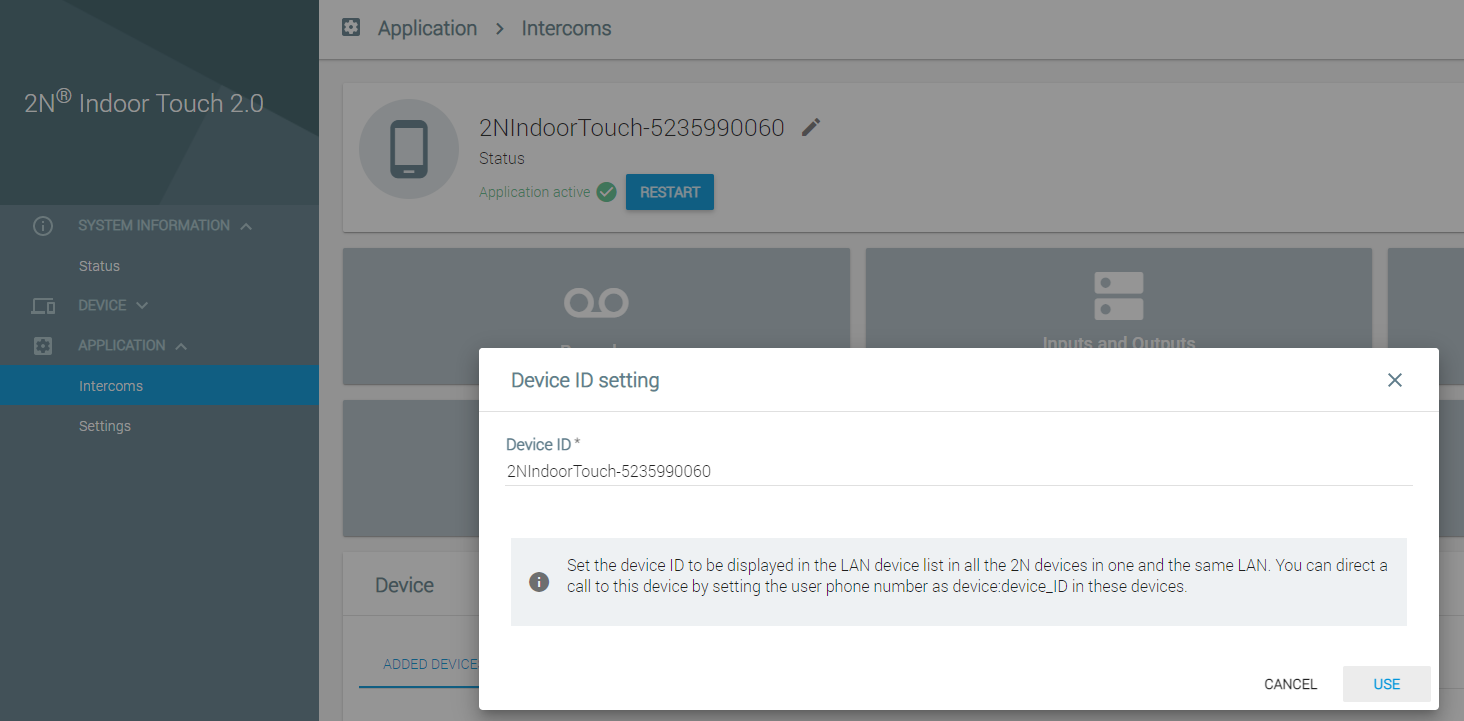
- Device ID - this is the device name of the 2N® Indoor Touch 2.0 - see the picture below for the location of the ID (in this example the ID is 2NIndoorTouch-5235990060)
2. Cloud mode
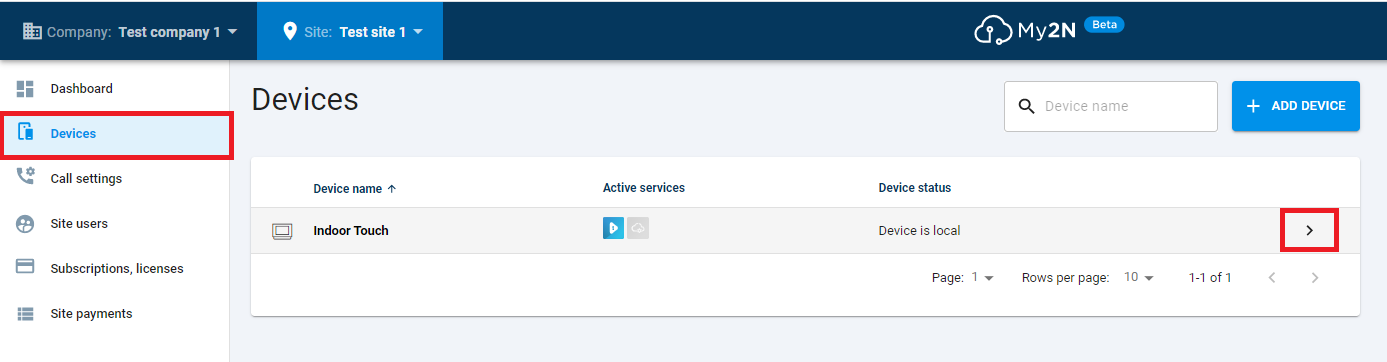
- In My2N press the button Devices in order to see your devices. Find your 2N® Indoor Touch 2.0 you wish to manually register to My2N.
Press the Details button (right arrow icon) to edit the details of your 2N® Indoor Touch 2.0 unit.
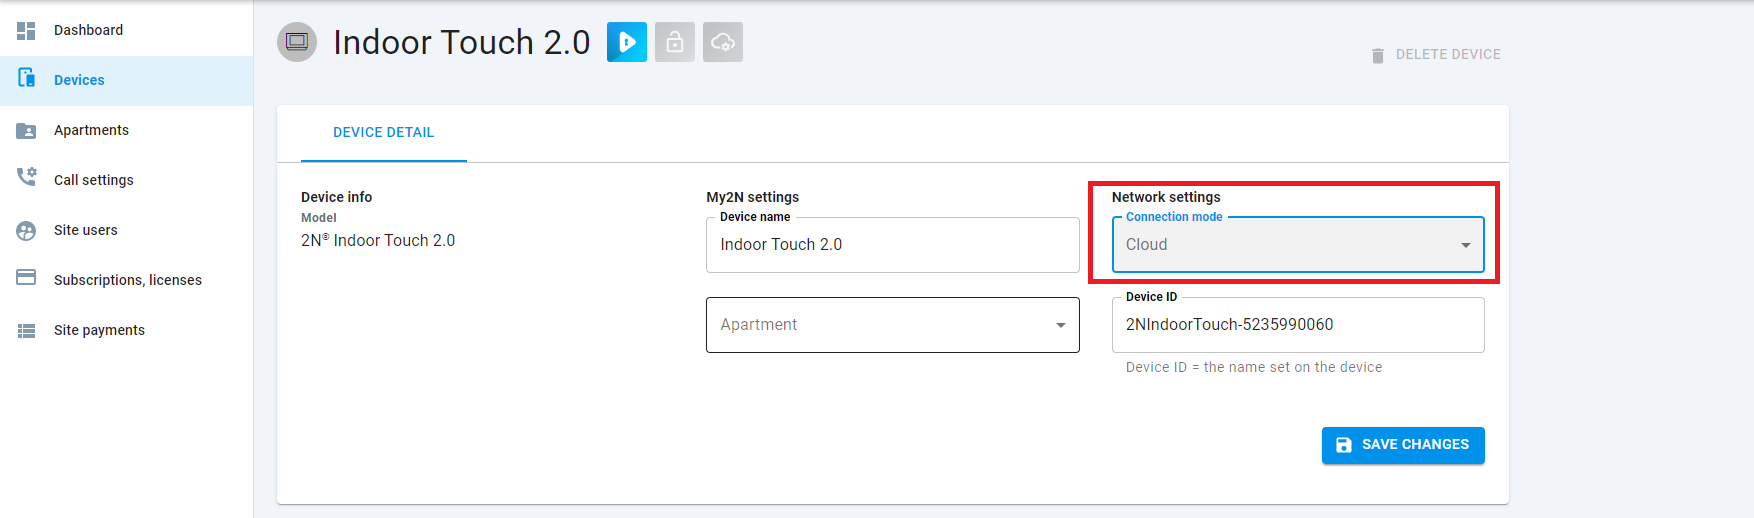
- In the device's details, switch Connection mode to Cloud by clicking on it (see below).
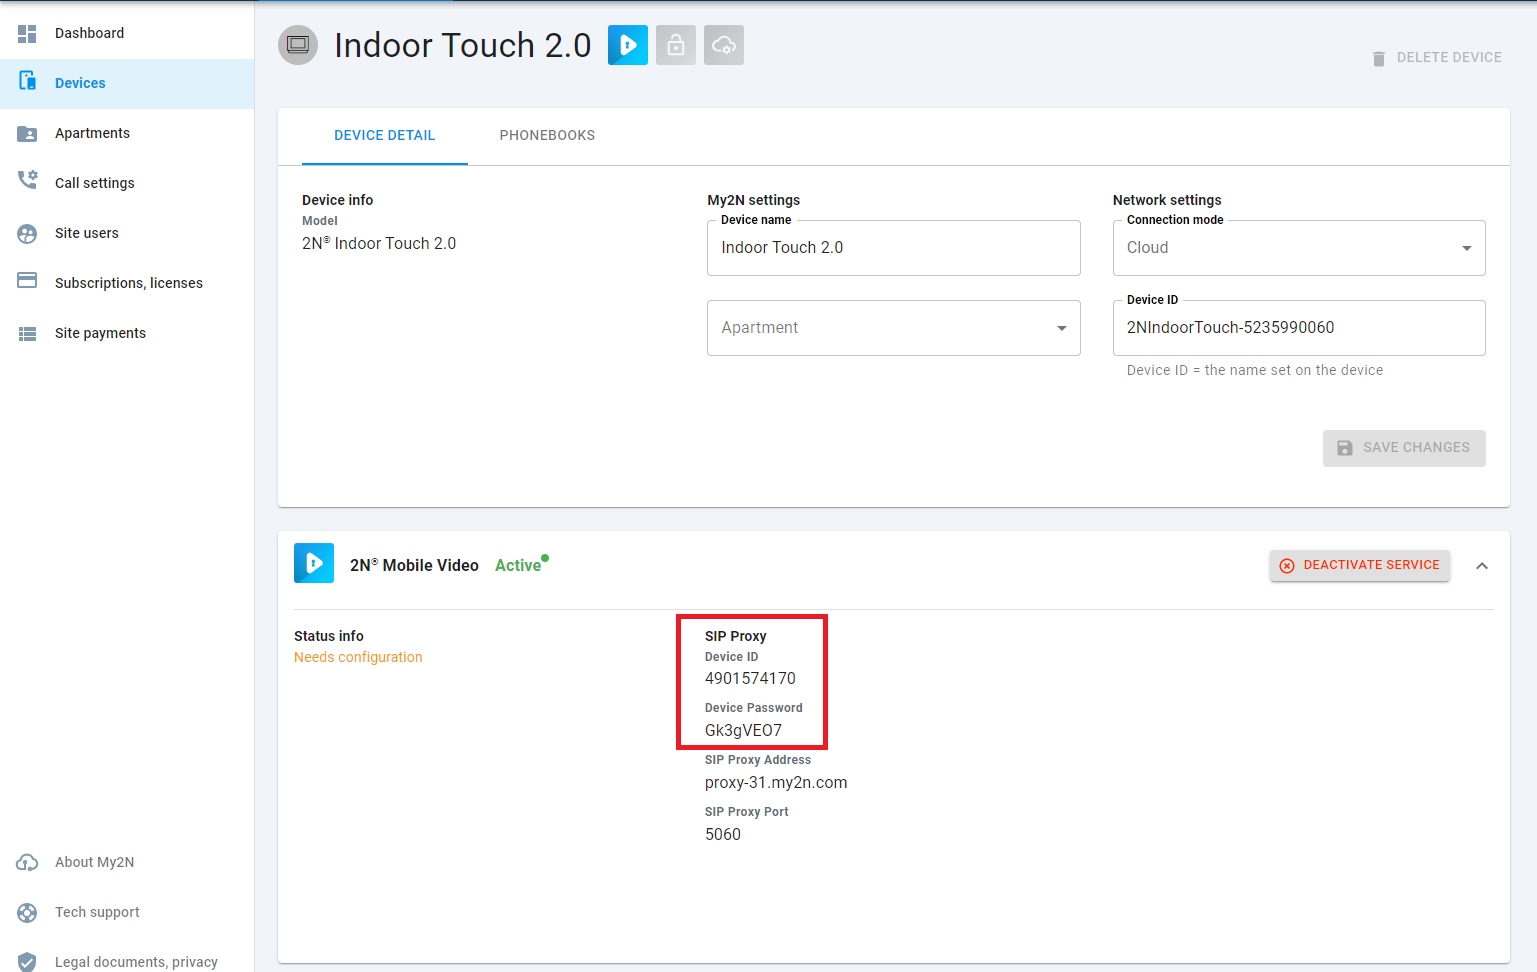
- The SIP registration details can be obtained in the 2N® Indoor Touch 2.0 device detail setting in your account (refer to Figure 4). In device detail, click on the arrow on the right to the "2N Mobile Video" section and then you will see the SIP Proxy credentials.
- Now you need to enter the SIP details to the 2N® Indoor Touch 2.0 unit, either over its web configuration interface (or locally).
In the web interface go to Intercoms > My2N and enter here the My2N details from the previous step according to the picture below and confirm it by clicking on USE (below right on the picture below).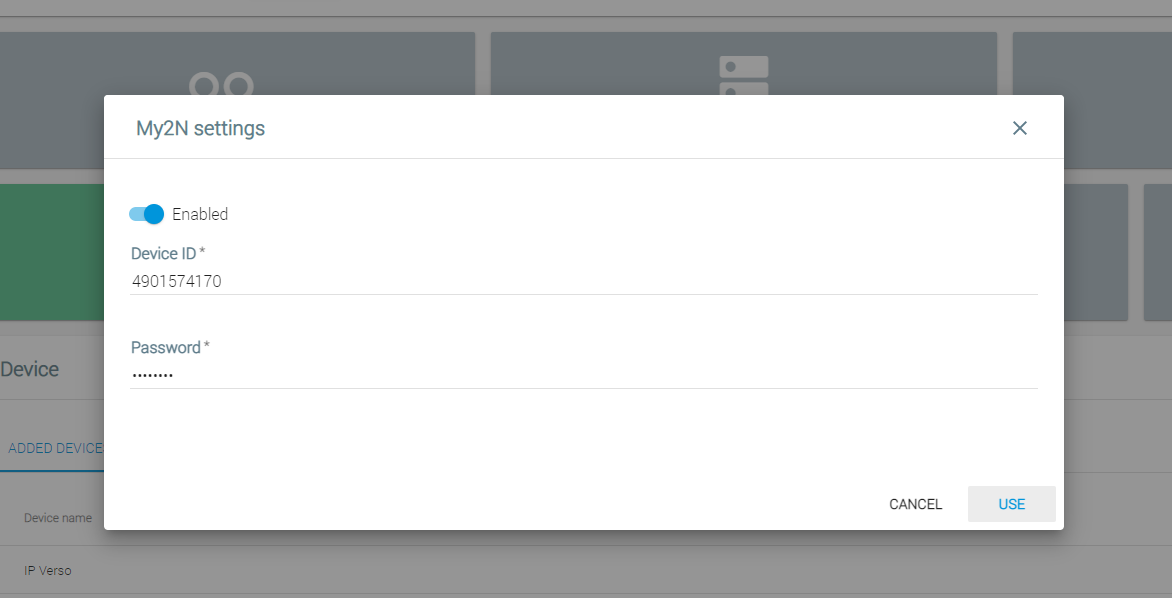
Please set the intercom's buttons in order to point them to the device you wish to call from the intercom.
In order to make calls from the intercom to 2N® Indoor Touch 2.0 devices, buttons on the intercom need to be configured to call it.
For detailed information on how to set buttons, please visit the following article:
Call setting - How to configure call settings for the IP intercom