My2N/KONE integration
This guide will show the step-by-step configuration of the integration between My2N and KONE clouds from the side of My2N.
Please ensure that the KONE company provides you with a building ID. Once you have your building ID, please contact 2N support to enable the integration under your account and provide them with the received building ID.
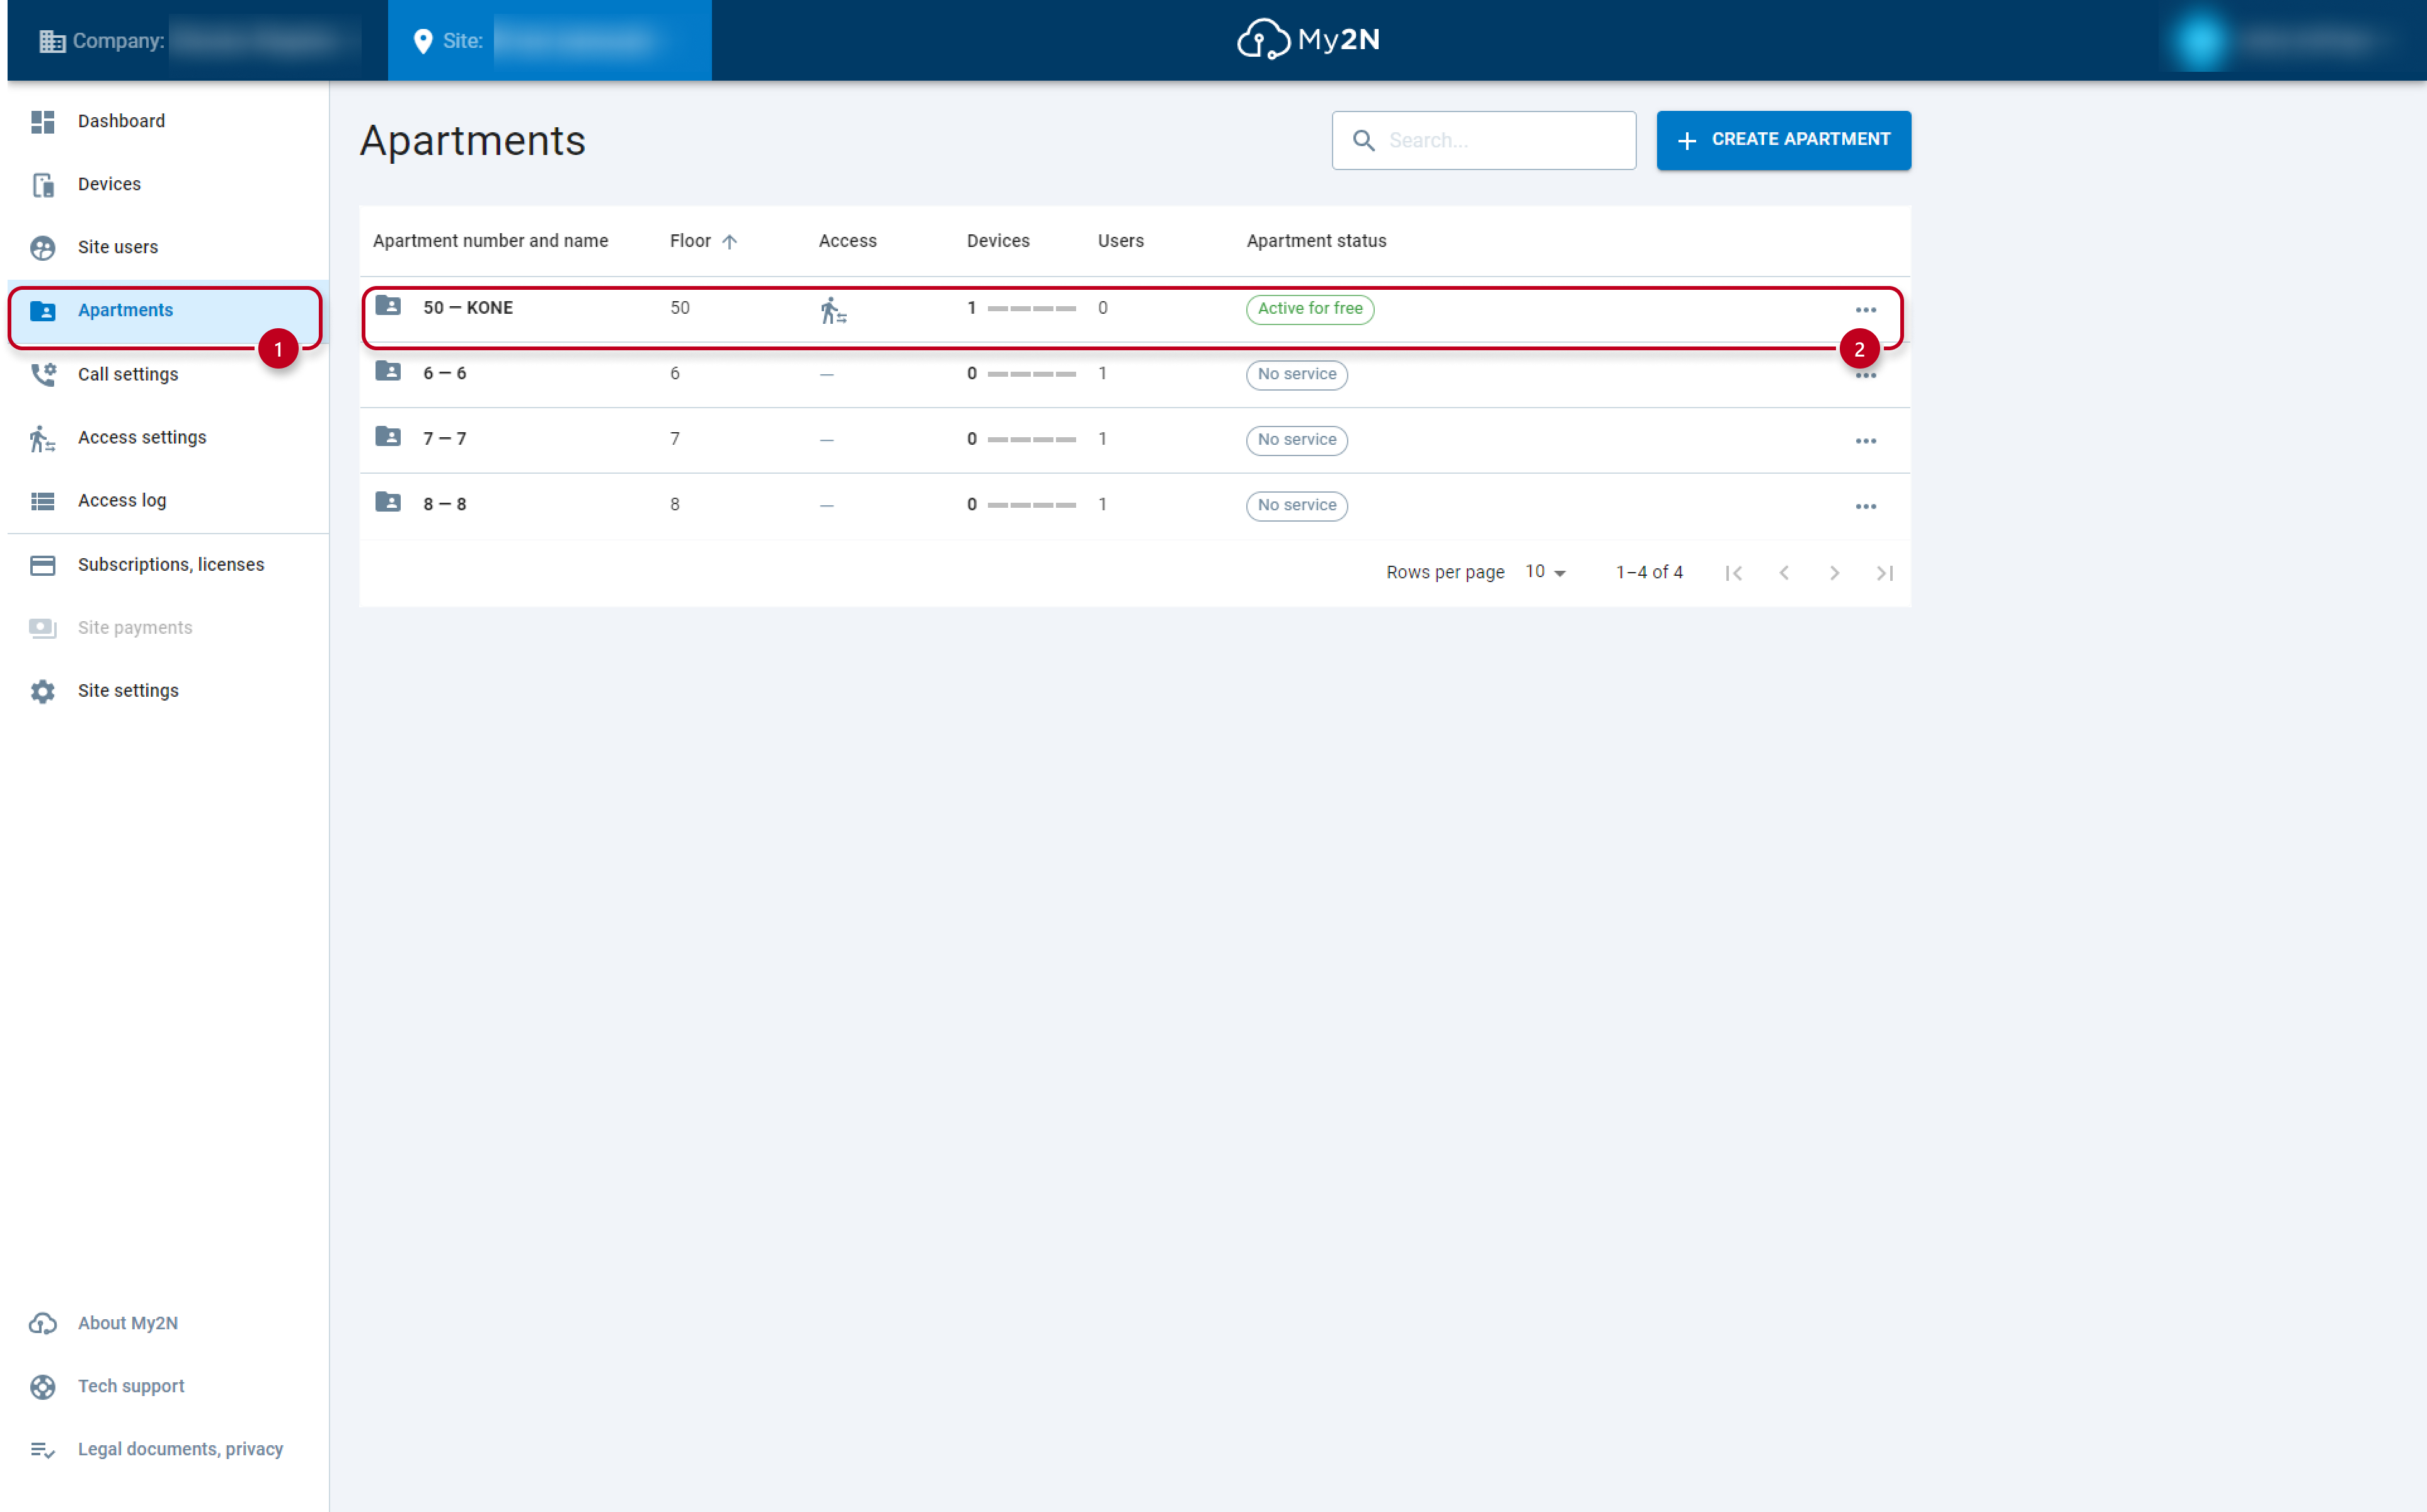
1) Create an apartment on the My2N site. Go to the section apartments -> click on the option create apartment -> give it a corresponding floor, number and name it -> click on the option create apartment.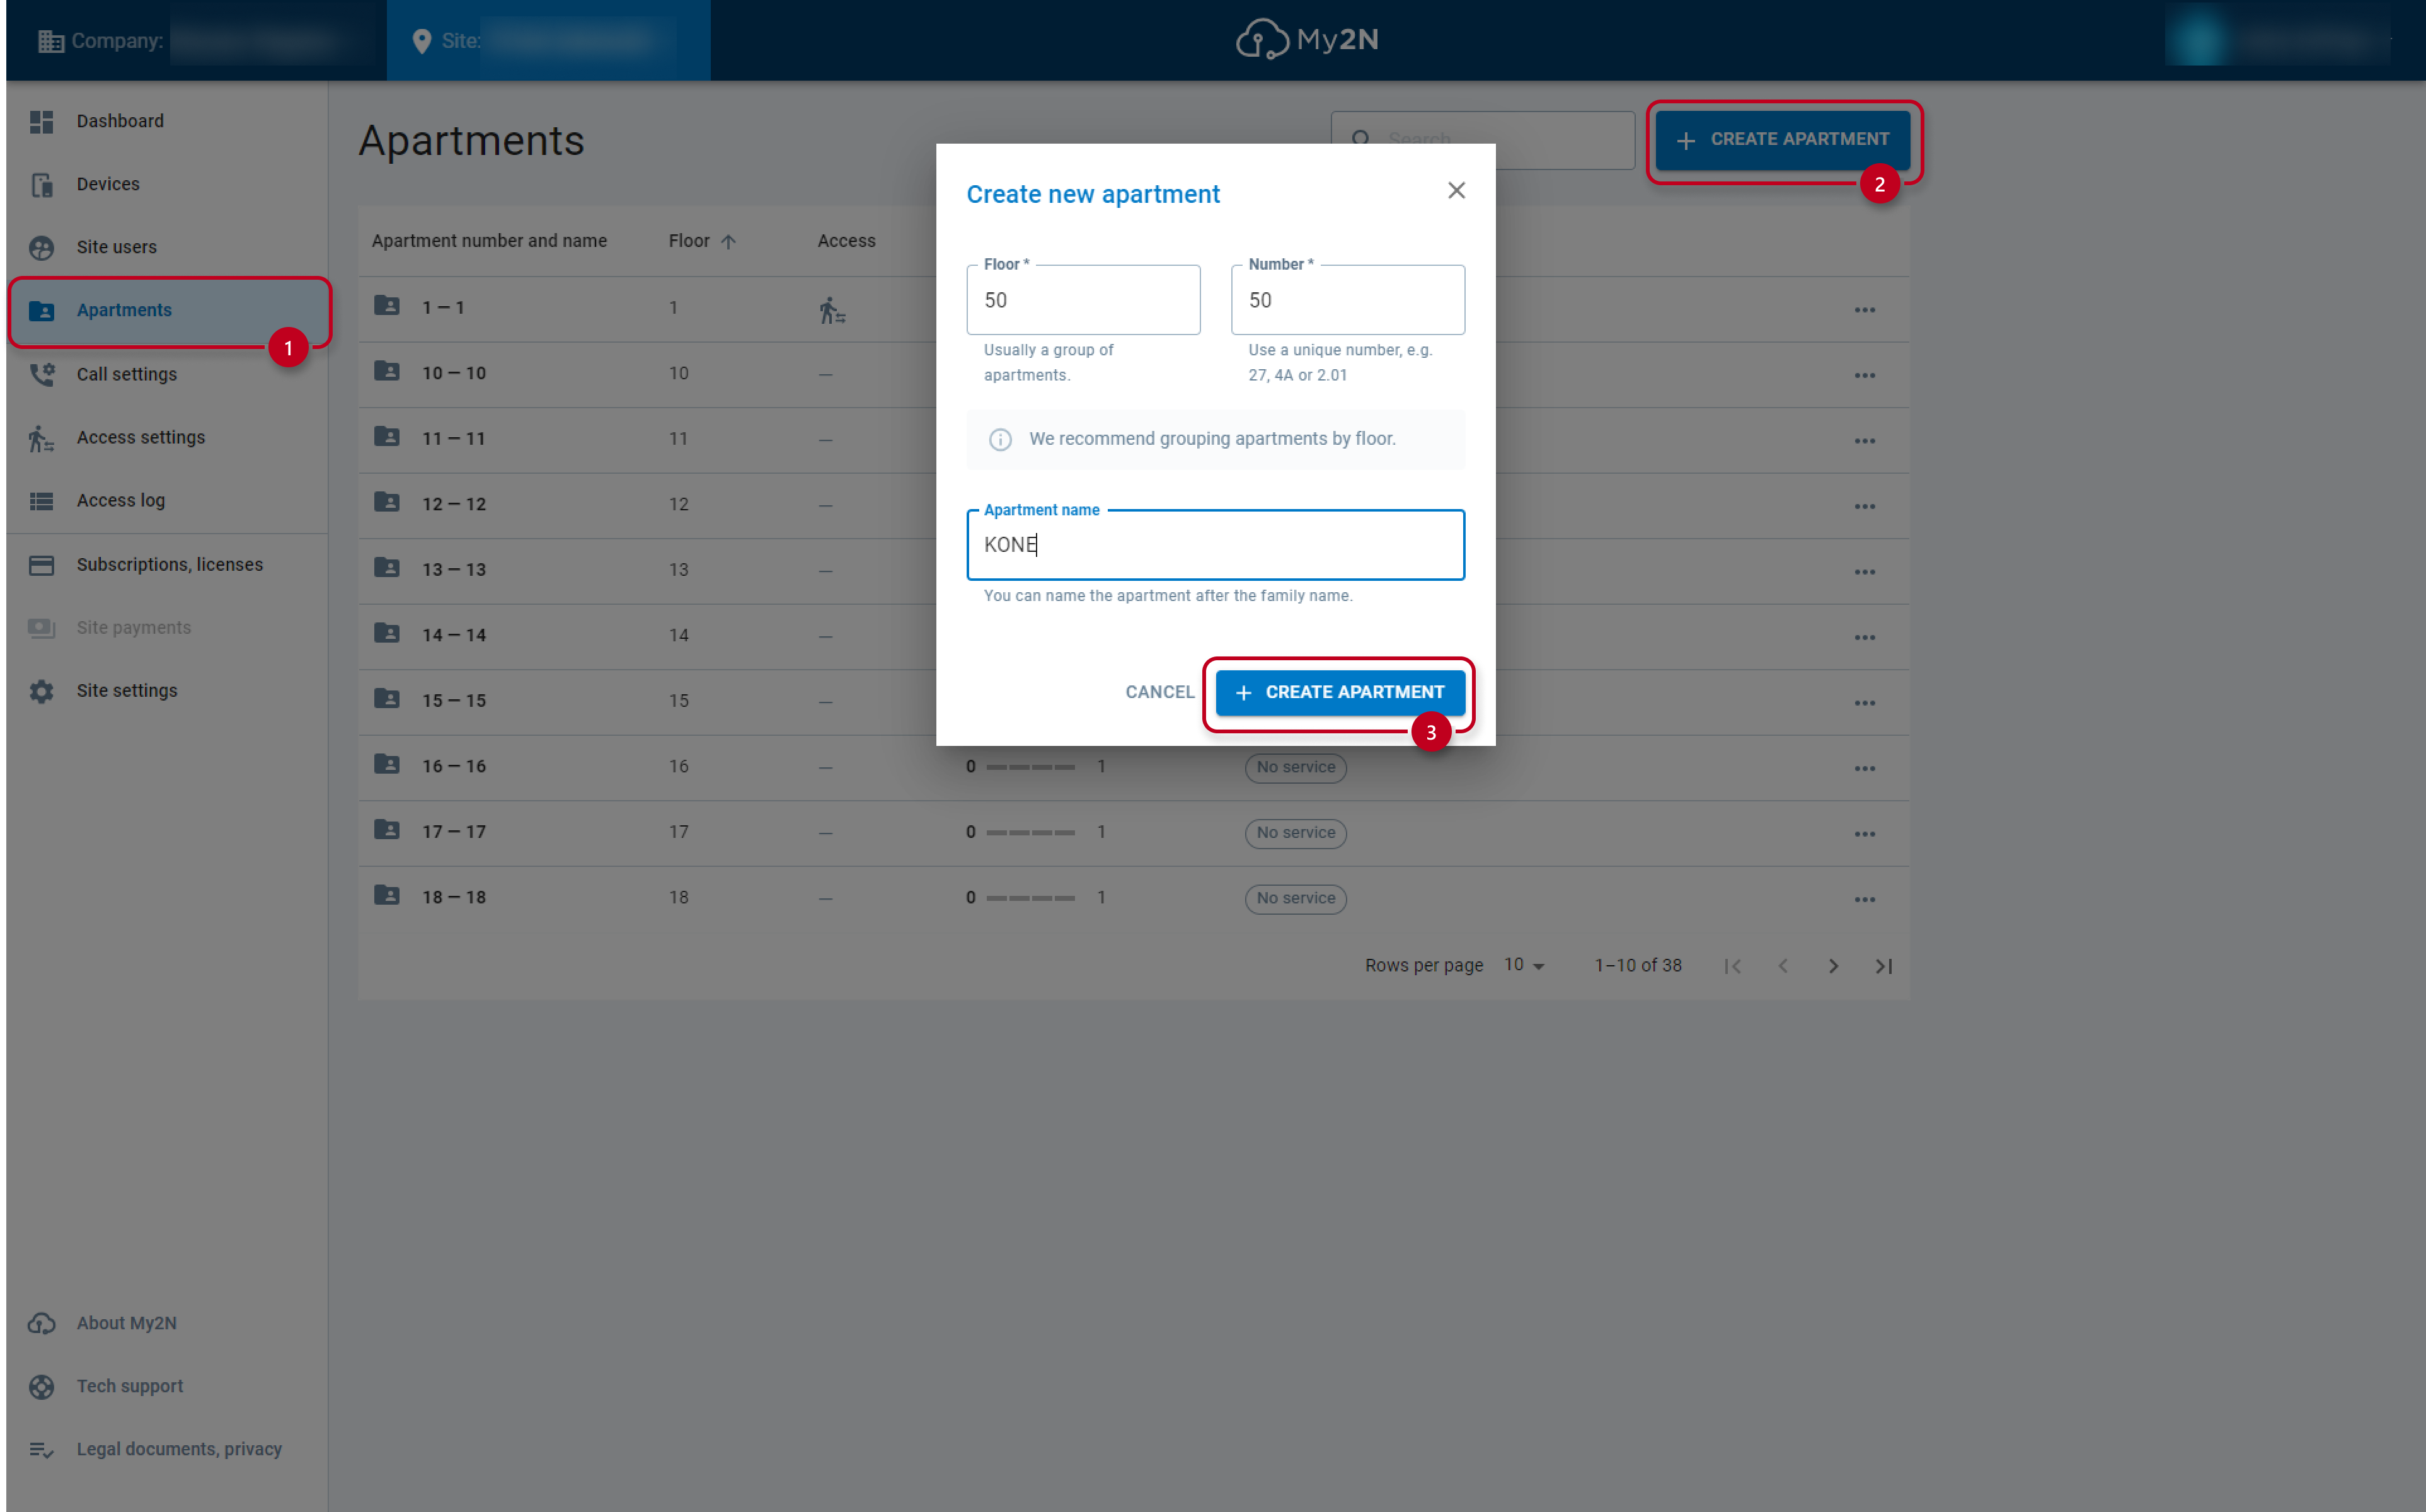
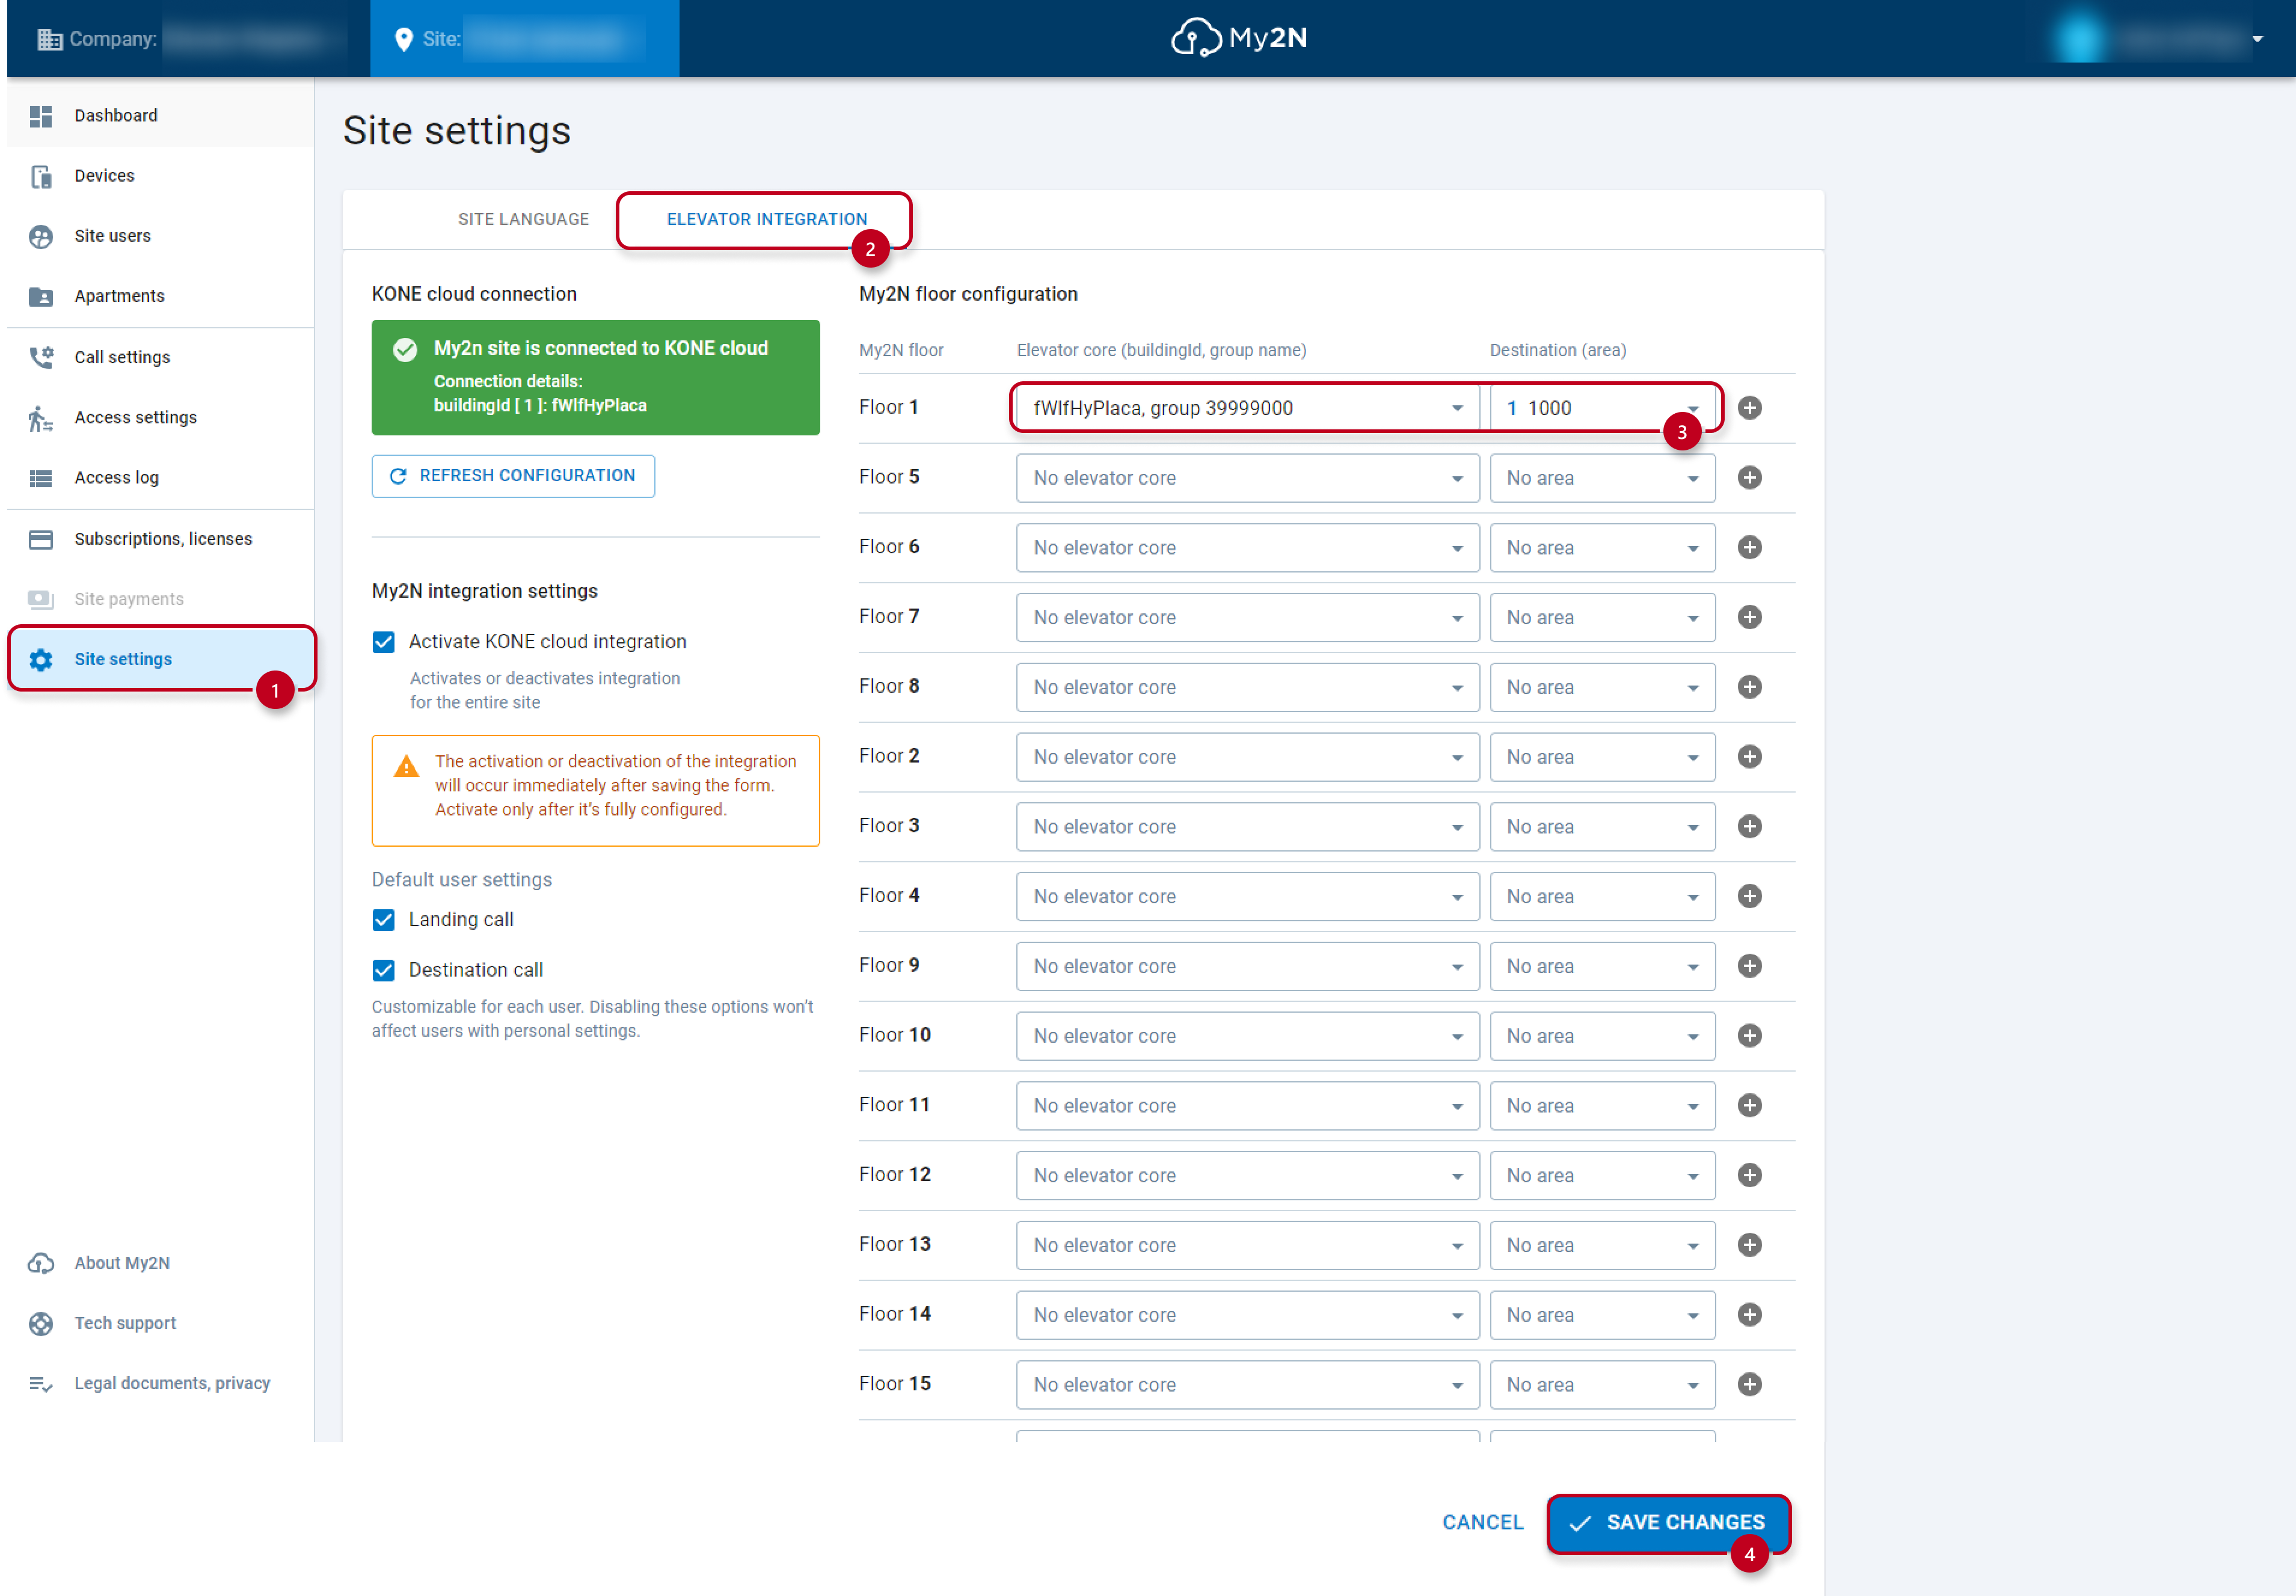
3) Go to the site settings -> elevator integration. By default, the integration is enabled. Here, choose the corresponding elevator core and destination. You can enable/disable Landing Call and Destination Call on this page as well. Click on the option save changes at the bottom right corner to make the changes.
Landing Call: Automatically call the elevator to the floor where a tenant enters the building.
Destination Call: In addition to the Landing Call functionality, automatically preset the elevator to stop at the floor where the tenant's apartment is located.
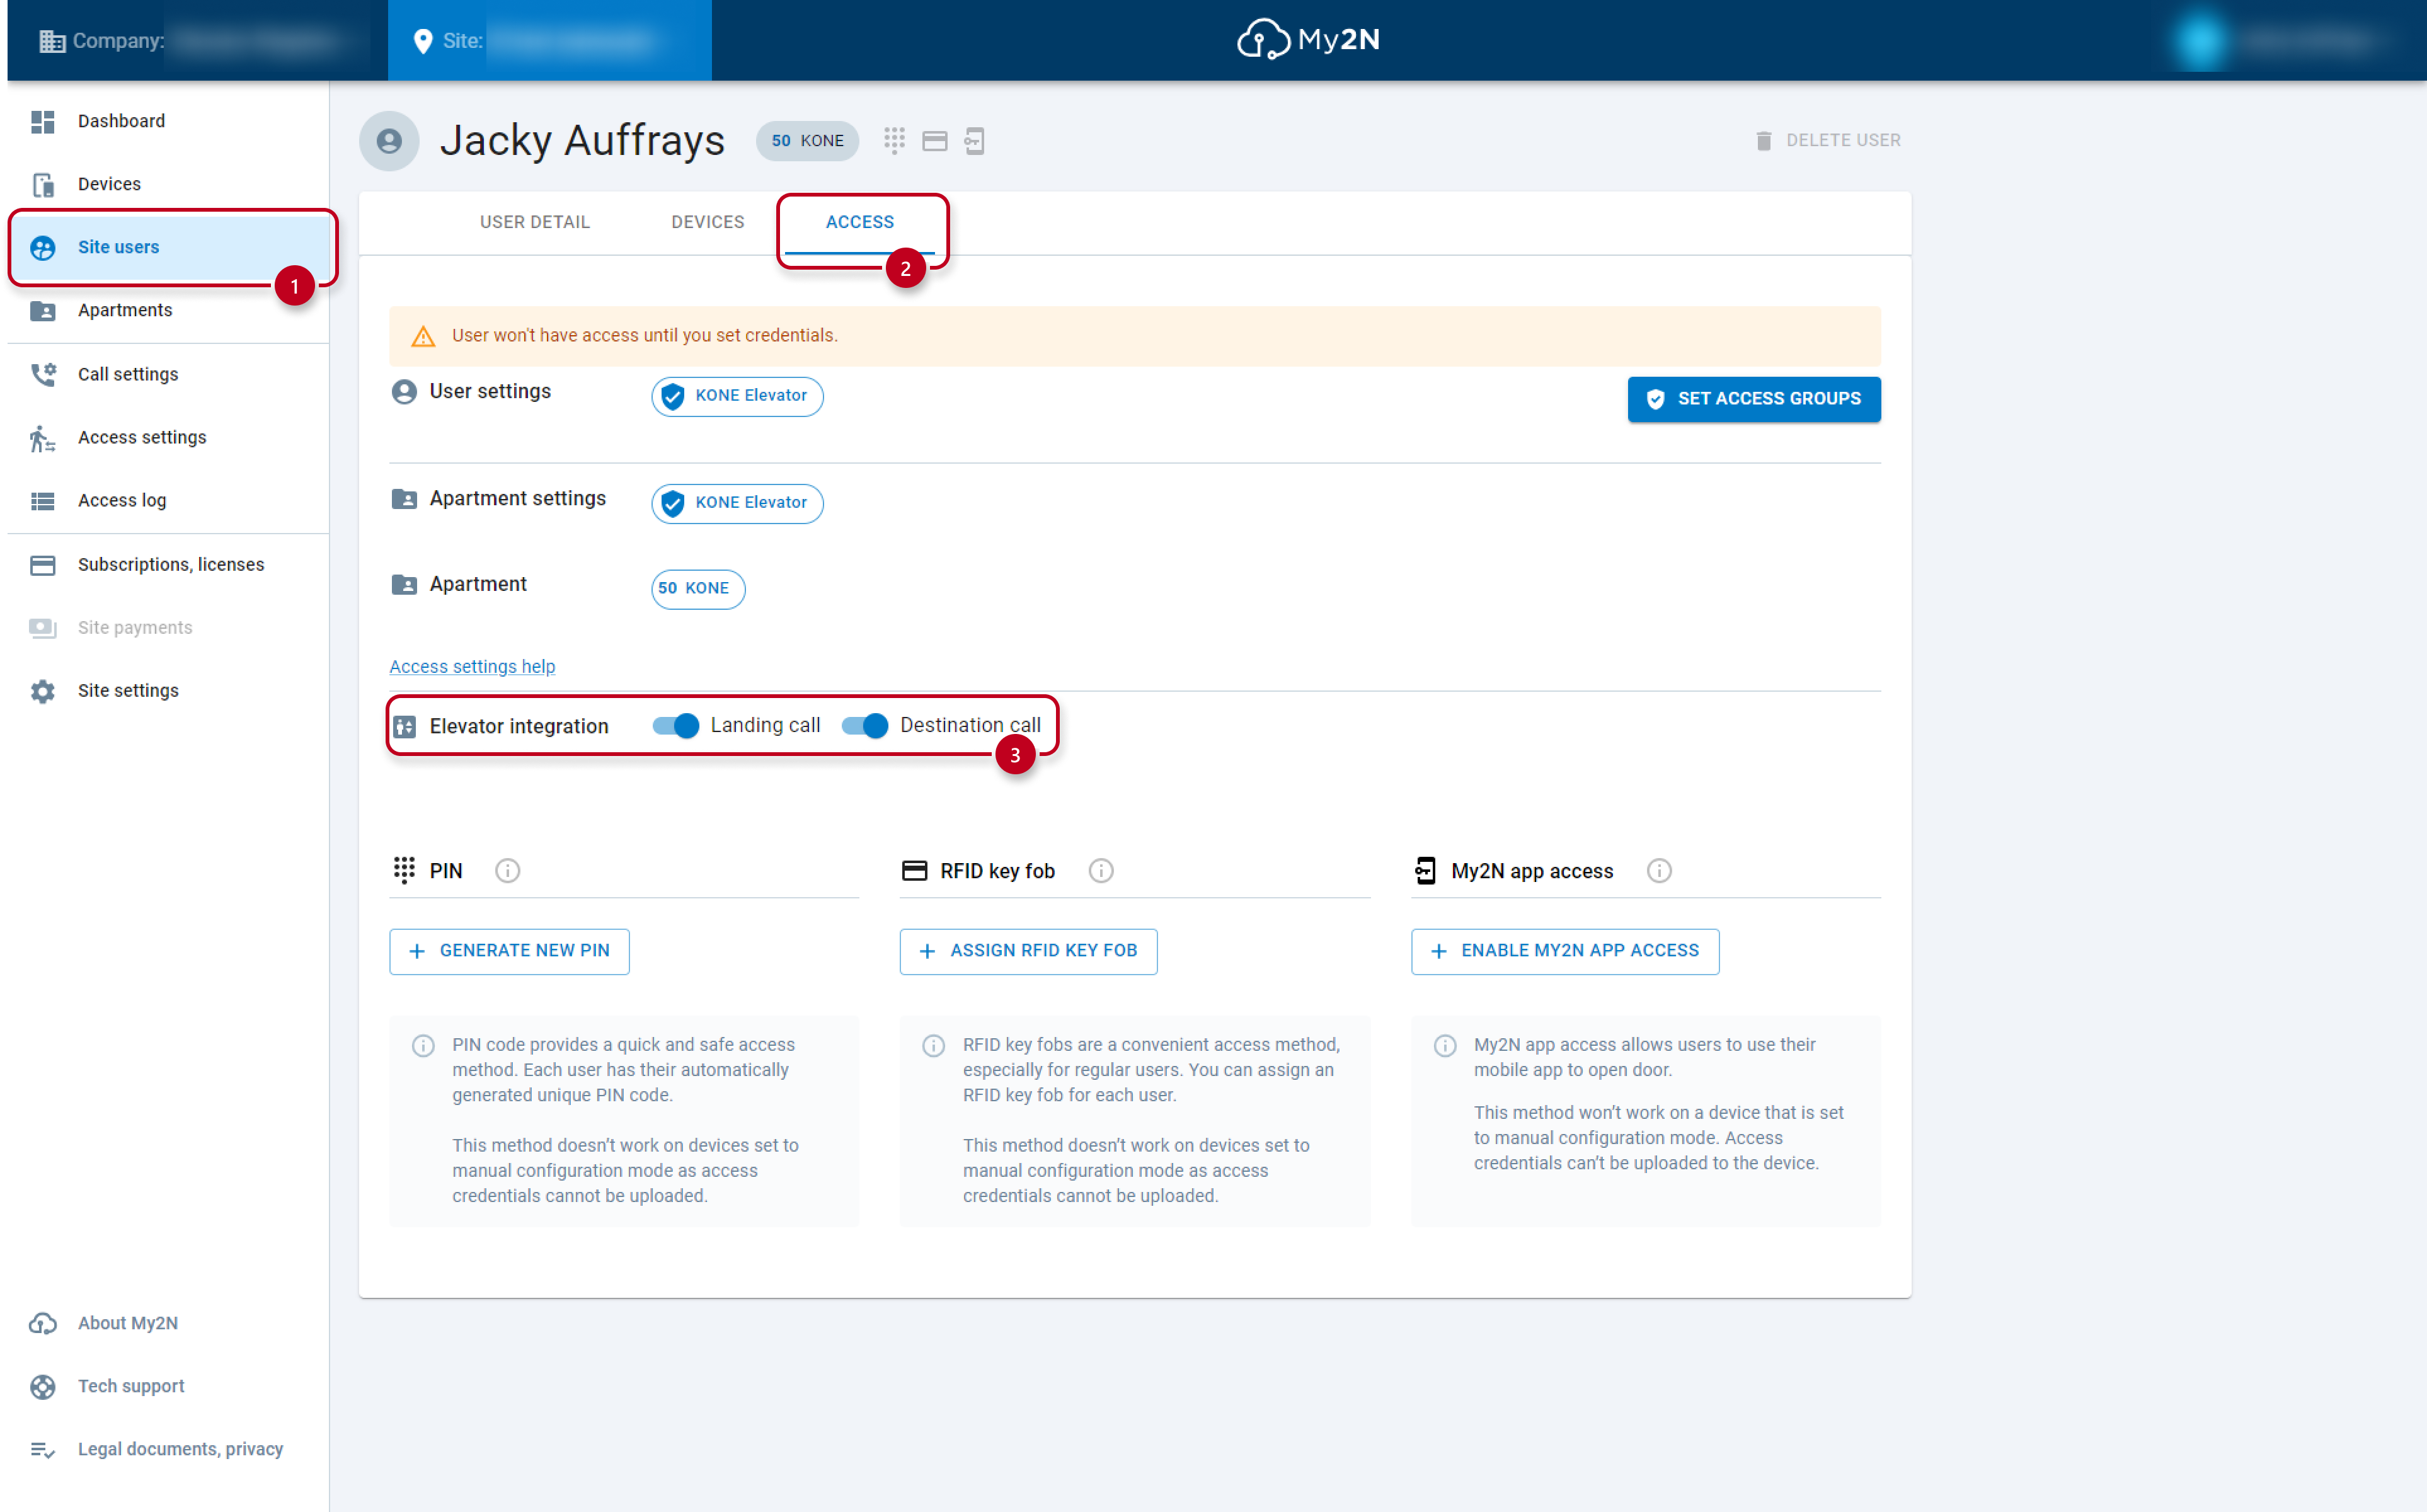
The Destination call and the Landing call can be configured separately for each user and intercom. For the specific user in the section site users -> access -> Elevator integration.
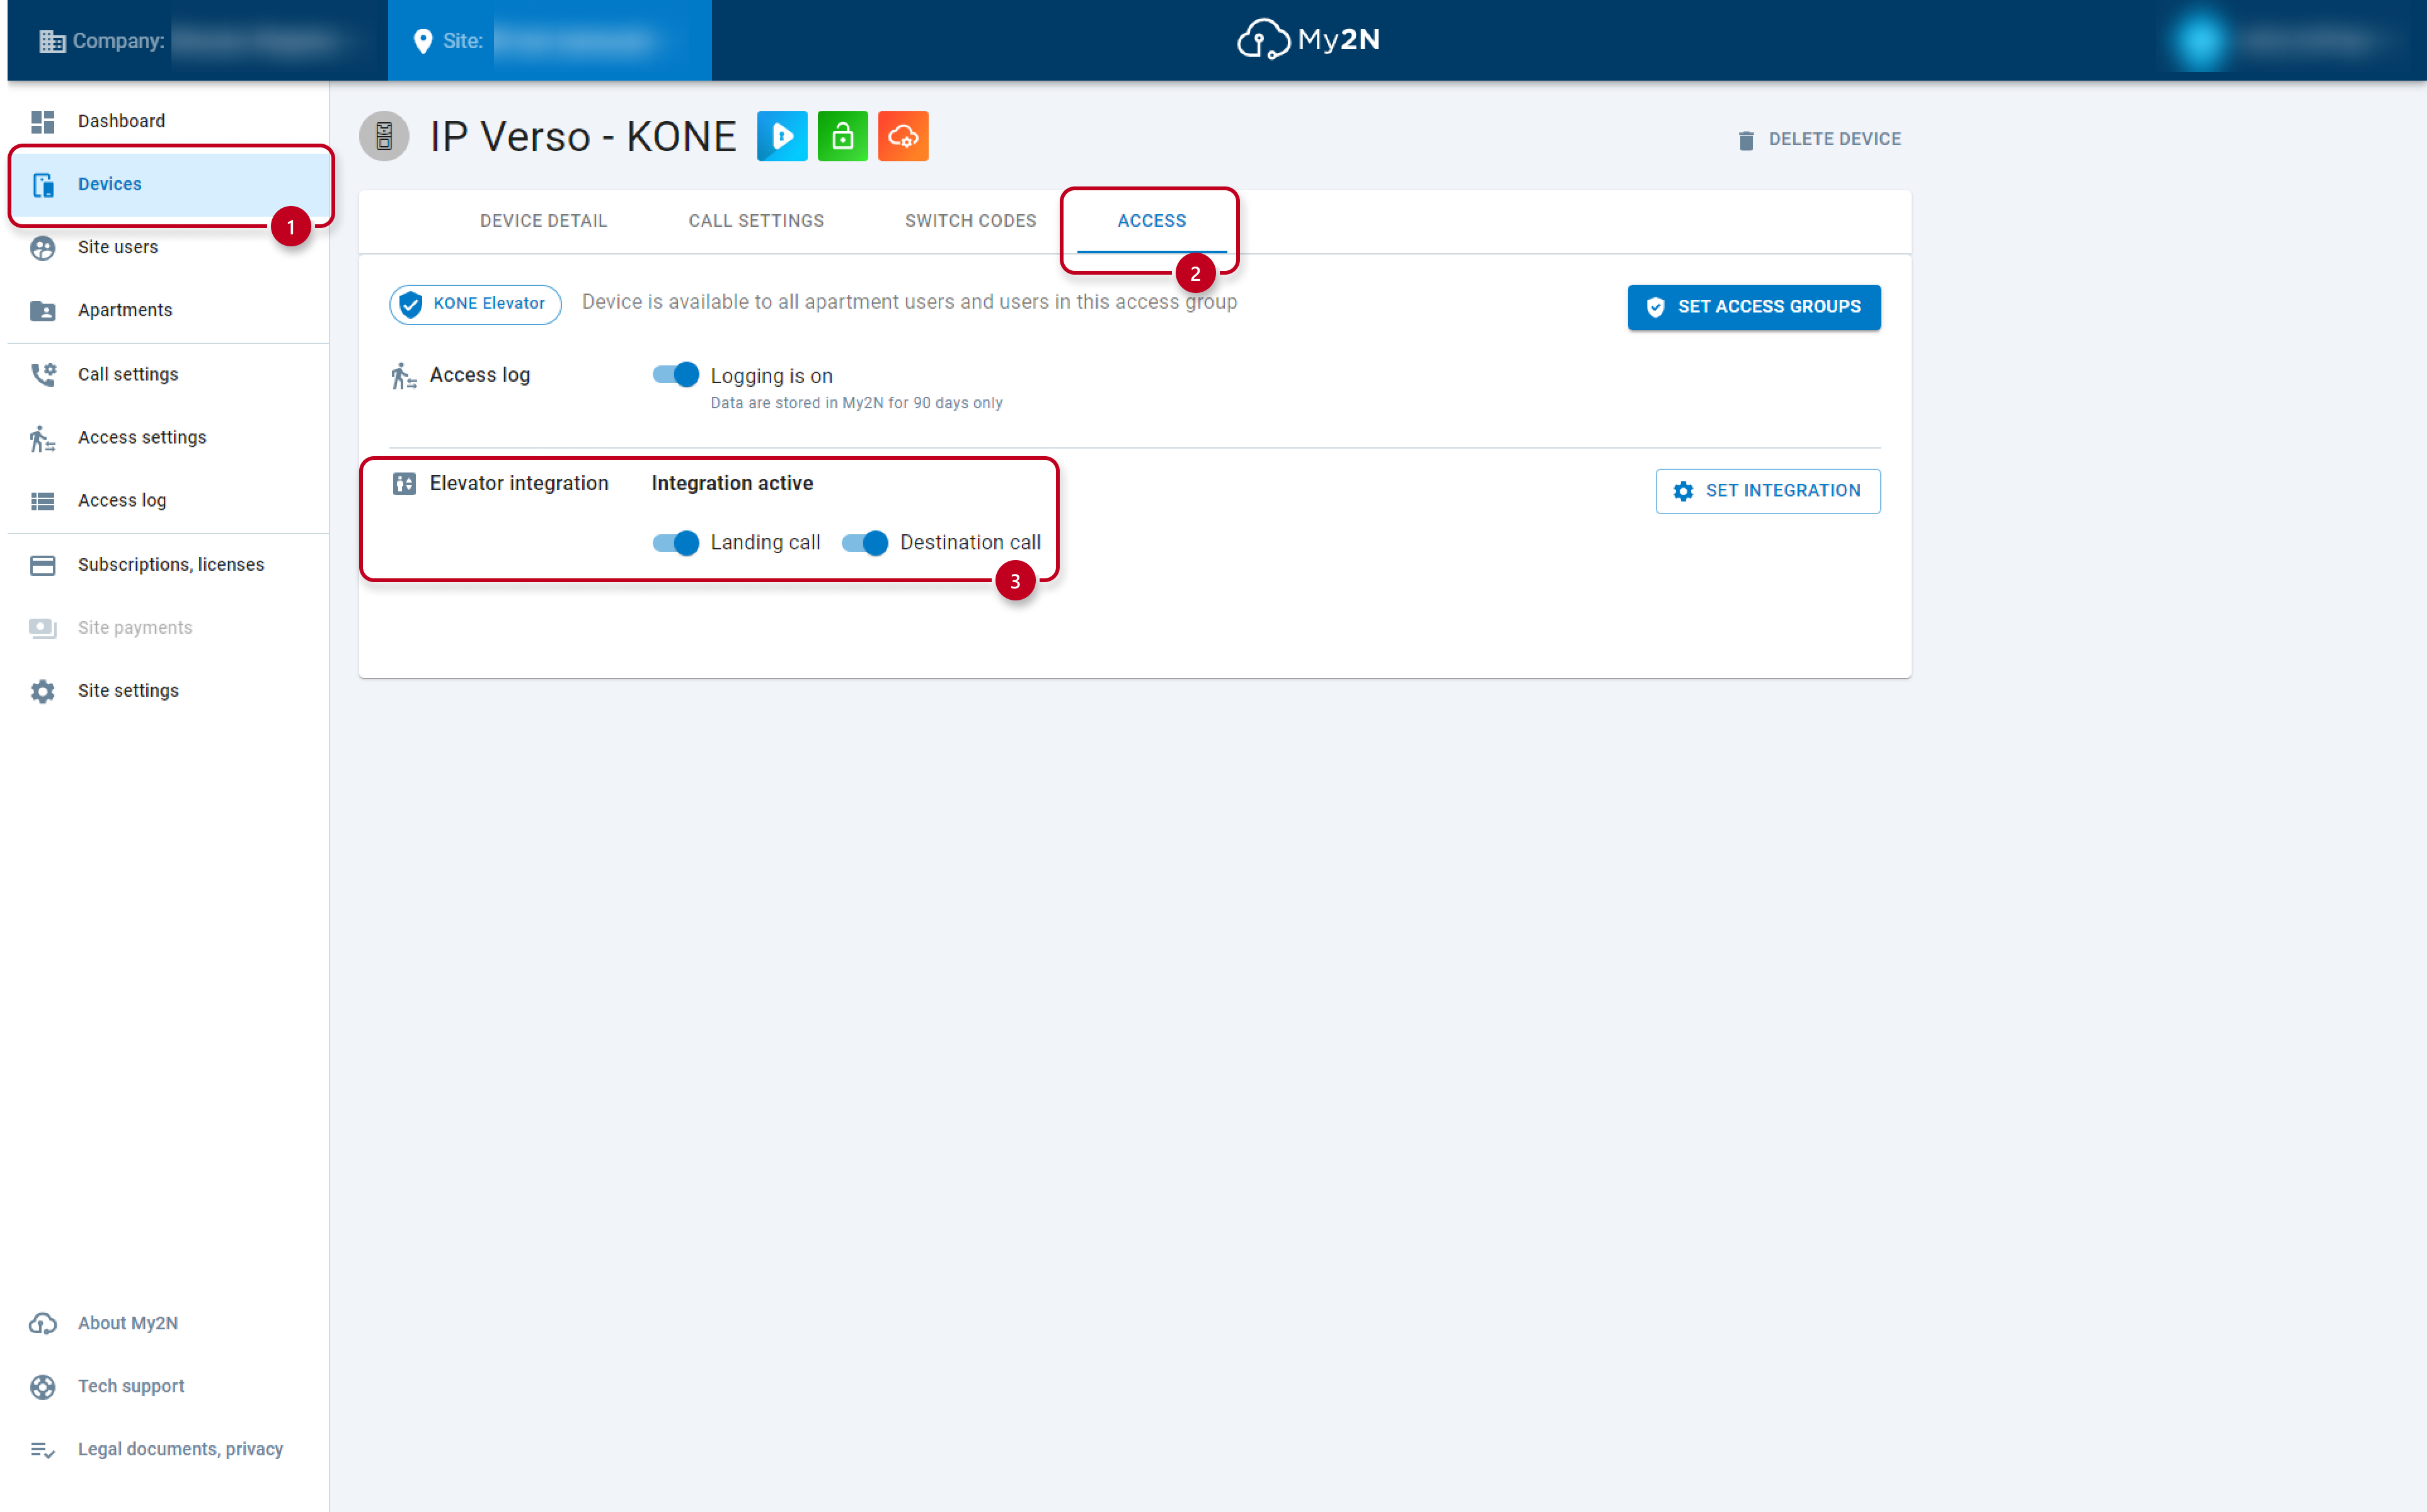
For the specific intercom in the section devices -> access -> Elevator integration.
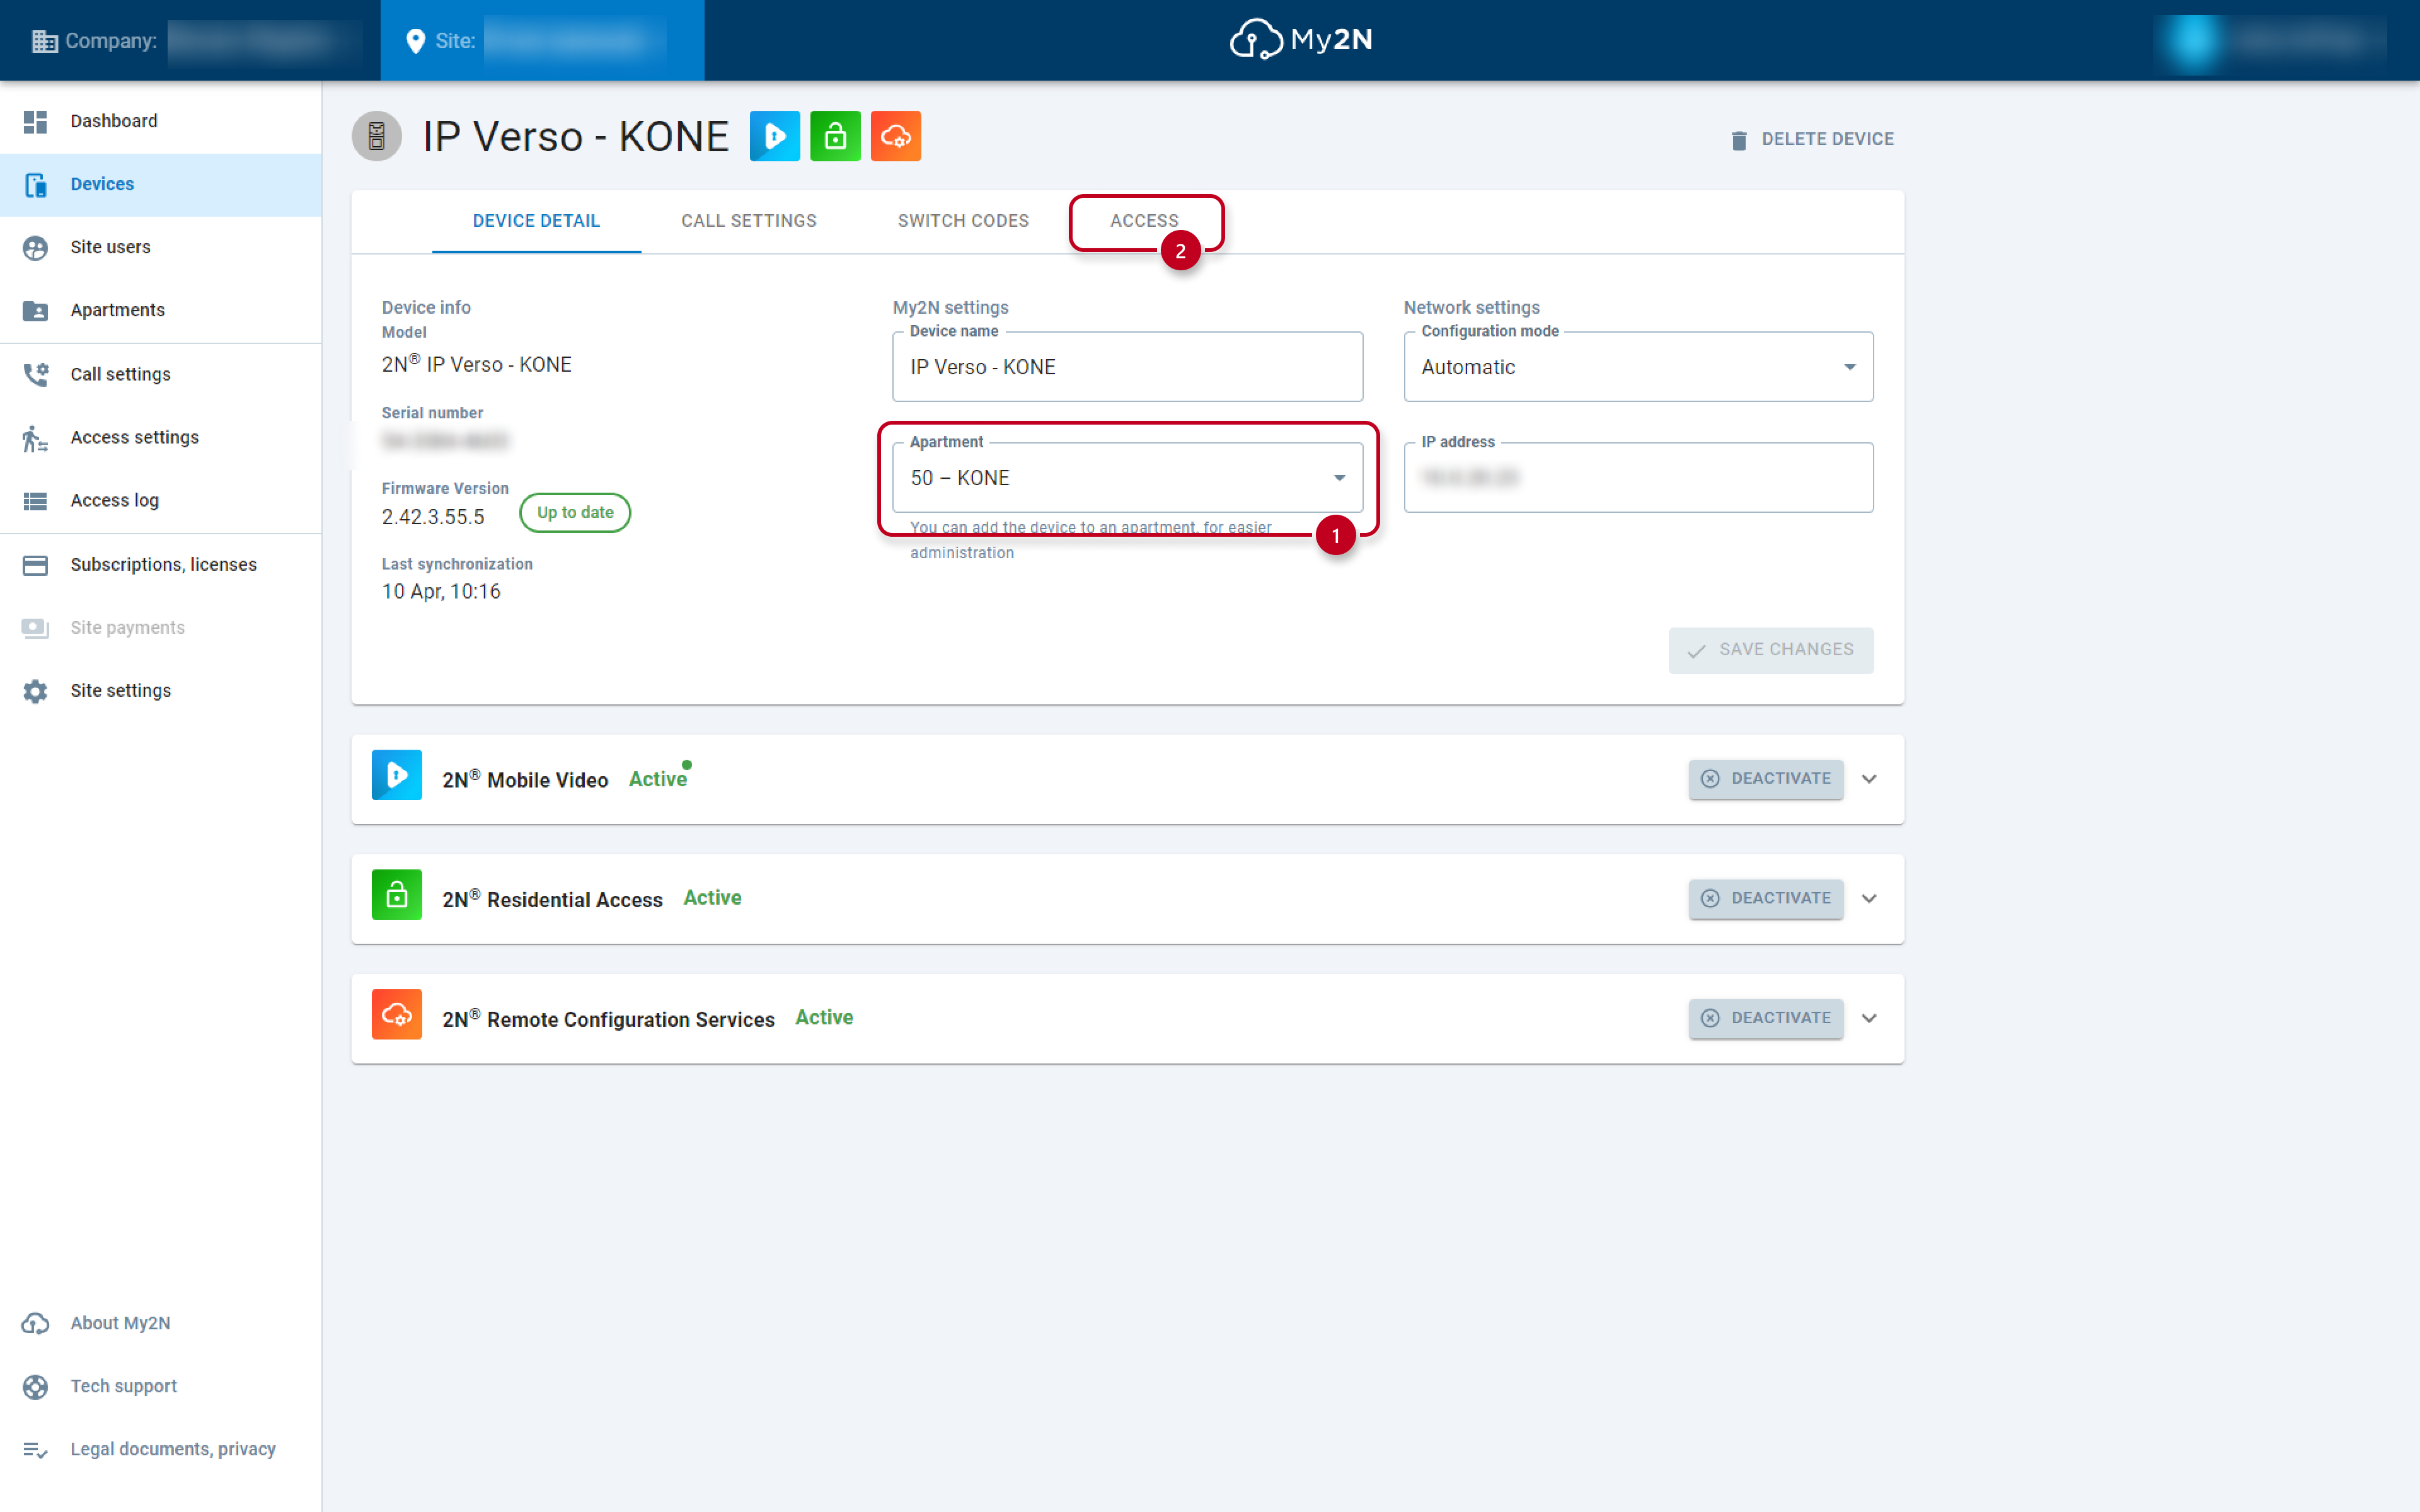
4) Activate the elevator integration on the intercom. Go to devices -> click on the intercom ->
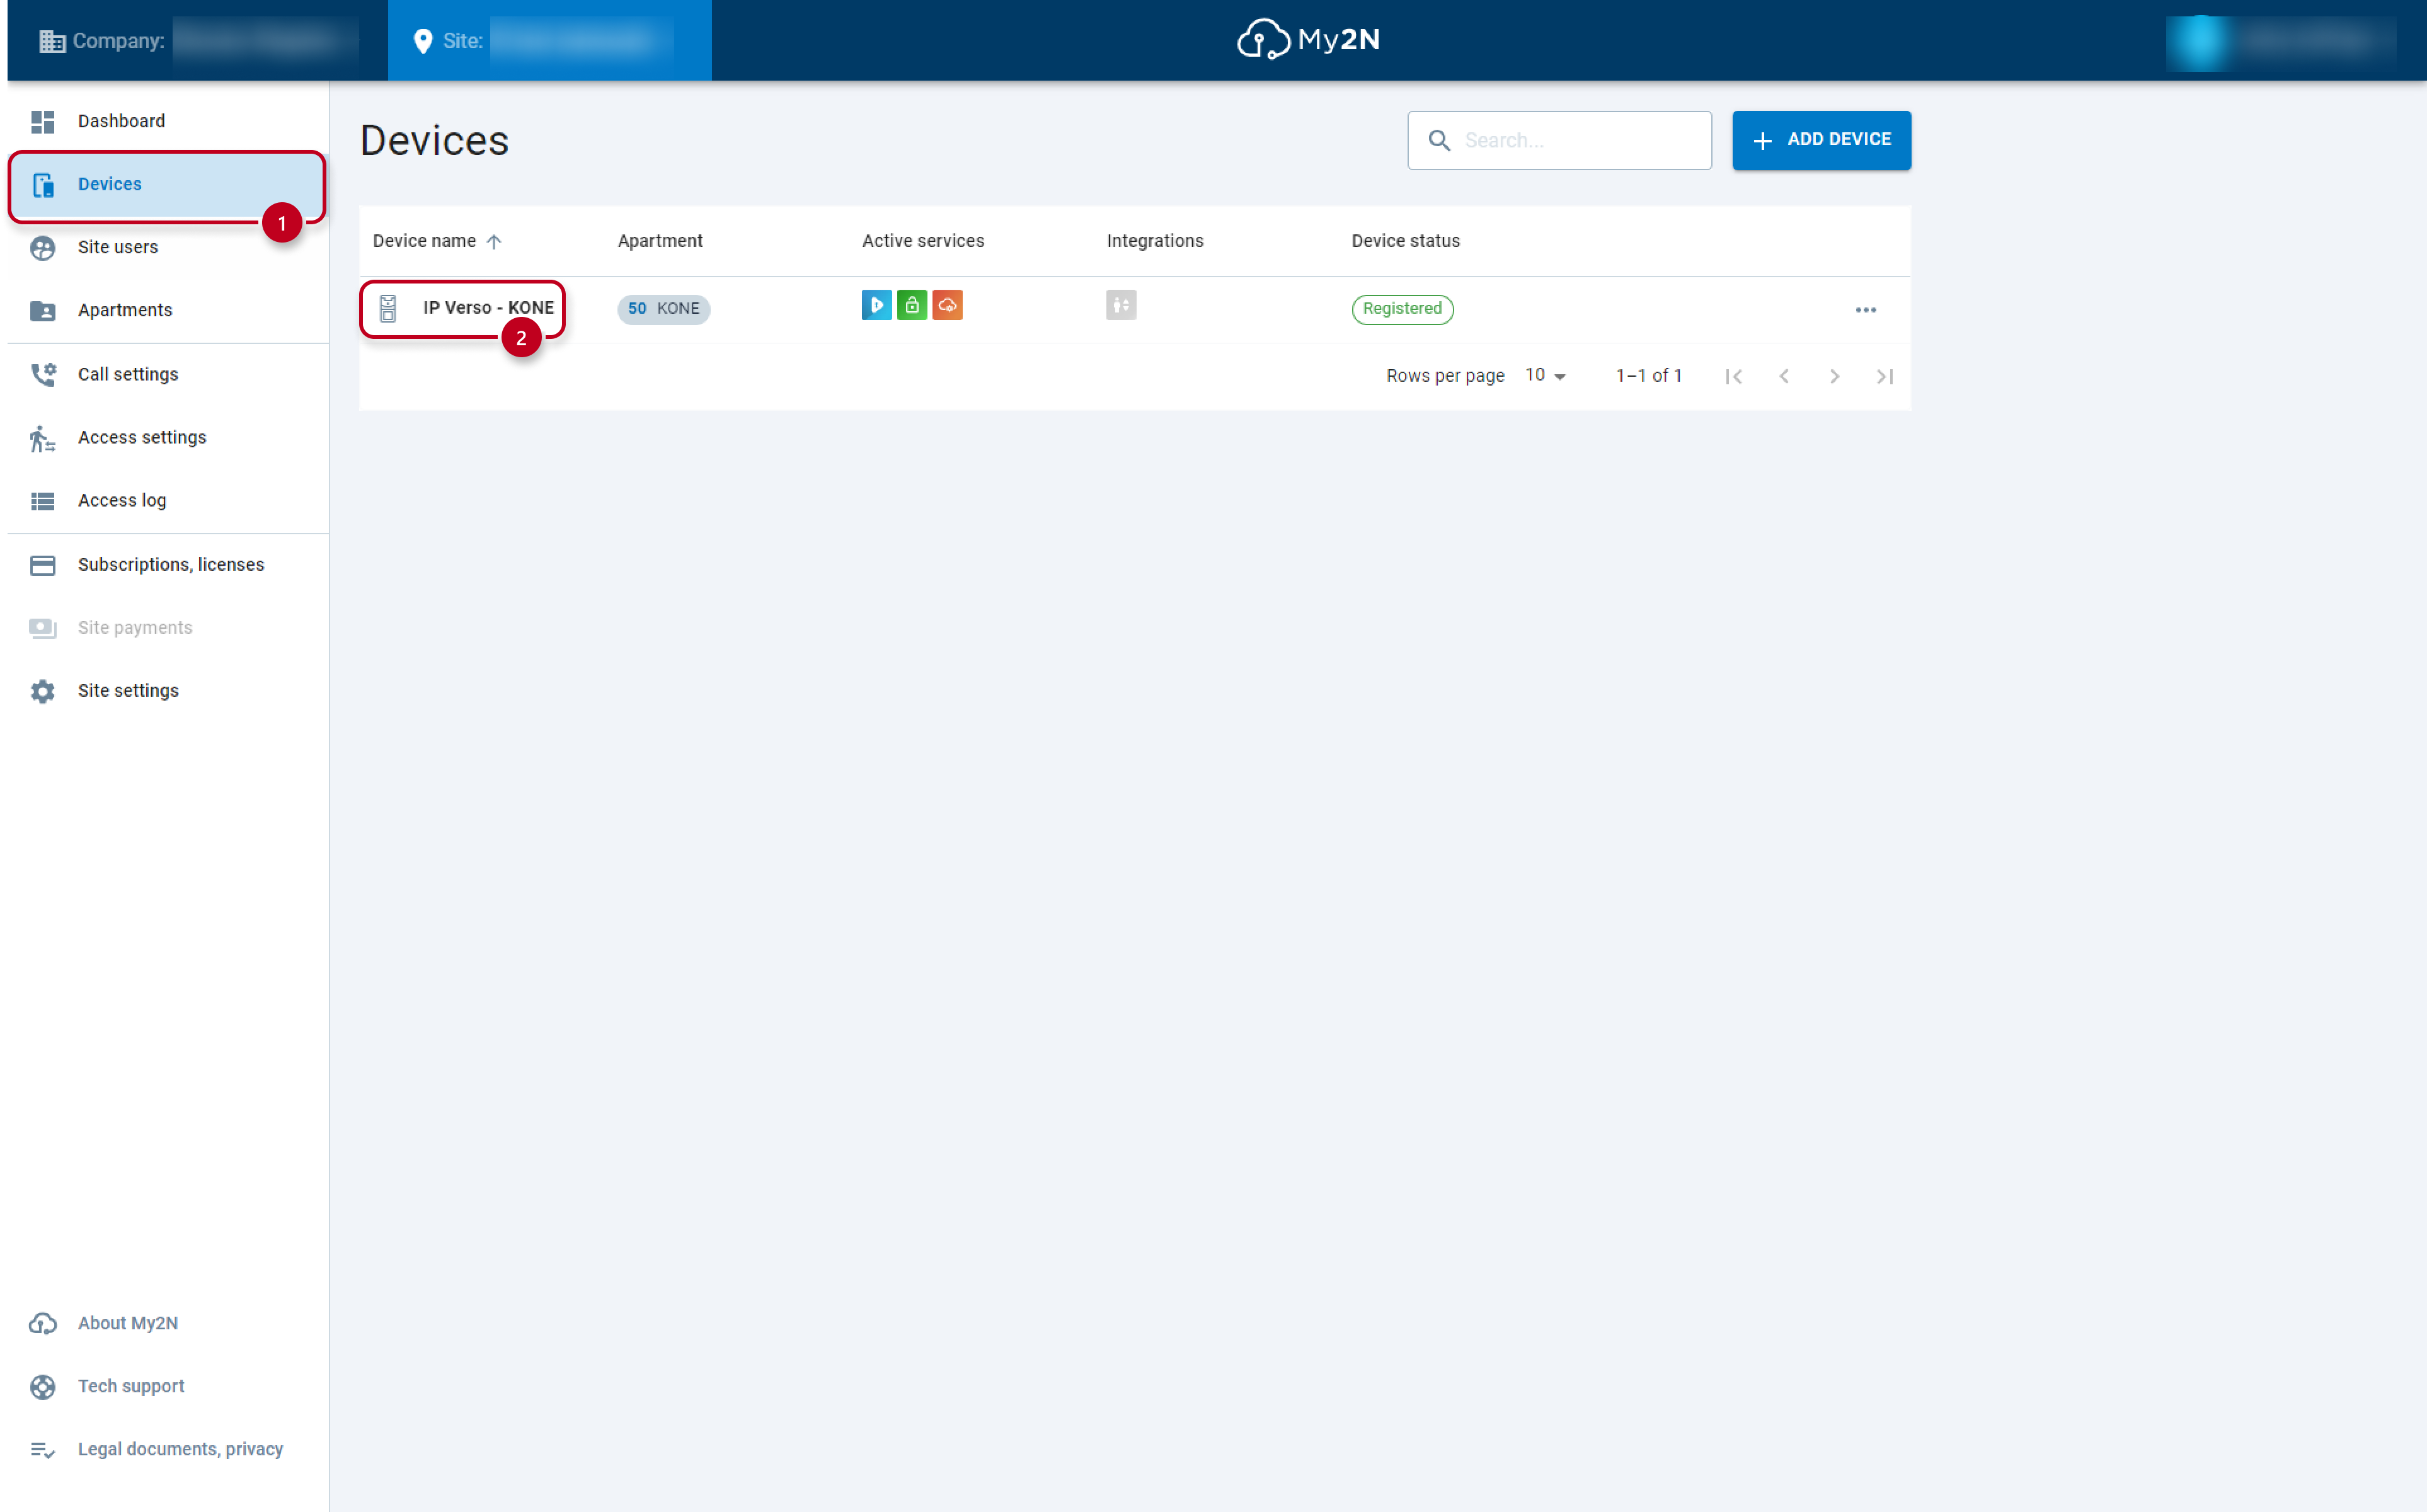
add the intercom to the corresponding apartment -> go to the section access ->
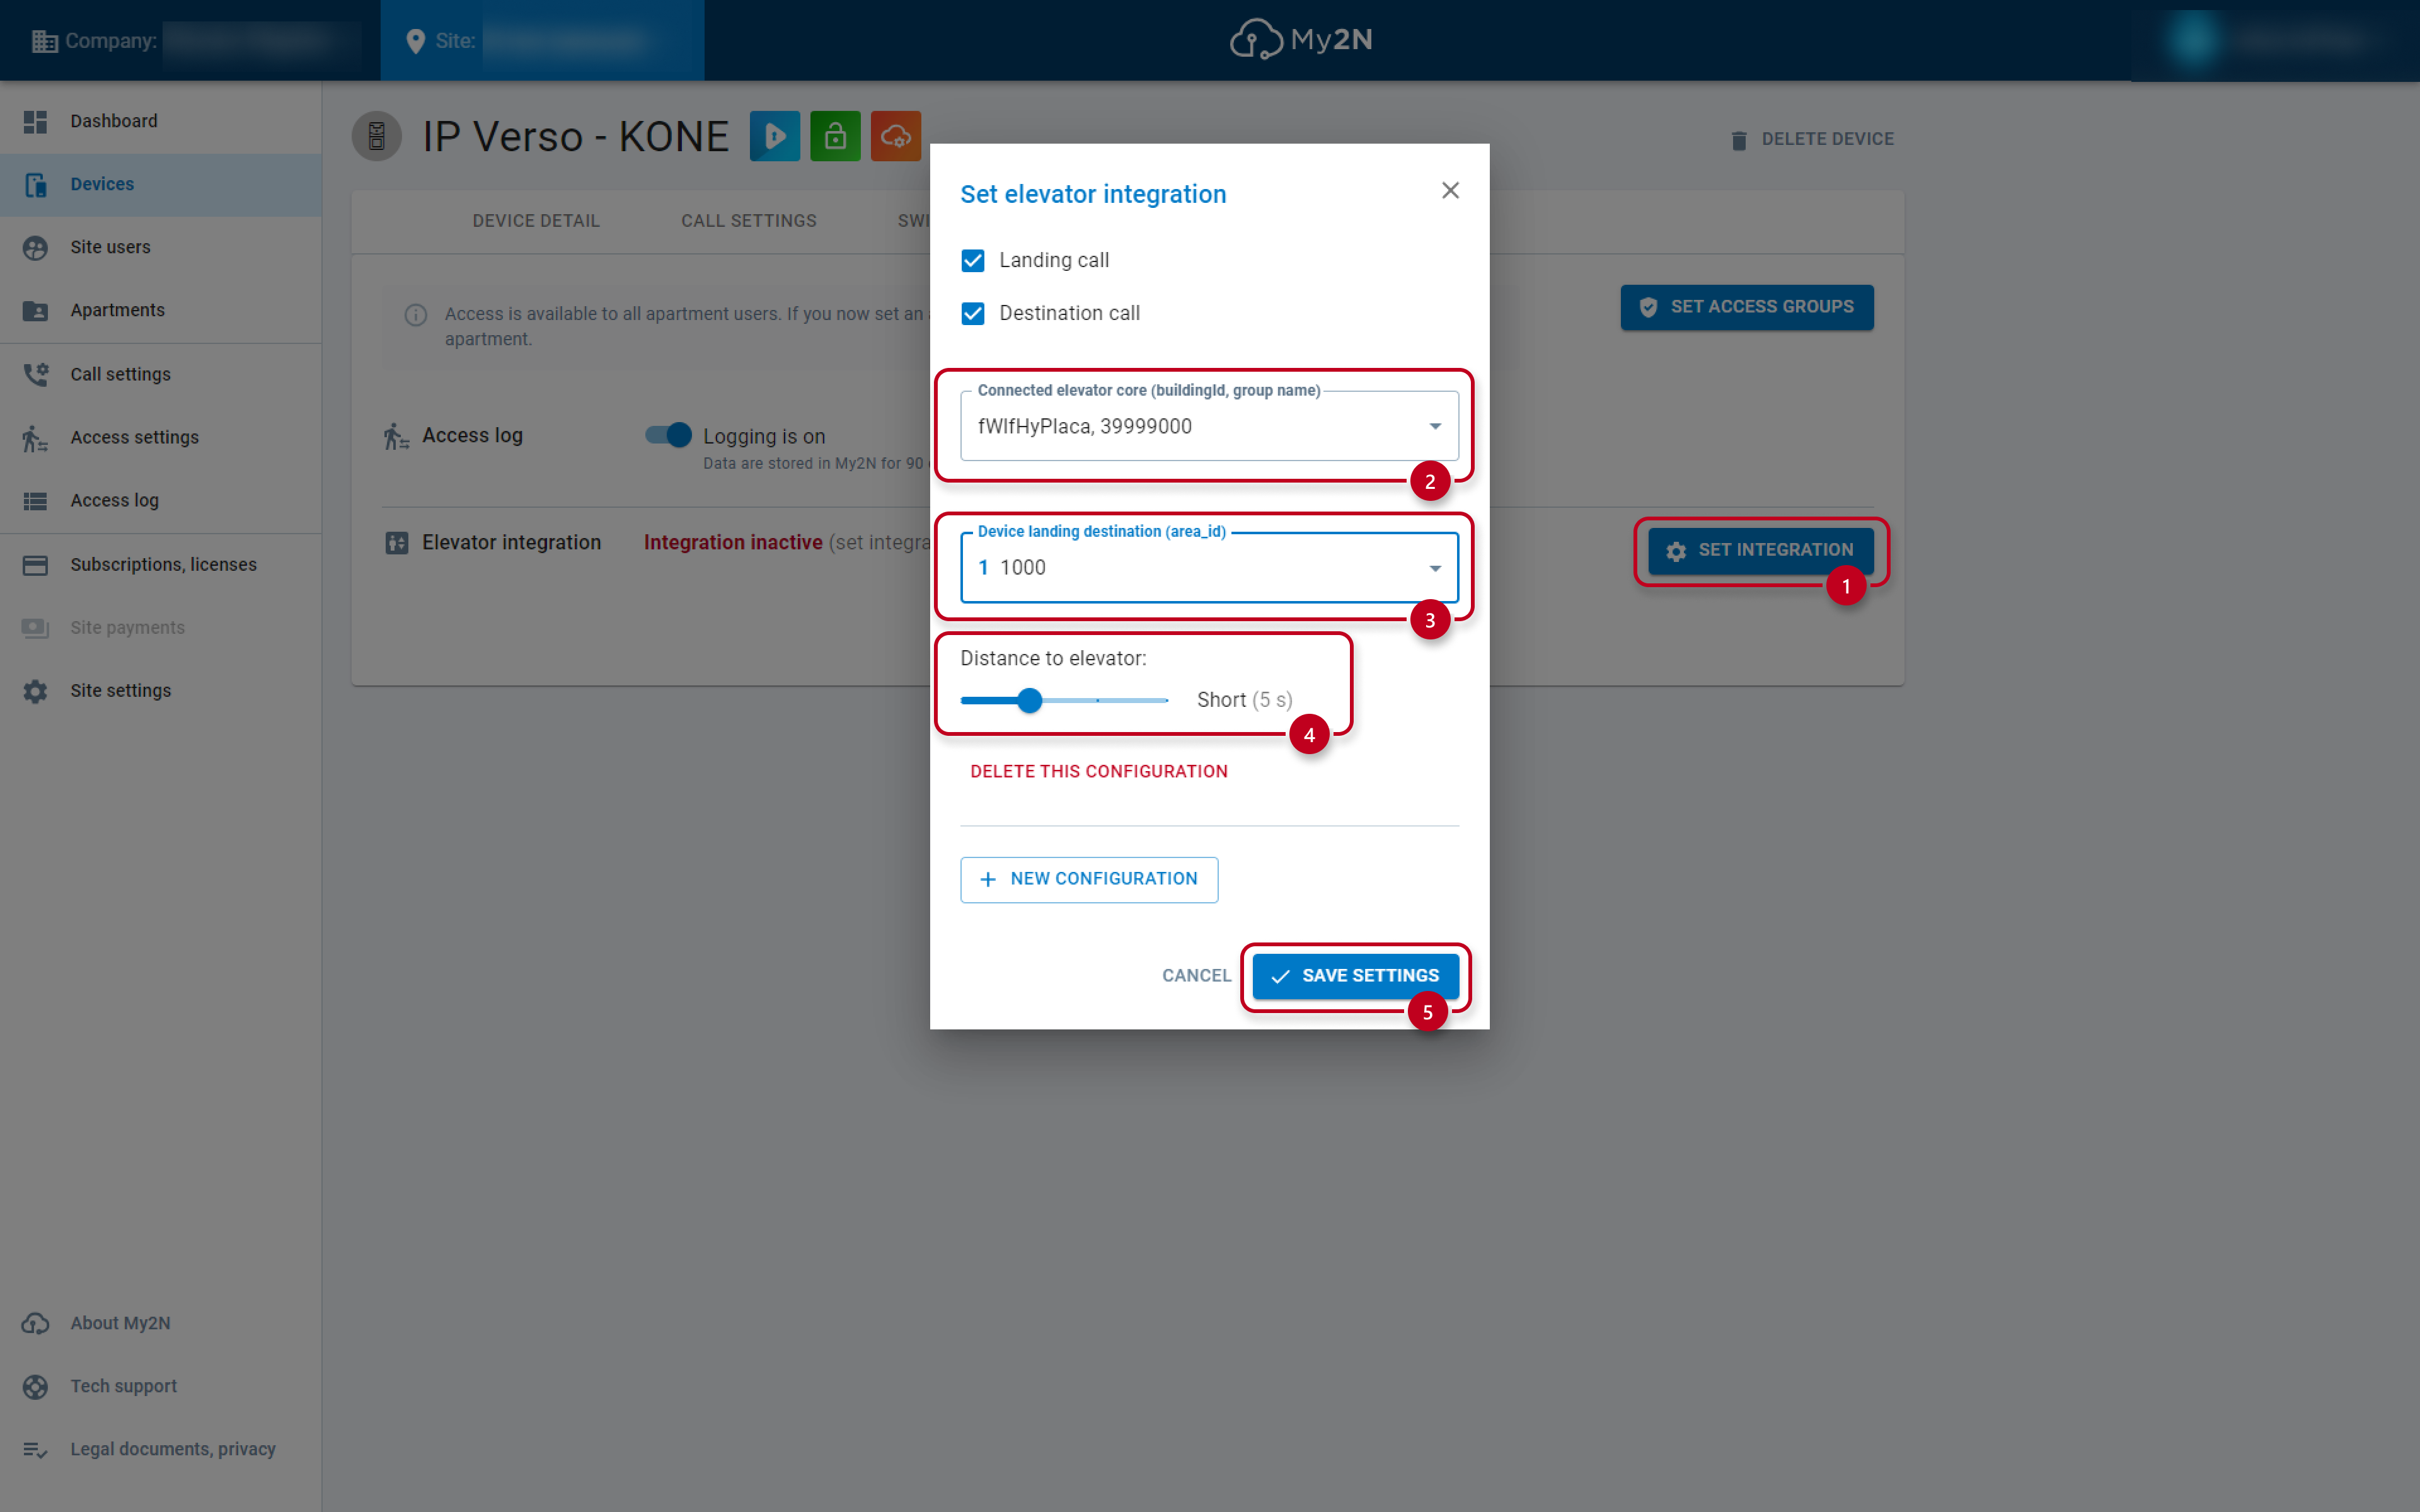
Click on the option set integration -> choose the corresponding elevator core and destination. You may also set up the distance to elevator which changes the waiting period of the elevator. The period can be set up to 30 seconds long. For example, if the elevator is further from the entrance, you can configure the longest waiting period. Click on the option Save settings.
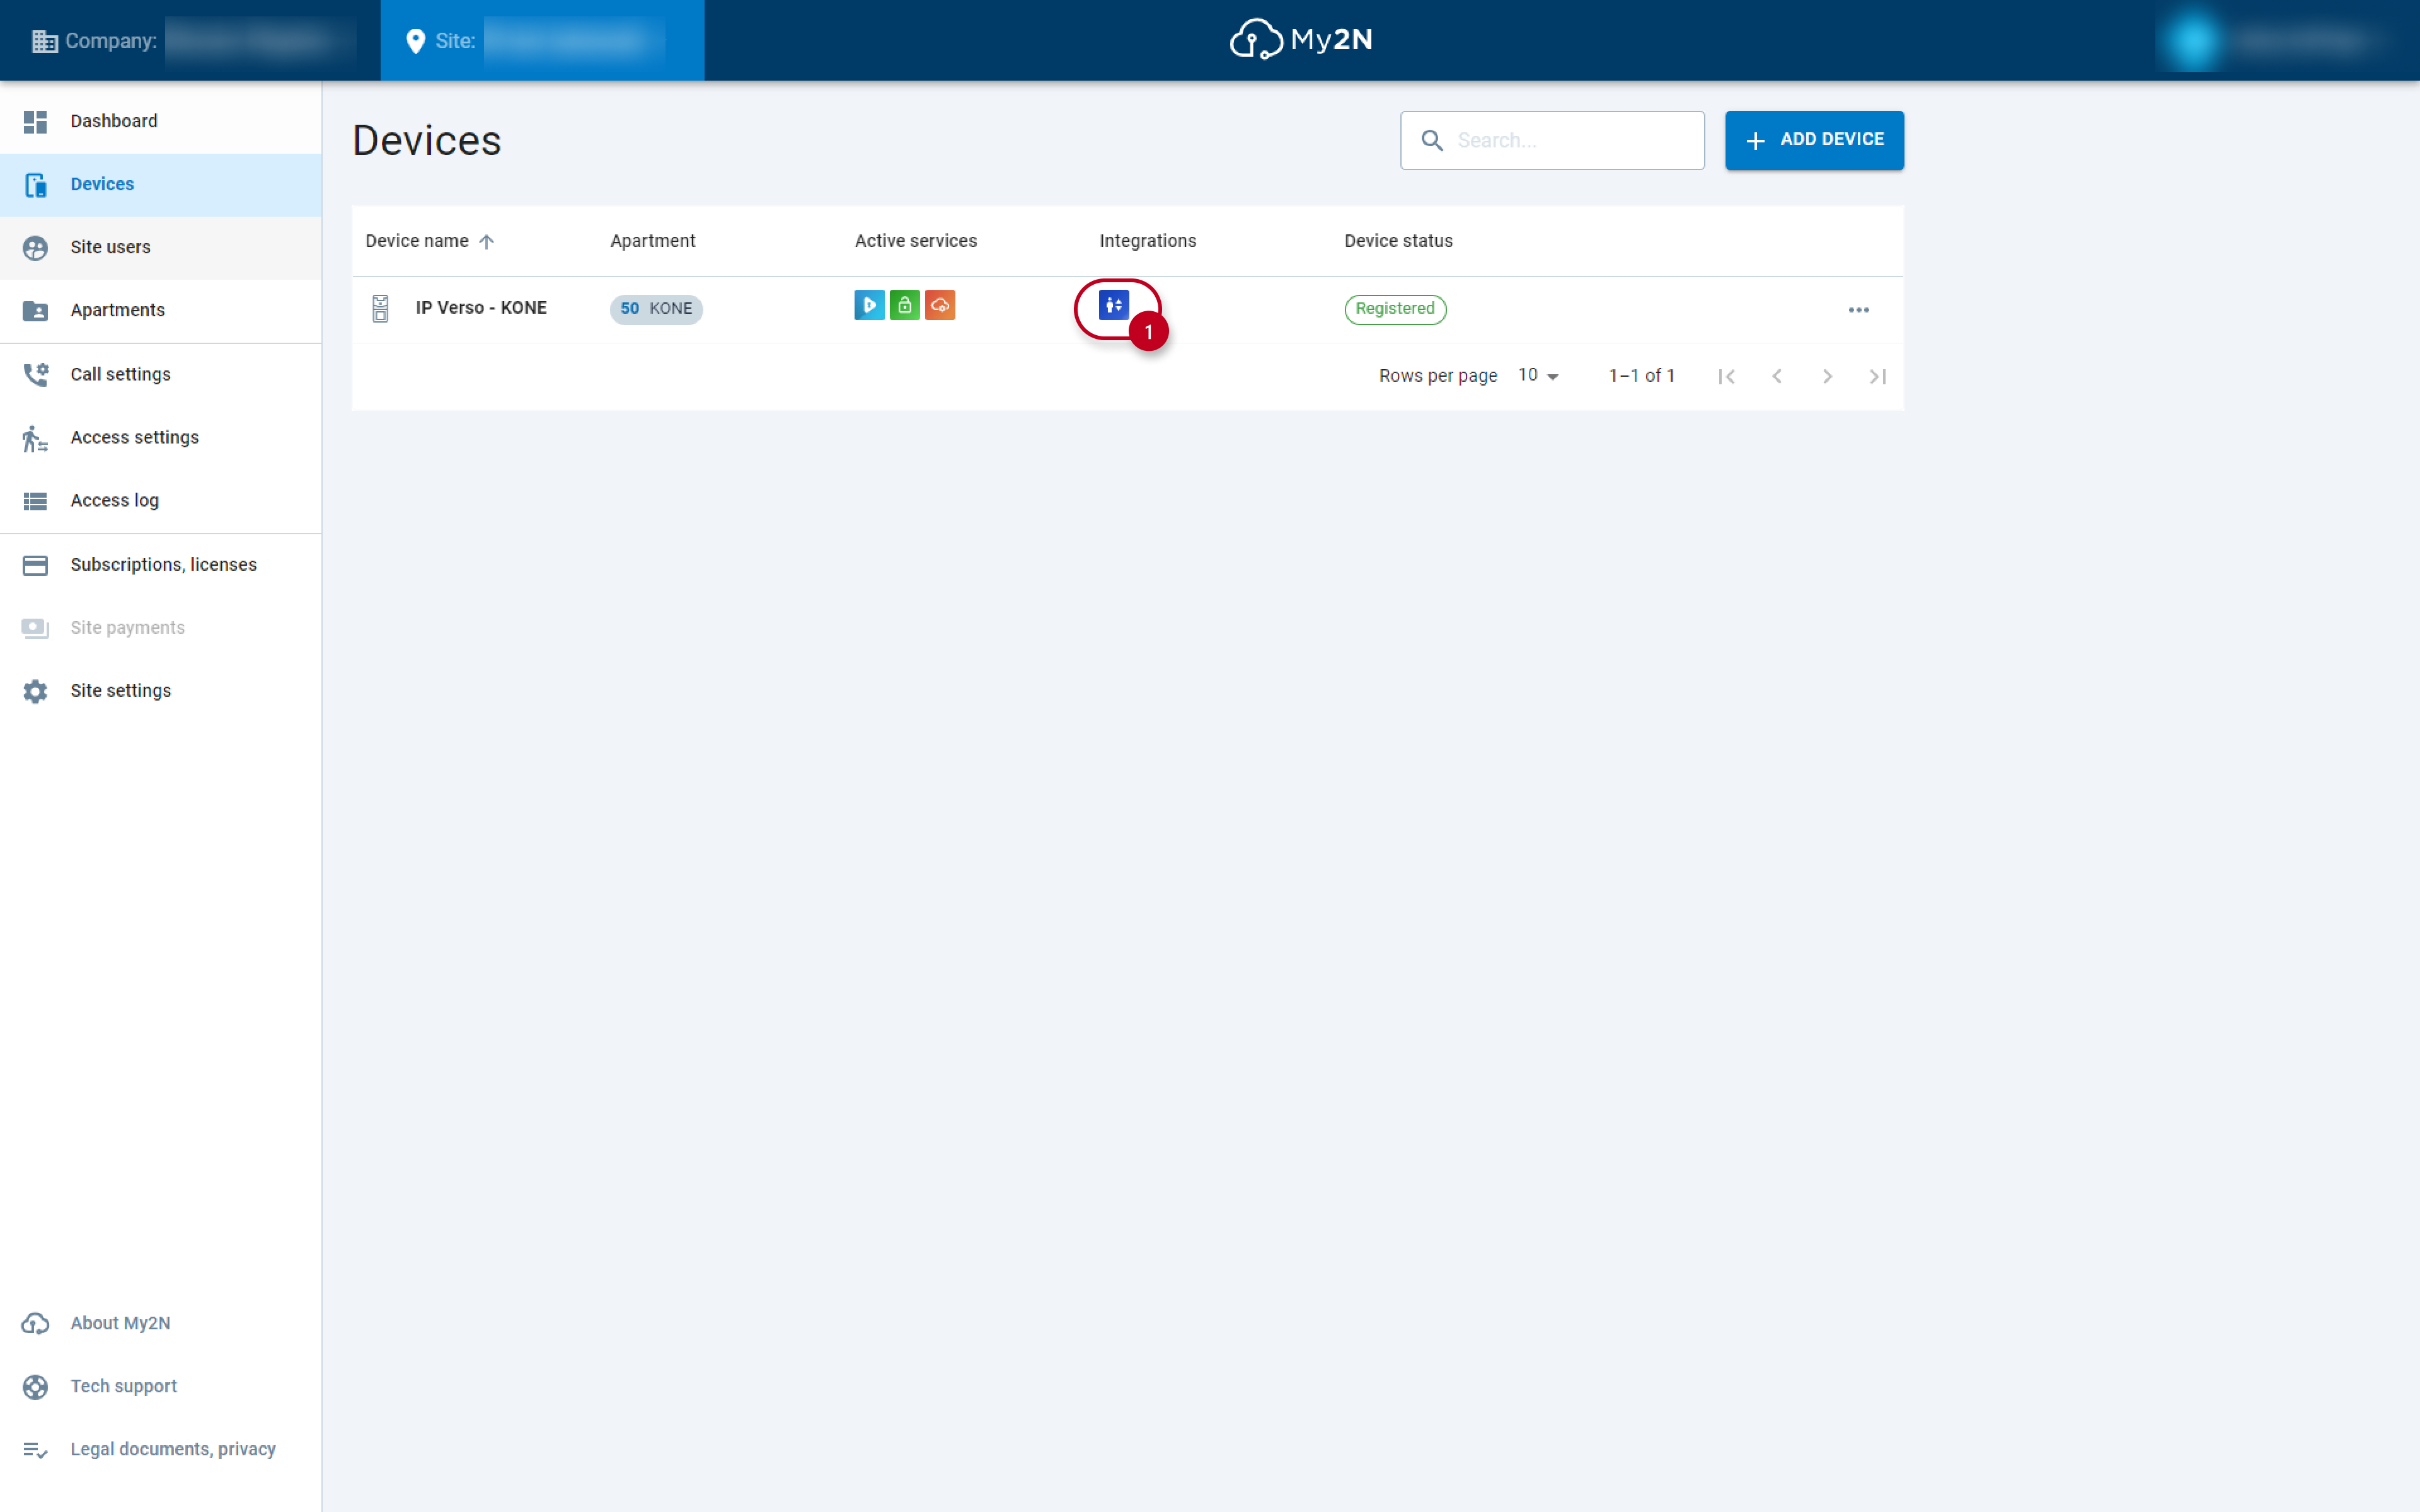
When the icon under the integrations tab is blue, it means that the elevator integration is active on the intercom.
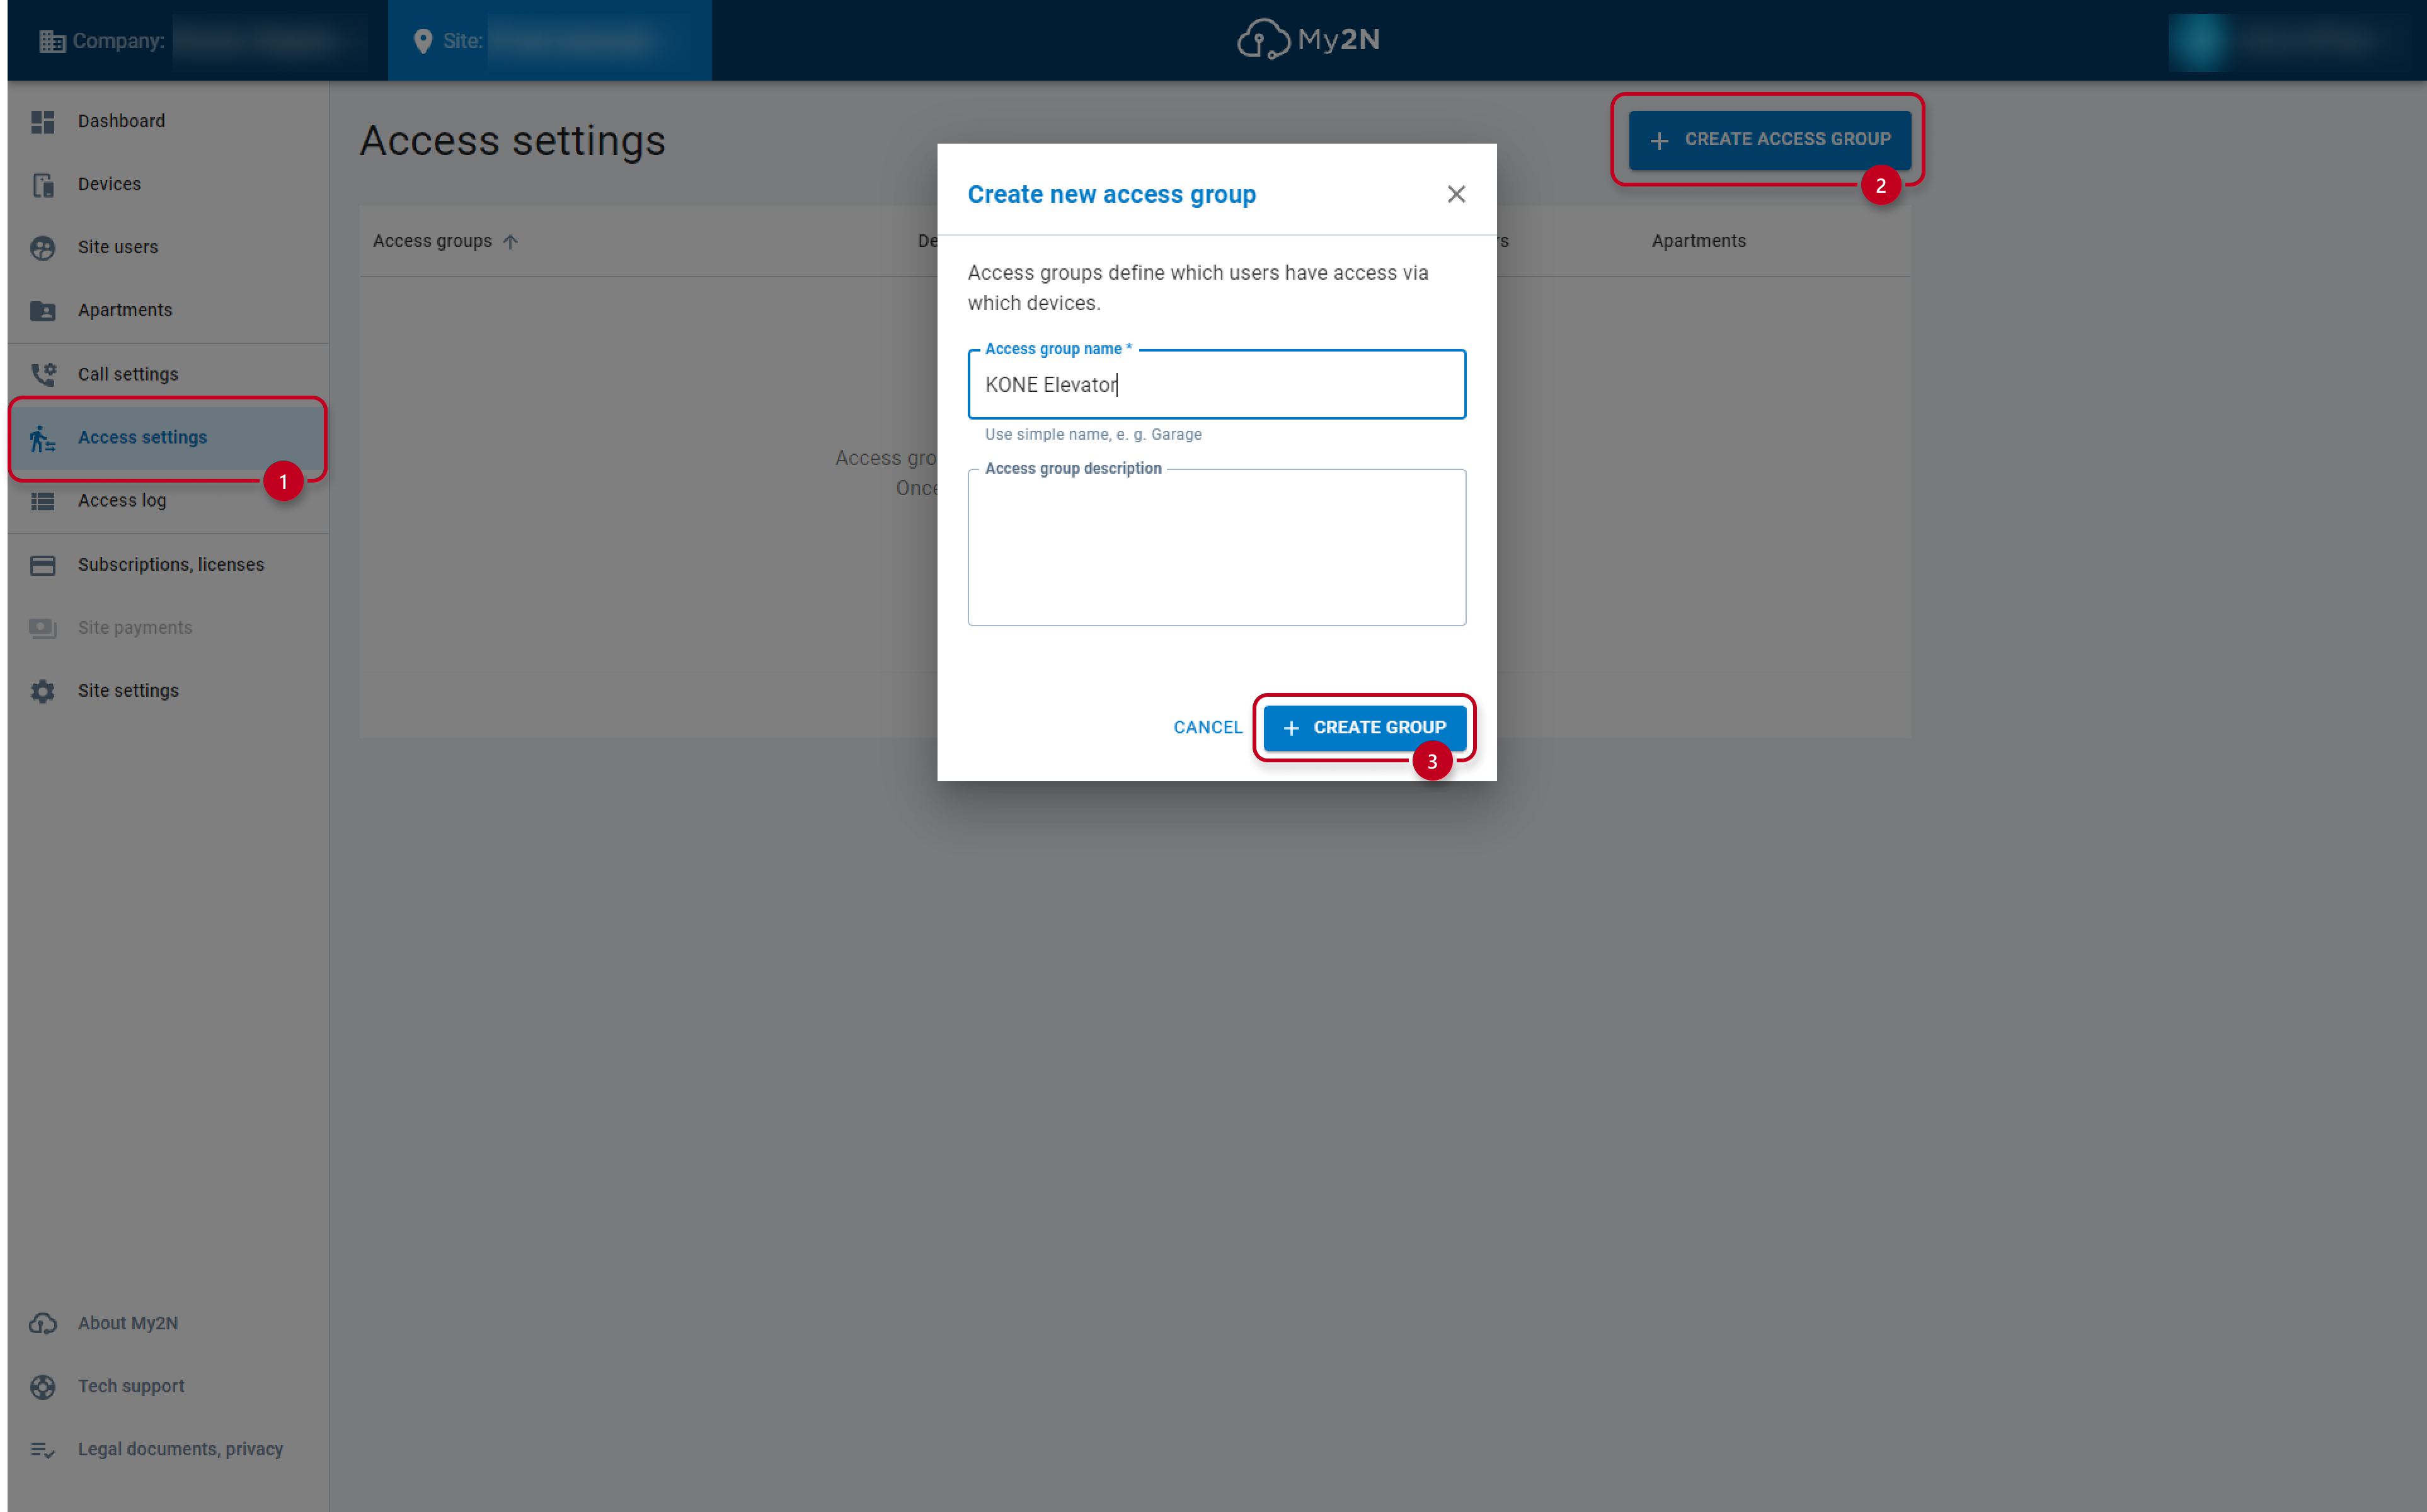
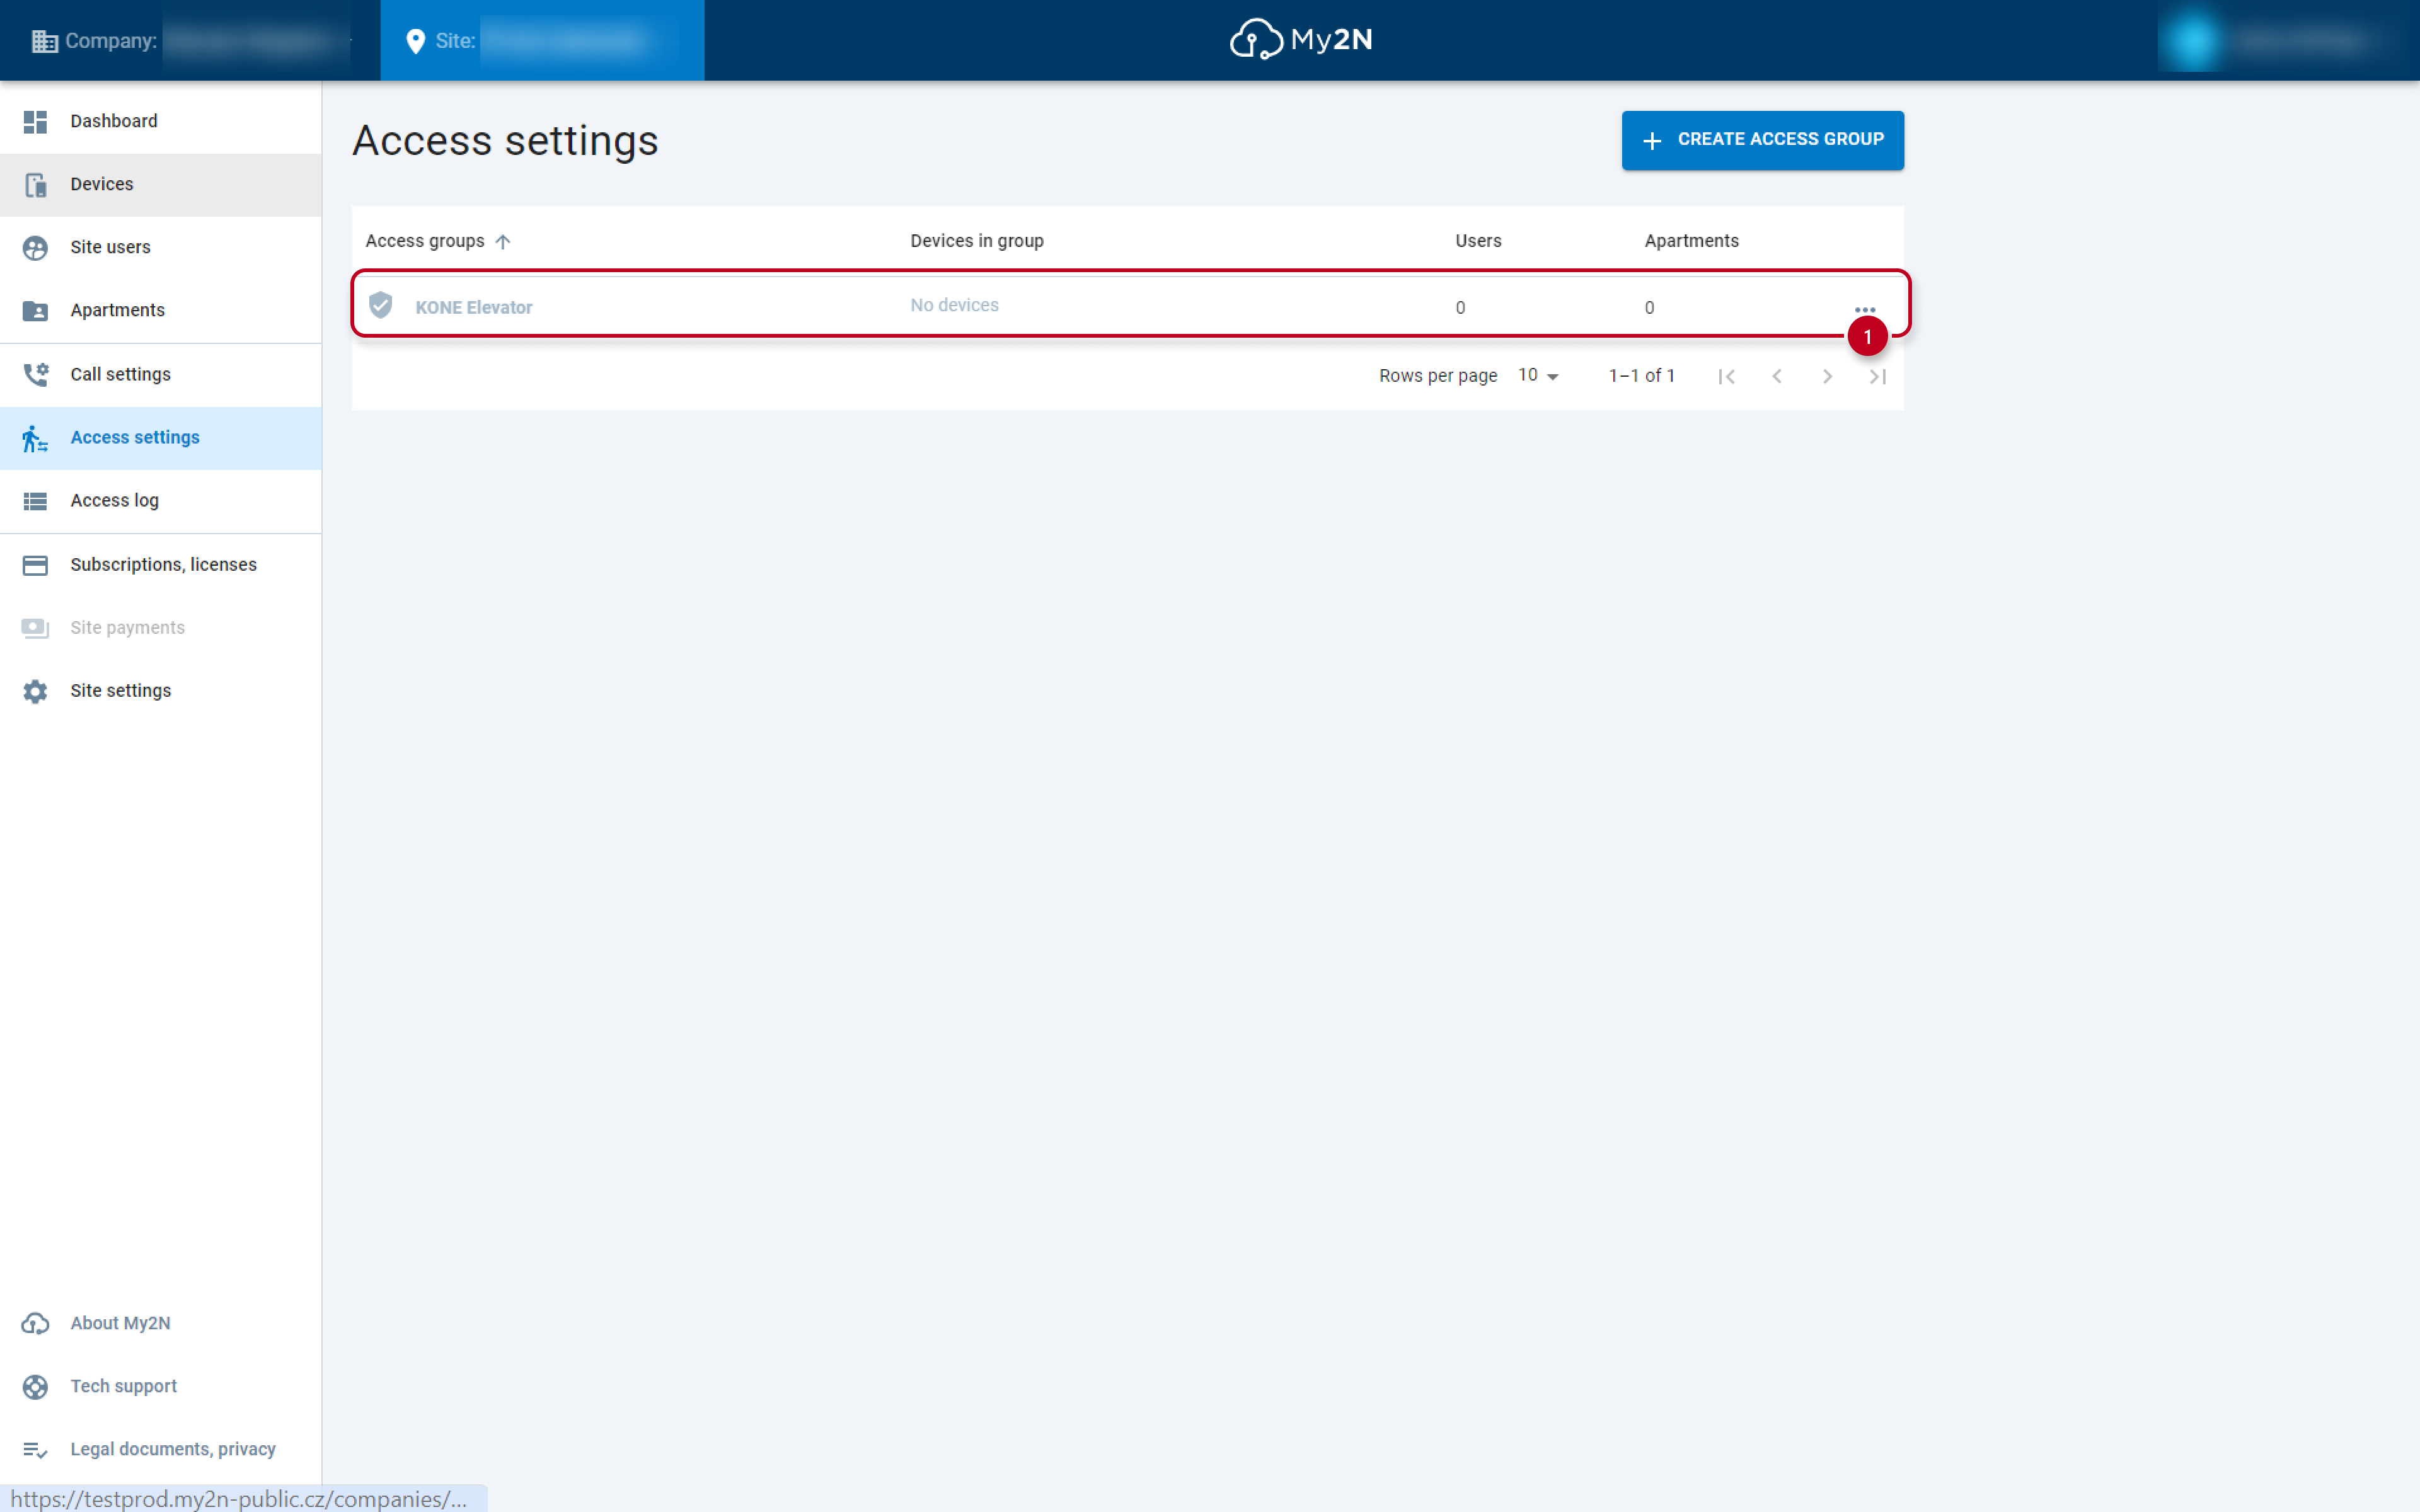
5) Create an access group. Go to the section access settings -> click on the option create access group -> name the group > click on the option create group.
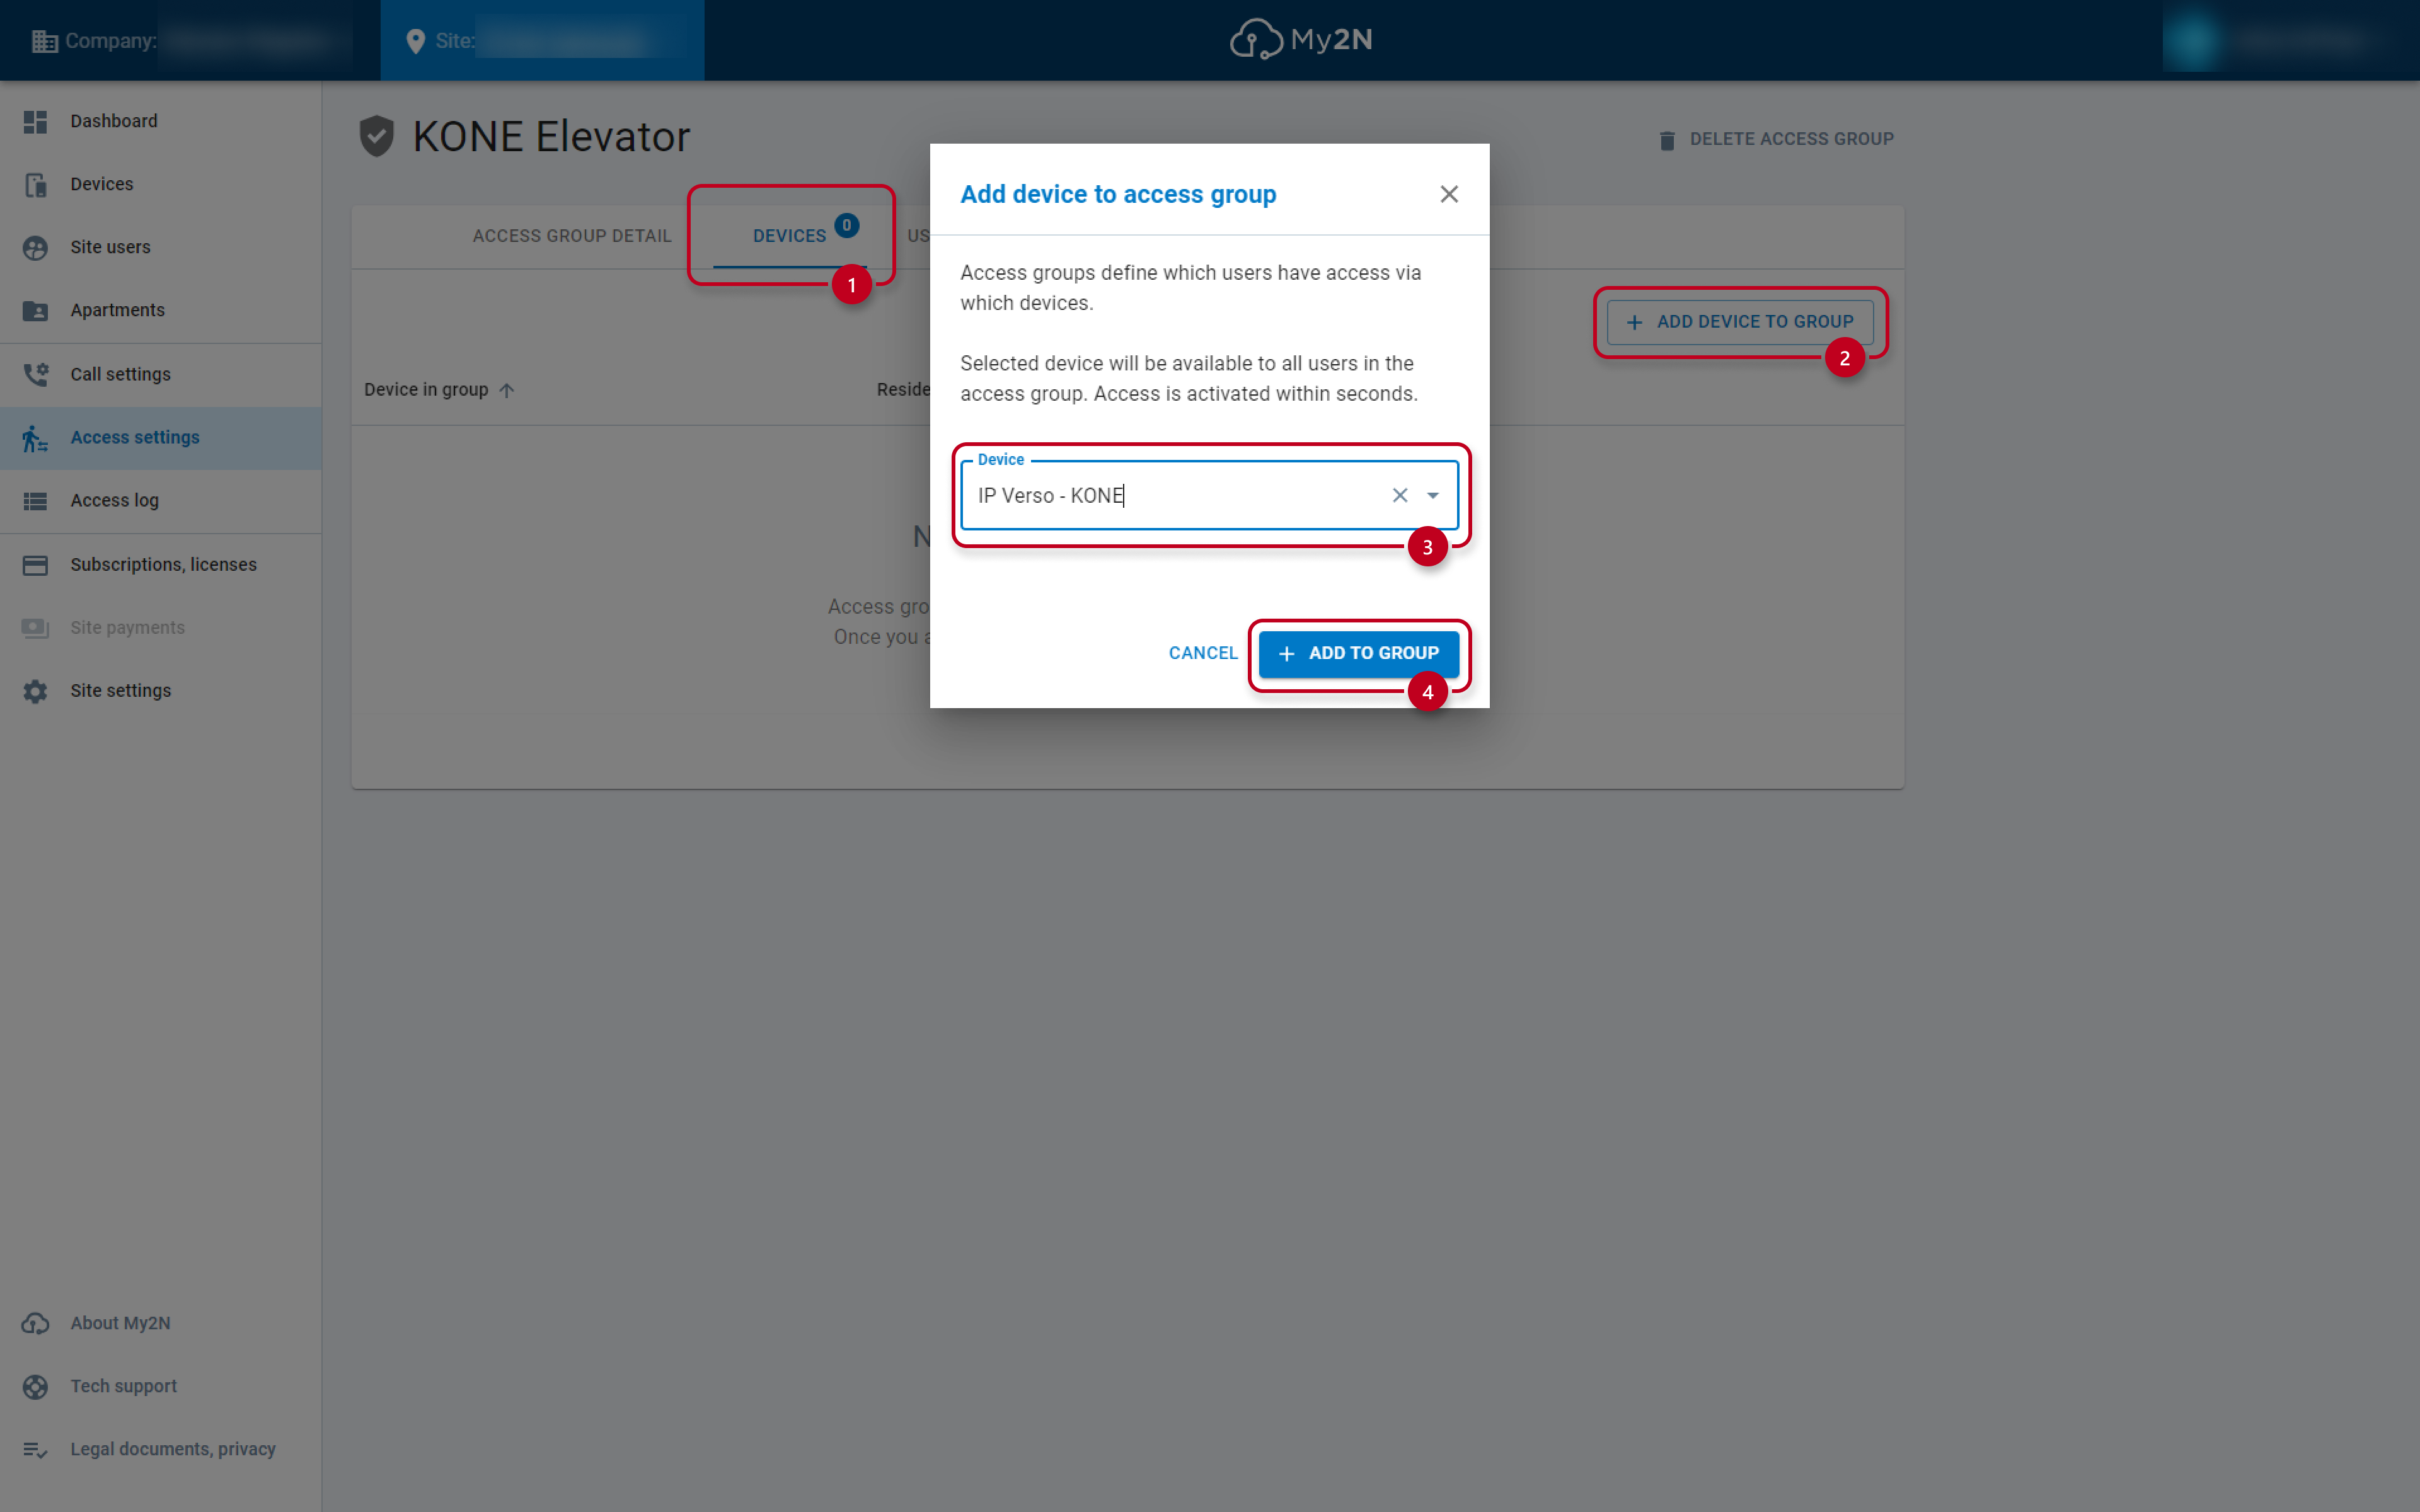
6) Configure the created access group. Click on the created group.
Firstly, go to the devices section -> click on the option add device to group -> select the device -> click on the option add to group.
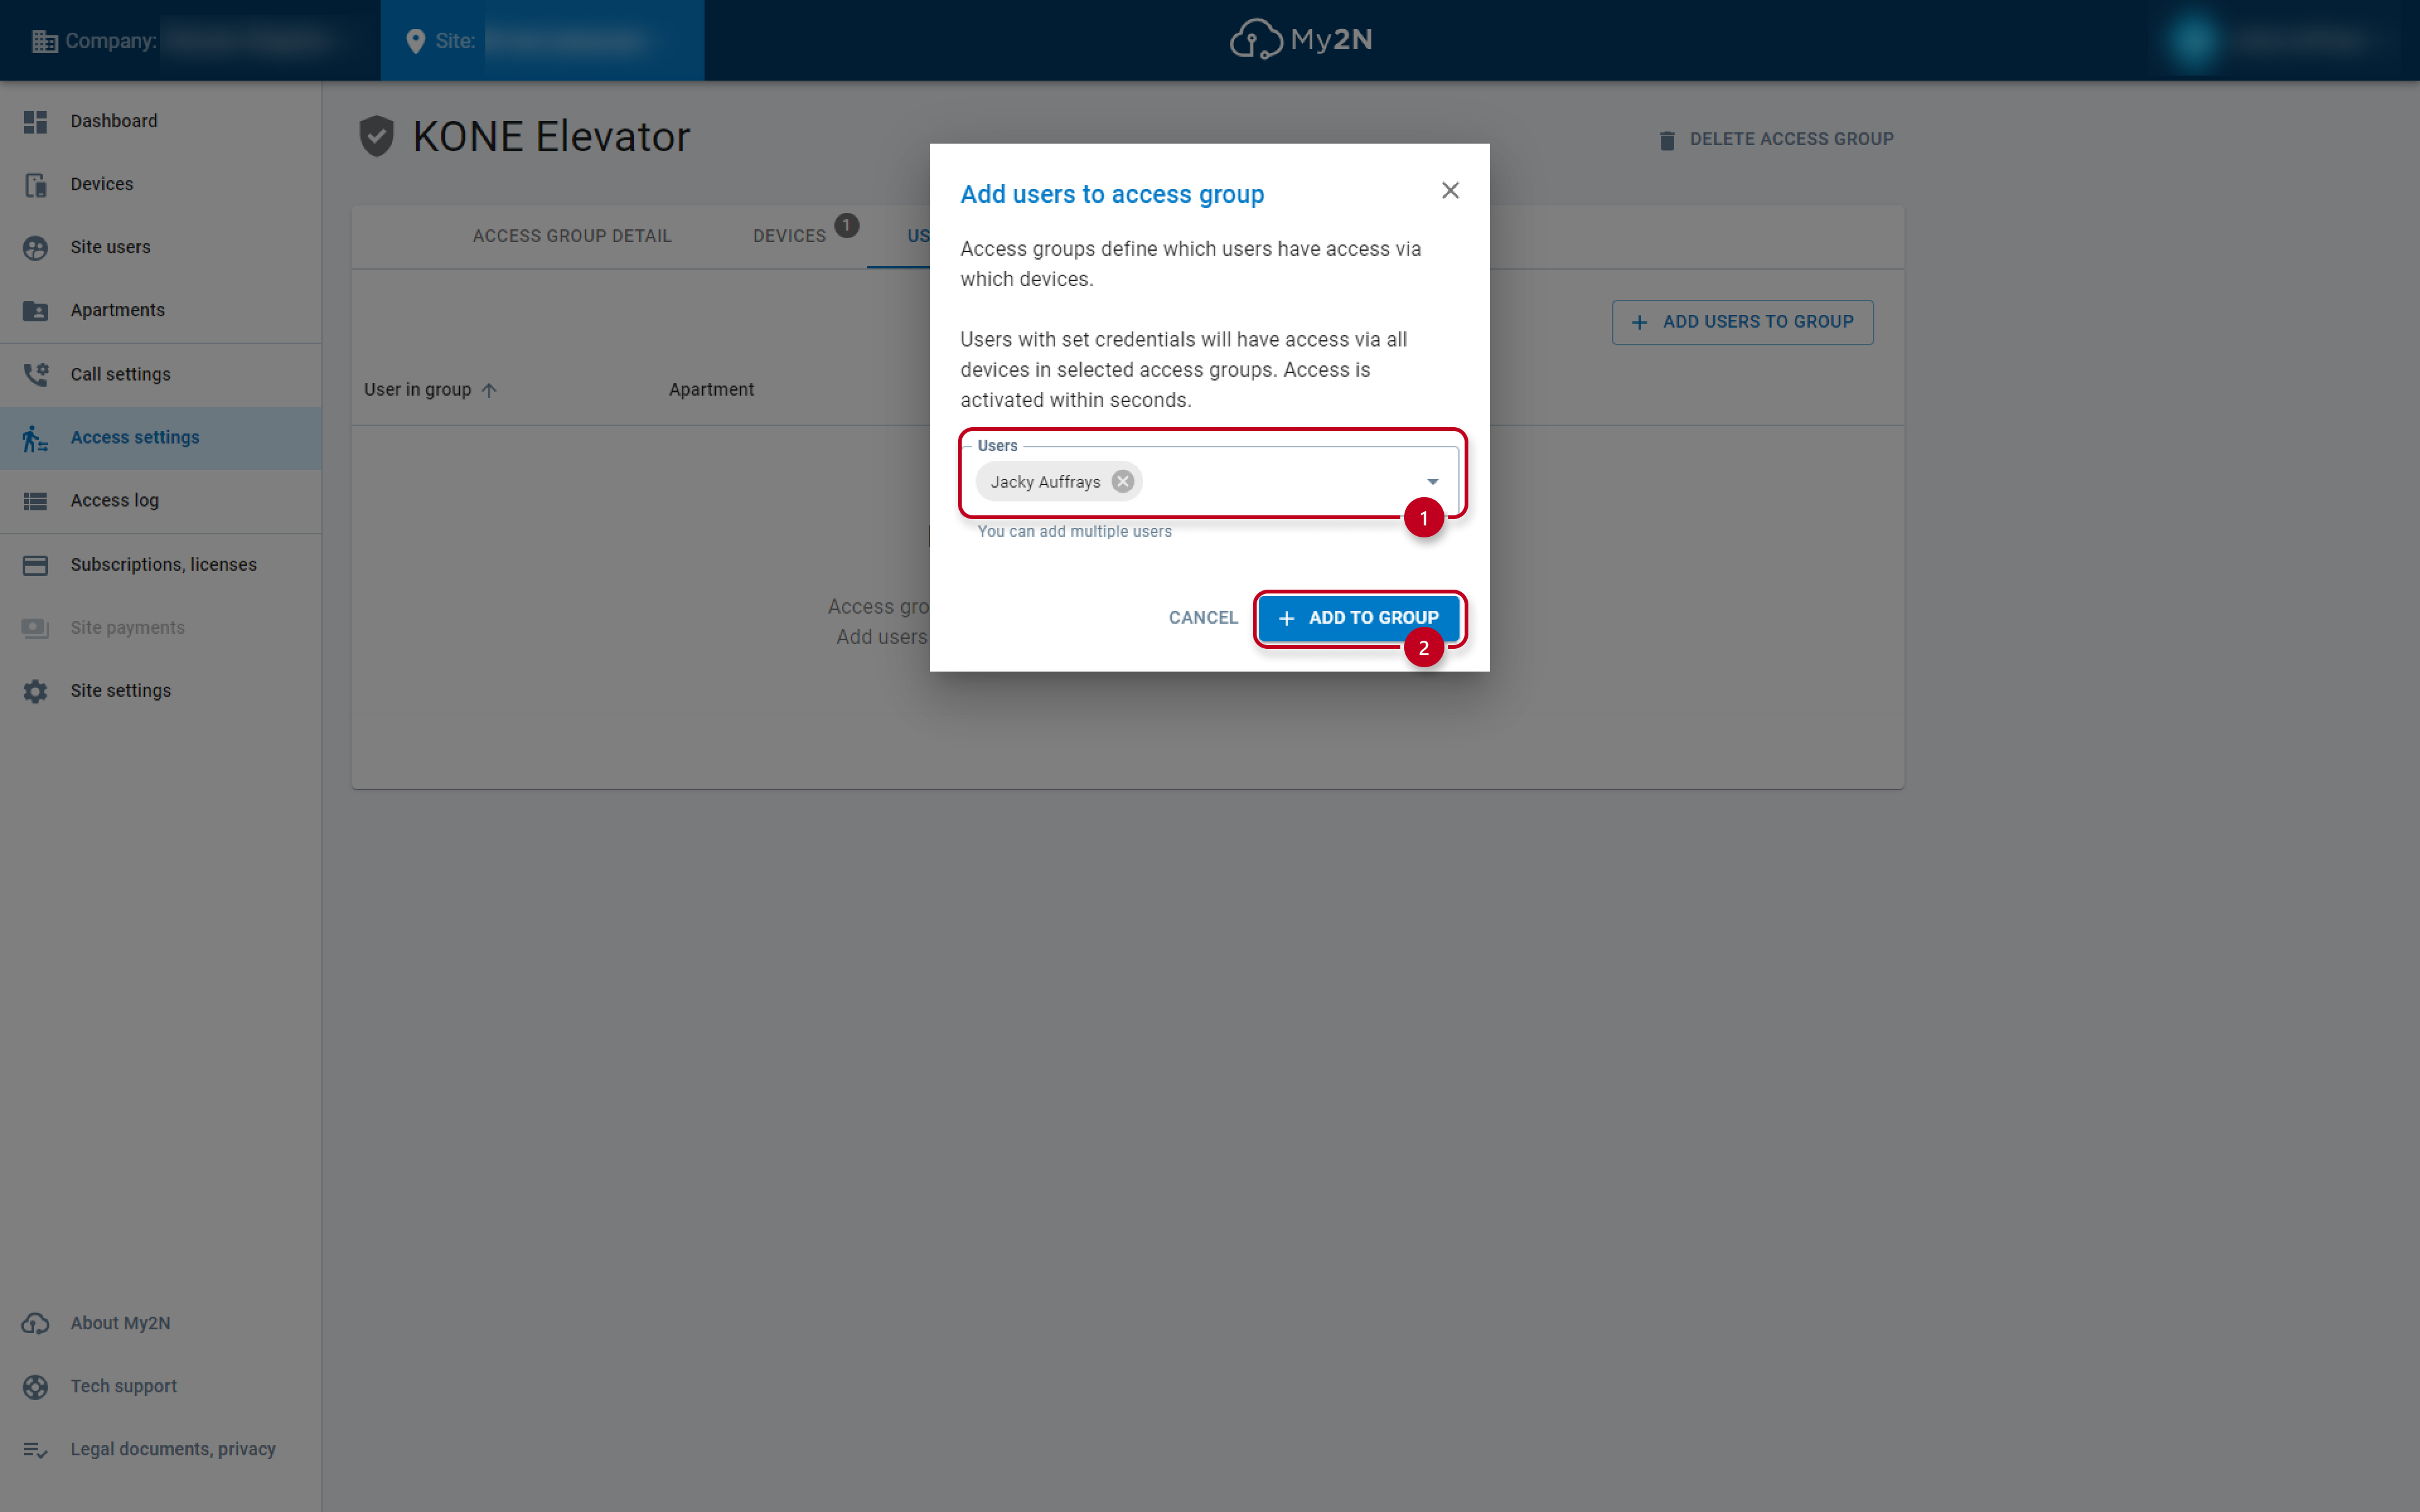
Secondly, go to the users section -> click on the option add users to group ->
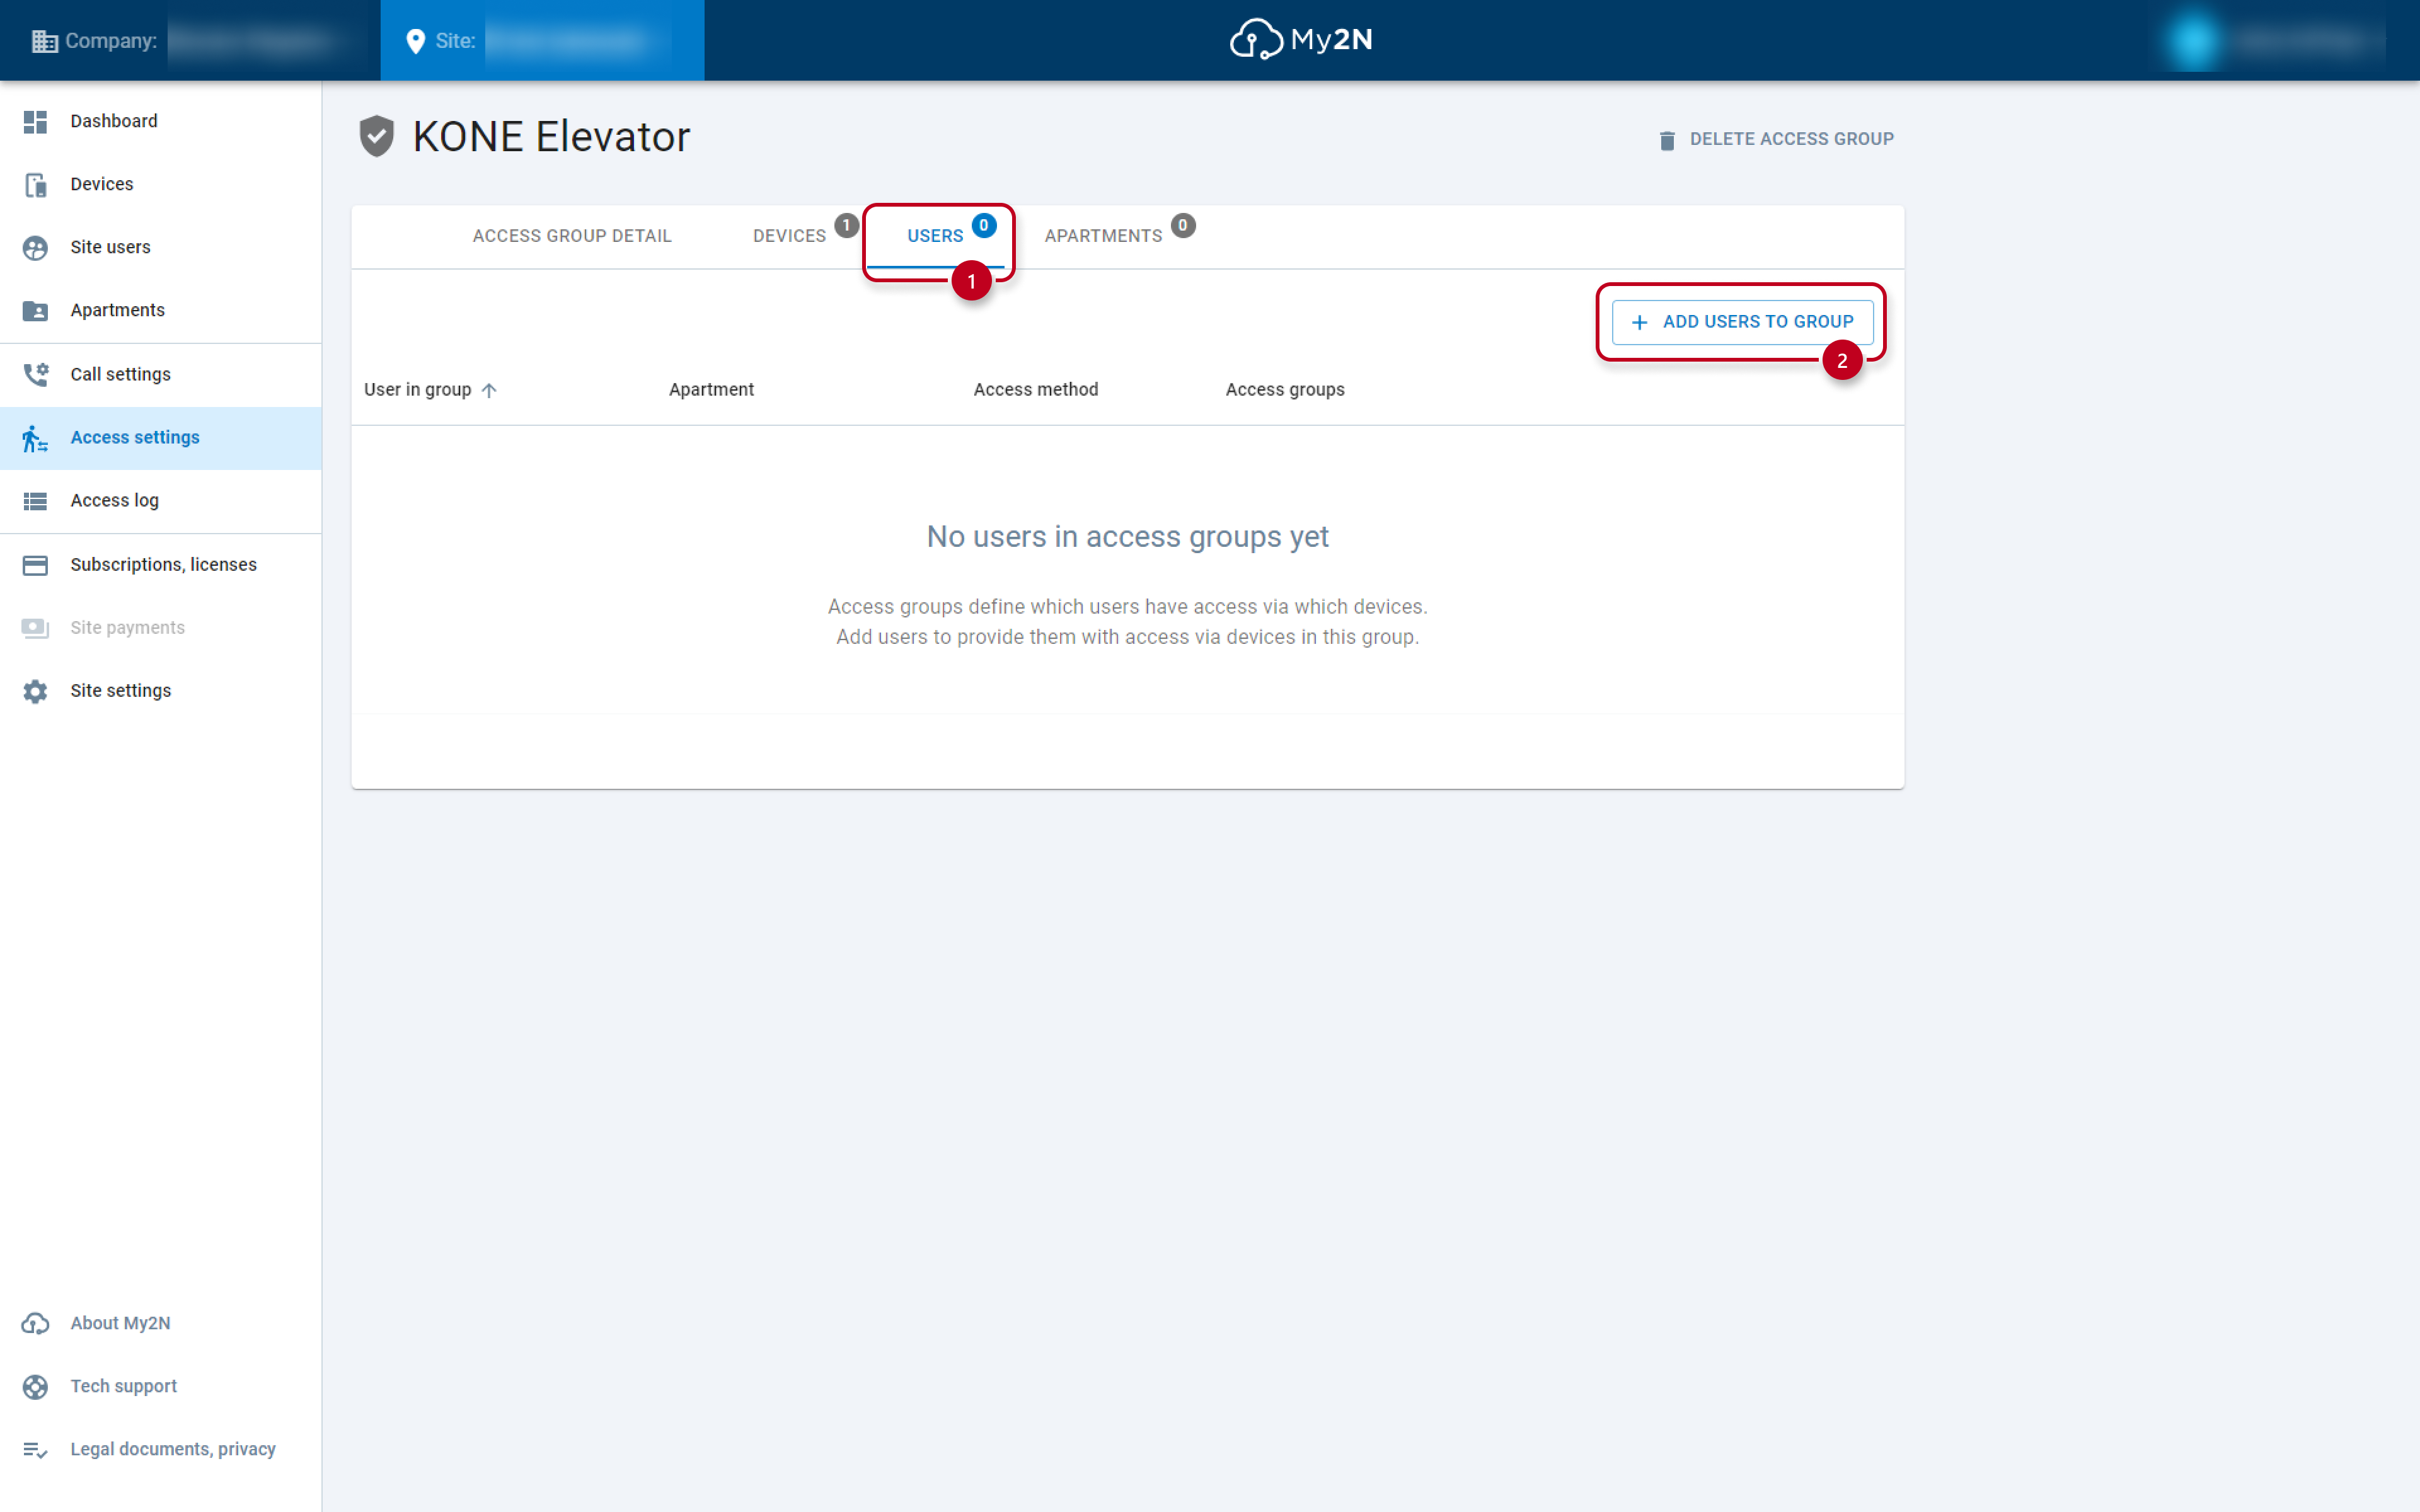
Select the user or create a new one-> click on the option add to group.
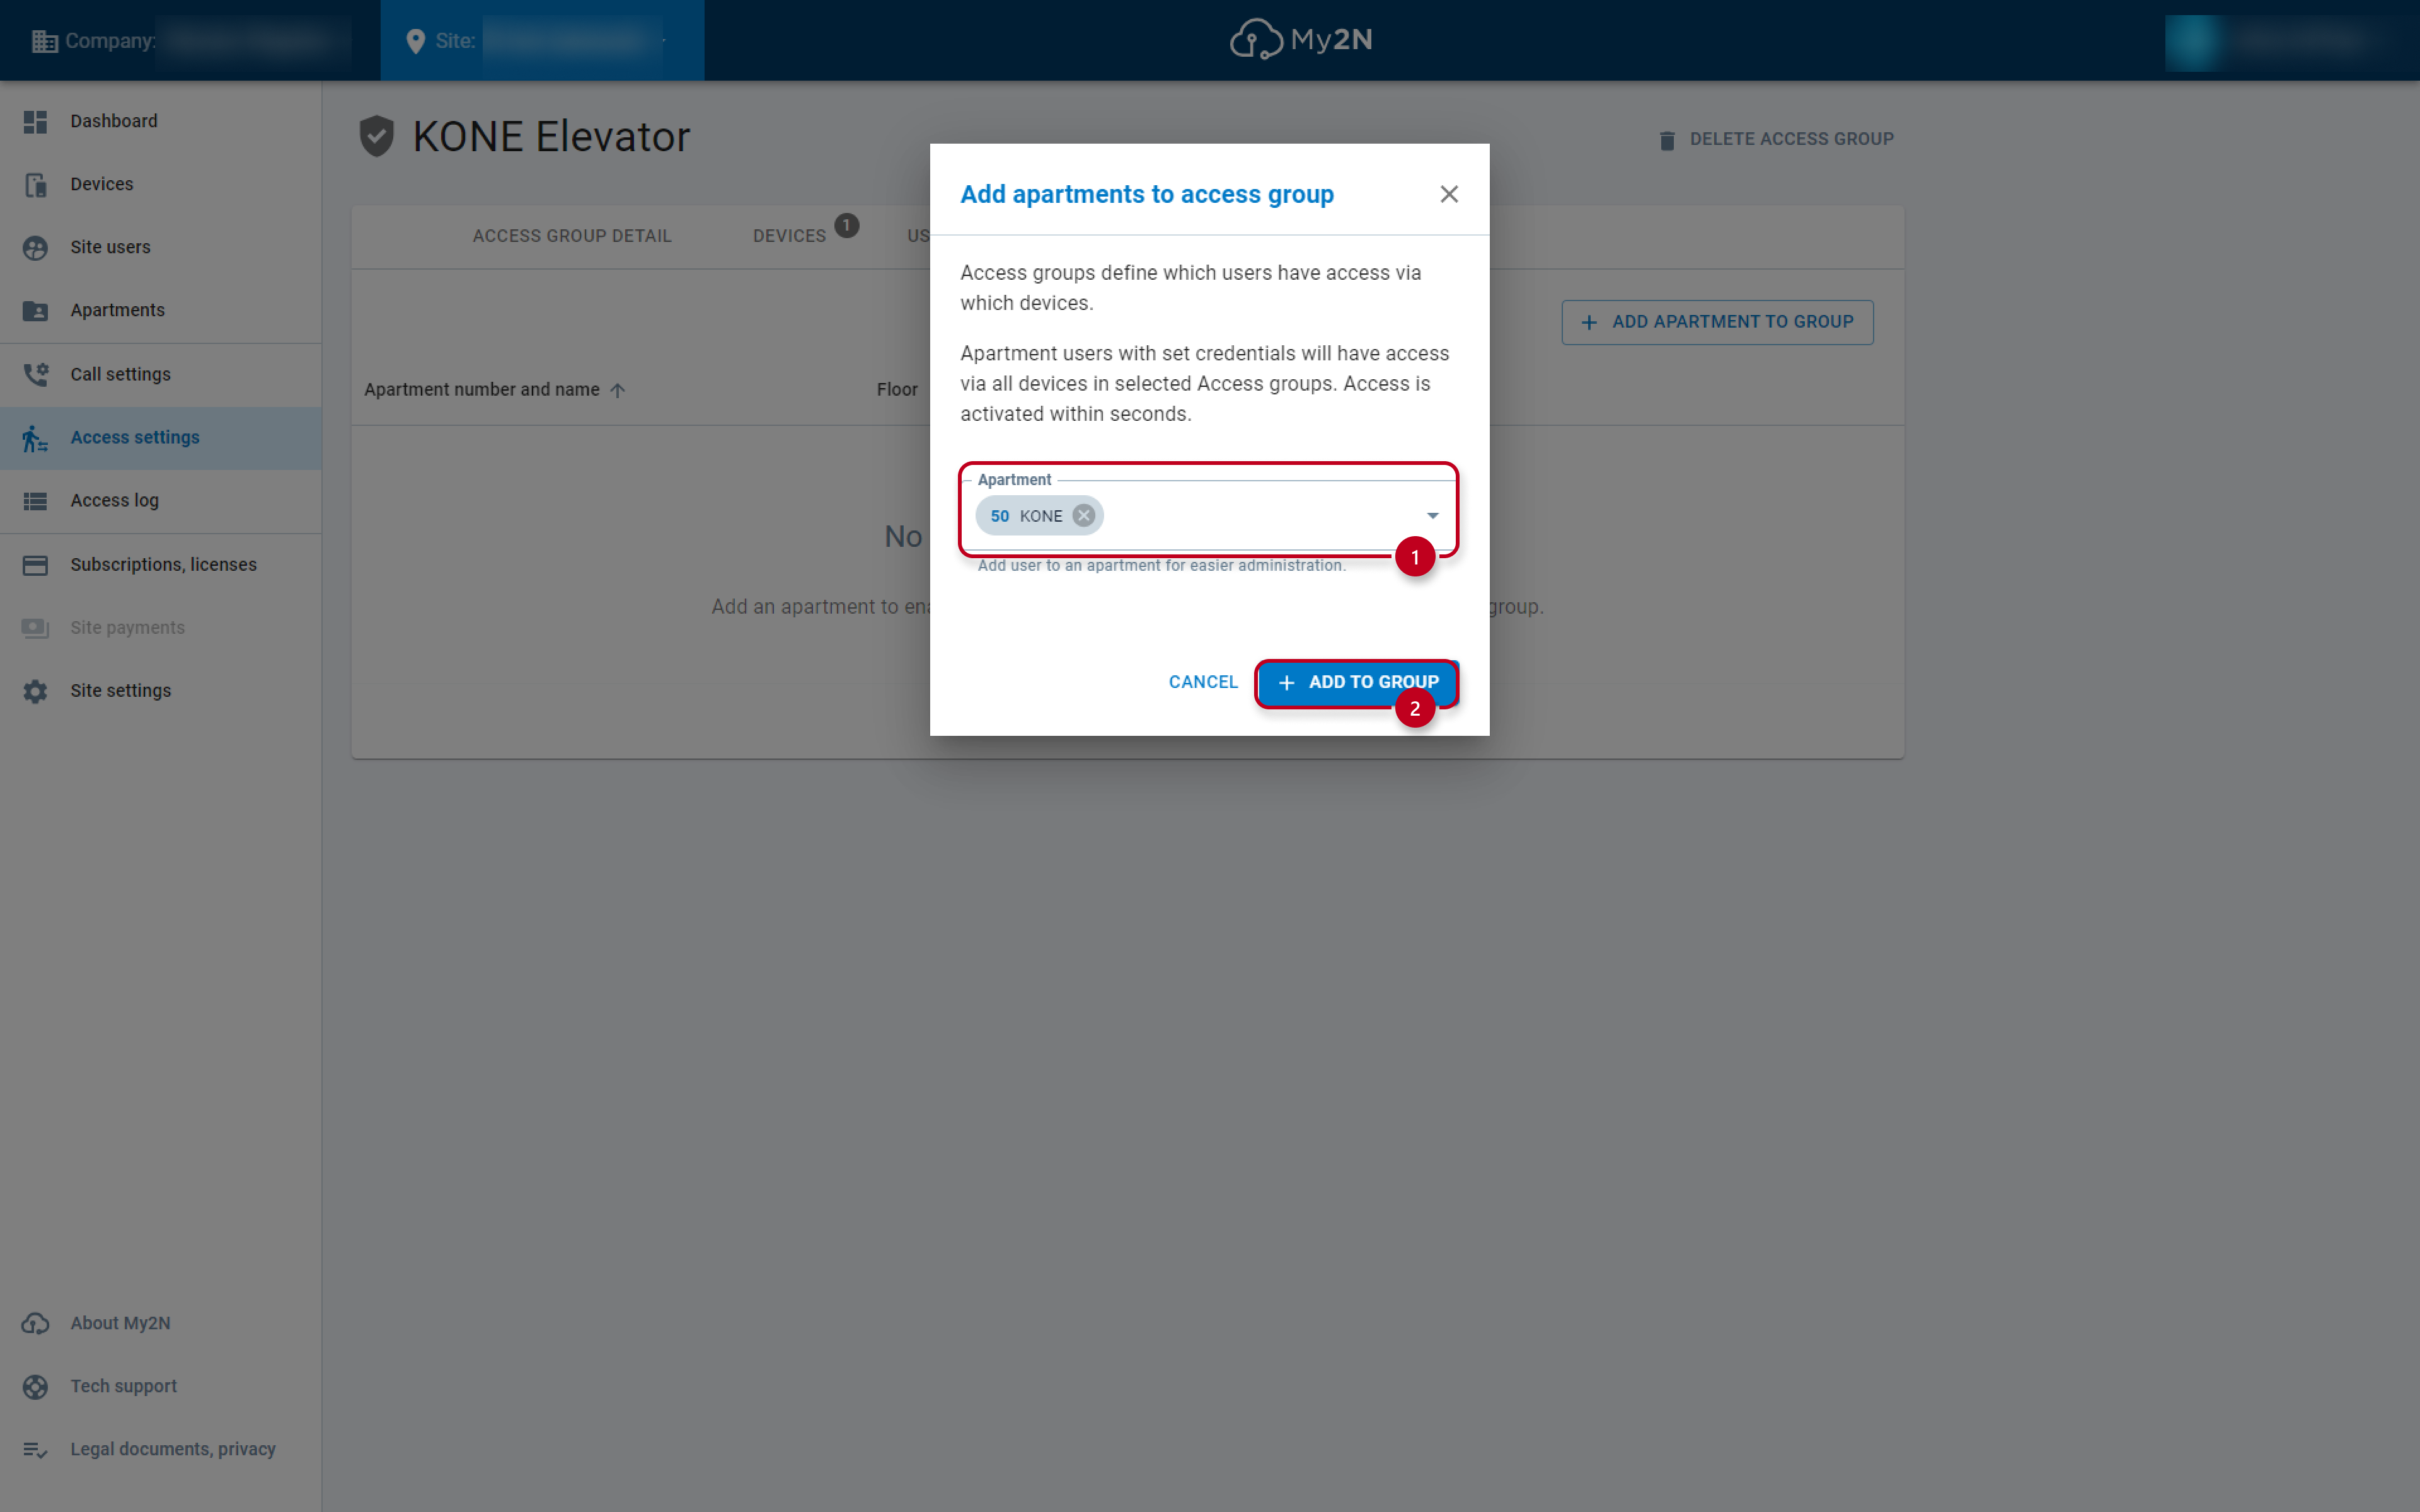
Lastly, go the apartments section -> click on the option add apartment to group ->
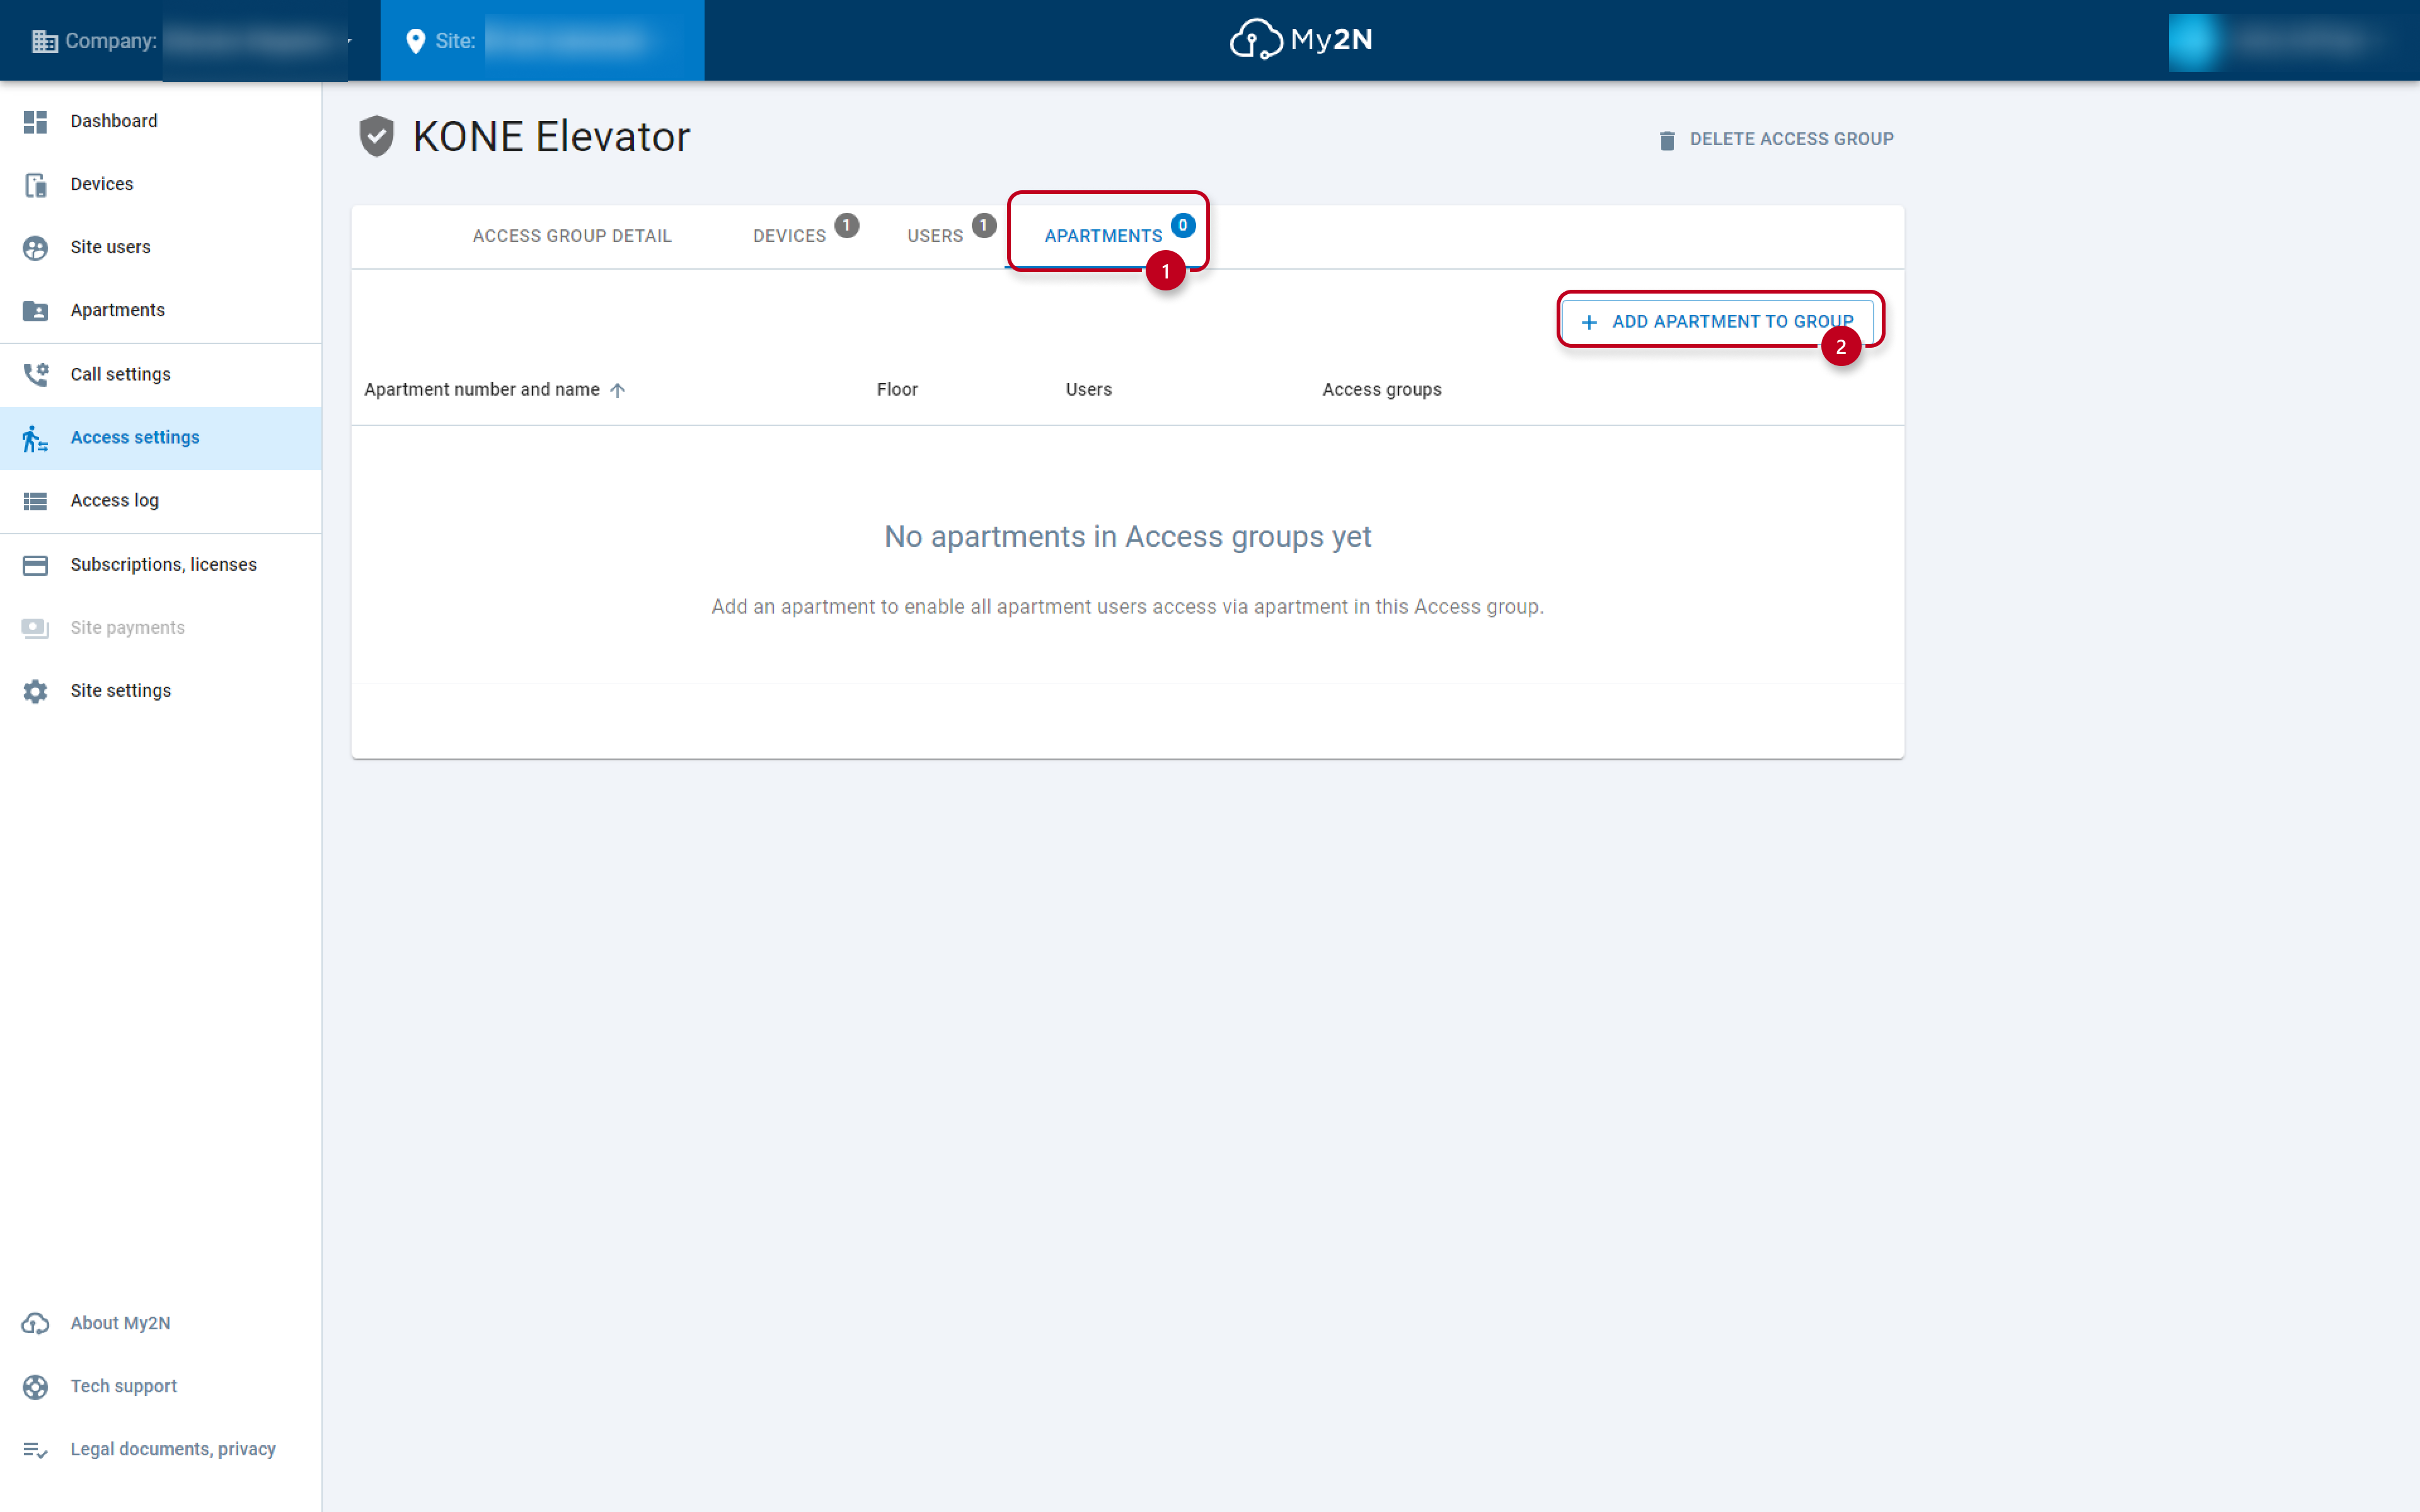
Select the apartment or create a new one -> click on the option add to group.
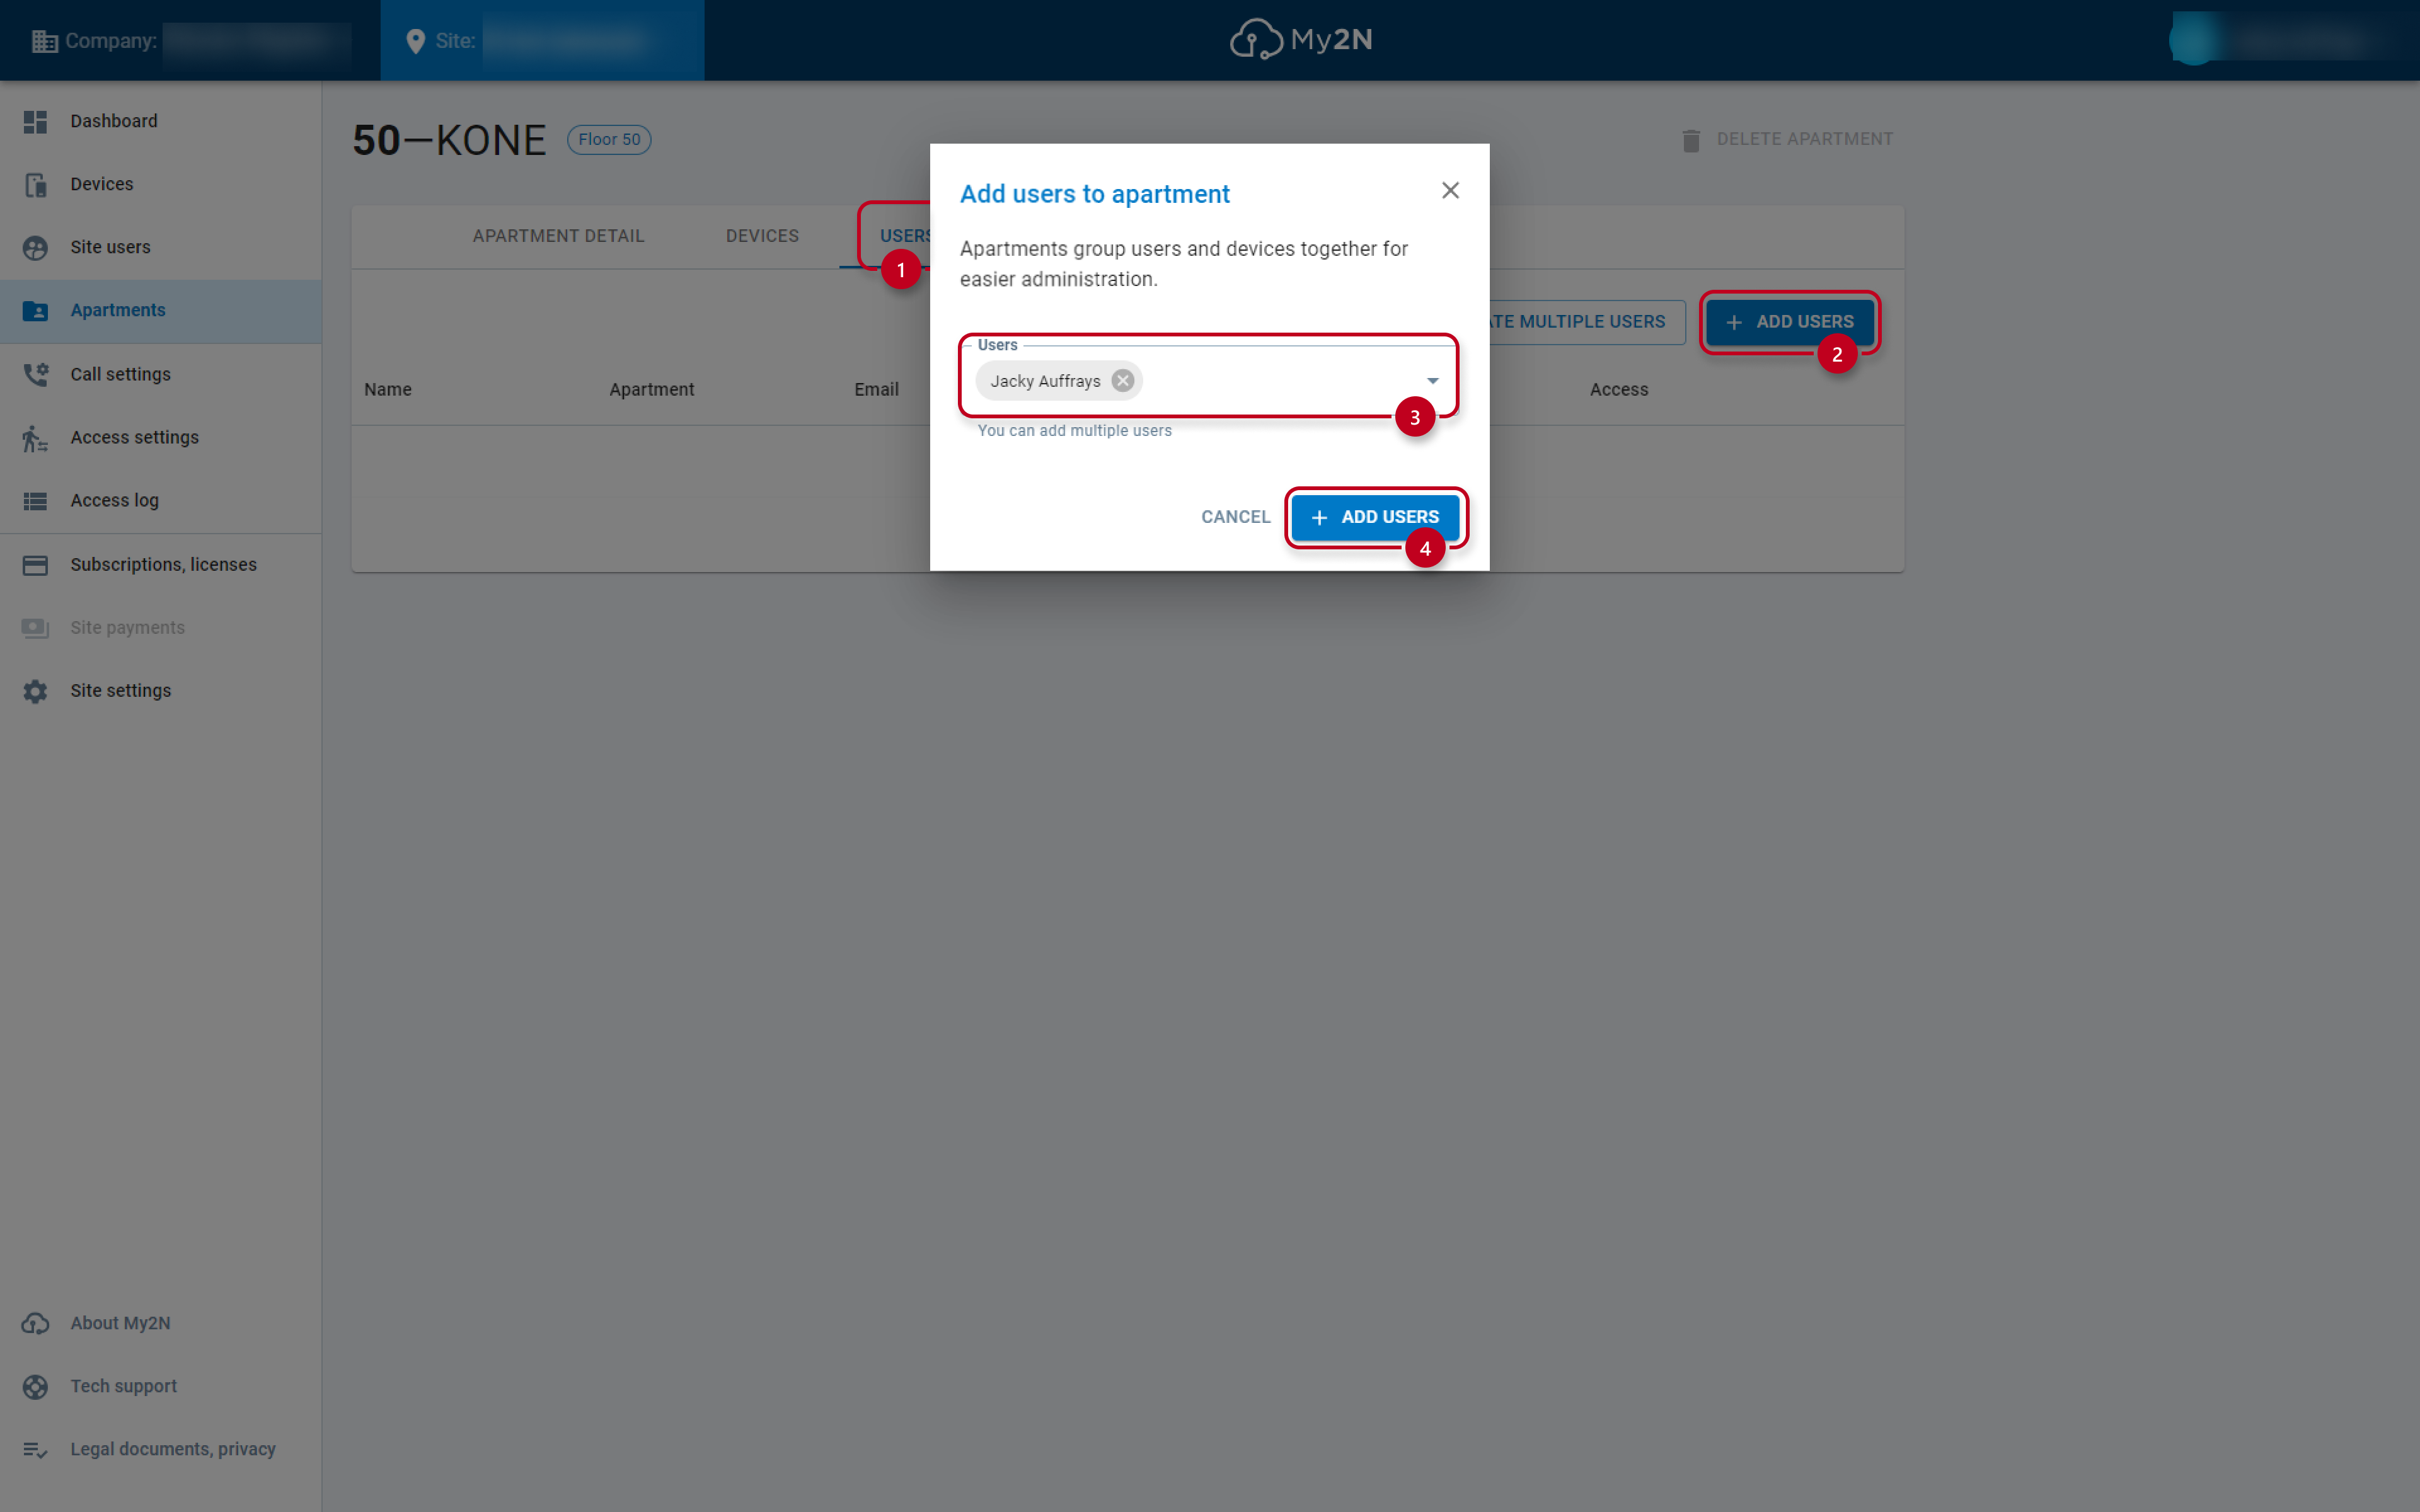
7) Add the user to the apartment as well. Go to the section apartments -> click on the correct apartment ->
Go to the section users -> click on the option add users -> select the user -> click on the option add users.
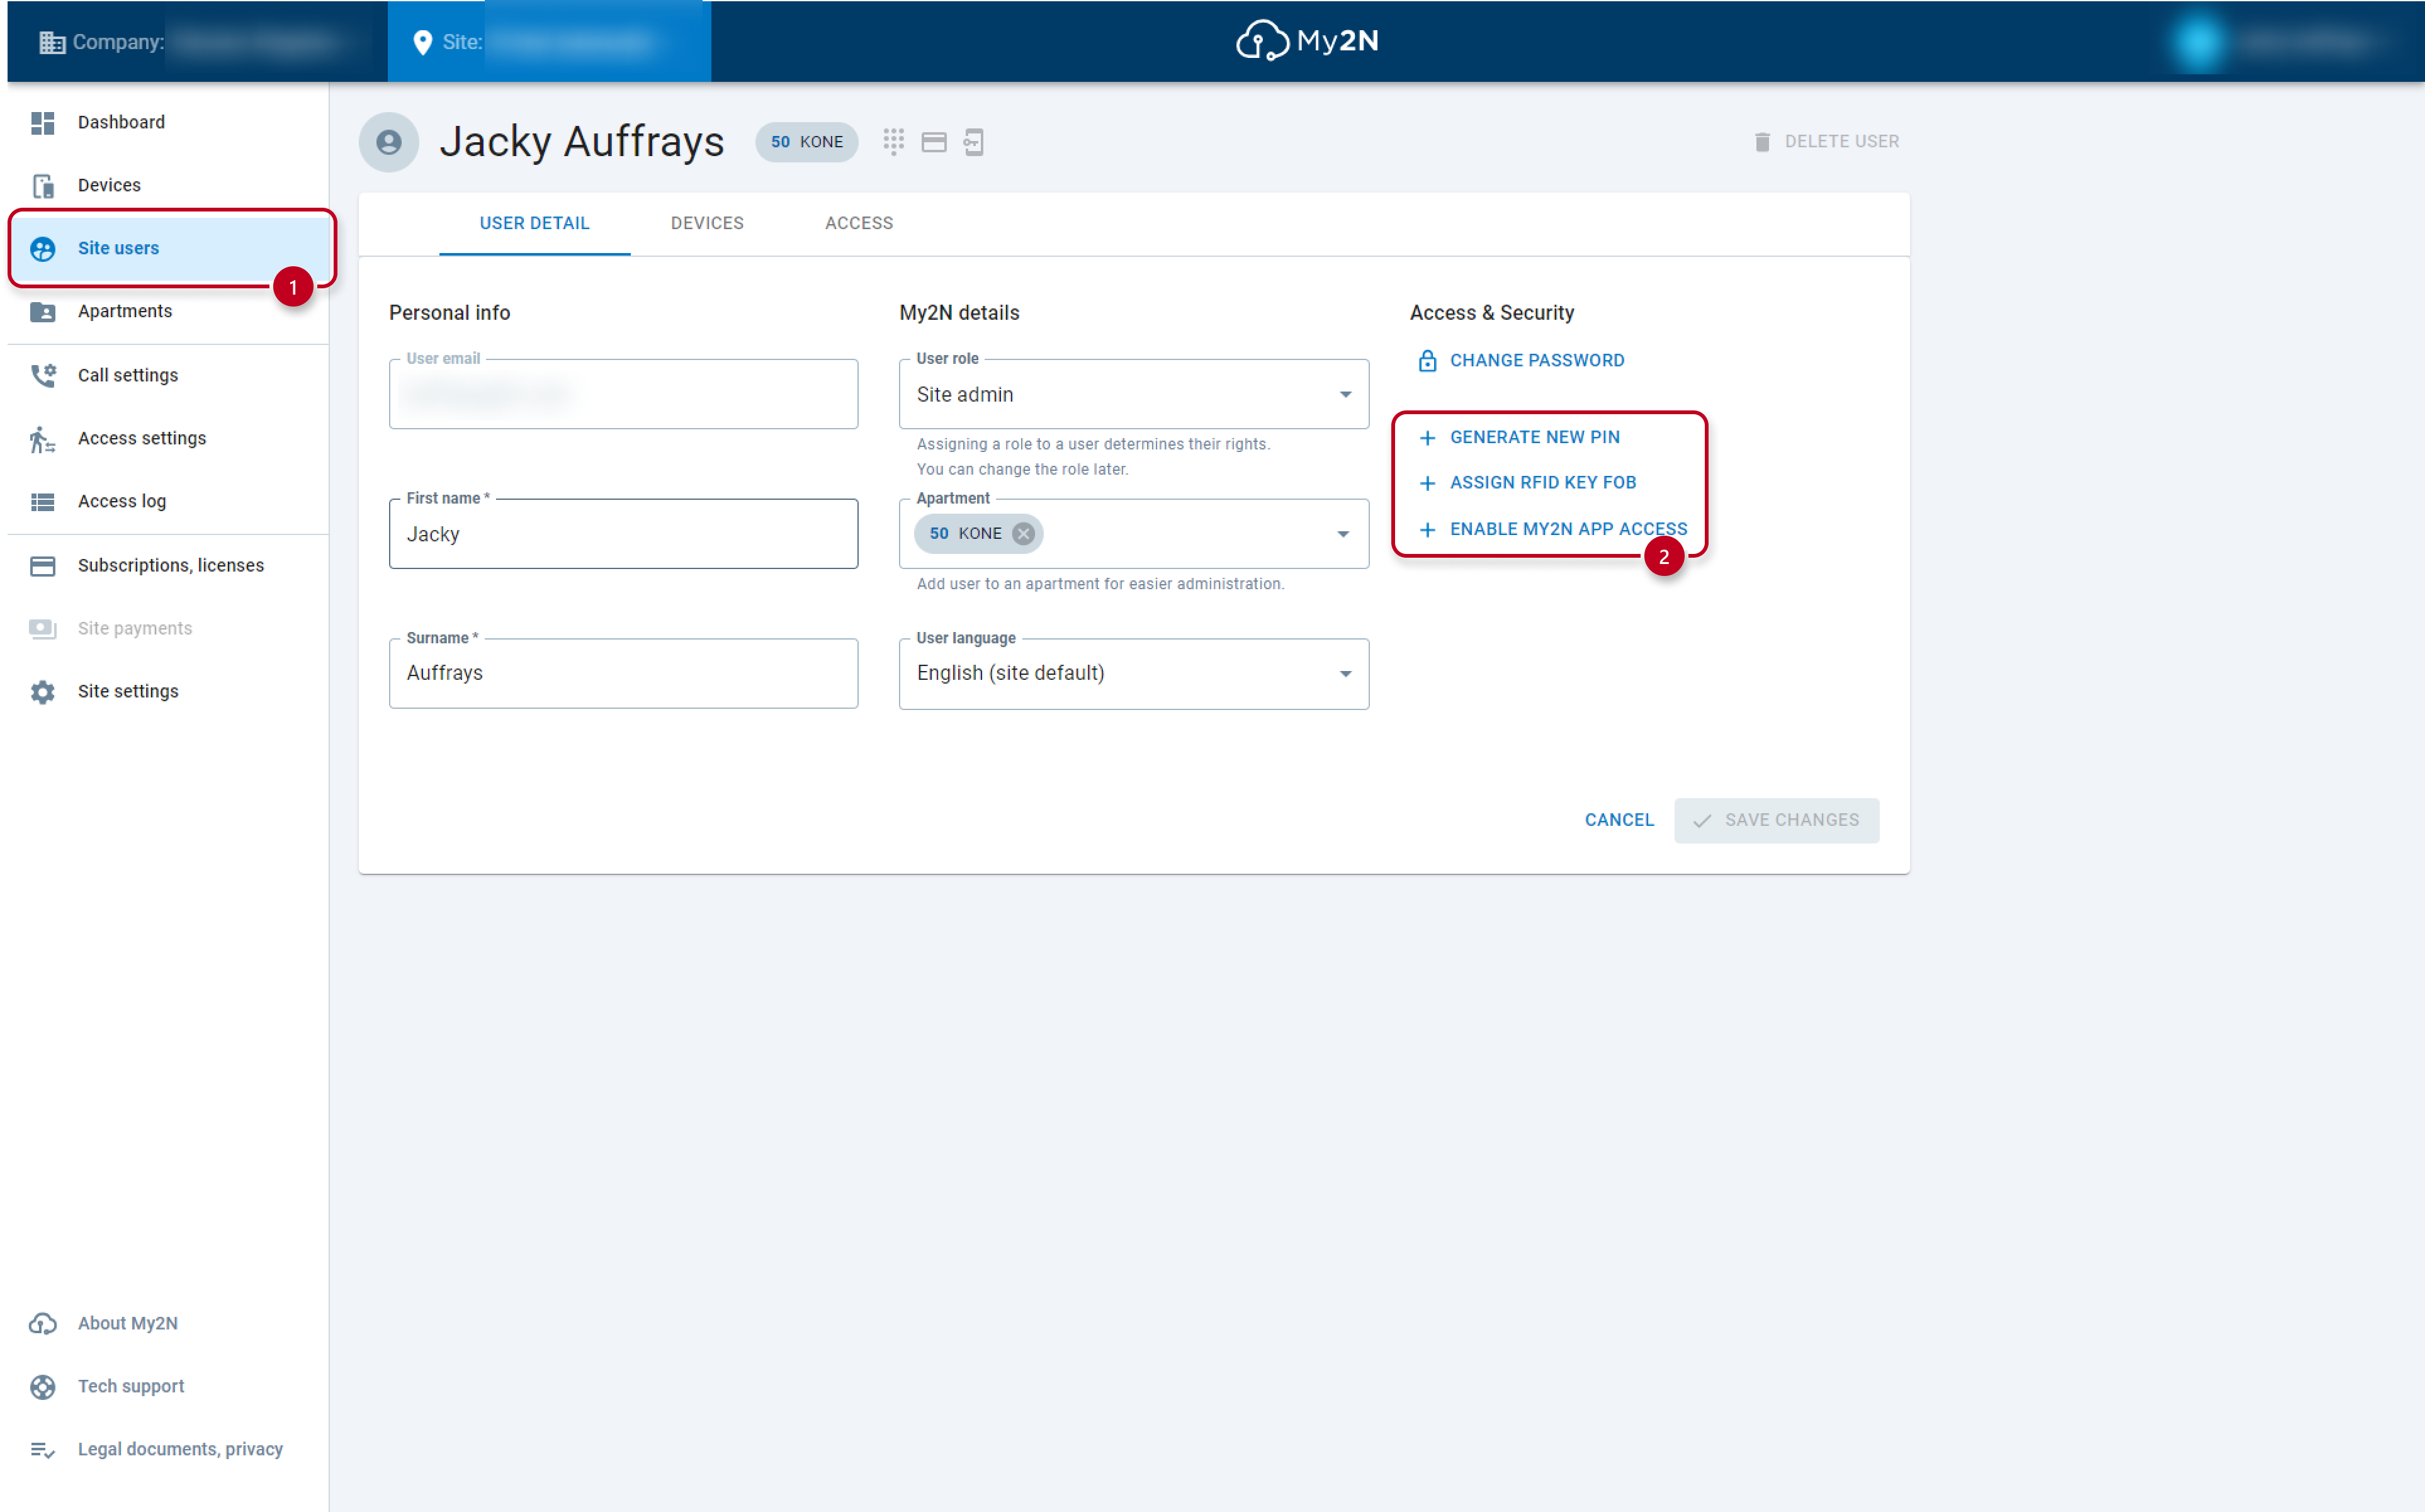
8) Add credentials to the user in the section site users. You may use a PIN code, RFID card/key fob, and My2N app access.
After all these steps are completed, you have successfully configured the integration.