How to set up Prepaid Wi-Fi Hotspot
1. Log in to the 2N® EasyRoute/ 2N® SpeedRoute device on IP address 192.168.1.1 as a Admin: User: Admin Password: 2n
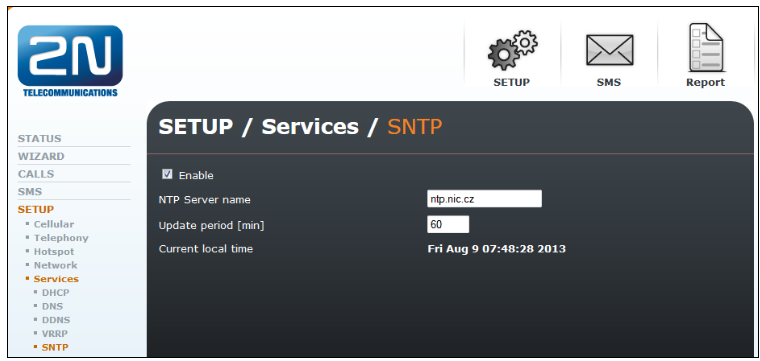
2. Set up time server. Go to menu SETUP → Services → SNTP fill in the IP address of some NTP (network time protocol) server plus set up your time zone.
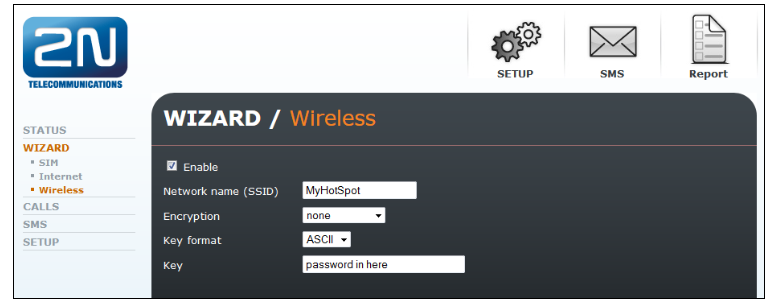
3. Enable Wi-Fi in menu: WIZARD / Wireless / (you can do the same in SETUP / Network / WLAN menu). Enter there the name of your Network and the password.
4. Enable Hotspot in menu: SETUP / Hotspot / Basic, you can select there between 2 options:
- Manual Mode: It means that you will generate a ticket for every single user who will try to connect to the internet using the HotSpot. Every ticket will have its own connection time, FUP Limit (if enabled) and valid time and you will be able to calculate the price for the connection time of every user.
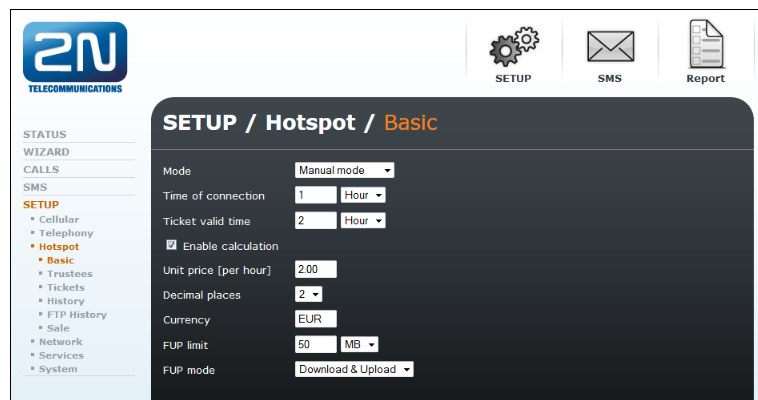
- Automatic Mode: Everyone will be able to connect to the HotSpot for the same amount of time, same amount of data (if FUP Limit is defined) and same price.
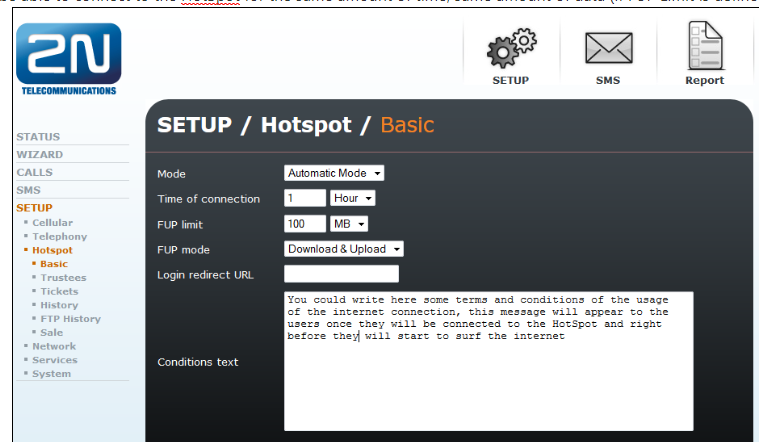
Enable billing: you can define the price of connection. Defined price = cost of connection per ONE hour.
Note: when admin enables Hotspot, his MAC address will be automatically fill in the Trustees. Admin
would not have to use the code to access the Internet. In order to use the code, delete your MAC address from
Trustees.
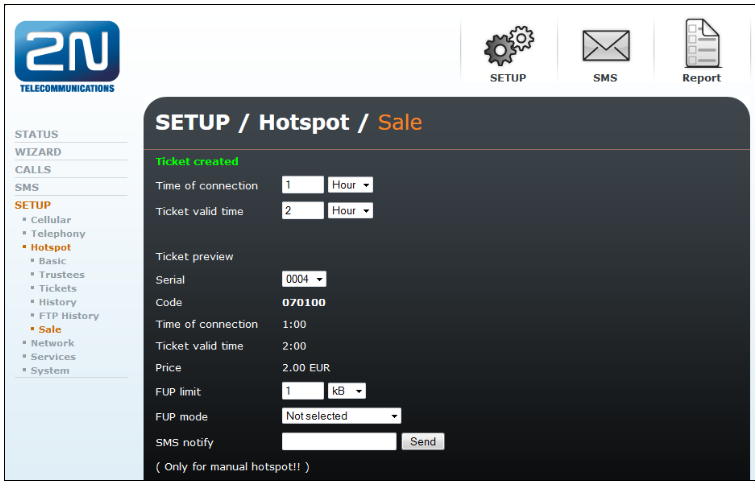
5. You can start sale/generate the codes:
- In Admin account: SETUP → Hotspot → Sale use the button Sale
- In Operator account: User: Operator Password: 2n menu SALE
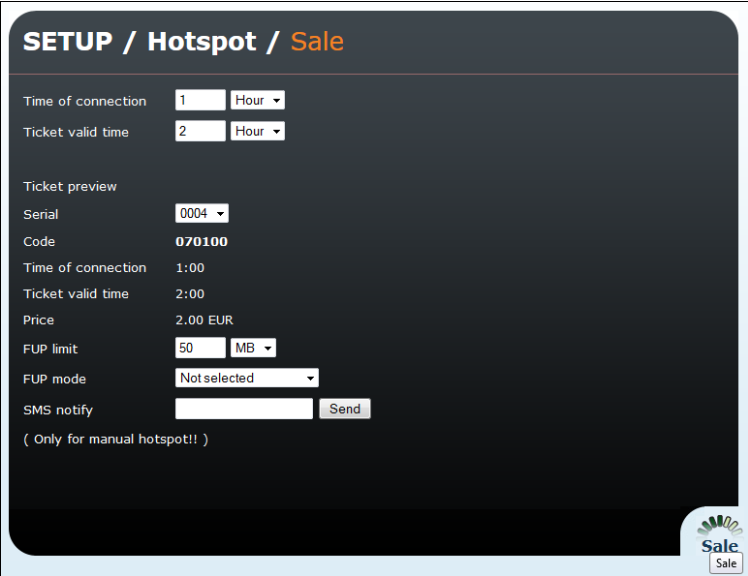
Right after you click on sale, you will see the following screen and you can see there the generated code for the user, you could write it down on a piece of paper or a bill or you could deliver this code over SMS if you know the mobile number of the user by filling the field SMS Notify.
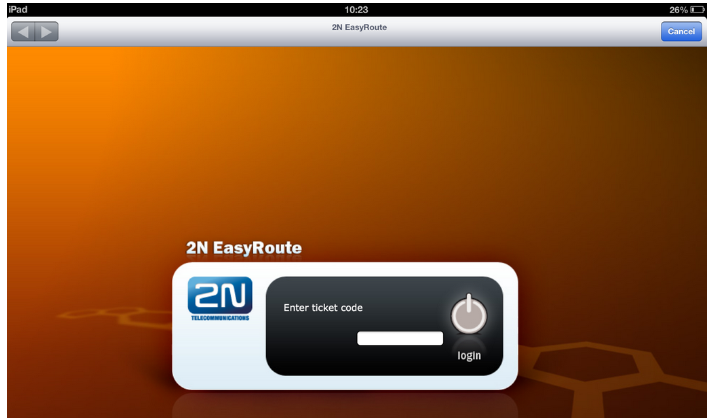
6. If you select the Manual Mode, every user trying to connect to the HotSpot will see the following screen for entering the code generated during the sale.
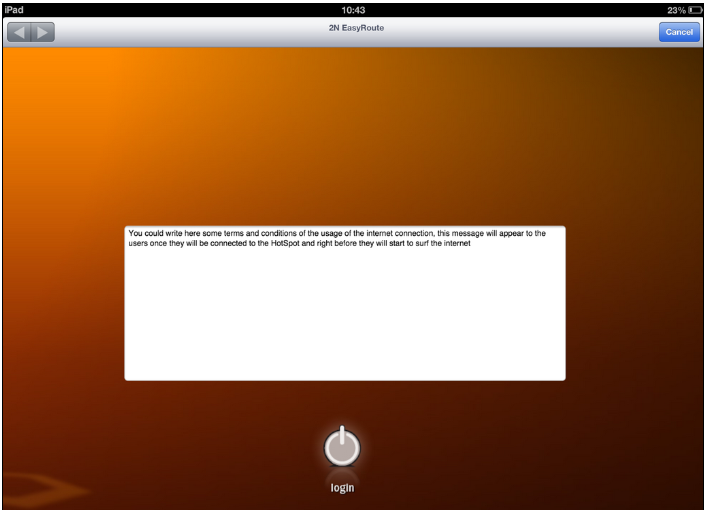
7. If you select the Automatic Mode (no tickets are generated), the users will see the following screen before connecting to the internet