Test server - 2N® SmartCom server configuration
- 2N® SmartCom (futher only apprev. SmC) test server location:
Public IP address 90.182.112.38
Listening port 1561 - Install 2N® SmartCom control panel, which will let you connect with 2N® SmC server. http://www.2n.cz/en/products/m2m/smartcom/
- For the access data (login, password) please contact your salesman or send a request go to https://support.2n.cz .
- Then run 2N® SmartCom control panel, fill in the generated Login and Password, Server Address 90.182.112.38, Port 1561. Pic. 1.
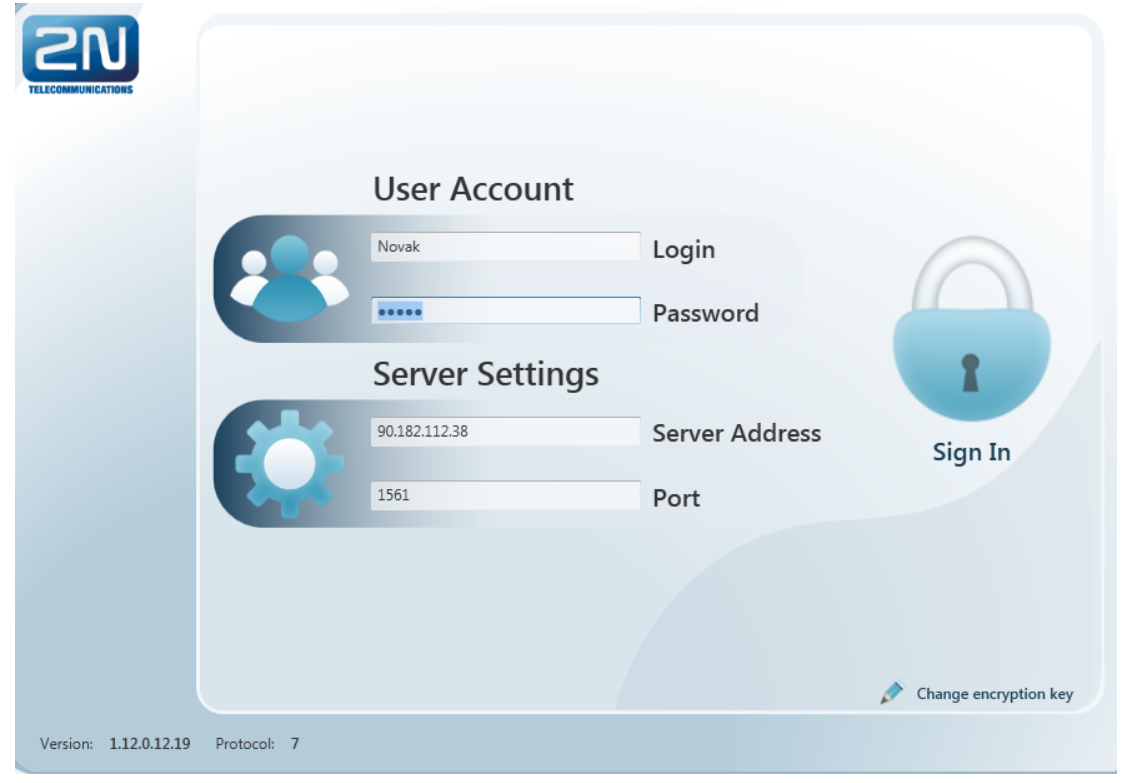
Pic. 1 - Confirm "Sign In".
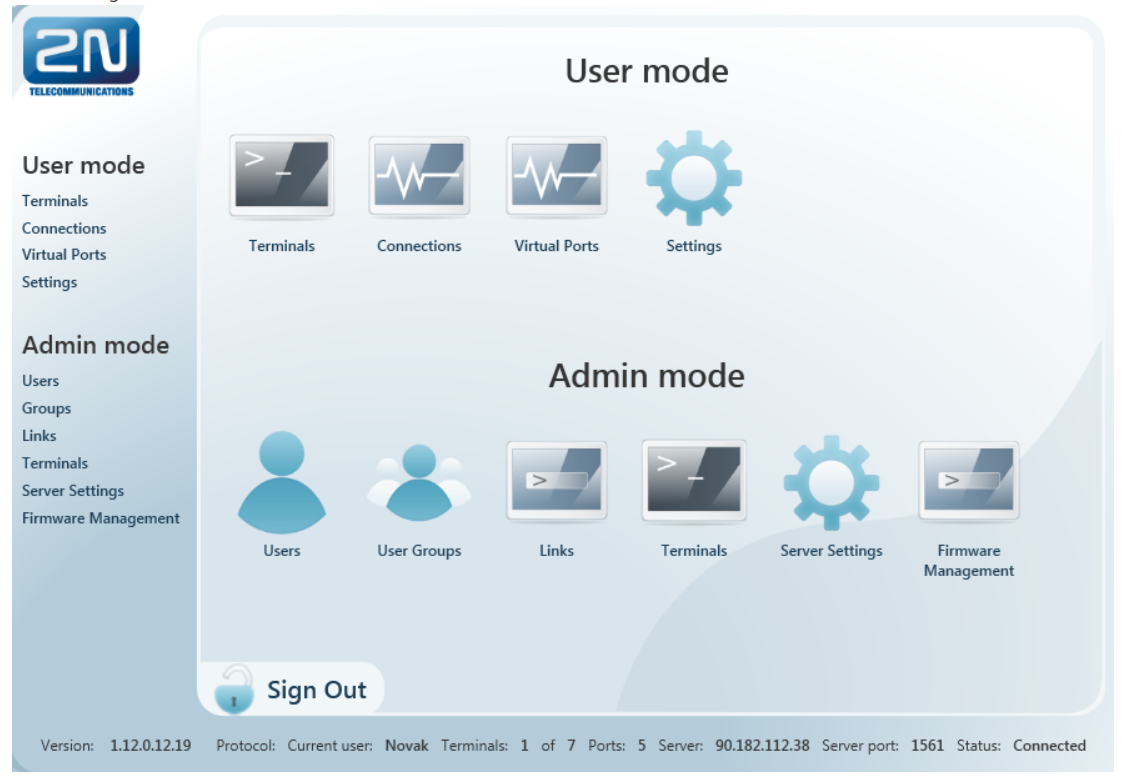
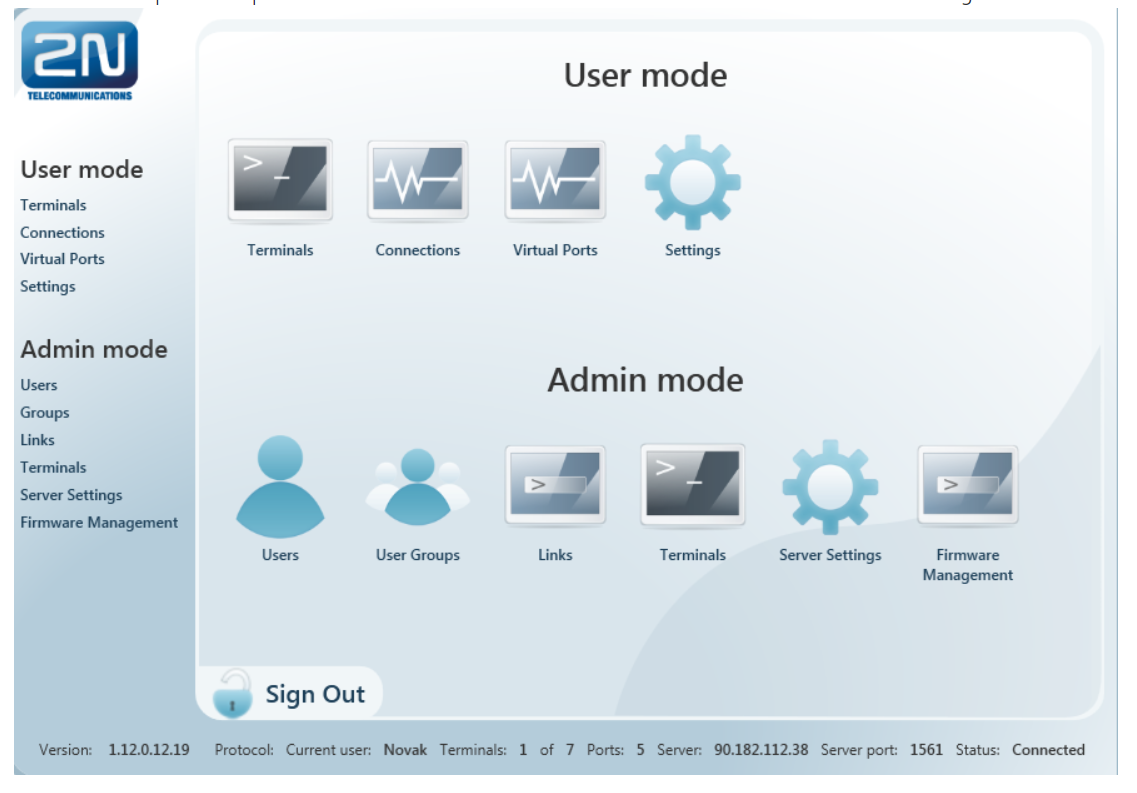
Pic.2 - Go to the tab "Terminals" in the section "Admin mode" Pic. 2.
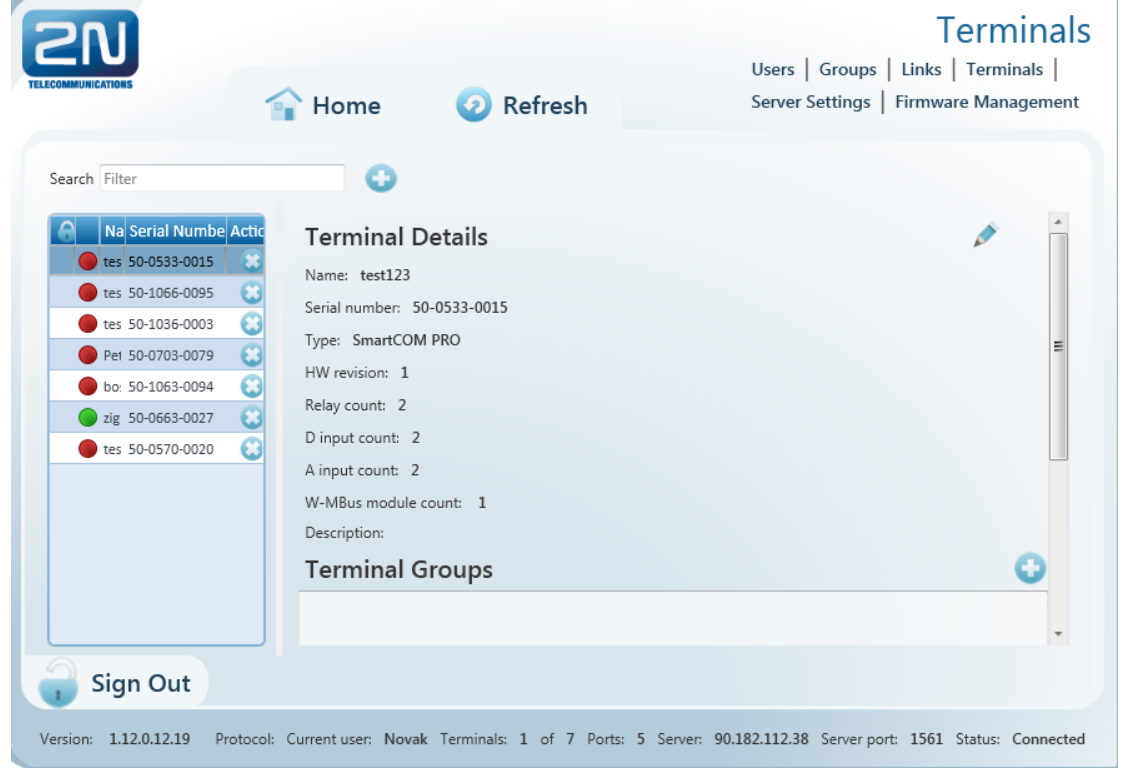
Pic. 3 - Then add the terminal by button PLUS Pic. 3. The most important data for correct connection 2N SmC to 2N SmC server are:
"Serial number" which you can find on the label placed at the backside of your 2N SmC or during the configuration on the main page of 2N SmC config program.
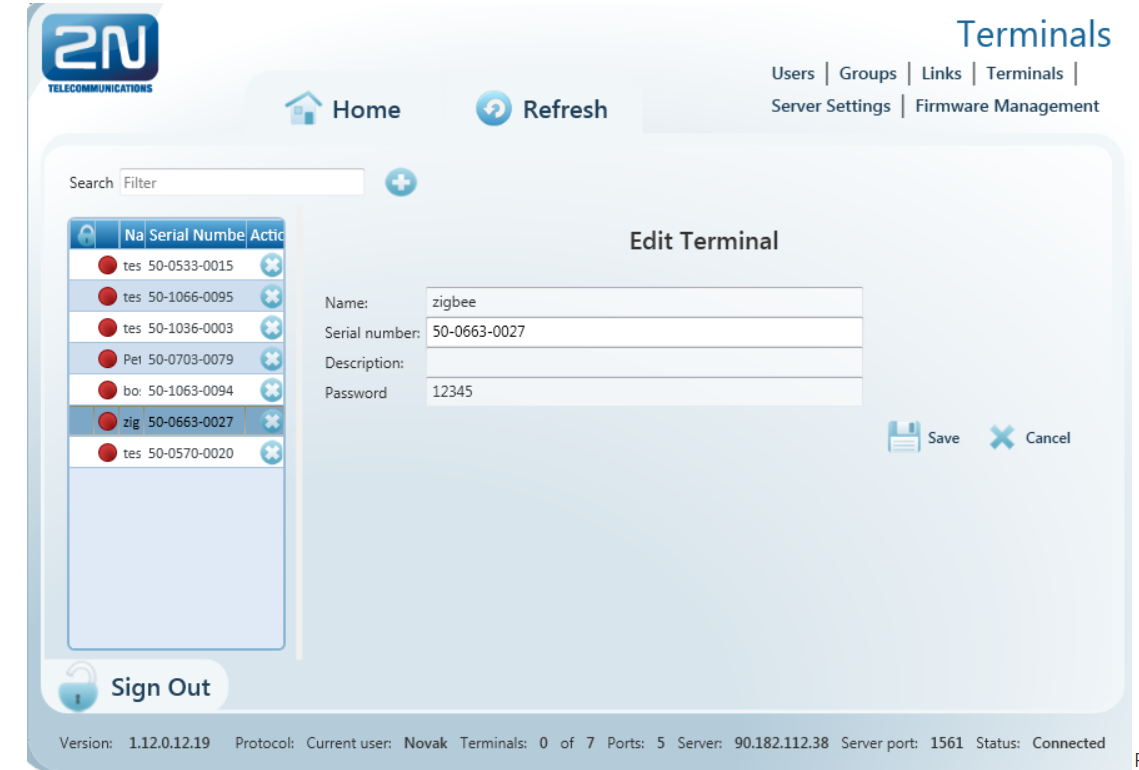
"Password" must be the same as the password, which you set during the configuration 2N SmC FAQ "How to configure 2N SmartCom". Do the "Save" button.Mind small and big letters!!!
 Pic. 4
 - If you correctly set "Serial number, Password" 2N SmC would connect to the server. Now you have successfully connected your 2N SmC terminal to 2N SmC test server. Pic. 5.
After that, in the same page "Terminals", you are allowed to add your 2N SmC terminal to Terminal Groups 2NTest.
Herein you can also set parameters of RS232/RS485.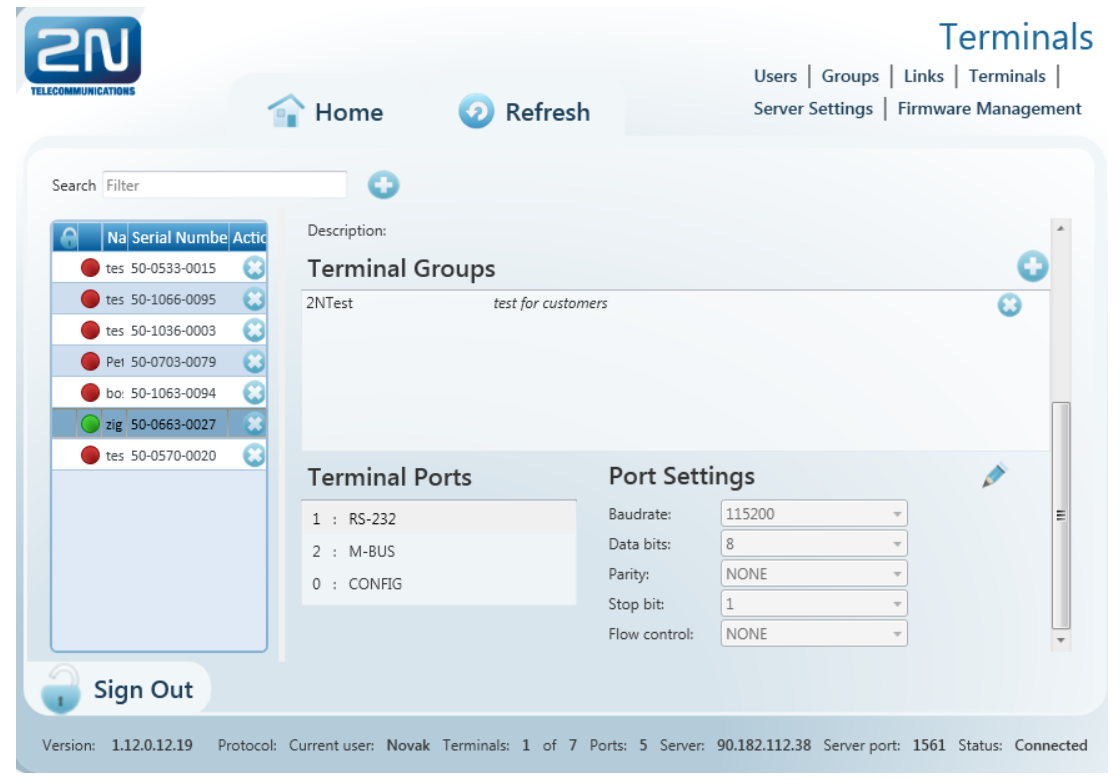
Pic.5 After successful connection is the next important step to install null-modem emulator com0com. You can install it in the sheet "Settings" in section "User mode" Pic. 6.
Pic. 6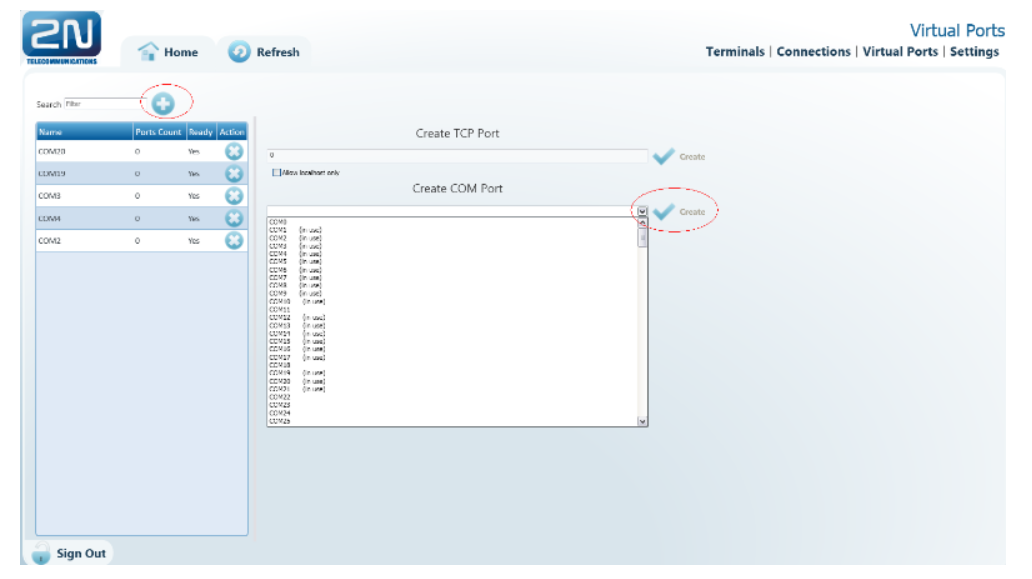
Pic. 9- In the tab "Virtual ports" add by button PLUS new virtual ports and confirm all by "Create" Pic. 9.
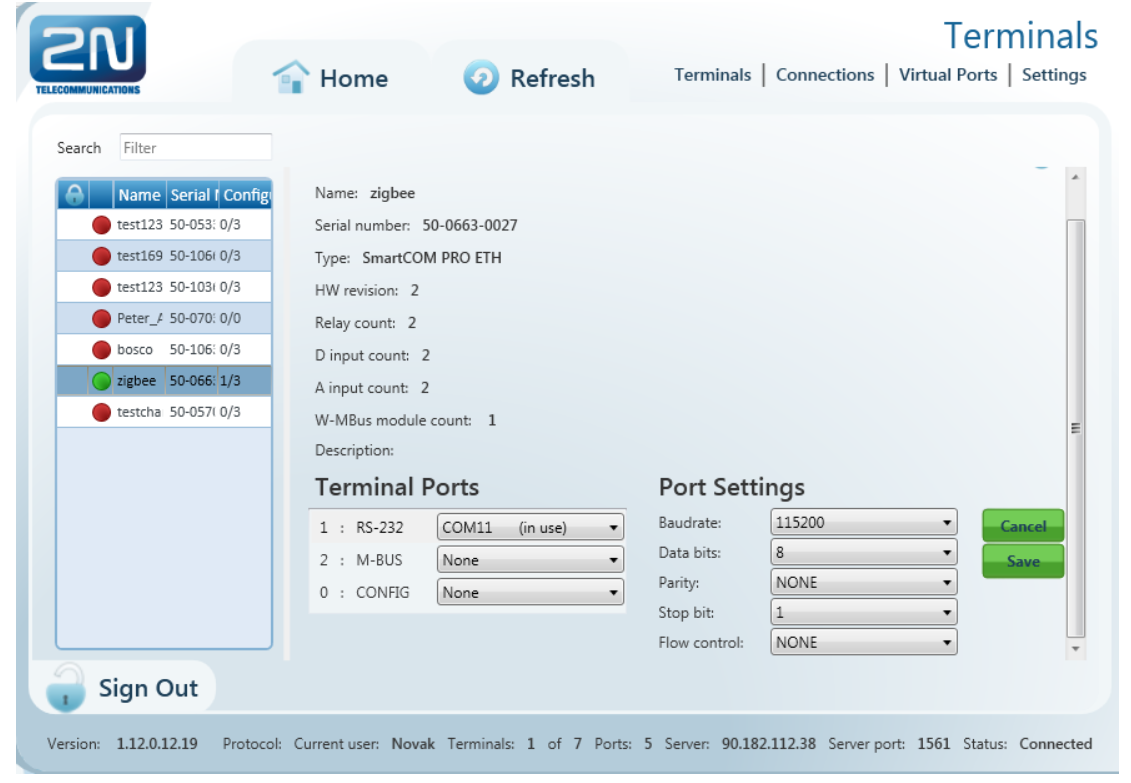
Pic. 10 - In the tab "Terminals" in section "User mode" you can choose COM port. Further you can set parameters RS232/RS485.
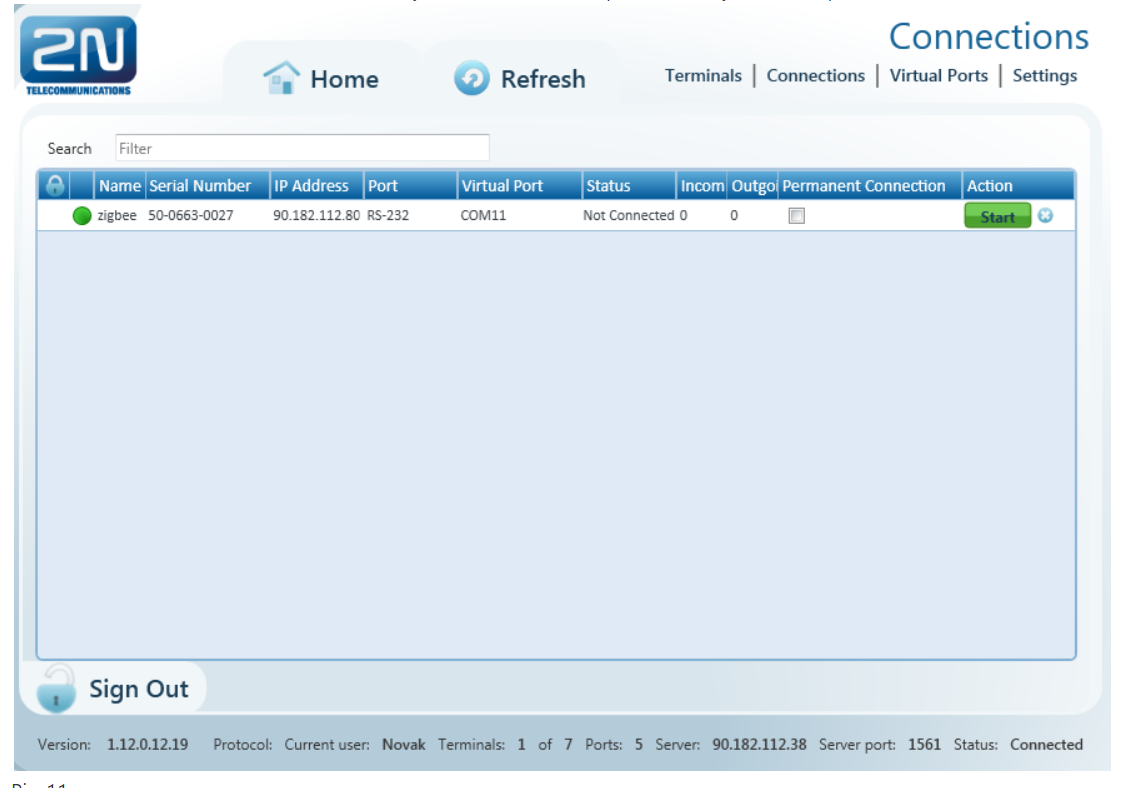
Pic. 11 - In the tab "Connections" you can download the data by pressing "Start".
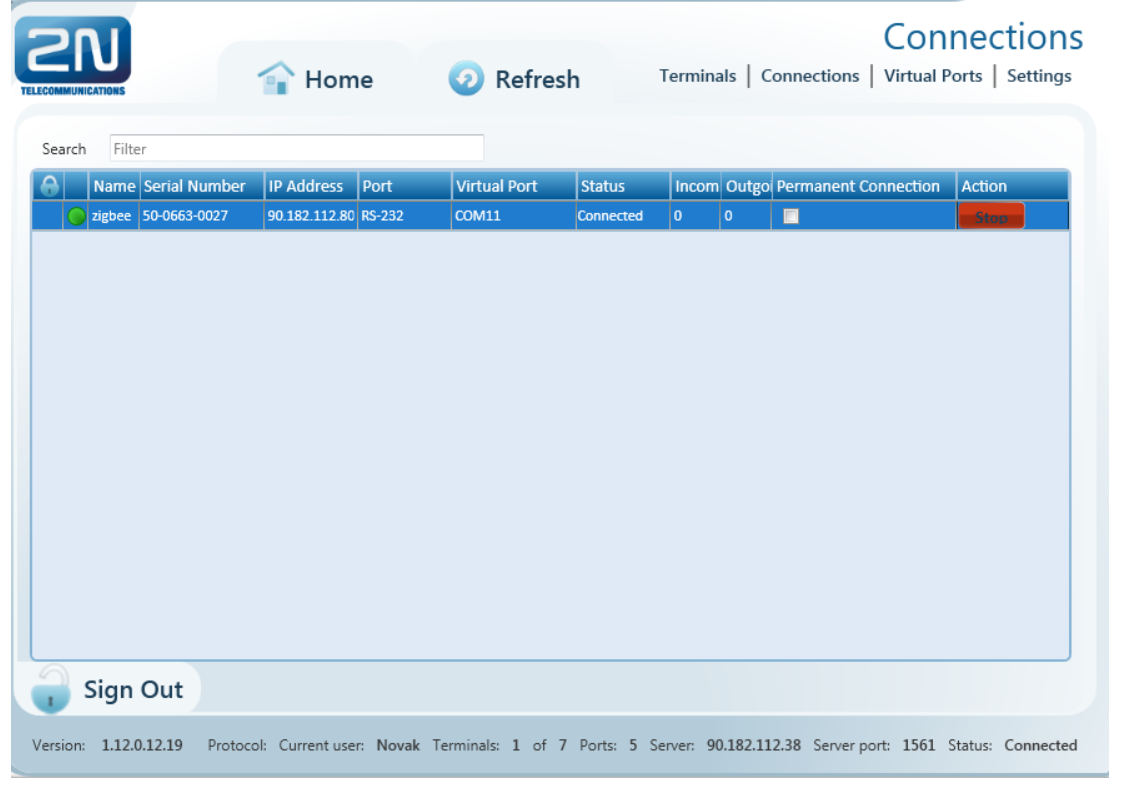
Pic. 12 - Right now, you have successfully set that data will be transfered to the COM2 port of your PC. You have to set up further details in your application. After that is the application able to read the data, example Pic. 13.

Pic. 13
Troubleshooting:
Test 2N® SmartCom (PRO) - Terminal error buffer code description