2N Contact Centre Solution - how to install
1) First of all – you need to upgrade your NetStar to version 4.2.0 or higher ( how to upgrade NS find on:
https://wiki.2n.cz/display/FAQ/Firmware+upgrade+-+How+to+proceed) or use Netstar SW version 1.2.2 or higher.s
2) Create User in your NetStar (in section User- Users & Groups). By this User will Contact Centre communicate with NetStar!
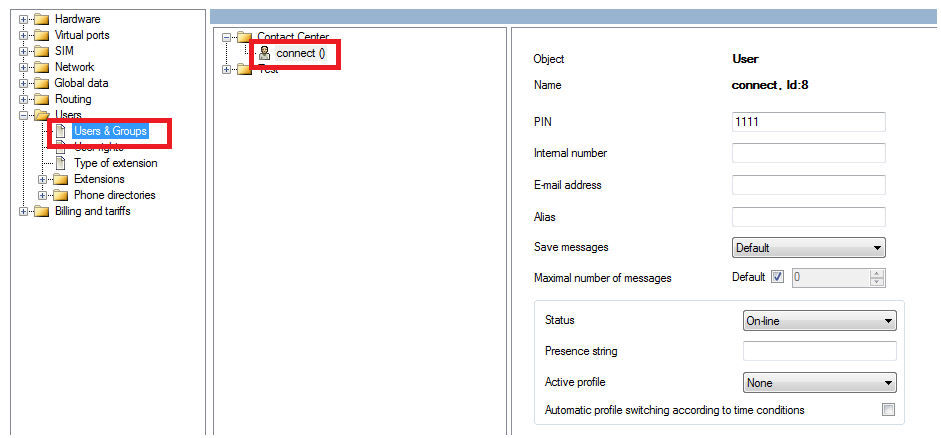
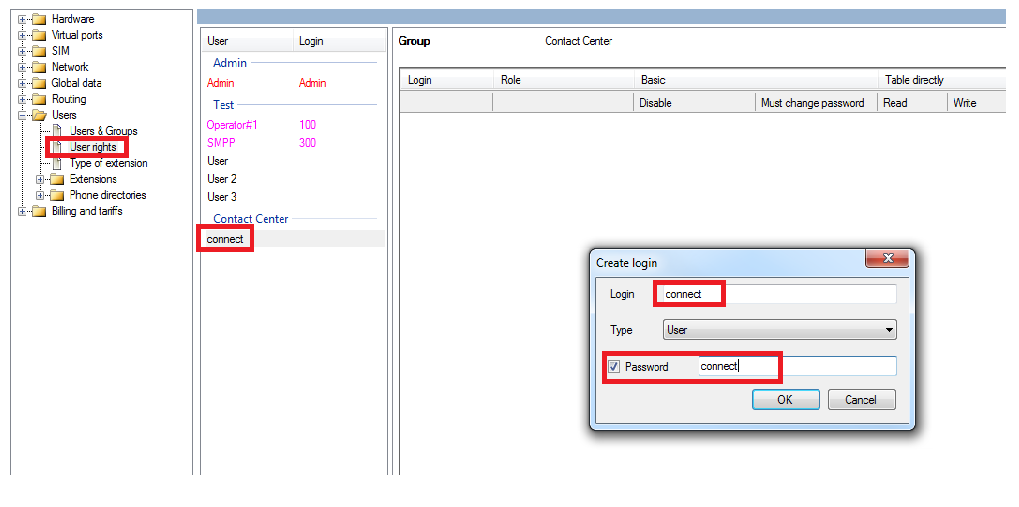
We created User: connect. Now we need to create login and password to this user. (In section Users – User rights.)
3) Install the 2N® Contact Centre Solution. HW requirements are ( 64b processor, 4GB RAM, 100GB HDD). It can be Virtual macine, Server or PC in the same LAN Network as 2N® NetStar is! Software is distributed with Cent Os 6.4 systém – which will be installed as well. If you are going to install Contact Center Solution on the virtual PC you need to enable virtualization (used as the hardware acceleration) on the BIOS.
Below all the step of installation are described.
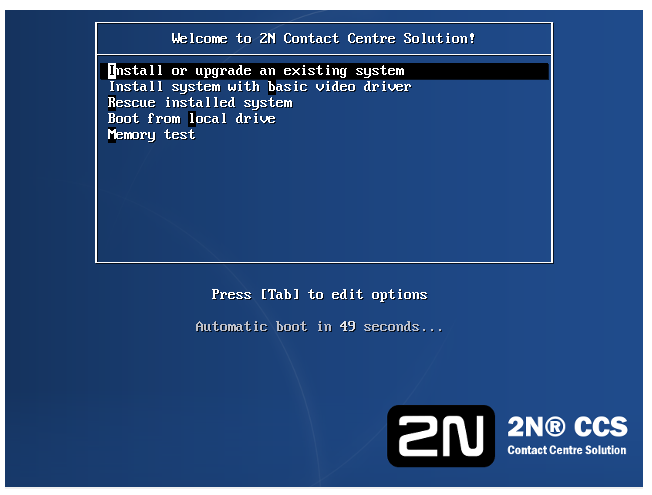
4) Select the first option or just wait.
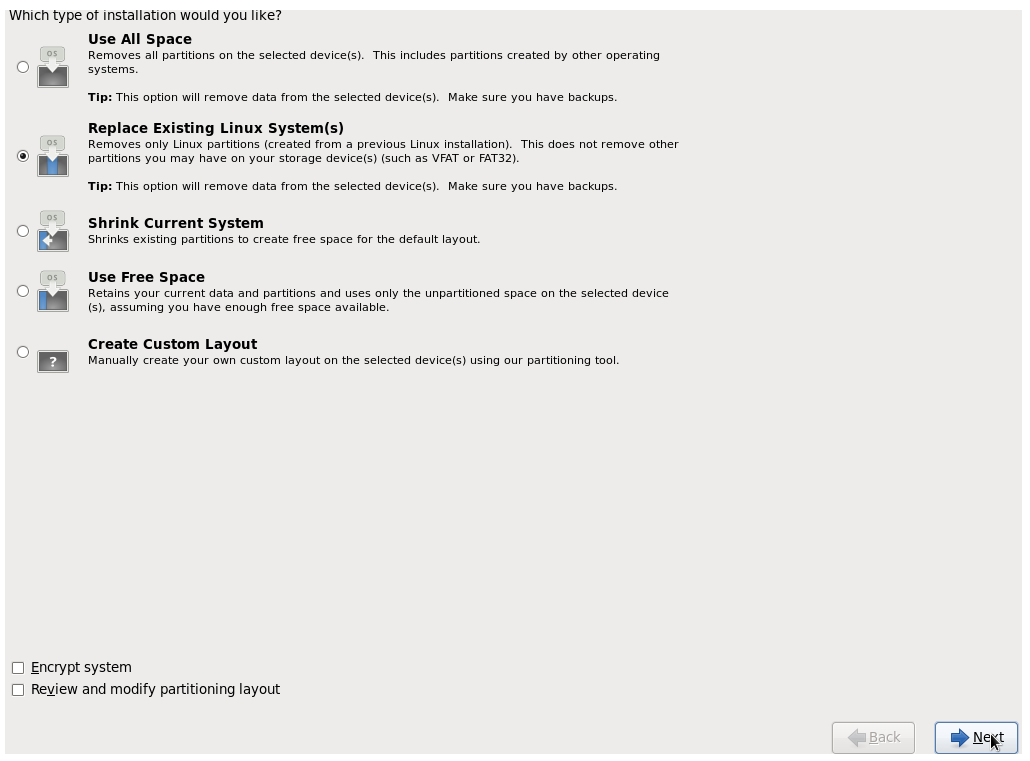
5) Then the systém will request to select one of the options below.
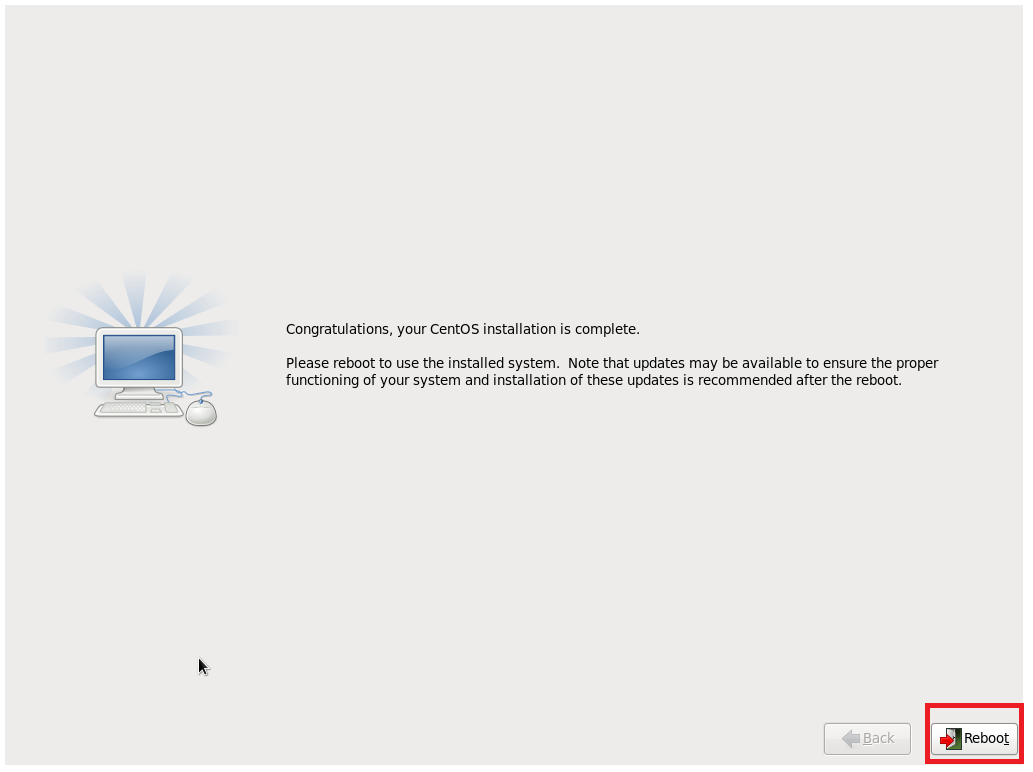
6) Installation will take approximately 15 minutes. After the installation is complete you will be requested to reboot the system.
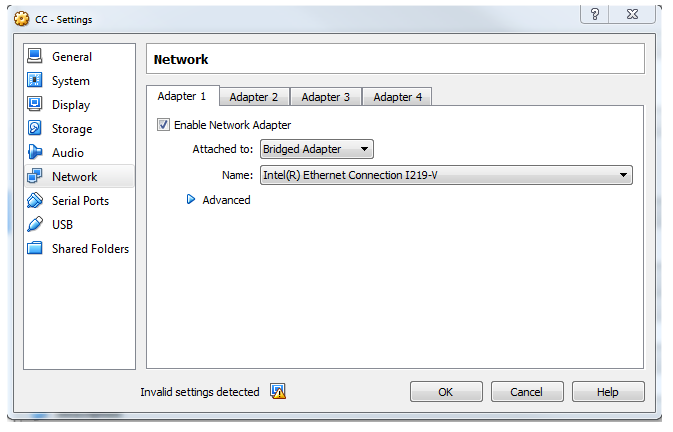
7) In Network section it is important setup Bridge Adapter.
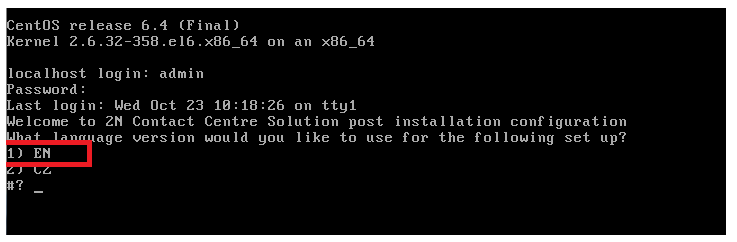
8) Eject installation disk from CD-ROM. Enter login and password. By default login is admin, password is 2n.
9) Select language and proceed with settings.
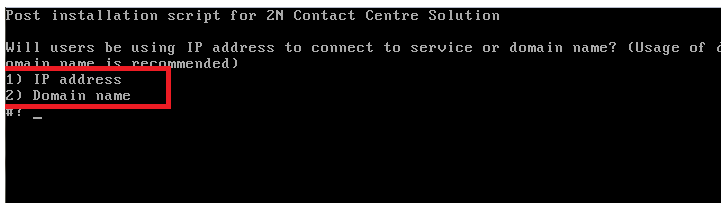
10) Then enter IP address of CCS or its domain name
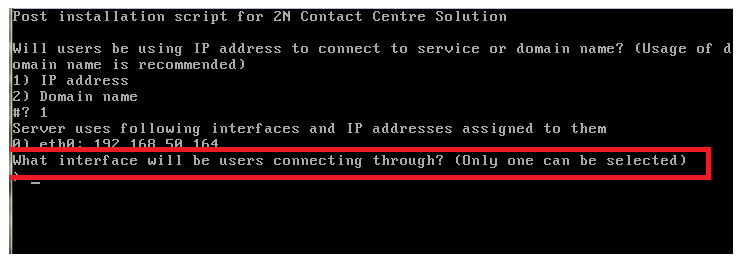
11) Select network interface for communication with Netstar and users (in the figure there is only one available Ethernet interface)
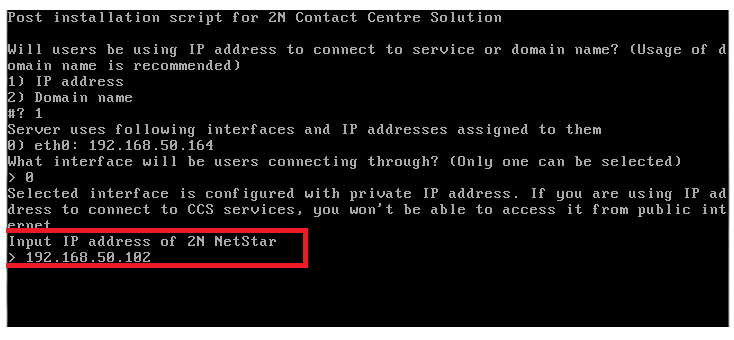
12) Enter IP address of Netstar
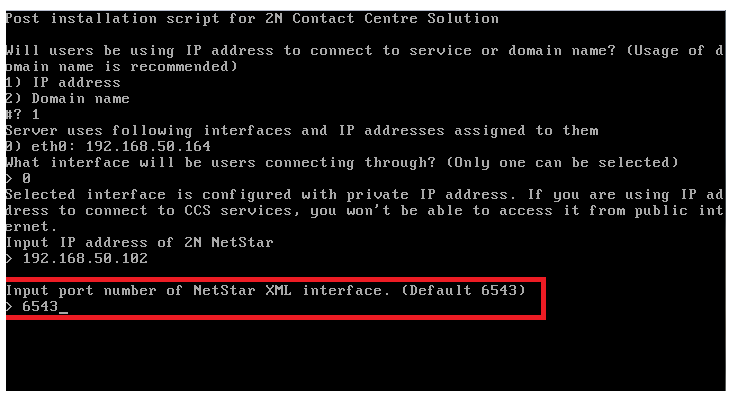
13) Enter TCP port for communication with Netstar, by the dafault it is 6543
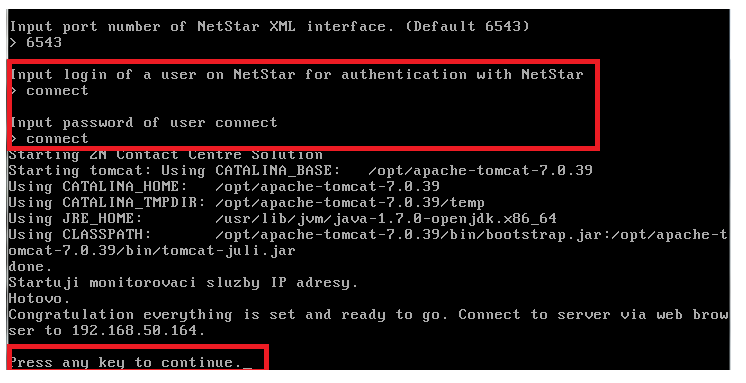
14) Enter login/password to connect to Netstar (we have created user the Contact Center user with login - connect and password - connect. After the connection is established you will be requested to press any key.
15) In this menu you can modify basic parameters of CCS

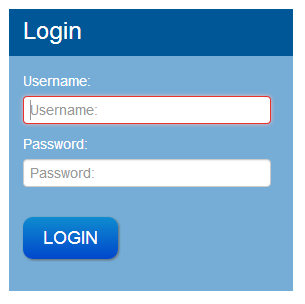
16) Connect to CCS via your web browser (recommended: Mozilla Firefox, Chrome, IE v.10) Use login: superadmin, password: 2n
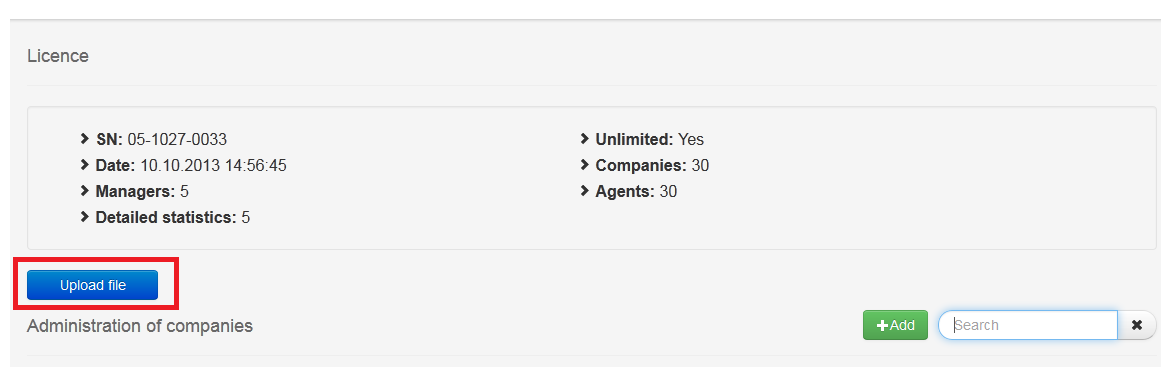
17) Upload the license which you received from Technical support department and create a company by clicking to “+Add” button
Now your CCS is ready to be configured.