2N® NetStar SW - How to install and license 2N® NetStar SW
This FAQ describes how to install 2N® NetStar SW. The 2N® NetStar SW is a virtual PBX that works the same as 2N® NetStar and offers the same 2N® Netstar Admin Tool as the hardware version. It has similar functionalities. With 2N® NetStar SW you can connect Softphones, IP phones or other solution working with SIP protocol.
Mandatory Software and Used ports
For use of 2N® NetStar SW and it's configuration software 2N® SW NetStar Admin Tool you need to have installed and enabled following software
- Microsoft Visual C++ 2013 Redistributable (x86)
- Microsoft Visual C++ 2015-2019 Redistributable (x86)
- .NET Framework 3.5
.NET Framework 4.7
Mandatory ports used by SW NetStar TCP UDP Info 6992 Communication port for NS Admin Tool 5060 5060 SIP Communication 30000+ RTP ports - can be changed
System capacity dependence on used HW
| Number of CPU cores | ||||
|---|---|---|---|---|
Number of concurrent calls | G.711 | G.711 recorded | G.729 | G.729 recorded |
| 50 | 1 | 2 | 2 | 2 |
| 100 | 2 | 4 | 2 | 4 |
| 200 | 4 | 4 | 8 | >8 |
| 600 | 8 | >8 | >8 | >8 |
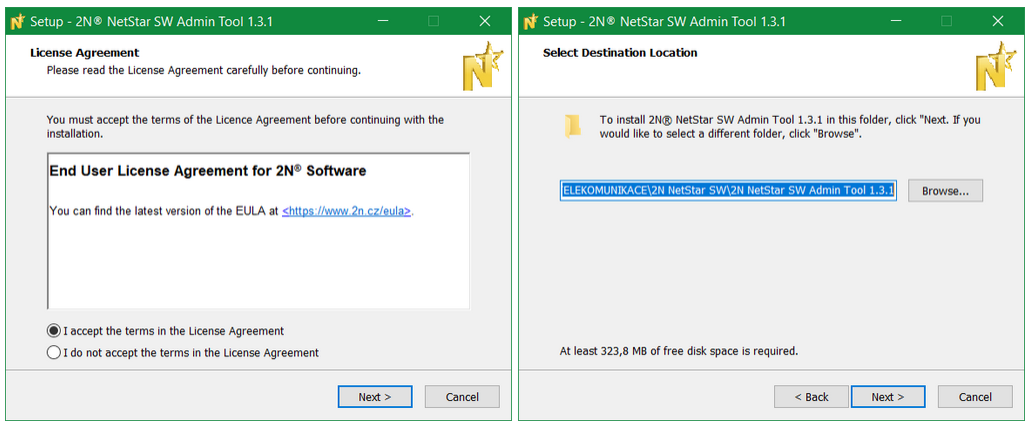
Installation of 2N® NetStar SW
- It is necessary to install setup+sw_version.exe, that you can download here
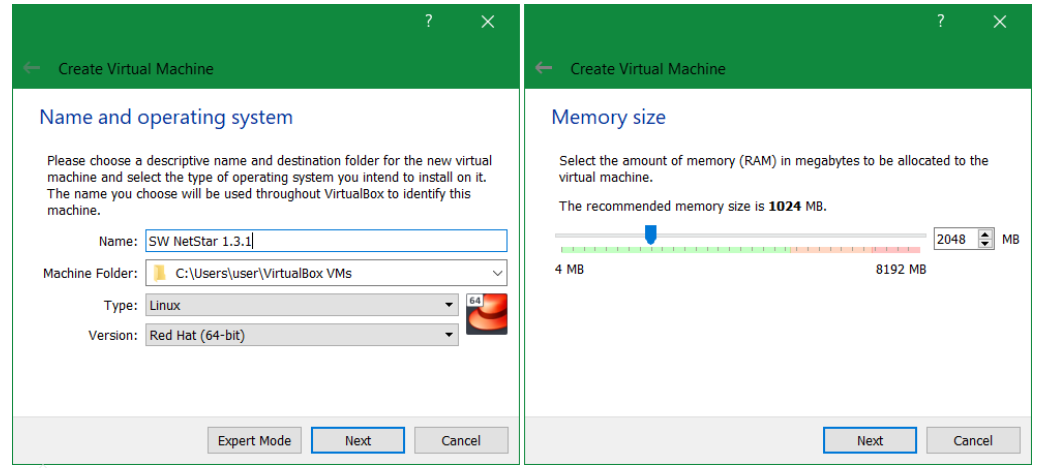
Installation of 2N® NetStar SW in VirtualBox
In VirtualBox it is necessary to add a new virtual PC where will be 2N® NetStar SW installed.
The whole process is not shown in pictures below, only mandatory ones as the virtual machine configuration may vary for everyone.
- Go to Storage -> Add optical drive
- Add the .iso file which is in the installation folder of SW NetStar Admin Tool
C:\Program Files (x86)\2N TELEKOMUNIKACE\2N NetStar SW\2N NetStar SW Admin Tool version Software\ISO -> netstar-pbx_version.iso - The .iso file is succesfully added to the virtual machine
- Change the Network Adapter so you can connect to your SW NetStar
Usually we use setting shown in the picture below, it may vary depending on your network setup.

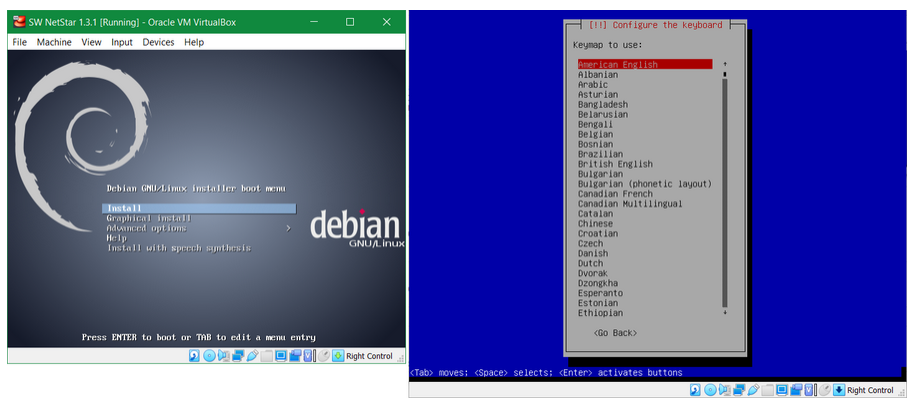
For the installation use classical option not the graphical one.
Choose the localization for you country.
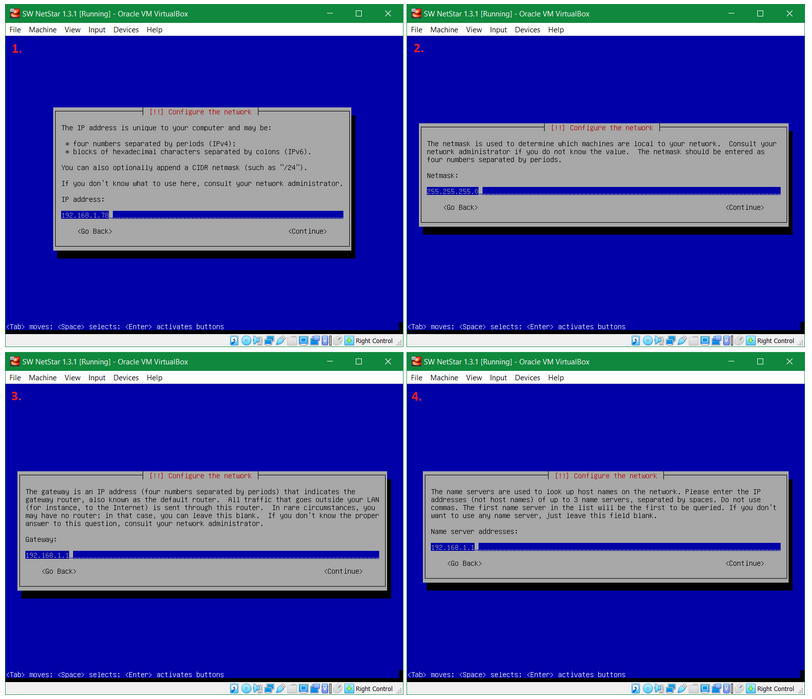
It is necessary to specify IP address, mask and default gateway and name server for 2N® NetStar SW. After that press Continue to install 2N® NetStar SW.
In our example we have used following IP addresses, they may differ depending on your network.
- IP Address which will be assigned to the SW NetStar - later used for connection via SW NetStar Admin Tool
- Network mask
- Network gateway
- DNS IP address
With Ping function you can check that 2N® NetStar SW is available and working.
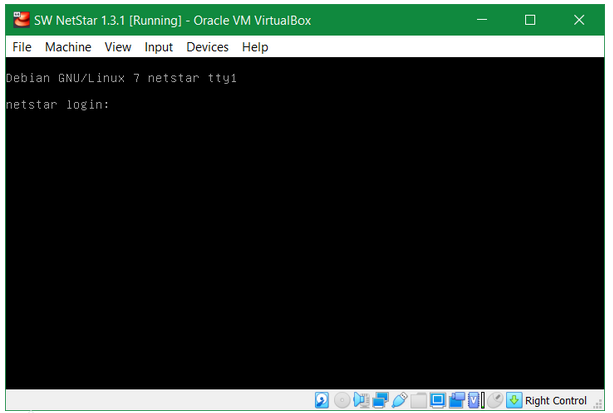
Default login to NetStar virtual machine is following
login: root
password: 2n
2N® Netstar SW Admin Tool
Rights
If you are setting up NetStar in a restricted environment and possibly on a PC without admin rights. Please check whether you will have an acces to following folders after installation.
C:\Users\username\Documents\2N TELEKOMUNIKACE\Netstar\
C:\ProgramData\2N TELEKOMUNIKACE\Netstar\C:\Program Files (x86)\2N TELEKOMUNIKACE\2N NetStar SW\2N NetStar SW Admin Tool 1.3.1\NsSwAdmin\Xml
- Installation folder(it may varry depending on what path you have chosen during installation process)
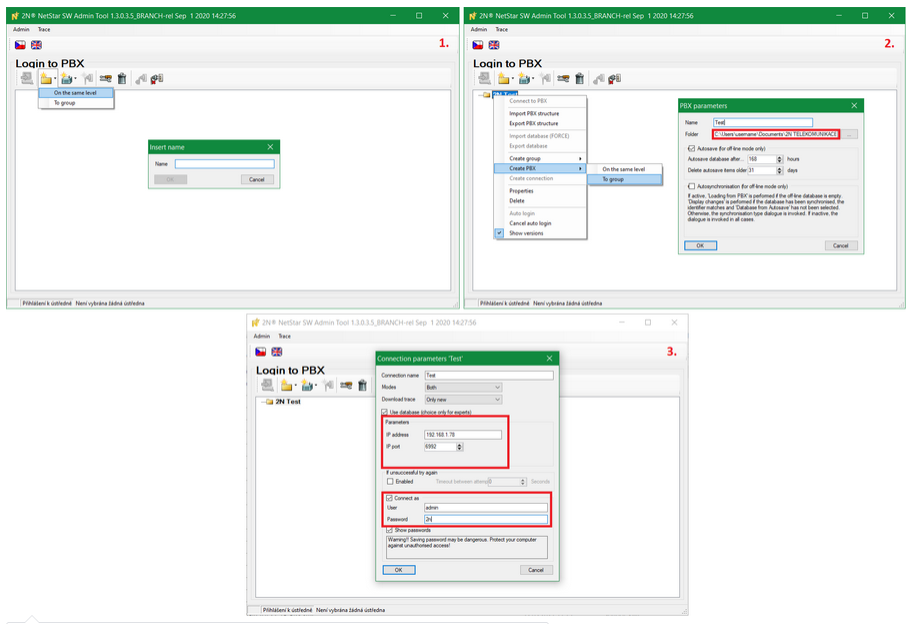
The 2N® NetStar SW Admin Tool has the same interface as the hardware version. To configure 2N® Netstar SW Admin Tool it is necessary to create PBX, configure IP address and connect to the PBX.
- Click on Groups -> On the same level -> Name your group
- Right click on the Group -> Create PBX -> To group
Name the group - hit OK - Name the connection
Fill the IP address of SW Netstar virtual machine - we used 192.168.1.78
Optionally you can fill the login credentials which in default are
login: admin
password: 2n
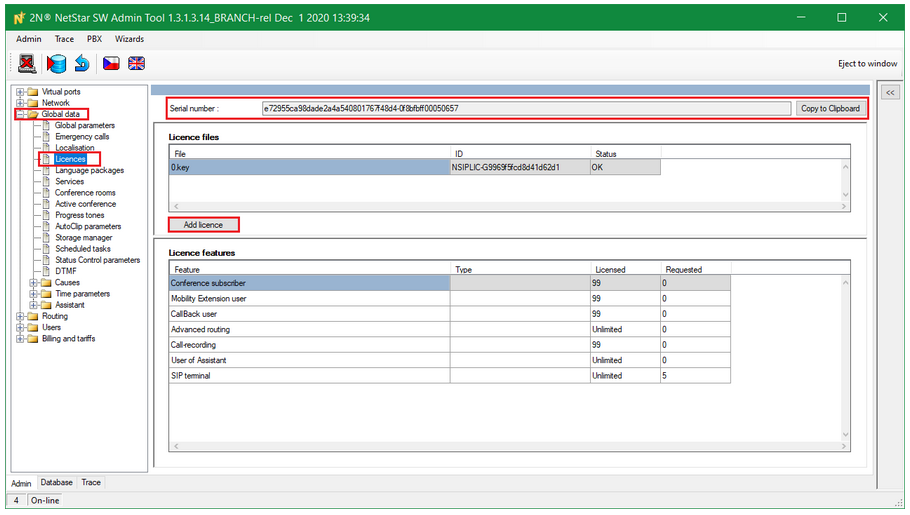
Licensing
Trial license
Unlike on Hardware version of NetStar the Software one does not have a 800h trial license.
To be able to use and work with a SW Netstar you need to add a license. The license key is based on license ID serial number. You need to order a license based on this ID number as there is not any trial time period. You can program it without a license but the license is mandatory for functionality
Connect to 2N Netstar SW Admin tool in online mode!
The ID serial number can be found in the section Global Data -> Licenses -> Serial number