Alcatel-Lucent OXE (OmniPCX Enterprise) R12: How to interconnect with 2N® VOICEBLUE NEXT
- 2N® VoiceBlue Next firmware Version 1.37.3.40.3
- Alcatel-Lucent OXE (OmniPCX Enterprise) R12
Functionality
- Incoming and outgoing call, opening the door
2N® VoiceBlue Next Configuration
- Please set all usual Network settings according to usual practice. Do not use Authorization ID nor fill out any password. For both options described further is the setting of 2N® VoiceBlu Next the same.
- 2N® VoiceBlue Next has these parameters:
- IP address 192.168.92.200
- Incoming port: 5060
- Firmware version: 1.37.3.40.3
- Alcatel OXE parameters:
- IP address 192.168.92.246
- Incoming port: 5060
- Version 12.2
Alcatel OXE configuration - Option - SIP
- Create Trunk group, Type T2 - MINI SIP or SIP
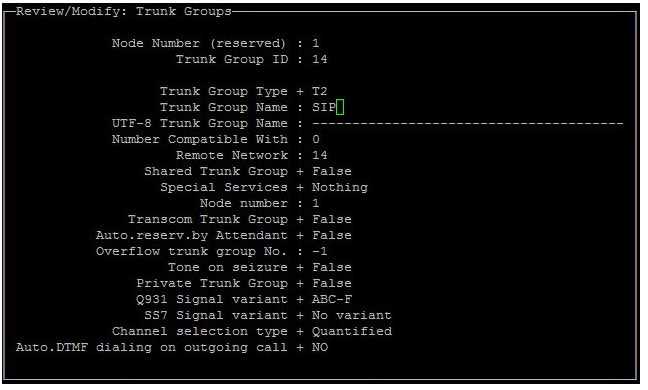
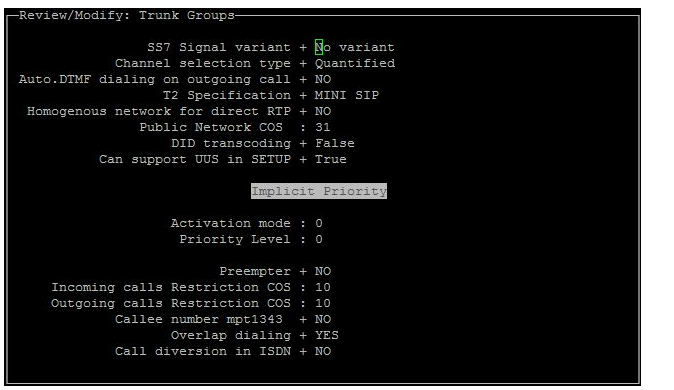
- Go to SIP Gateway settings
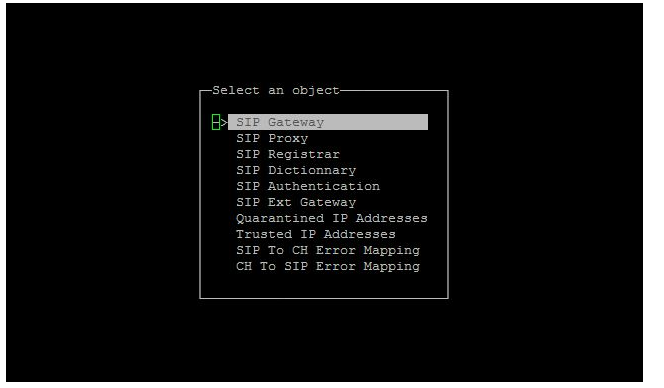
- SIP Gateway - fill out number of SIP Trunk Group
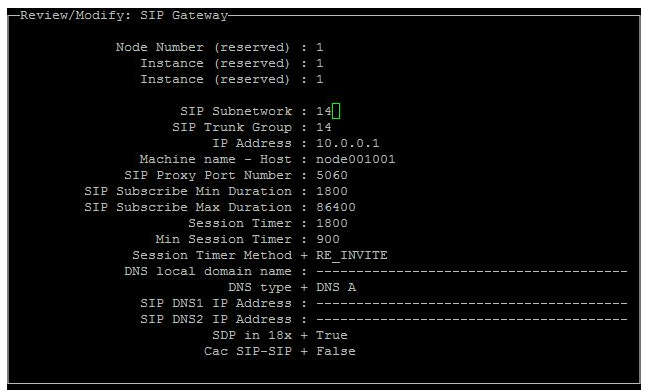
After this please restart the Alcatel OXE.
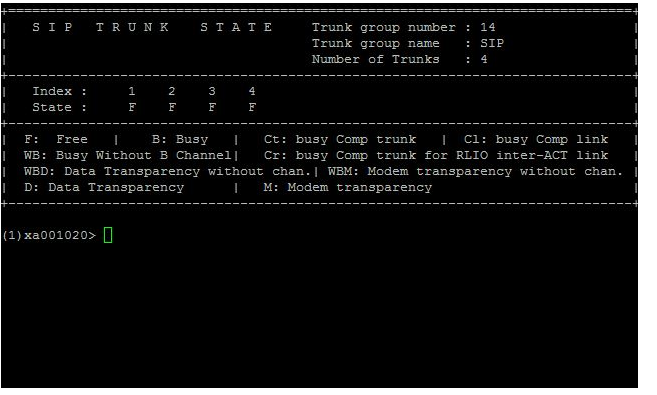
- Make sure that trunk channels are free.
- SIP Proxy - set minimal authentication method to SIP

2N® VoiceBlue Next configuration
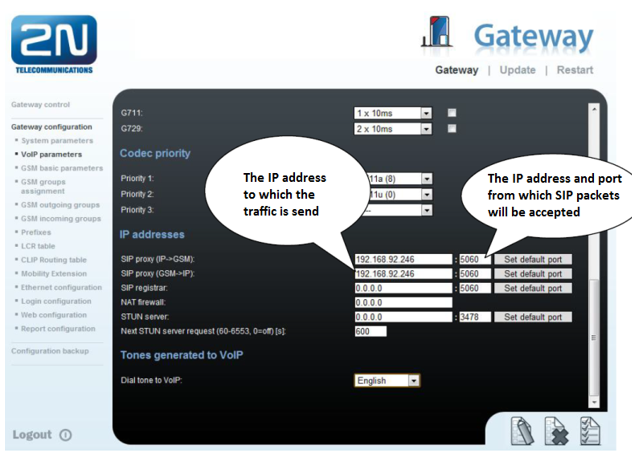
1. SIP trunk interconnection
For the setting of the trunk between the 2N® VoiceBlue Next and your PBX you need to configure SIP proxy (GSM→IP) for GSM incoming calls. SIP proxy (IP→GSM) is designed to secure communication with traffic from your PBX only. You can specify the IP address and port from which SIP packets will be accepted.
In case you leave there 0.0.0.0 it will be open for all traffic.
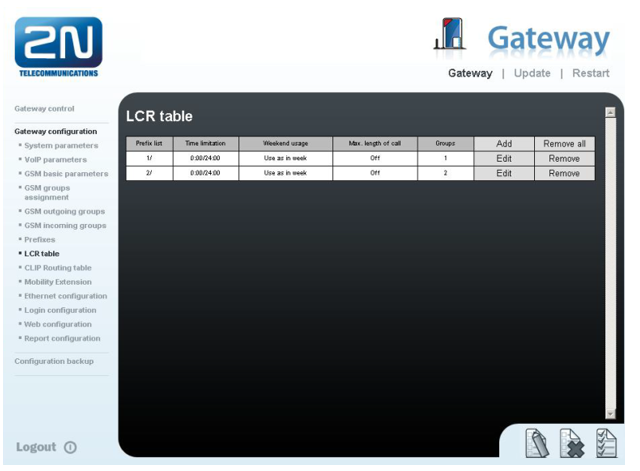
2. Configuration of the LCR (Least Cost Routing)
The GSM operator has e.g. in our country prefix 6 and 7 with nine digits in a number. The setting is below.
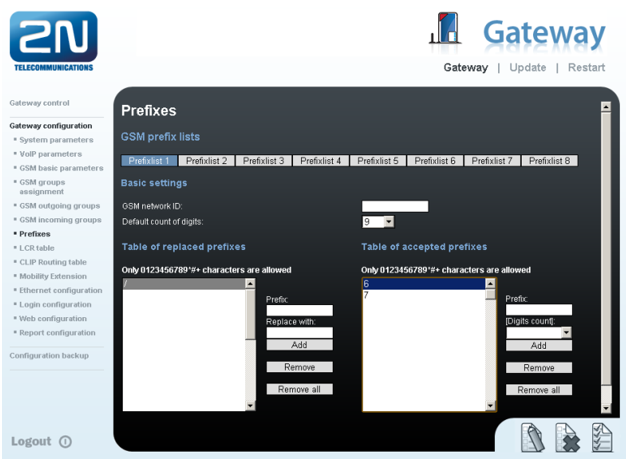
You need to create LCR rule for defined prefixes. The GSM group defines a way for the outgoing call routing. An appropriate SIM card is selected based on the GSM groups assignment.
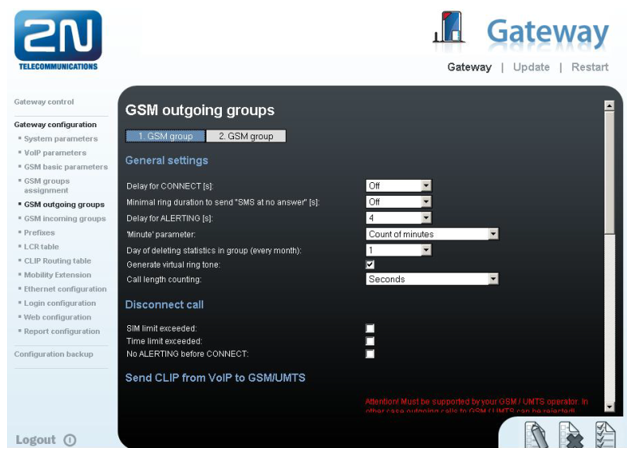
3. Configuration of GSM outgoing groups
You are able to set up different settings for each GSM group (CLIR, free minutes, virtual ring tone, roaming and others). In case you don´t have a Ring back tone, set up Delay for ALERTING to option 4.
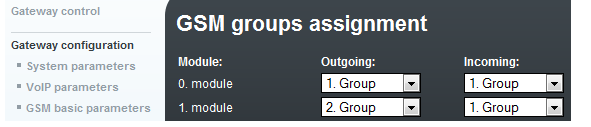
4. Incoming calls
For incoming calls you can define 2 groups with the different behaviour and assign them to the GSM modules. The settings are similar with GSM groups assignment for outgoing calls.
In GSM incoming groups you can define the behaviour for each GSM incoming group. Choose the mode to Reject, Ignore, Accept incoming calls or Callback.

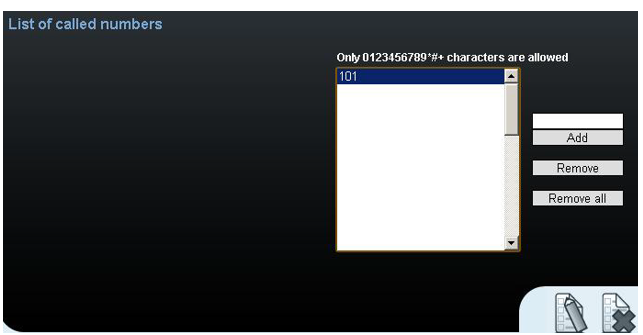
You can define the list of called numbers which will be automatically dialled after DTMF dialling timeout if the customer does not press any button till the specified time. From the configuration, you can see 10 seconds for DTMF dialling and after that the call will be routed to the extension 101 to your PBX (if you set up SIP proxy (GSM->IP) in VoIP parameters).