Asterisk - How to interconnect with Asterisk?
- 2N® VoiceBlue Next has these parameters:
- IP address 10.0.0.20
- Incoming port: 5060
- Asterisk parameters:
- IP address 10.0.0.10
- Incoming port: 5060
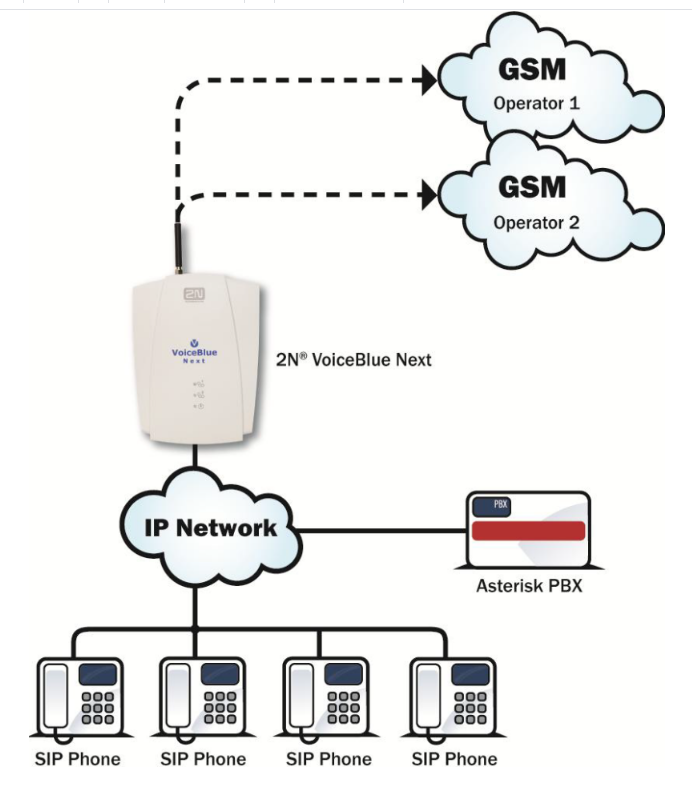
Scenario
- If we have an IP network in which Asterisk PBX, several SIP phones and 2N® VoiceBlue Next are connected, the configuration would be as shown in the figure below. Furthermore, suppose that the network is addressed as shown in the figure and GSM numbers are all numbers starting with 6, 7 and containing 9 digits.
2N® VoiceBlue Next settings
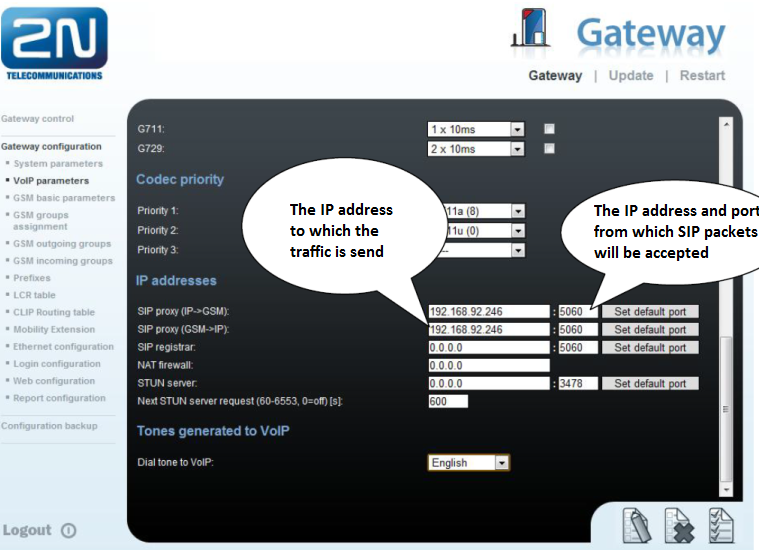
SIP trunk interconnection
For the setting of the trunk between the 2N® VoiceBlue Next and your Asterisk PBX, you need to configure "SIP proxy (GSM→IP)" for GSM incoming calls. "SIP proxy (IP→GSM)" is designed only for secure communication with the traffic from your Asterisk. You can specify the IP address and port where the IP packets will be accepted.
If you leave there "0.0.0.0", the traffic will be unsecured.
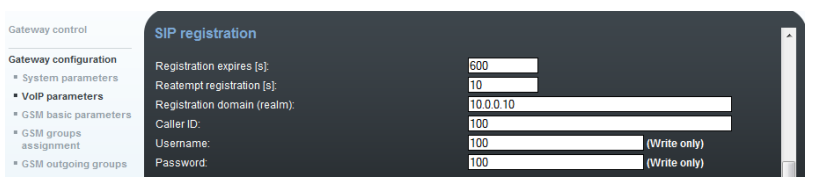
To enable incoming calls to Asterisk, you can register the 2N® VoiceBlue Next directly into the Asterisk system. You can register it as "Friend" types in case you require registration based on username and password or "peer" type (on based of IP address and port).
SIP registrar...an Asterisk IP address which registers the gateway
Registration domain - IP address where the gateway is going to be registered
Username...username under which the gateway shall be registered
Password...registration password
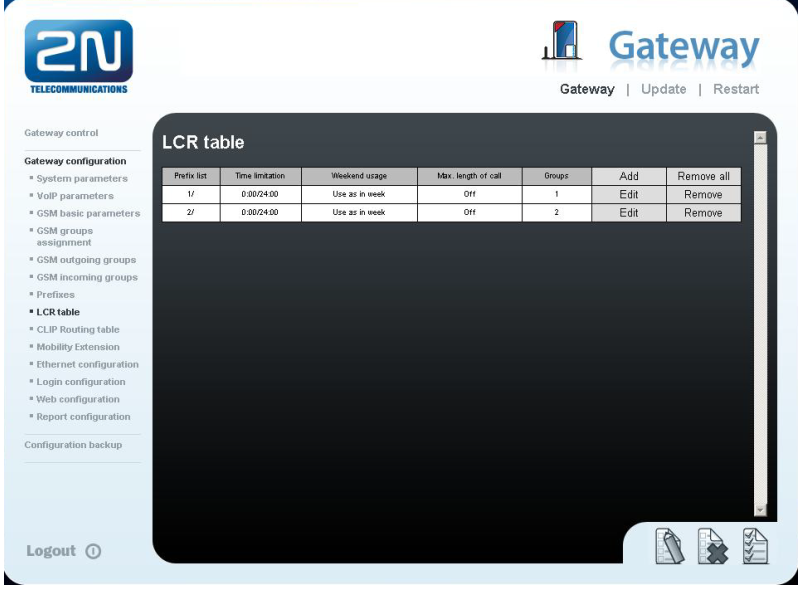
Configuration of the LCR (Least Cost Routing)
You have to specify prefixes for the operators in the country you are currently located. An example of this would be that in Czech Republic prefix 6 and 7 have a 9 digits number.
The setting is displayed below.
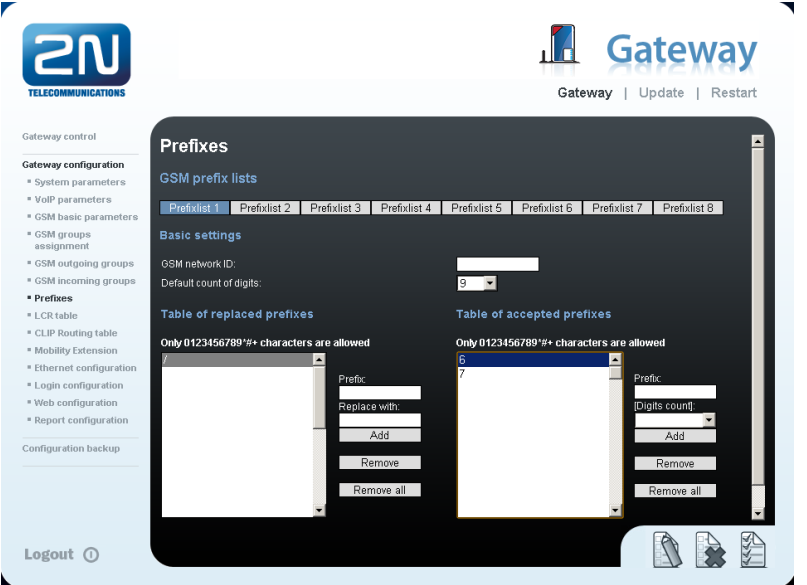
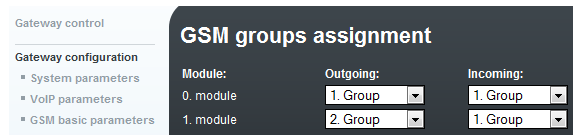
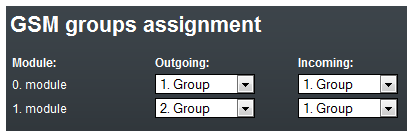
You need to create specific guidelines connecting prefixes with the GSM group. In the "GSM group" you will specify settings for SIM cards assigned to this specific group. In the "GSM group assignment" you can assign the module for the appropriate GSM outgoing group.
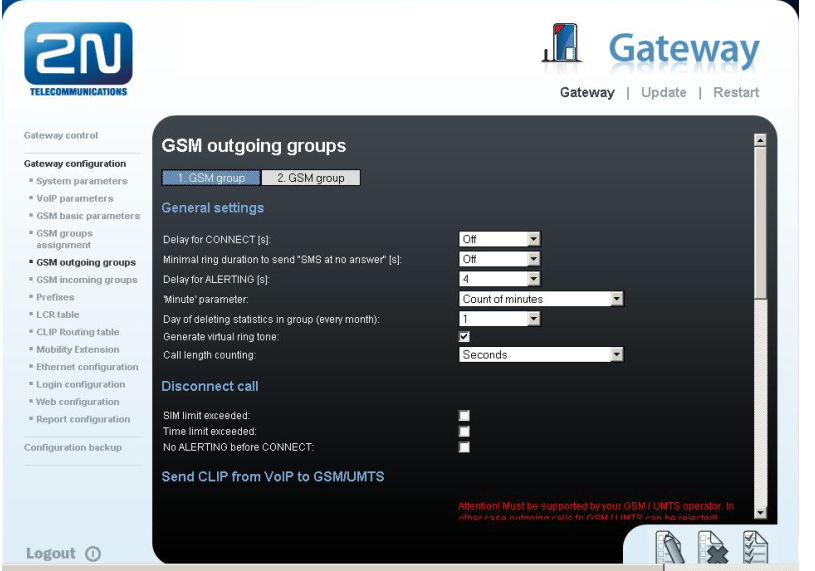
Configuration of GSM outgoing groups
You are able to have different setting for each GSM group (CLIR, free minutes, virtual ring tone, roaming and others)
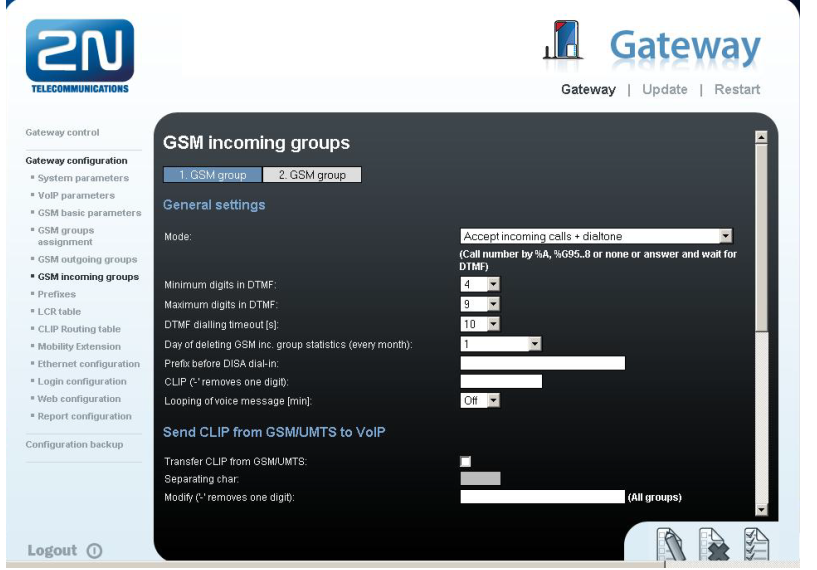
Incoming calls
For incoming calls you can define 2 groups with the different behaviours and assign them to the GSM modules. The settings are similar with "GSM groups assignment" for outgoing calls.
In GSM incoming groups you can specify the traits for each GSM incoming group. Choose the mode to Reject, Ignore, Accept incoming calls or Callback.
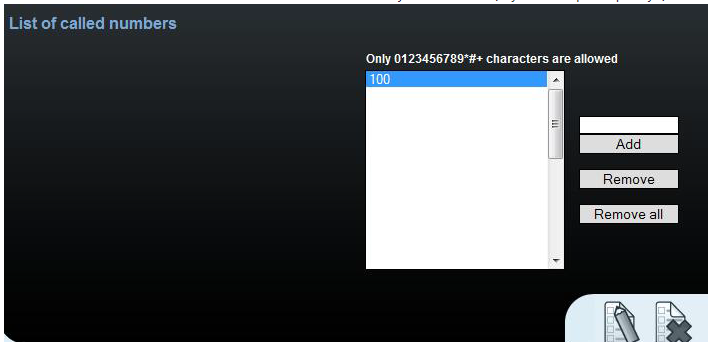
You can define the list of numbers called. The number will be automatically dialled after the DTMF dialling has timed out. This happens when the customer does not press any button until the specific time. At this point, the number will be routed to the extension 100 to your Asterisk (if you set up SIP proxy (GSM->IP) in VoIP parameters).
Asterisk settings
- Now add a few lines into the Asterisk configuration for proper routing of outgoing calls to the 2N® VoiceBlue Next gateway and receiving calls coming from the GSM gateway to Asterisk.
Outgoing calls
The core of Asterisk connection is saved in the /etc/asterisk/extensions.conf file.
Open this file in your favorite editor and add the following lines:
exten=>_6XXXXXXXX,1,Dial(SIP/${EXTEN:0}@10.0.0.20,,r)
exten=>_7XXXXXXXX,1,Dial(SIP/${EXTEN:0}@10.0.0.20,,r)
Once you have saved and closed the file, restart Asterisk. From this point forward, all calls starting with 6 and 7 should be routed to the 2N®VoiceBlue Next gateway.
Incoming calls
It is highly recommended to make few restrictions for incoming calls in order to prevent unauthorised people from calling over your system.
Since the 2N® VoiceBlue Next system works with the SIP, modify the /etc/asterisk/sip.conf file where the 2N® VoiceBlue Next section could look as follows:
[general]
port = 5060
bindaddr = 0.0.0.0
allowgues=no
context = sip
disallow=all
allow=ulaw
[VoiceBlueNext]
type=peer
host=10.0.0.20
username=voiceblue
secret=password
fromdomain=10.0.0.20
Furthermore restart the Asterisk after saving the file. Then the Asterisk will be ready to receive calls coming from the 2N® VoiceBlue Next gateway.
What to do in case of trouble:
First of all check our web page faq.2n.cz and try to see if there is any solution to your problem. In case you cannot find the proper answer, use the link: How to report an issue on the 2N® VoiceBlue Next.
Here is the the direct link: https://jira.2n.cz/confluence/pages/viewpage.action?pageId=22513331