FAX - How to configure
This HOW TO GUIDE is valid only with 2N® OfficeRoute which has got a FXS port (analog interface).
- Open web configuration interface of the Office Route and log in.
First of all you need to set up the FXS line. Configuration wizard has created this line by default but you have got a possibility to modify this line. For example to change its number. You can do it in Telephony - Services - Devices - FXS line.
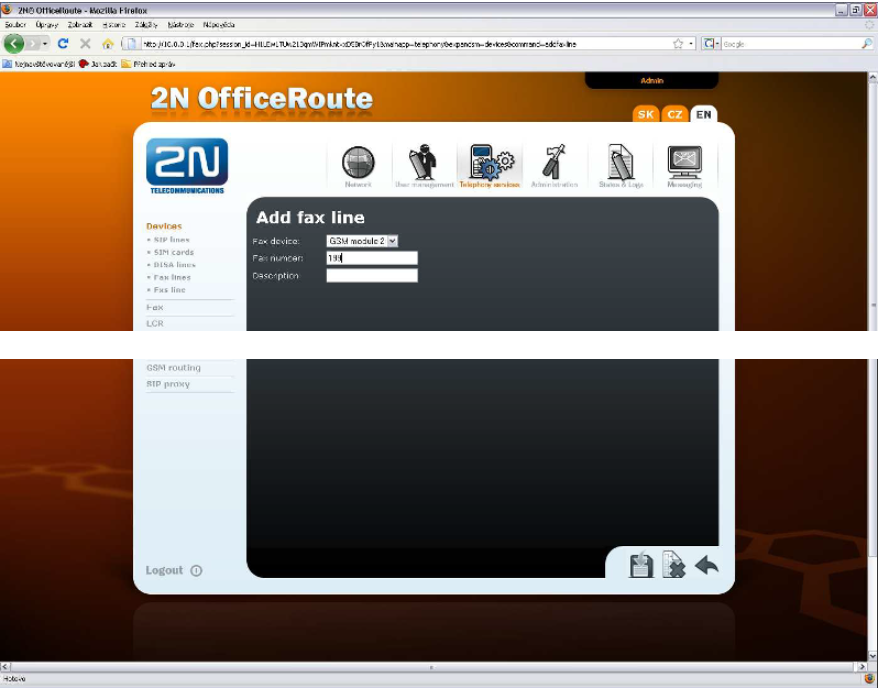
- Then you need to create FAX line. This line IS NOT created by the configuration wizard so you have to do it manually. Go to the Telephony Services - Devices - FAX line and click + sign to add a new fax line. Choose the GSM module where is your SIM with fax number (you need to allow multi-numbering on your SIM). Then fill in FAX number (the same number like in your FXS line) and click save.
- If you want to use more then one GSM module for FAX, add another FAX line with different GSM module and the same FXS line number.(in GSM module there have to be also SIM with FAX number inserted).
- Now you have created all lines what you needed. Go to the LCR and create a new route with your FAX lines. Telephony services - LCR - routes. Fill in a name for your route and add your FAX lines that you want to use in this route.
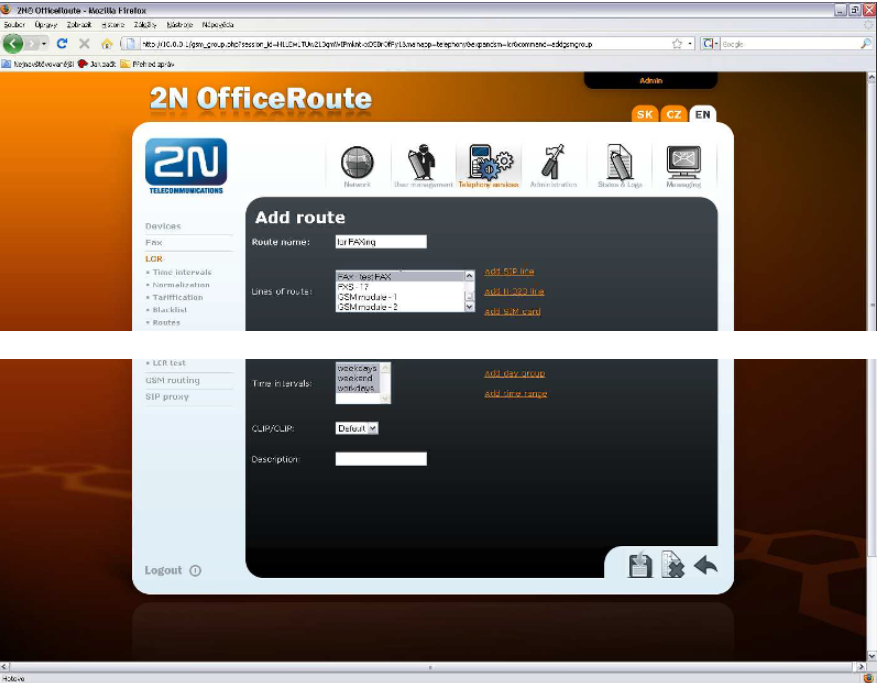
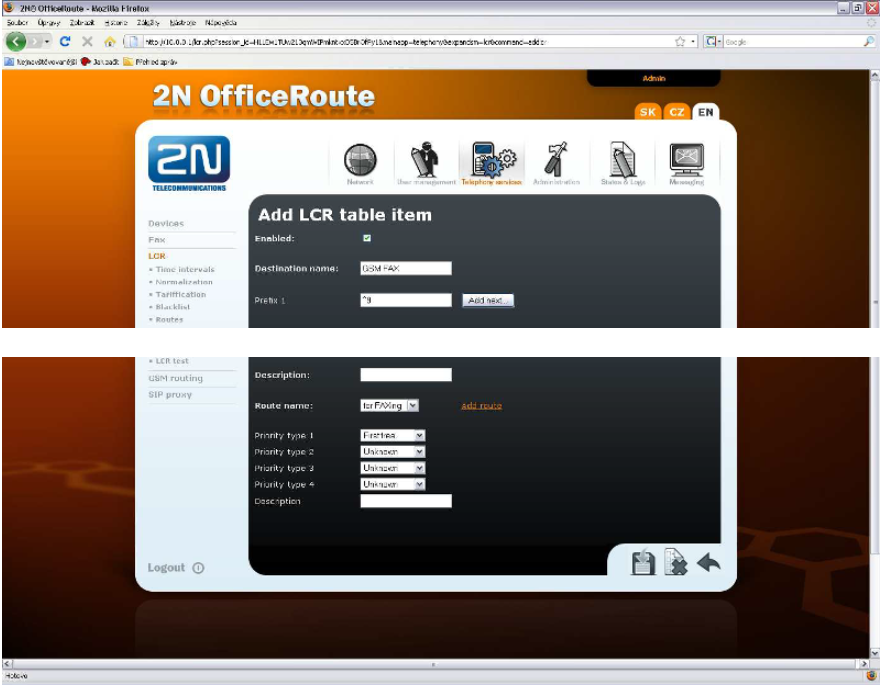
- When you save your new route, click on LCR again because we need to create a rule for FAX route. It means that for example all your outgoing FAX calls will start with the digit 9. You need to define that a call with 9 at the beginning of called number will use the route that includes FAX lines. Click add sign + to create a new rule. Fill in Destination name (must be different then route name), fill prefix ^9 (it means that all called numbers start with 9), choose route and priority that will be used to choose lines in your route (when you have got more then one line, this priority will be used). Priority must be chosen every time. Click save.
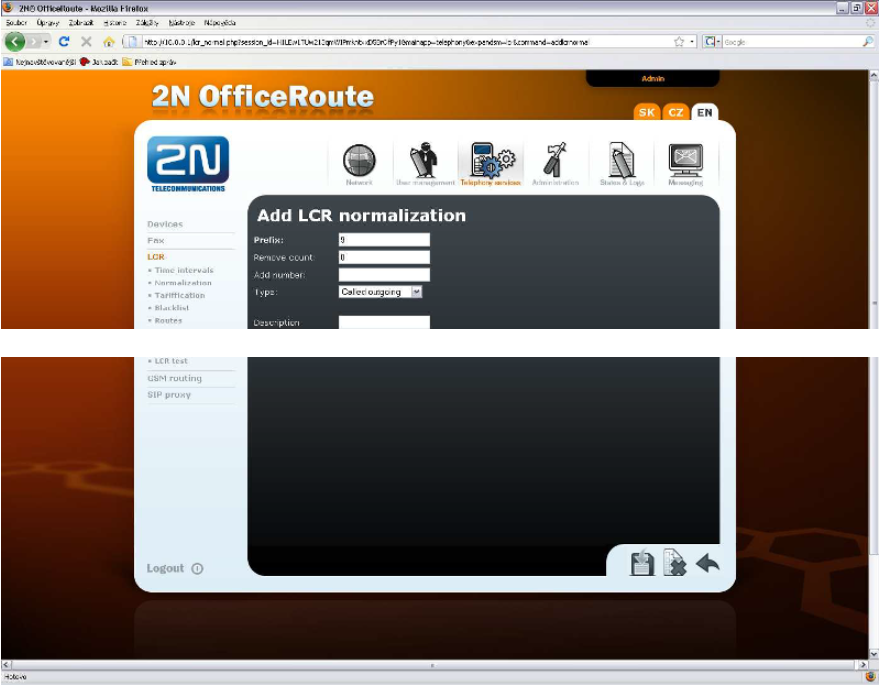
- When you dial FAX call, you enter digit 9 at the beginning (in our case). This number is used for routing purpose but you can not dial this number to GSM network. It means that we need to cut off this digit. Go to the LCR - Normalization. Add a new normalization rule. Fill in prefix 9 and as a type enter "called outgoing". Prefix will be removed automatically so you do not have to fill in something else. Remove count keep 0. Save it.
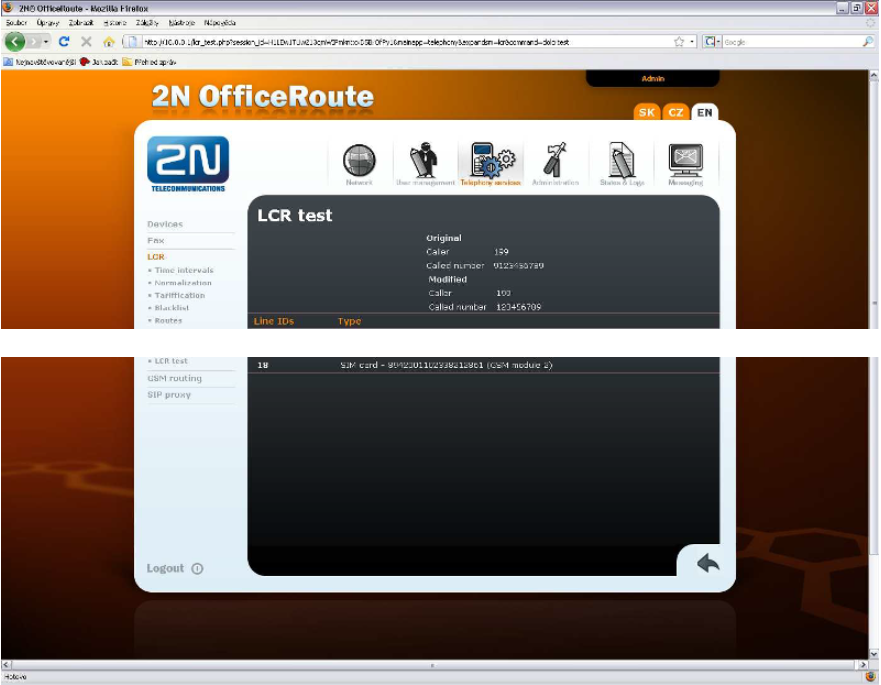
- Everything for outgoing FAX is set. You can check your settings in LCR TEST. Fill caller number 199 (in our case) and call according to your wish but it must start with 9. Then click save and you will see the result of normalization and used outgoing SIM card for this FAX call.
- You do not need to set almost anything for incoming direction. GSM module recognizes the incoming FAX call (because it comes to your FAX number on your SIM) and transfers this FAX to your FXS line directly. (number 199 in our case). Please make sure that in LCR settings there is number 199 routed to FXS port. You have to create a rule for that with appropriate FXS line.
There is also a possibility to send fax via TCP/IP. When you have got an account in VoIP provider which supports T.38 protocol, you can send FAX from the FXS port on your Office Route directly to your VoIP provider via TCP/IP connection. You need to do following:
Create a new SIP Line. Telephony Services - Devices SIP lines. Fill VoIP provider SIP server IP address. SIP name (number or account name from VoIP provider), user name and password for authentication.
The rest of settings are the same like in the case before. You just need to change lines in your FAX route. Instead of FAX line you will use this new SIP line.