PBX booster - How to set 2N® NetStar as a PBX booster
- This „how to“ manual will help you to set up 2N® NetStar as a PBX booster. NetStar is connected via PRI/BRI between the PSTN network and the PBX and brings new services like:
- Mobility Extension
- IVR
- CallBack
- AutoClip Routing
- SMS
Before you start programming the system, it is highly recommended to read the configuration manual.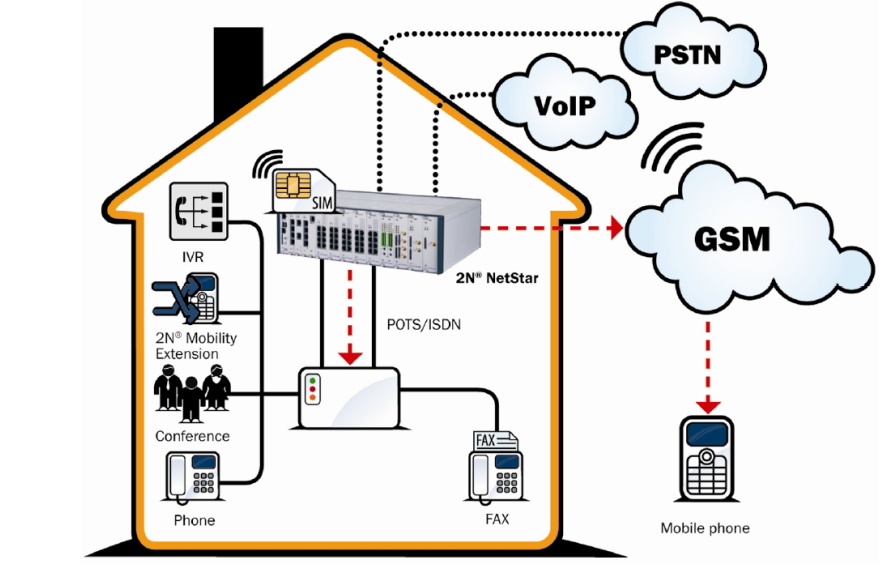
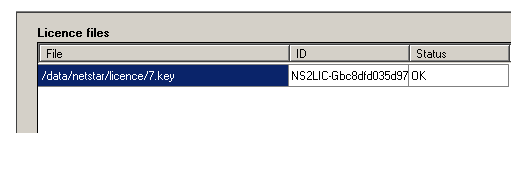
- Check your licence – you need at least 2 PRI ports and Mobility Extension licence – according to number of ME extensions. (Global data -> Licence). If you do not have it, please contact support@2n.cz.
2. Set up both PRI ports.
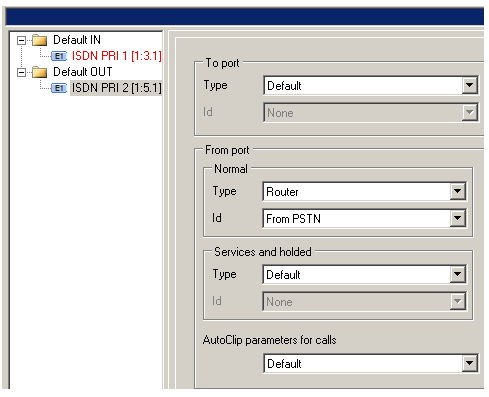
- Port connected to PSTN as TE, port connected to PBX as NT. (Set up jumpers too!)
- Set up TE port as Default OUT and NT port as Default IN (important for proper network tones transmission).

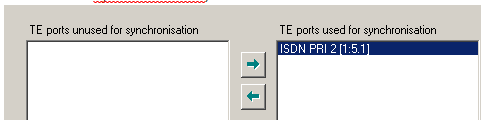
- Set up TE port as a port used for synchronisation. (Hardware -> Synchronisation).
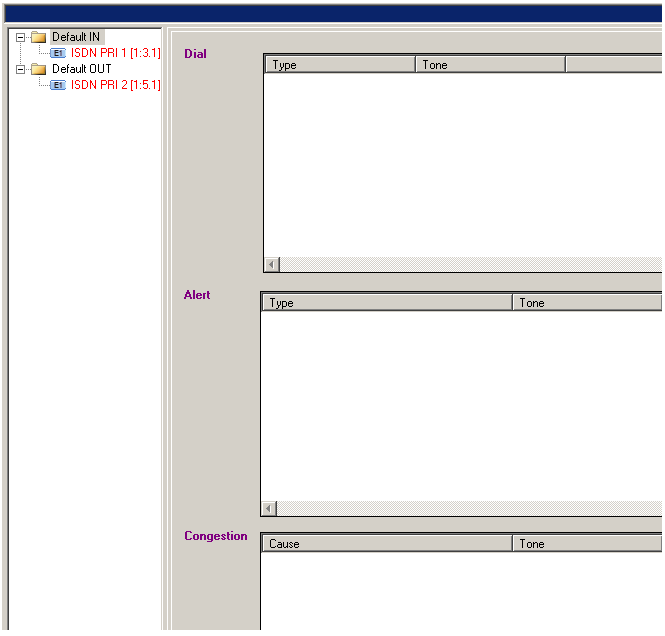
- Delete all tones from Default IN (Properties -> Tones).
3 . Set up GSM/UMTS ports
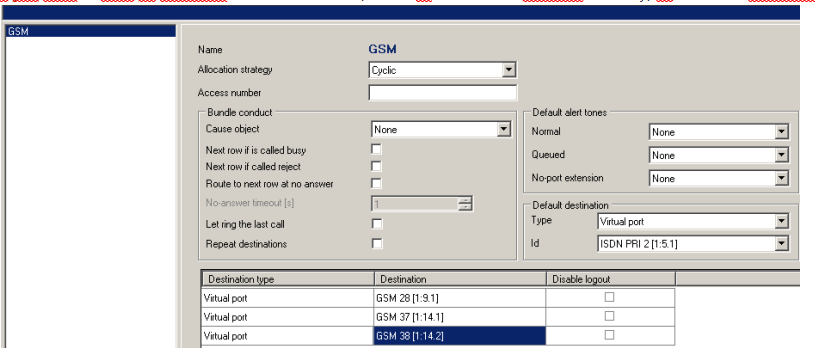
- Create a bundle - GSM (Routing -> Routing objects -> Bundle) and use all GSM ports in this bundle. It is recommended to use cyclical strategy.
- If you want to have an overflow to PSTN network (in case all GSM/UMTS modules are busy) fill in default destination - PRI port to PSTN.
4. If you want to make calls to VoIP provider:
- Create a SIP trunk – SIP GW. (Virtual ports -> SIP -> SIP Gateway).
Add RTP interface
Select codecs
Set up IP address of the other peer and realm (in our example proxy1.test.com)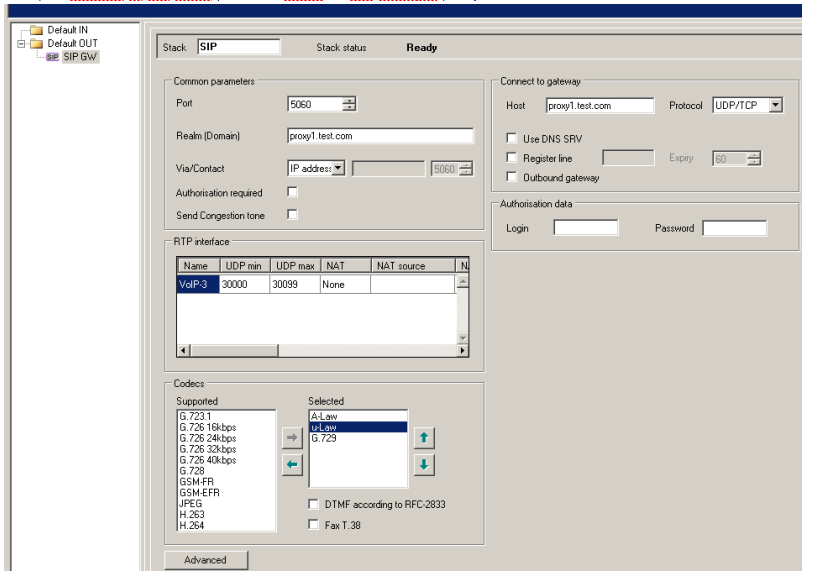
- set up a VoIP card (Hardware -> Boards -> VoIP Board)
- Create a SIP trunk – SIP GW. (Virtual ports -> SIP -> SIP Gateway).
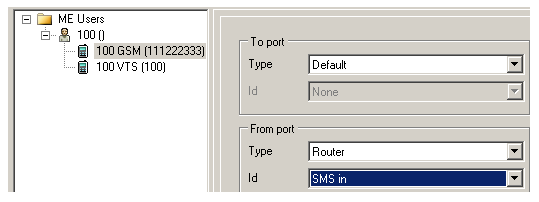
5. Create a Group – ME users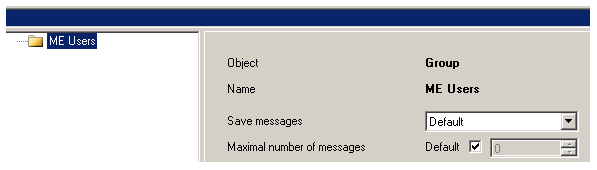
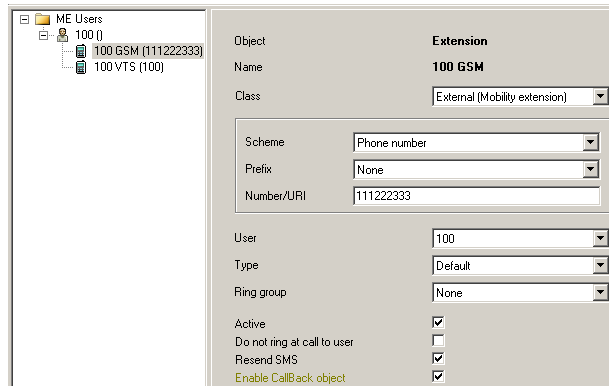
6. Create User and his extensions
- each user has got 2 extensions:
- ME (mobile phone)
- DDI of the PBX (set up the number in the same format that does PBX expect!)
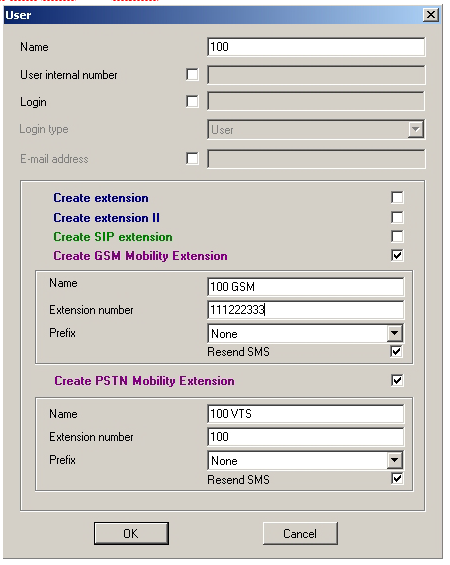
In our example User 100 has got ME 111 222 333 and DDI 100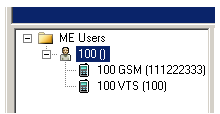
- the purpose of this router is to capture particular DDI in incoming call from PSTN and split the call to PBX (DDI) and GSM (Mobility Extension).
In our example number 100 is captured and split and the other calls are transparently resent to PBX.
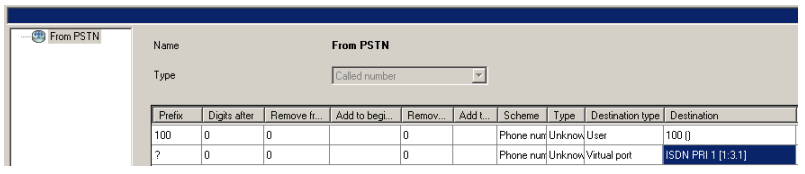
8. Use router From PSTN as a from port router on the TE port. (Properties -> Routing)
9. Create a router - From PBX. (Routing -> Routers -> Called party number Router)
-the purpose of this router is to be a decision maker which will send GSM calls to GSM, VoIP calls to VoIP trunk and all other calls to PSTN.
In our example the GSM prefix is 7 (9 digit long). Calls beginning with 0 (9 digits long) are sent to VoIP.
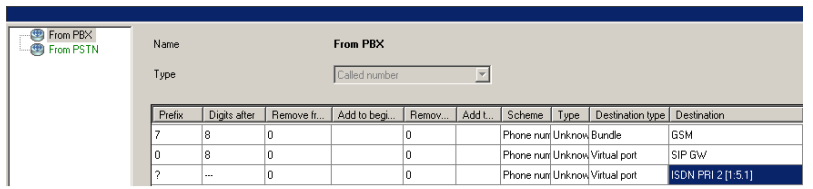
10. Use router From PBX as the from port router on the NT port. (Properties -> Routing)

11. Set up IVR
a. Create Router To PBX (Routing -> Routers -> Called party number Router)
-the purpose of this router is to route DDI numbers to PBX (in our example DDIs - 1xx)

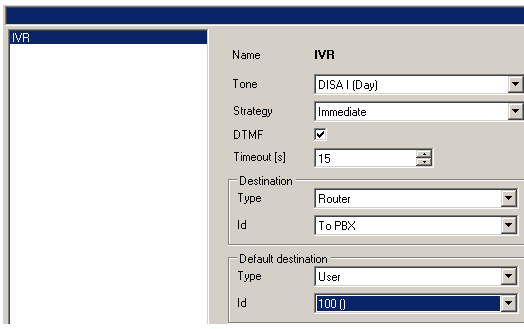
b. Create DISA – IVR (Routing -> Routing Objects -> DISA)
-the purpose of DISA is to play announcement to the caller and to give the caller an opportunity to dial DDI number to PBX.
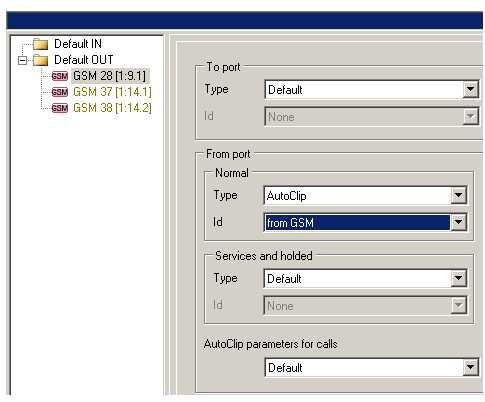
12. Create AutoCLIP router – From GSM. (Routing ->AutoCLIP Routers)
-the purpose of this router is to route all missed calls from GSM to particular extensions, the outbound calls have been originally made. Any other incoming call will be sent to IVR.

13. Use AutoCLIP router From GSM as a from port router on all GSM ports. (Properties ->Routing) and (Virtual ports -> GSM -> Basic).
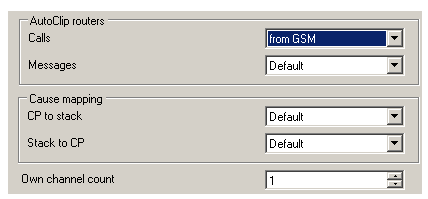
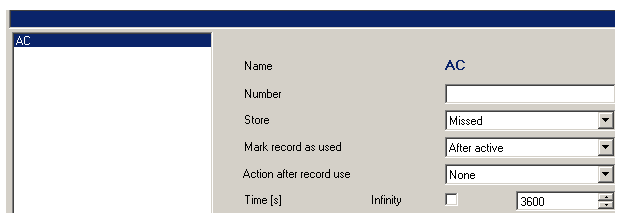
14. Create AutoClip parameters - AC (Global Data -> AutoClip parameters)
15. Use AutoClip parameters AC on Default IN. (Properties -> Routing)

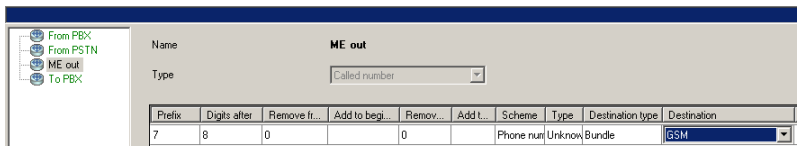
16. Create router – ME out. (Routing -> Routers -> Called party number Router)
-the purpose of this router is to route calls to ME extensions. (In our example GSM numbers begins with 7)
17. Create DISA – ME in (Routing -> Routing Objects -> DISA)
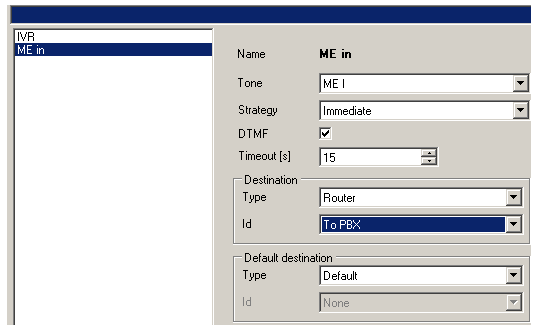
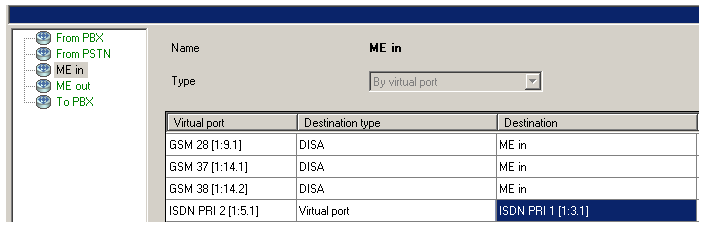
18. Create router - ME in (Routing -> Routers -> By virtual port)
-the purpose of this router is to provide a dial tone to ME extensions, so you can dial any DDI of the PBX.
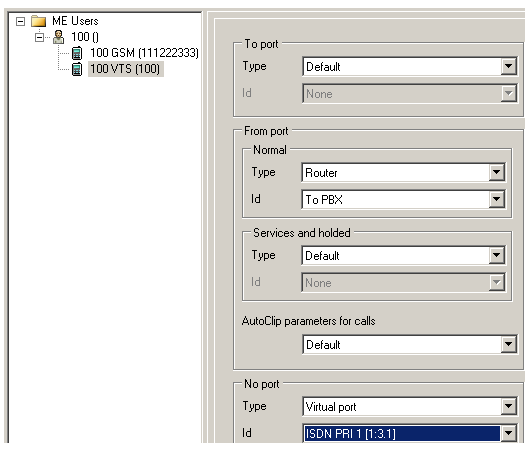
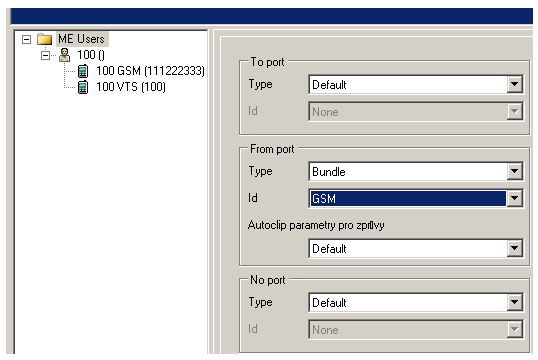
19. Use router ME out as no port router and router ME in as from port router on all ME (GSM) extensions. (Properties -> Routing)

20. Set up routing for DDI extensions (Properties -> Routing)
21. Set up SMS routing (Users & Groups -> Properties -> Messages routing)
-the purpose of this routing is to give you a possibility to send SMS from NS Assistant.
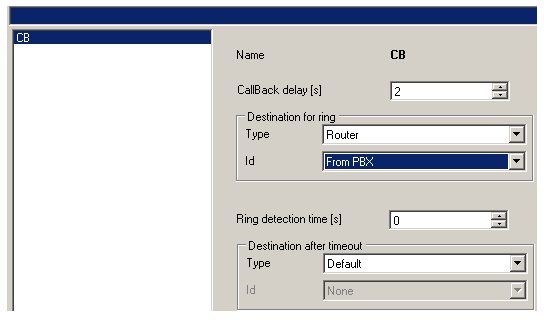
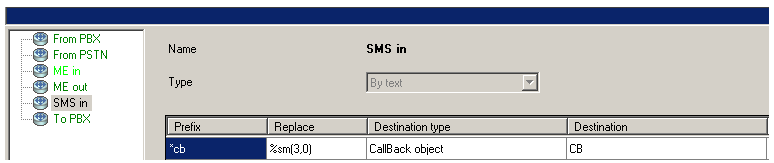
22. Set up Callback
a. Create a Callback object – CB (Routing -> Routing objects -> Callback objects)
b. Create router - SMS in (Routing -> Routers -> By text)
c. Use router SMS in as a from port routing on ME extensions (Users & Groups -> Properties-> Messages routing)
d. Activate Callback on all ME extensions – you need a licence!! (Basic)