Aastra 5000
Content
Aastra 5000
Tested with
| Aastra 5000 | 2N IP Intercom | Registration | Calls |
|---|---|---|---|
| - | 2.8.0.17.2 |
Settings
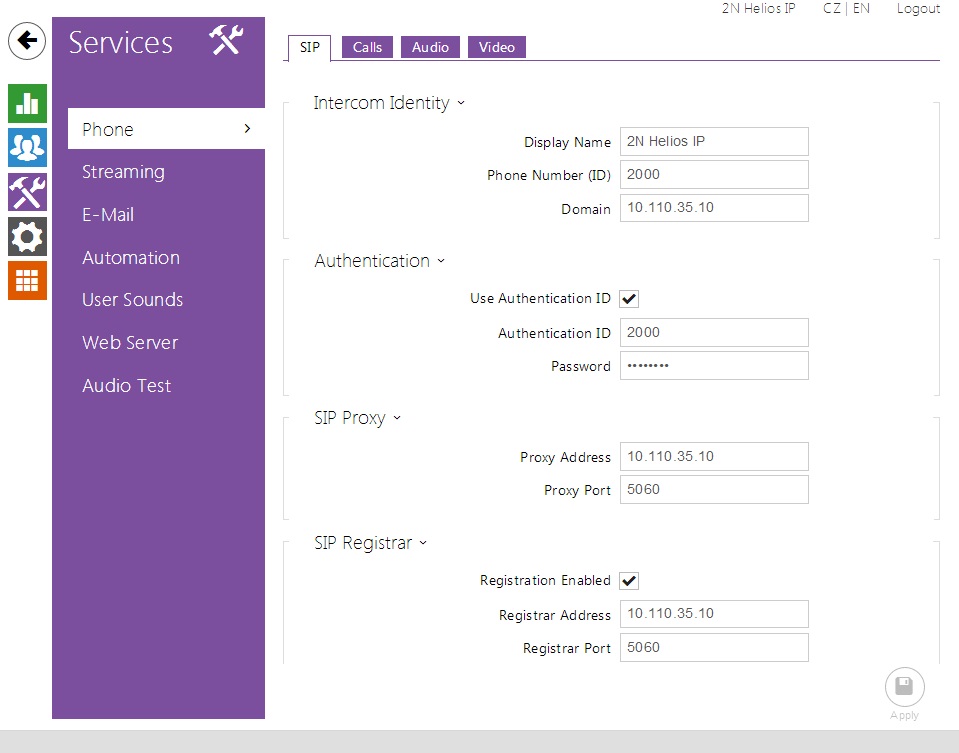
Configure network and SIP parameters on the 2N IP intercom via its web interface. First go to the section Advanced settings -> SIP Settings and fill user ID, password and SIP proxy IP address. As a last step do not forget to activate the registration by setting Enable registration parameter to "Yes".
 |
 |
 |
 |
 |
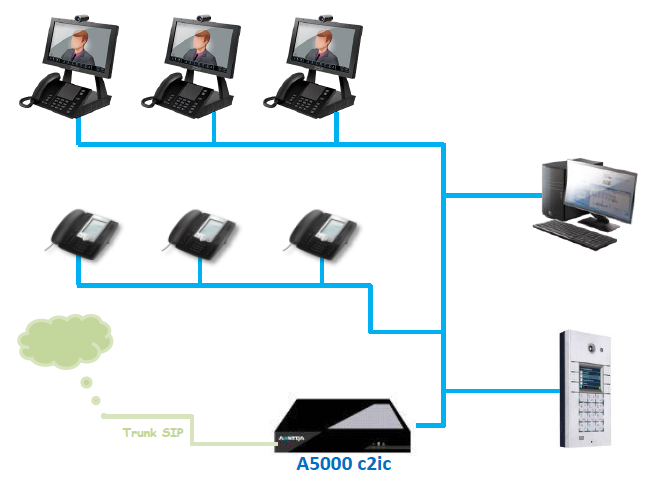
If you have Aastra 5000 PBX and you would like to connect it with your 2N IP intercom, you can do it by using the SIP protocol. Interconnection will be as below.
 |
Aastra 5000 configuration
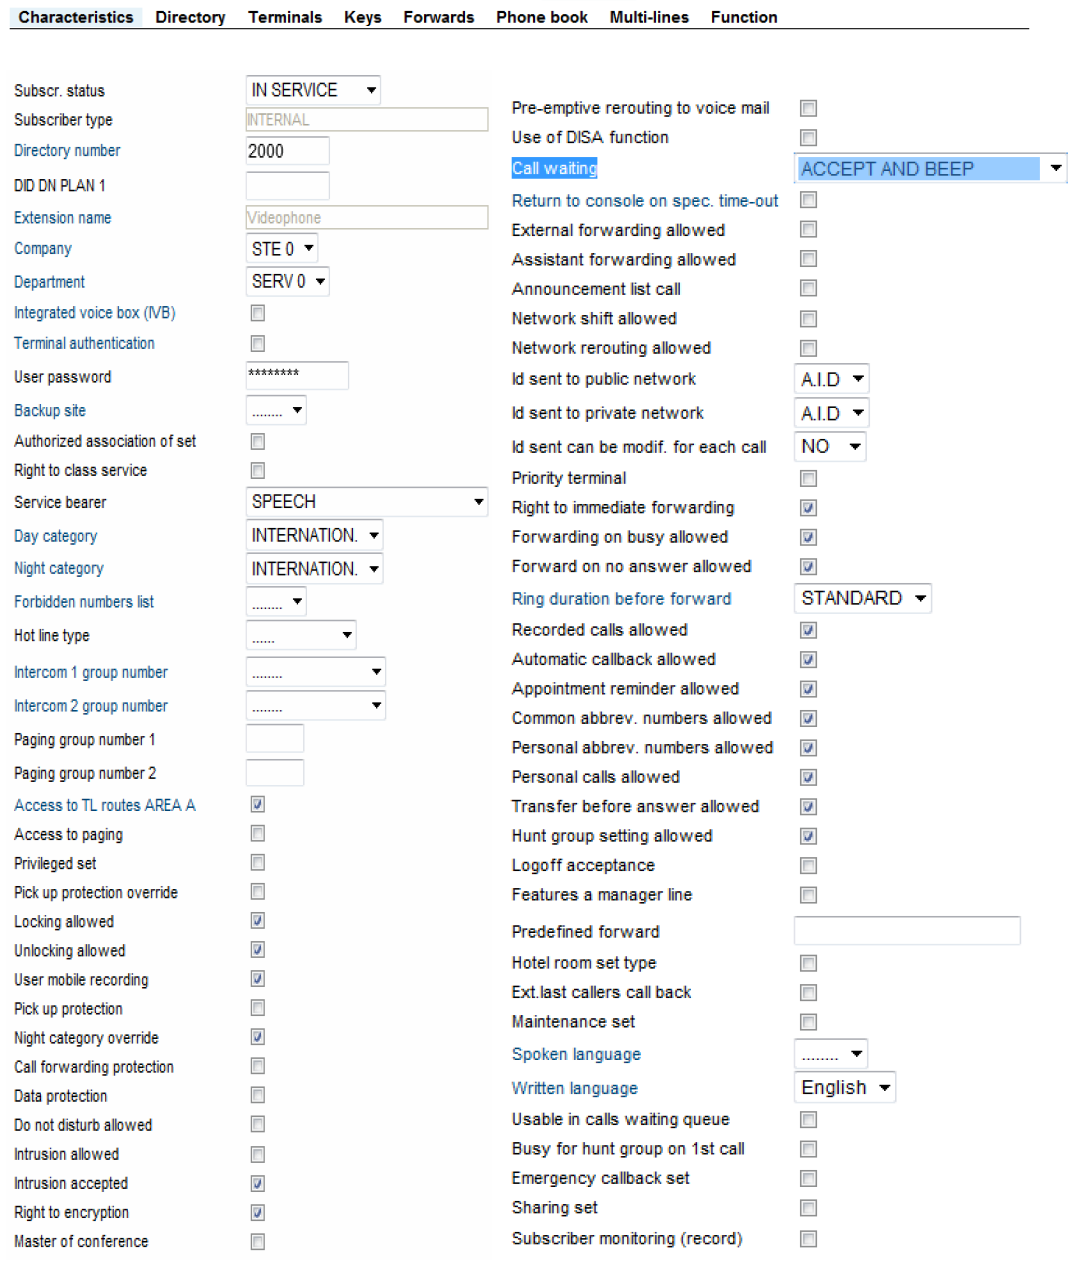
Create a new SIP subscriber on the Aastra 5000 with Aastra Management Portal (AMP). The Number of line keys must be set to 2, so that the device is handled as a multiline subscriber.
In example below we register 2N IP intercom to Aastra 5000 as an extension 2000.
The field Call waiting must be set to “ACCEPT AND BEEP”.
 |
Used Symbols
![]() - Verified with video
- Verified with video
![]() - Verified with audio only
- Verified with audio only
![]() - Work with limitation
- Work with limitation
![]() - Incompatible
- Incompatible