To add 2N IP Intercom to Anynode PBX activate the Configuration Mode in the web GUI of your Anynode server and run Wizard. Then chose Create a node as registrar for SIP option and click Start.
You can also find some video tutorials of Anynode on the Youtube platform: https://youtu.be/8dsOVqfvTCM
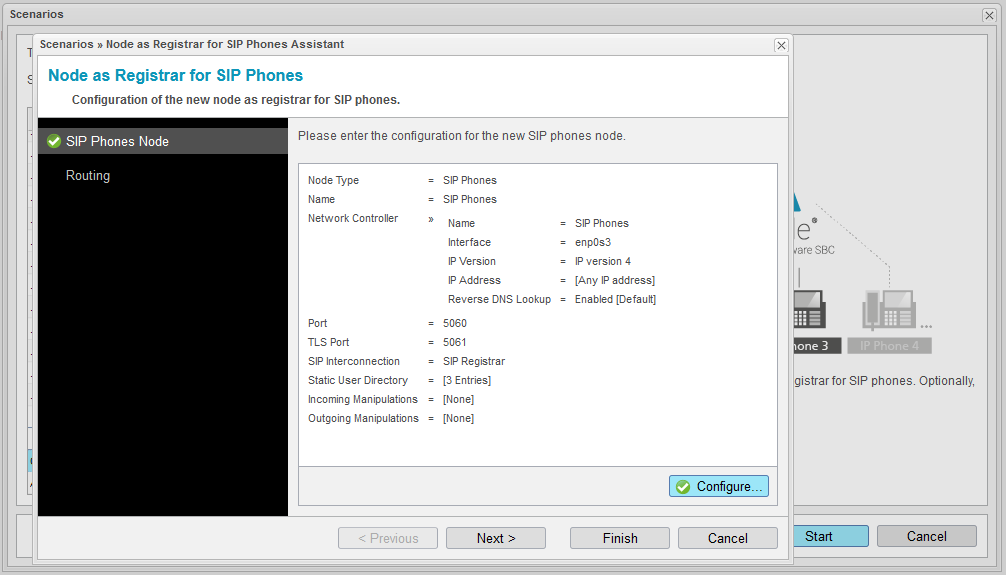
Click on
Configure... button to set everything up.
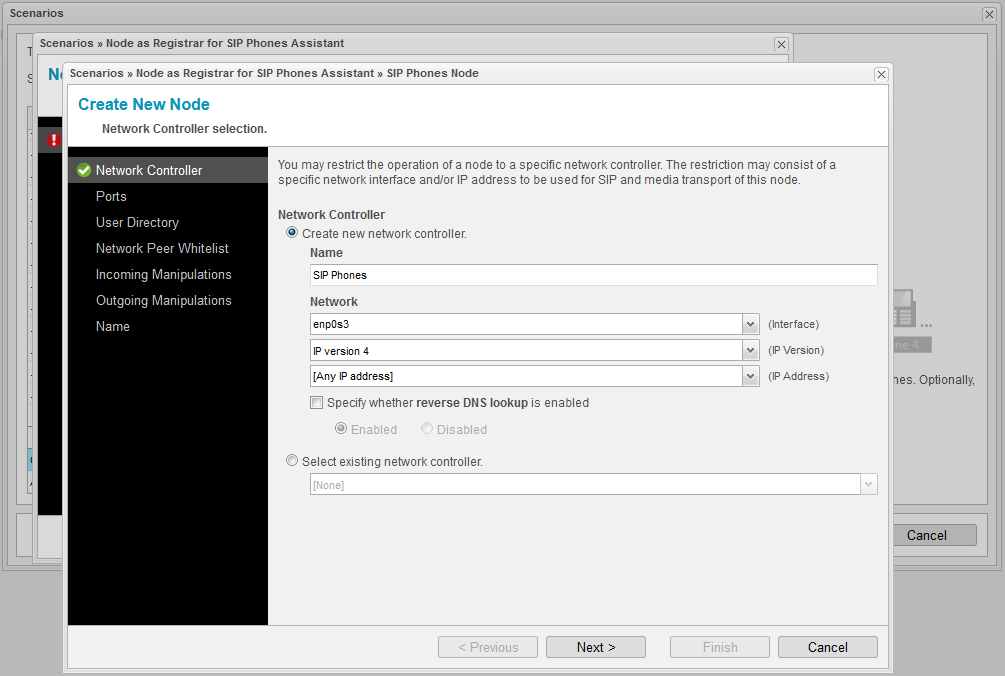
If your Anynode server doesn't have a
Network Controller set yet, it must be done now. Enter the
Name and exact
Network Interface name according to your OS. Than you can setup
IP addresses and clik
Next.
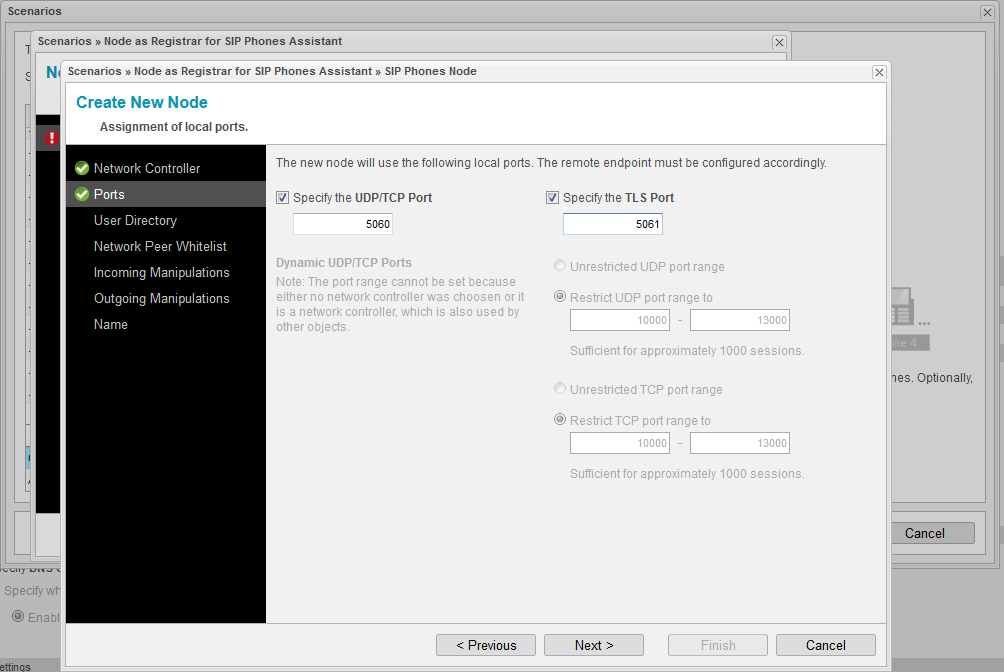
Configure
Ports to be used for registrar. Usualy they are 5060 for UDP/TCP connection, or 5061 for TLS.
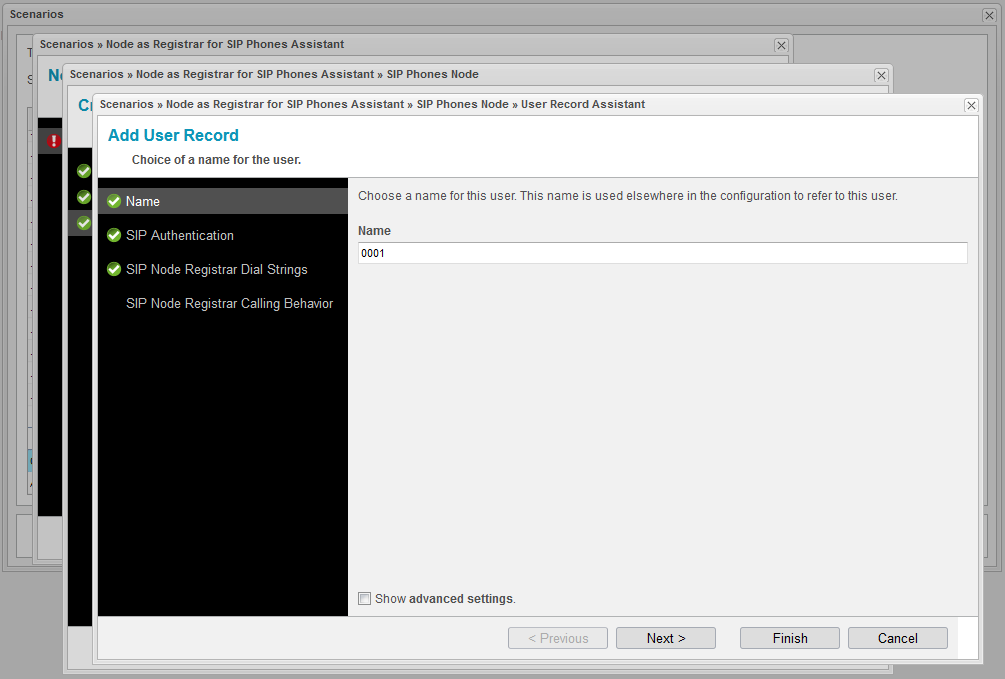
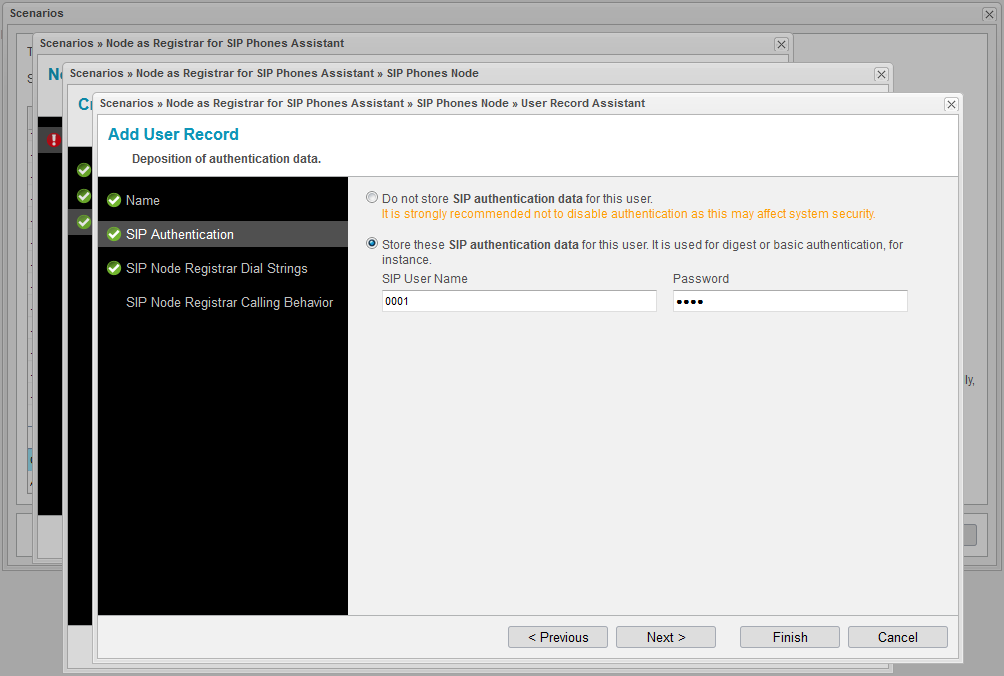
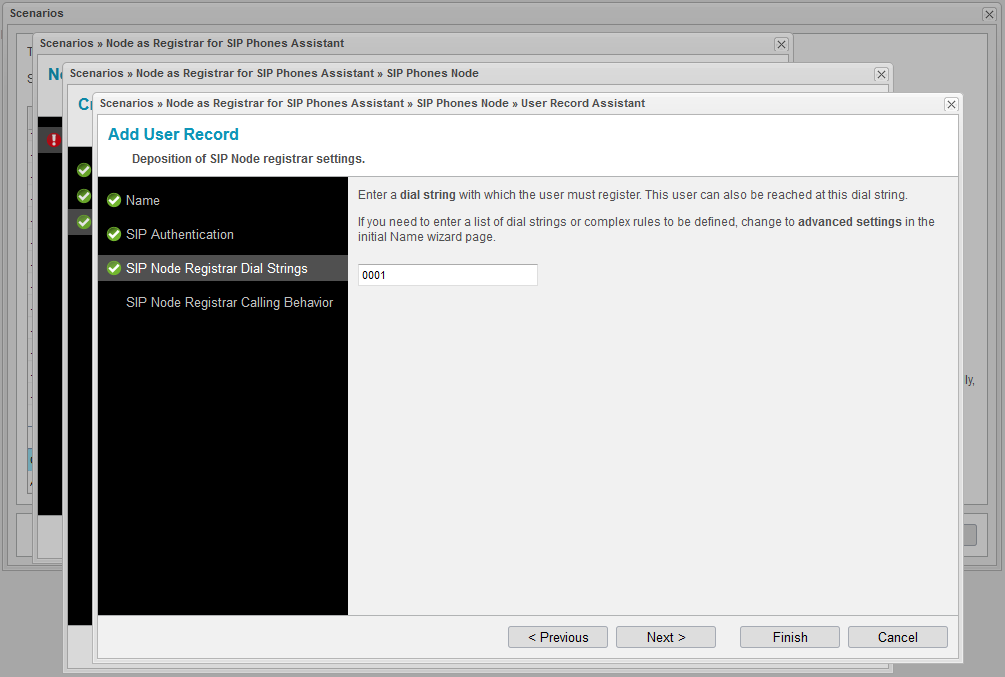
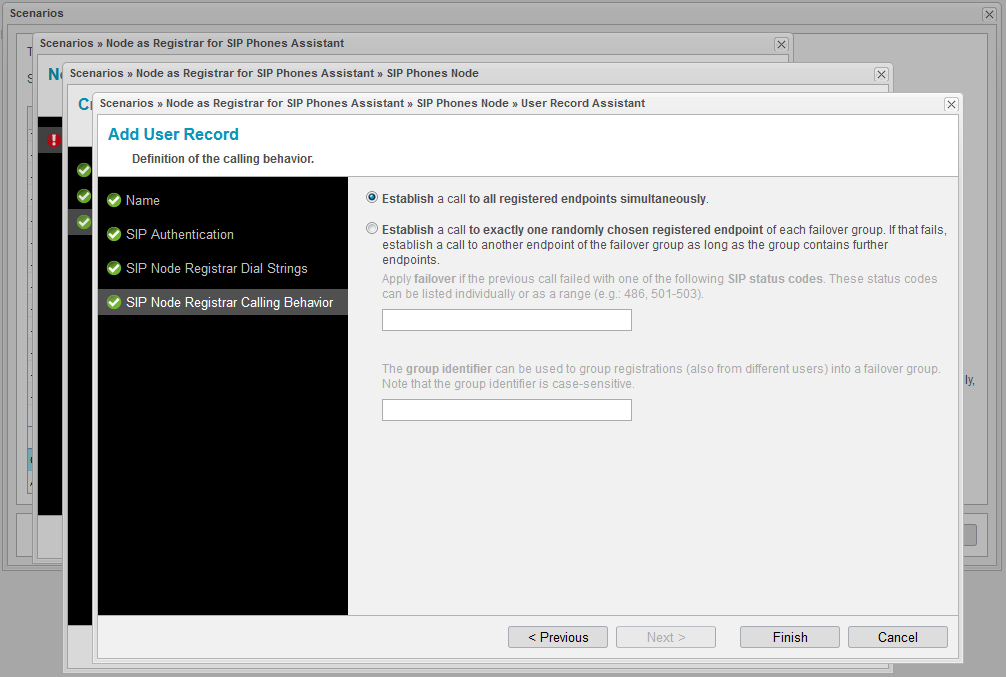
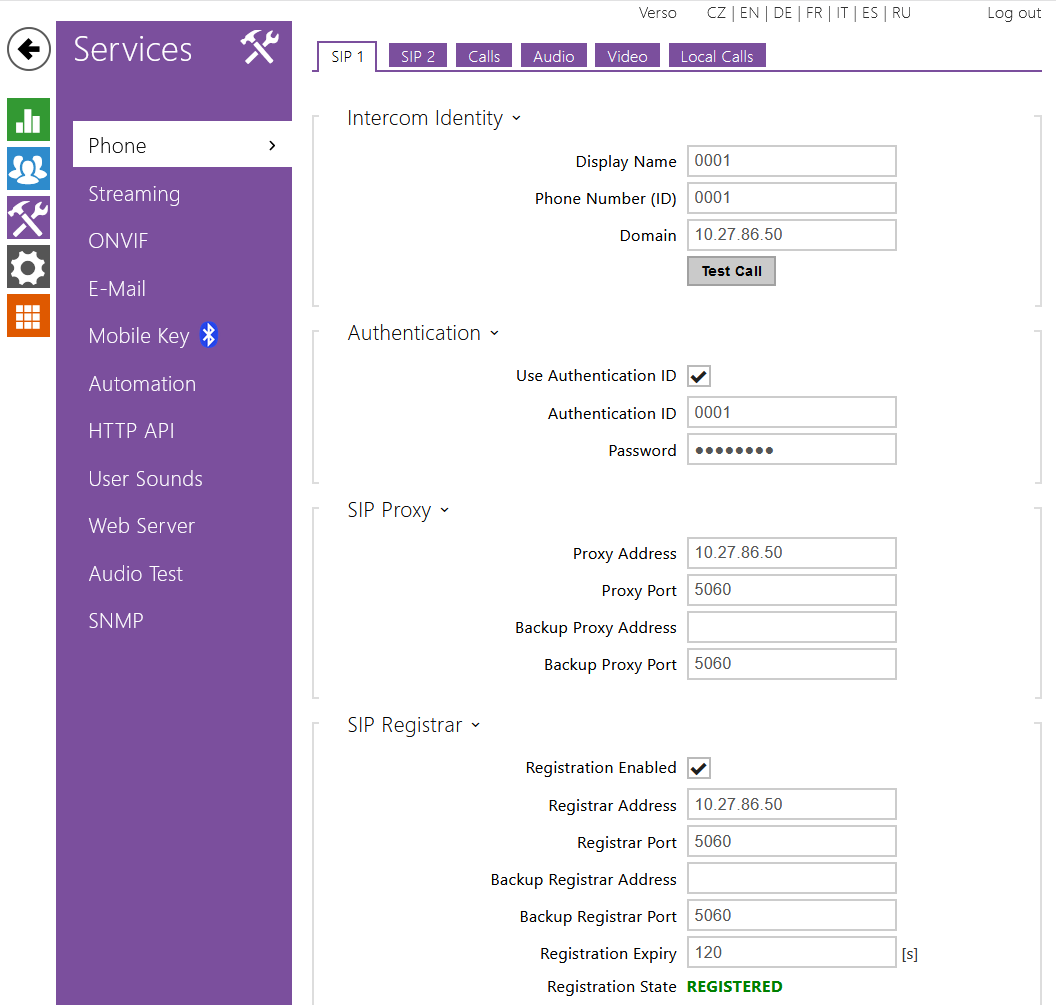
Than configure directory of phone devices connected to PBX, including the account for
2N IP Intercom. Enter a
Name,
SIP authentication data,
Dial string for Registrar or other custom settings if you need. Repeat that same for all telephone devices and click
Finish.
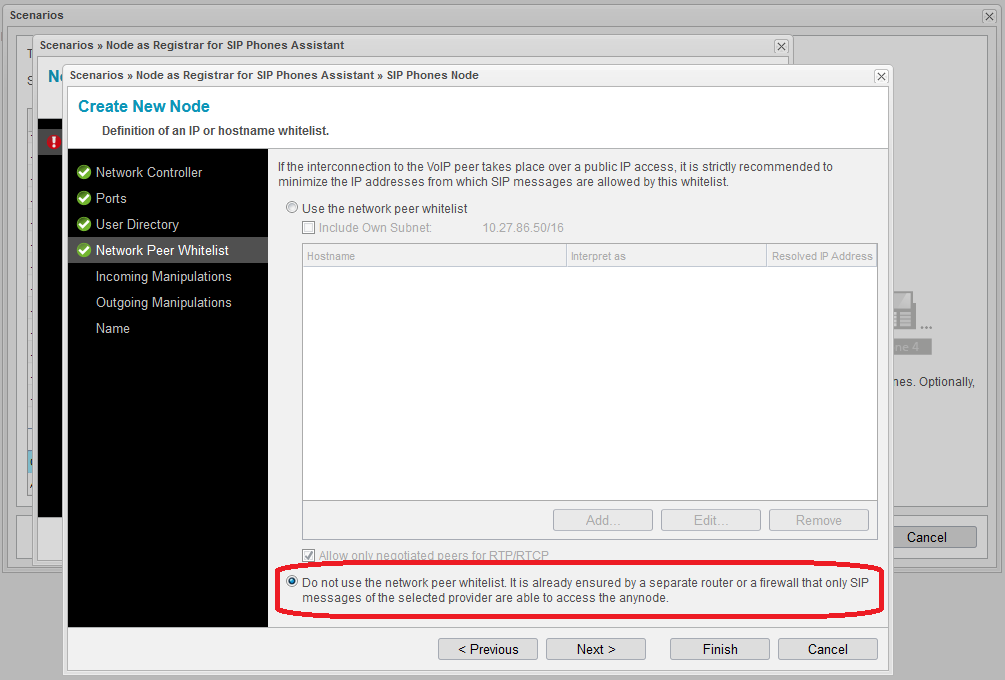
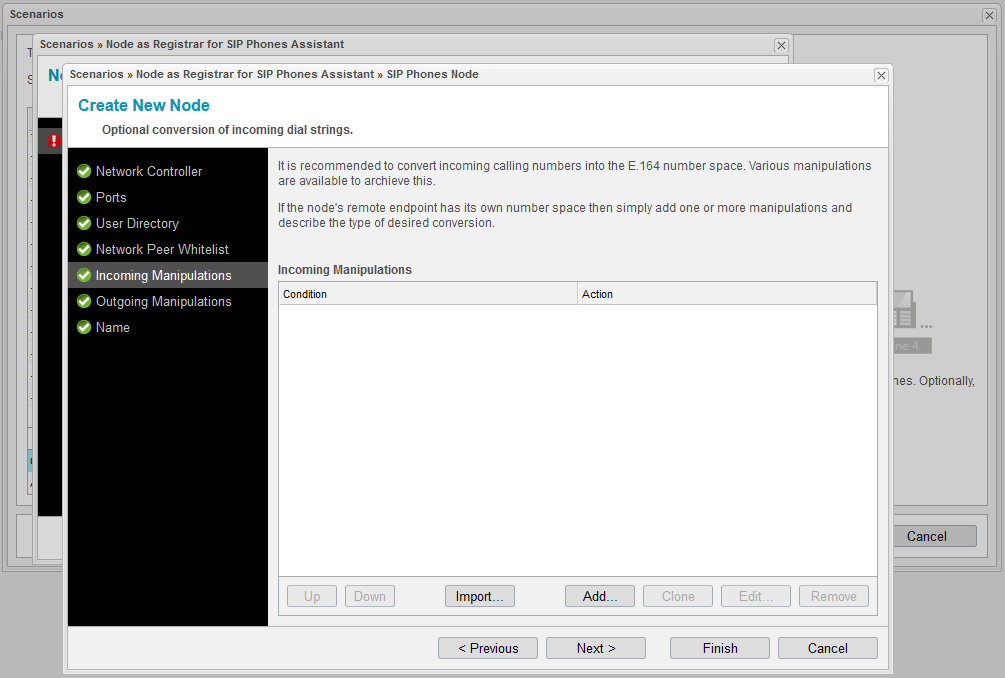
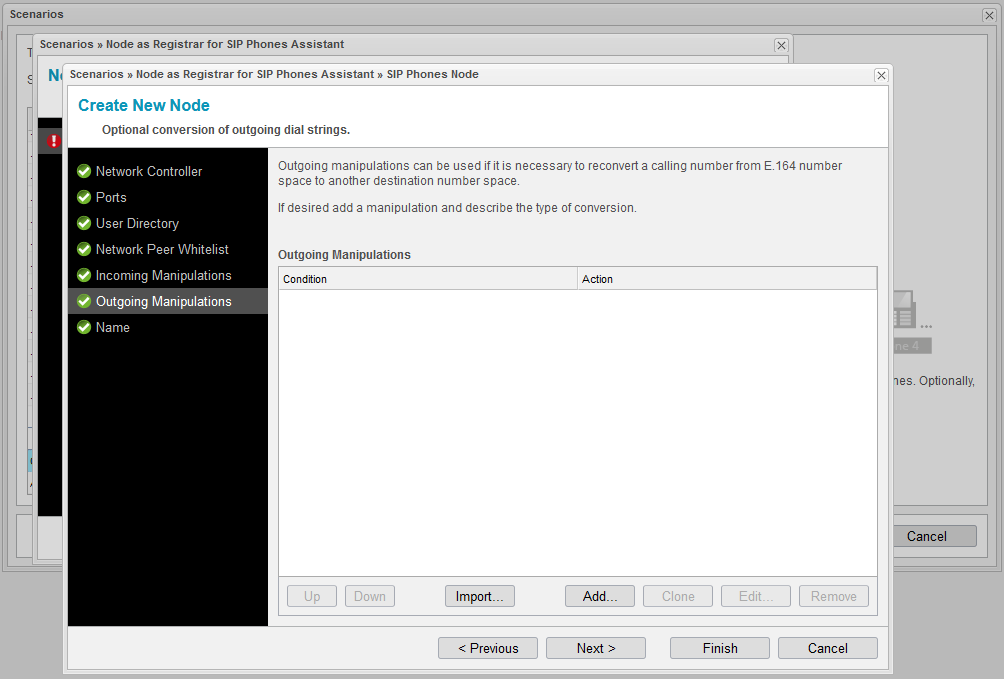
Continue with configuration of Network Peer Whitelist and Minipulations according to screenshots, or if you need another settings, configure it according to your needs.
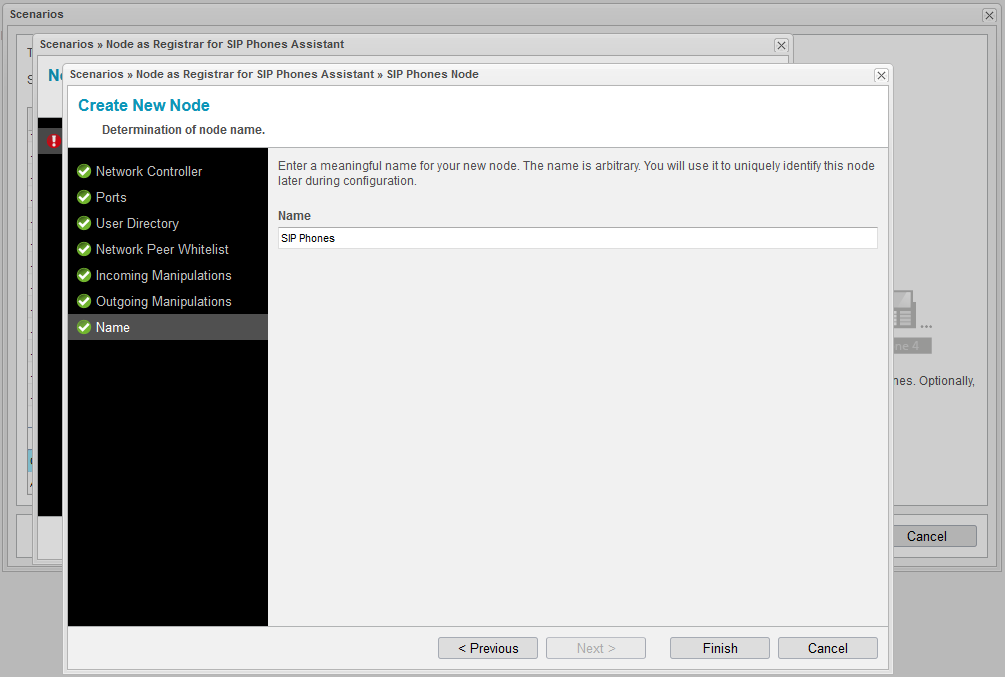
Enter a name of
SIP Phones Node and click
Finish two times.
Audio and Video configuration
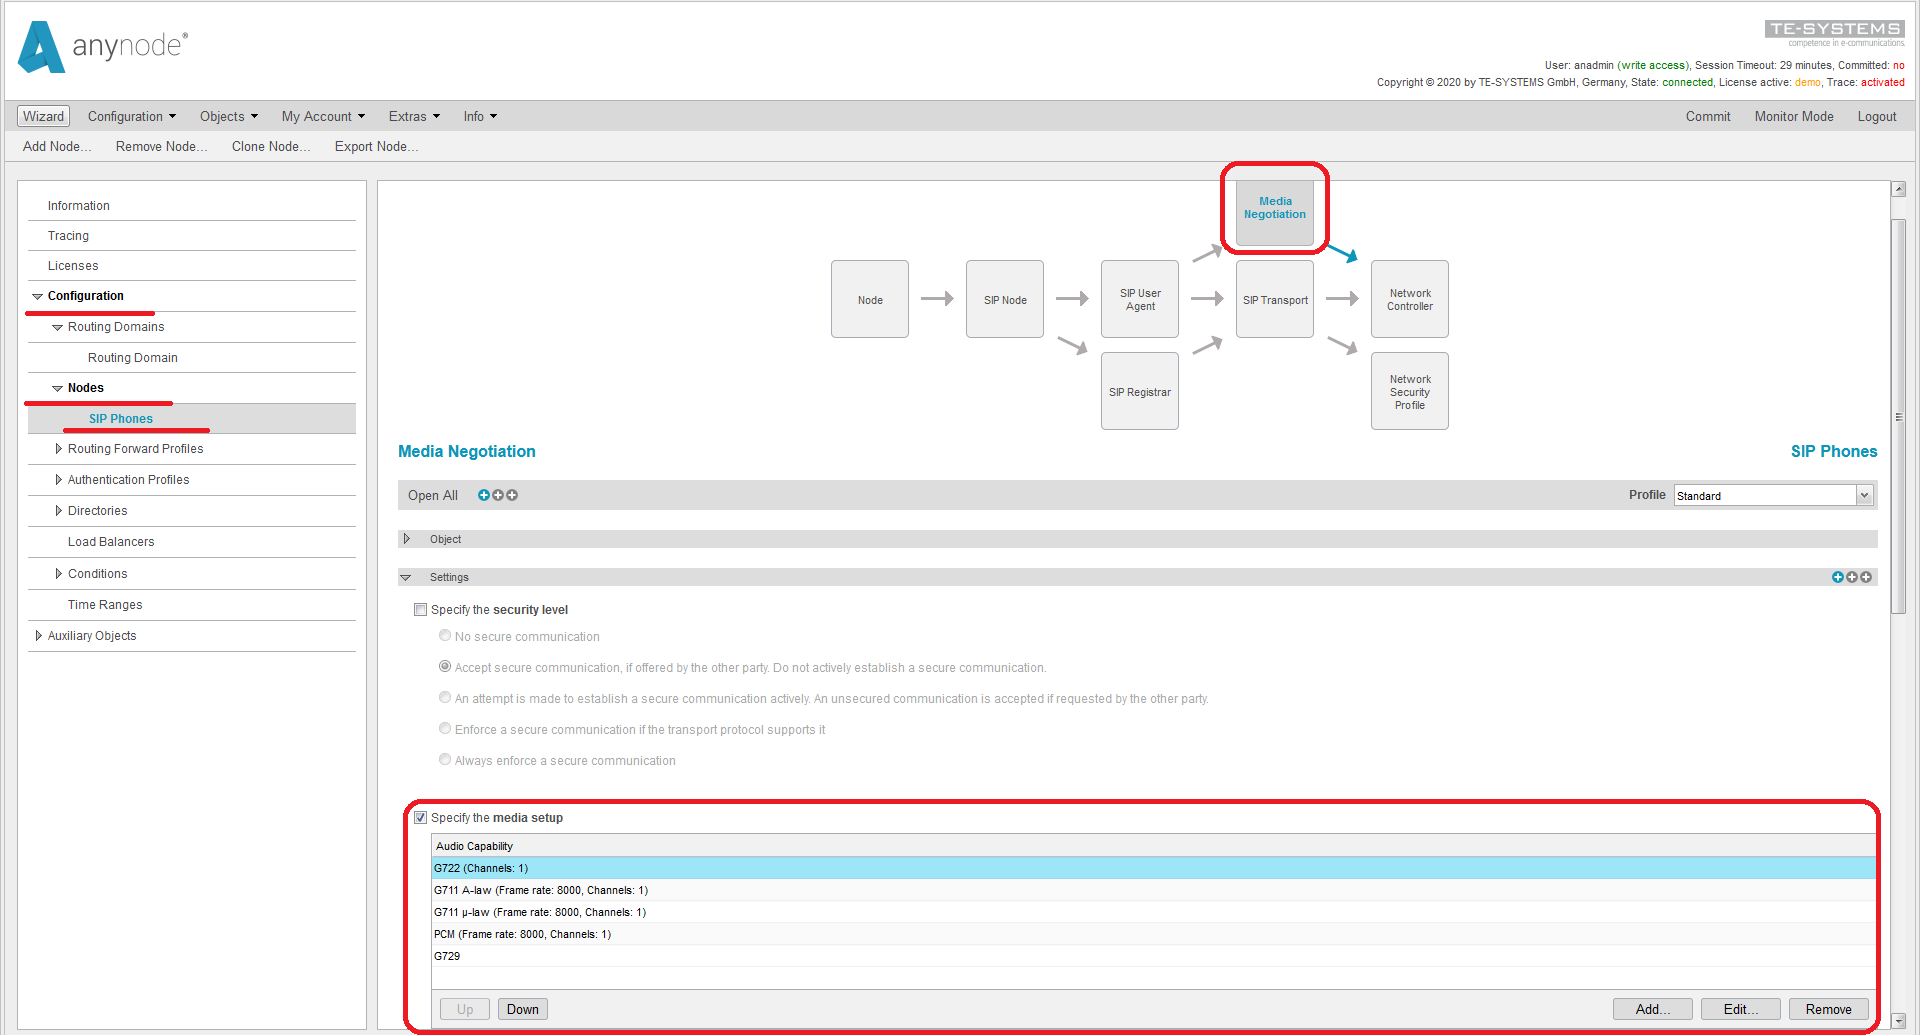
To configure Audio codecs stay in Configuration Mode and enter to the menu: Configuration / Nodes / SIP Phones chose Media Negotiation and in the Settings menu set necessary codecs according to the image.
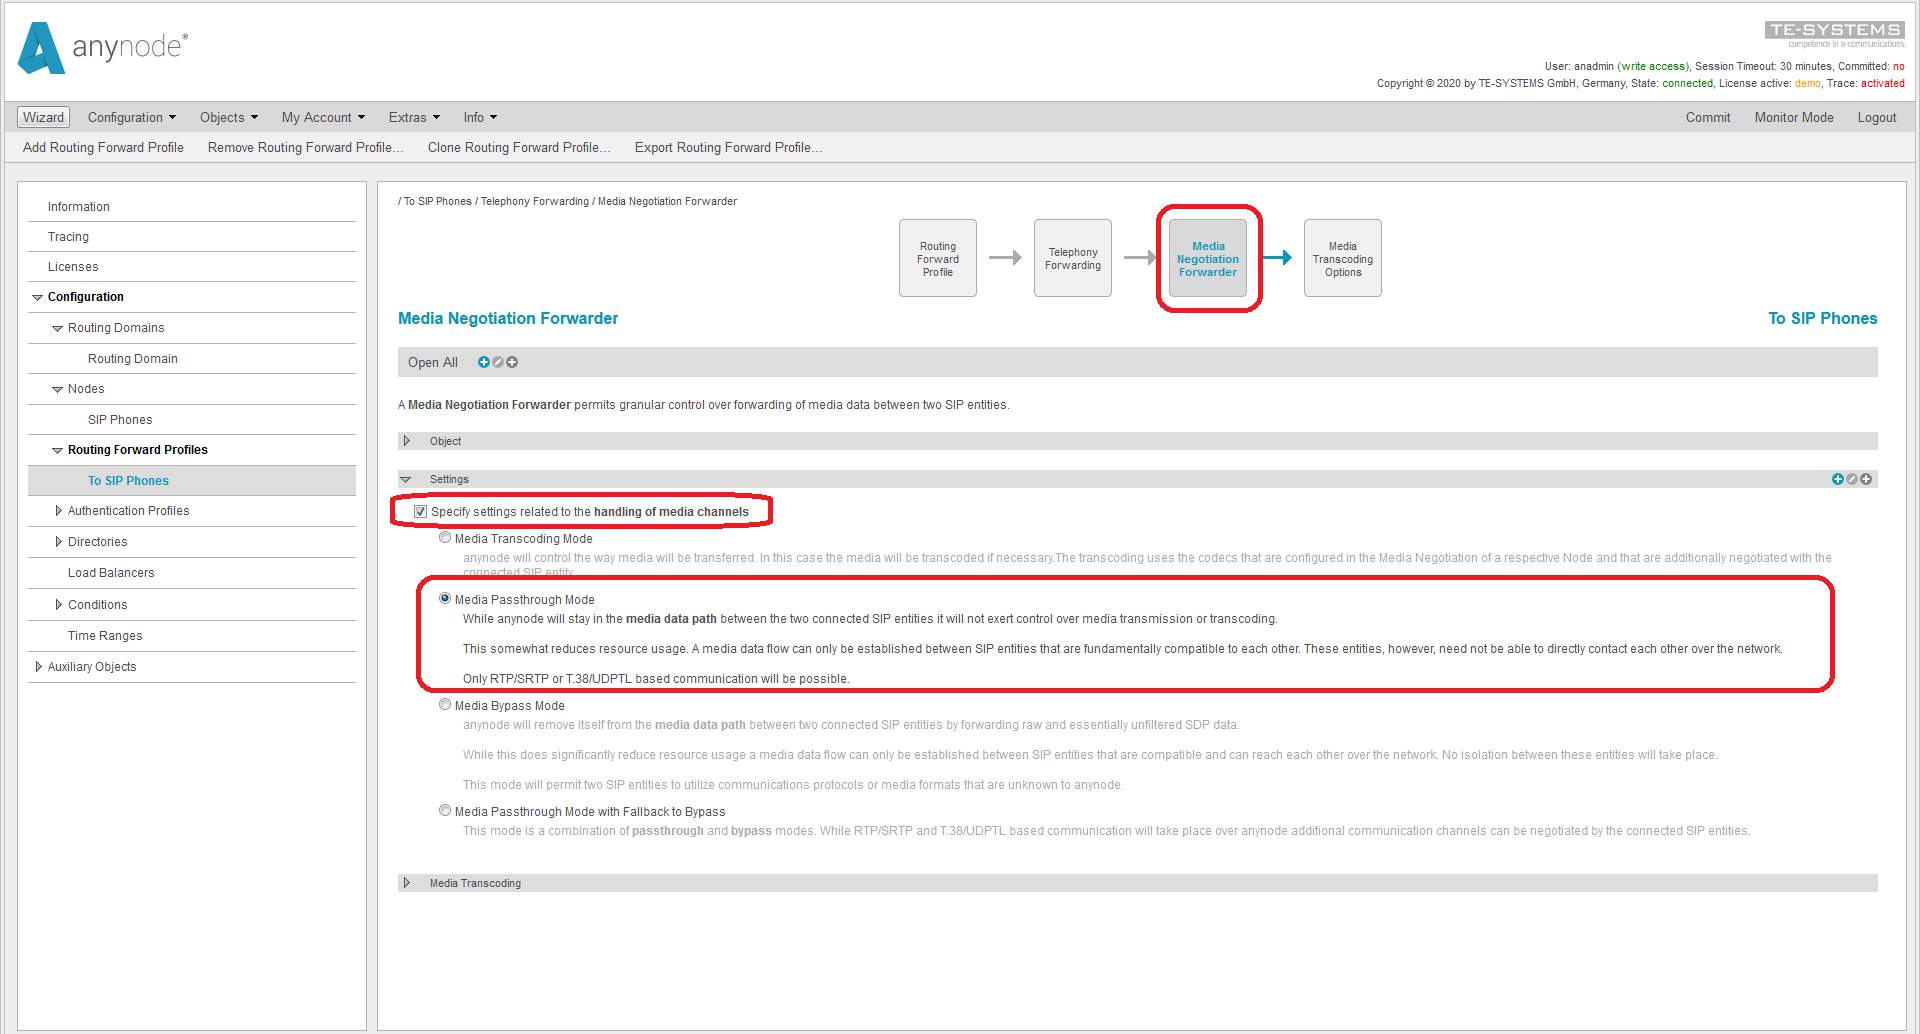
Video is only supported by Passthrough Mode. So please enter the menu:
Configuration /
Routing Forward Profiles /
To SIP Phones and chose
Media Negotiation Forwarder. In the Setting section and continue according to the picture.
- Verified with video
- Verified with audio only
- Work with limitation
- Incompatible


