Cisco Webex Calling
Content
About
Cisco Webex Calling is a cloud-based phone system that is optimized for midsized businesses. It has all the essential business calling capabilities you are likely to need. No need to worry anymore about the expense and complexity of managing a phone system infrastructure on your premises.
Web address: https://www.webex.com/
Version 2024 September
Tested with
| Cisco Webex | 2N IP Intercom | Registration | Calls | Secure RTP (SRTP) |
|---|---|---|---|---|
| September 2024 | 2.45.0.59.0 |
COMPATIBLE MODELS:
- 2N IP Style
- 2N IP Verso 2.0
- 2N IP Verso
- 2N LTE Verso
- 2N IP One
- 2N IP Solo
- 2N IP Base
- 2N IP Force
- 2N IP Vario
- 2N IP Safety (Audio only)
- 2N SIP Speaker (Audio only)
- 2N SIP Speaker Horn (Audio only)
Settings
This guide describes basic steps for configuration of connection between 2N IP Intercom and Cisco Webex platform.
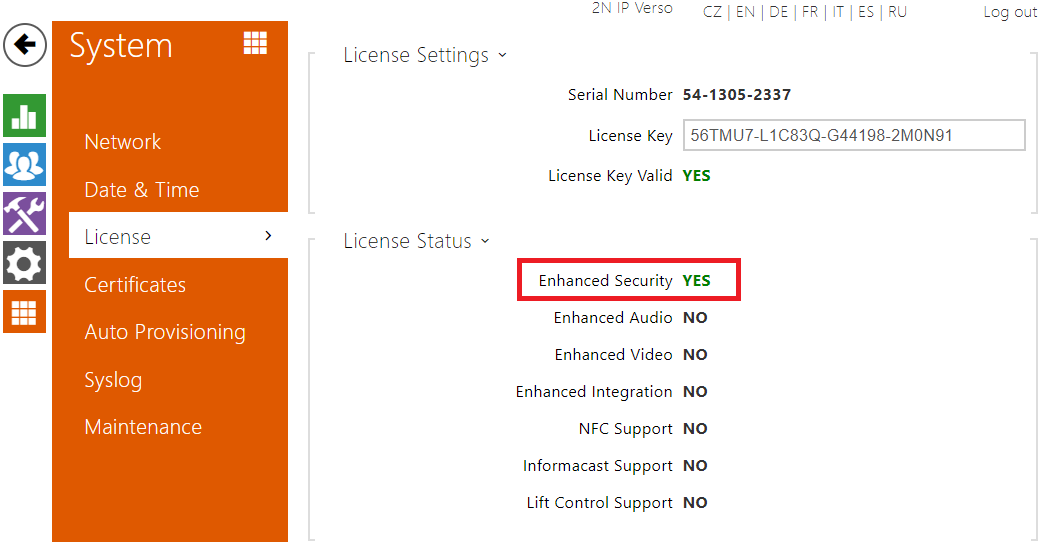
1. License
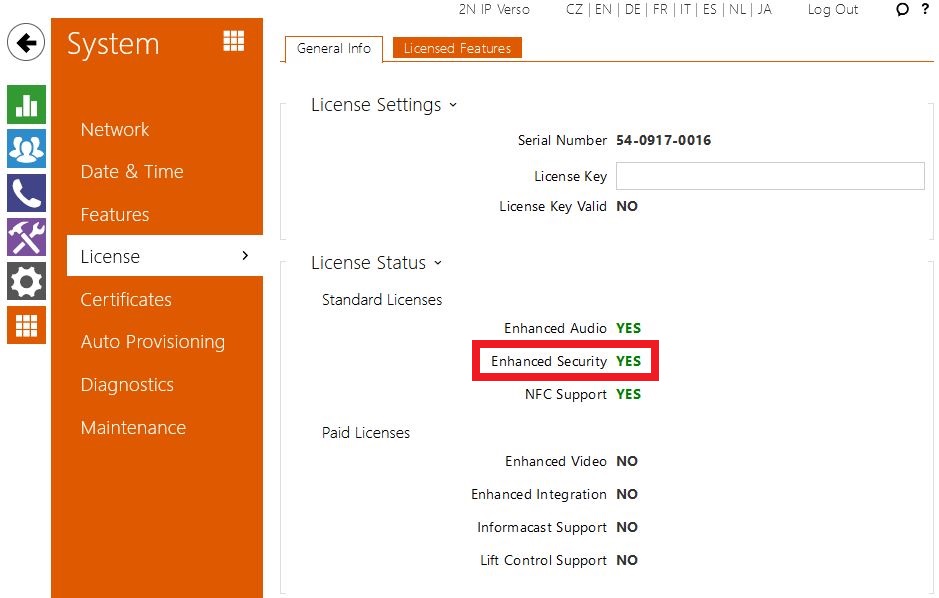
This functionality requires Enhanced Security license, which is now a part of the standard license. The license status can be checked in the menu System / License / General Info
 |
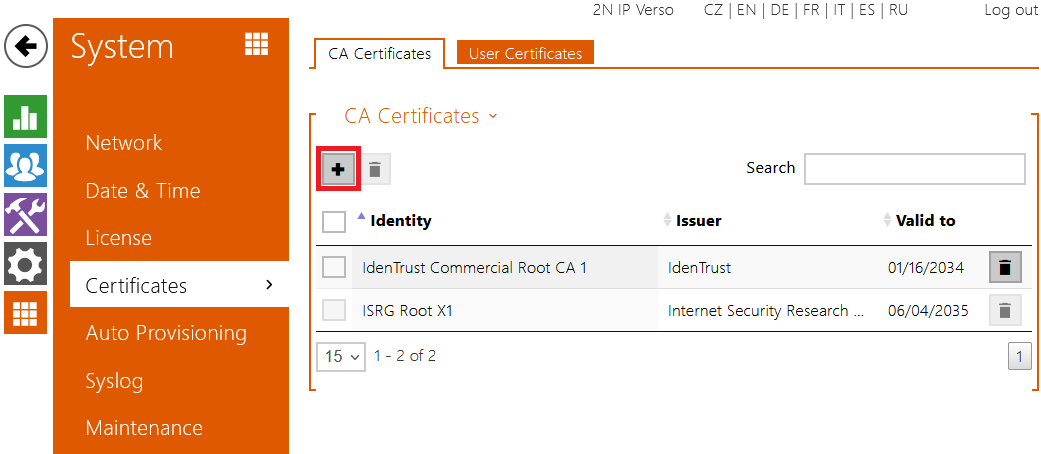
2. Certificate
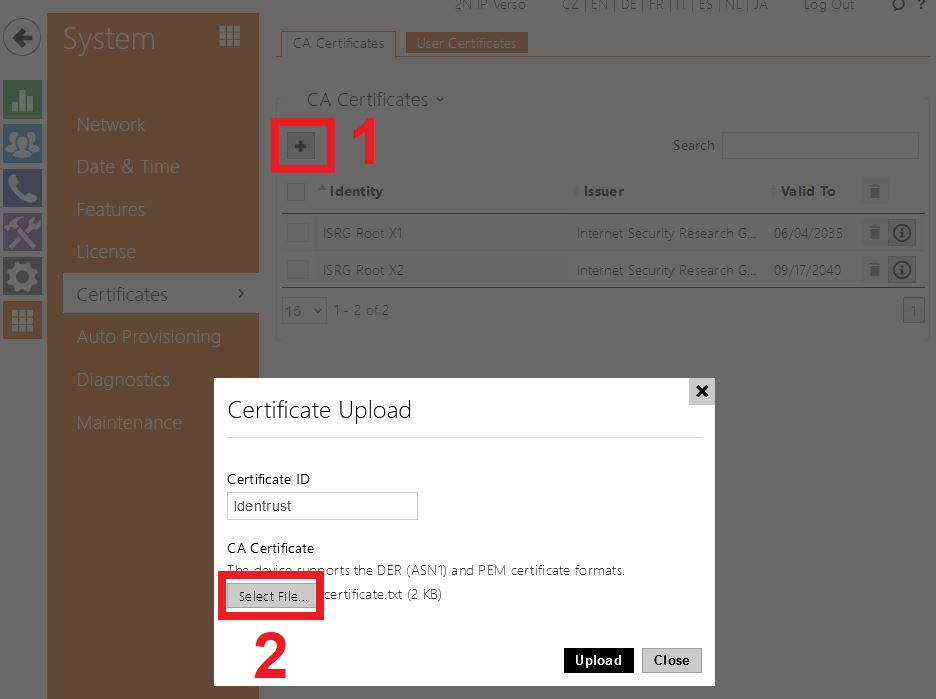
In the menu System / Certificates / CA Certificates insert an Identrust Root CA 1 certificate, which can be downloaded at https://www.identrust.com/identrust-commercial-root-ca-1?msclkid=9033e0a8d03d11ecbcbe5f088a4ae13a
The dialog for certificate upload is called by the "+" button.
 |
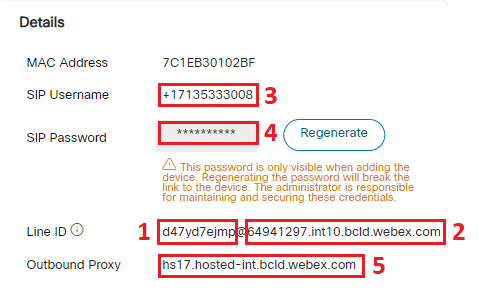
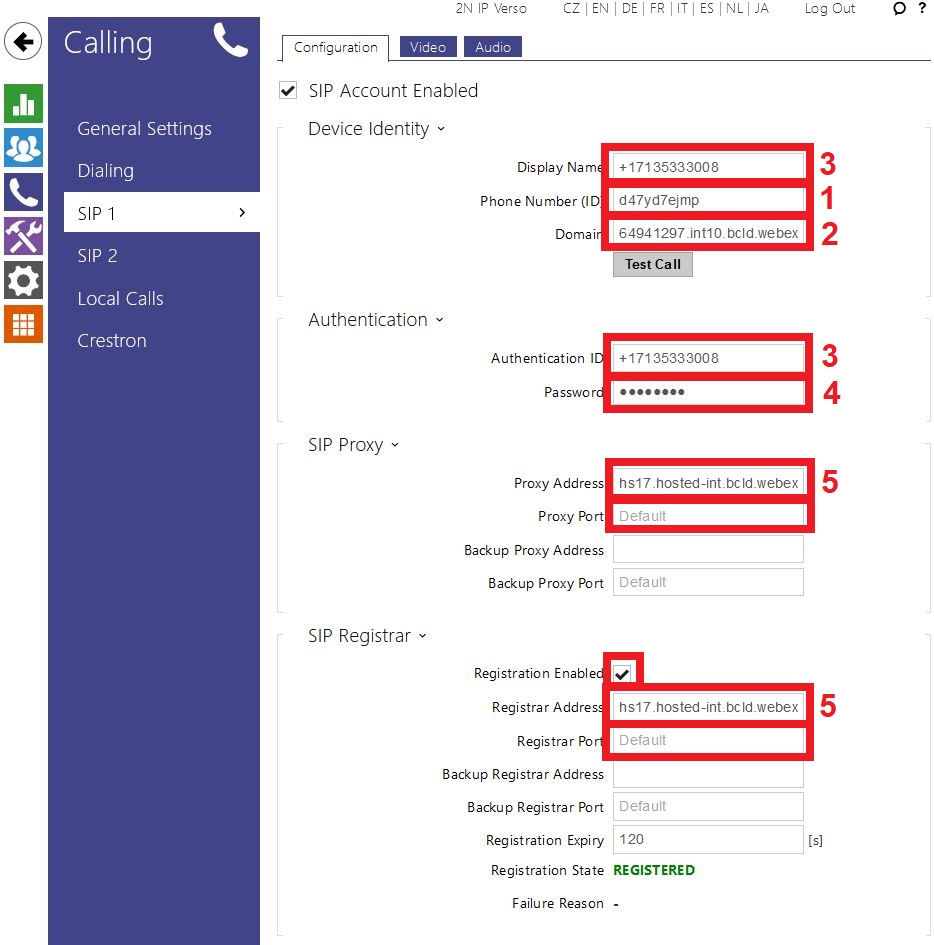
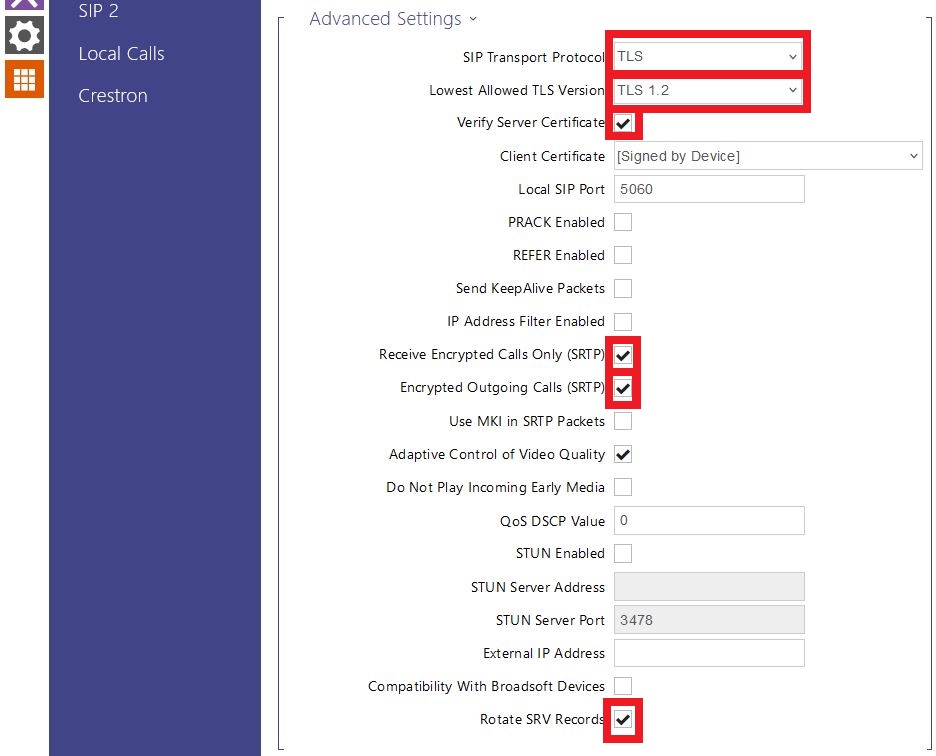
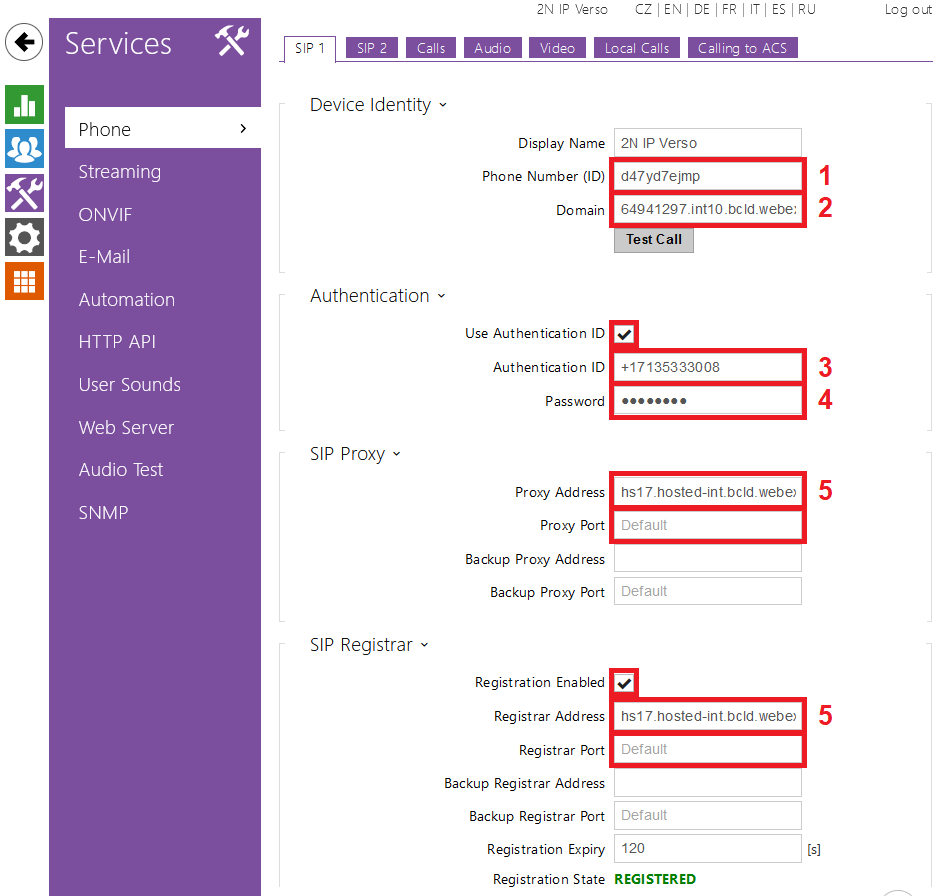
To configure the SIP properties, a Workspace and related 2N device have to be created in the Webex Control Hub as described at: https://help.webex.com/en-US/article/nemh93t/Add-your-customer-managed-device
The SIP credentials are provided by the Webex Control Hub in the menu Management / Workspace in the device details:
 |
 |
 |
 |
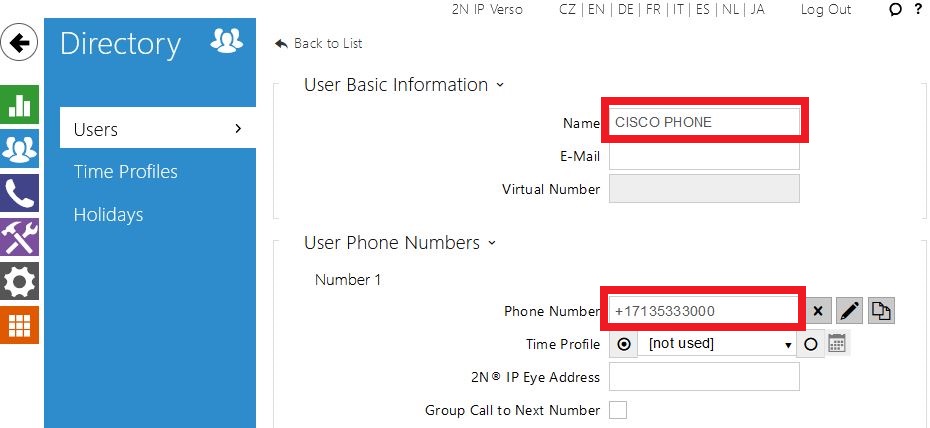
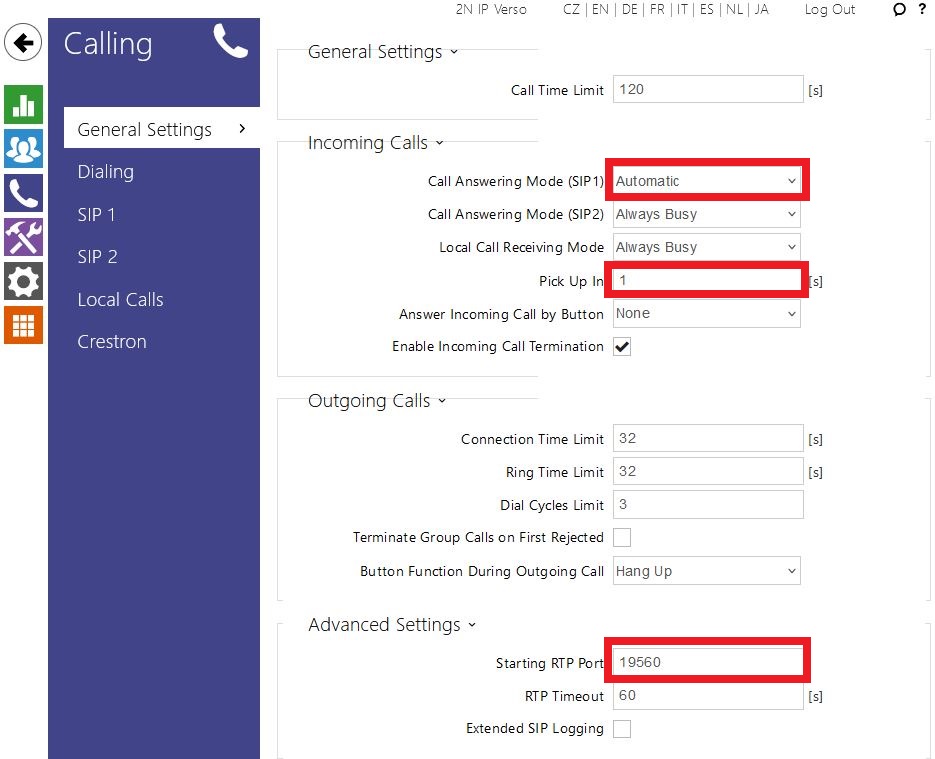
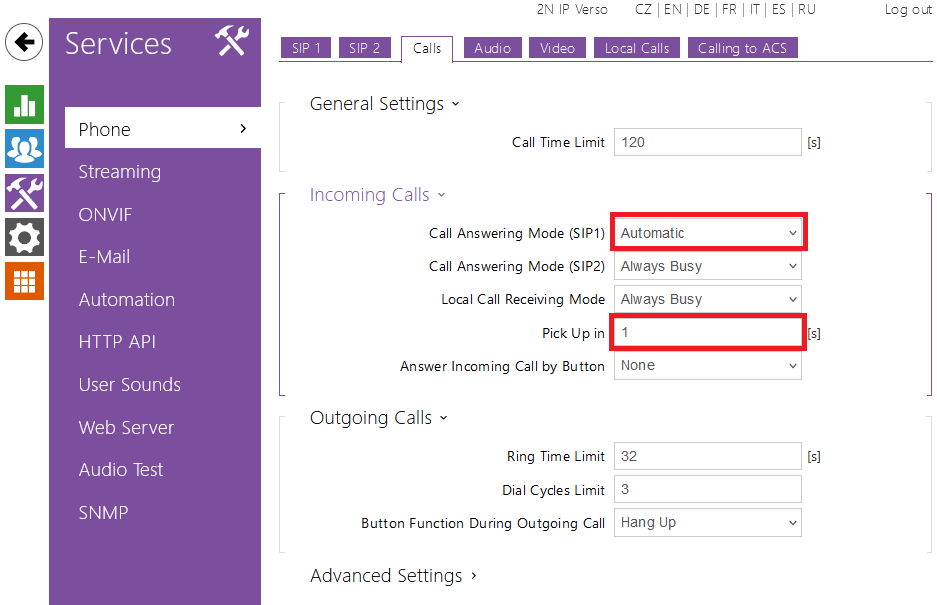
4. Configuration of calls
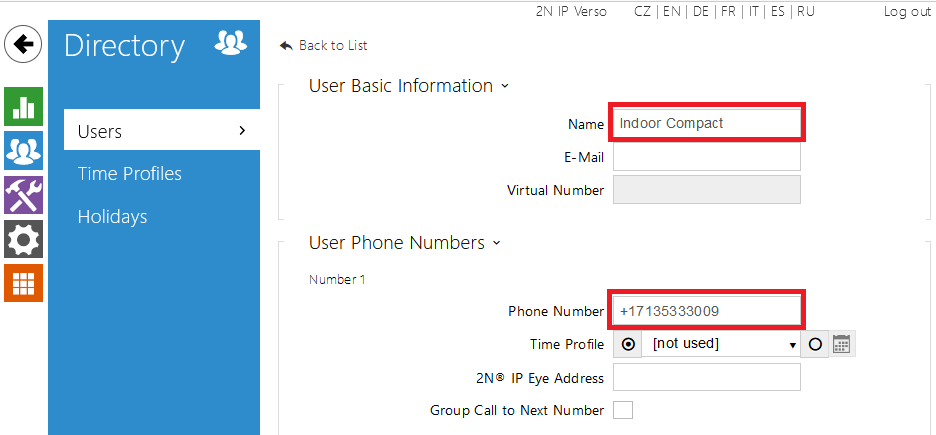
A user is configured in the menu Directory / Users. This user represents the destination to call and can be either a valid PSTN number or an internal extension:
 |
 |
 |
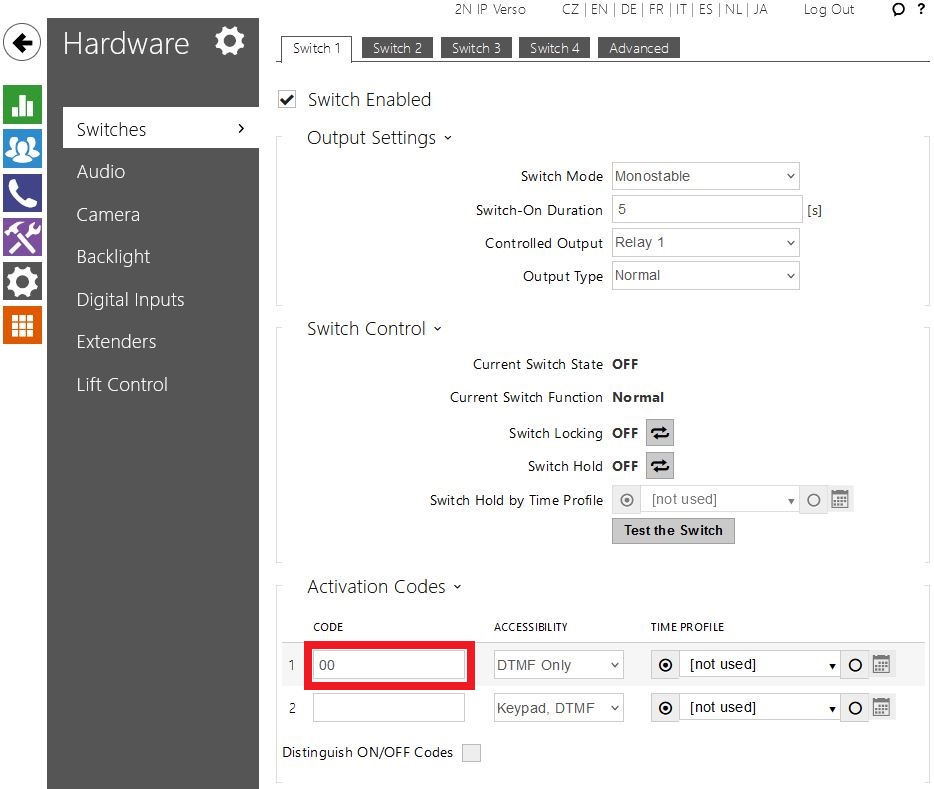
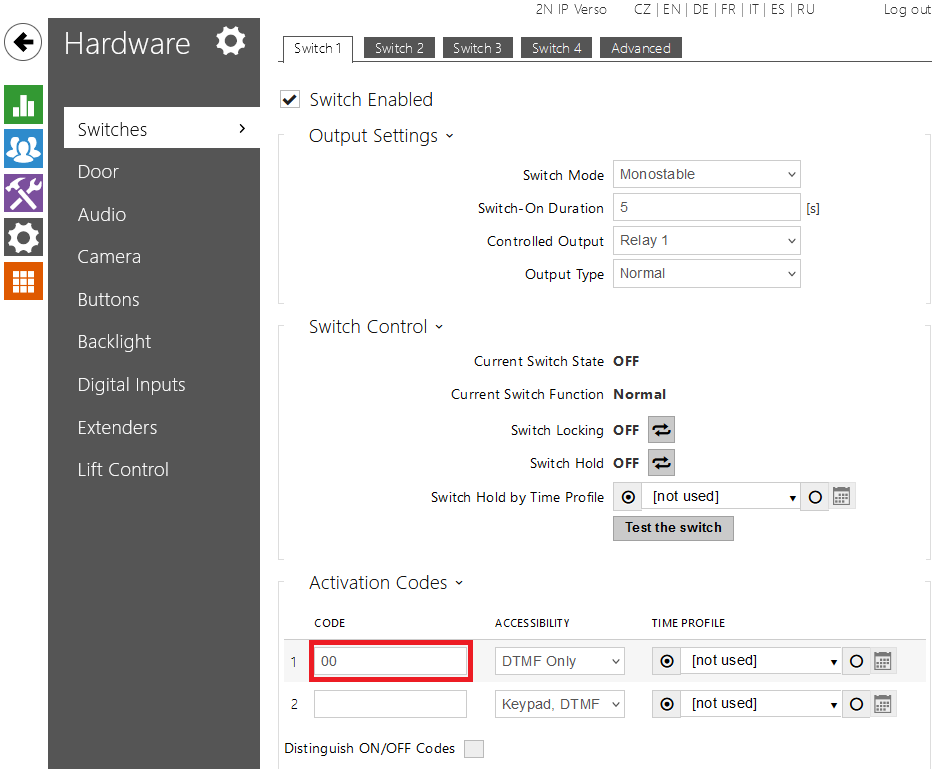
5. Configuration of locks
A door connected to the intercom can be unlocked by a DTMF code. Codes are configured in the menu Hardware / Switches / Switch 1. A code 00 is configured in the default. Codes entered at the phone are confirmed by an asterisk (*).
 |
Version 2022 July
Tested with
| Cisco Webex | 2N IP Intercom | Registration | Calls | Secure RTP (SRTP) |
|---|---|---|---|---|
| July 2022 | 2.34.2.43.10 |
COMPATIBLE MODELS:
- 2N IP Style
- 2N IP Verso 2.0
- 2N IP Verso
- 2N IP Force
- 2N IP Solo
- 2N IP Base
- 2N IP Safety (Audio only)
- 2N SIP Speaker (Audio only)
- 2N SIP Speaker Horn (Audio only)
Note
- There is a limitation that the device won't fallback. Fix for this issue is planned for version 2.35 which is scheduled for April 2022.
Settings
This guide describes basic steps for configuration of connection between 2N IP Intercom and Cisco Webex platform.
1. License
In the menu System / License check if your device has Enhanced Security enabled. If not, please contact your distributor and purchase the Enhanced Security license (2N Part No. 9137908).
 |
2. Certificate
In the menu System / Certificates insert an Identrust Root CA 1 certificate, which can be downloaded at https://www.identrust.com/identrust-commercial-root-ca-1?msclkid=9033e0a8d03d11ecbcbe5f088a4ae13a
The dialog for certificate upload is called by the "+" button.
 |
To configure the SIP properties, a Workspace and related 2N device have to be created in the Webex Control Hub as described at: https://help.webex.com/en-US/article/nemh93t/Add-your-customer-managed-device
The SIP credentials are provided by the Webex Control Hub in the menu Management / Workspace in the device details:
|
 |
 |
 |
4. Configuration of calls
A user is configured in the menu Directory / Users. This user represents the destination to call and can be either a valid PSTN number or an internal extension:
 |
 |
 |
5. Configuration of locks
A door connected to the intercom can be unlocked by a DTMF code. Codes are configured in the menu Hardware / Switches / Switch 1. A code 00 is configured in the default. Codes entered at the phone are confirmed by an asterisk (*).
 |
Used Symbols
![]() - Verified with video
- Verified with video
![]() - Work with limitation
- Work with limitation
![]() - Incompatible
- Incompatible