NFON

Content

About

NFON

Used Symbols

About

Accessible PBX functions

Cloudya, the cloud telephone system from NFON, delivers your complete PBX! Cloudya makes things better with simple, intuitive communications tools and a single phone number and inbox for reaching every employee. This professional communication service leaves no questions unanswered.

  • Do business from anywhere on any device
  • Simple interface, drag & drop features
  • Geo-redundant, failsafe infrastructure

https://www.nfon.com/

NFON

Tested with

NFON2N IP IntercomRegistrationCalls audioCalls videoSecure RTP (SRTP)Door openTransferVideo preview
 2.29.1.38.8(tikot)(tikot)(chyba)(tikot)(tikot)(tikot)(chyba)

Settings

NFON configuration

To be able to connect the 2N IP Intercom into NFON services, the new Extension is needed.

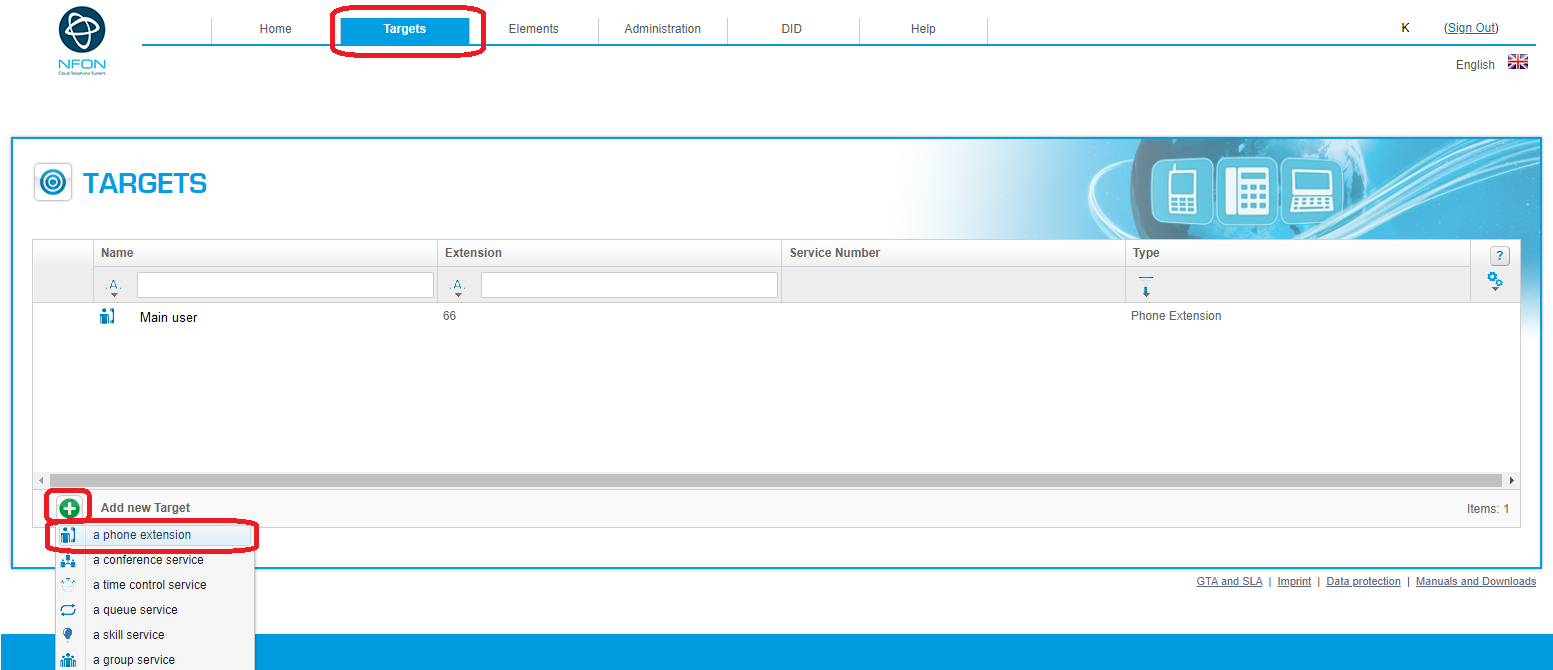
Login by your admin account to NFON portal https://portal.nfon.com/ and go to menu Targets. Click on the button + Add New Target bottom the table and slect and select a phone extension.


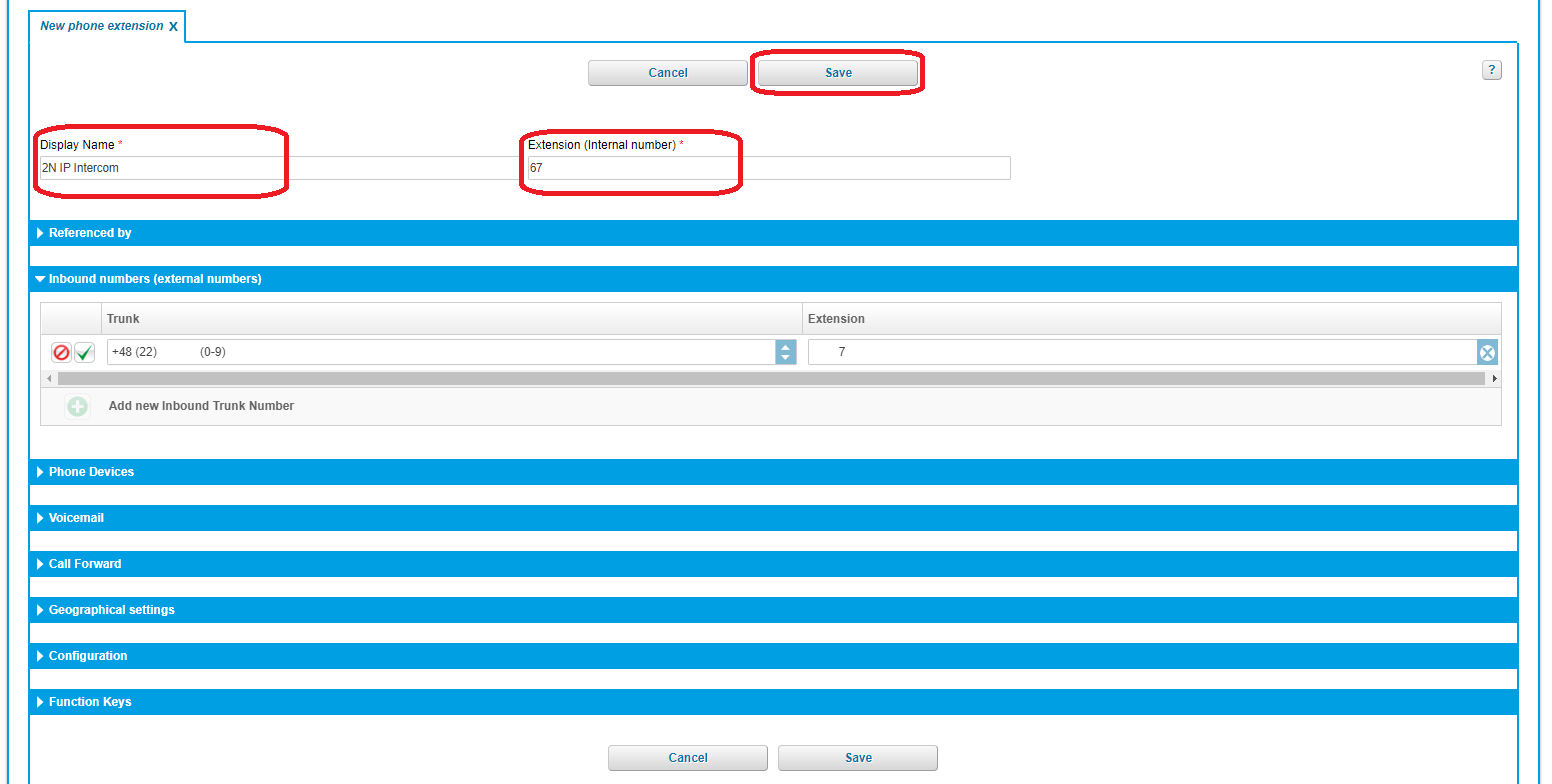
Fill the name of Extension, the name will be displayed as caller, or in the phone book. Write number of Extension (Internal number), it will be used to make internal calls. Save the new Extension.


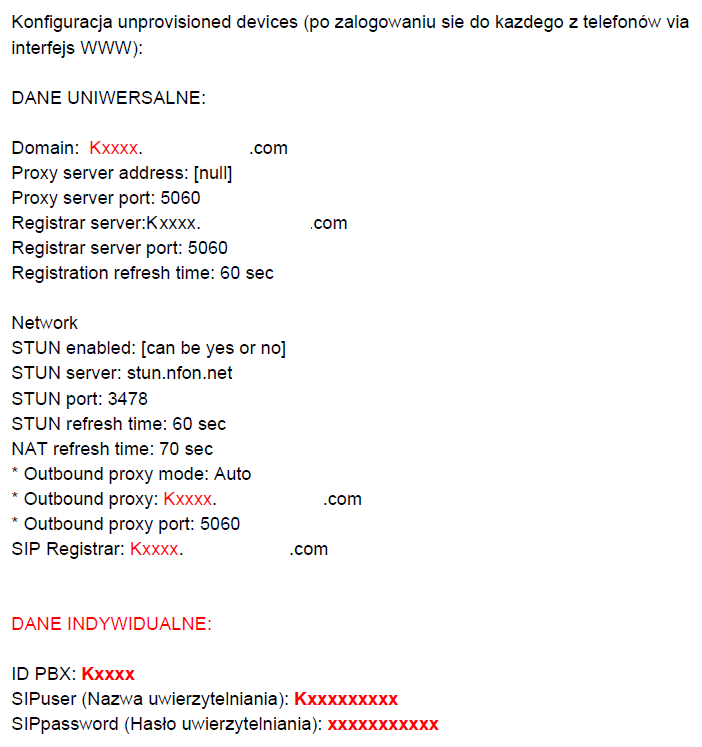
The 2N IP Intercom must be added into Devices. As it is not one of NFON full provisioned devices, it must be added by NFON support. So please ask your NFON support contact to add Unprovisioned SIP Device. It is in the list of Devices than and the NFON support will provide configuration credentials for SIP device.

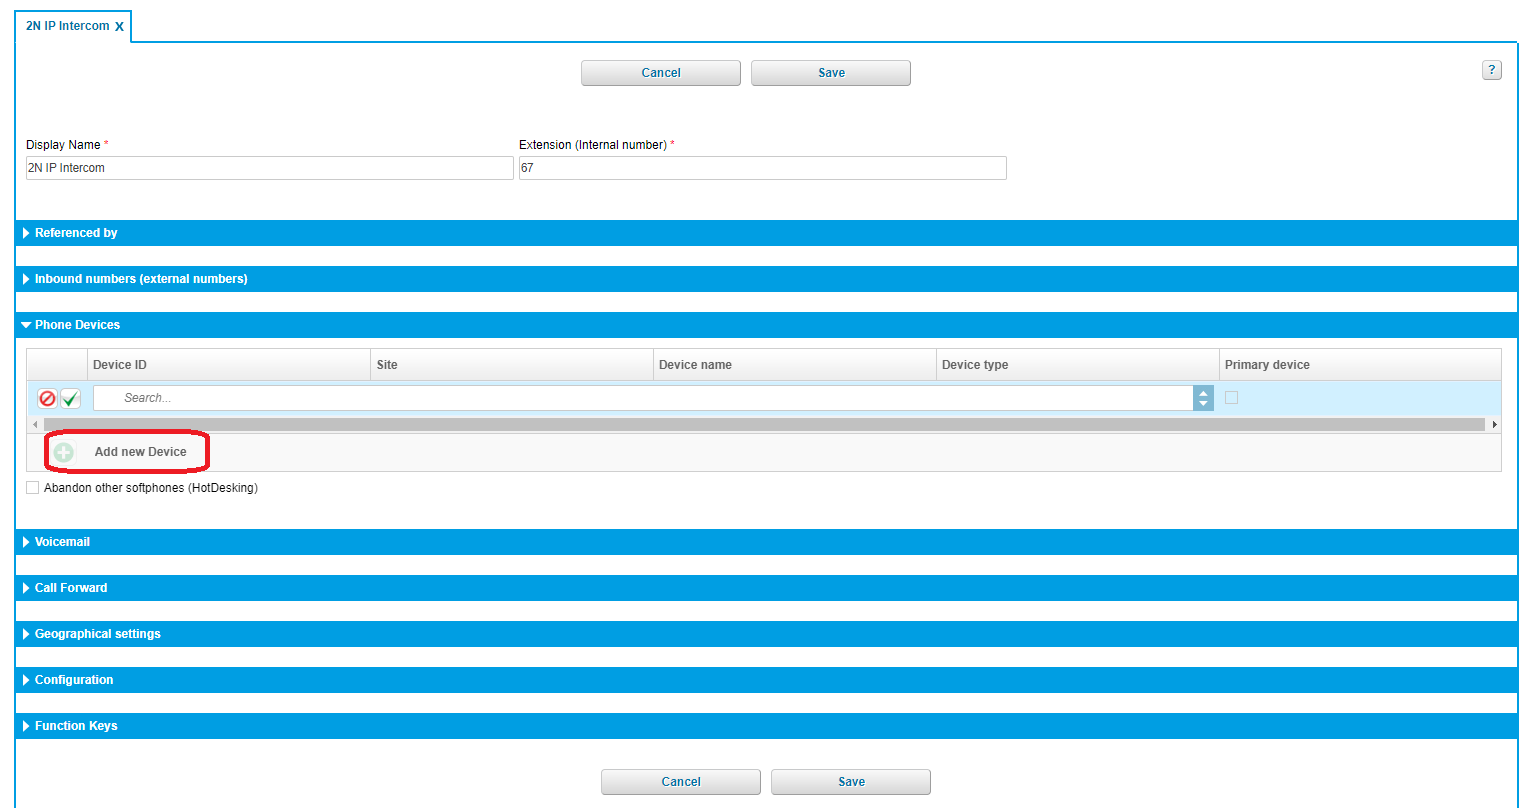
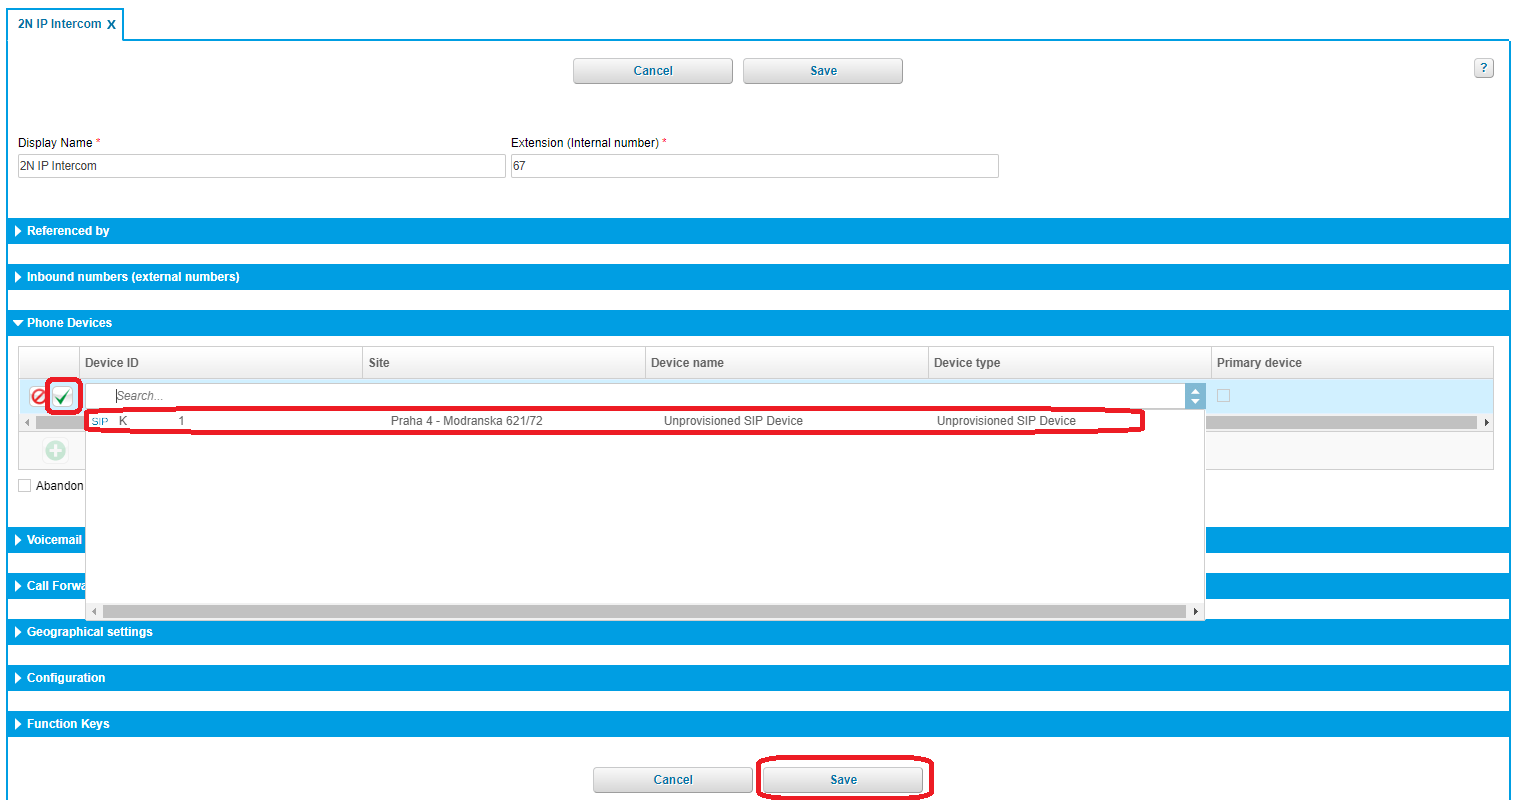
Connect the Phone extension with the device. Go to menu Targets and click on editation icon next to prepared extension of 2N IPIntercom.
In Phone Devices section click on + Add new Device, select correct Unprovisioned SIP Device and confirm by clickyng the ✔️ button. Save the setting.

2N IP intercom configuration

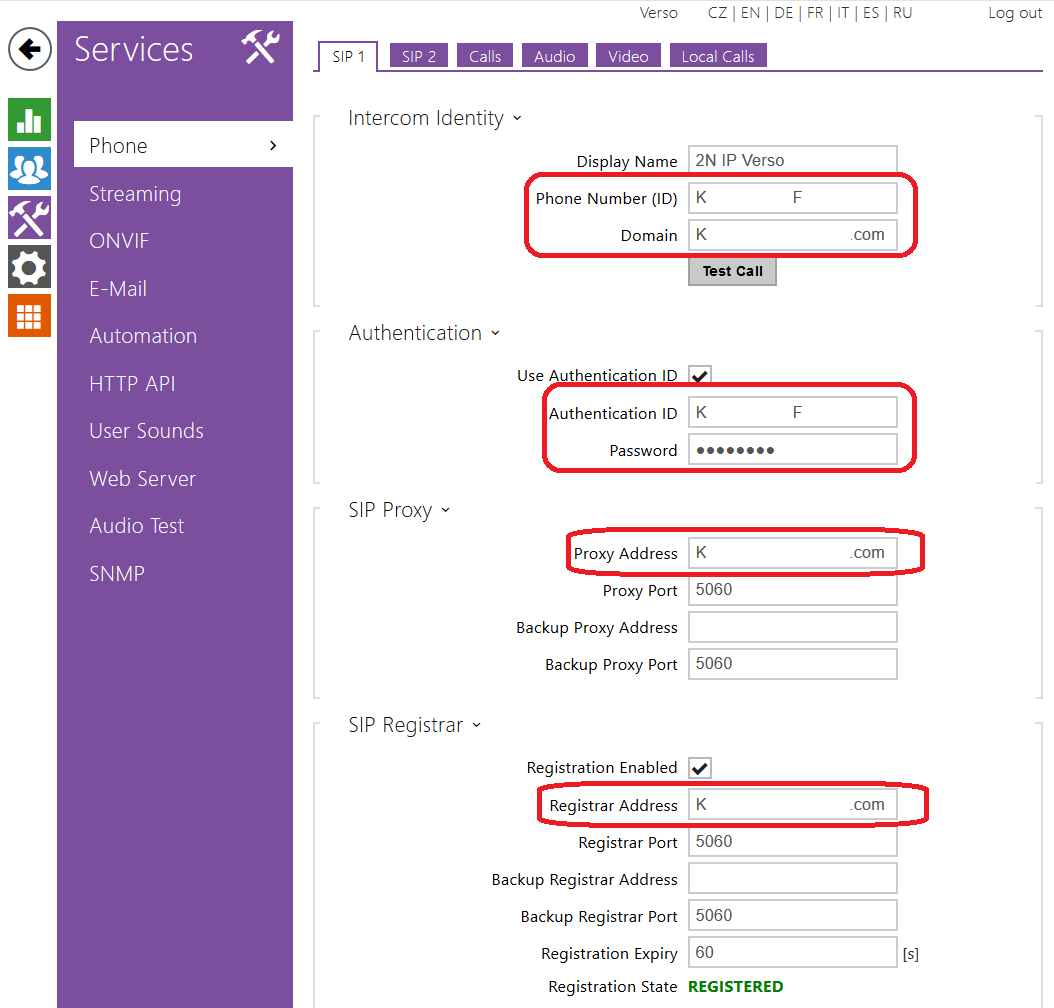
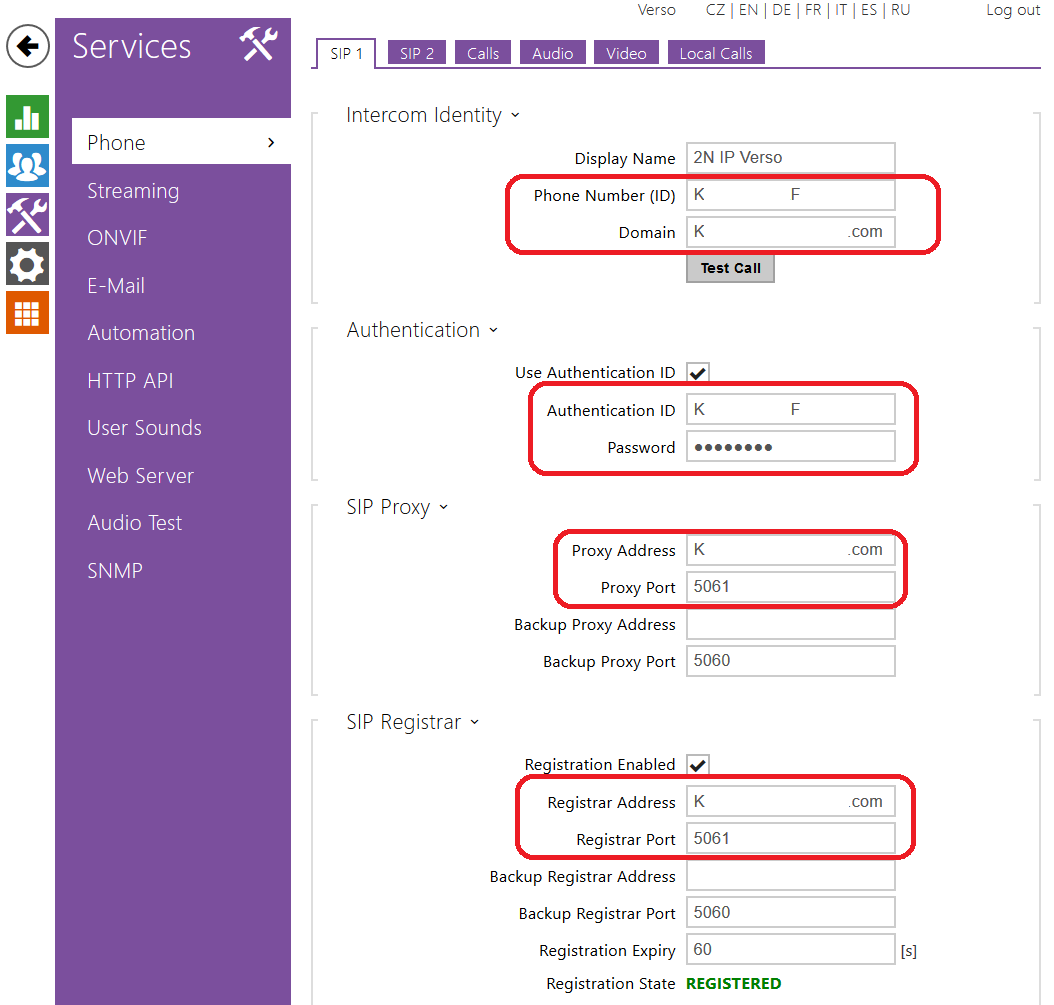
Login to 2N IP intercom by your admin credentials, default login is Username: Admin and Password: 2n. Go to the menu Services / Phone / SIP 1. Fill in SIP credentials according to document received from NFON support, you got by adding Unprovisioned SIP Device. Then click on Save button.


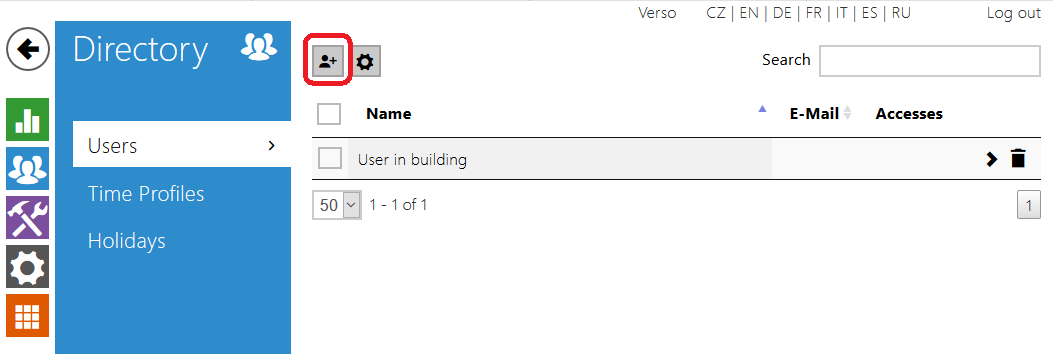
Add a user you want to call by pressing the 2N IP Intercom button into configuration. Open menu Directory / Users and click on button Create new user.


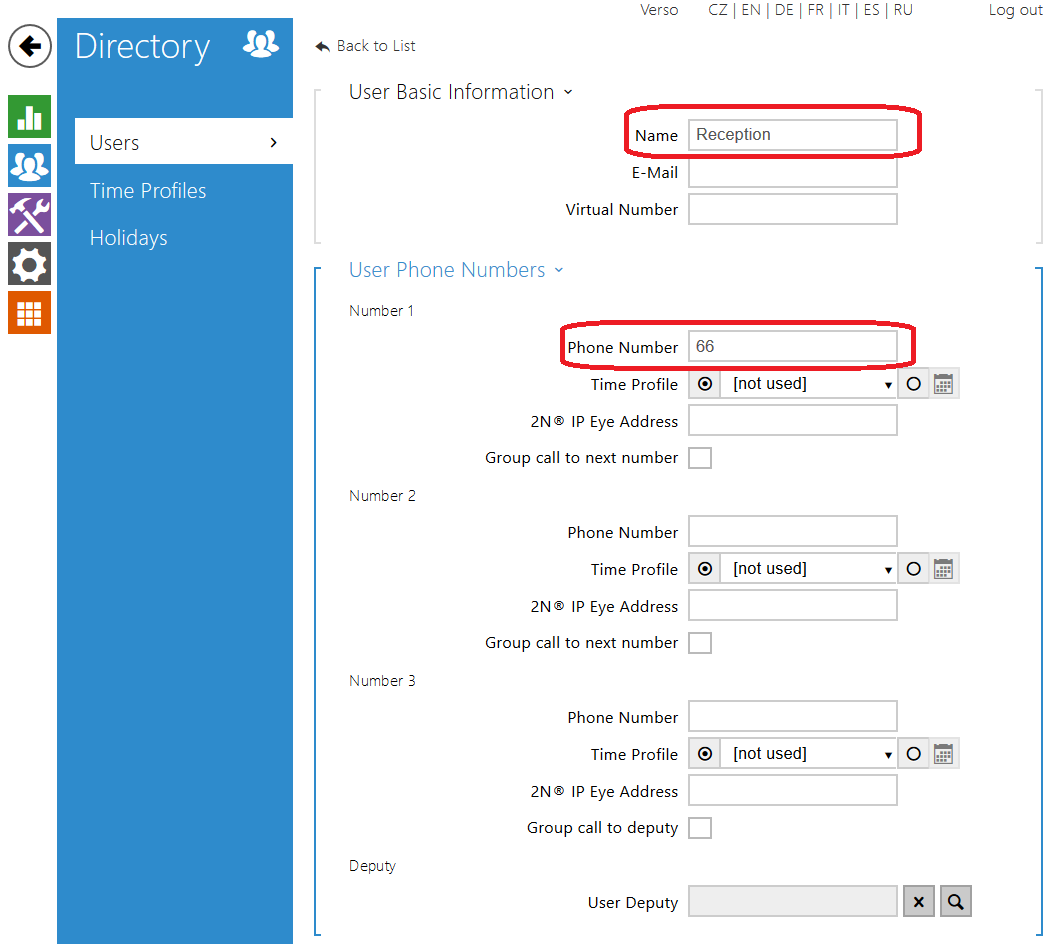
Enter a name, you want to use in Directory list and as Phone Number, use number of Extension from NFON. Then save the configuration.


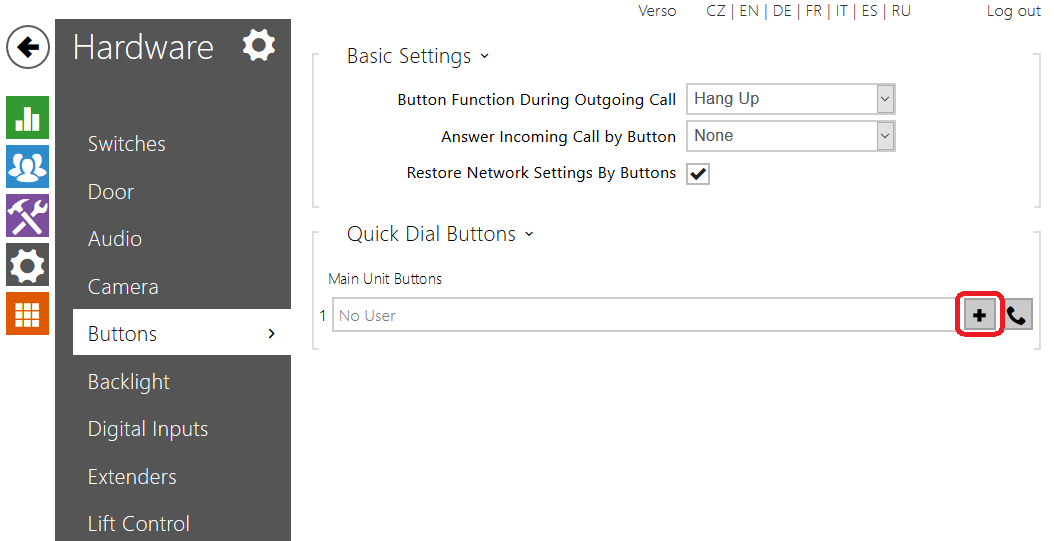
To use 2N IP Intercom calling by press its hardware button, assign the user to the button. Open menu Hardware / Buttons. Click on + button according to used Quick Dial Button.


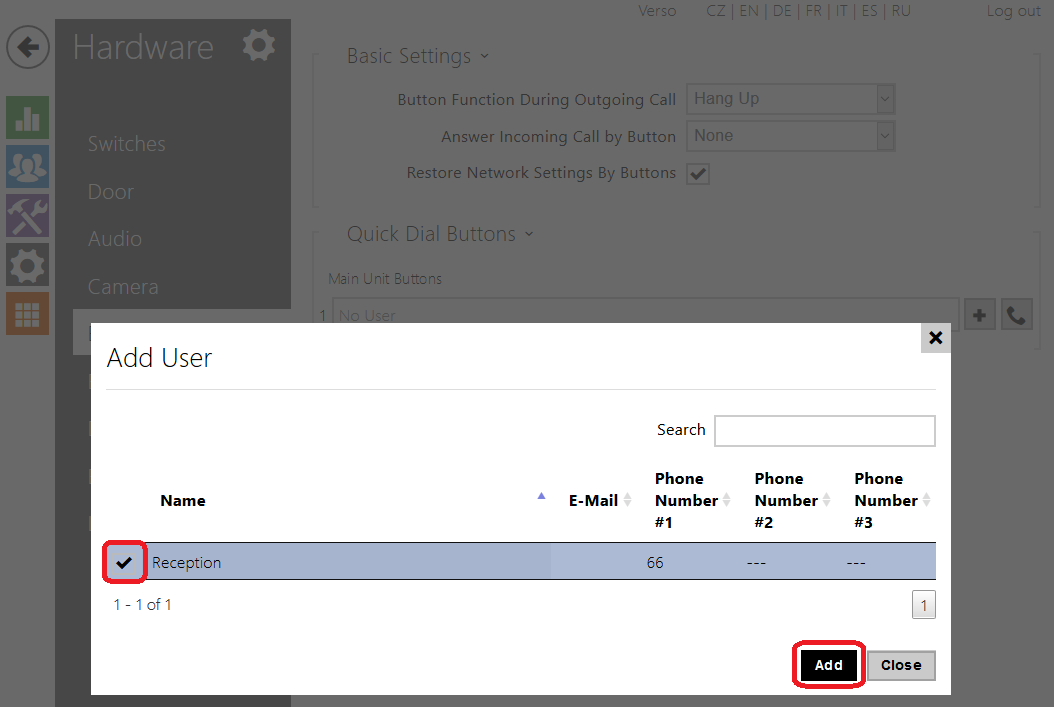
Chose a user you want to call by pressing the button, click on Add button and save the configuration.

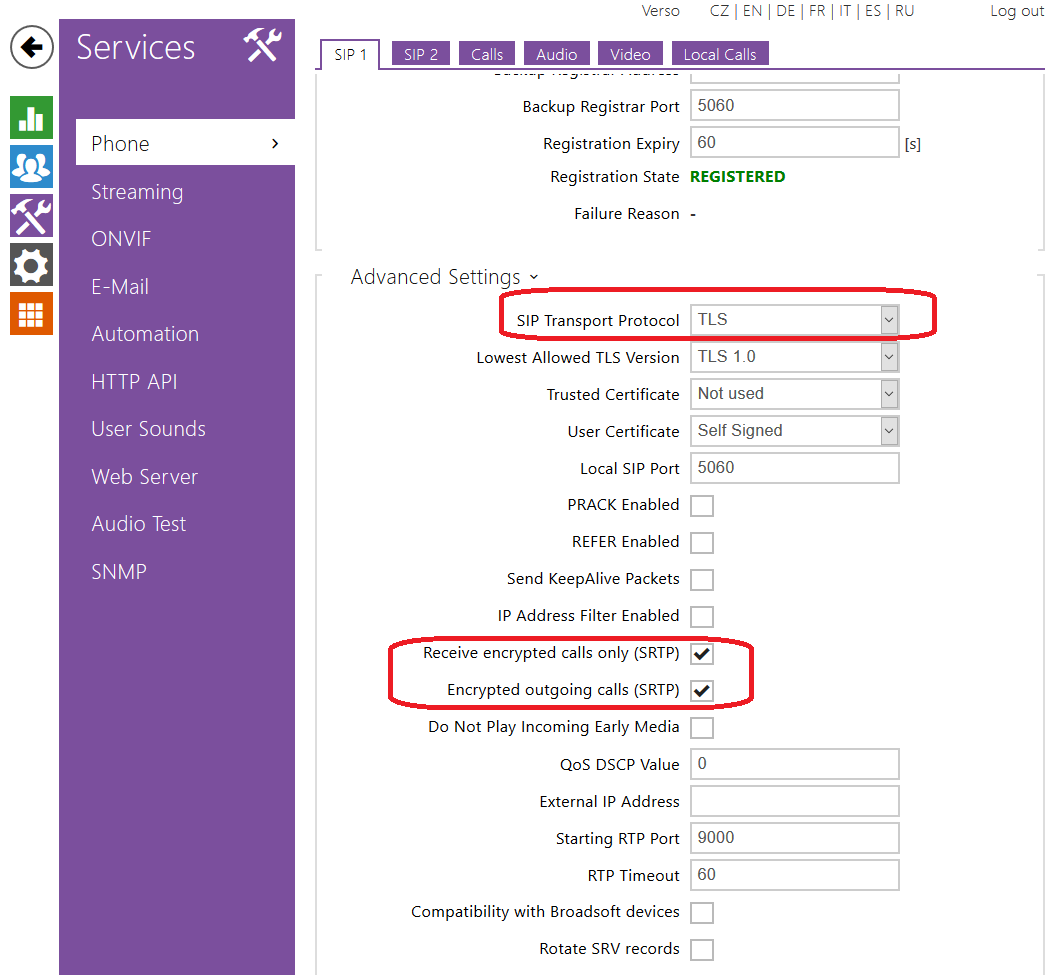
To use secured configuration, you can switch to SIPS and SRTP on your 2N IP Intercom. Use login credentials mentioned above in section 2N IP Intercom configuration and change some default configuration in menu Services / Phone / tab SIP 1:

  • SIP Proxy / Proxy Port: 5061
  • SIP Registrar / Registrar Port: 5061
  • Advenced Settings / SIP Transport Protocol: TLS
  • Advenced Settings / Receive encrypted calls only (SRTP): Check
  • Advenced Settings / Encrypted outgoing calls (SRTP): Check

Then save the configuration.

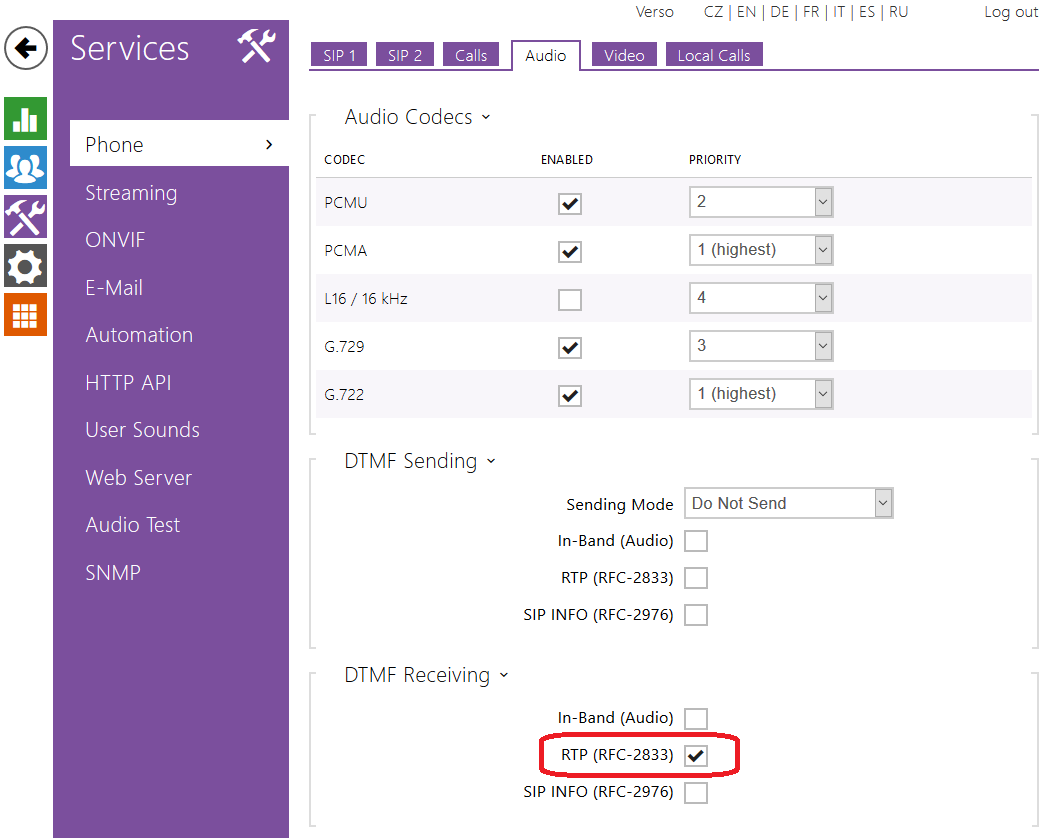
You can open door while call by using DTMF. Go to the 2N IP Intercom menu Services / Phone / Audio tab. Select RTP (RFC-2833) in DTMF Receiving section and save the configuration.


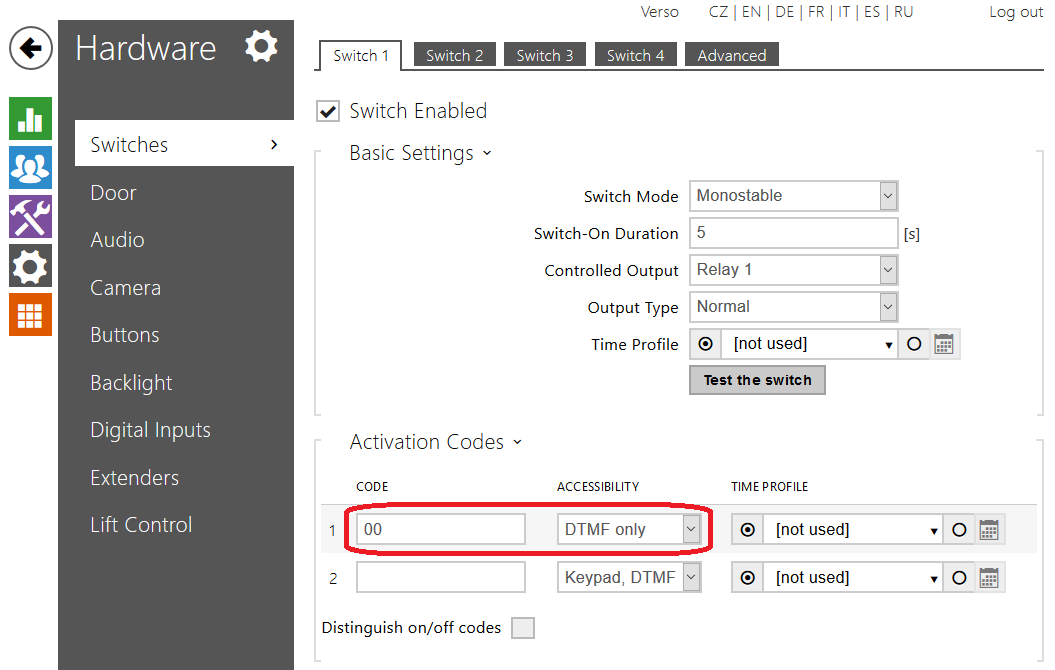
There is default code prepared in 2N IP Intercom, it opens Door by pressing 00# on a phone dialpad. To change default code go to the menu Hardware / Switches / Switch 1 tab. There you can change the code and save the configuration.

Required licenses

  • Enhanced Security for SRTP and SIP over TLS

Used Symbols

(tikot) - Verified with video

(varování) - Work with limitation

(chyba) - Incompatible