Herta Security
Content
About
Herta security bio access is systems that uses rstp stream from 2N intercoms for face recognition and face detection and sends MQTT message to 2N Devices that could be used in Automation to typically trigger switch.
https://hertasecurity.com/facial-recognition-access-control-software/
Version 3
| Herta Security | 2N IP Intercom Version | Face Validation | Face Detection |
|---|---|---|---|
| 3.3.0 | 2.32.6.41.4 |
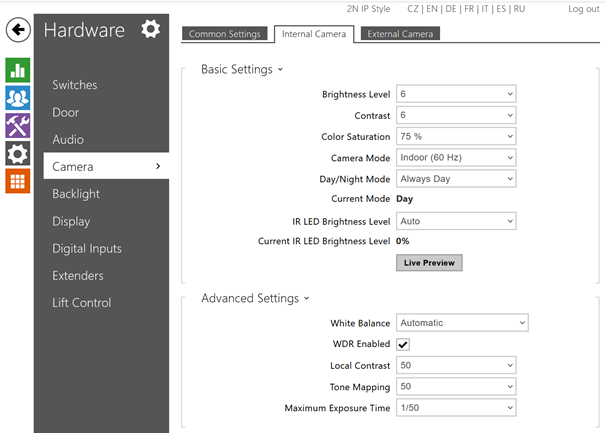
2N IP Intercom Settings
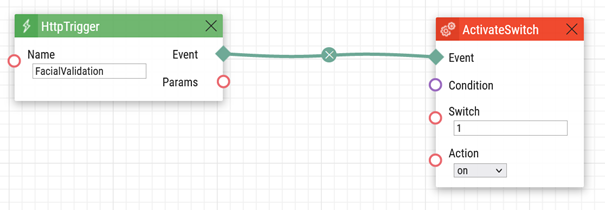
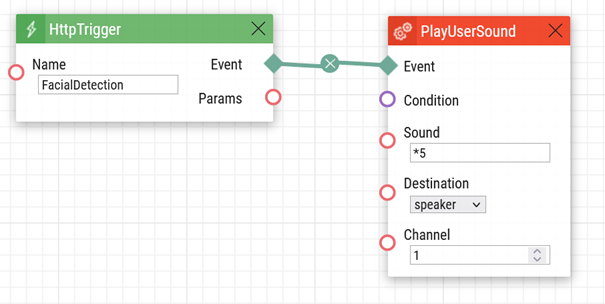
Go to Services -> Automation following 2 triggers can be prepared:
Face Validation: Triggers when face is detected and matched against user in Herta database
 |
Face Detection: Triggers when any face is detected.
 |
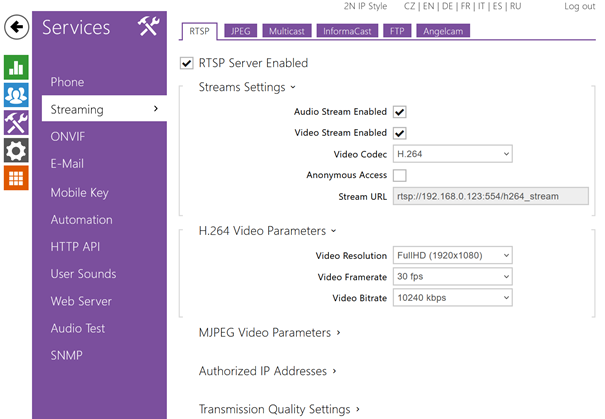
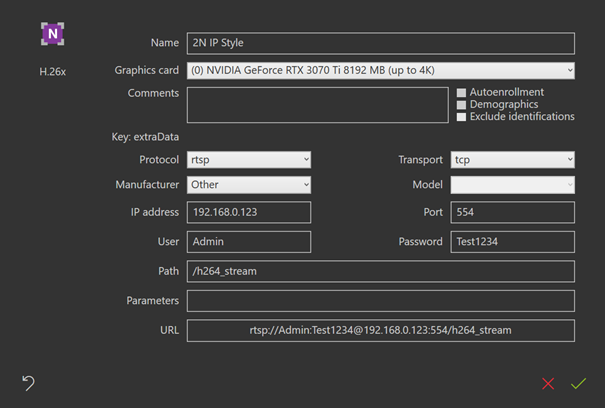
Go to services -> Streaming and configure RTSP Server as following:
 |
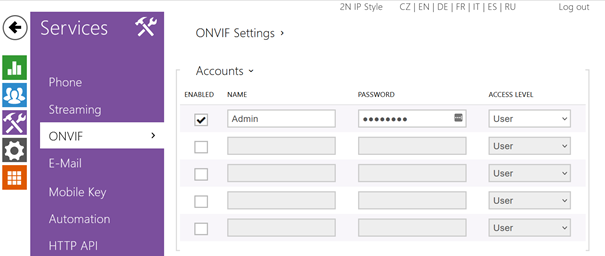
Go to services -> ONVIF and set one user (this will be later used in Herta SW.
 |
 |
Herta Security
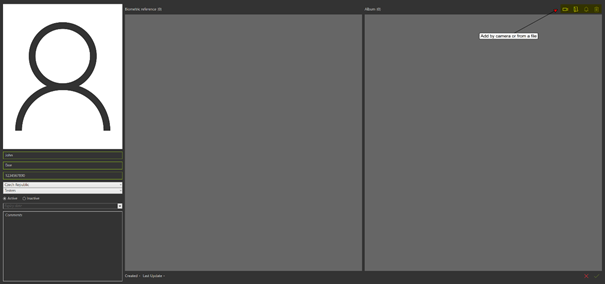
BioCom license is required. Go to Live -> Add source -> Add Camera.
 |
 |
Under Subjects press Add new subject icon ![]() . Fill in the information, add person to the group and in top right corner add picture reference, either from a file or webcam.
. Fill in the information, add person to the group and in top right corner add picture reference, either from a file or webcam.
 |
Activate MQTT communication in HERTA config file: Close Herta SW. Go to %appdata%/Herta Security/Herta/3/setting.xml.
Find MQTTSetting and modify as following:
<MQTTSettings>
<ConnectToMQTTServer>true</ConnectToMQTTServer>
<Server>localhost</Server>
<Port>1883</Port>
</MQTTSettings>
Also enable REST by setting following.
<UseRest>true</UseRest>
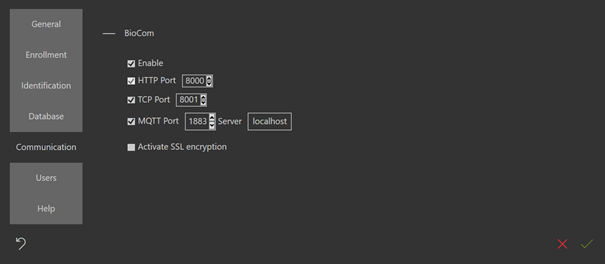
Start Herta sw again and go to Settings -> Communication and set following.
 |
Open moquitto.conf file and in the beginning add following 4 lines
listener 1883
listener 9001
protocol websockets
allow_anonymous true
Start Mosquitto from command line with verbose parameter “mosquitto.exe -v”
Configure Herta 2N Integration tool: Open the tool and configure as following
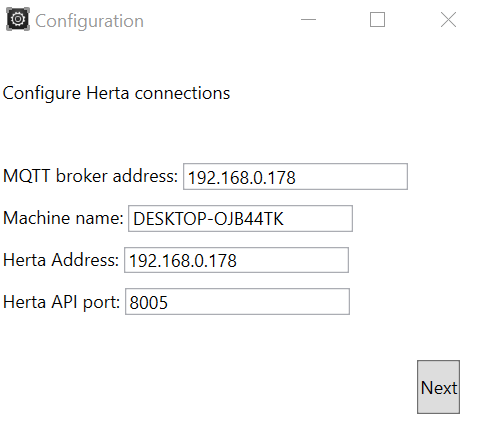 |
Machine name is the one Running Herta.
Herta Address and API port was configured in previous step.
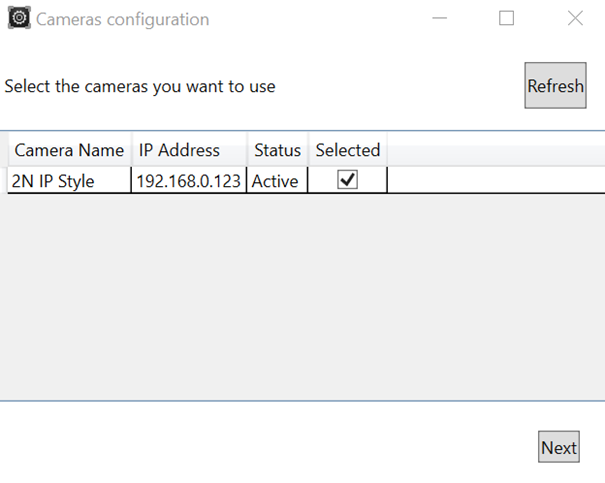
After clicking next select your camera (this list is taken from Herta).
 |
 |
Licenses
- 2N Enhanced Integration license
- 2N Enhanced Video license
Used Symbols
![]() - Compatible
- Compatible
![]() - Work with limitation
- Work with limitation
![]() - Incompatible
- Incompatible