WebRelay
External IP Relay

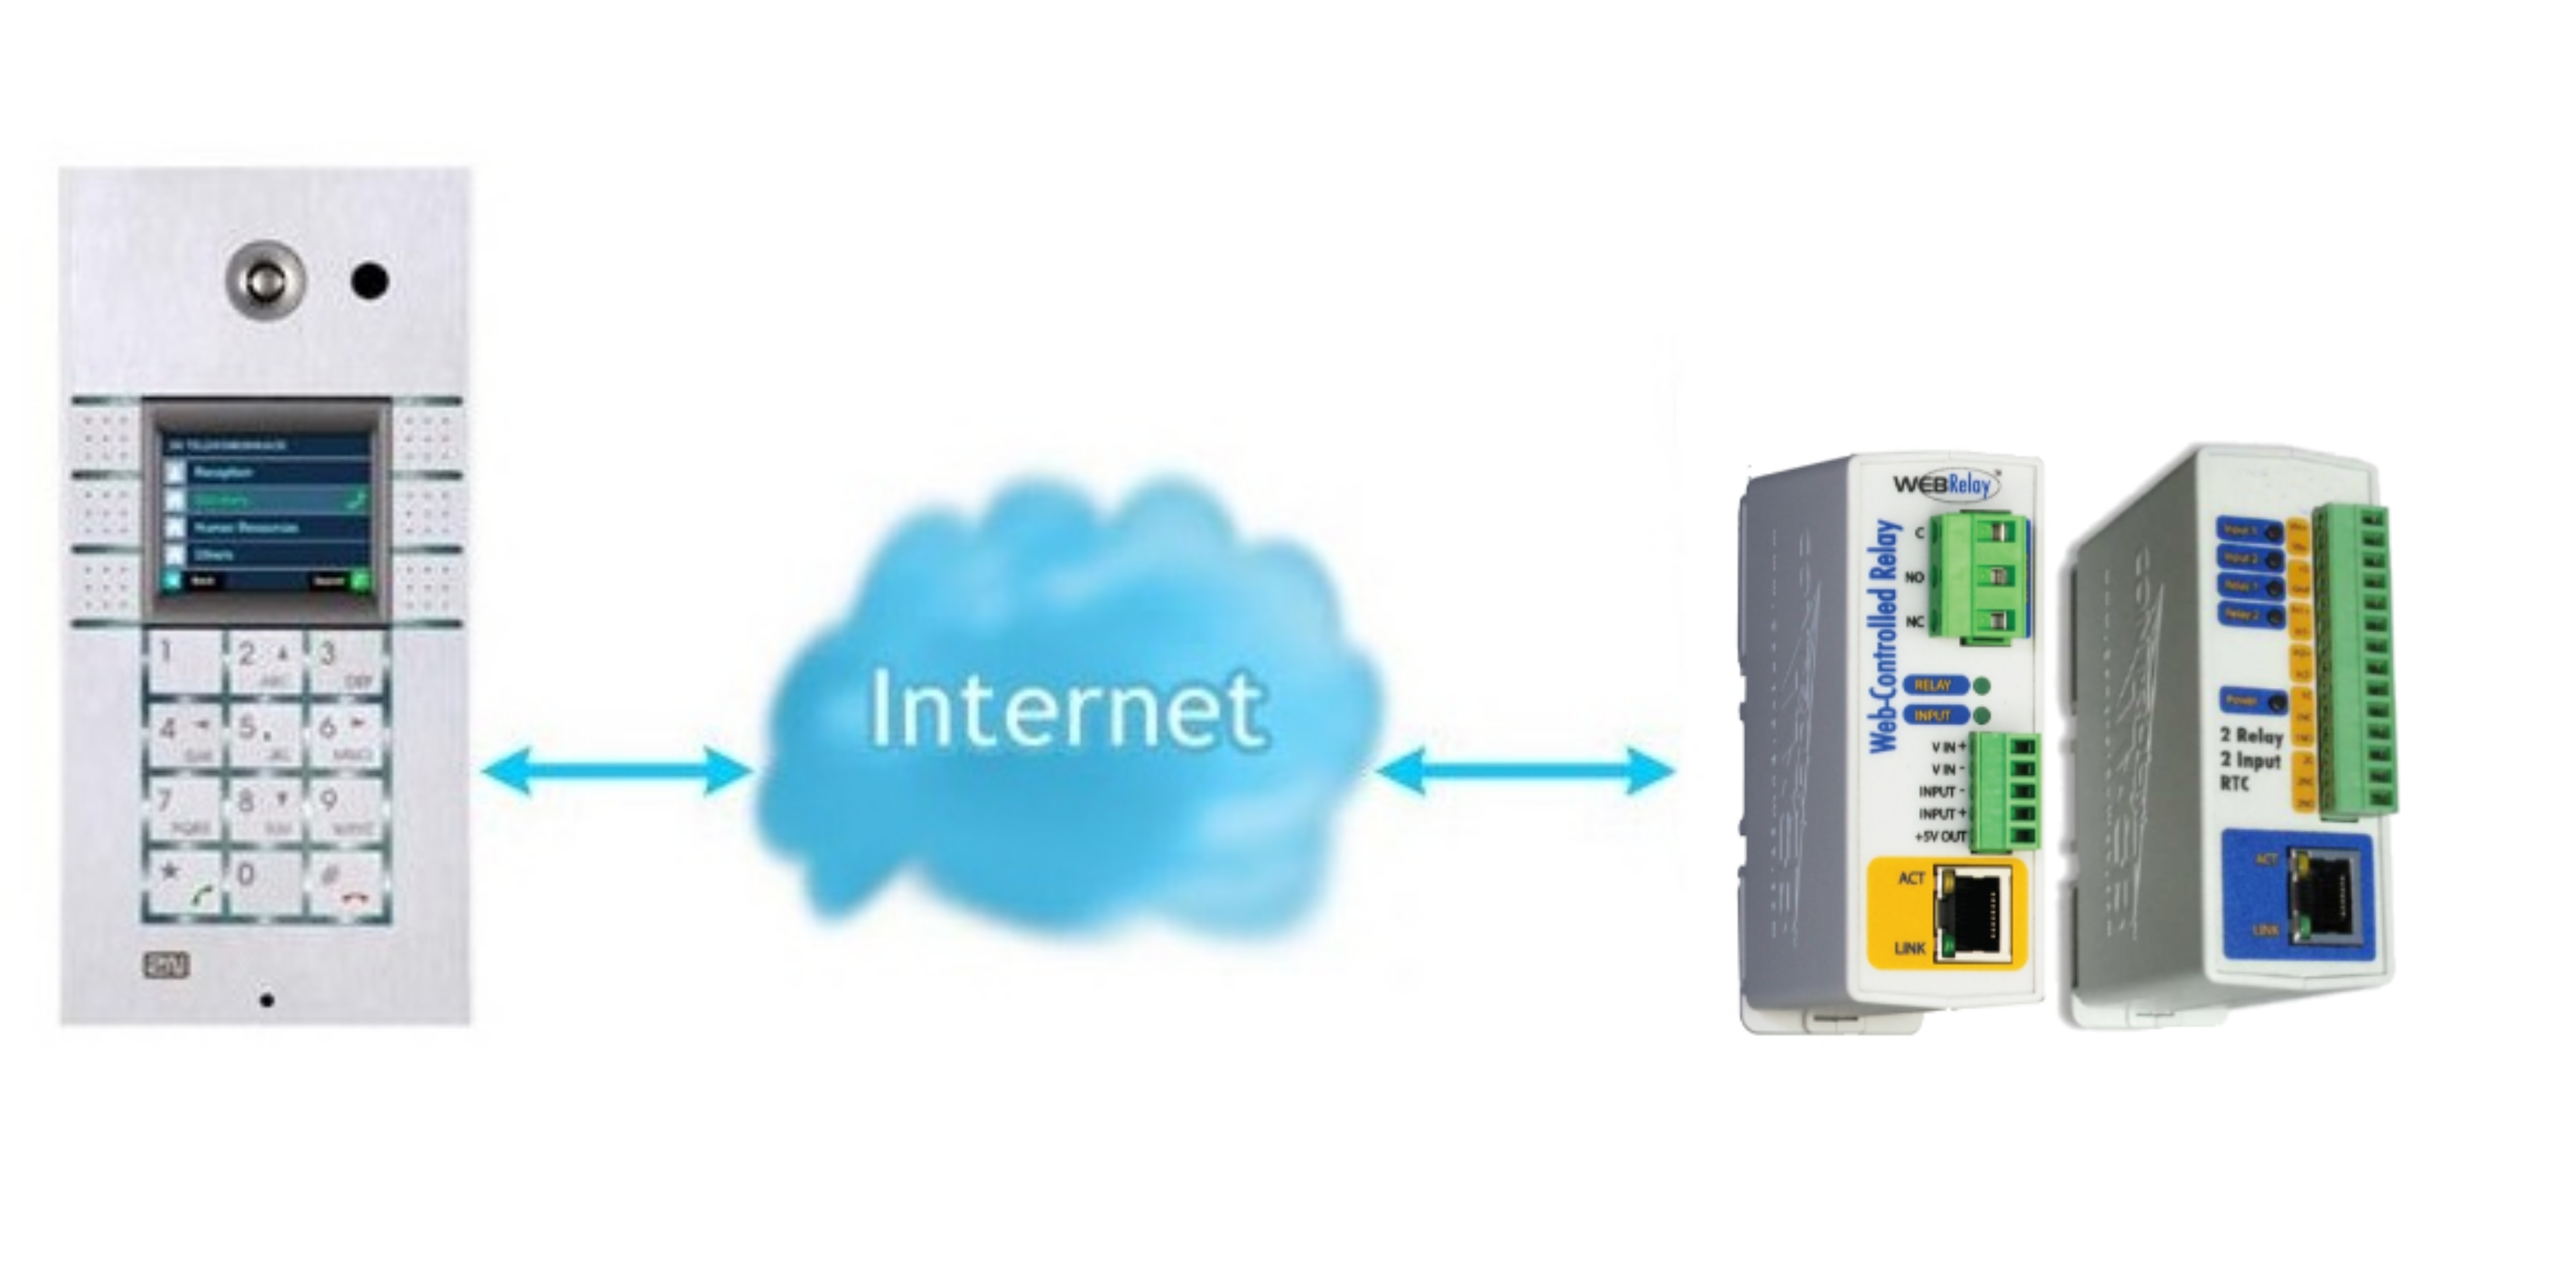
You can use external relay controlled by 2N IP Intercom by HTTP commands for a remote control. We offer IP relay with one output (9137410E) or with four outputs (9137411E).
If you will use External IP relay you need an Integration license.
 |
Default parameters:
IP: 192.168.1.2
Username: -
Password: webrelay
If you have your IP relay in the default setting, open your web browser and enter IP address http://192.168.1.2. Then you should be able to see control page similar as in the picture on the right site depending on the version of the product you own.
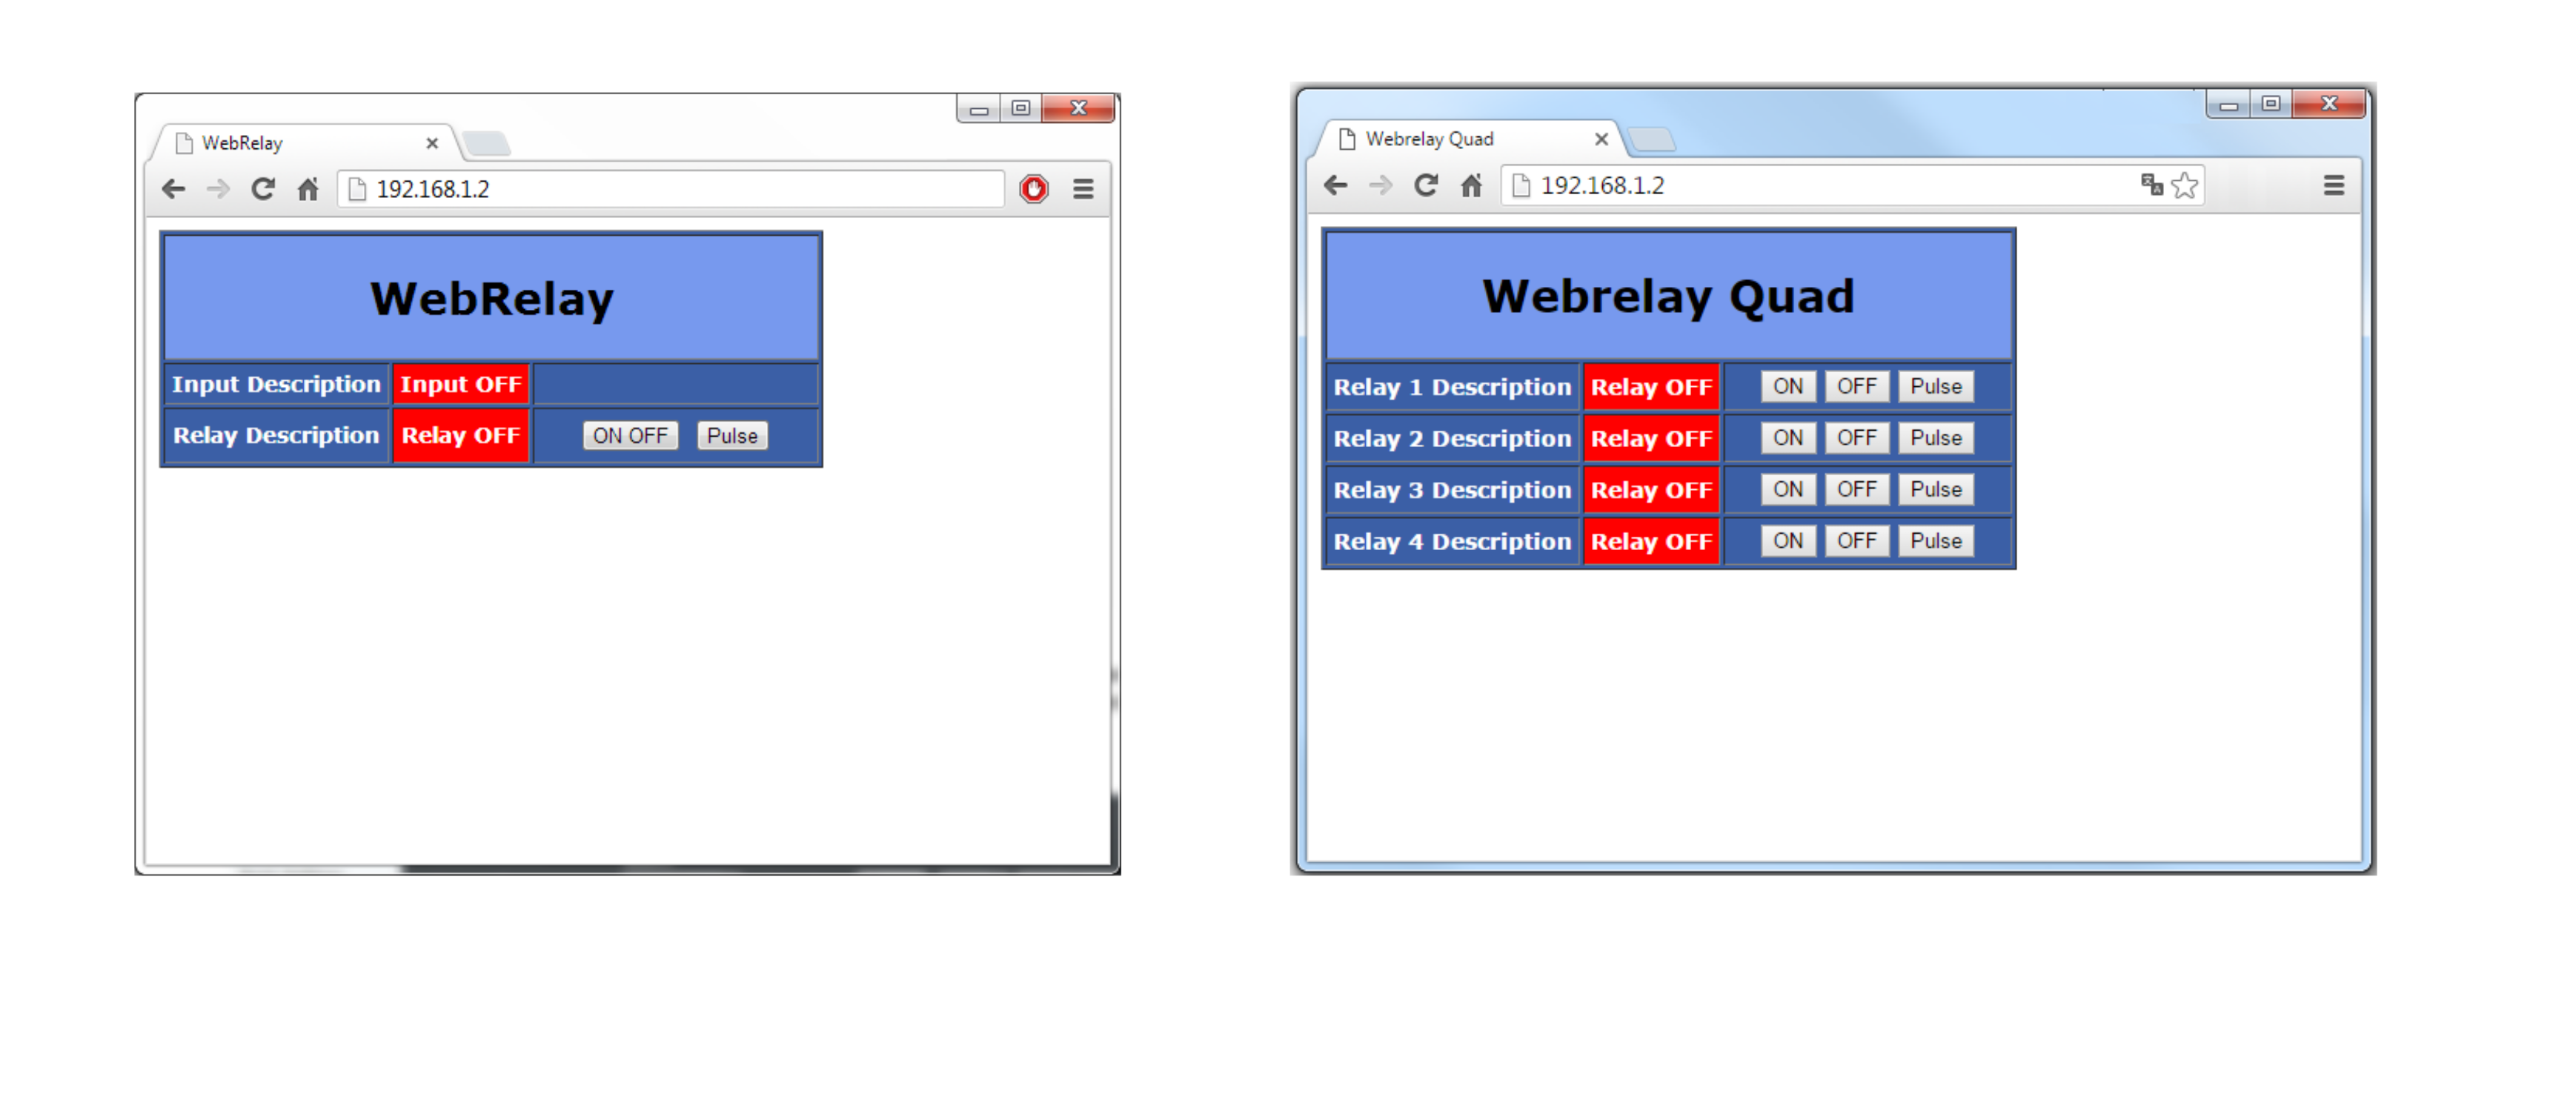 |
Note
If you are not able to access the IP relay web interface, then please check if your computer is in the same network as IP relay (PC must have IP address 192.168.1.x)!
External IP relay settings
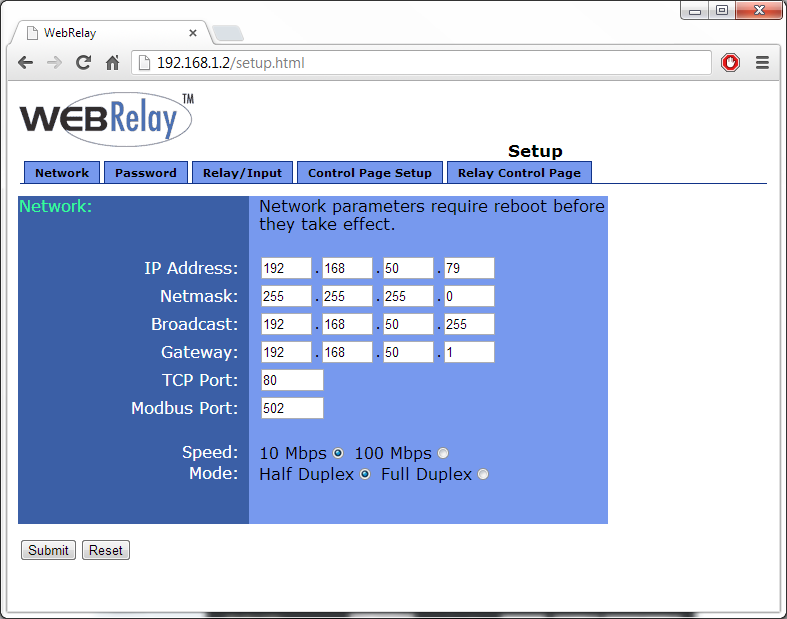
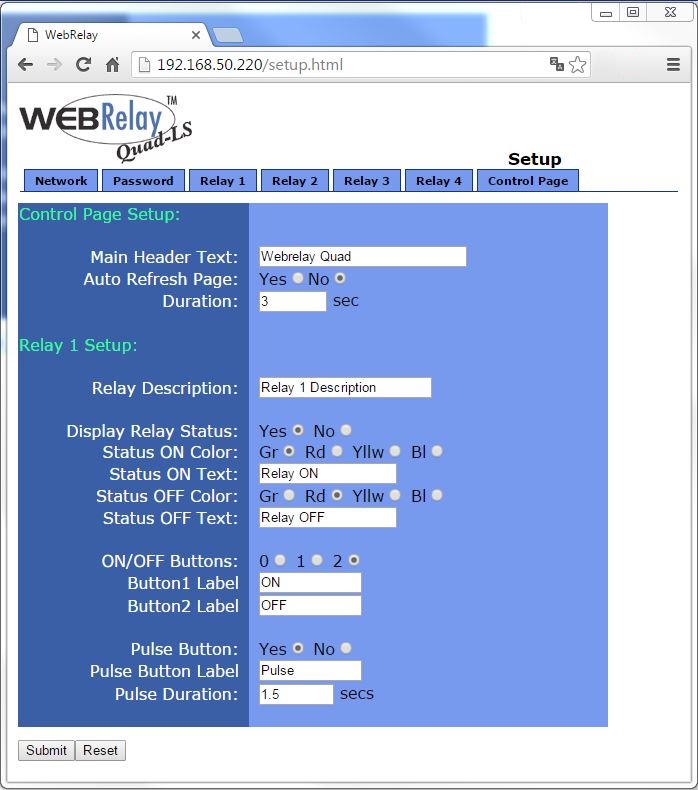
To enter webrelay configuration web, go to the page http://192.168.1.2/setup.html, username: admin, password: webrelay. Now you can configure IP relay and change the webrelay IP address in the menu Network. Used HTTP commands are key sensitive.
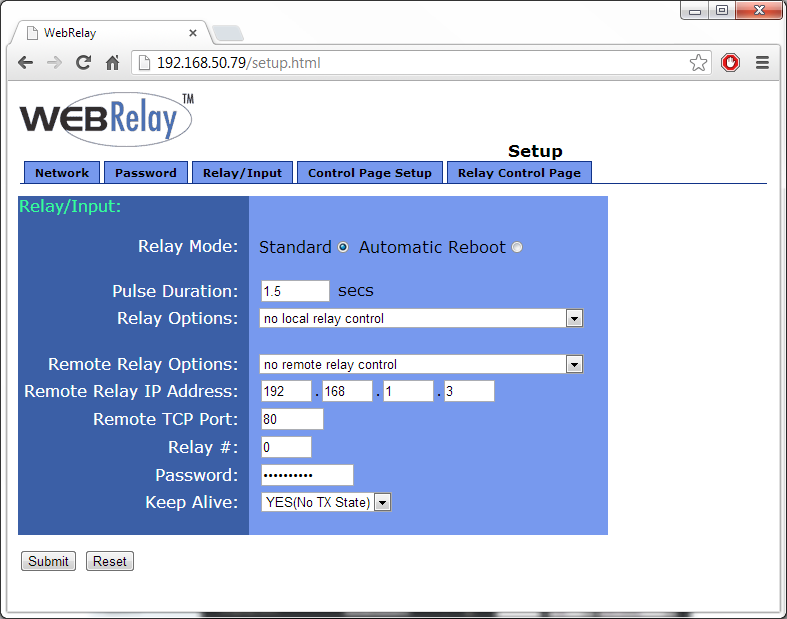
IP relay with one output (9137410E)
In Relay/Input tab change parameter Relay Options to “no local relay control”. With that you make sure, that the relay will be controlled only HTTP commands.
 |
HTTP switch ON command:
HTTP switch OFF command:
All relay State options:
0 = Turn relay off1 = Turn relay on 2 = Pulse relay- If you want to change look of the Relay Control Page, you can do it in Control Page Setup.
IP relay with four outputs (9137411E)
 |
HTTP WebRelay - Quad switch ON command:
- http://192.168.1.2/state.xml?relay1State=1
- http://192.168.1.2/state.xml?relay2State=1
- http://192.168.1.2/state.xml?relay3State=1
- http://192.168.1.2/state.xml?relay4State=1
HTTP WebRelay - Quad switch OFF command:
- http://192.168.1.2/state.xml?relay1State=0
- http://192.168.1.2/state.xml?relay2State=0
- http://192.168.1.2/state.xml?relay3State=0
- http://192.168.1.2/state.xml?relay4State=0
All relay State options:
0 = Turn relay off
1 = Turn relay on
2 = Pulse relay
- If you want to change look of the Relay Control Page, you can do it in Control Page Setup.
Detailed information about the IP relay settings and additional features can be found in manual. If you would like to upgrade IP relay, please follow the manual as well:
http://www.controlbyweb.com/webrelay/WebRelay_Manual_v3.3.pdf
Secured HTTPS IP relay with two outputs (9137413E)

HTTP WebRelay - switch ON command:
Use unsecured HTTP commands:
Or use secured HTTPS commands:
HTTP WebRelay - switch OFF command:
Use unsecured HTTP commands:
Or use secured HTTPS commands:
Additional WebRelay control examples:
http://192.168.1.2/state.xml?pulseTime2=5&relay2=2 (pulse relay 2 for 5 seconds)
http://192.168.1.2/state.xml?pulseTime1=5&relay1=2 (pulse relay 1 for 5 seconds)
https://192.168.1.2/state.xml?pulseTime2=5&relay2=2 (https pulse relay 2 for 5 seconds)
https://192.168.1.2/state.xml?pulseTime1=5&relay1=2 (https pulse relay 1 for 5 seconds)
All relay State options:
0 = Turn relay off
1 = Turn relay on
2 = Pulse relay
Detailed information about WebRelay can be accessed at User's Manual.
- Your device should not be on lower FW version than 3.08.
- Users are strongly advised to change default password after first installing the Web Relay. To change admin password, navigate to General Settings > Passwords > Administrator. It is also advised to disable Manager login and enable User Password Requirement and setting a strong User password (different from Admin password). When enabling User password, you will need to use this password for HTTPS control. It is recommended to use User account for switch control rather than Admin account.
- We also recommend disabling HTTP access to the web relay and only allow secured HTTPS connections. This can be done in the General Settings > Ethernet. After saving the changes, the Web Relay has to be restarted.
- Web Relay might not currently support automatic forwarding to HTTPS and the HTTPS address might need to be specified manually after disabling HTTP access.
If you want to change look of the Relay Control Page, you can do it in Control Page Setup section.
Setup 2N IP Intercom
Login to 2N IP Intercom web configuration menu and in Hardware - Switches - Switch 1 > HTTP Commands set the switch parameters according to your needs. If this setting is done and you want to activate/deactivate external IP relay the same way as the internal, set the External command parameters as below.
 |
Setup 2N IP Intercom using Automation (Gold license needed)
Login to 2N IP Intercom web configuration menu and in Services - Automation - Function 1 set the automation according to your needs. Please remember that with Automation you can setup your own functions to activate / deactivate external relay via HTTP commands.
Sample switch control HTTPS request sent on code 1234 entered on intercom.
 |
To learn more about Automation please follow this link with this manual.