Milestone XProtect
Content
Version 2022 R3, 2021, 2020, 2019, 2018, 2017
About
Founded in 1998, Milestone Systems is a global industry leader in open platform IP video management software. The XProtect platform delivers powerful surveillance that is easy to manage, reliable and proven in thousands of customer installations around the world. With support for the widest choice in network hardware and integration with other systems, XProtect provides best-in-class solutions to video enable organizations – managing risks, protecting people and assets, optimizing processes and reducing costs. Milestone software is sold through authorized and certified partners.
Version 2022 R3, 2021, 2020, 2019, 2018, 2017
Tested Functions
| Milestone XProtect | 2N IP Intercom Version | 2N® Access Commander | Scan device | Video from 2N IP Intercom | Audio from 2N IP Intercom | Audio to 2N IP Intercom | Switch control | Events from 2N IP Intercom | ONVIF-T support |
|---|---|---|---|---|---|---|---|---|---|
| 2022 R3 | 2.39.2.51.6 and higher | - | |||||||
| 13.2a | 2.36.0.48.2 | - | |||||||
| 12.1a | 2.25.0.34.8 | 1.16 | |||||||
| 12.1a | 2.23.0.32.6 | - | |||||||
2.20.0.29.5 | - |
2N IP Intercom Settings
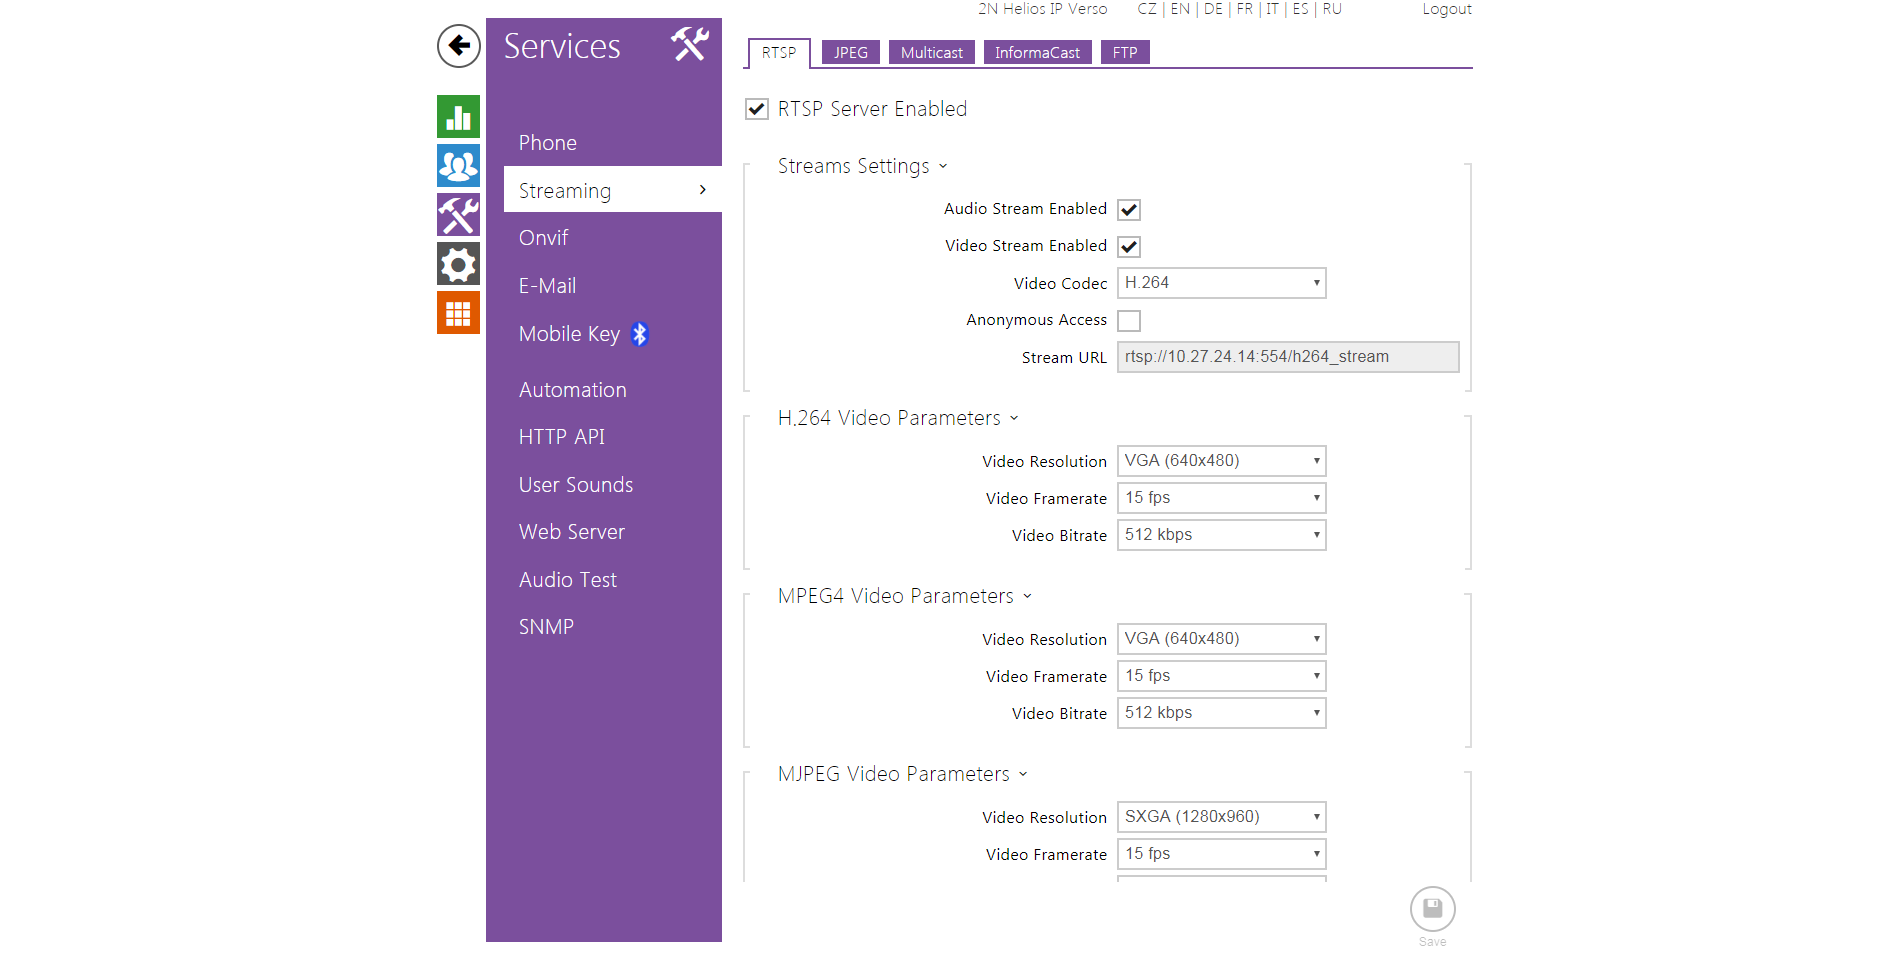
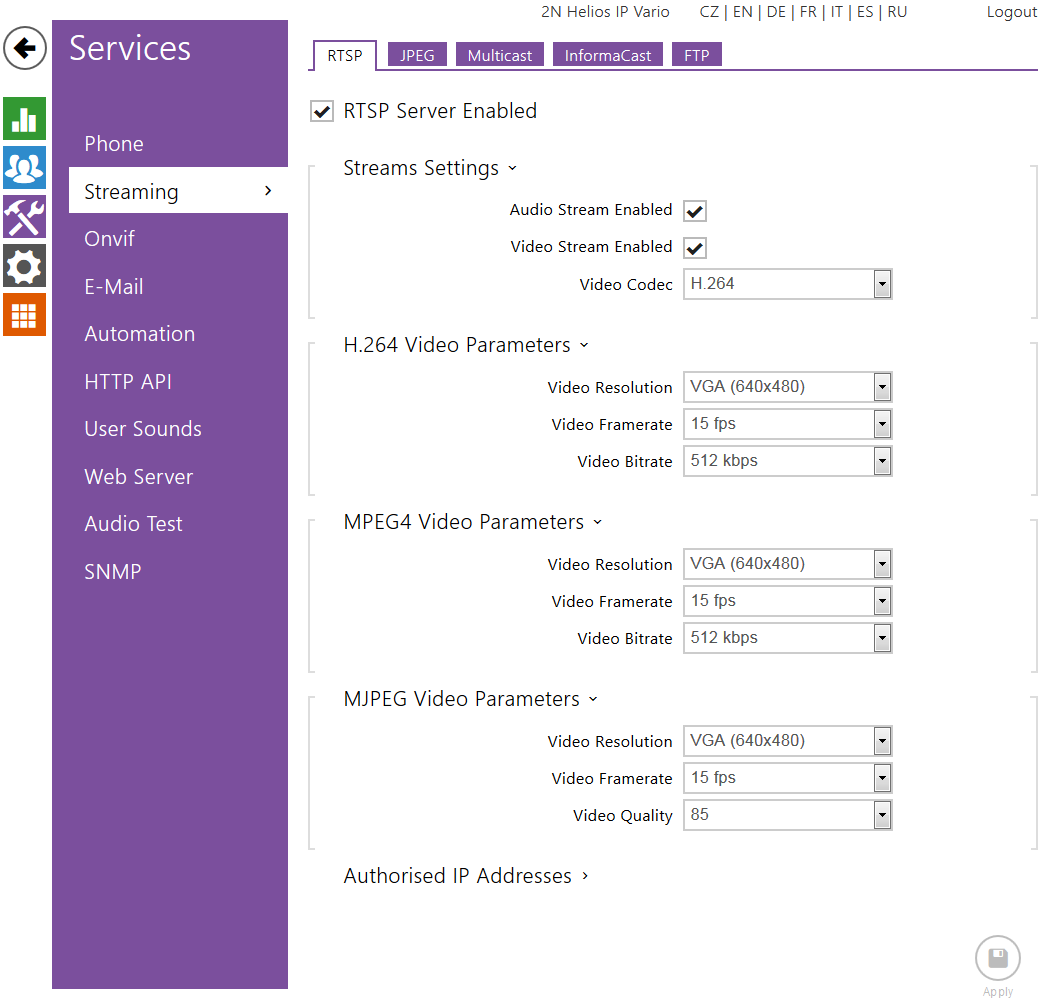
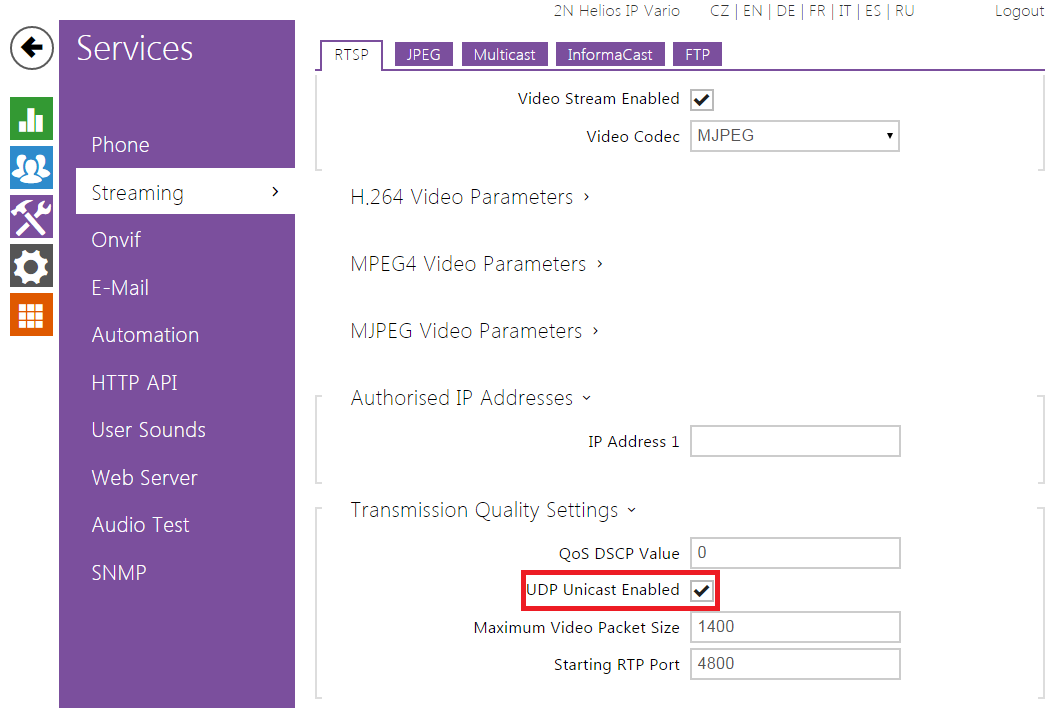
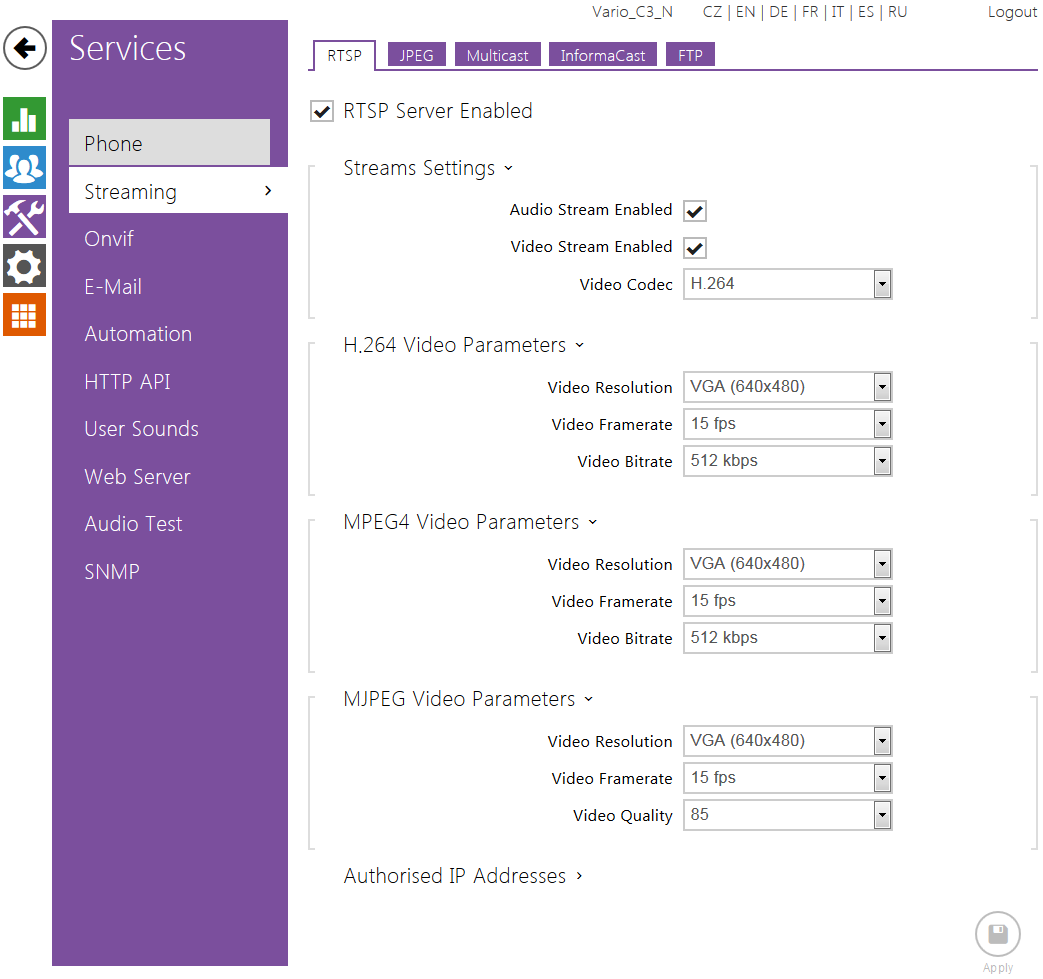
Enable parameter RTSP Server Enabled in menu Services / Streaming.
 |
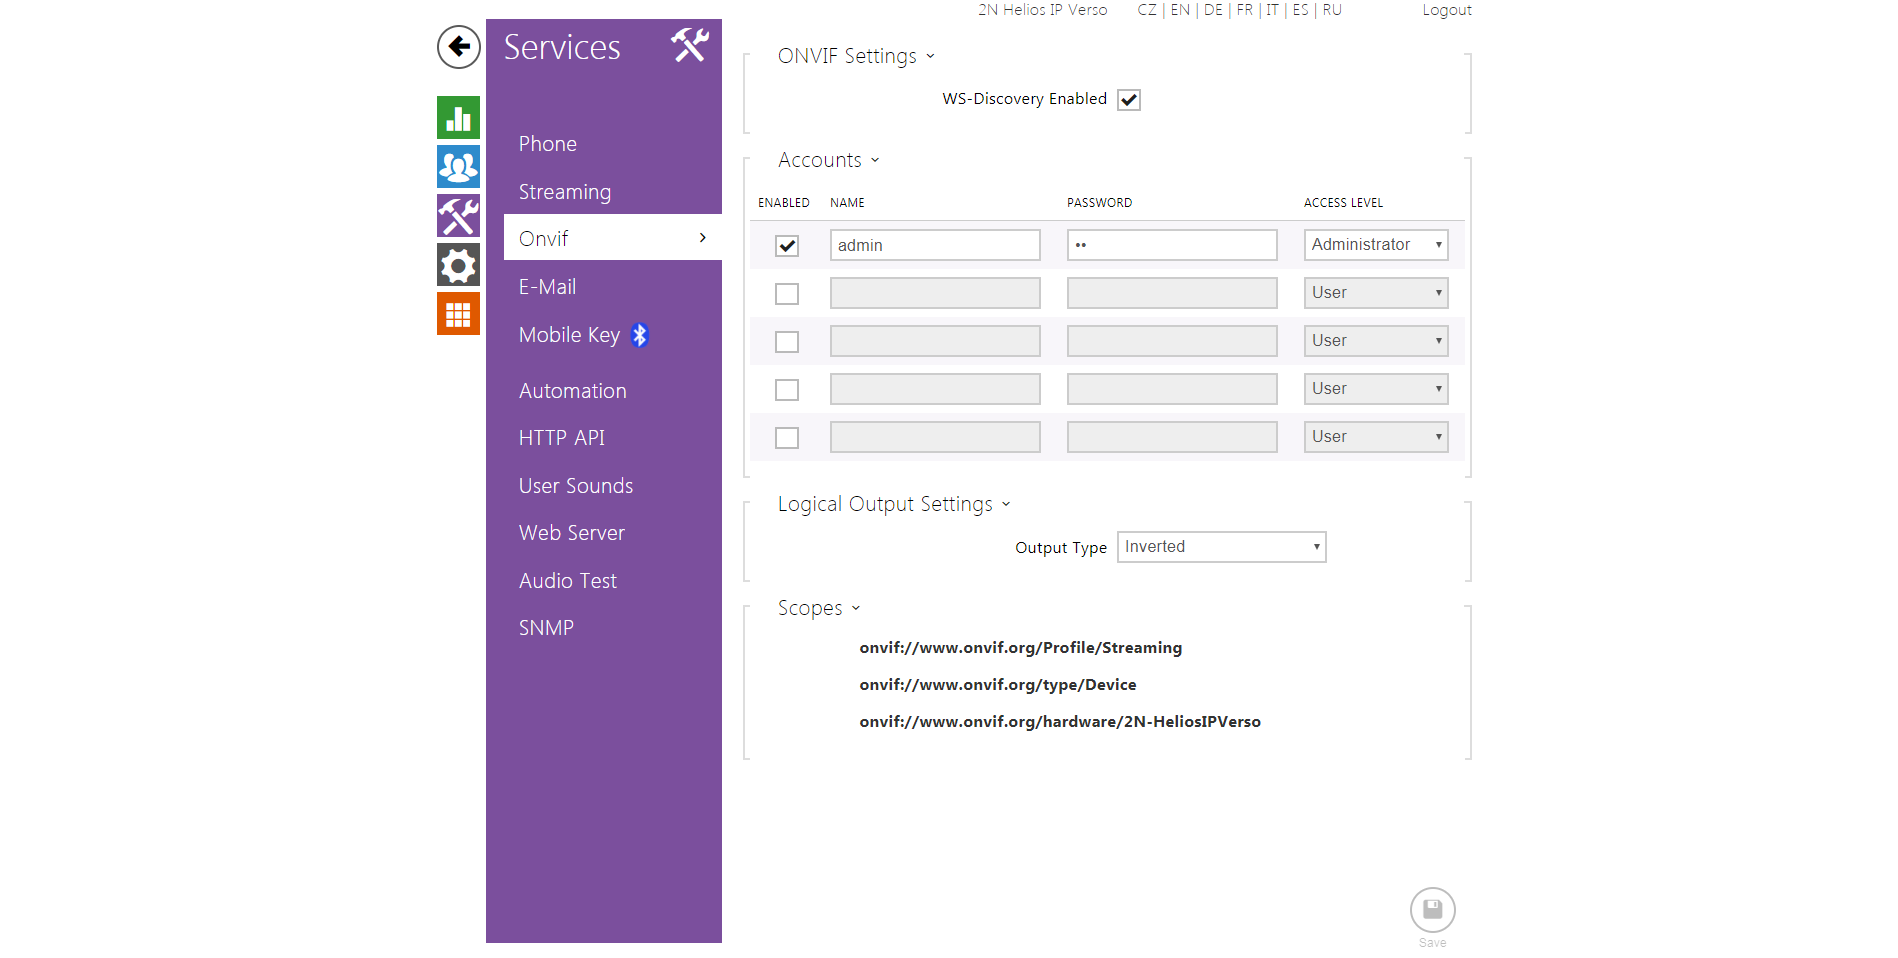
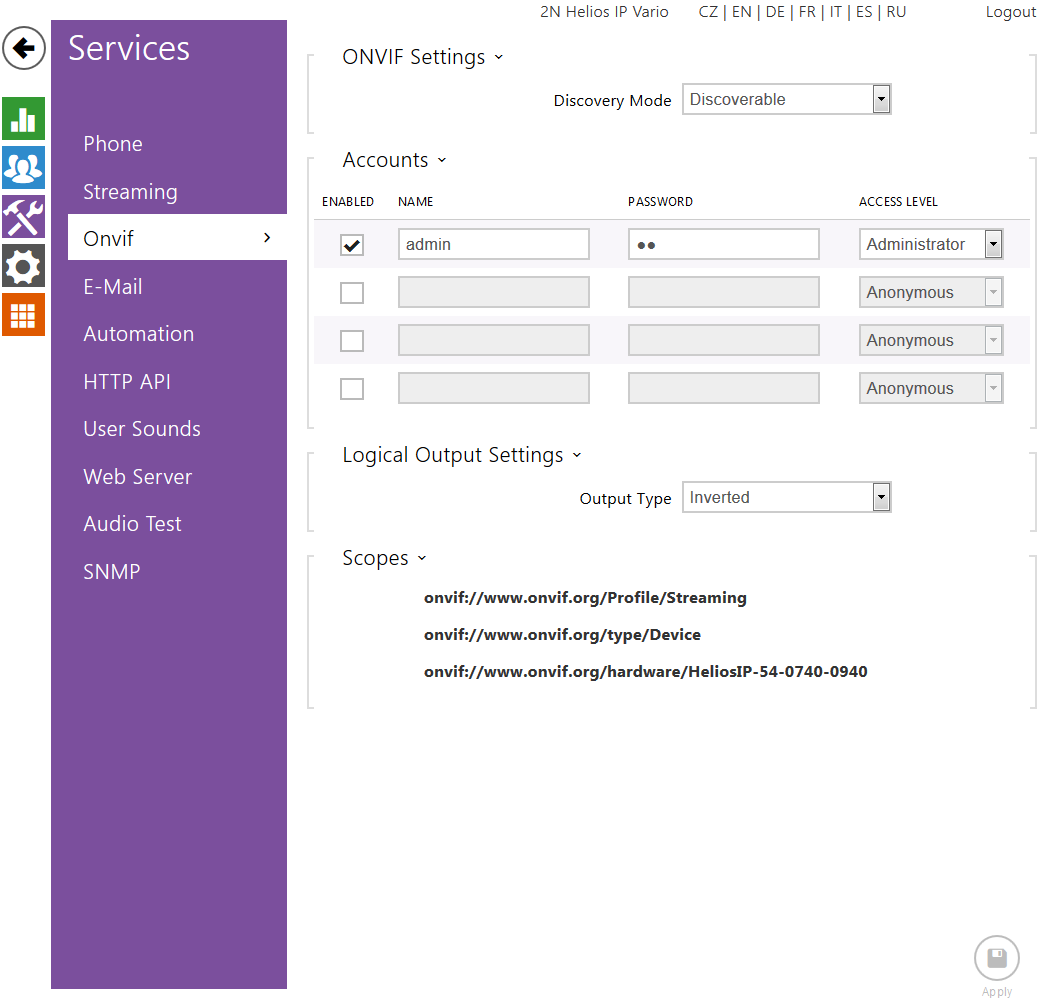
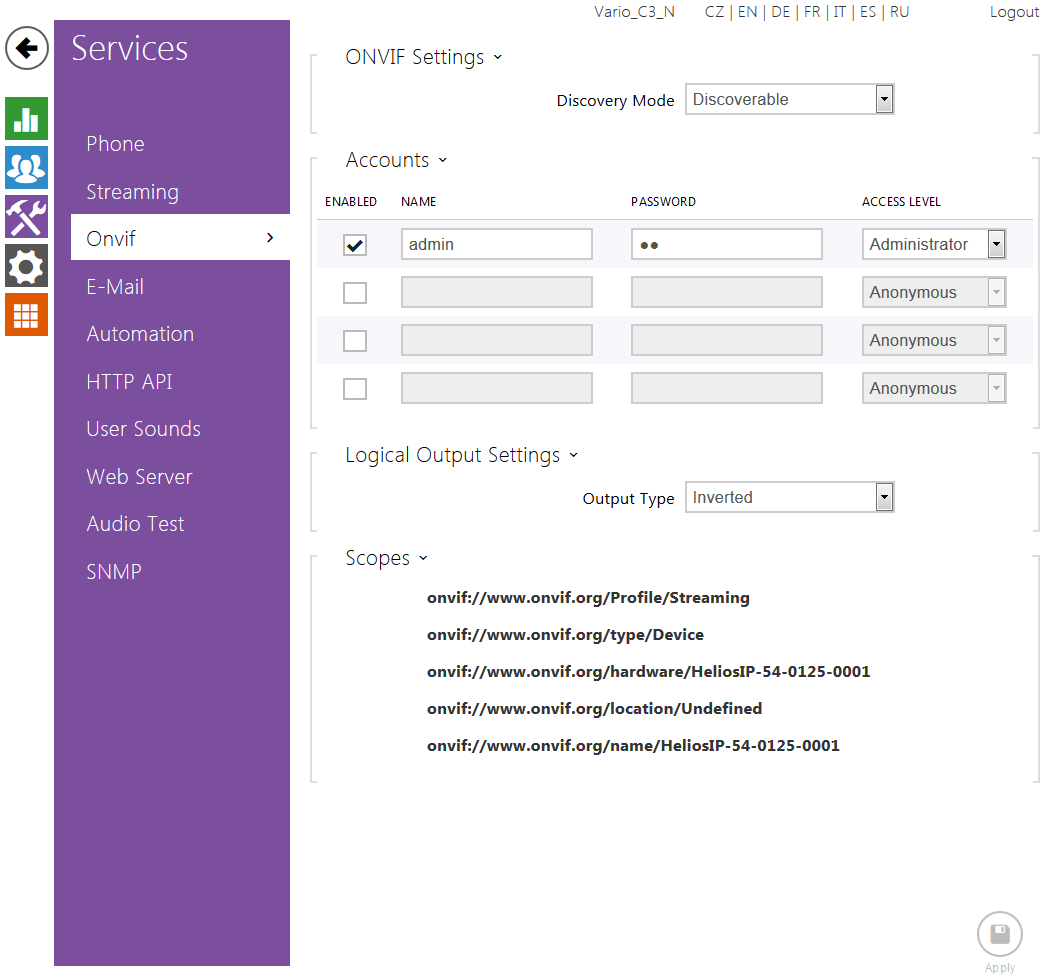
Enable Onvif and set authorisation data in menu Services / Onvif.
 |
 |
 |
 |
2N® Access Commander Settings
Tested Features
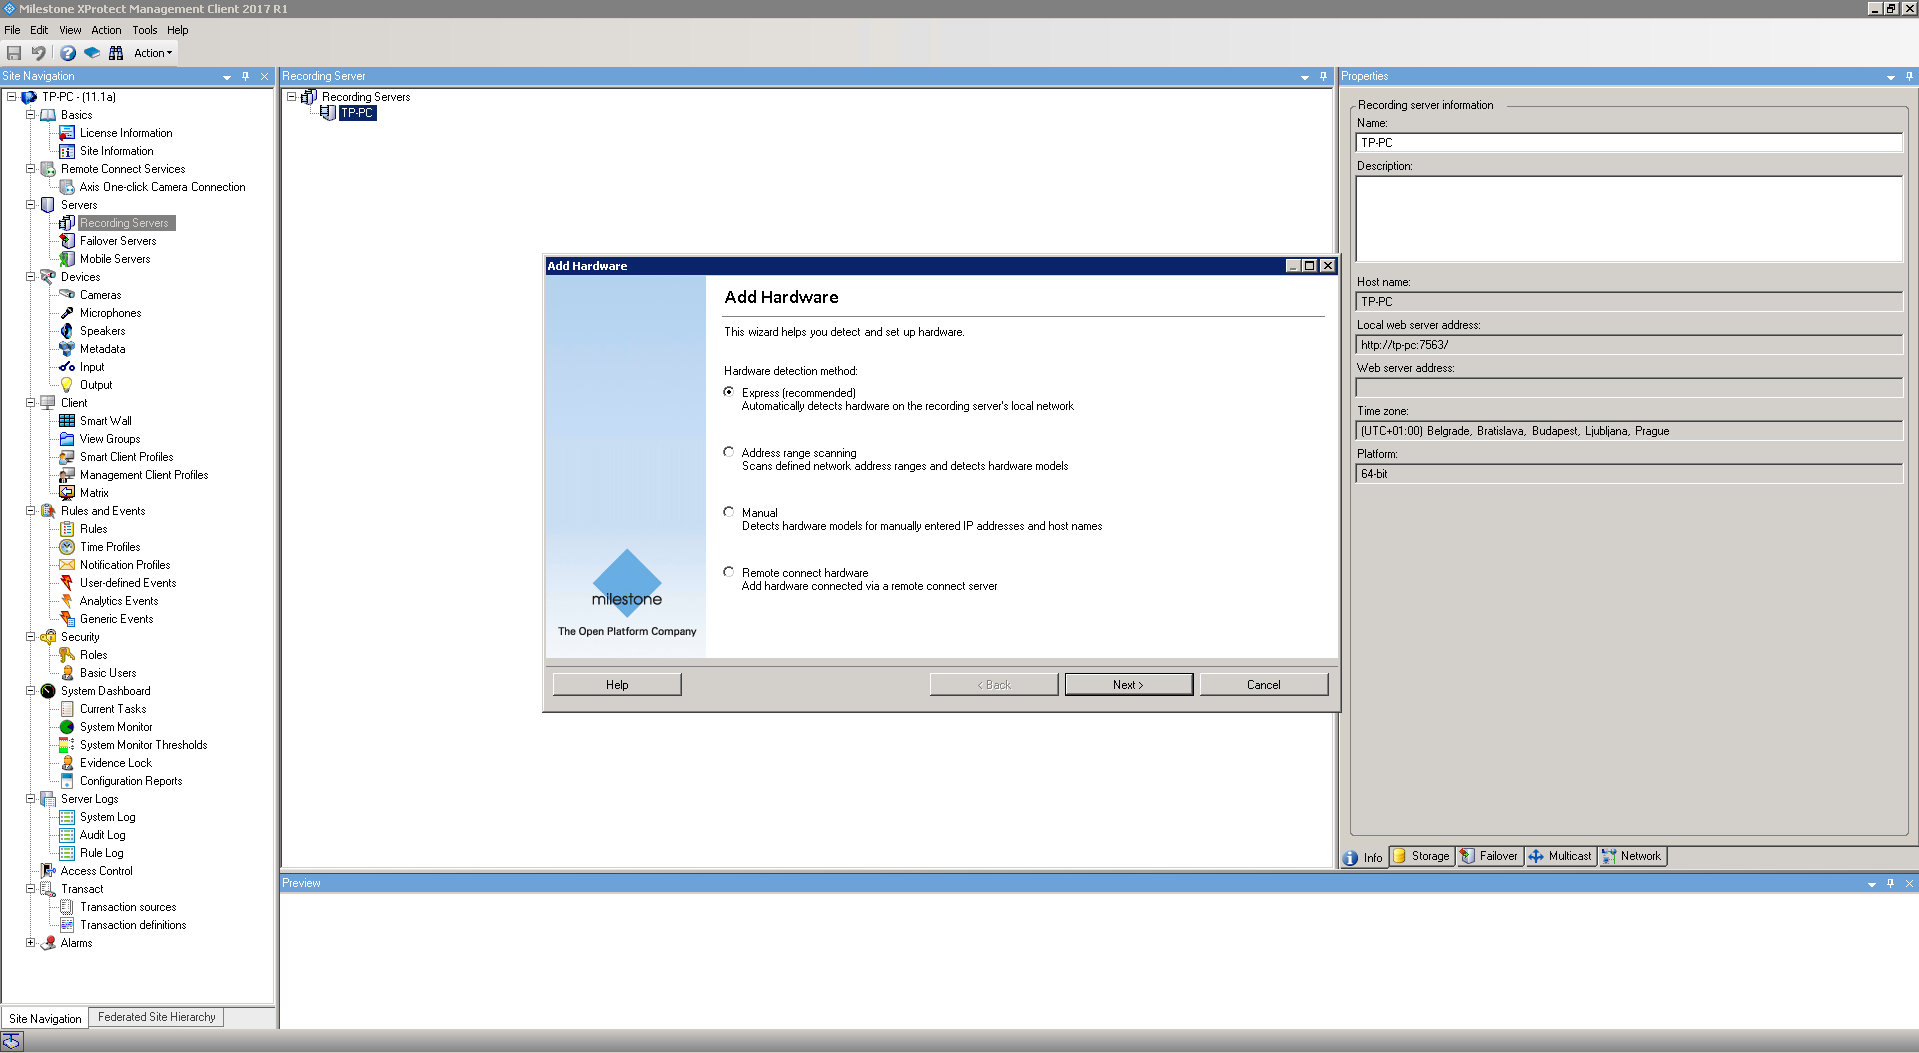
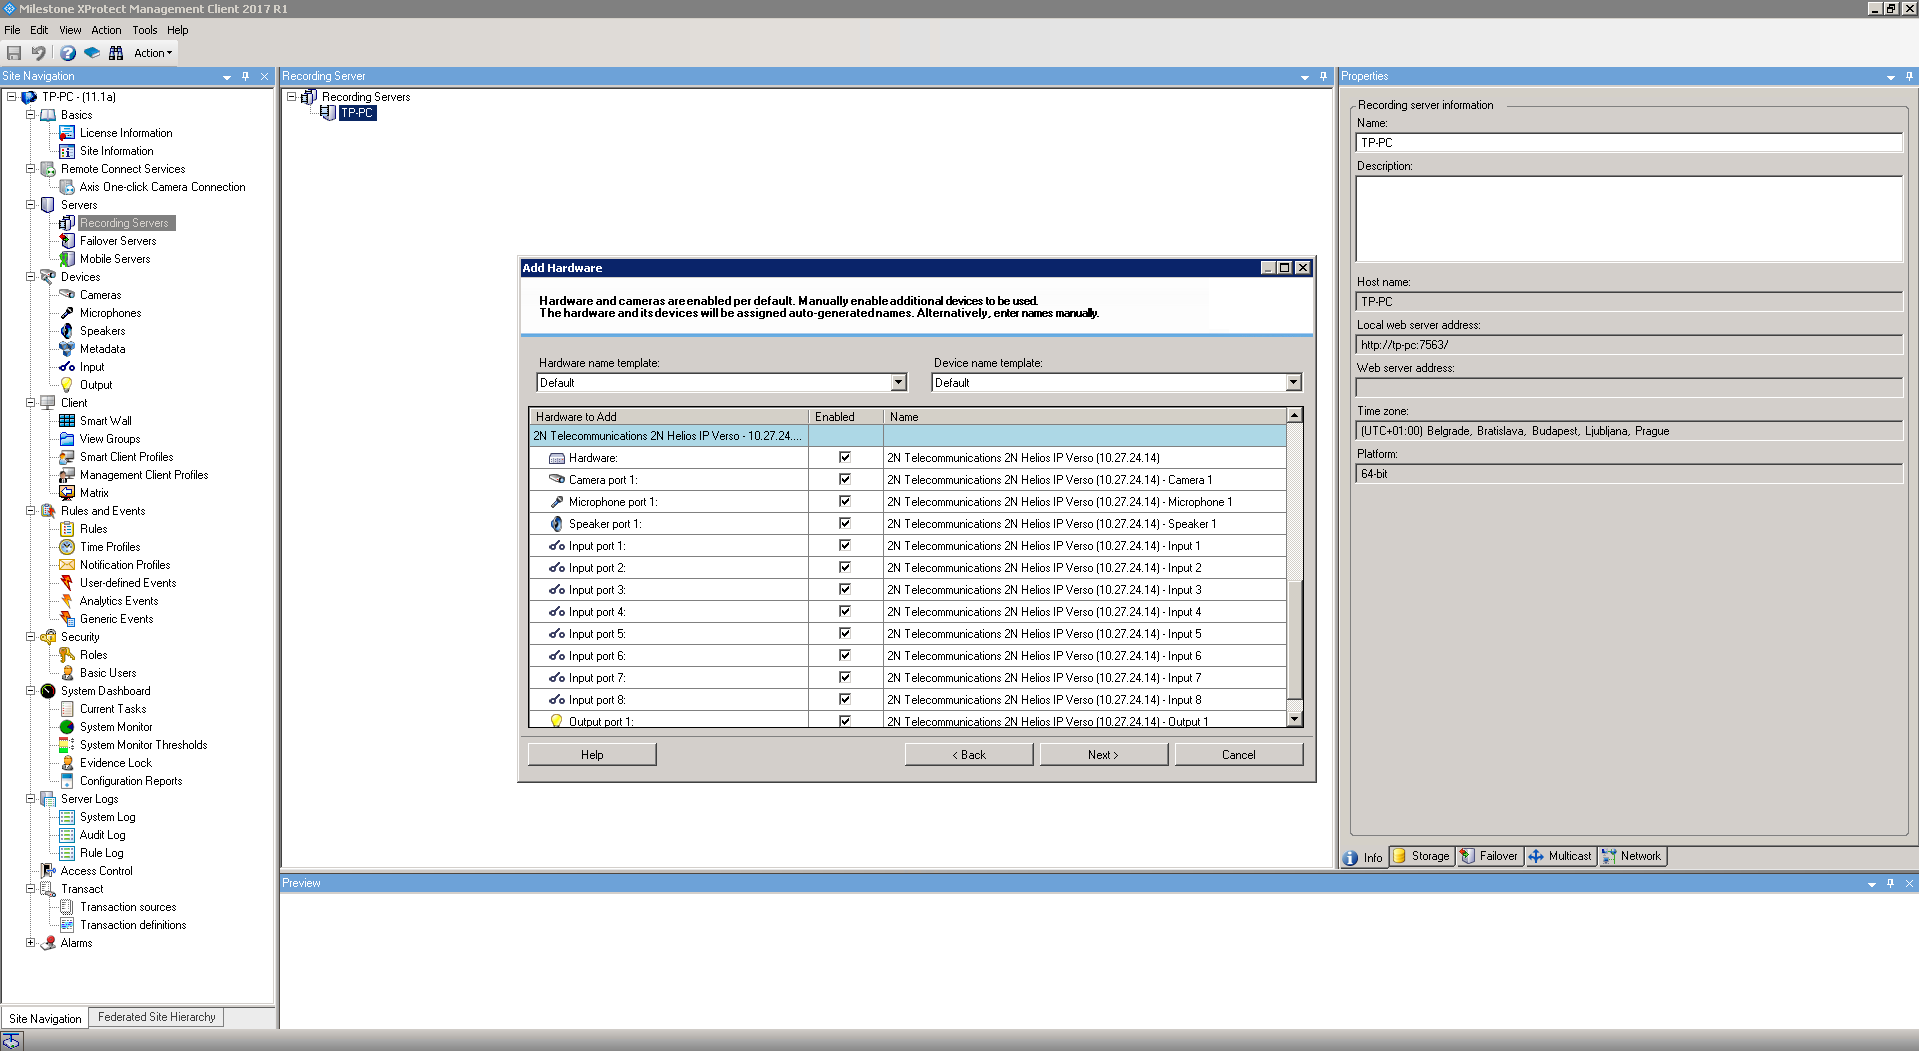
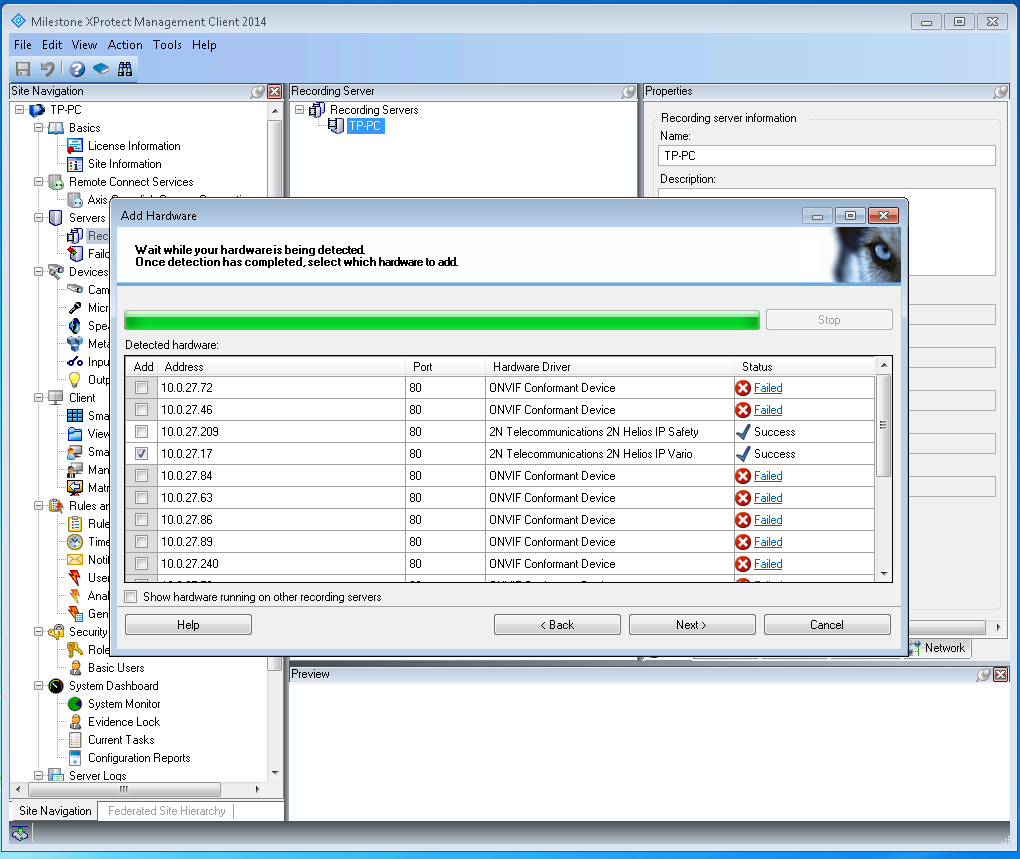
On the side of Milestone server go to section "Servers/Recording servers". Do a right click on your recording server and choose "Add Hardware" (if server is not authorized yet, then you have to click on "Authorize first"). Now click on "Add" to add a new device fill credentials that you choosed for Onvif account in the intercom (in our case it is ONVIF/ONVIF). Then click on next.
 |
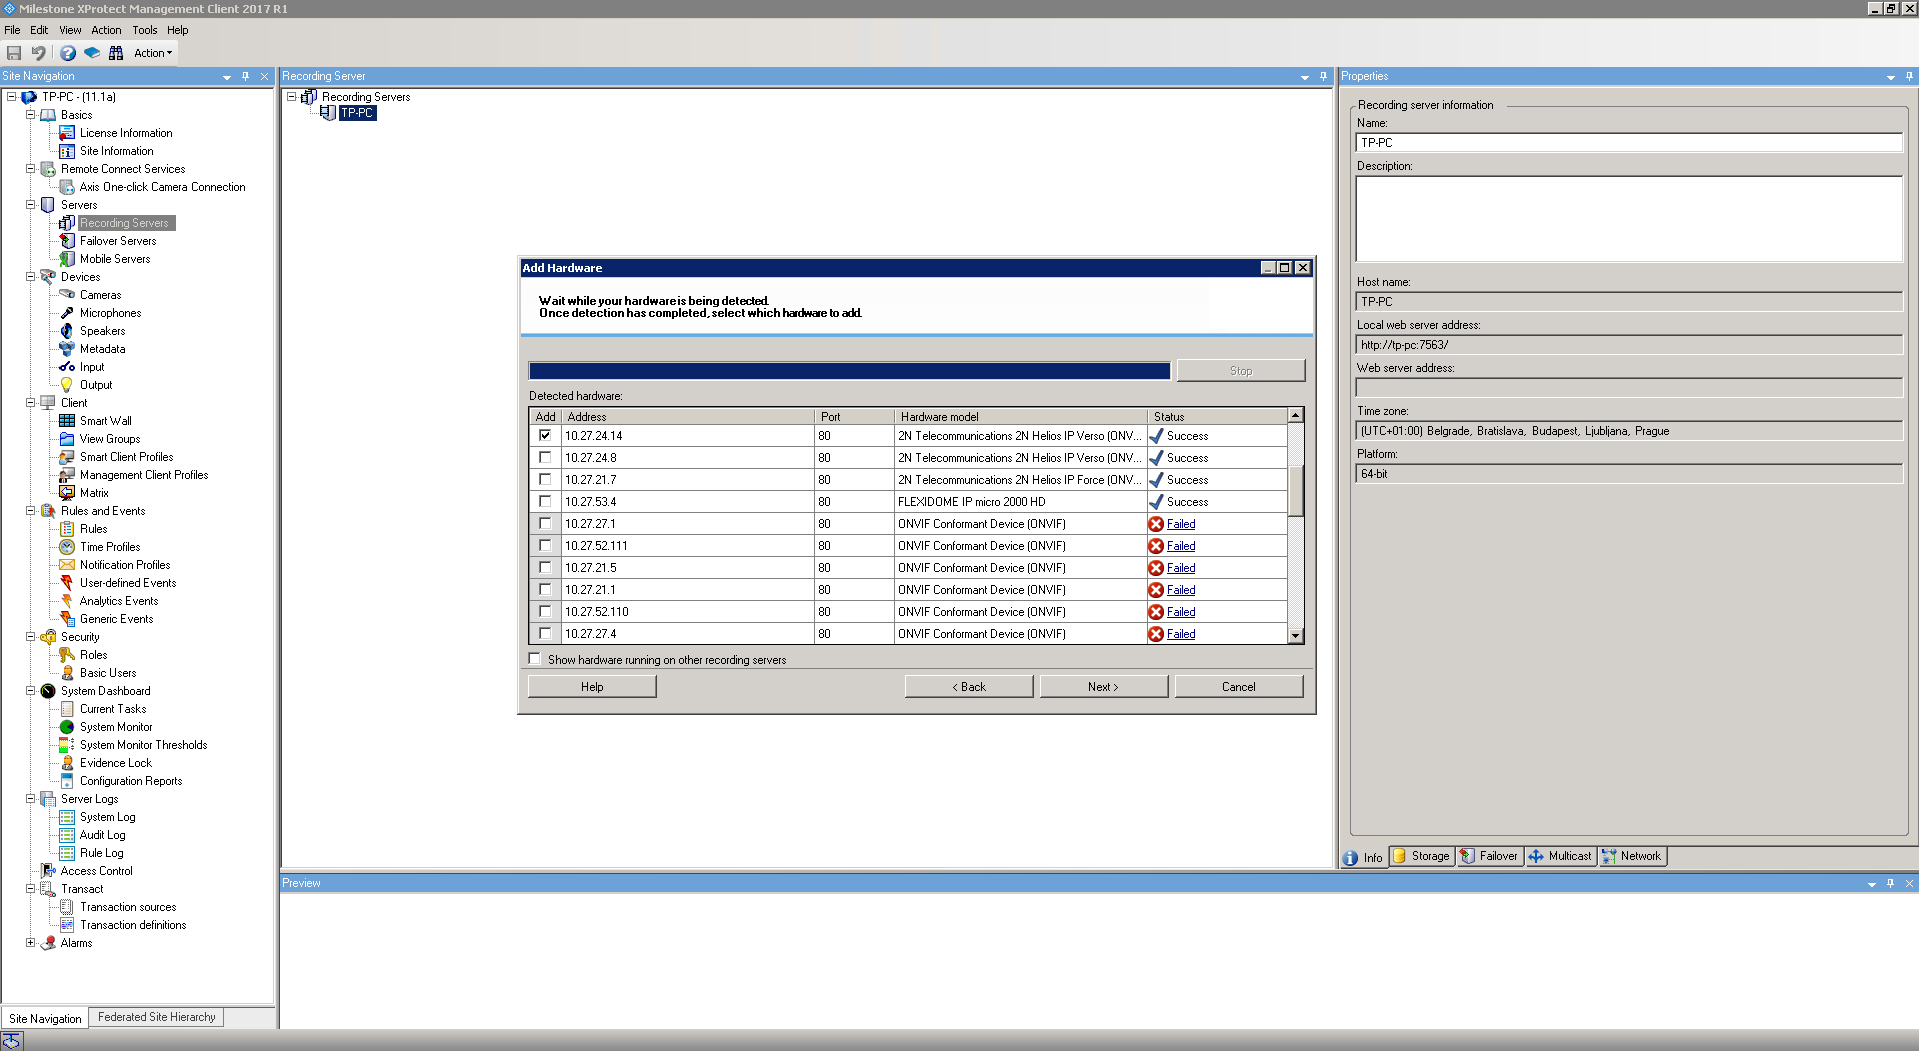
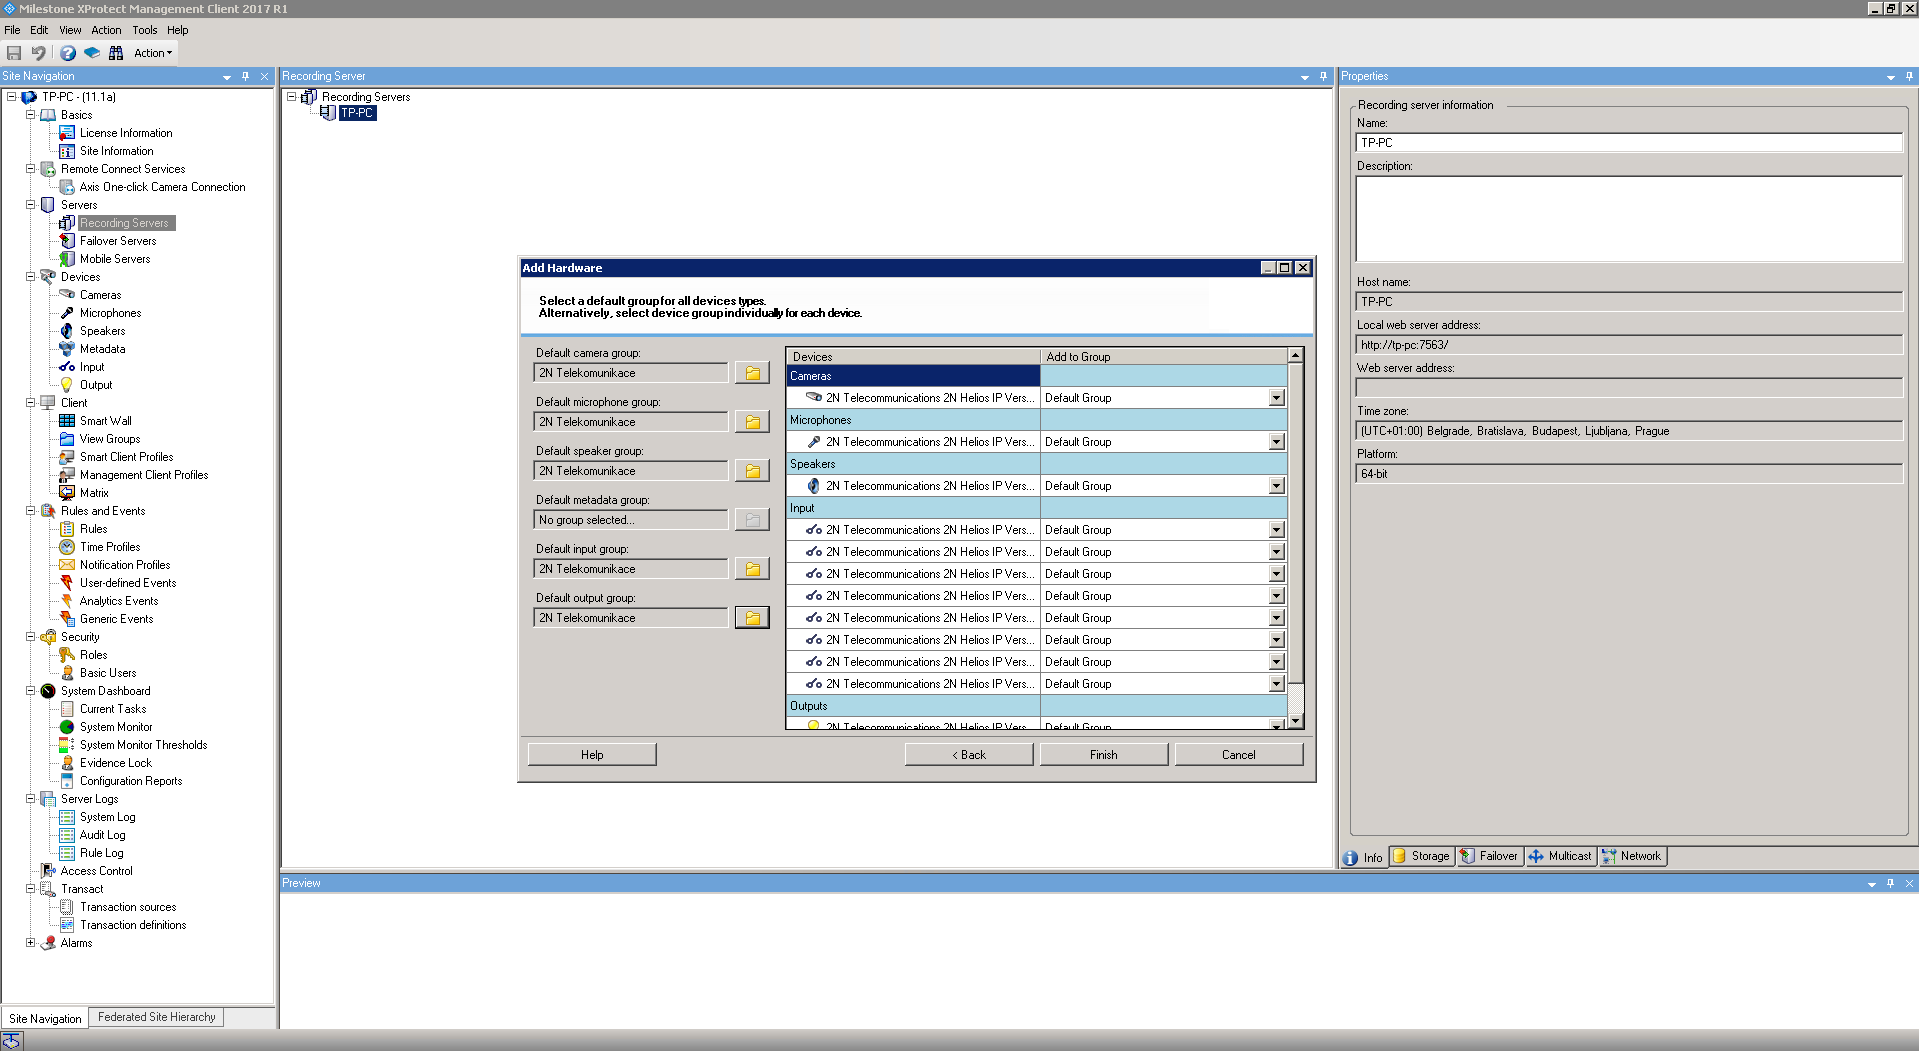
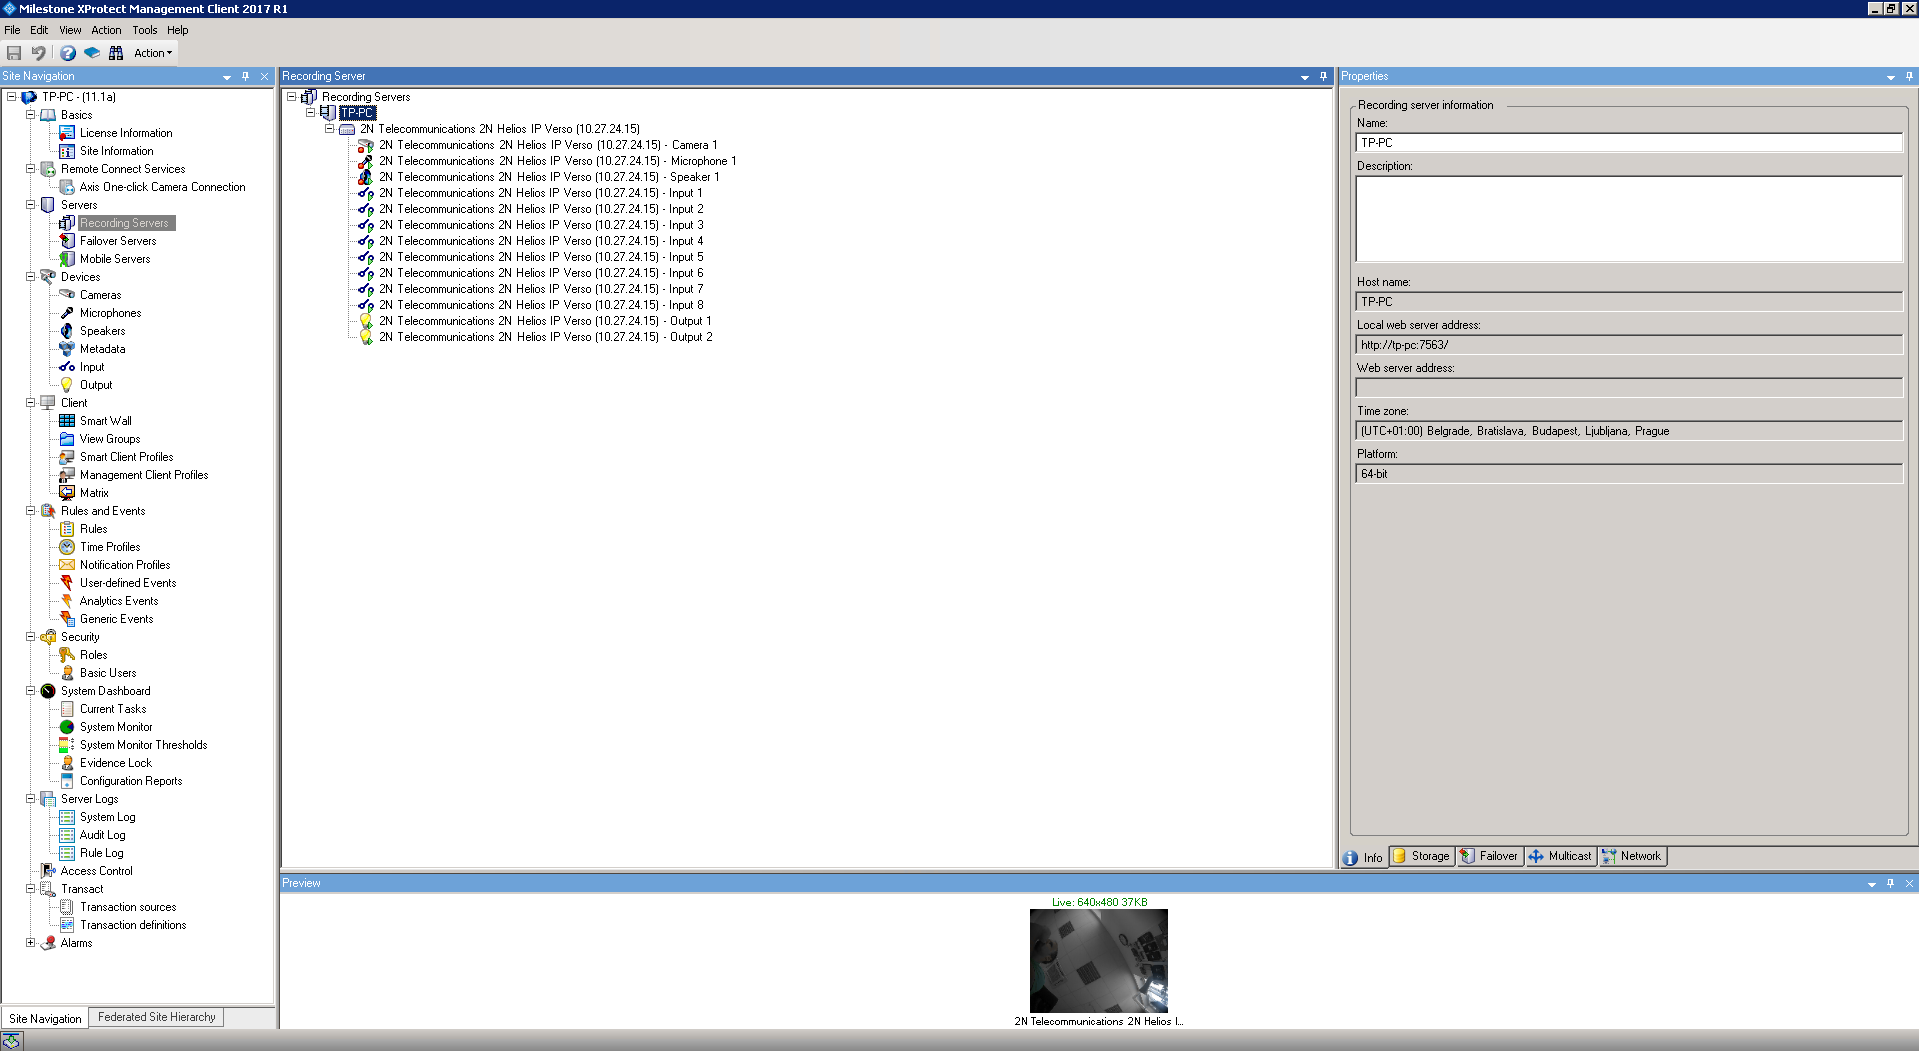
Now Milestone will search for ONVIF devices in your network, once the intercom will be found, it will appear with label "Successfull". If intercom is not checked, then please do so and click on "Next".
 |
 |
 |
 |
 |
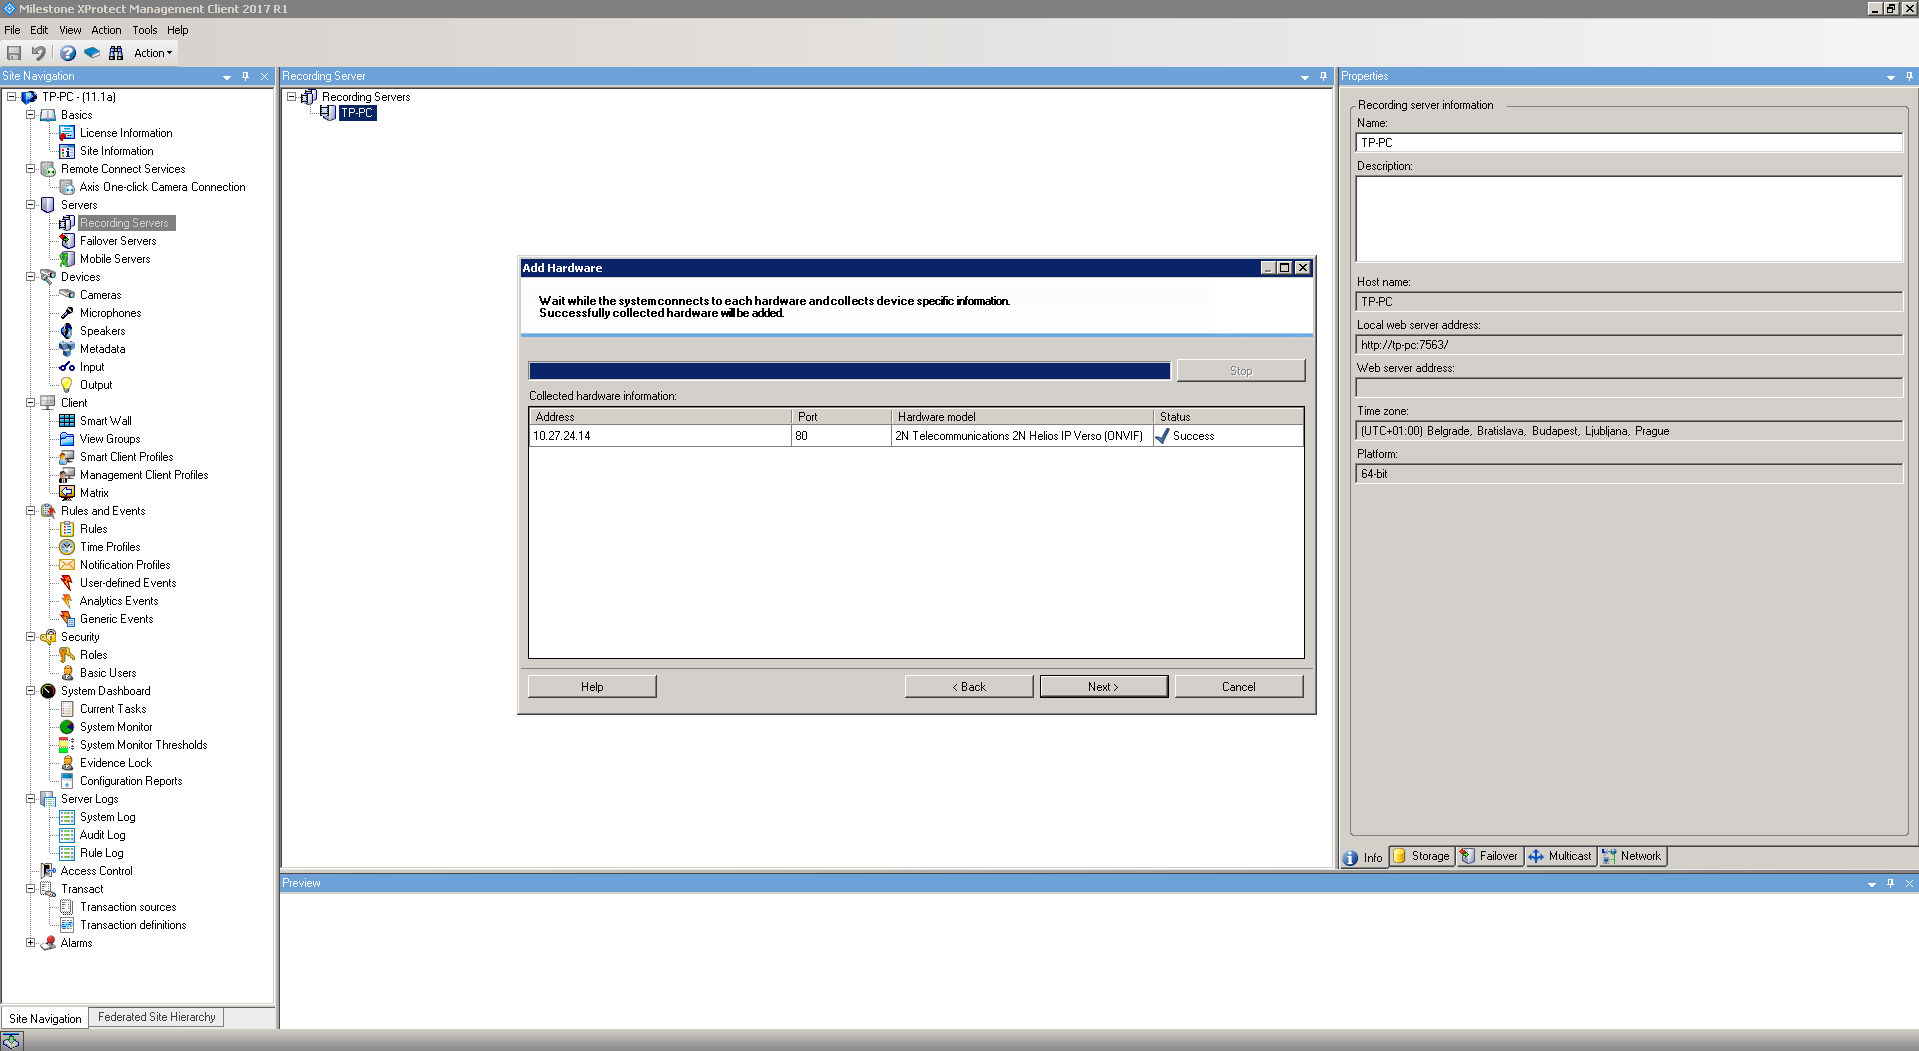
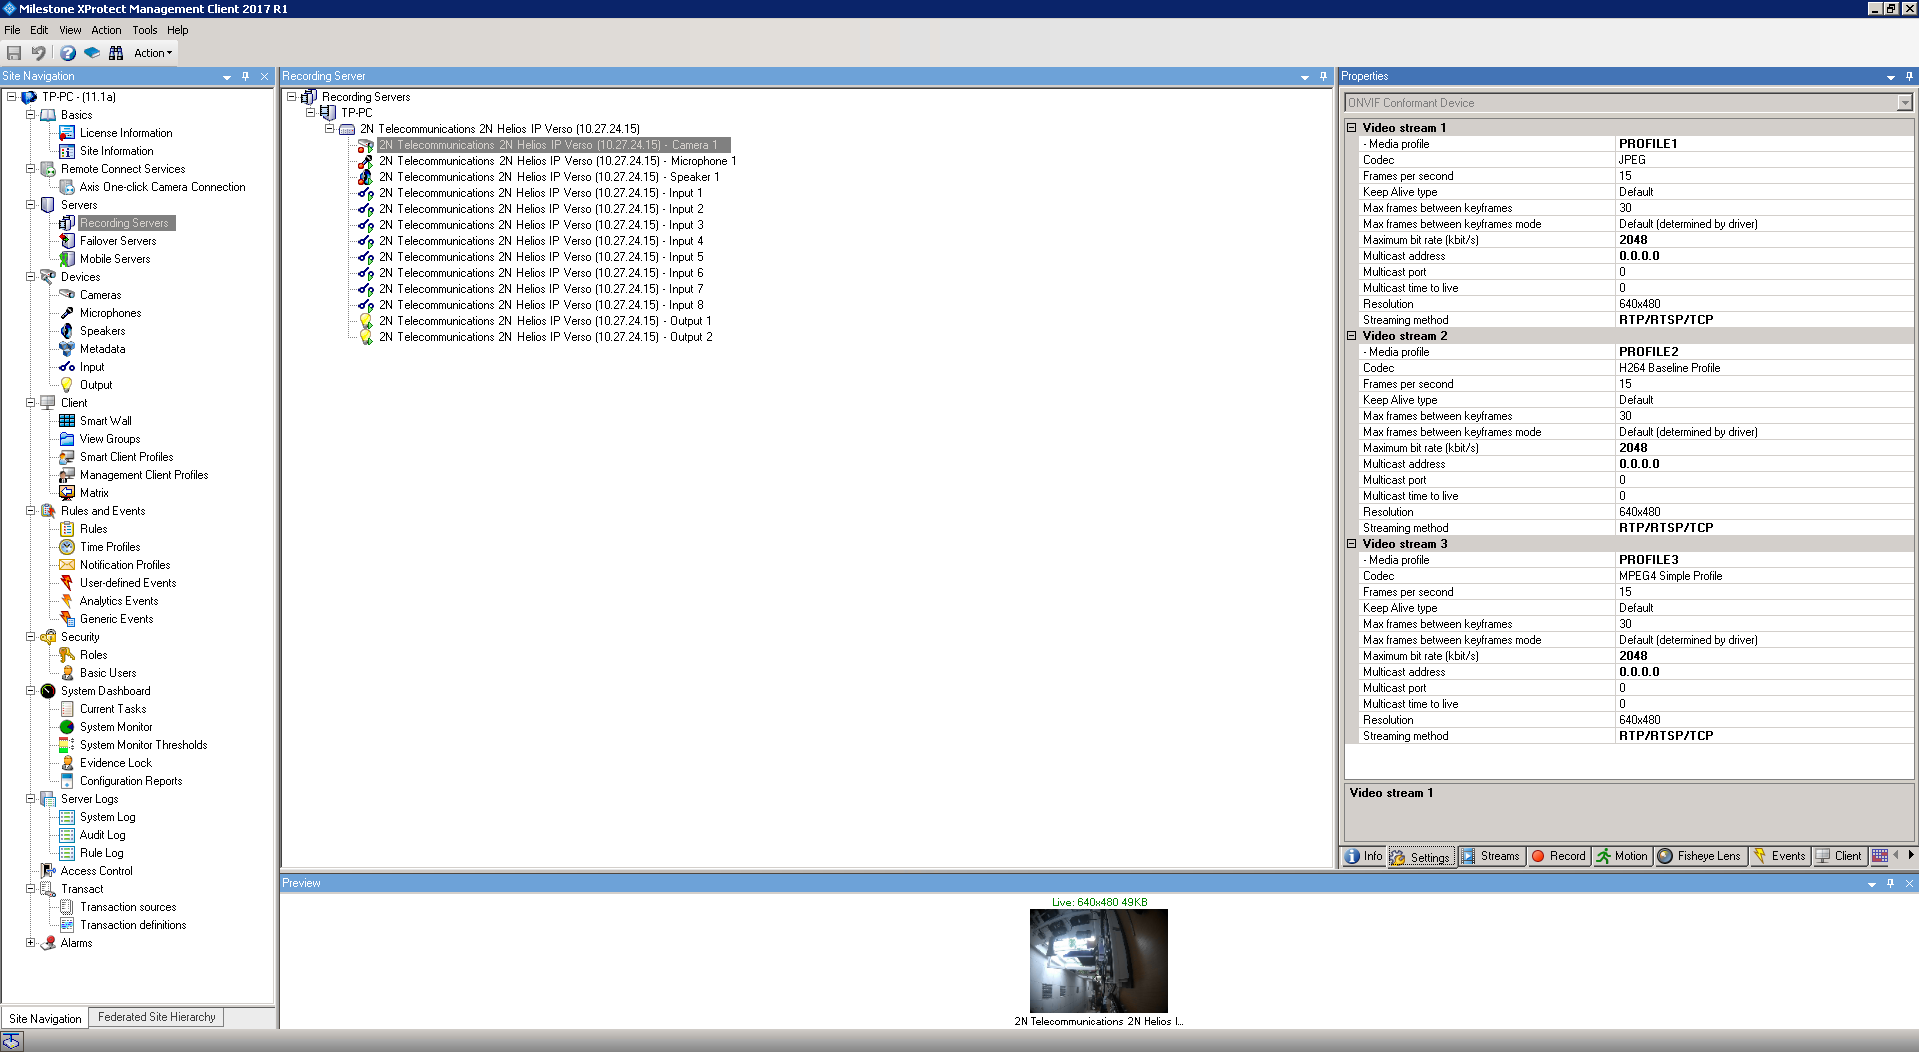
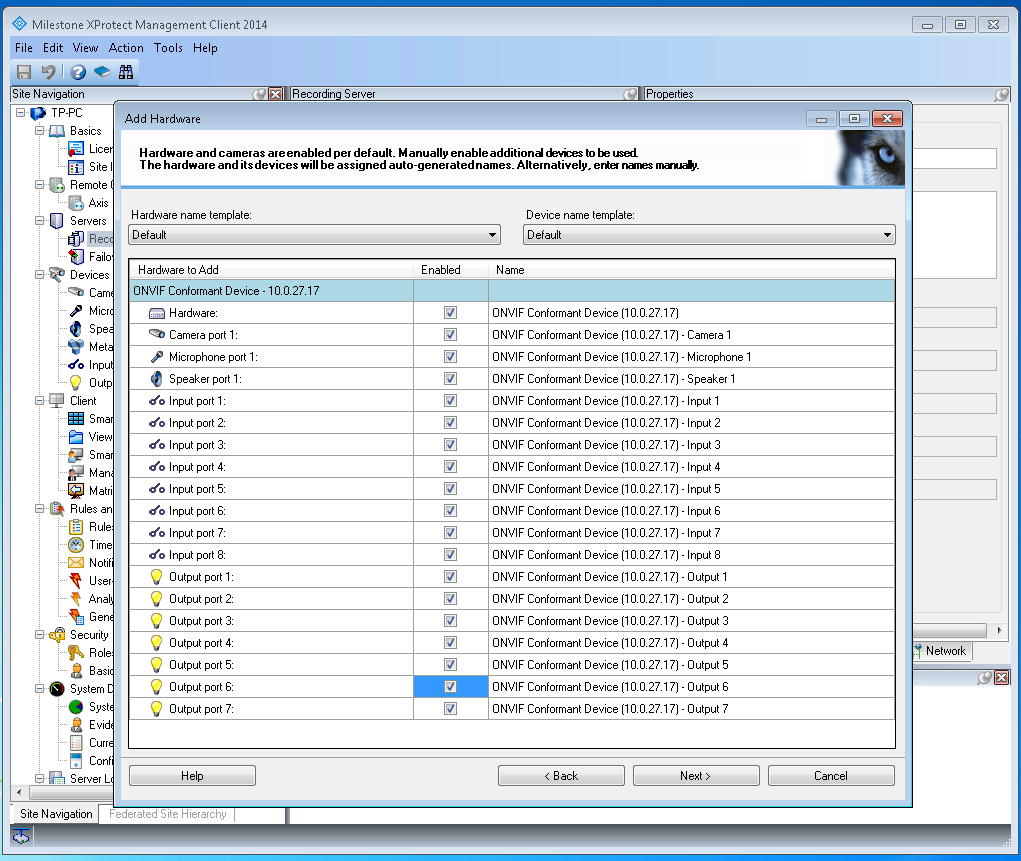
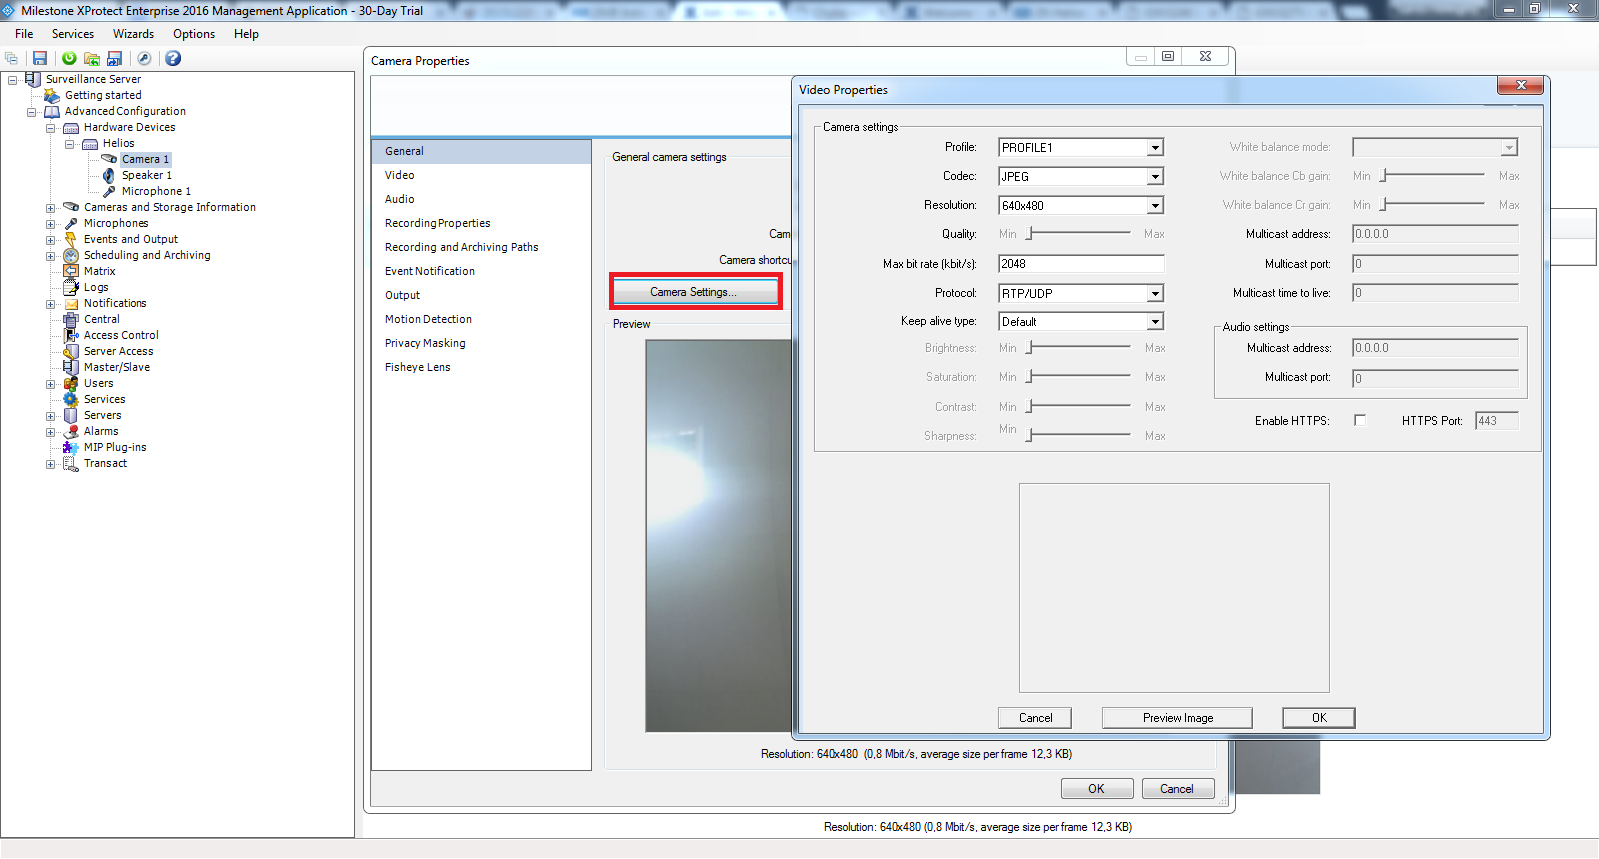
Now you can set video parameters, for example resolutions, codec ....
 |
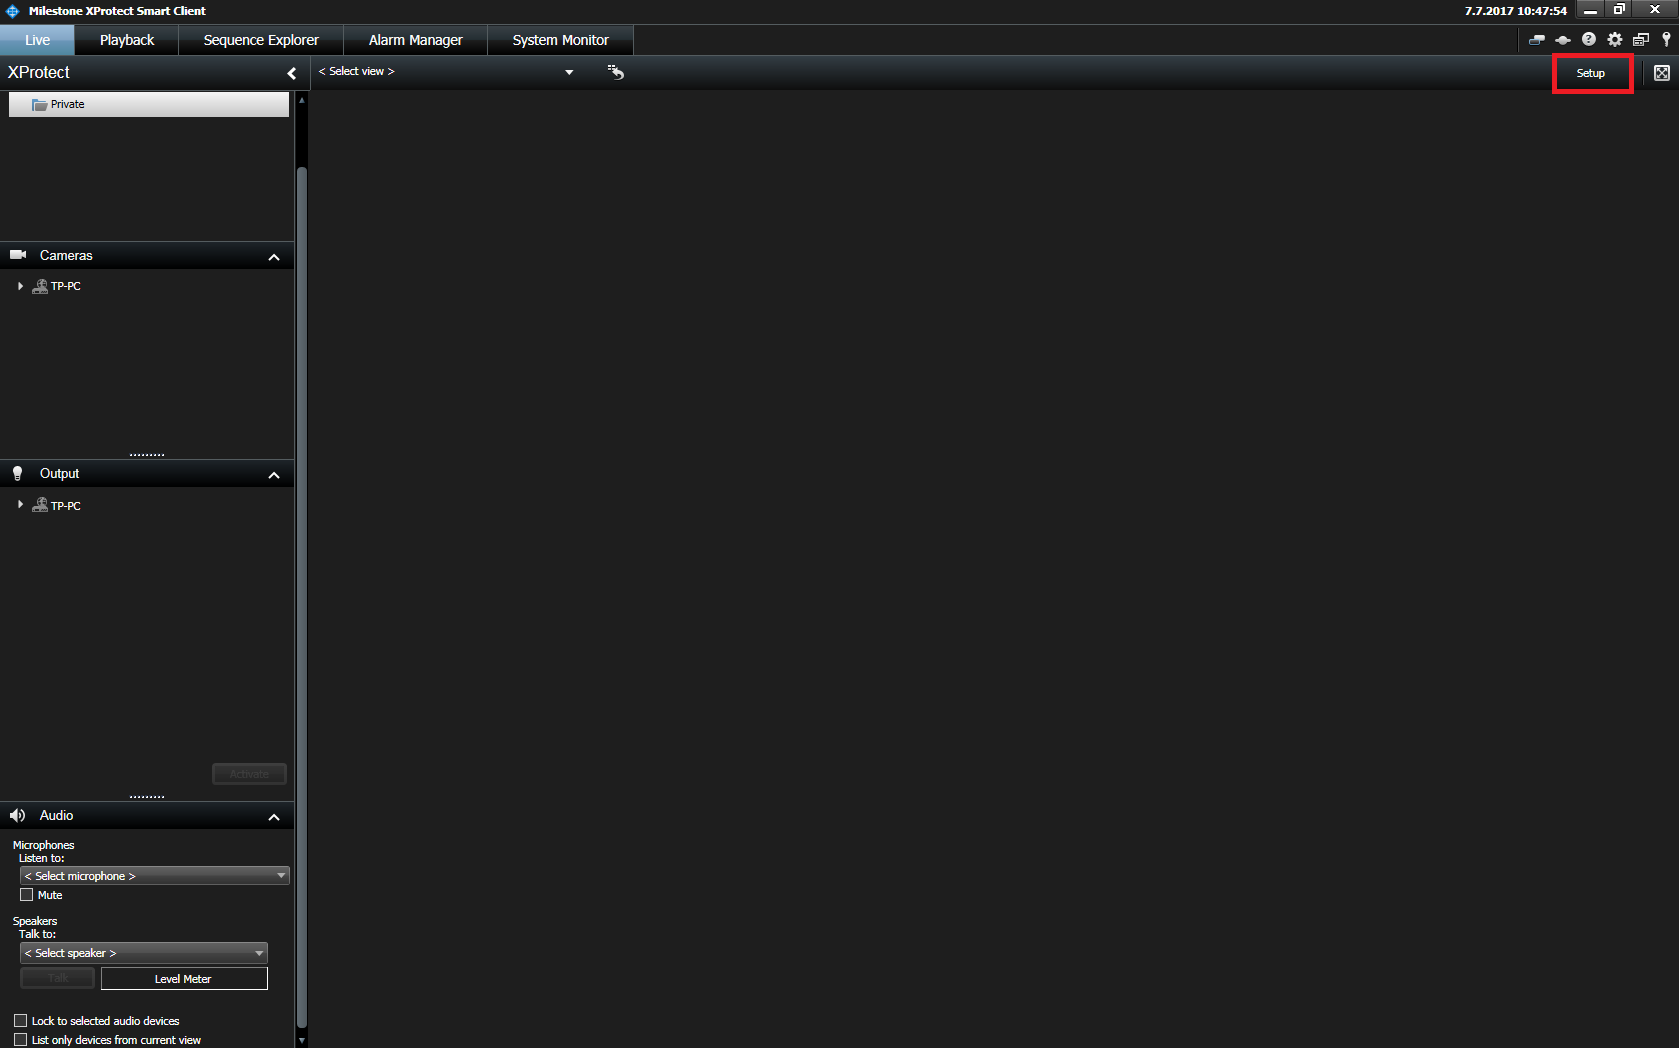
Double-click the shortcut icon XProtect Smart Client on the desktop. The login screen is shown. Type your user name in the User name box, and your password in the Password box. Click Login. After successful login you should add your camera. Go to menu Setup.
 |
 |
 |
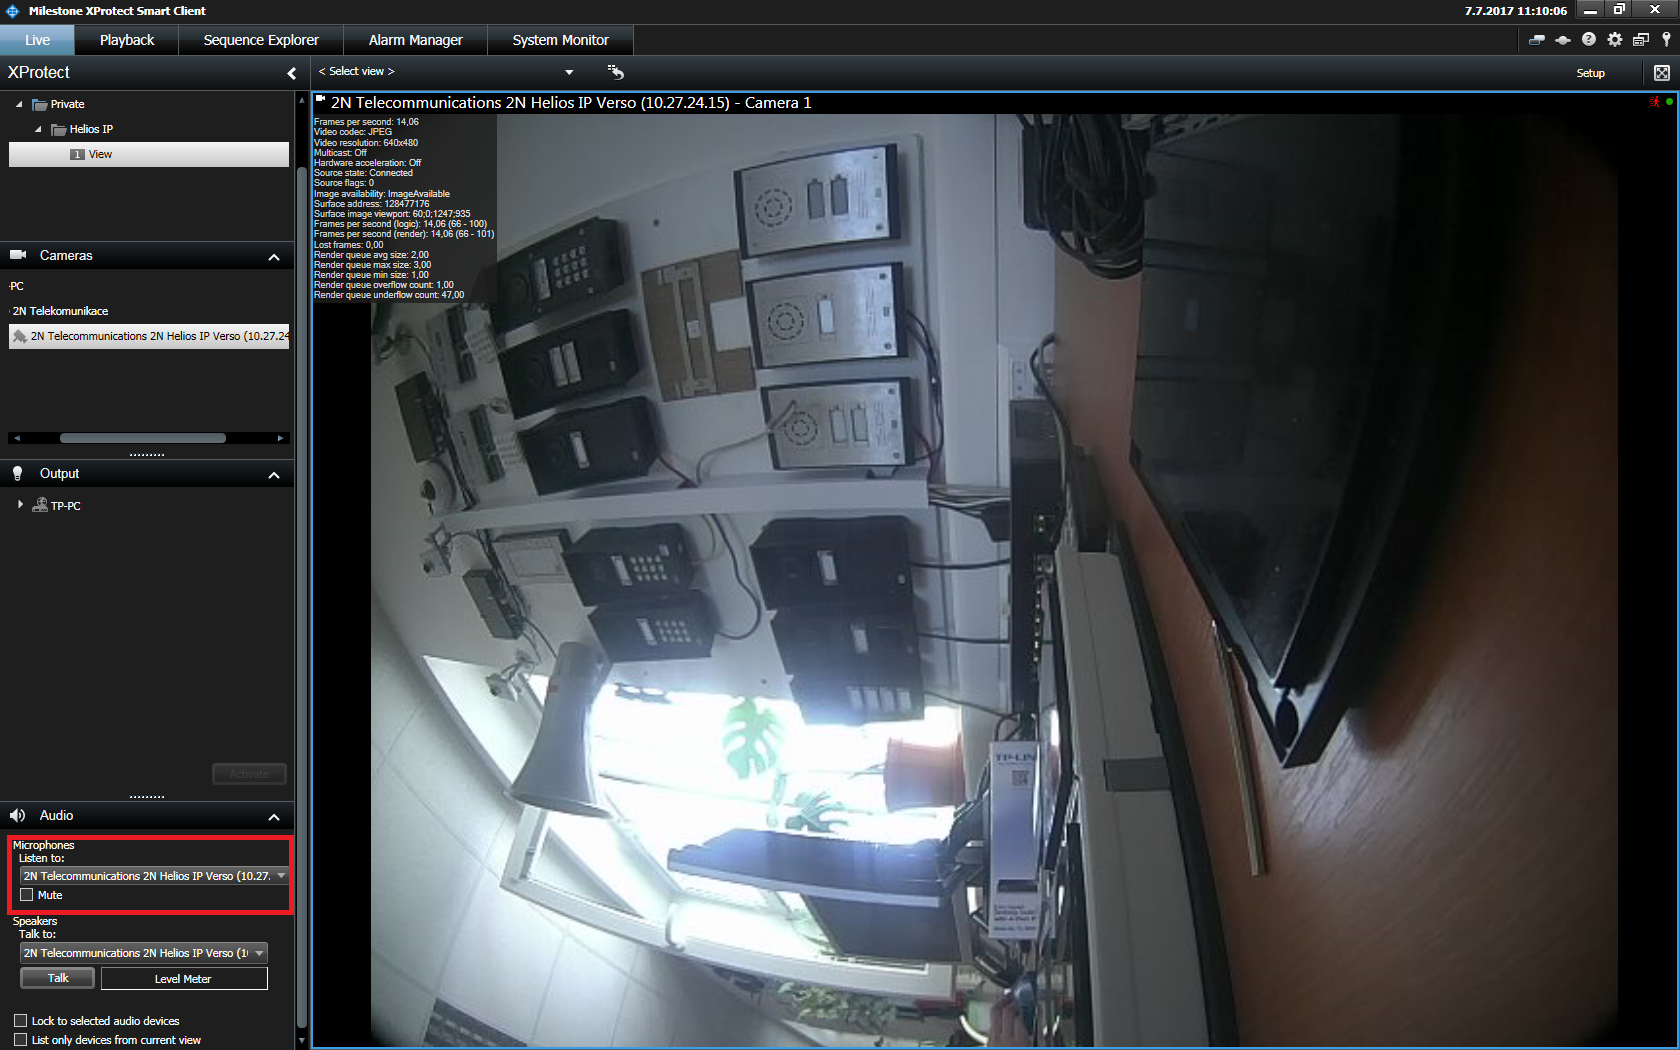
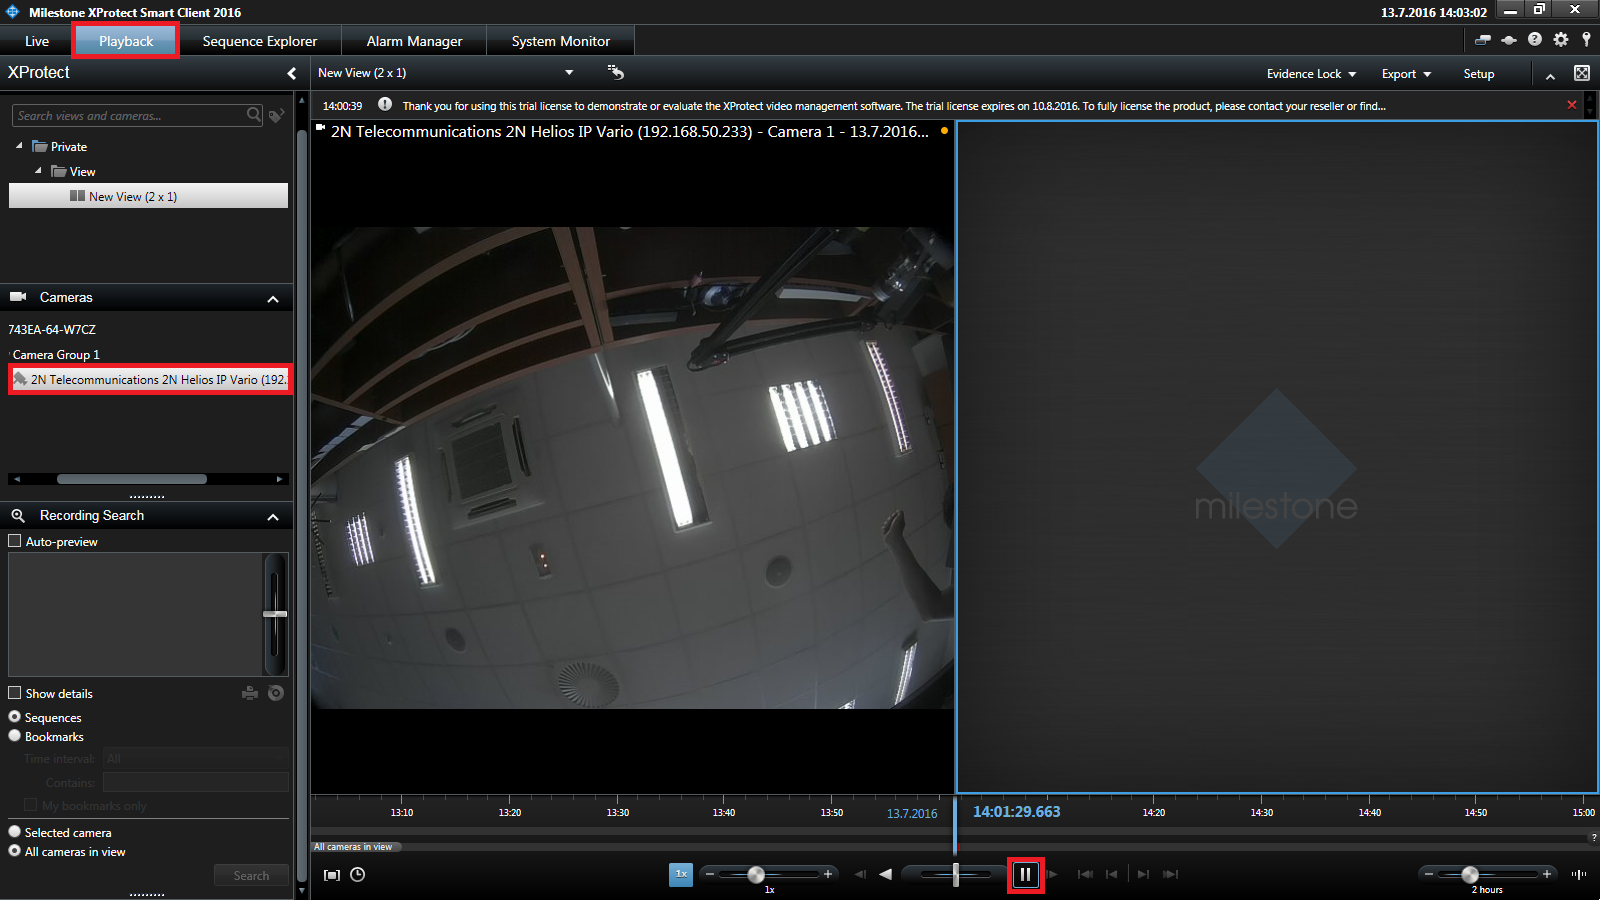
In the XProtect Smart Client you should hear audio from 2N IP Intercom. After you add your camera, drag selected camera and drop it into your View from the camera tree. And then you can hear audio from 2N IP Intercom.
 |
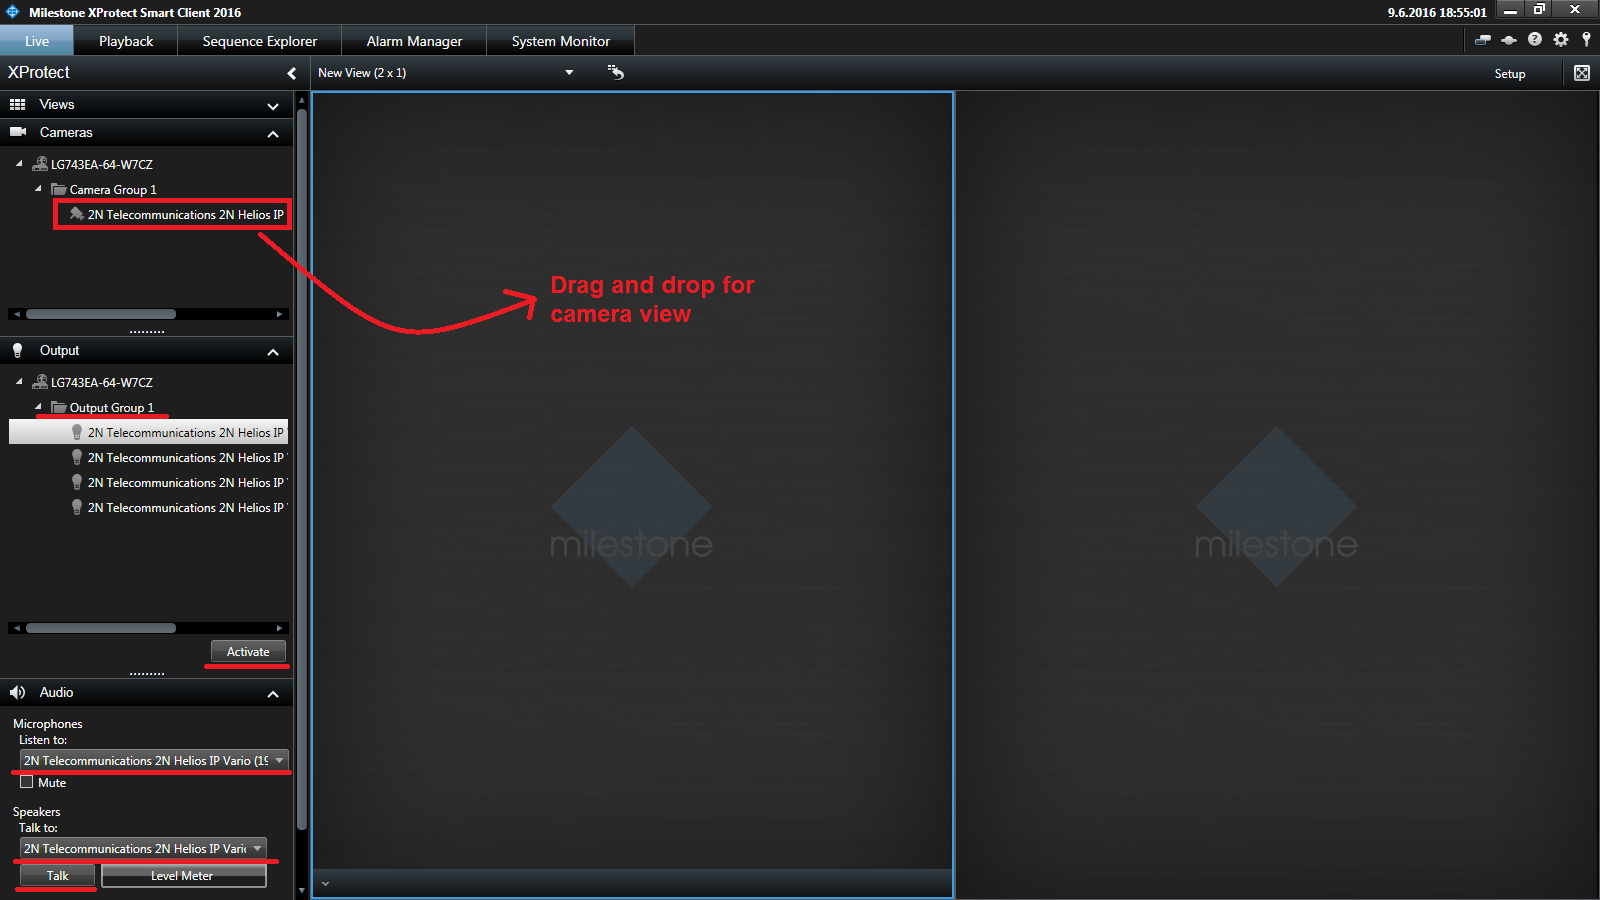
In the XProtect Smart Client you should talk to 2N IP Intercom. After you add your camera, drag selected camera and drop it into your View from the camera tree. And then you can press button and talk.
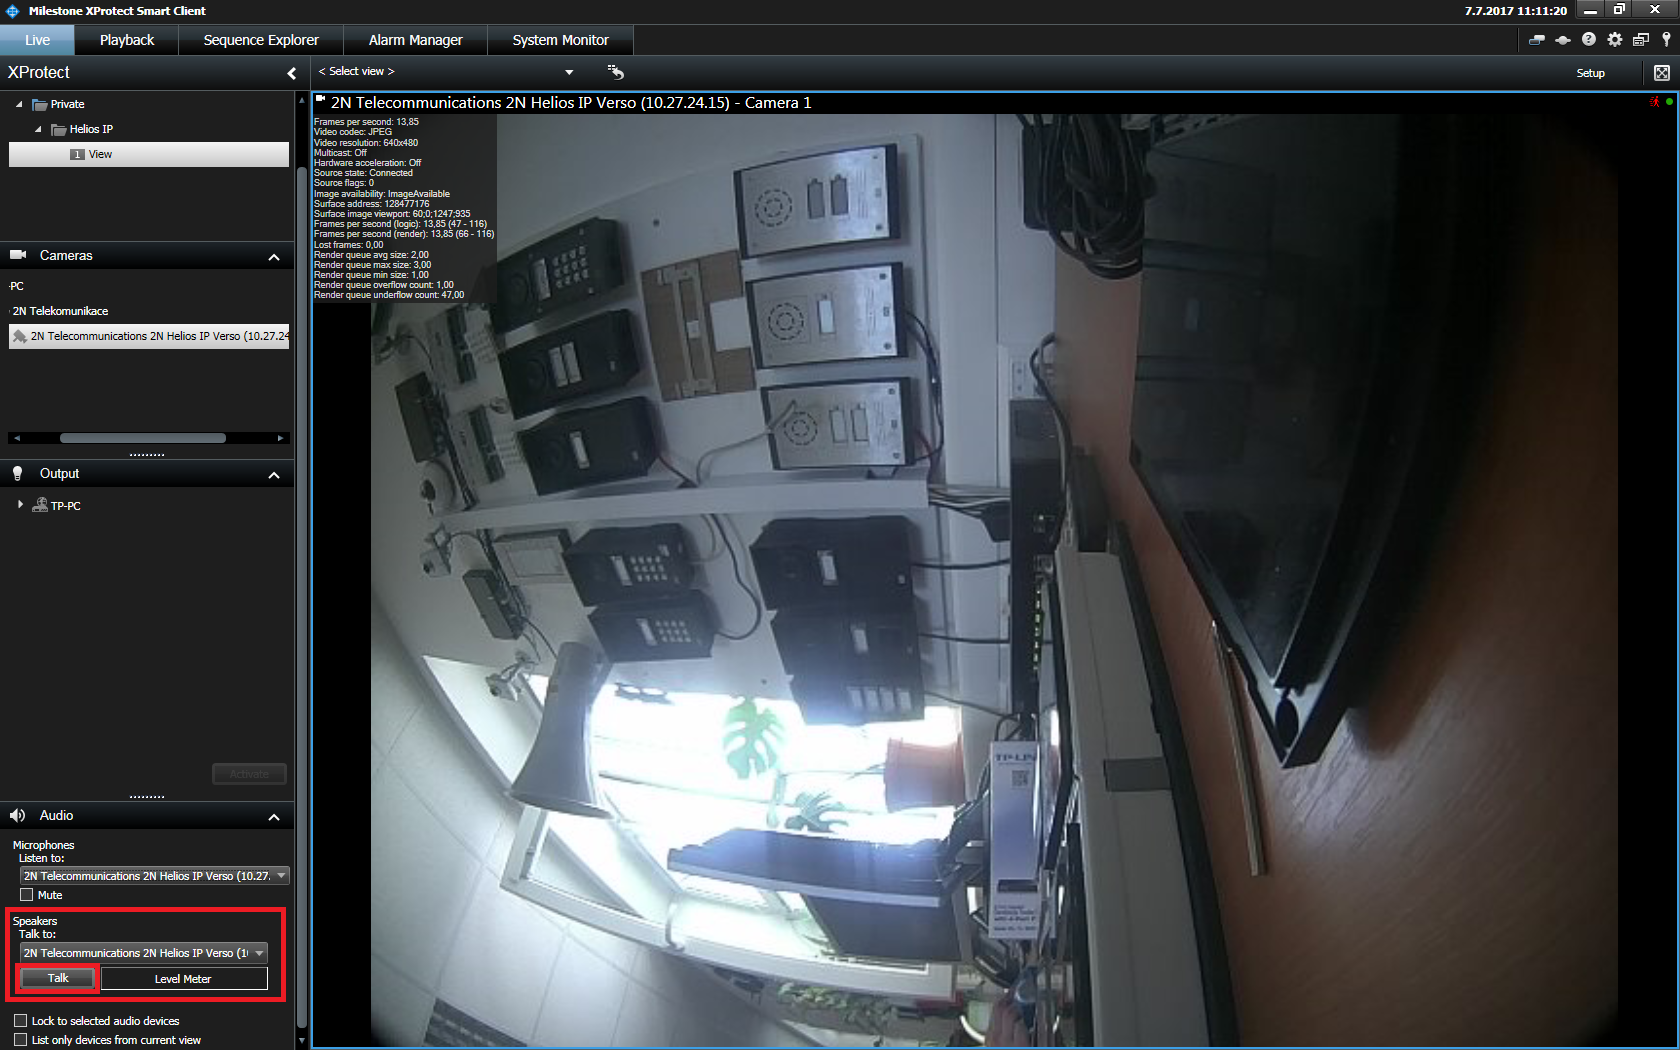 |
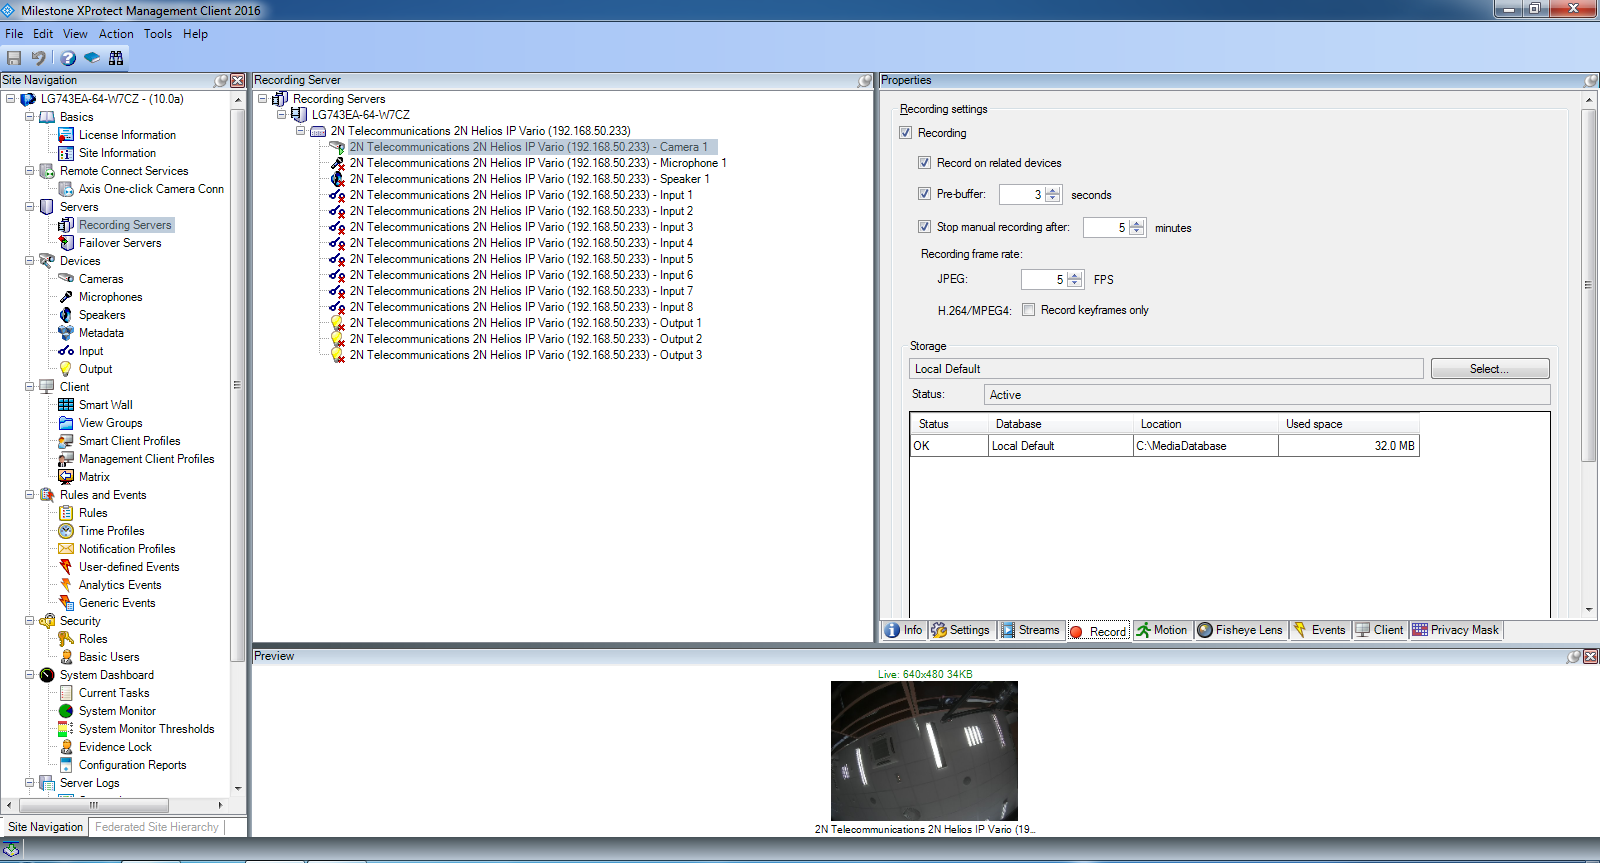
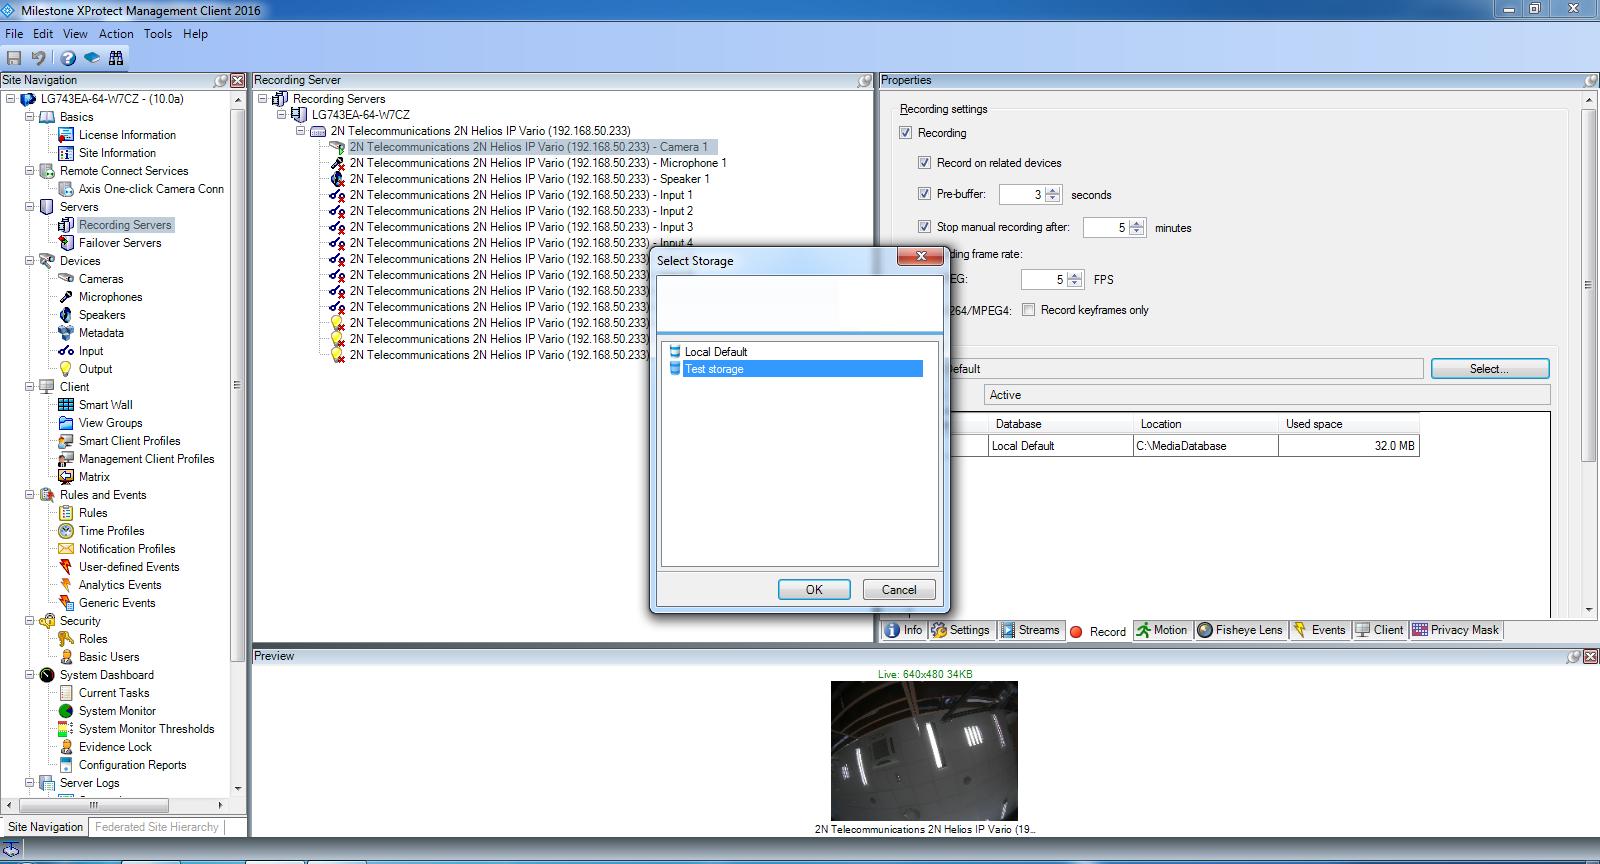
In the XProtect Management Client you can set Output Trigger Time for your Outputs.
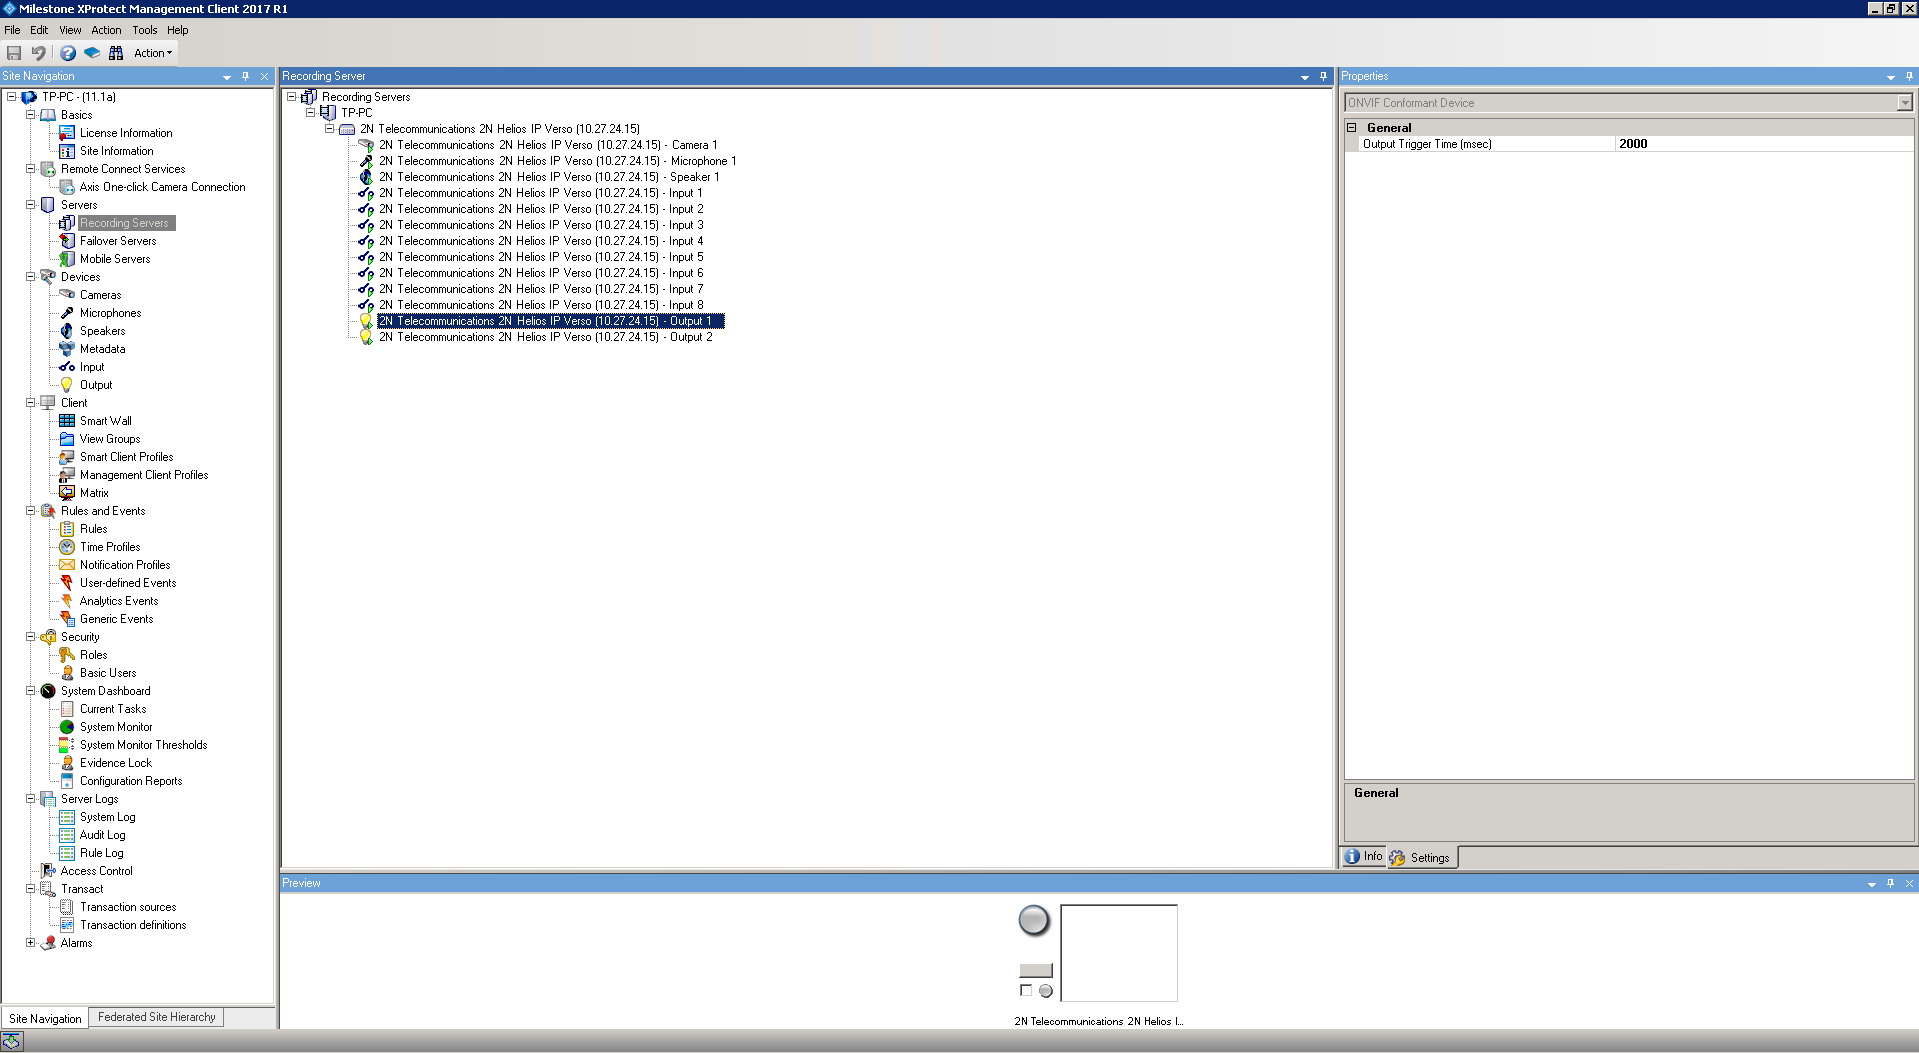 |
And in the XProtect Smart Client you should set outputs of 2N IP Intercom. After you add your camera, set one of Digital outputs 2N IP Intercom and with the active the output.
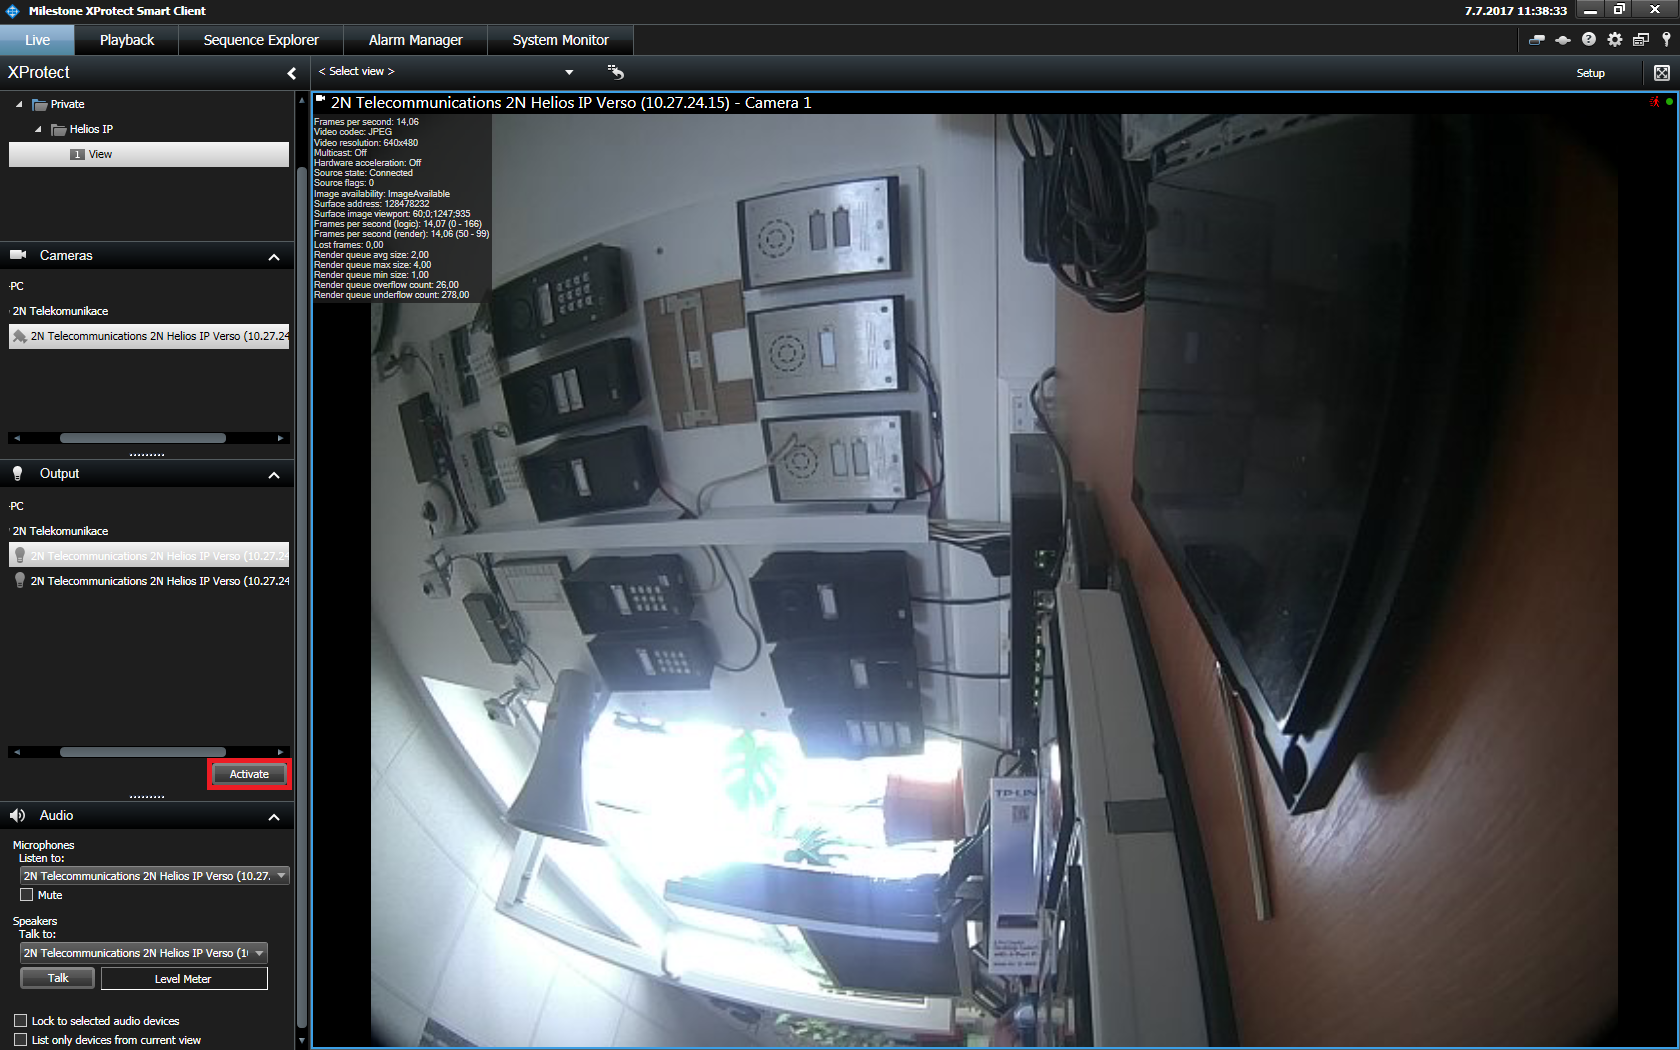 |
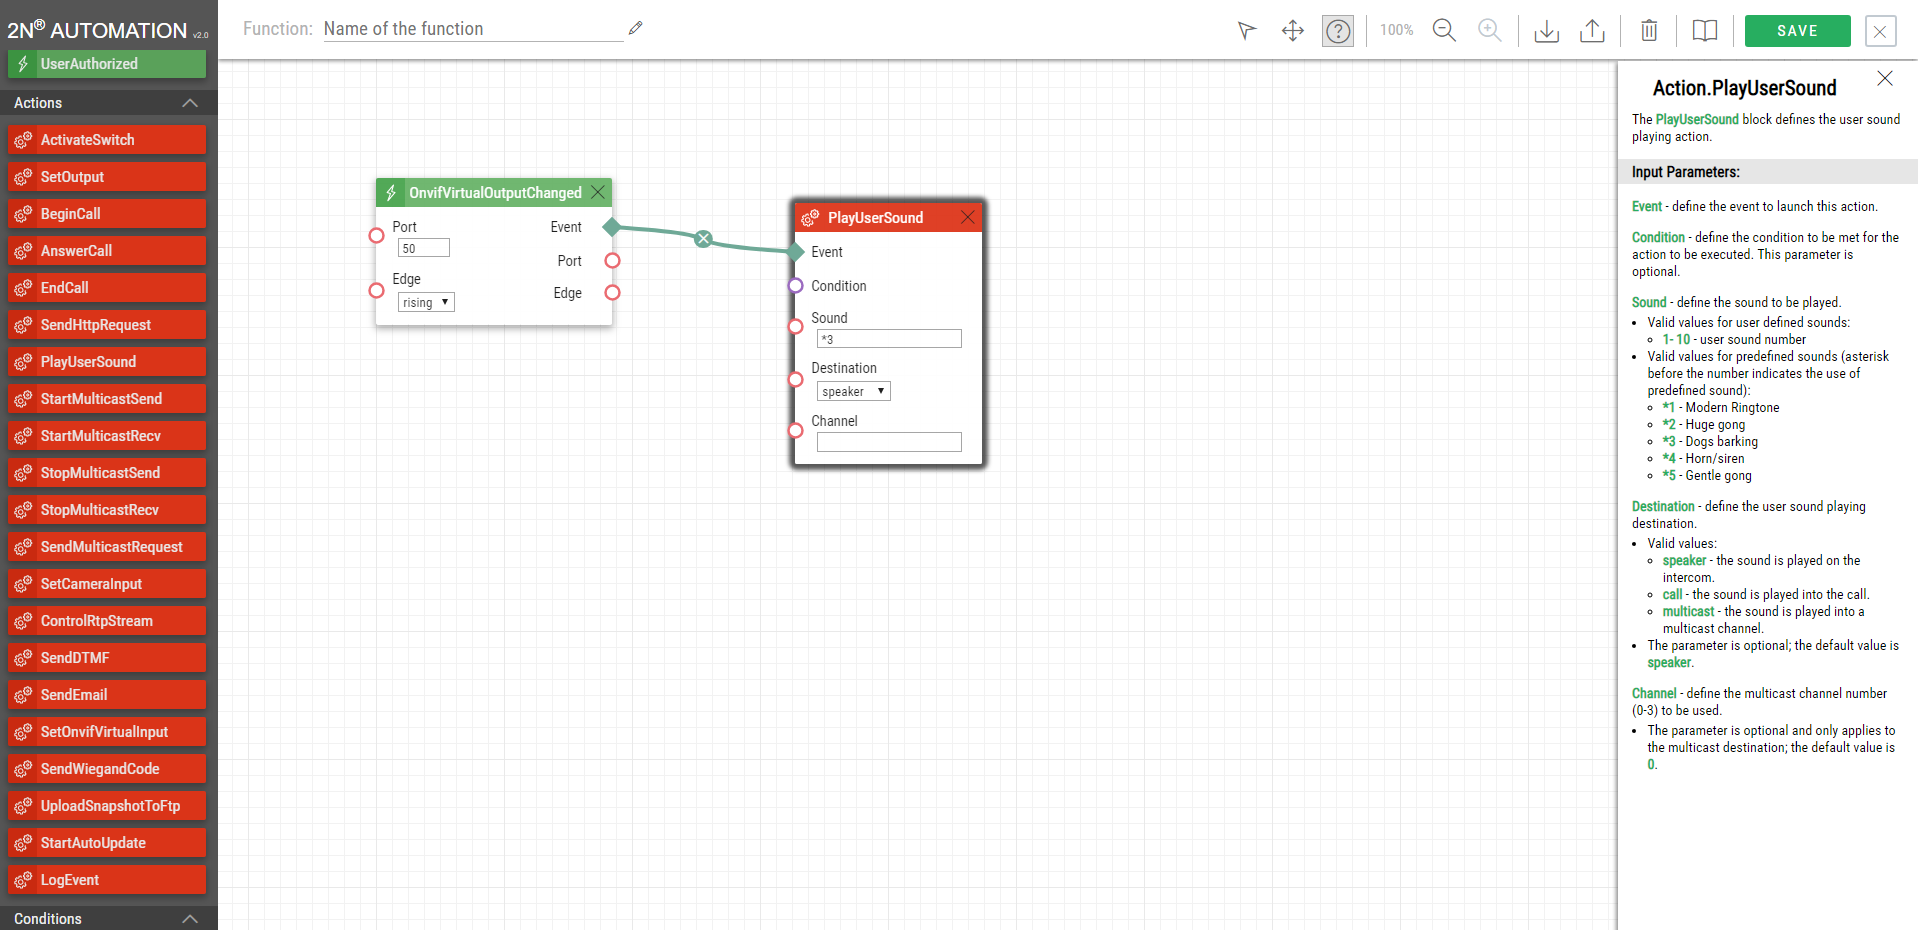
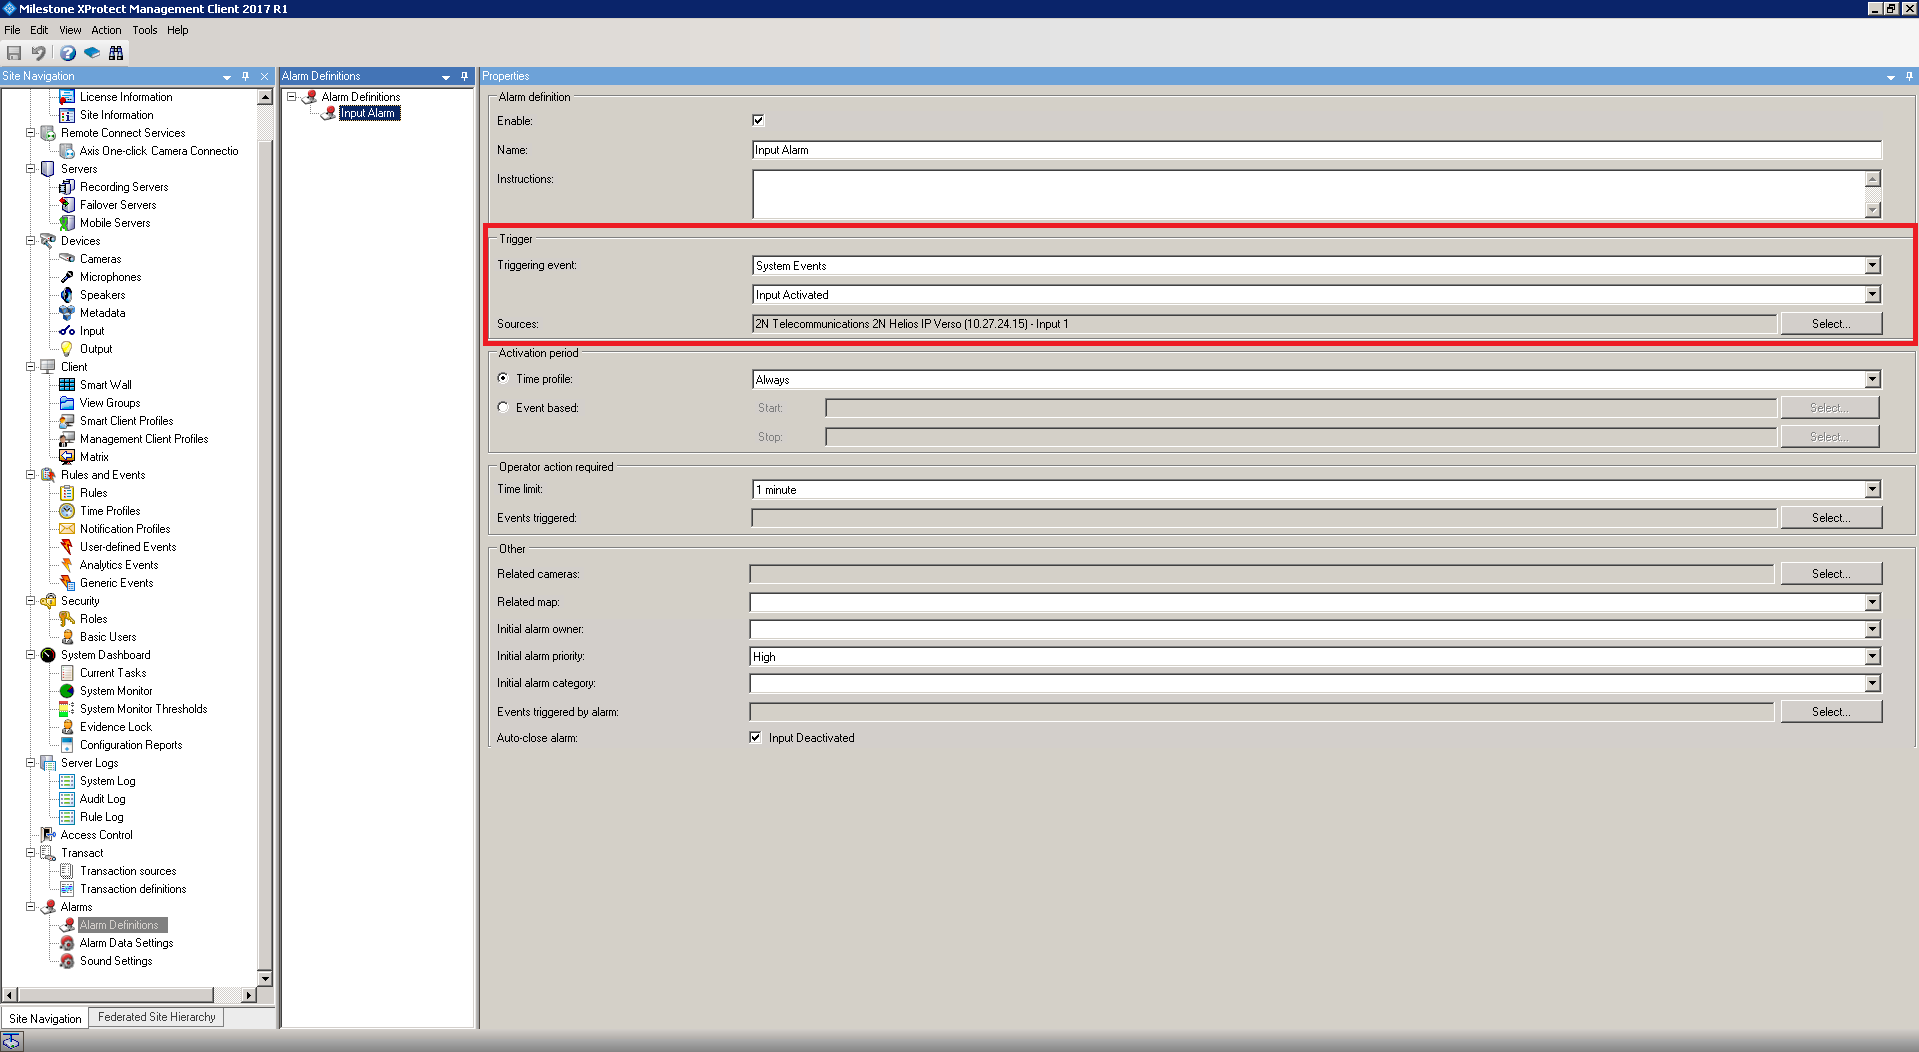
As an example an alarm raised when 2N IP Intercom digital input is activated will be configured. Alarm will be raised when a Hardware Input Event is registered in Milestone VMS. Add Input Rising Event and Input Falling Event for correct function alarm.
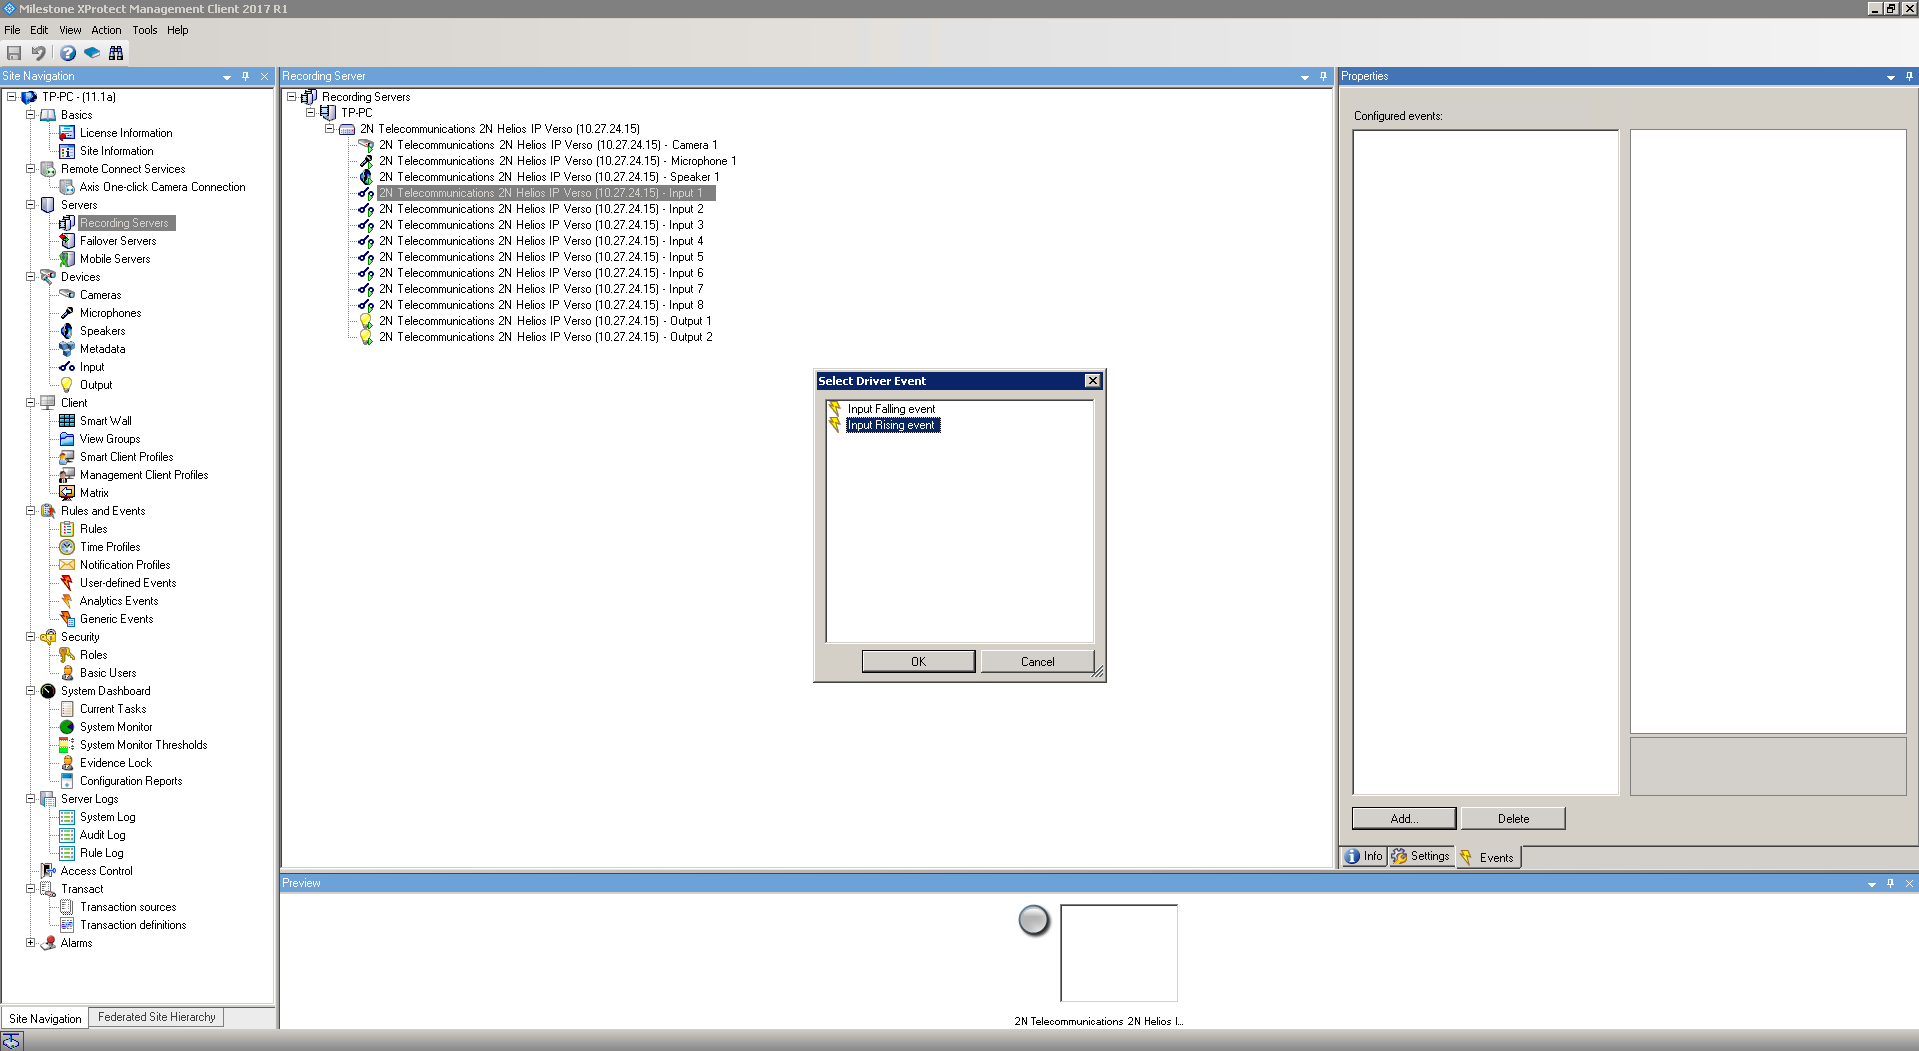 |
Now new Alarm Definition is to be created. Select Create New Alarm, set the parameters for input and click to Save.
 |
 |
Version 2016
Tested Functions
| Milestone XProtect | 2N IP Intercom Version | Scan device | Video from 2N IP Intercom | Audio from 2N IP Intercom | Audio to 2N IP Intercom | Switch control | Events from 2N IP Intercom |
|---|---|---|---|---|---|---|---|
2.17.0.26.1 | |||||||
2.14.2.23.4 |
2N IP Intercom Settings
Enable Onvif and set authorisation data in menu Services / Onvif
 |
Enable parameter RTSP Server Enabled in menu Services / Streaming
 |
 |
Tested Features
On the side of Milestone server go to section "Servers->Recording servers". Do a righ click on your recording server and choose "Add Hardware" (if server is not authorized yet, then you have to click on "Authorize first"). Now click on "Add" to add a new device fill credentials that you choosed for Onvif account in the intercom (in our case it is ONVIF/ONVIF). Then click on next. Now Milestone will search for ONVIF devices in your network, once the intercom will be found, it will appear with label "Successfull". If intercom is not checked, then please do so and click on "Next".
 |
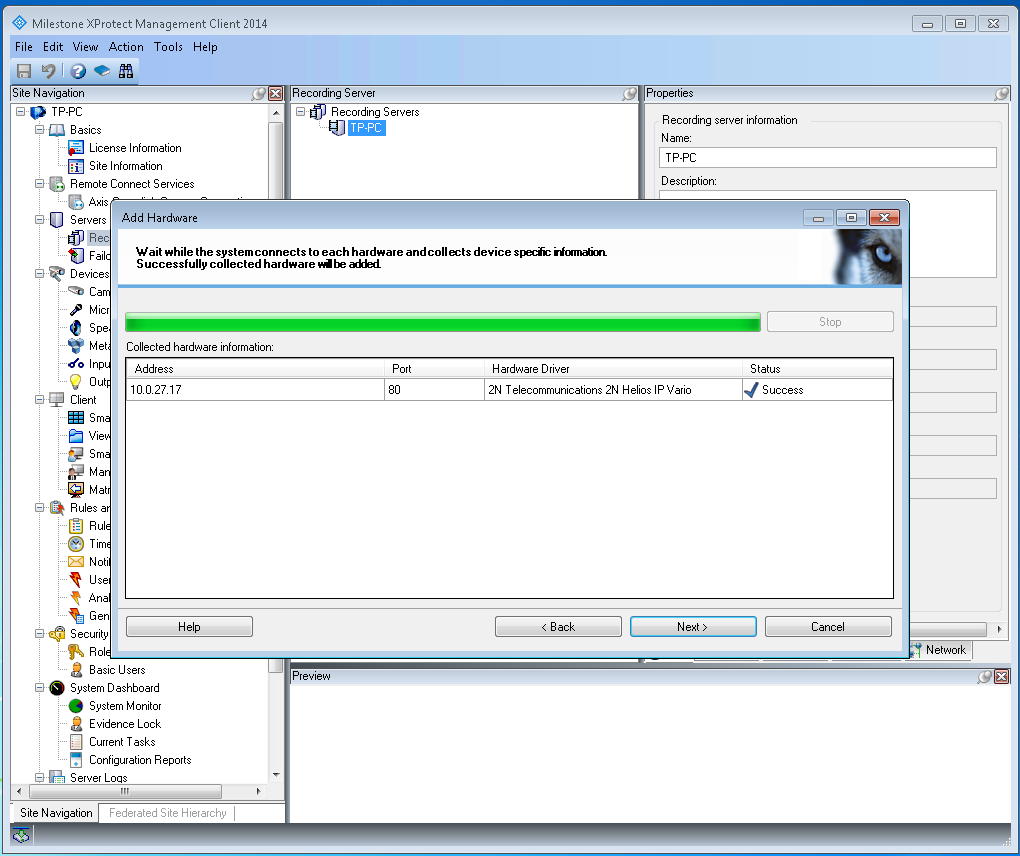
On next screen you will see successfully added devices, just click on "Next" again.
 |
 |
 |
 |
 |
 |
 |
 |
 |
 |
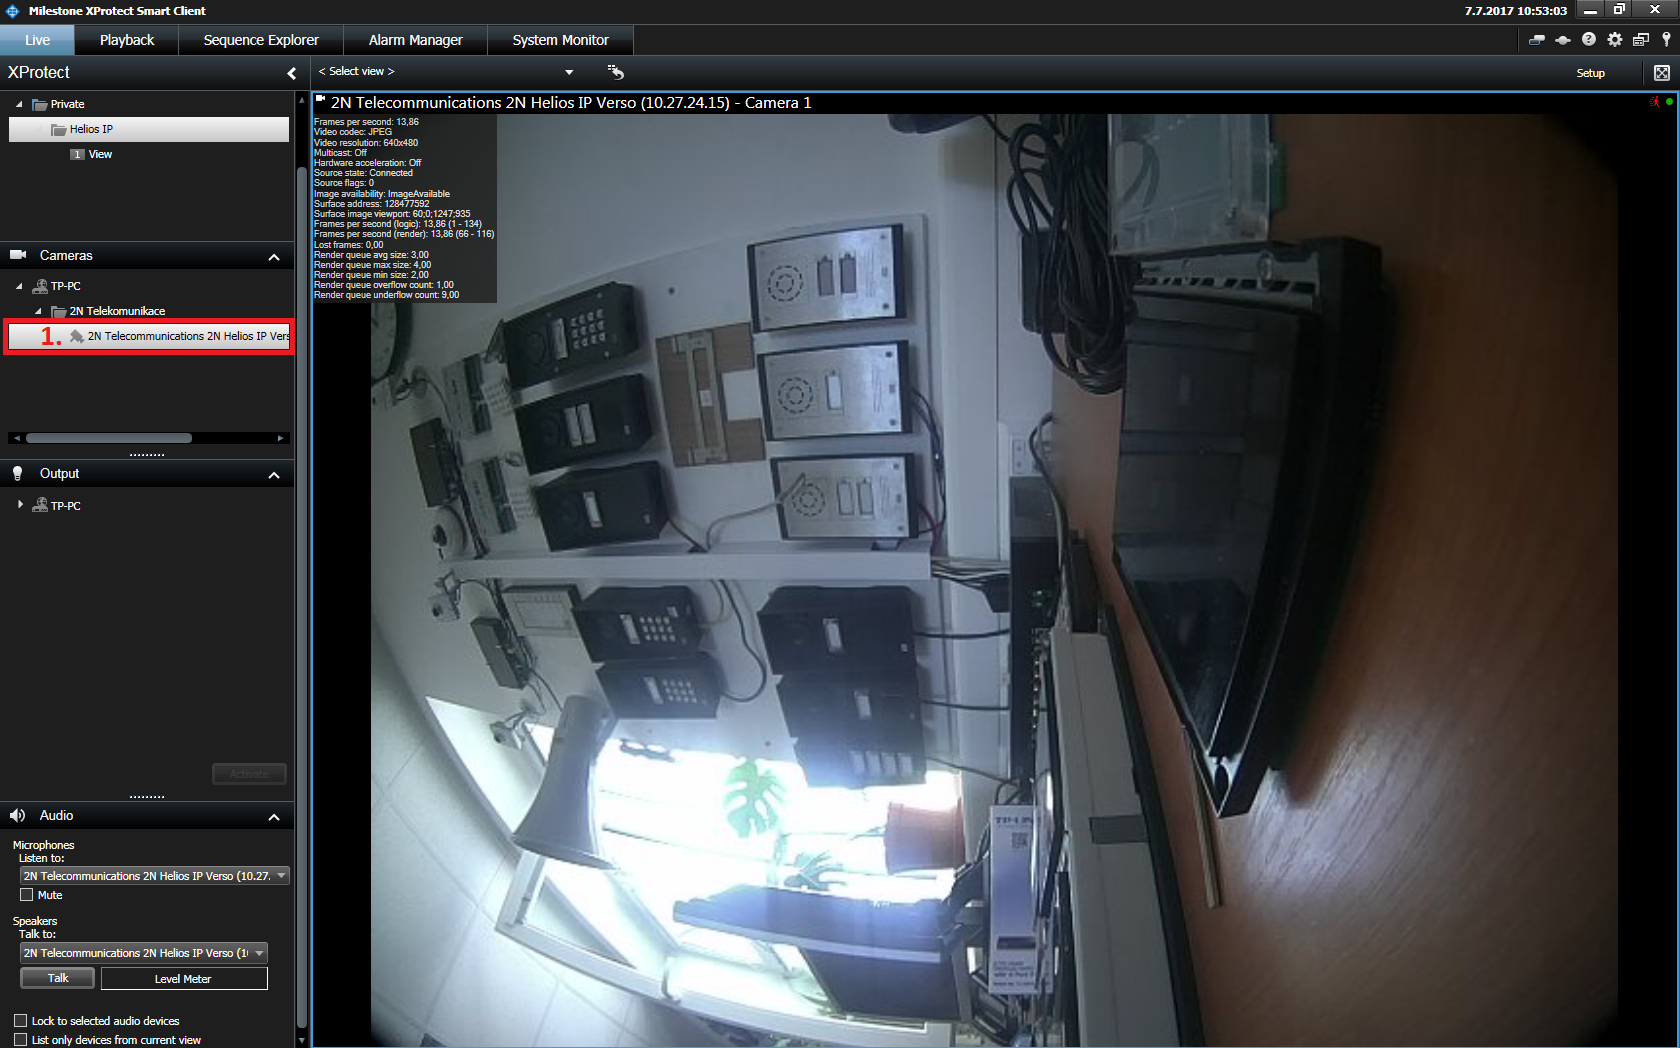
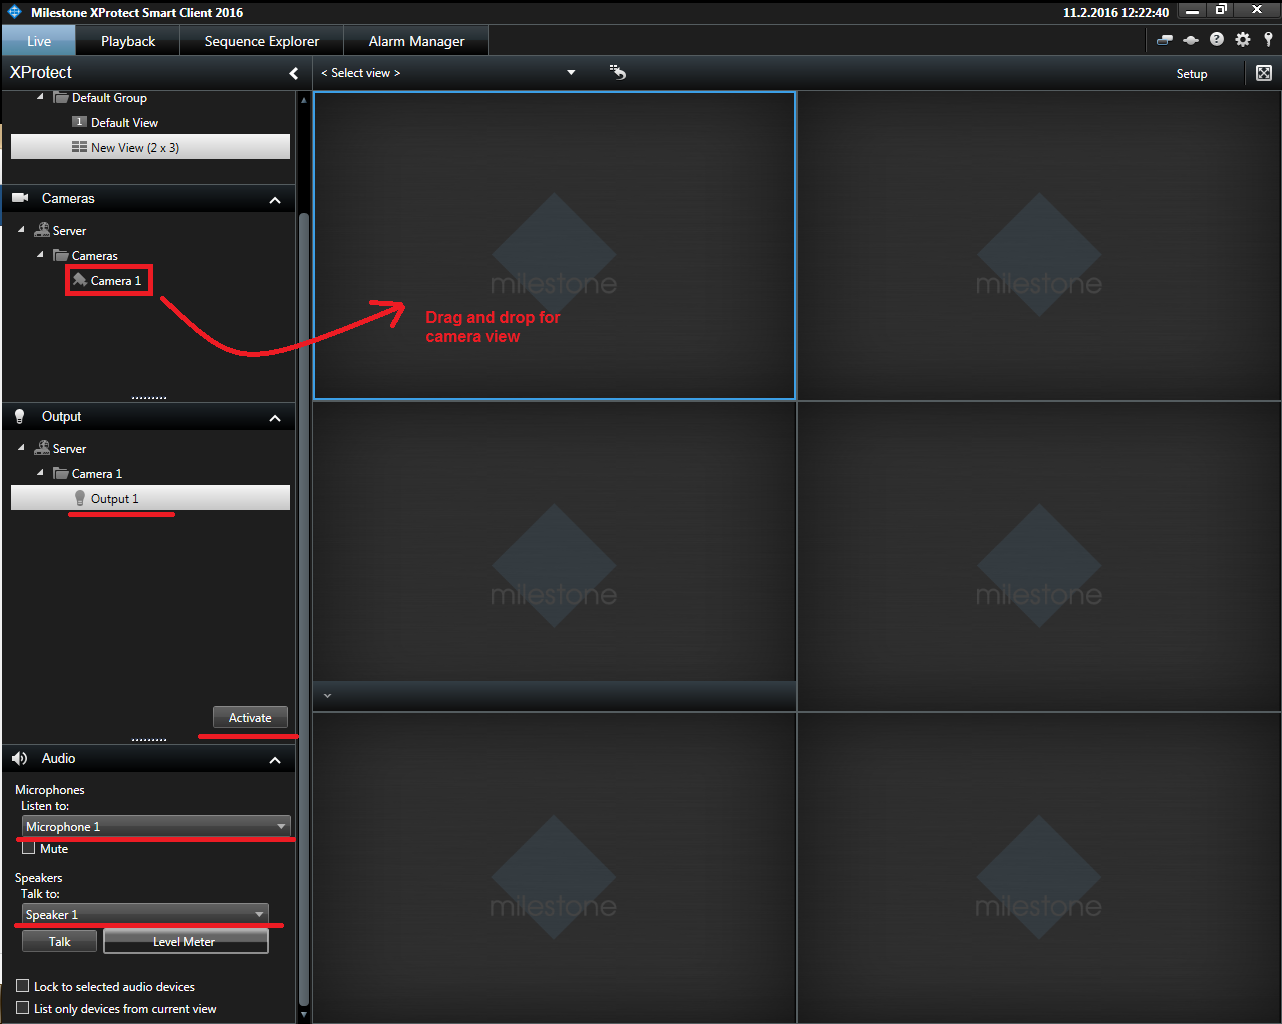
Right now you can start "Milestones Smart Client" which is surveillance window for video monitoring (for security guys). Once you run this application for the first time you will see several sections on the left side (added cameras, created outputs, detected audio devices) but there will be no video preview on the right side of the screen. You can very easily drag selected camera and drop it into any window on the right side (this is settings only for actual login). Finally you can also enable audio from 2N IP Intercom – you can set microphone for listening-in.
 |
For talk to 2N IP Intercom – select appropriate speaker to which you want to talk (you have to press and hold button "Talk").
|
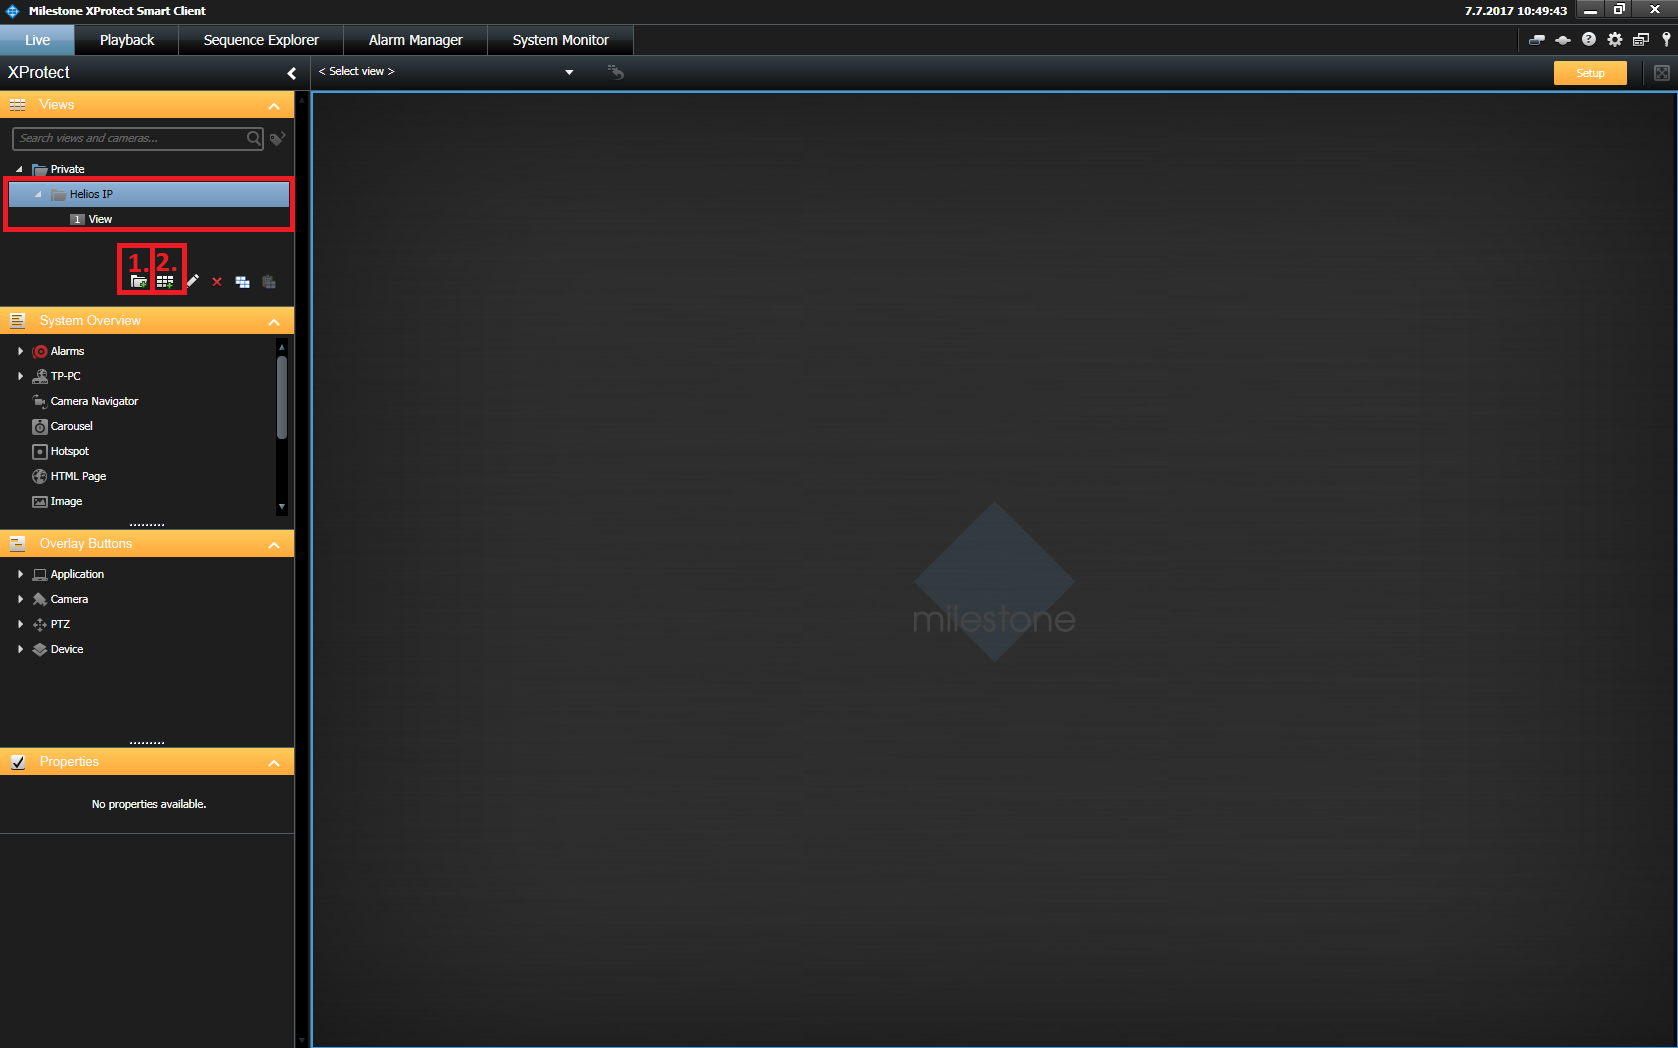
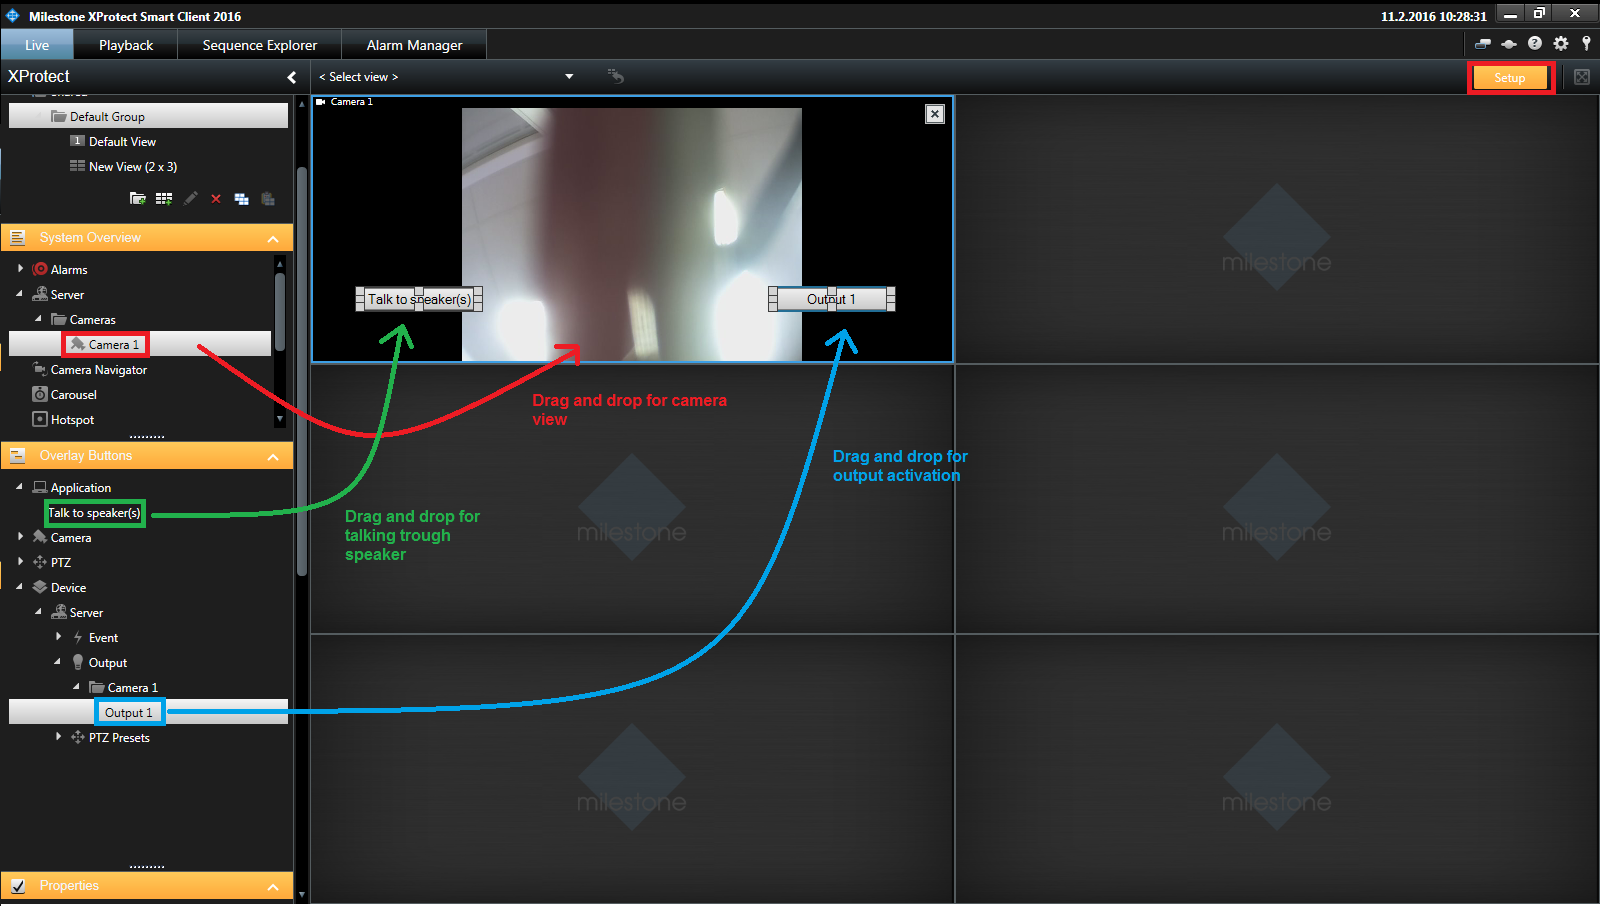
If you want to create different preview, add cameras permanently into the active area on the right side and add there some special buttons for talking to the speakers then you have to go to the setup mode. Click on the "Setup" button on the top right corner as shown in the next picture. Everything is based on drag and drop principle. You can move there camera, button which will allow you to talk trough the speaker of the device.
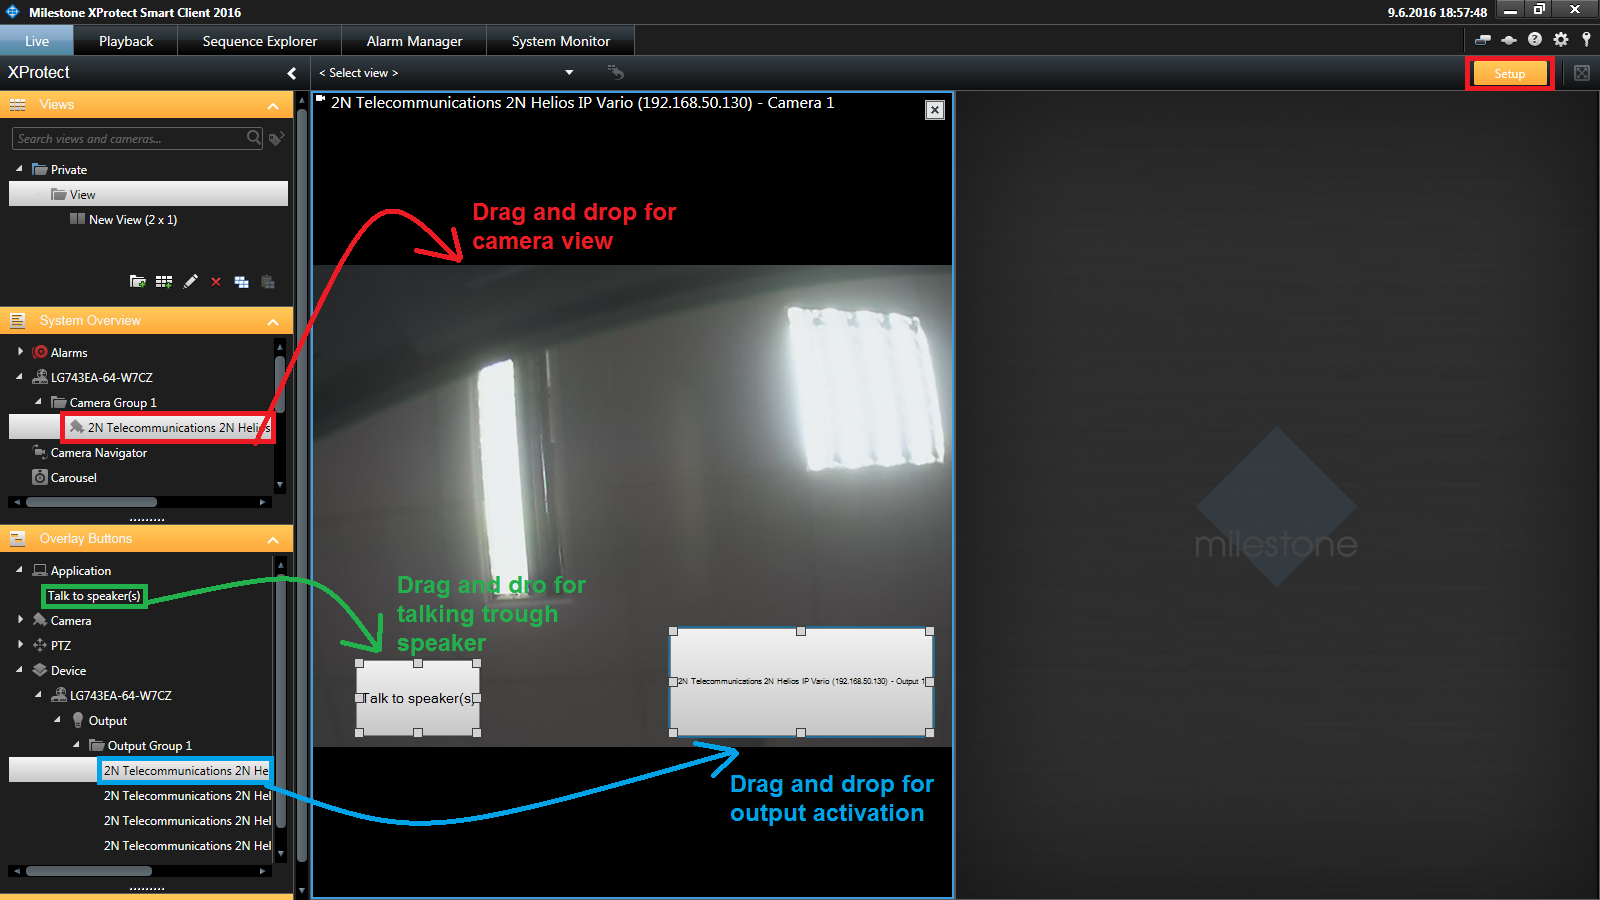 |
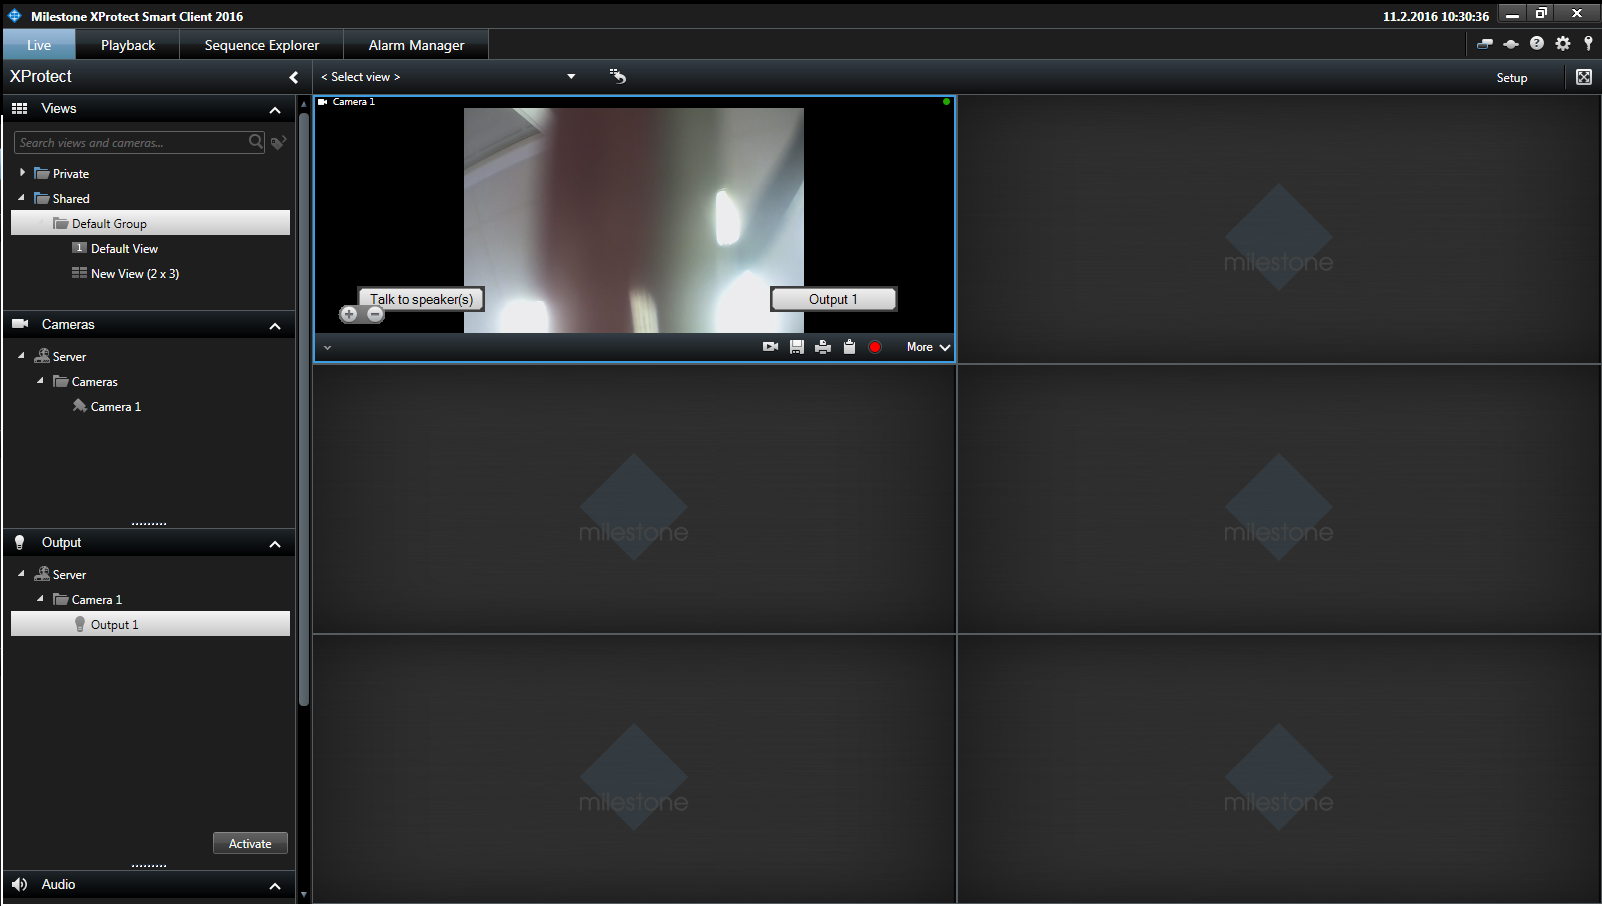
Finally you have to click on the "Setup" button again. You will move back to the live preview and you can monitor selected cameras, you will see extra added buttons in the preview and also windows layout will be modified based on your settings. Buttons for talk to speakerwill be visible, when you will stay on the camera window with cursor of your mouse.
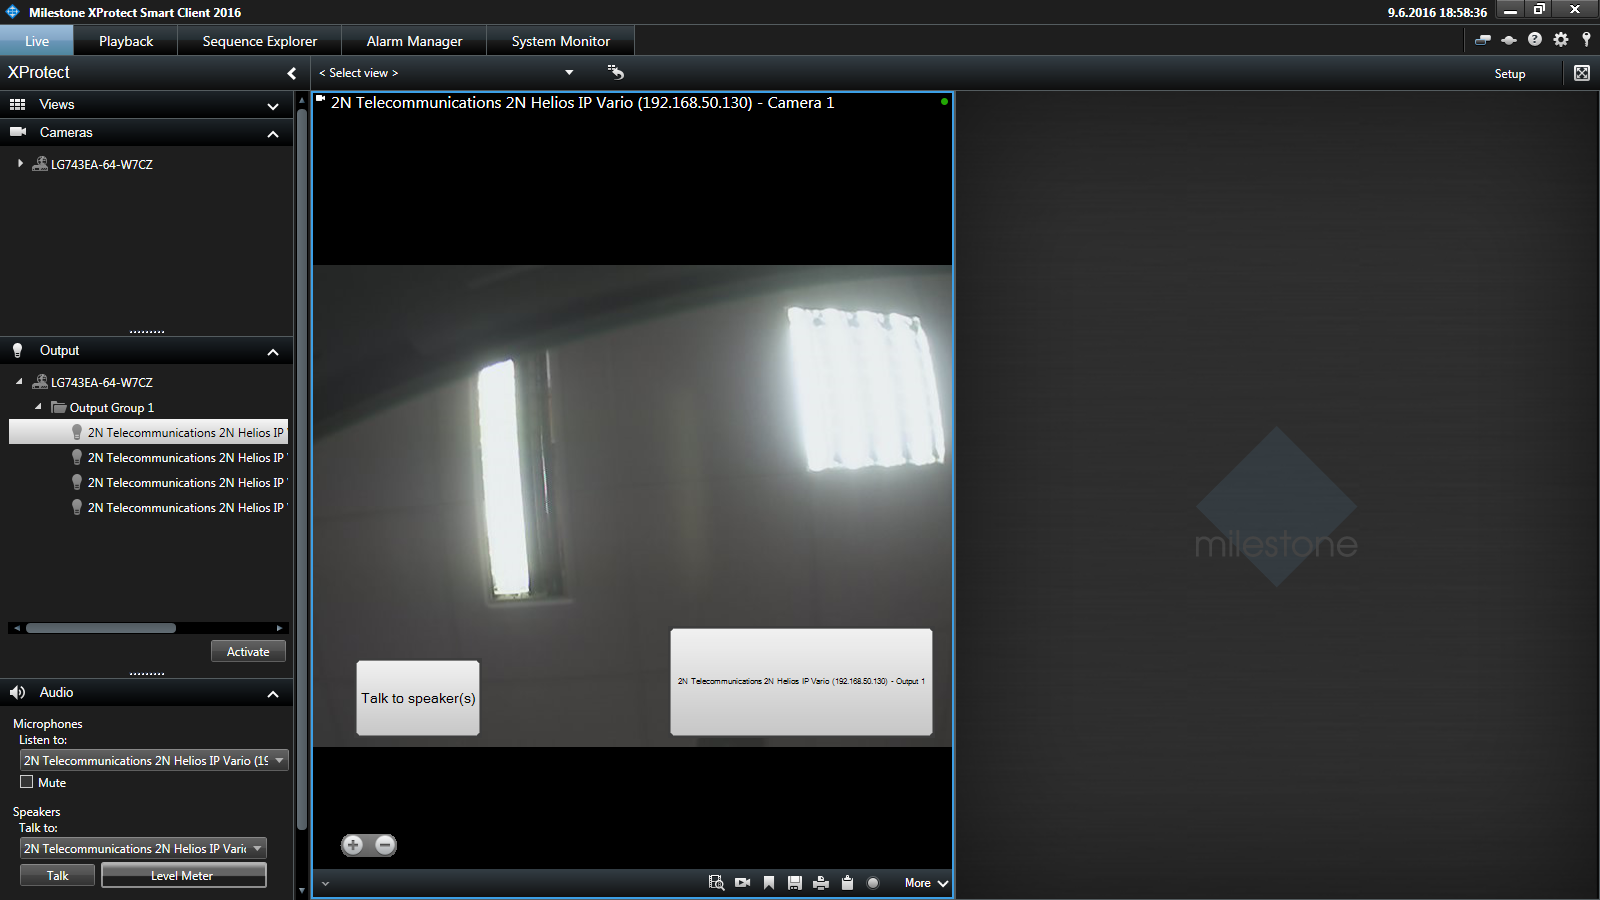 |
For Switch Control - You can also activate selected output from this client – choose appropriate output (relay) and click on the “Activate” button as shown in the picture below.
|
If you want to create different preview, add cameras permanently into the active area on the right side and add there some special buttons for relay activation then you have to go to the setup mode. Click on the "Setup" button on the top right corner as shown in the next picture. Everything is based on drag and drop principle. You can move there camera, button for output activation.
|
|
Version 2014
Tested Functions
| Milestone XProtect Enterprise | 2N IP Intercom Version | Scan device | Video from 2N IP Intercom | Audio from 2N IP Intercom | Audio to 2N IP Intercom | Switch control | Eventrs from 2N IP Intercom |
|---|---|---|---|---|---|---|---|
8.6a | 2.10.0.19.3 |
2N IP Intercom Settings
As a very first step you have to do a configuration under the section Onvif. Please keep in mind that the Onvif protocol is licensed, for full functionality you need to have a "enhanced video" license for 2N IP Intercom unit. Enable at least one ONVIF user with the Administrator access level in menu Services / Onvif.
 |
Enable parameter RTSP Server Enabled in menu Services / Streaming.
 |
Tested Features
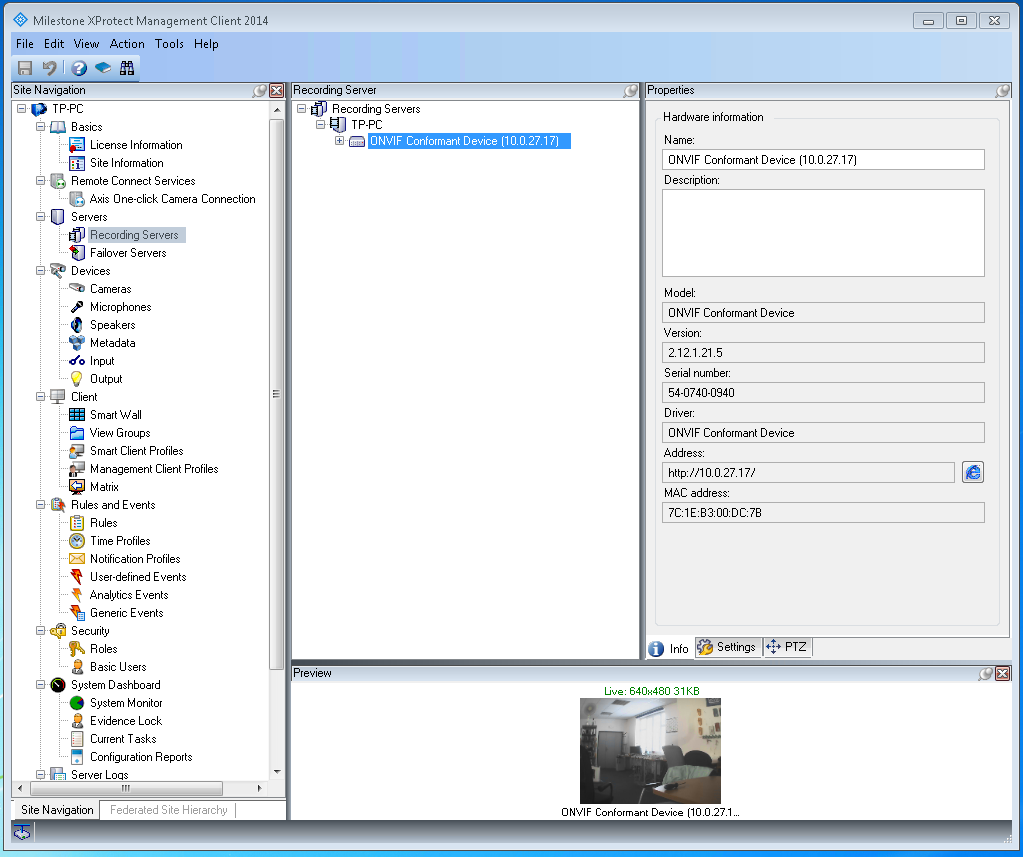
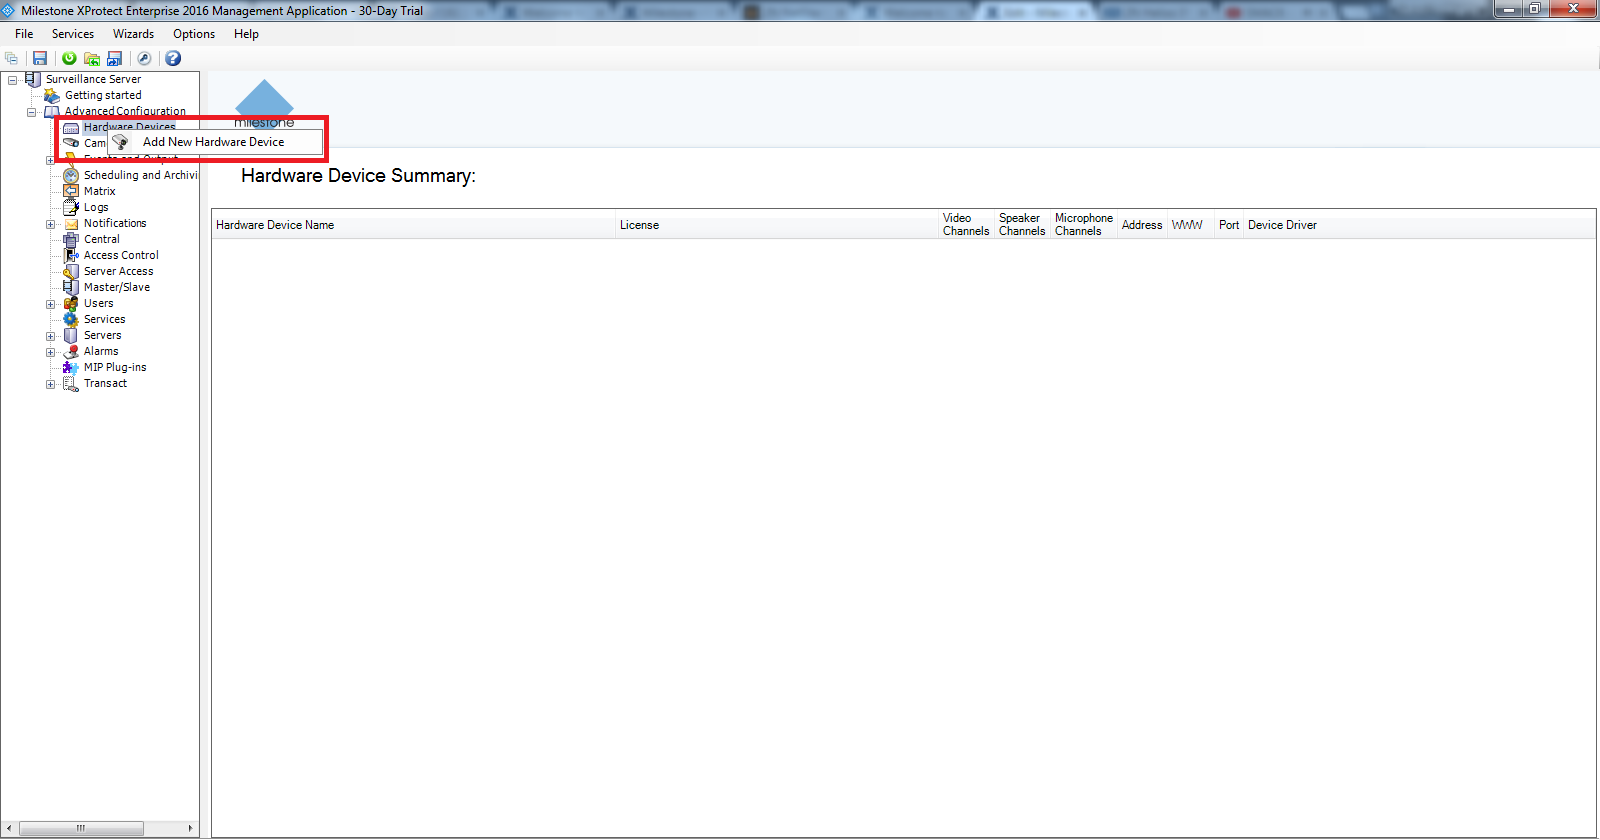
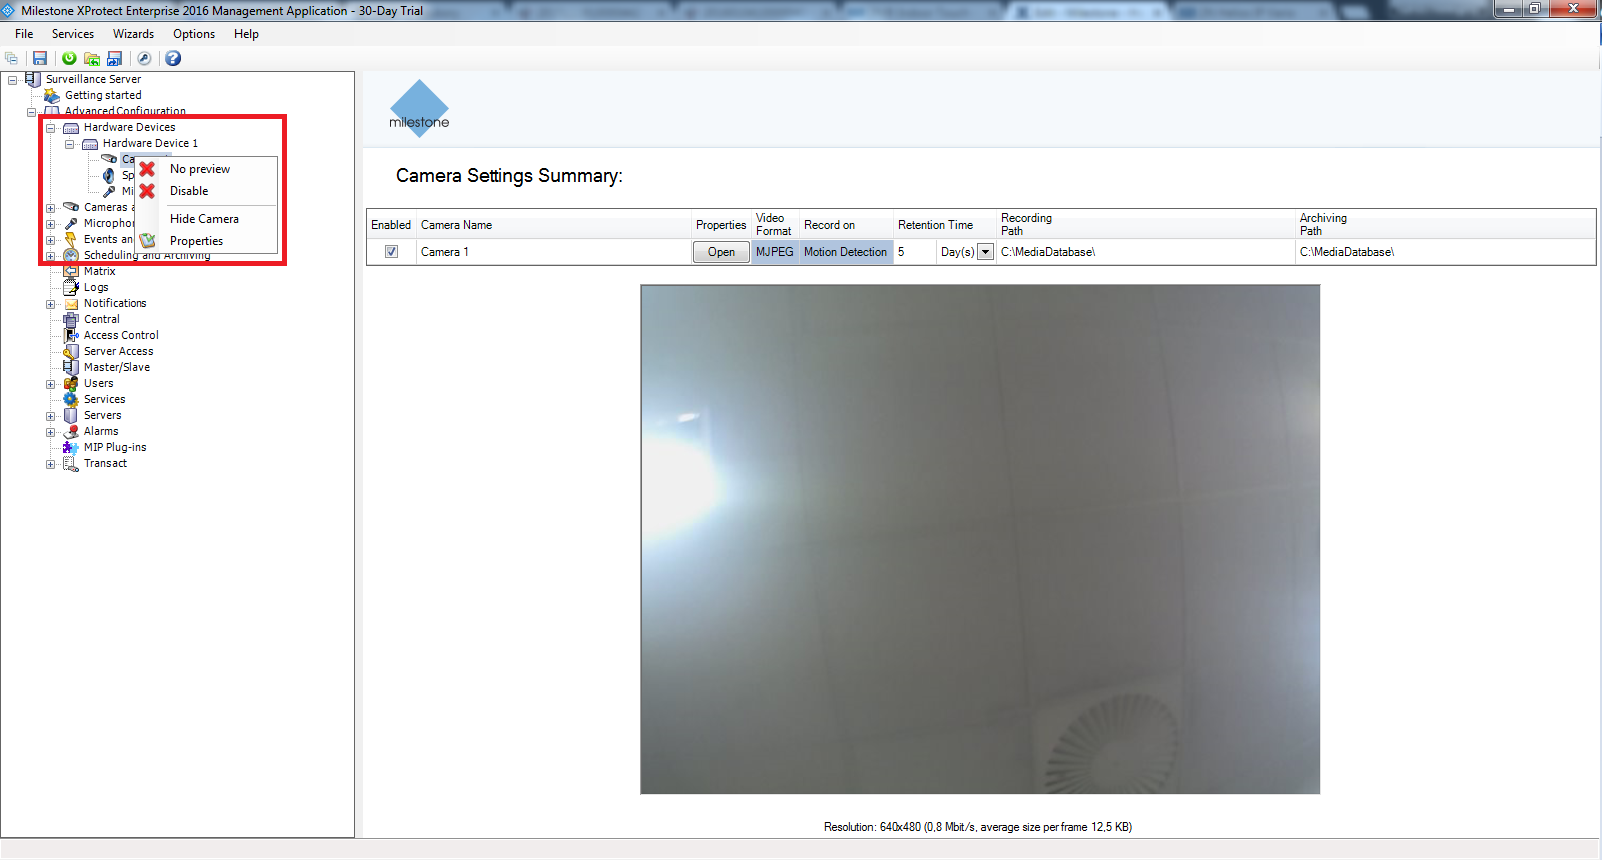
On the side of Milestone server do right click on Hardware Devices and and click on Add New Hardware Device.
 |
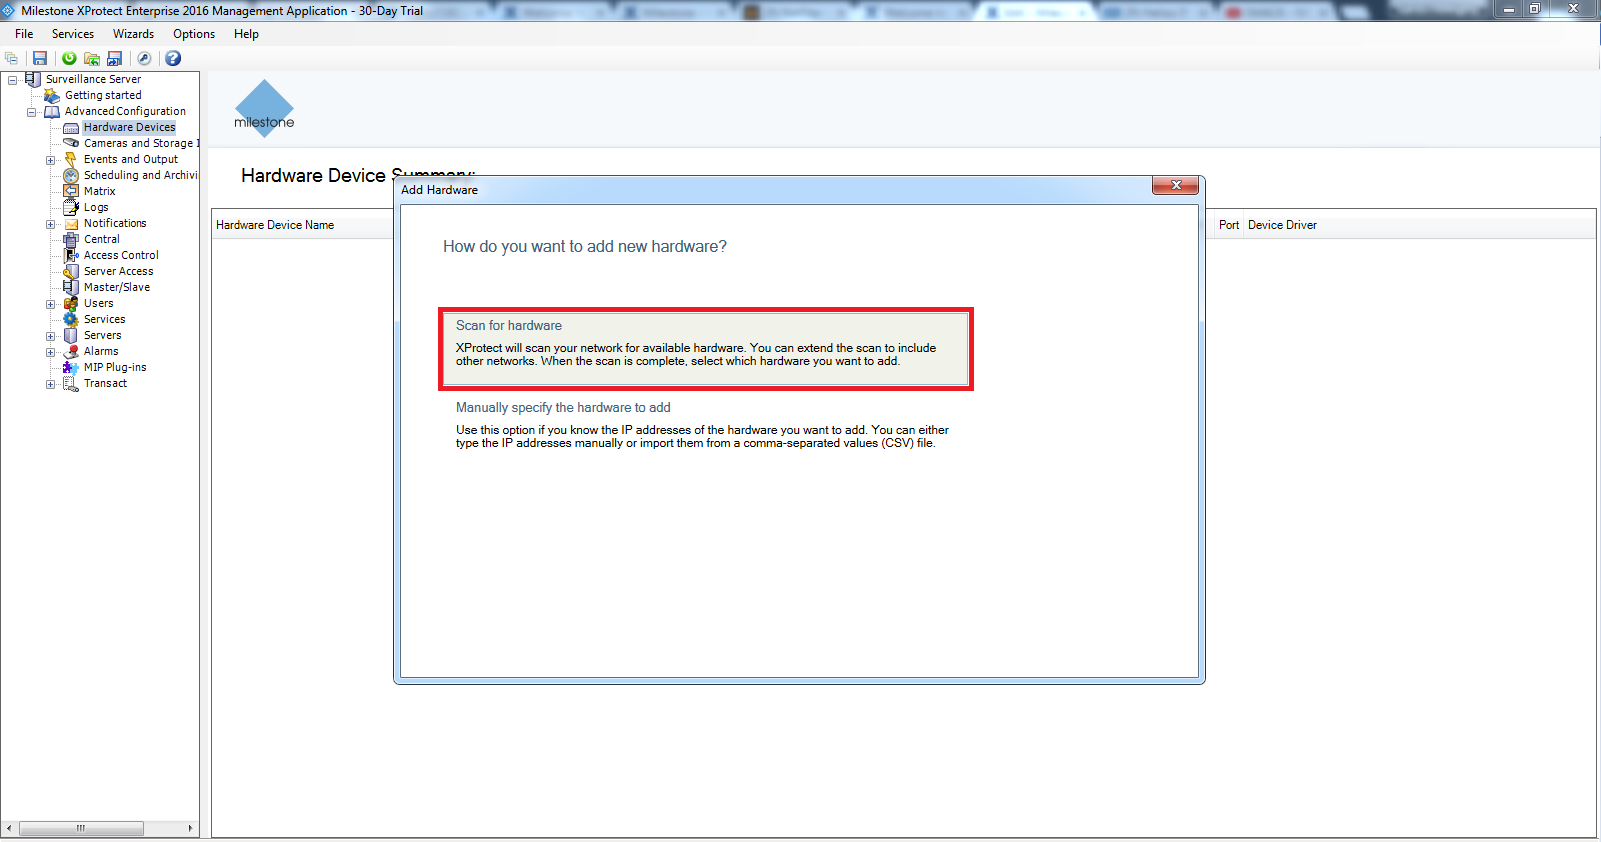
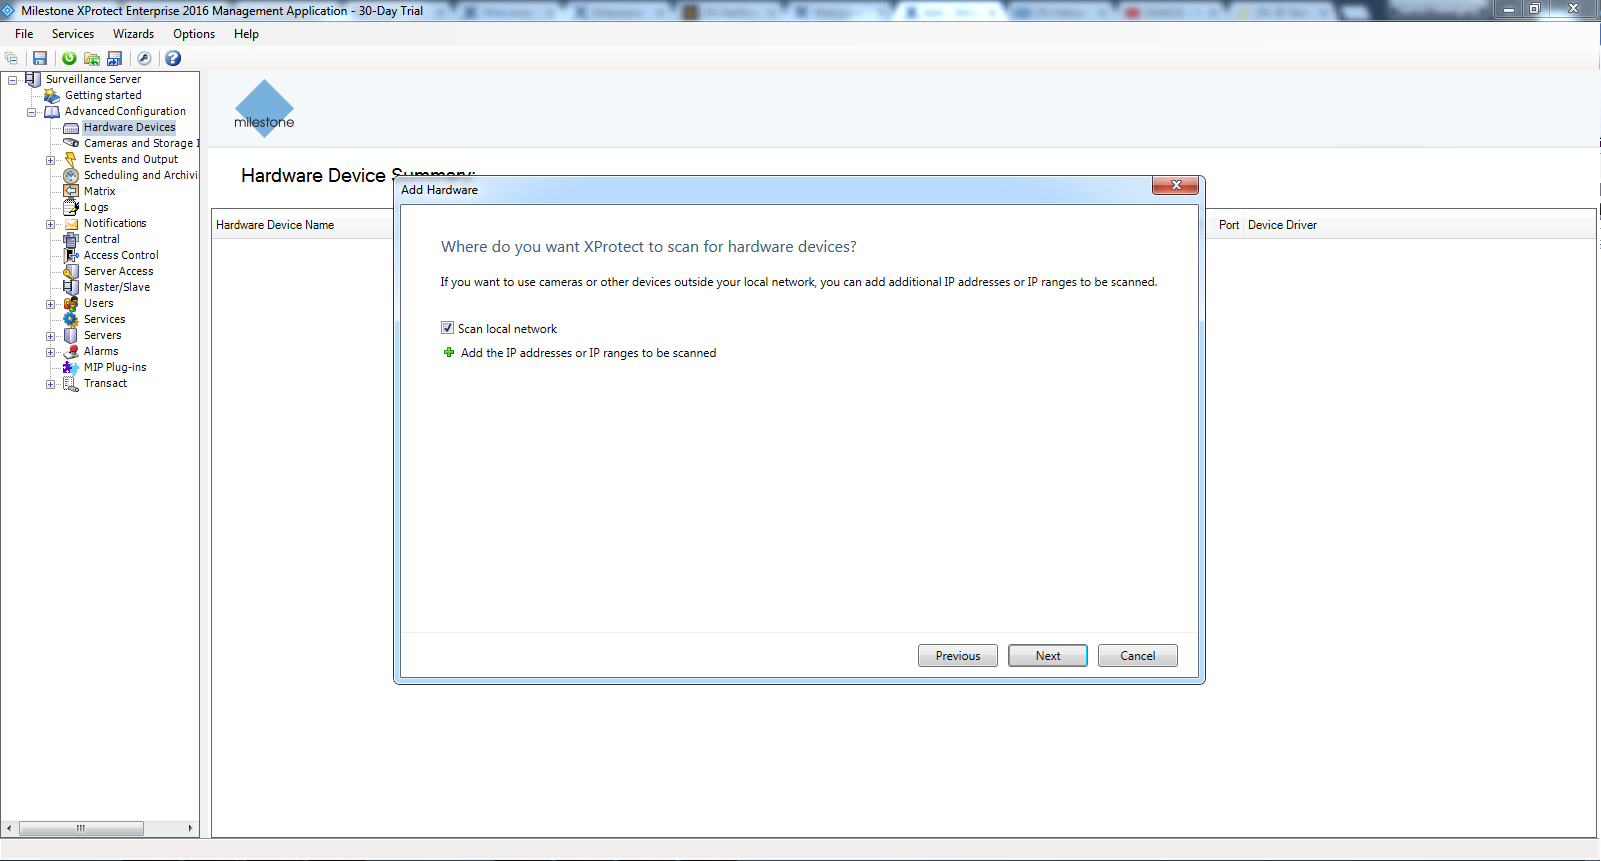
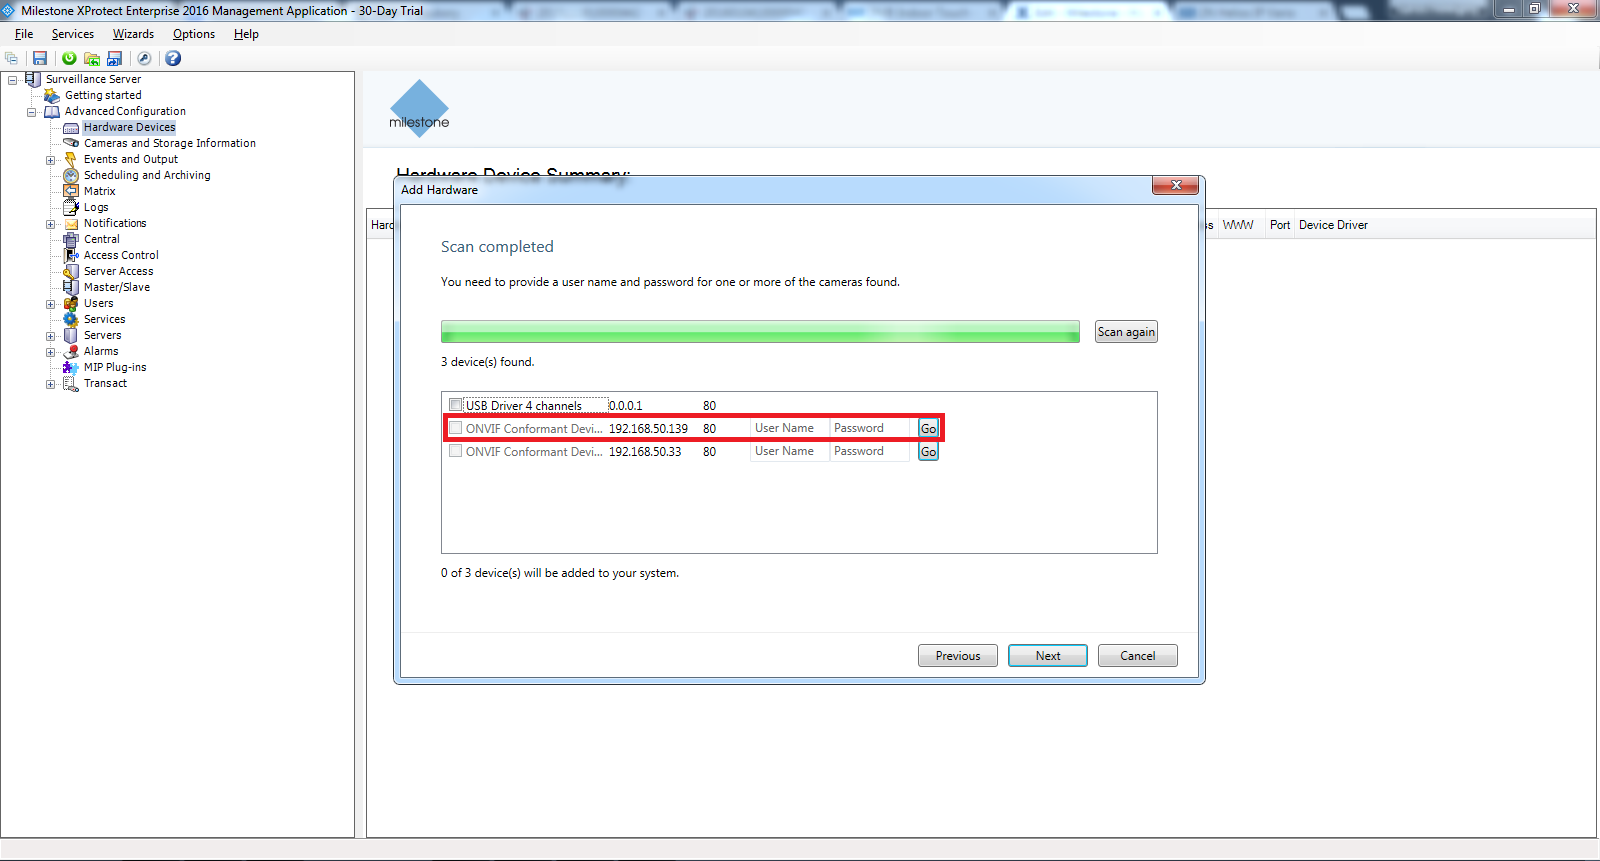
In next step you can choose if you want to add device manually or if you want to scan your local network for ONVIF ready devices. We choosed automatic scan as it is much eaiser.
 |
 |
 |
 |
 |
 |
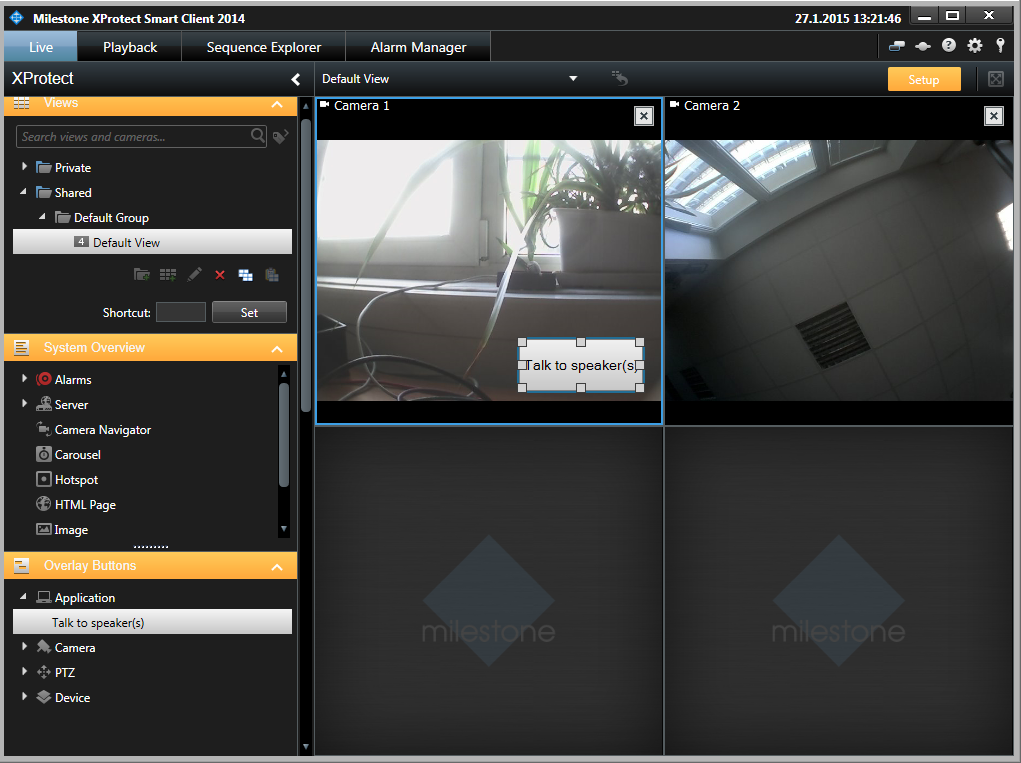
Enable Setup and configure Overlay Buttons / Application / Talk to speaker(s). Press the button Talk to speaker(s) to stream audio from microphone to the speaker.
 |
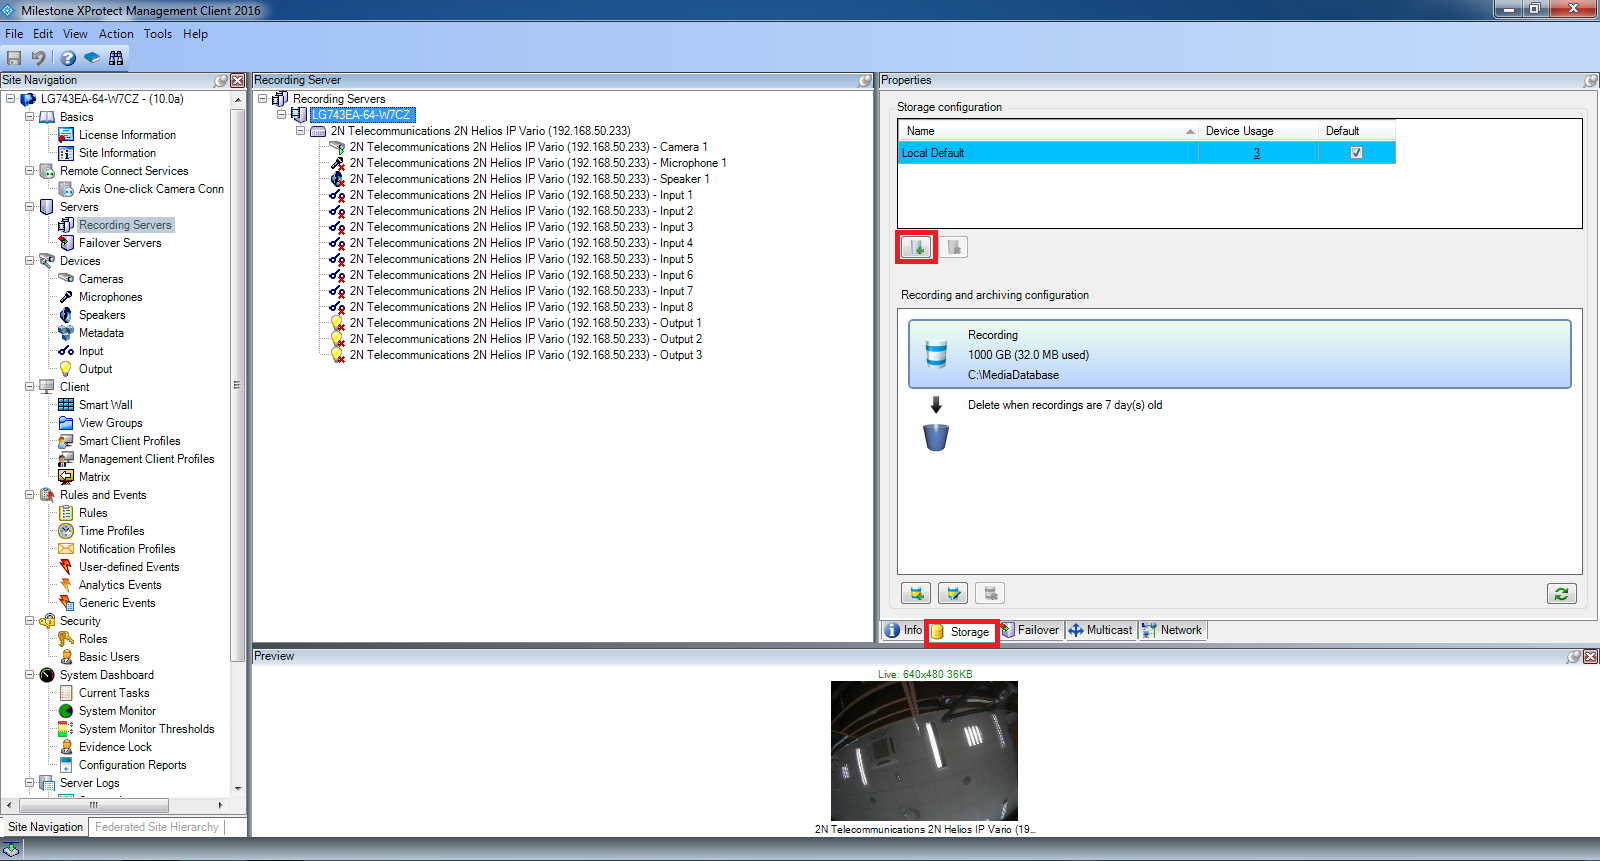
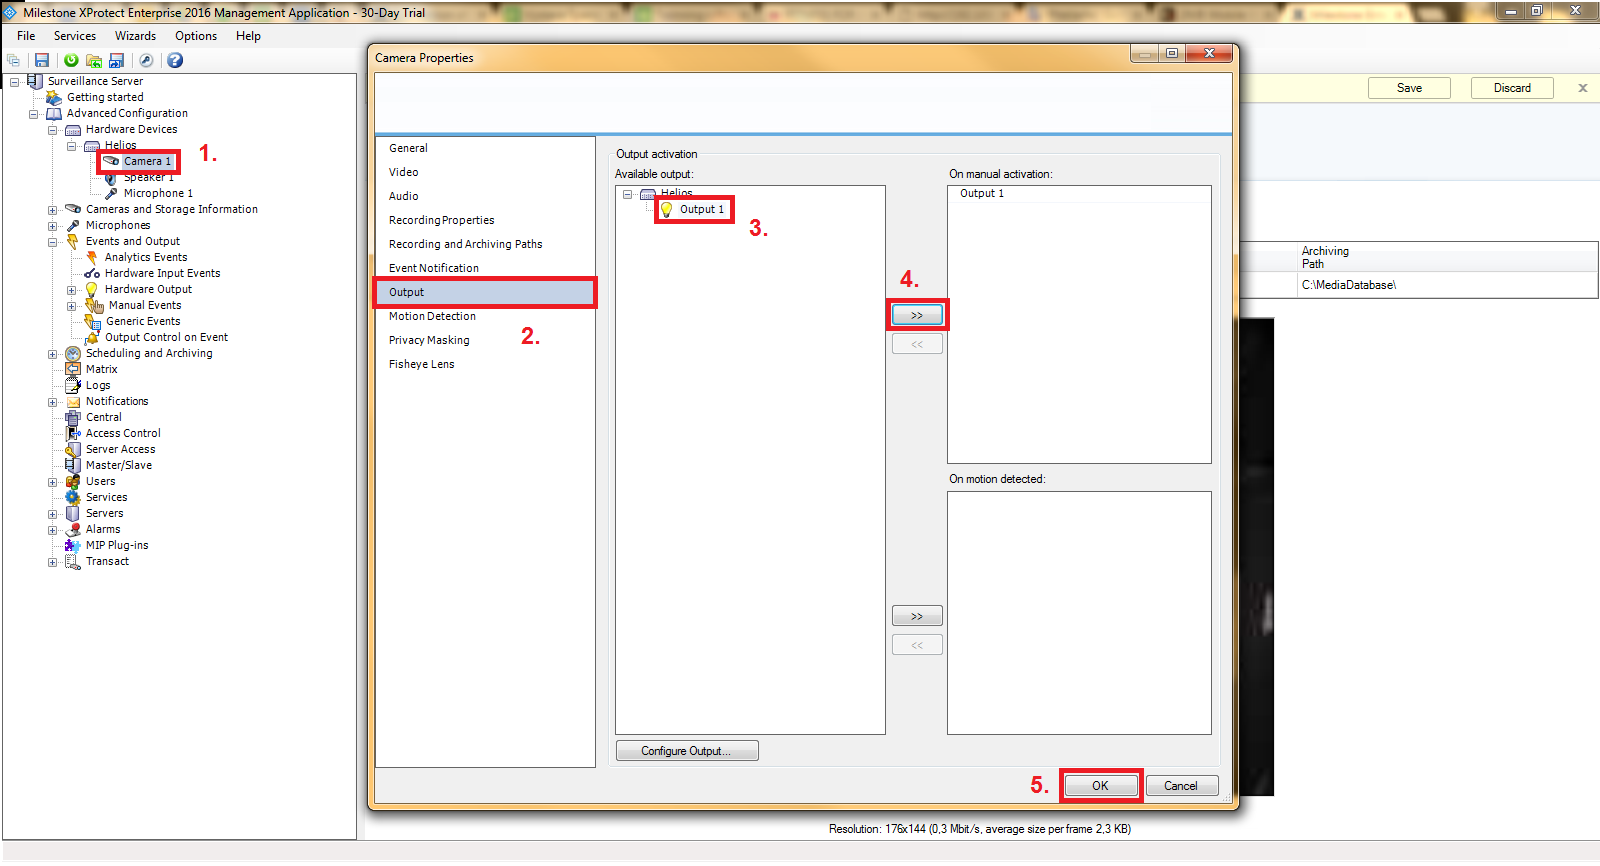
Once you have successfully added new hardware devices into the Milestone VMS system (camera, microphone and speaker) which was described in the previous part of this FAQ then you can move to the section "Advanced configuration – Events and Outputs – Hardware outputs" and make a right click on this item. After that click on the "Add New Output".
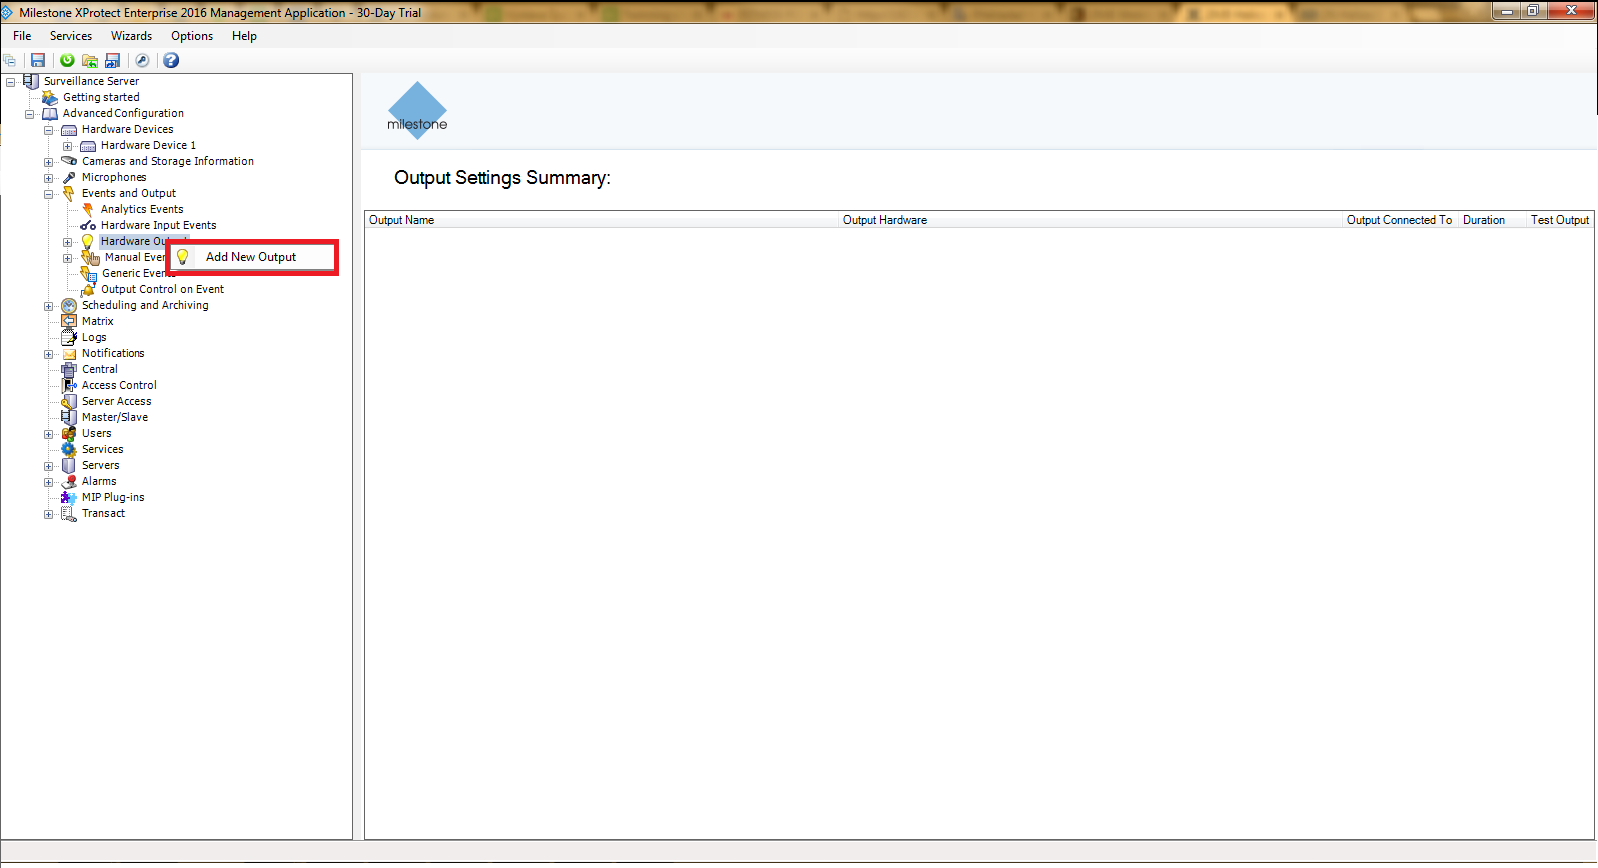 |
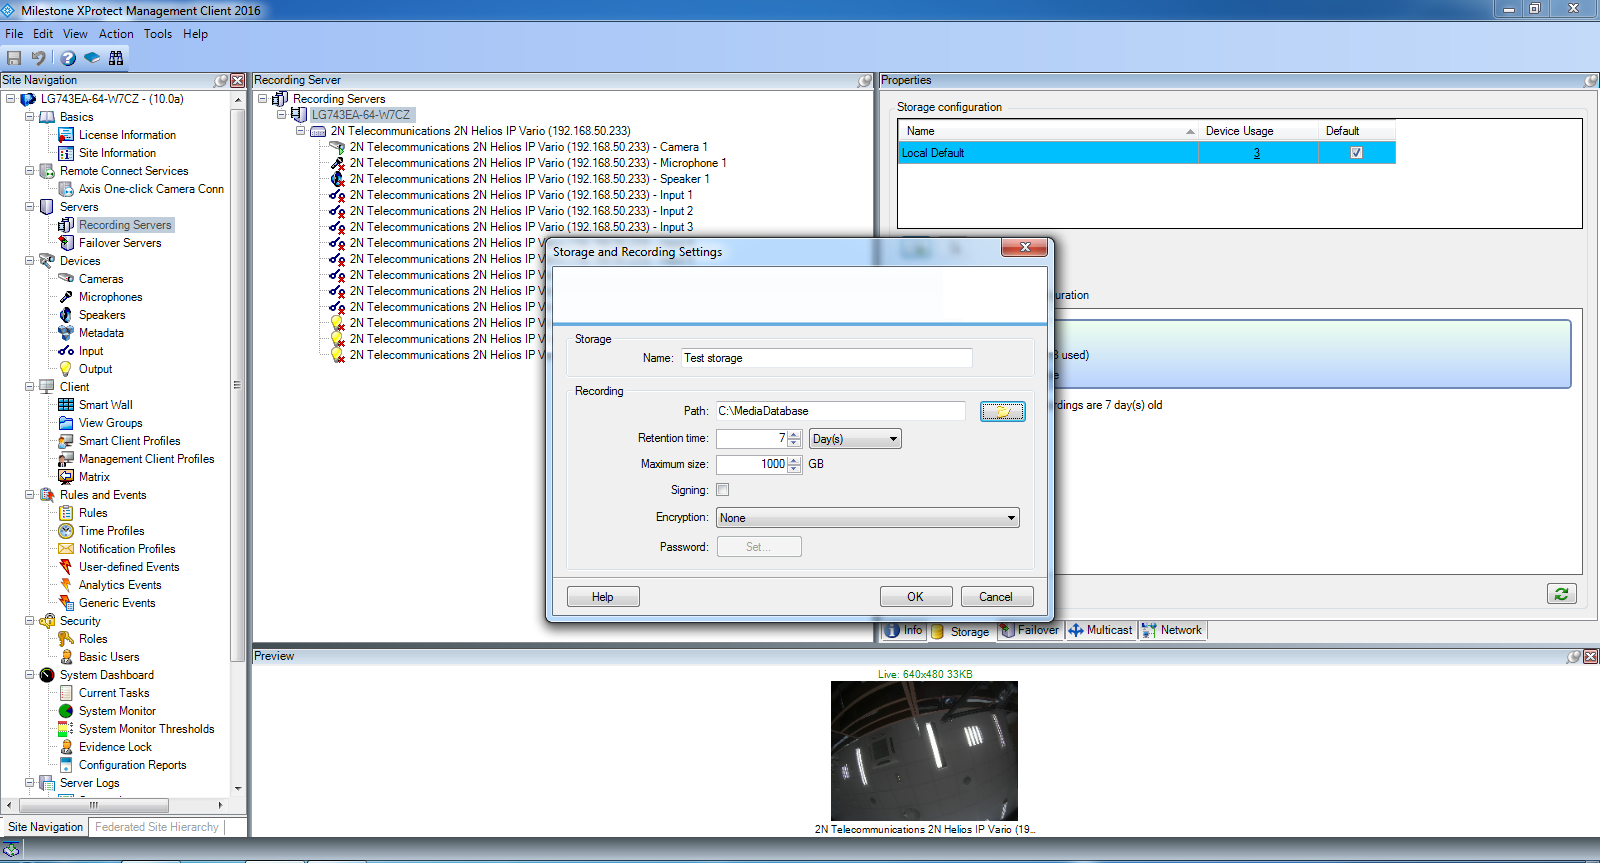
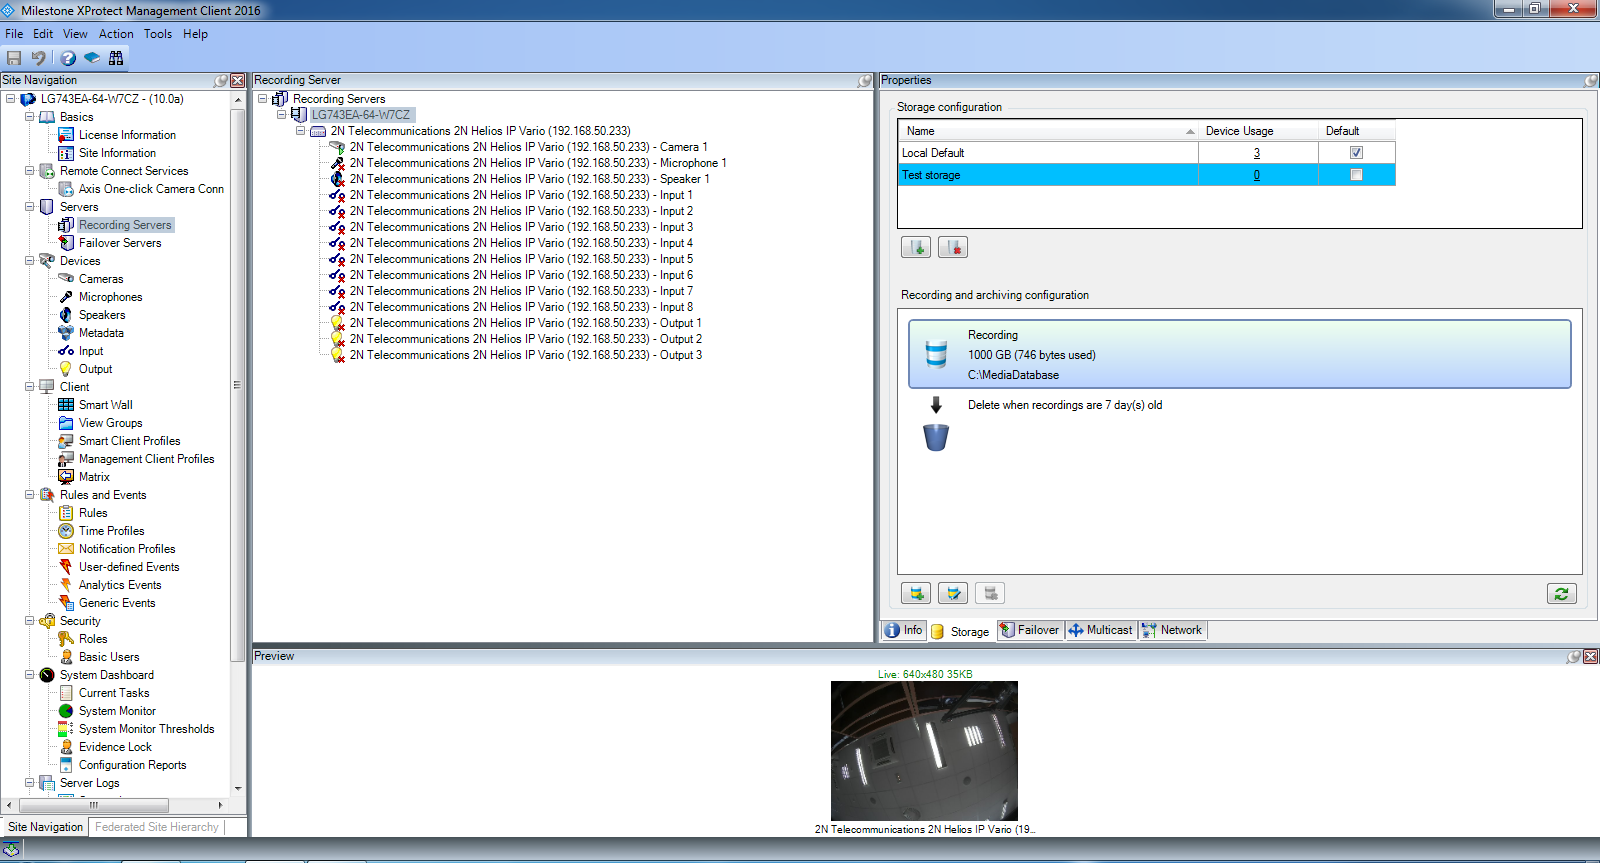
Once you click on "Add New Output" new window will appear. Click on add and output will be added right away. Now you can Rename the output, select output on device, which will be controled by this virtual output you just created, set its duration and even test it to ensure that you are picking right output. When everything is set, confirm it by pressing OK.
 |
 |
 |
If you want to create different preview, add cameras permanently into the active area on the right side and add there some special buttons for relay activation or for talking to the speakers then you have to go to the setup mode. Click on the "Setup" button on the top right corner as shown in the next picture. Everything is based on drag and drop principle. You can move there camera, button for output activation or button which will allow you to talk trough the speaker of the device.
 |
Finally you have to click on the "Setup" button again. You will move back to the live preview and you can monitor selected cameras, you will see extra added buttons in the preview and also windows layout will be modified based on your settings. Buttons for talk to speaker and for output activation will be visible, when you will stay on the camera window with cursor of your mouse.
 |
Used Symbols
![]() - Compatible
- Compatible
![]() - Work with limitation
- Work with limitation
![]() - Incompatible
- Incompatible
2N® Access Commander