Mirasys
Content
About
Mirasys NVR software is a distributed, digital video management system (DVMS) for video and audio surveillance applications. The software can be used for monitoring real-time and recorded video, audio and text data, and to control dome cameras, I/O devices and IP cameras. The software supports systems consisting of both analog and/or digital surveillance cameras, supporting the creation of analog (DVR), digital (NVR) or hybrid (consisting of both analog and digital) surveillance systems. A centralized surveillance system can consist of up to 100 local or remote recorders.
https://www.mirasys.com/mirasys-vms-pro
Version 8
Tested Functions
| Mirasys | 2N IP Intercom Version | Scan device | Video from 2N IP Intercom | Audio from 2N IP Intercom | Audio to 2N IP Intercom | Switch control | Events from 2N IP Intercom |
|---|---|---|---|---|---|---|---|
8.0.0 | 2.19.0.28.5 |
2N IP Intercom Settings
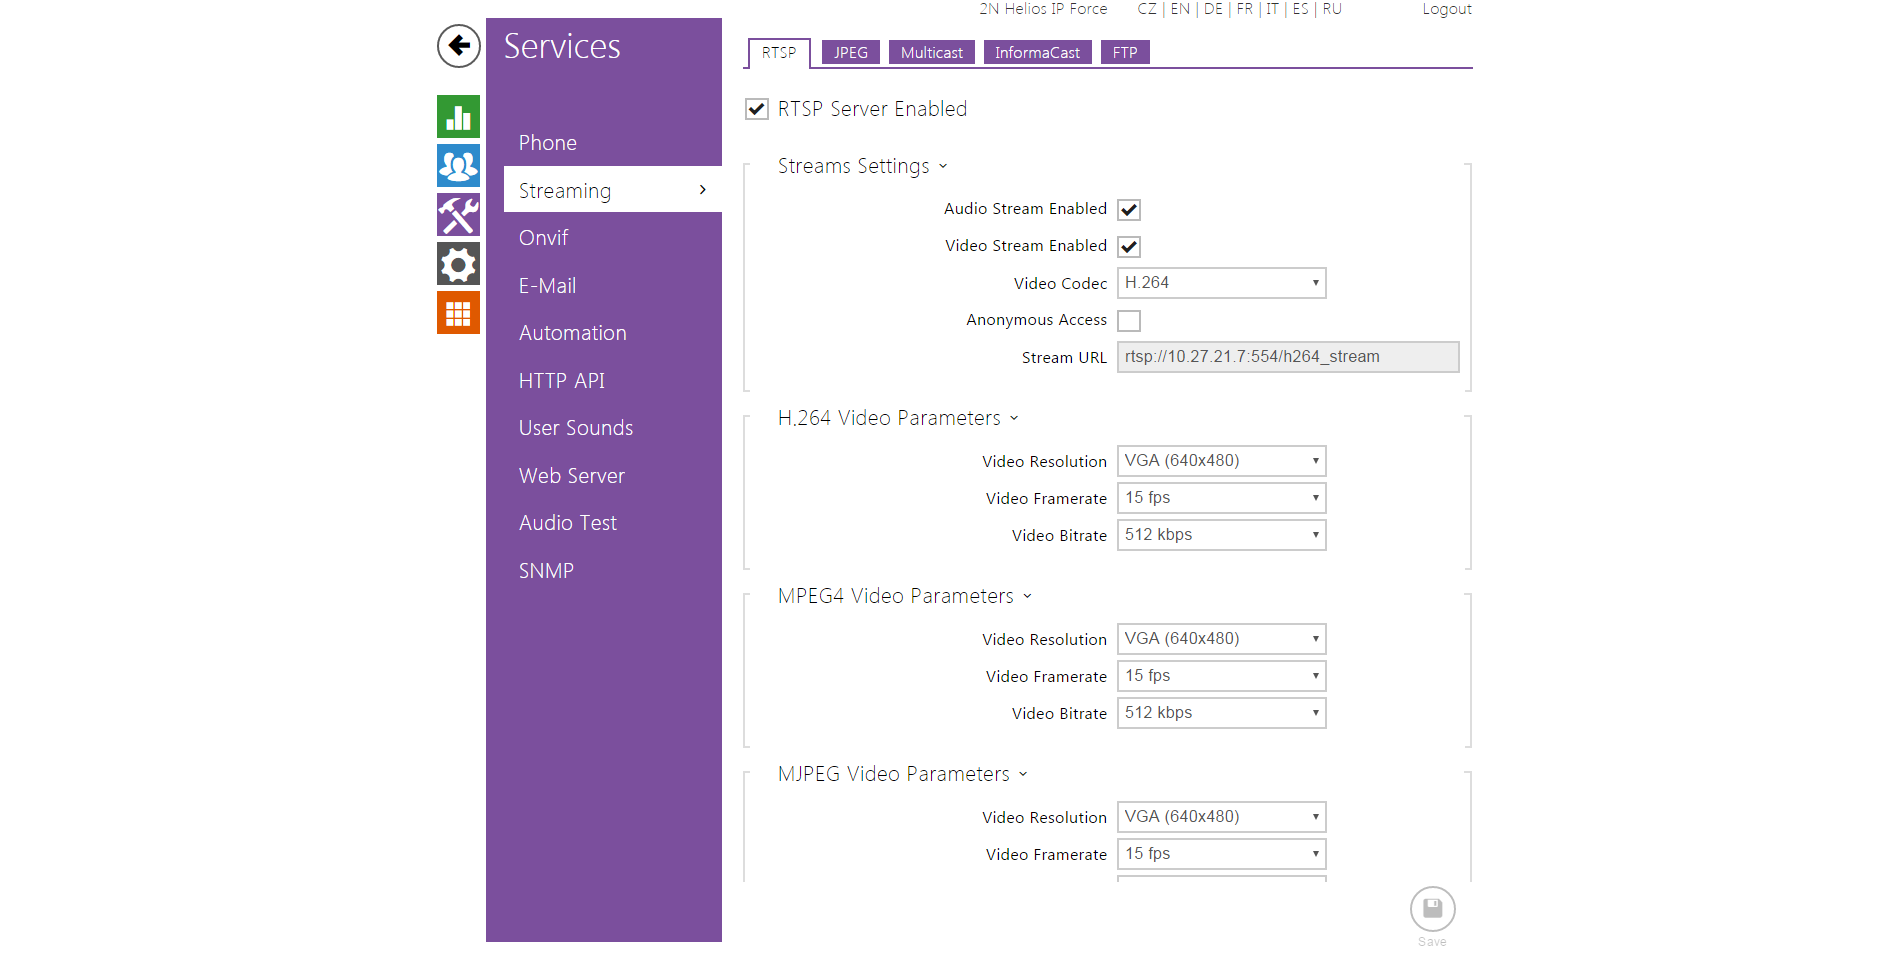
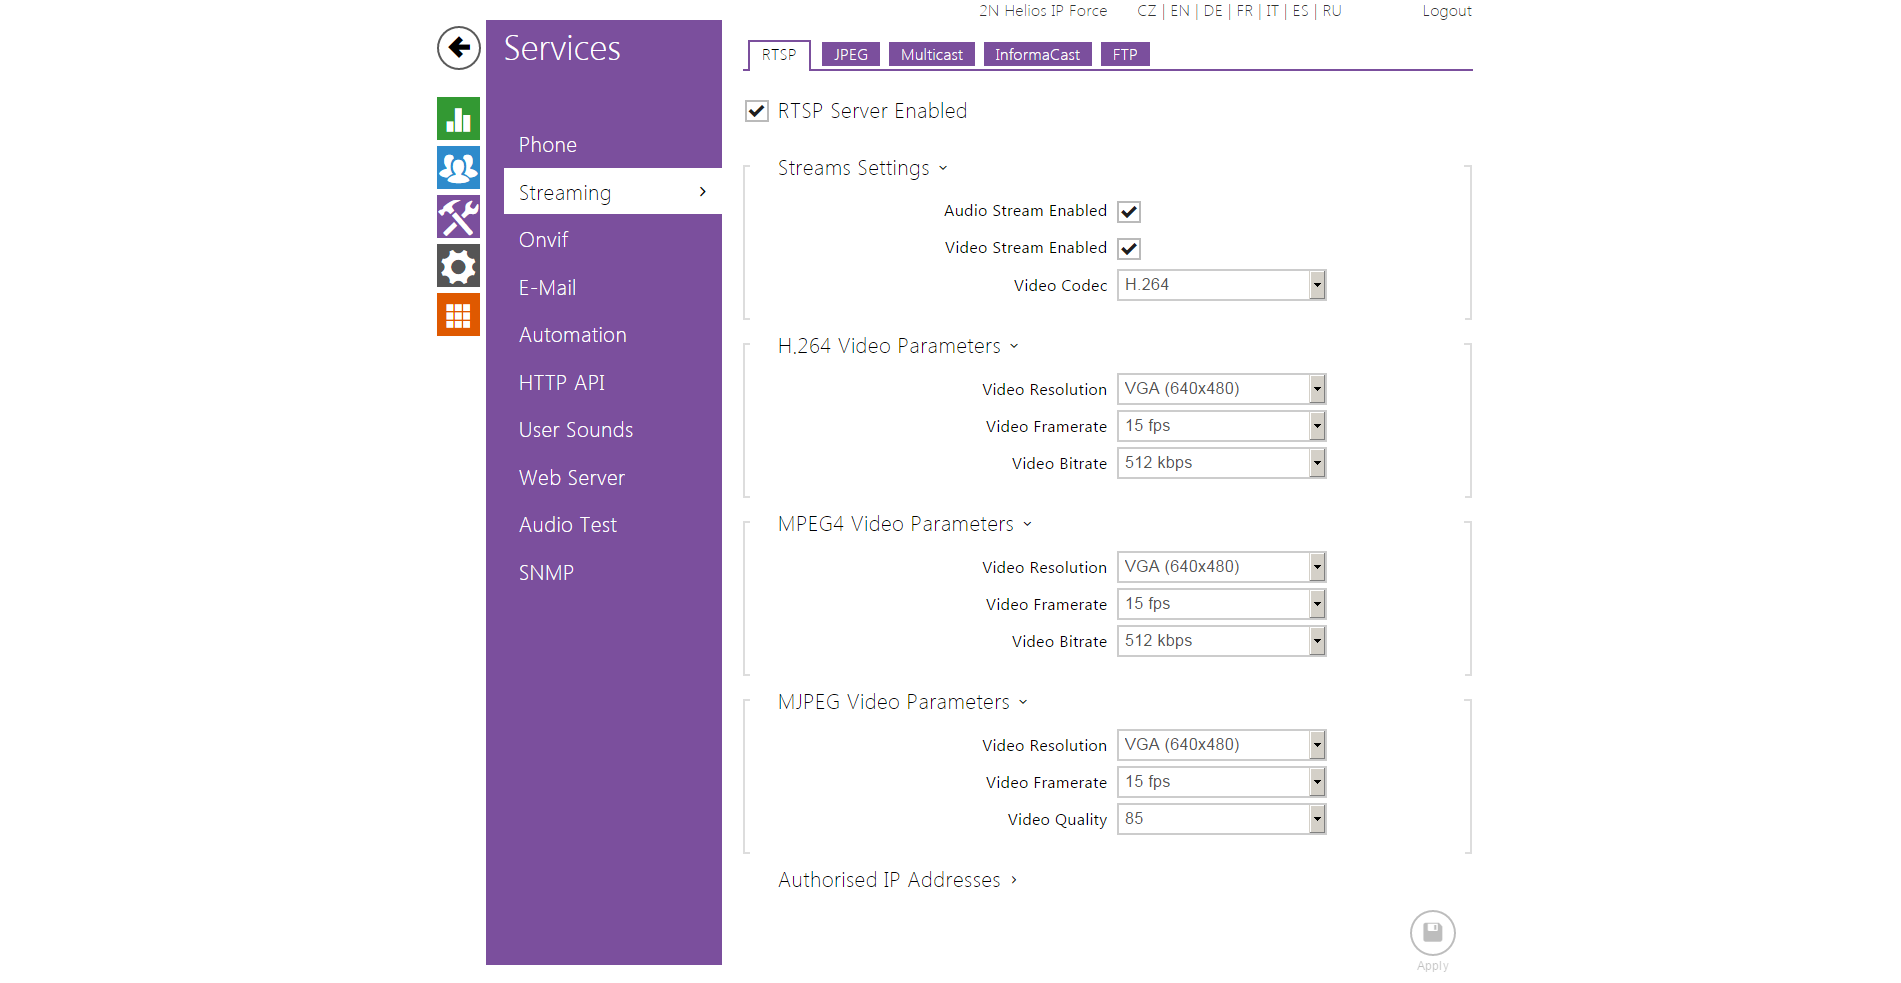
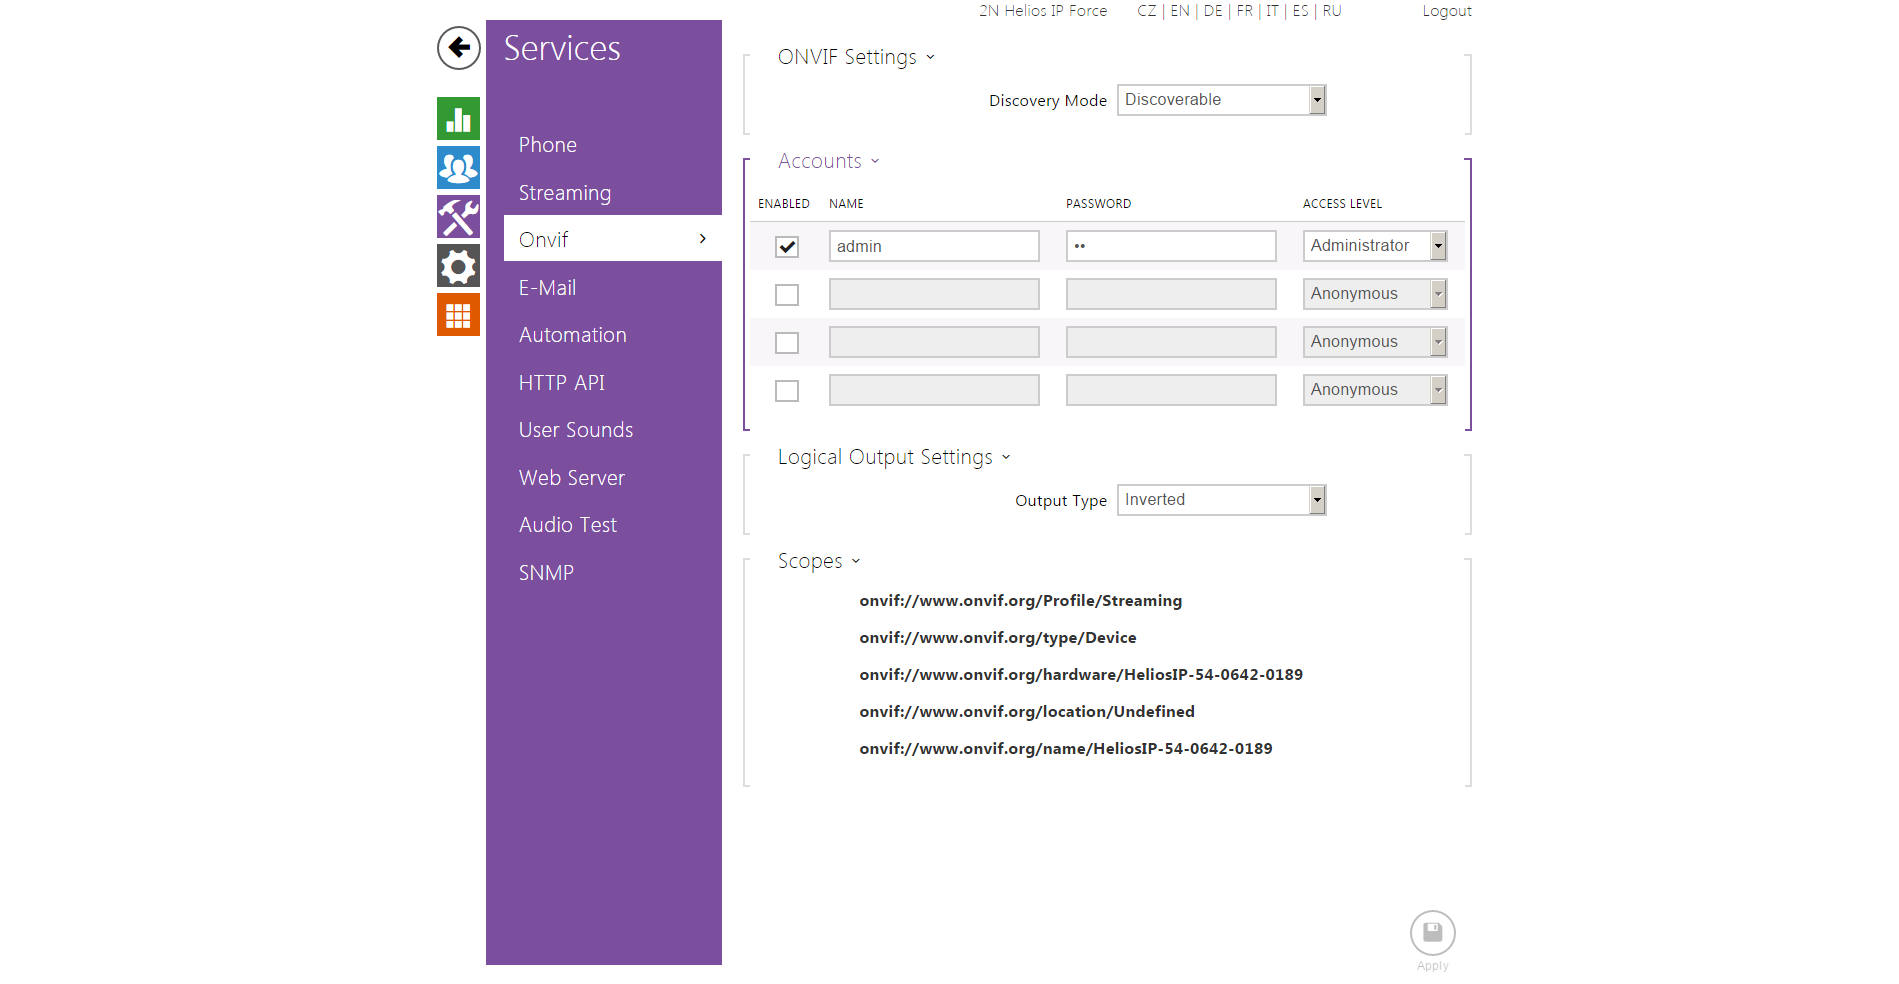
Enable parameter RTSP Server Enabled in menu Services / Streaming.
 |
 |
 |
Tested Features
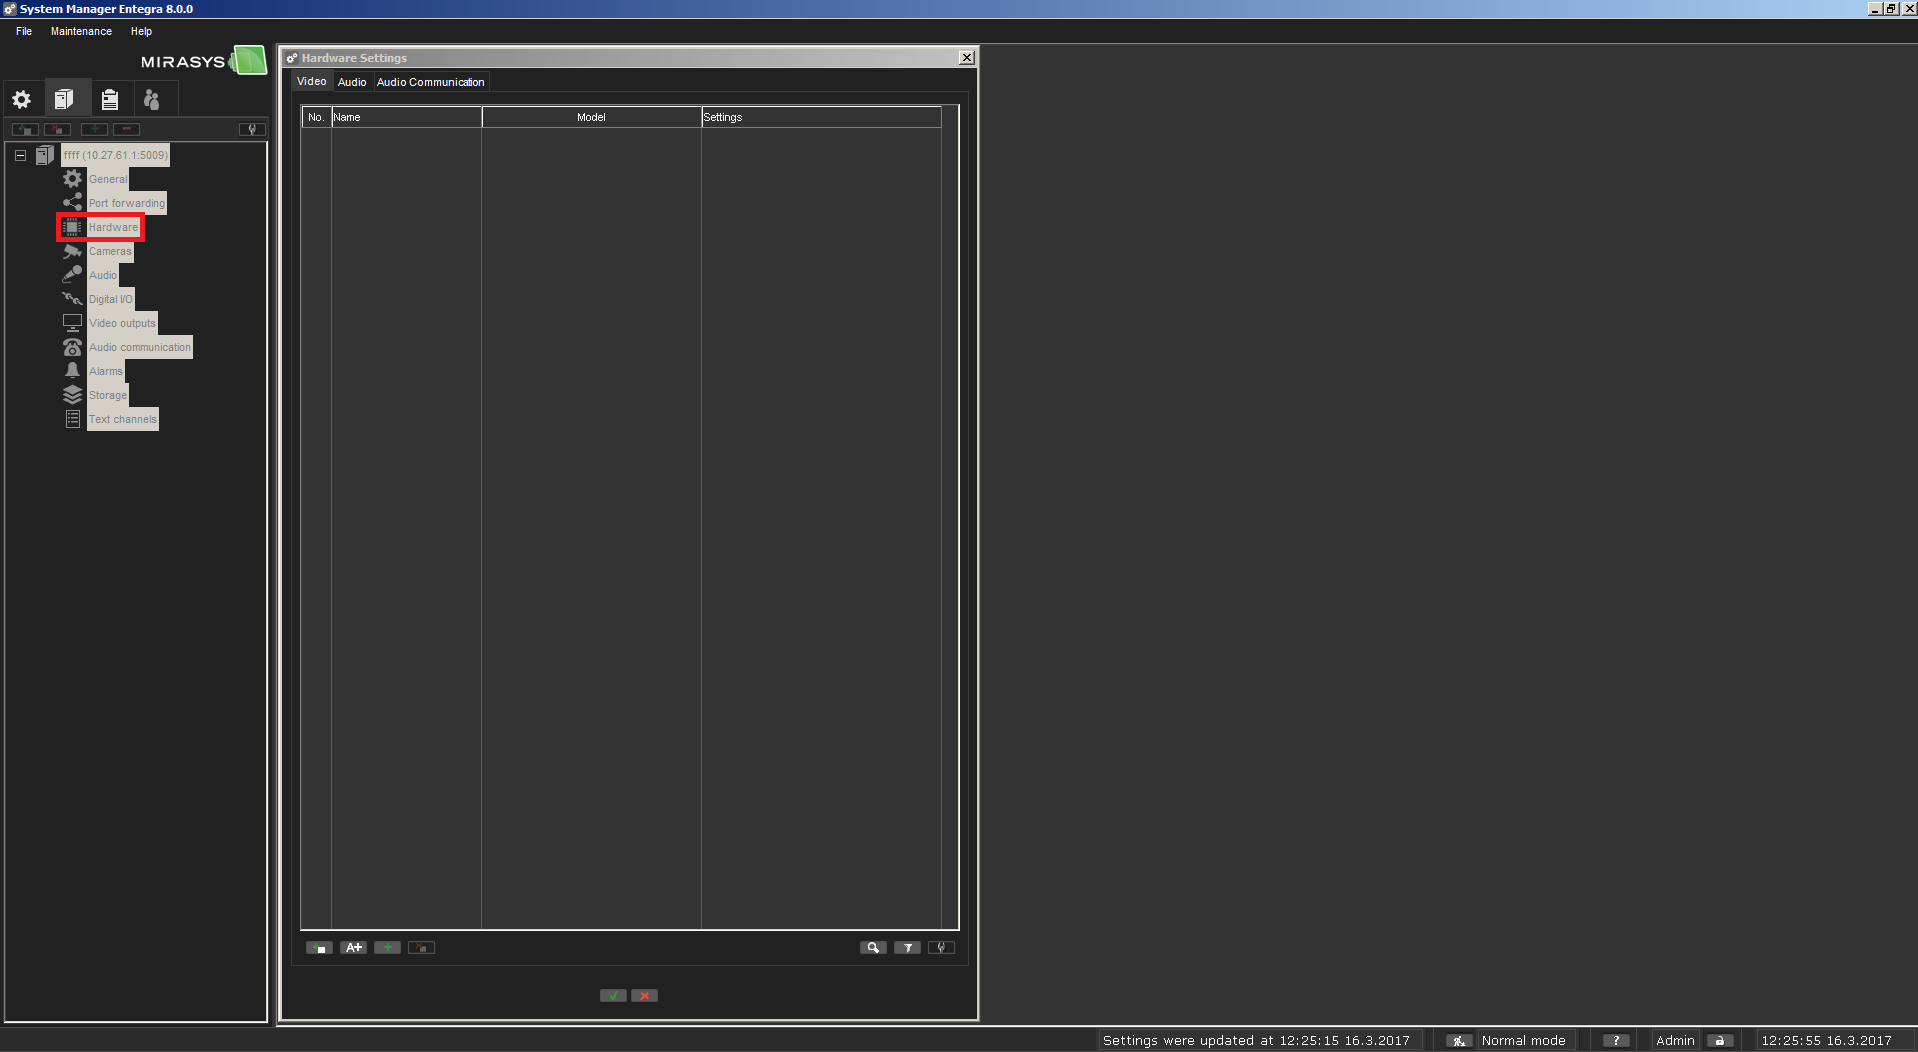
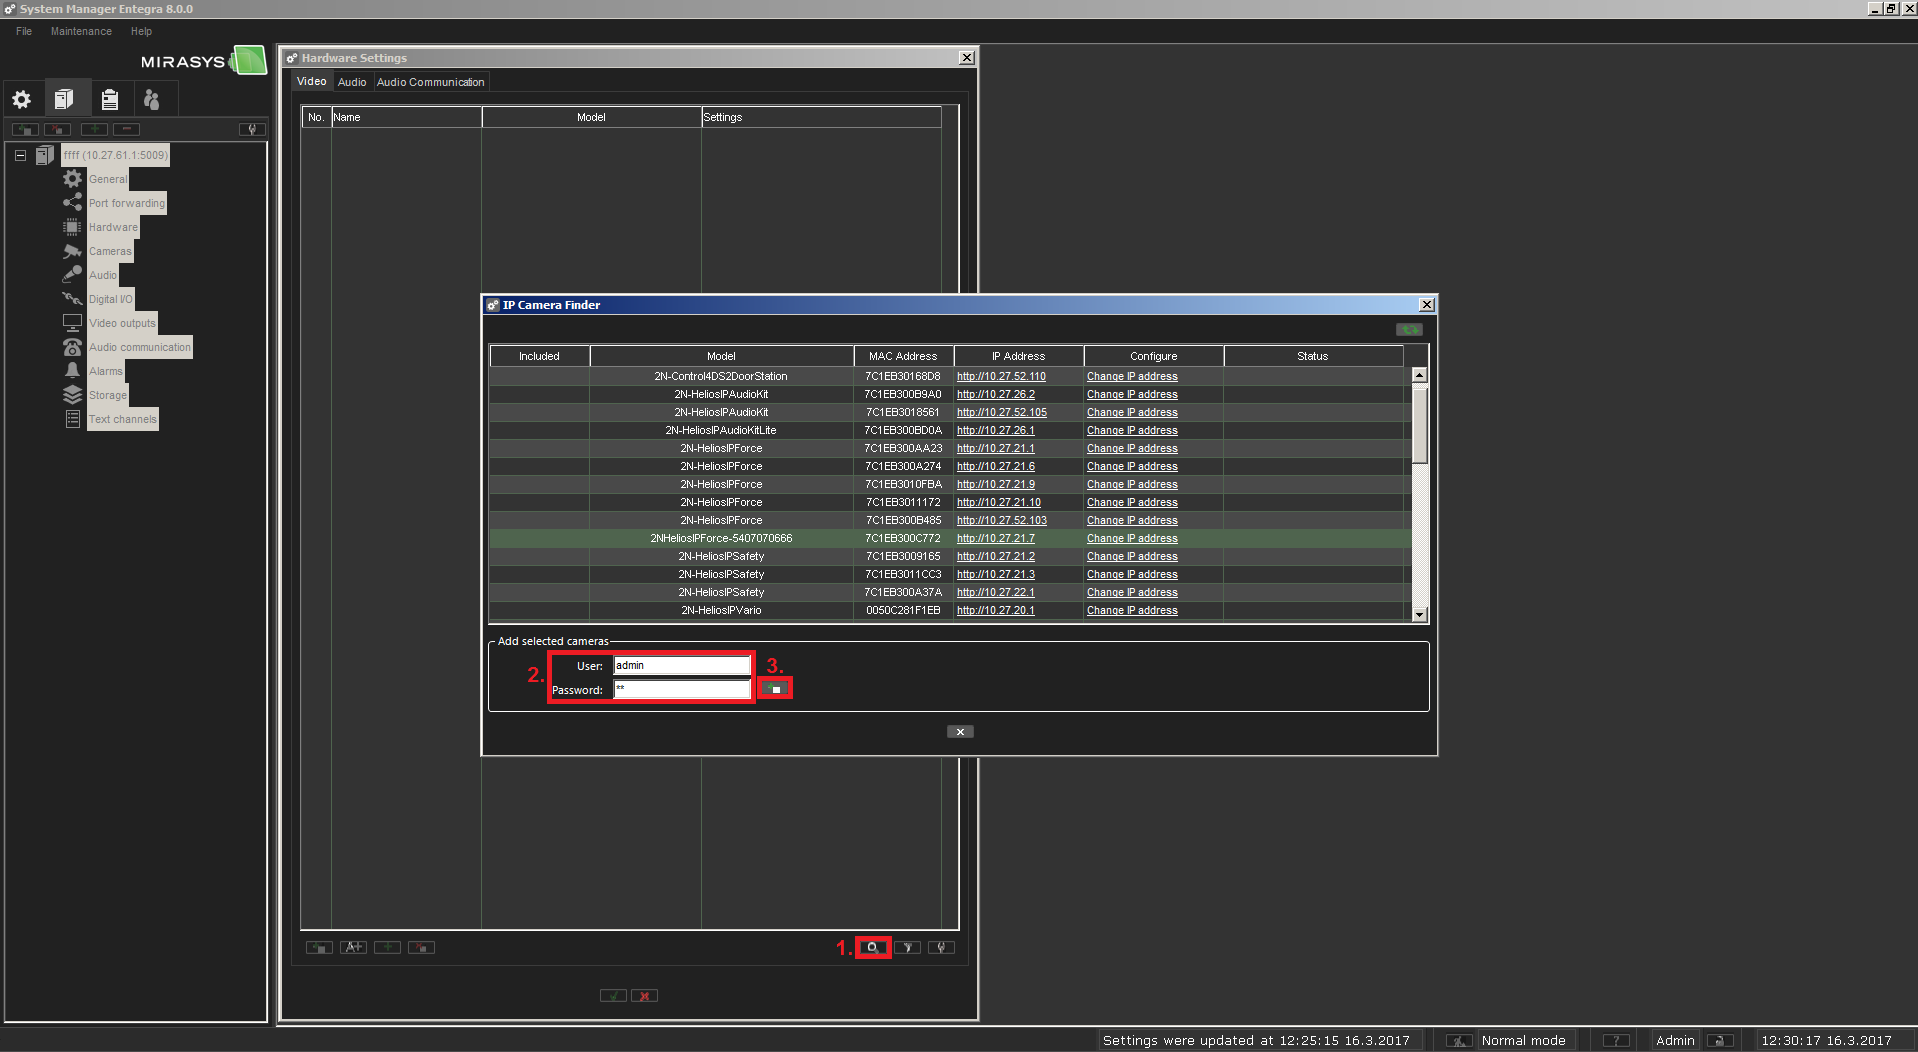
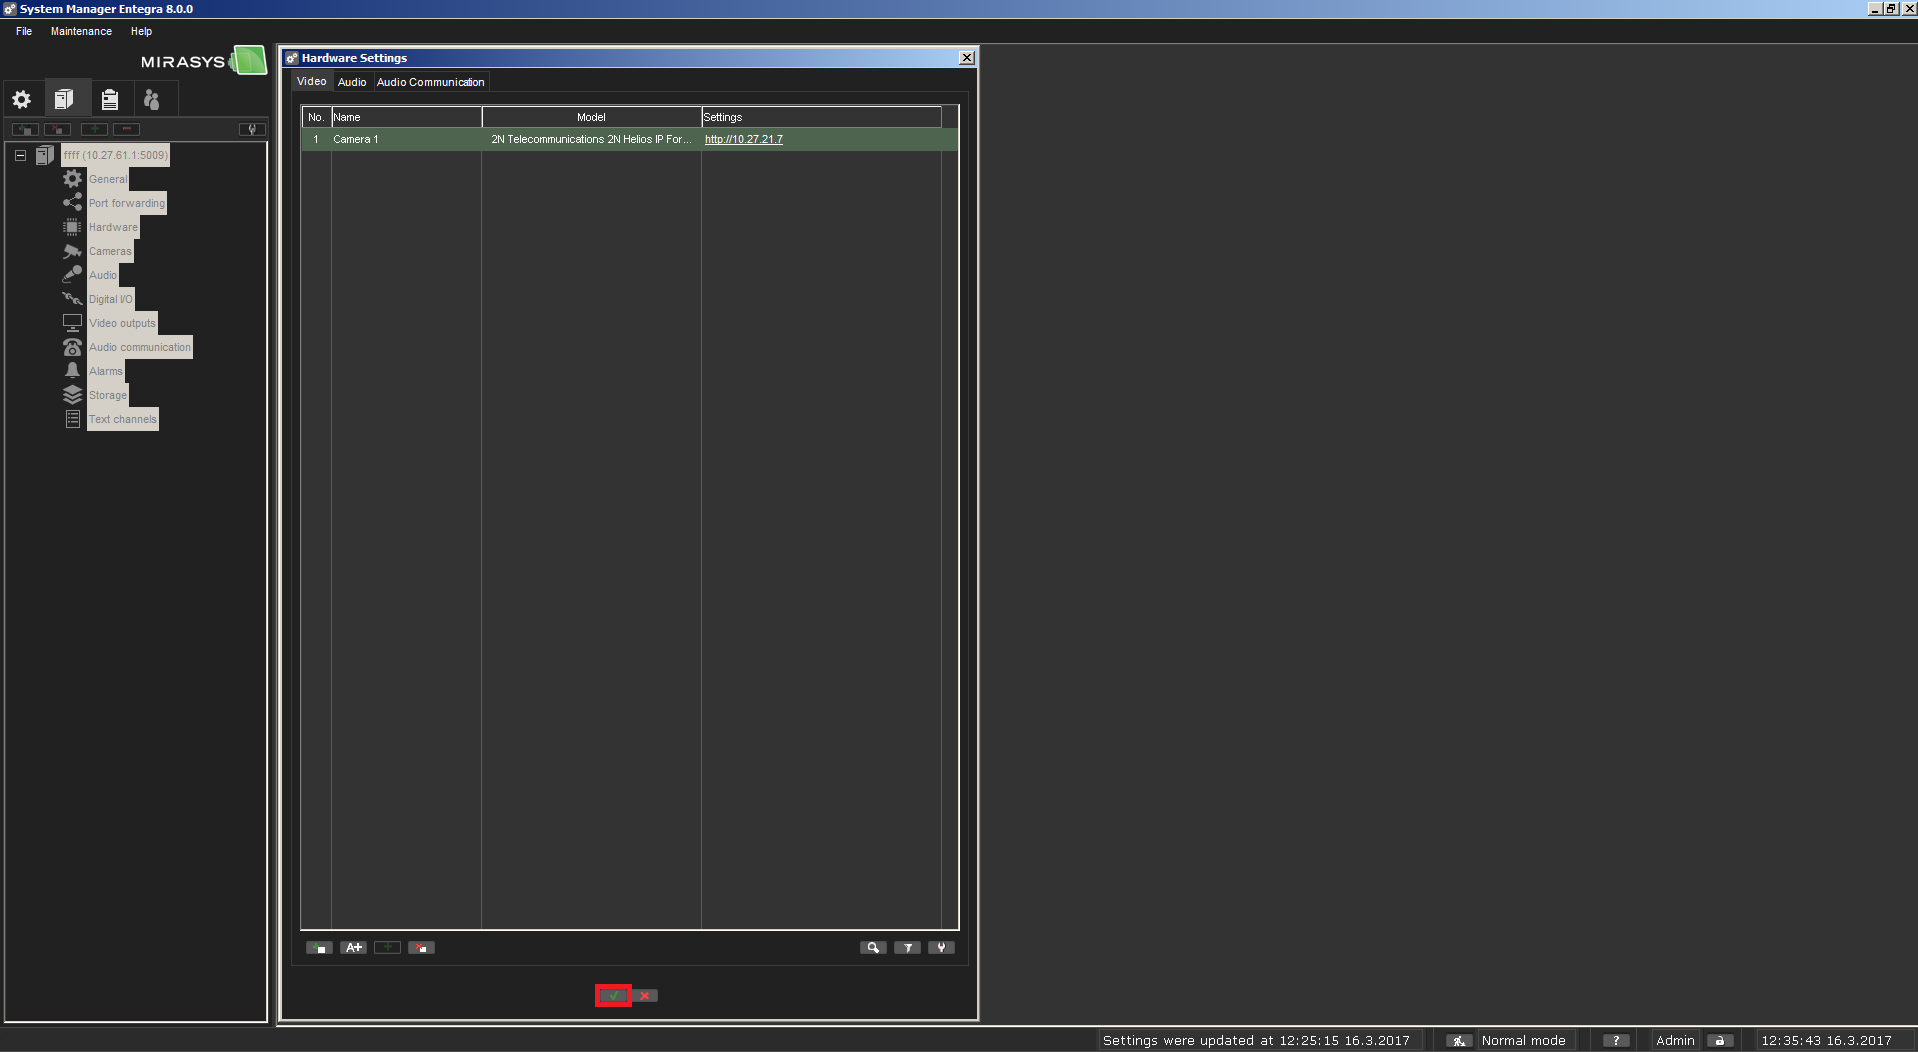
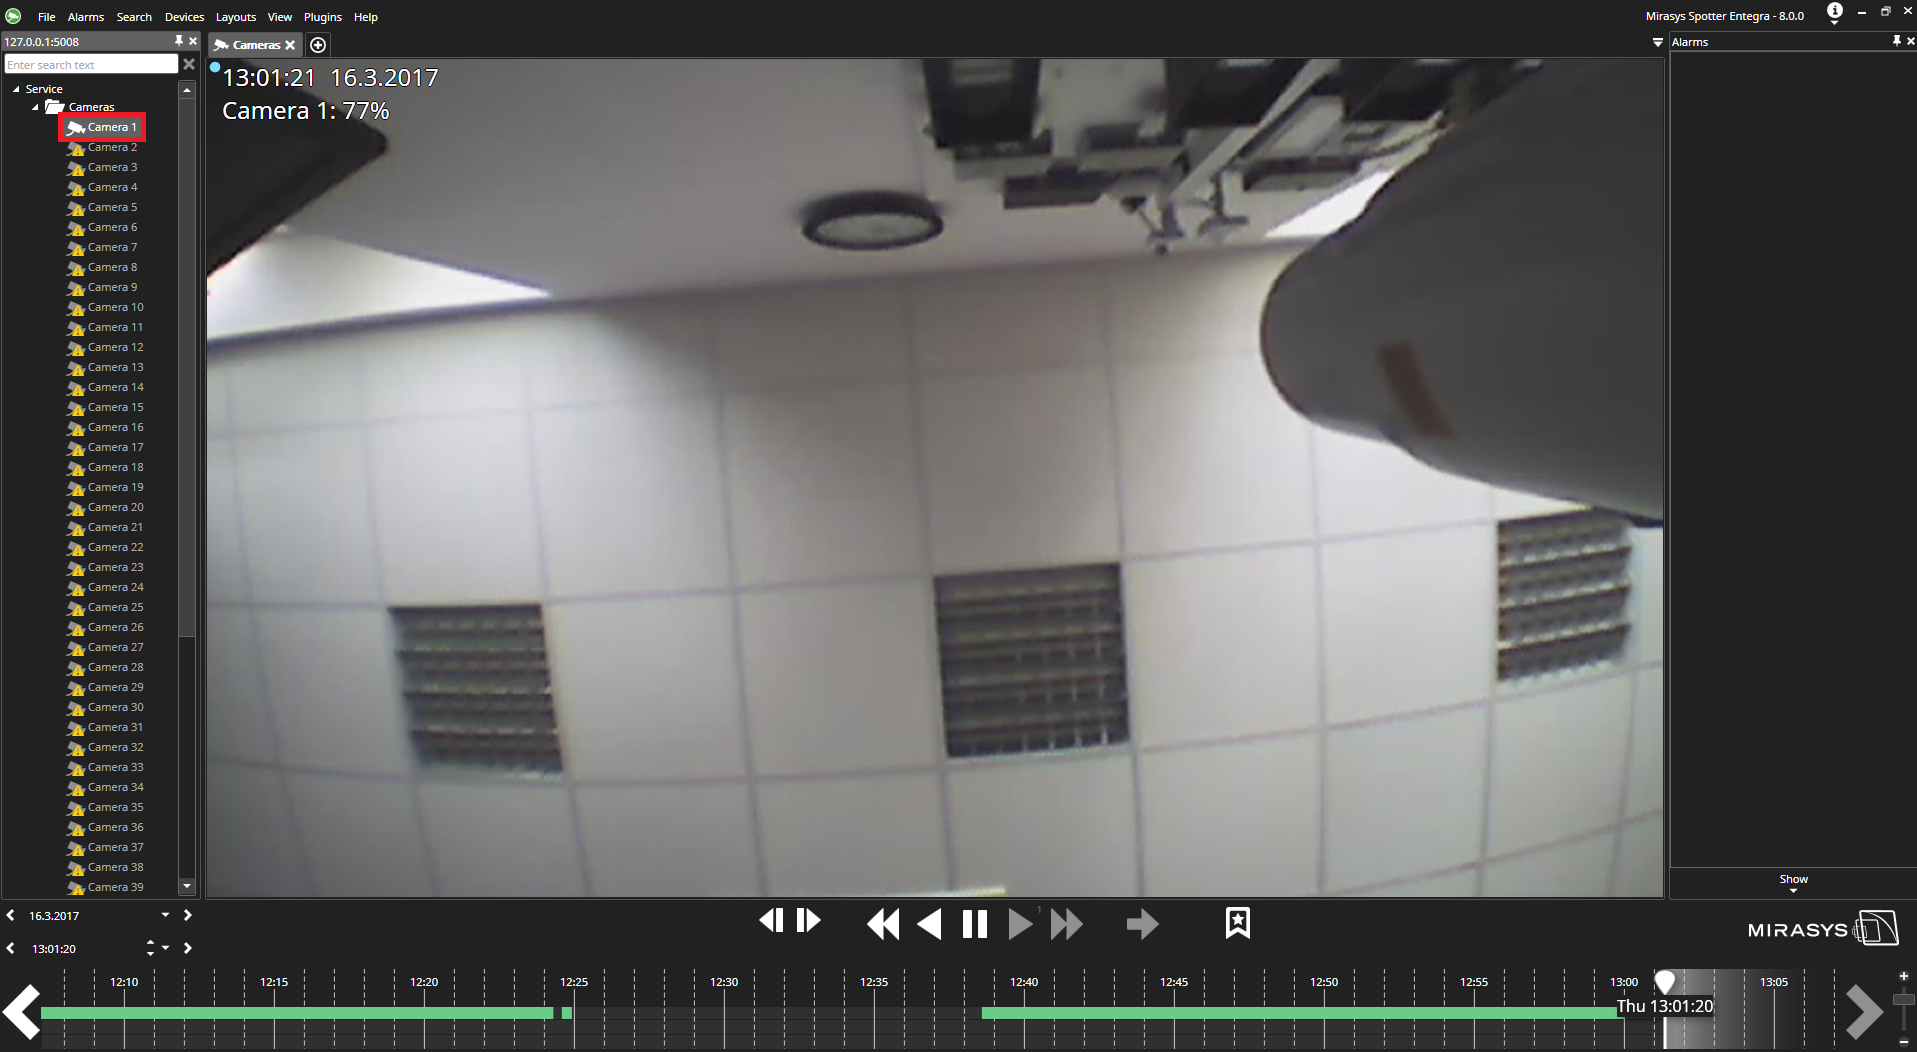
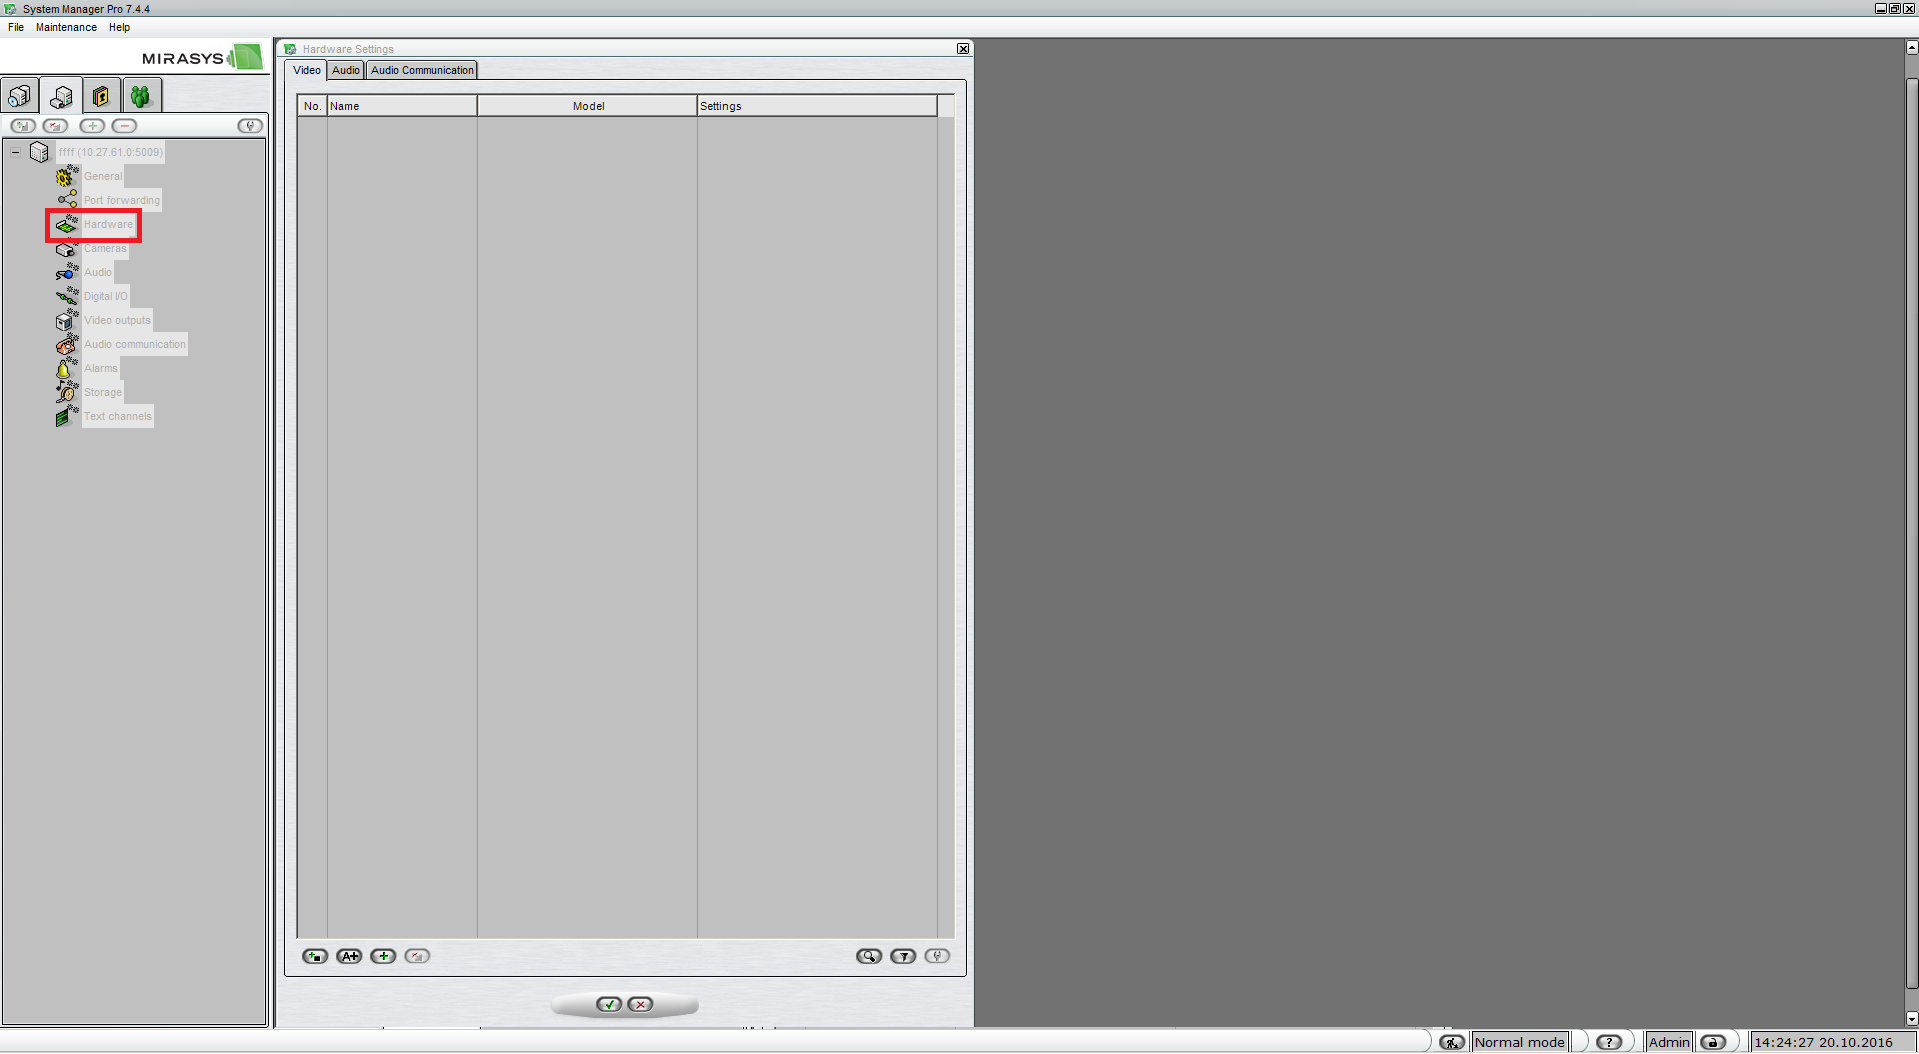
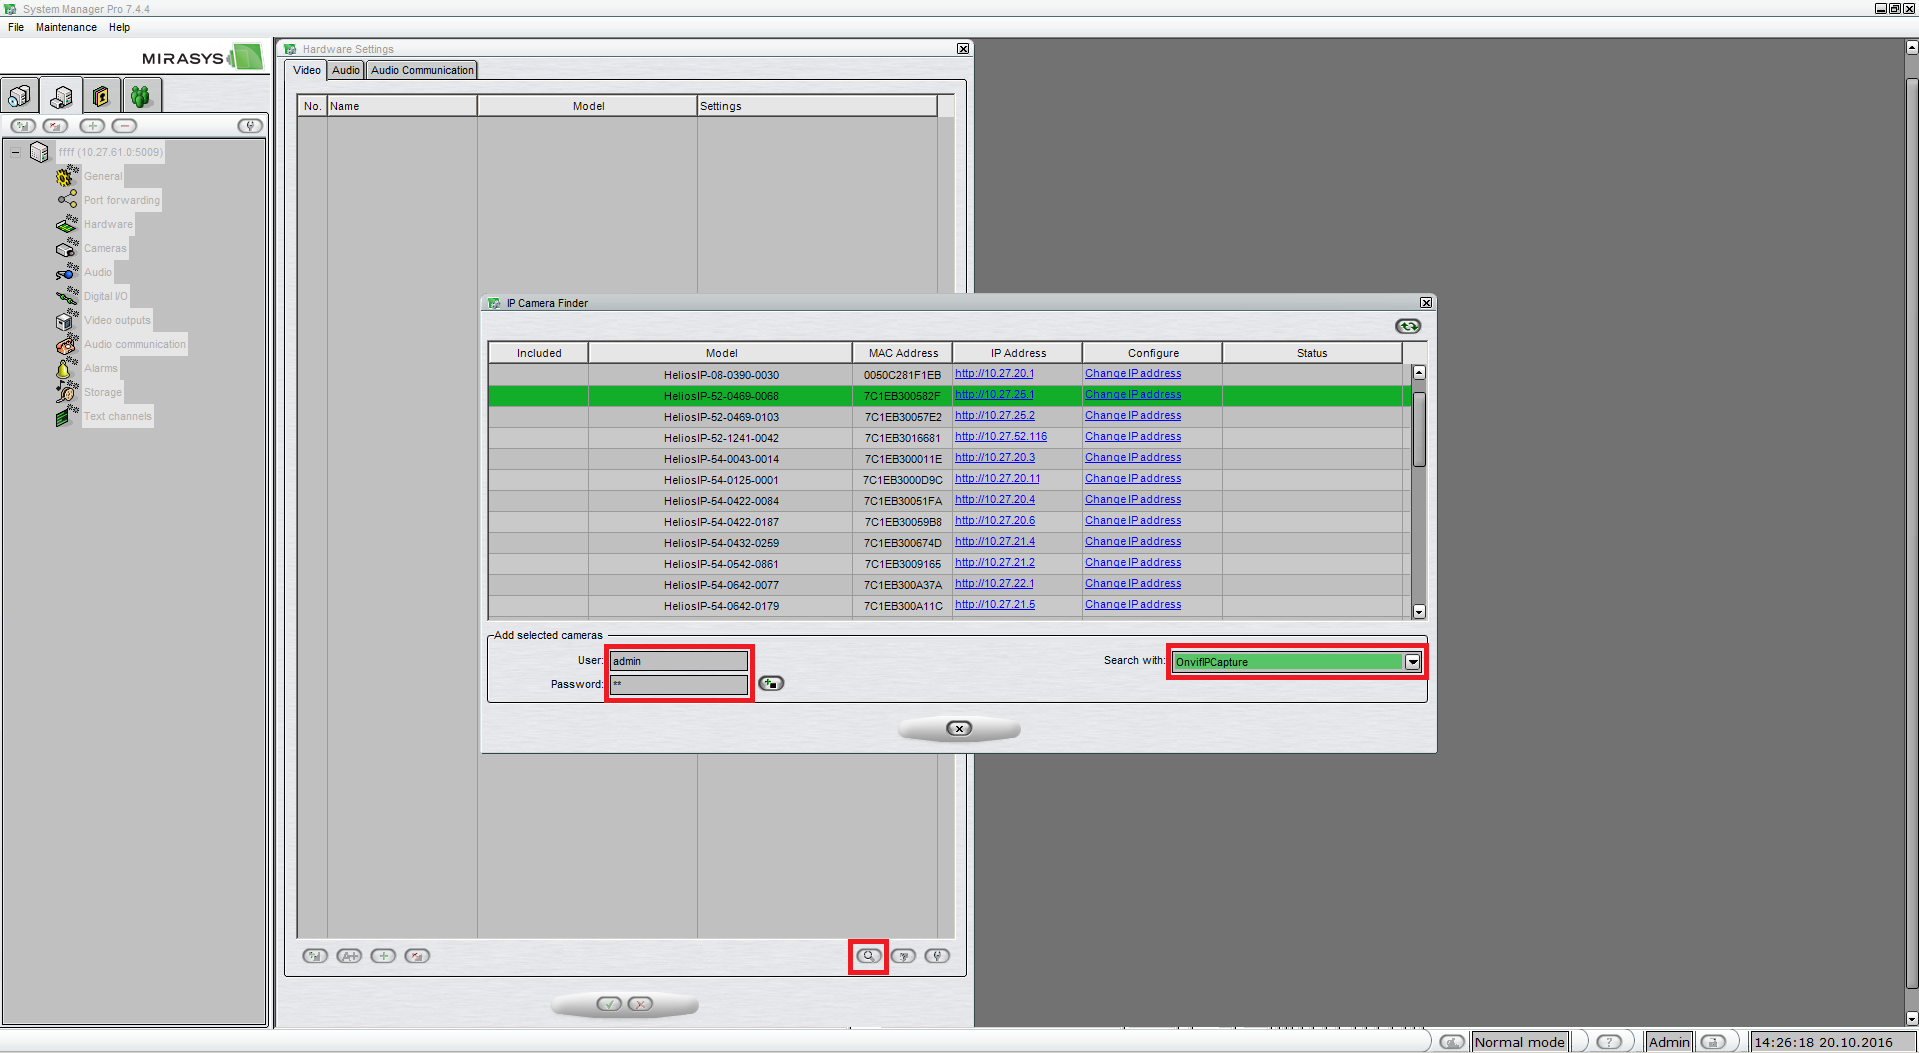
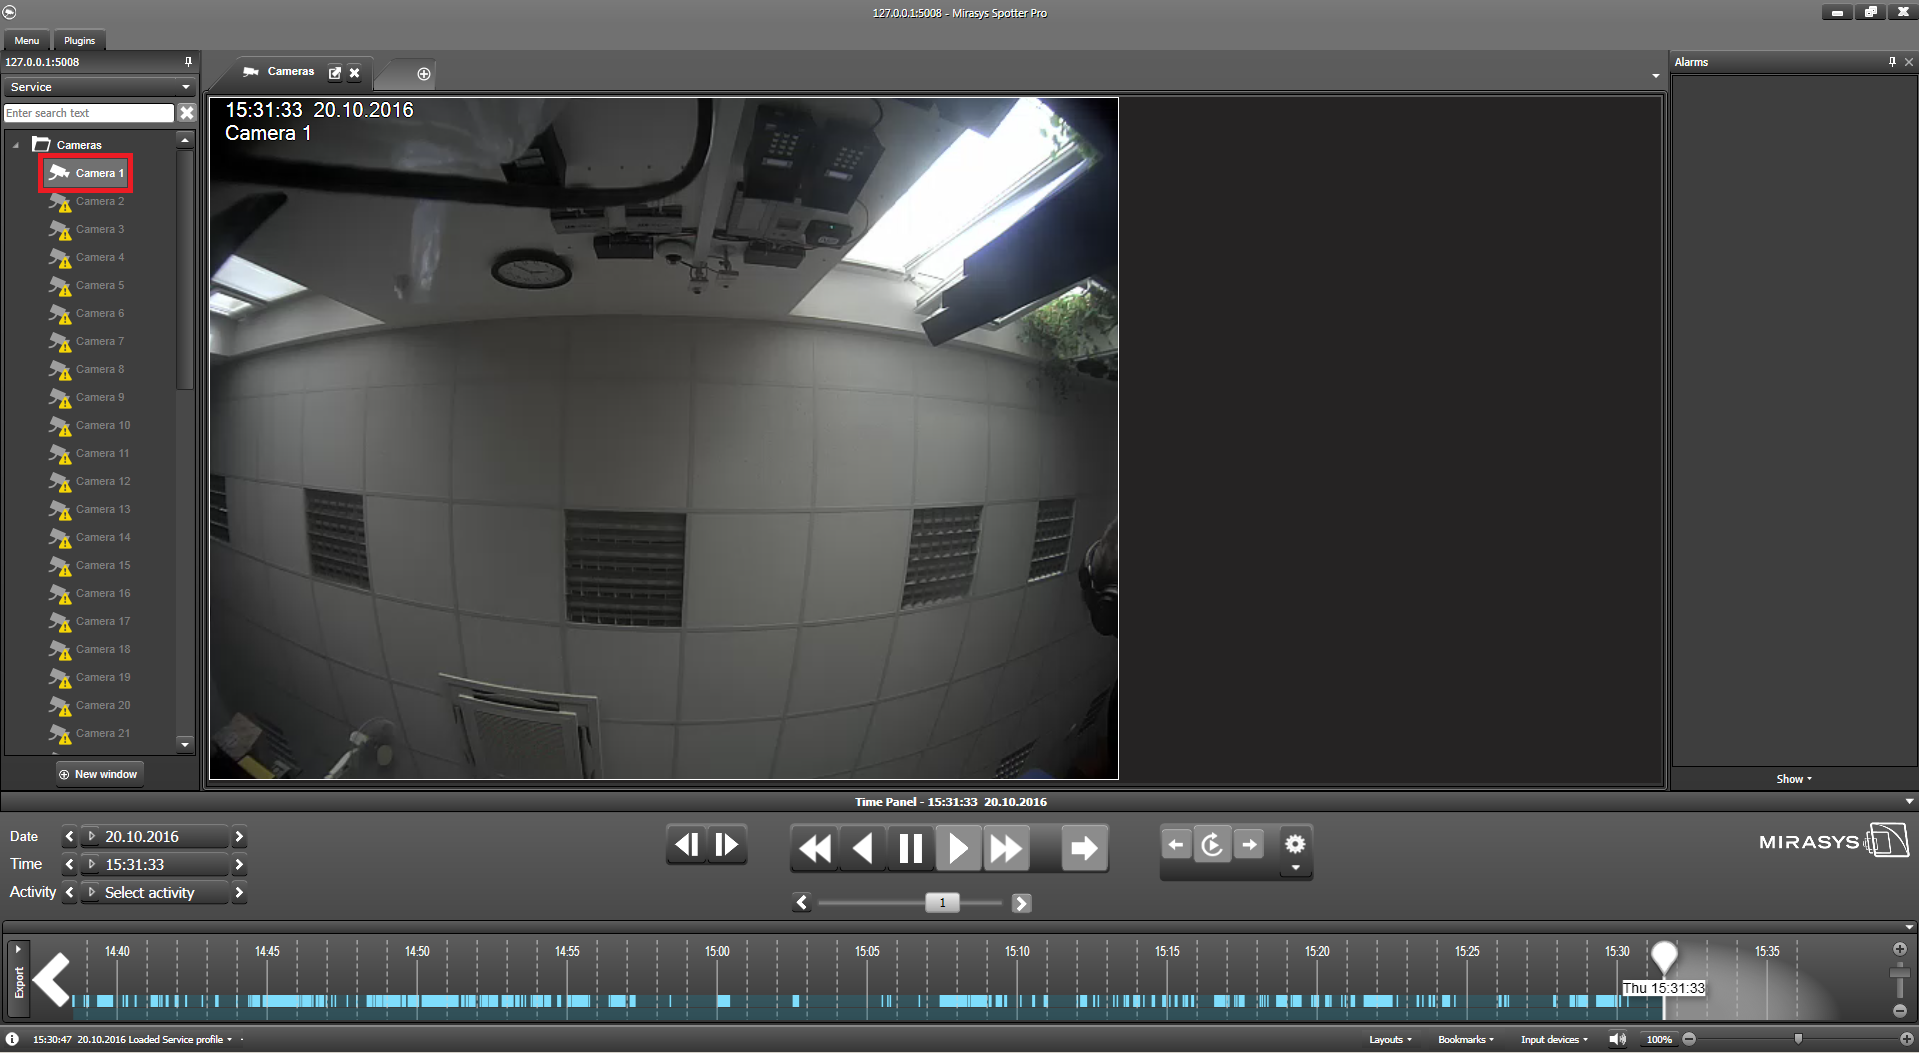
Double-click the shortcut icon DVMS System Manager on the desktop. The login screen is shown. Select the Master Recorder to which you want to connect to from the System address pull-down menu. Type your user name in the User name box, and your password in the Password box. Click Login. A progress bar is shown on the screen while the program loads. IP cameras can be configured through the Video tab of Hardware settings.
 |
 |
 |
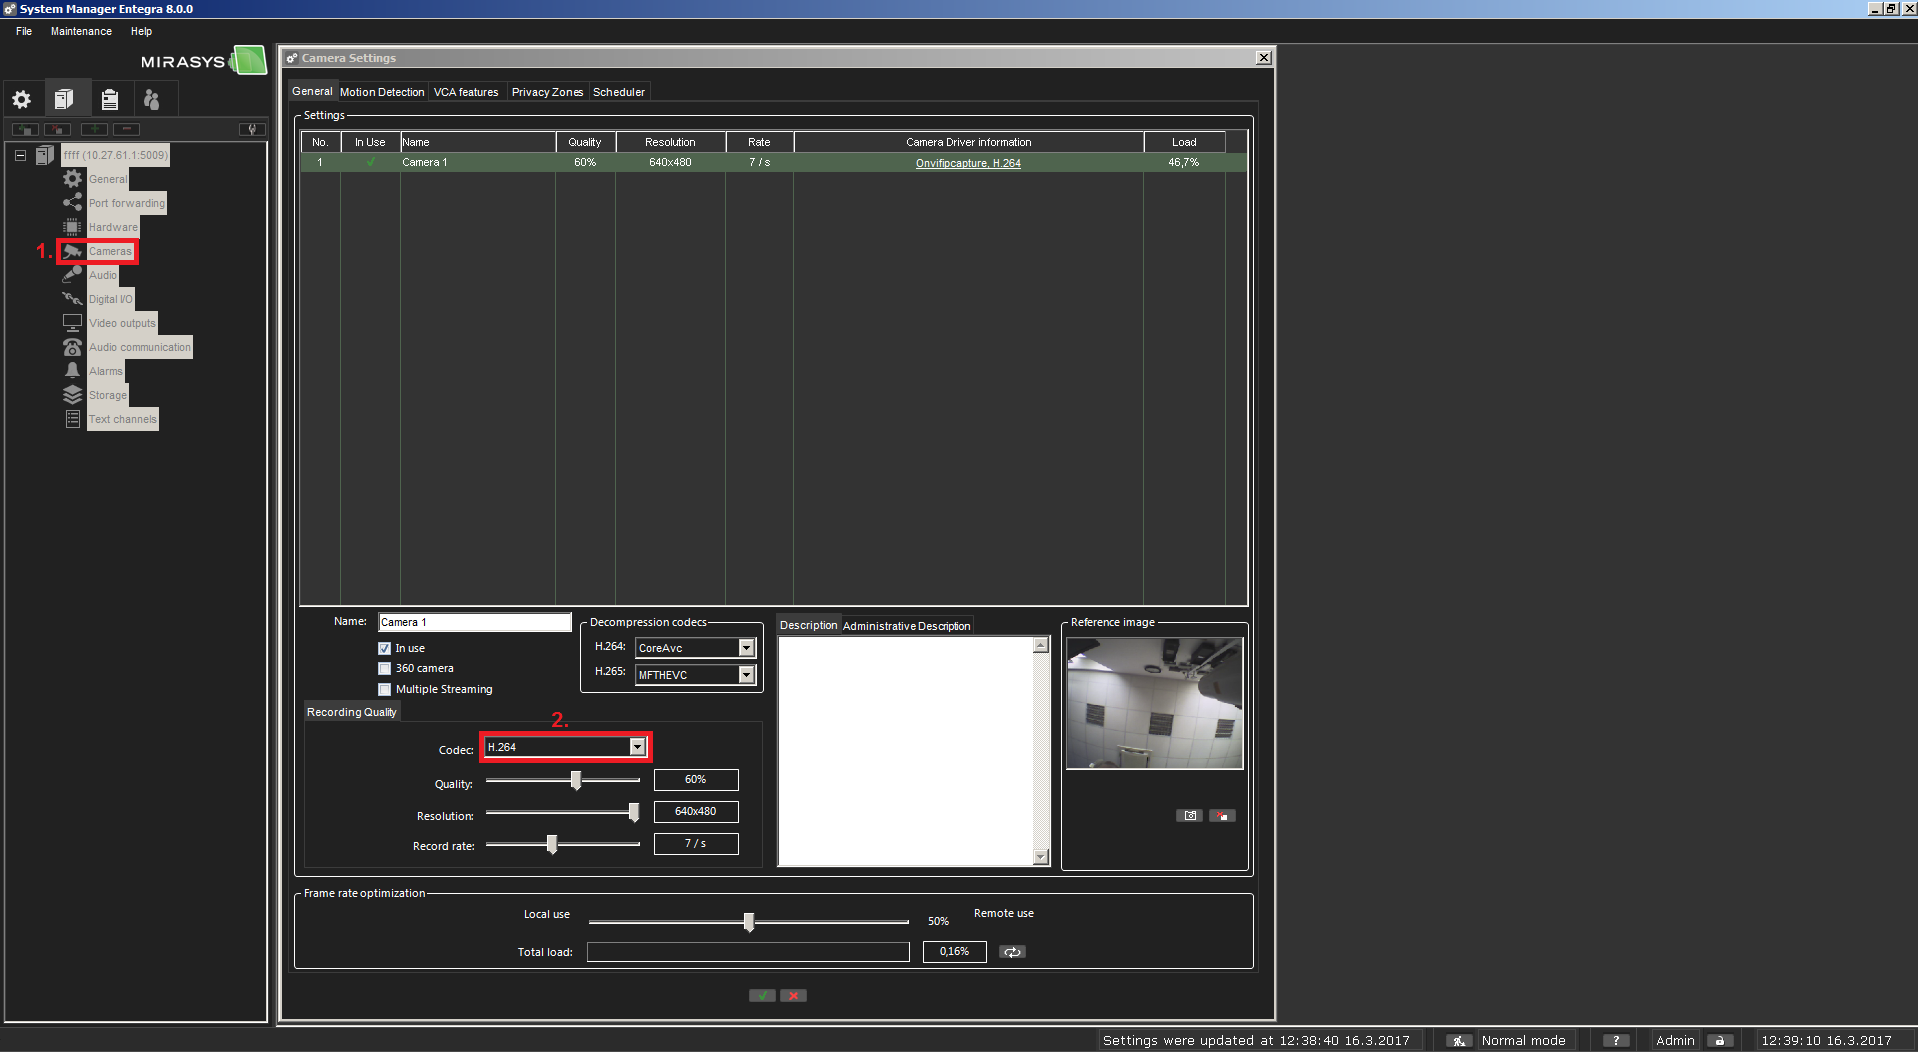
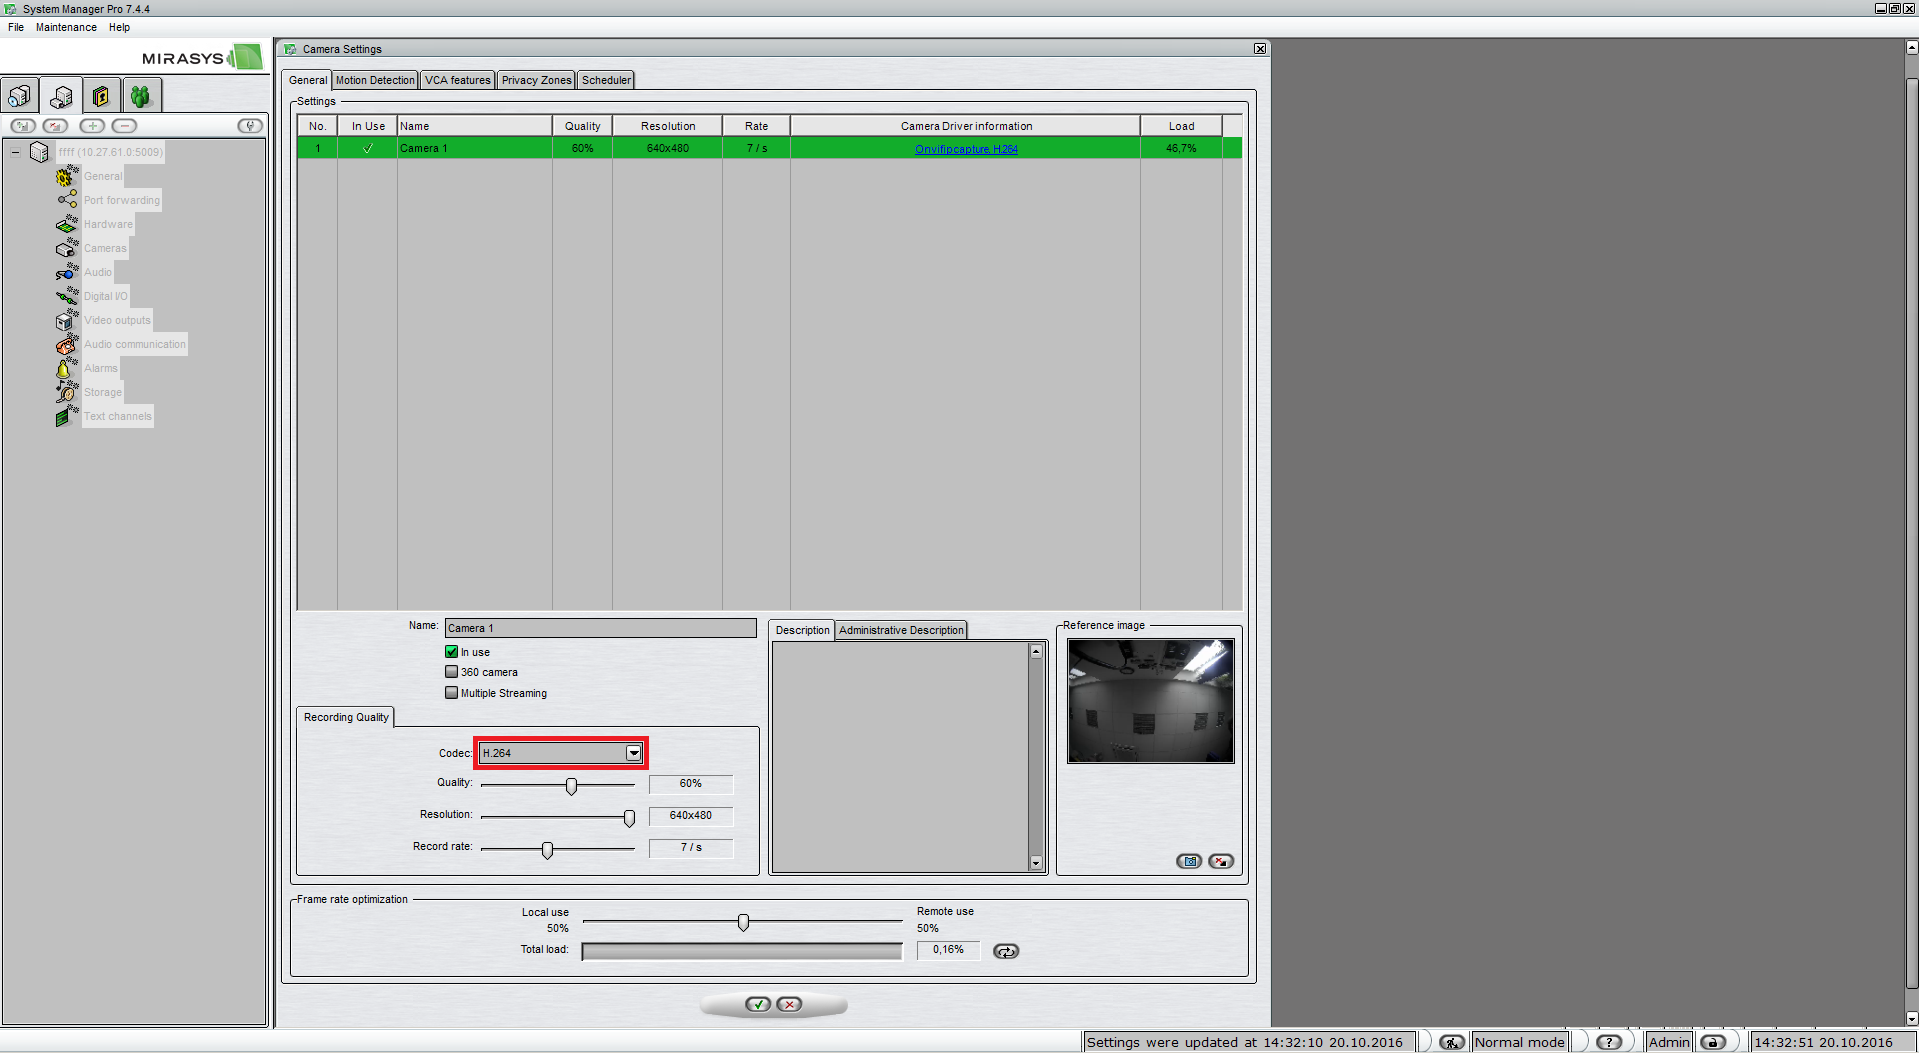
Open the Cameras page from the recorder menu. In the Motion Detection tab, select the camera from the camera list. The General tab shows a summary of camera parameters in the upper part of the page. You can change the parameters in the lower part of the window. Set JPEG or H.264 as the codec for the camera. Click OK to exit the Camera Settings.
 |
 |
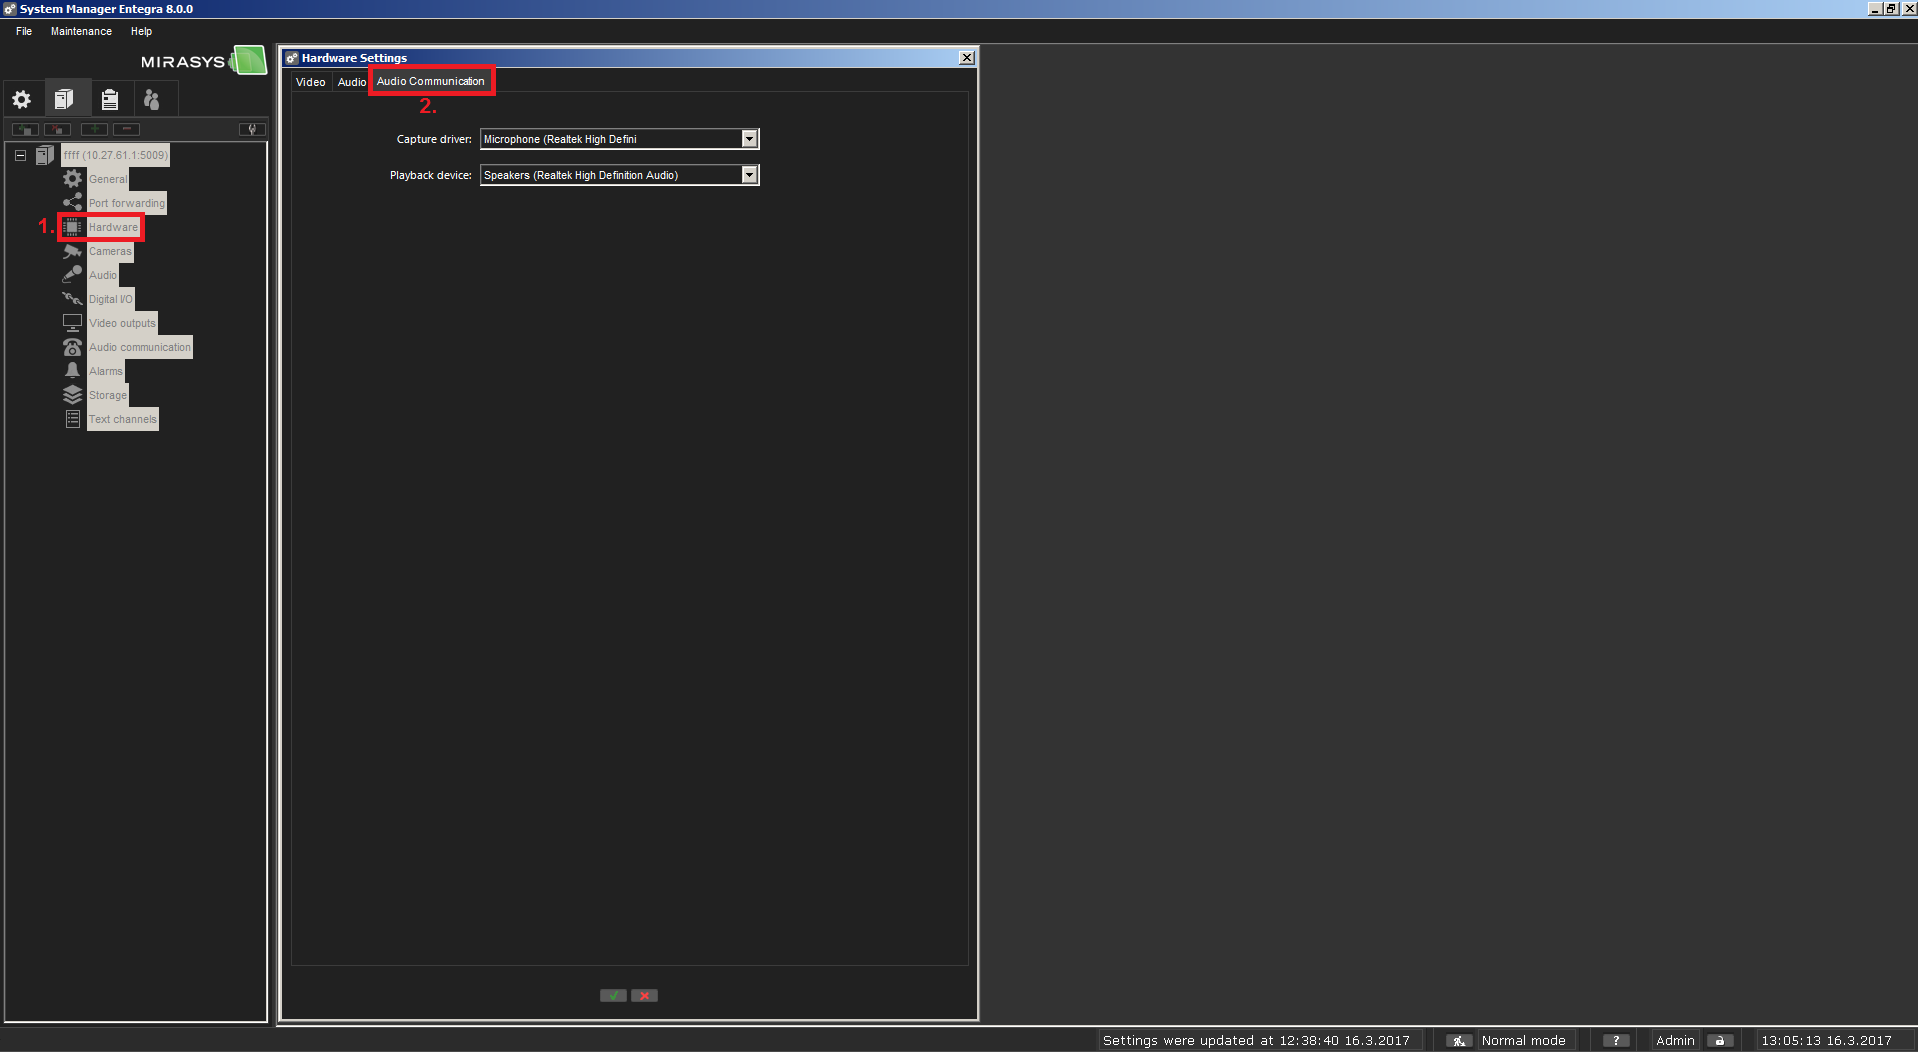
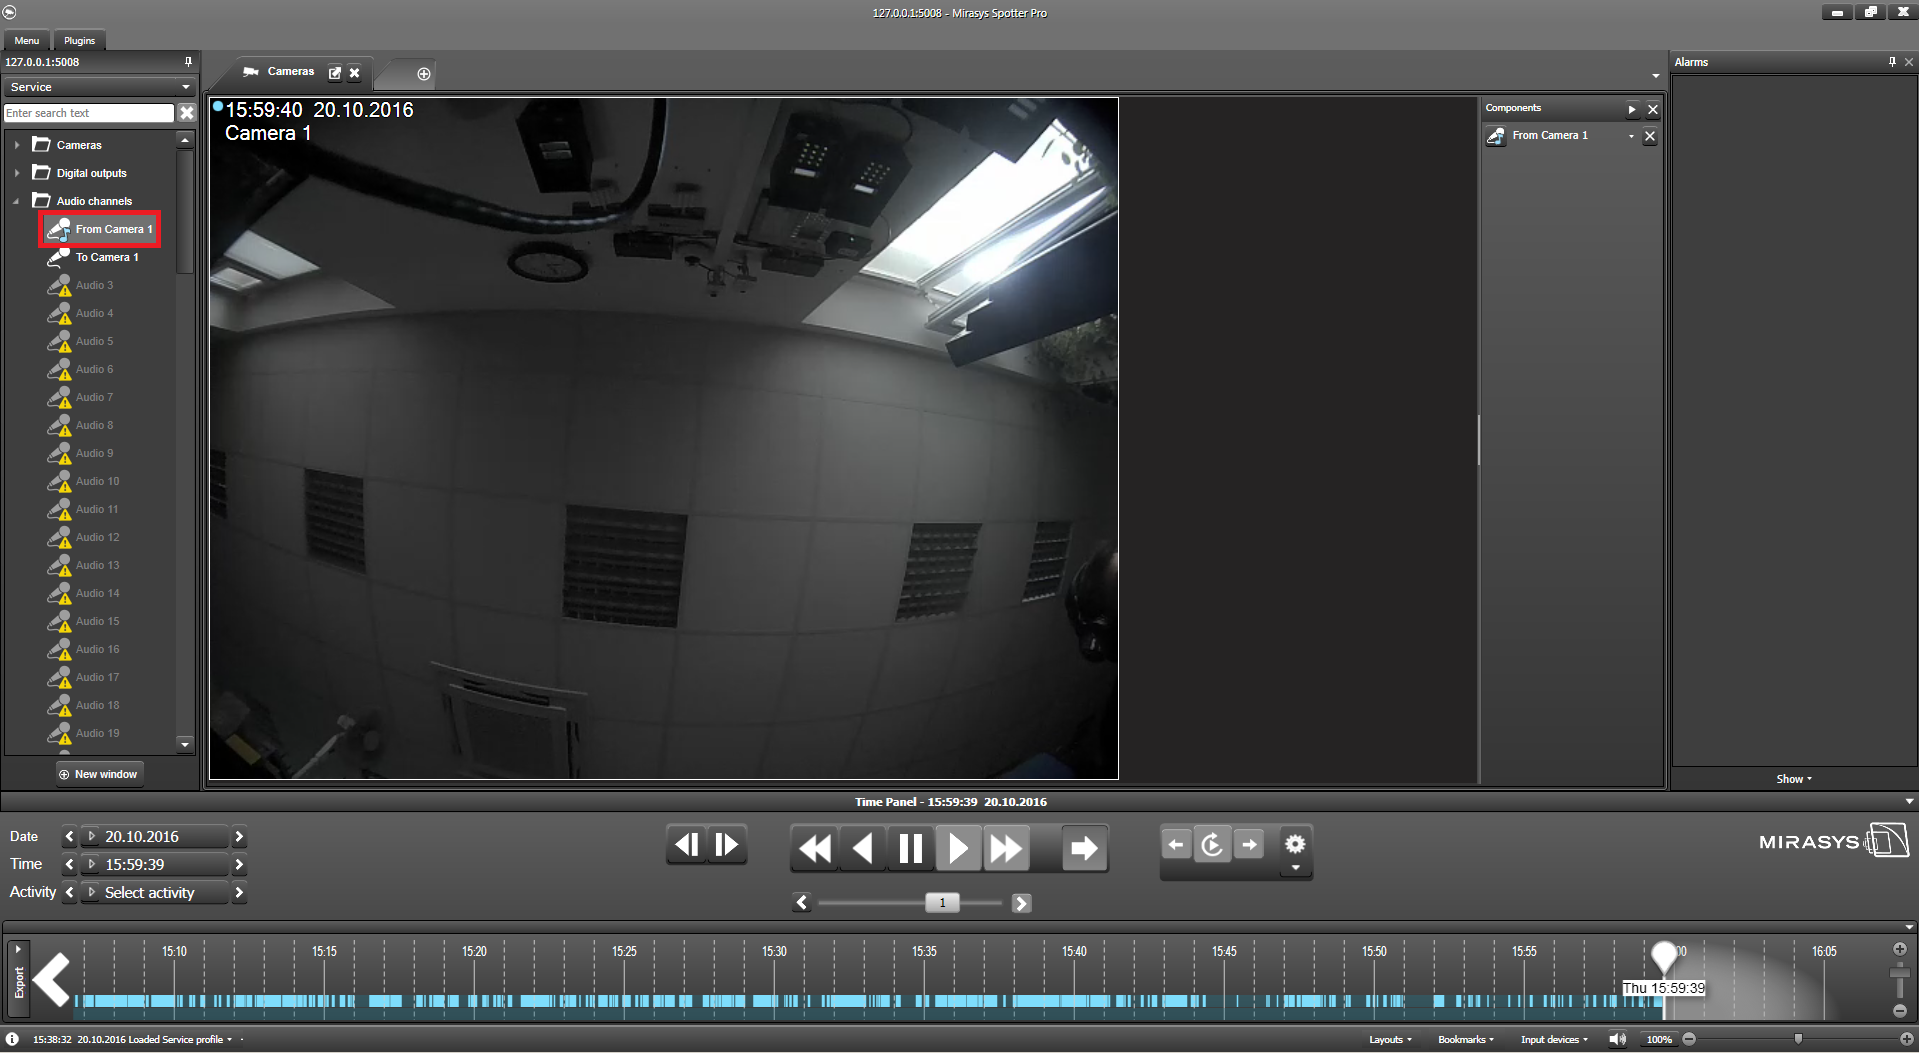
In the DVMS System Manager audio from 2N IP Intercom can be configured through the Audio Communication tab of Hardware settings. Set audio for communnication.
 |
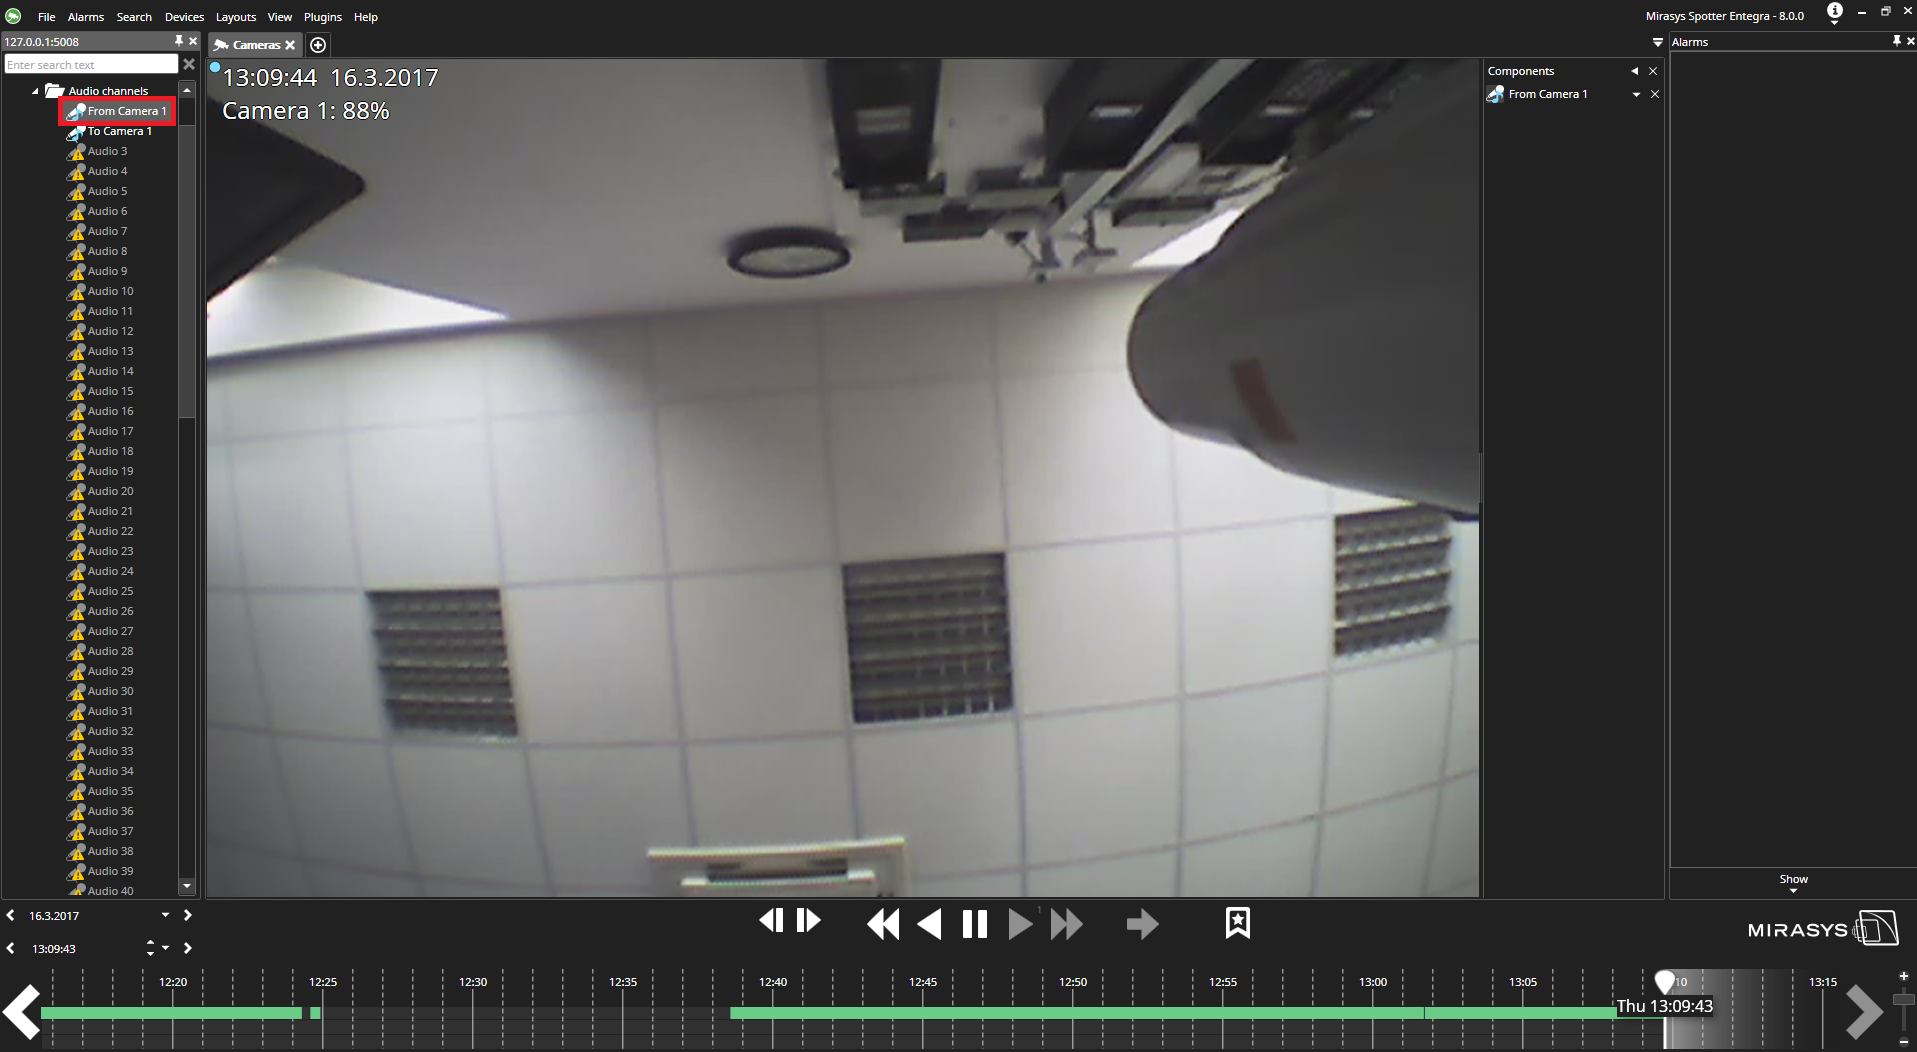 |
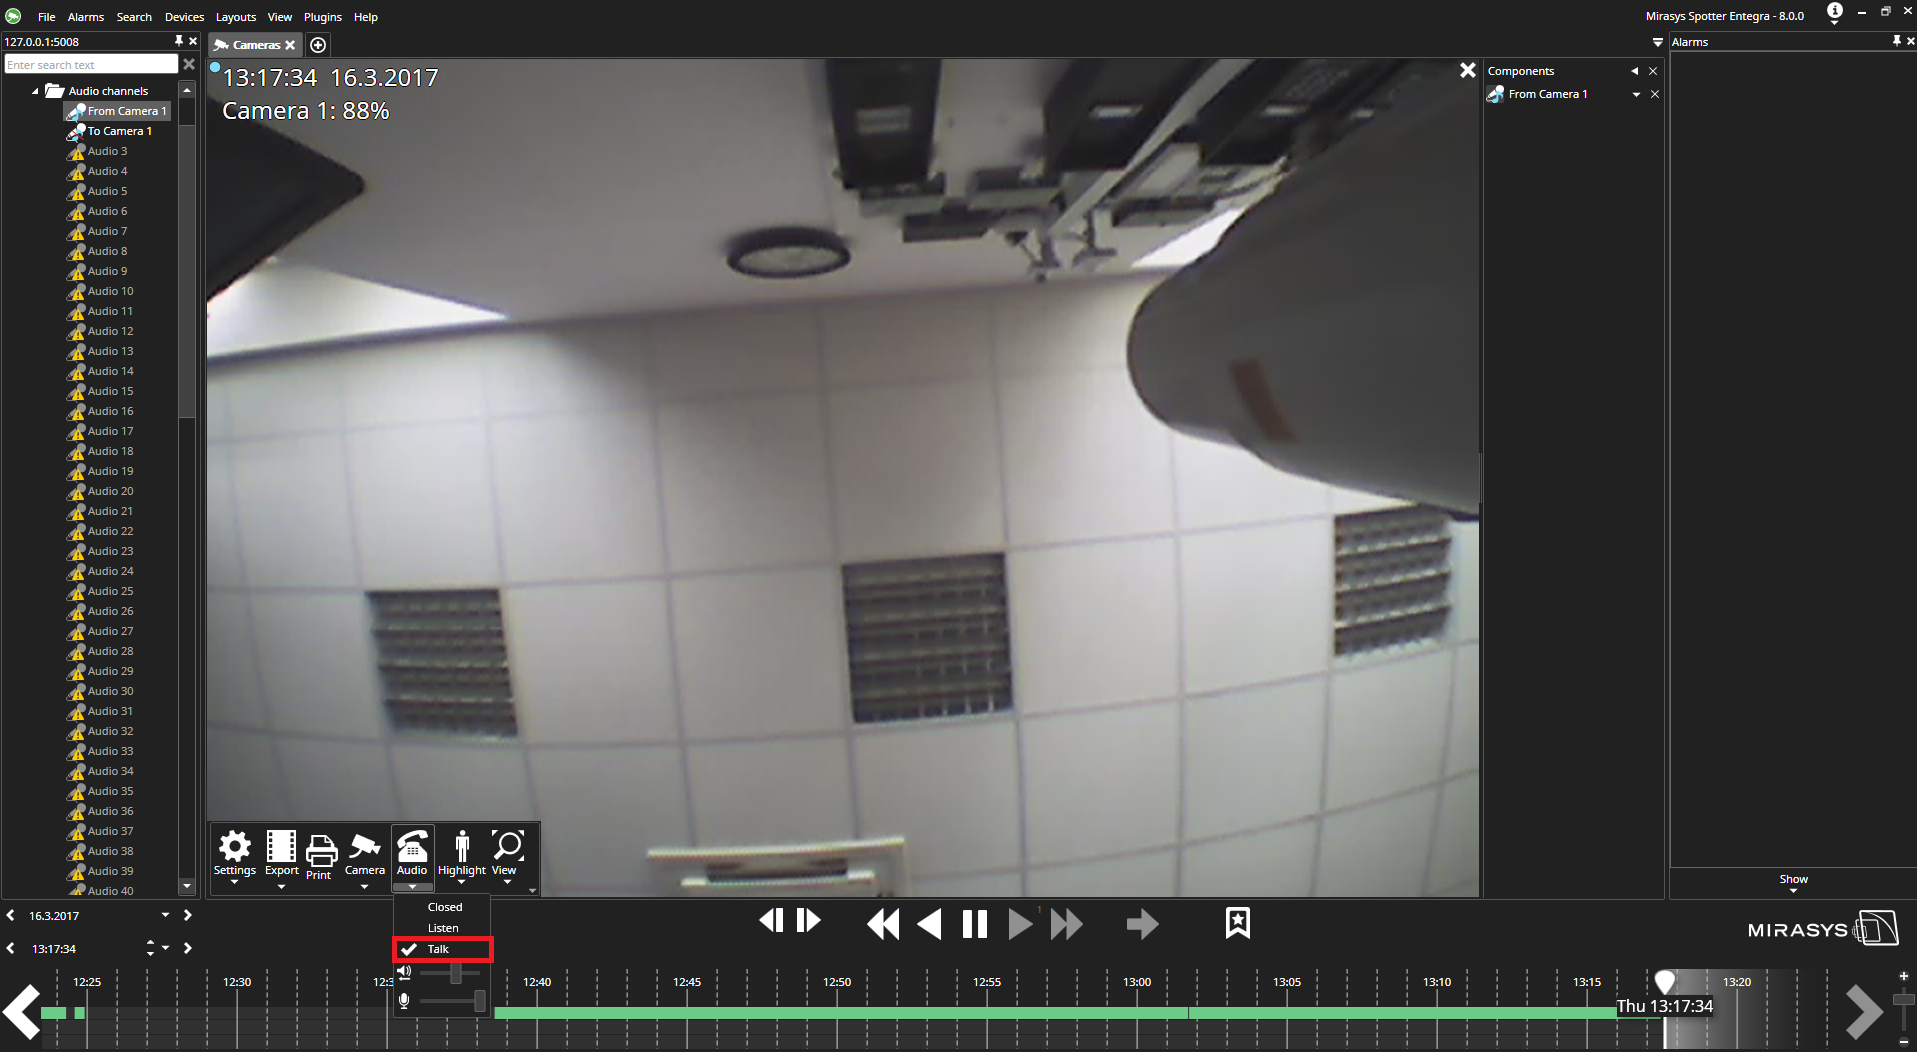
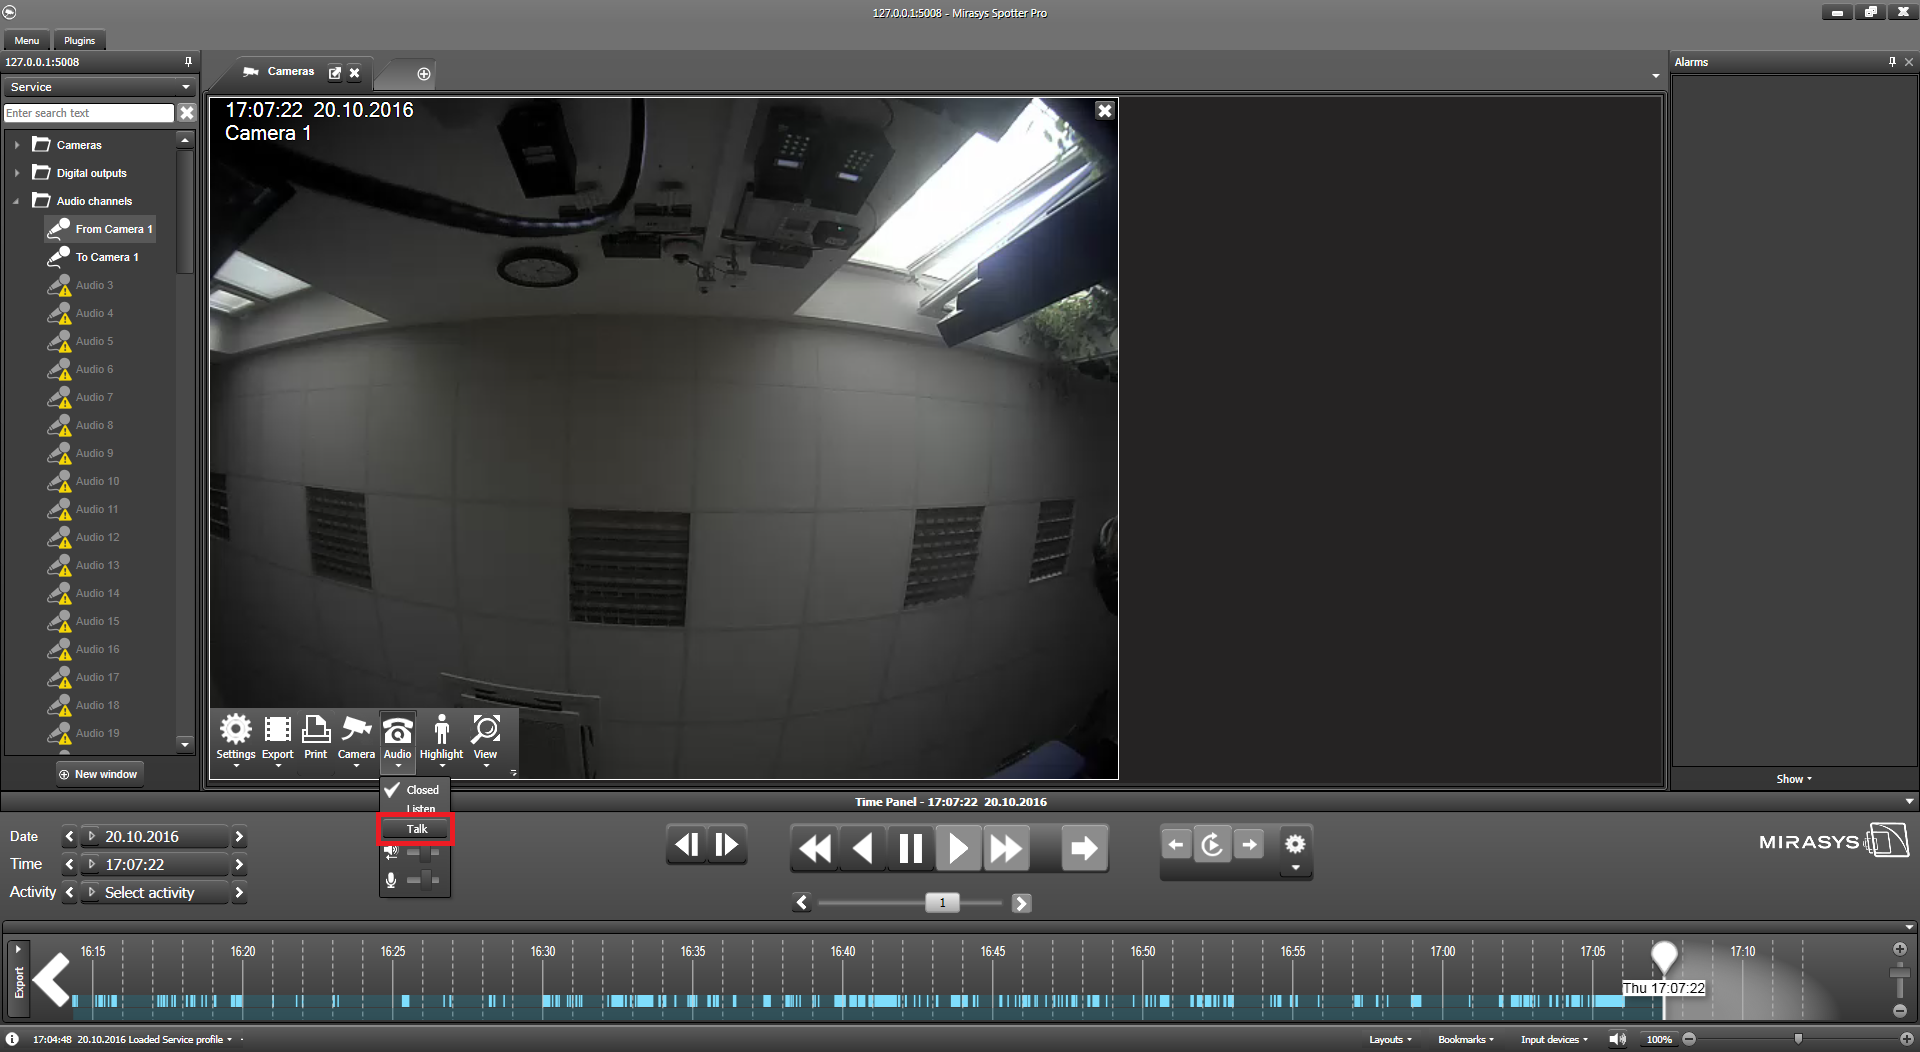
In the Spotter you should talk to 2N IP Intercom. After you add your camera, click Talk from bar of camera. And then you can talk and you can hear audio to Helios IP.
 |
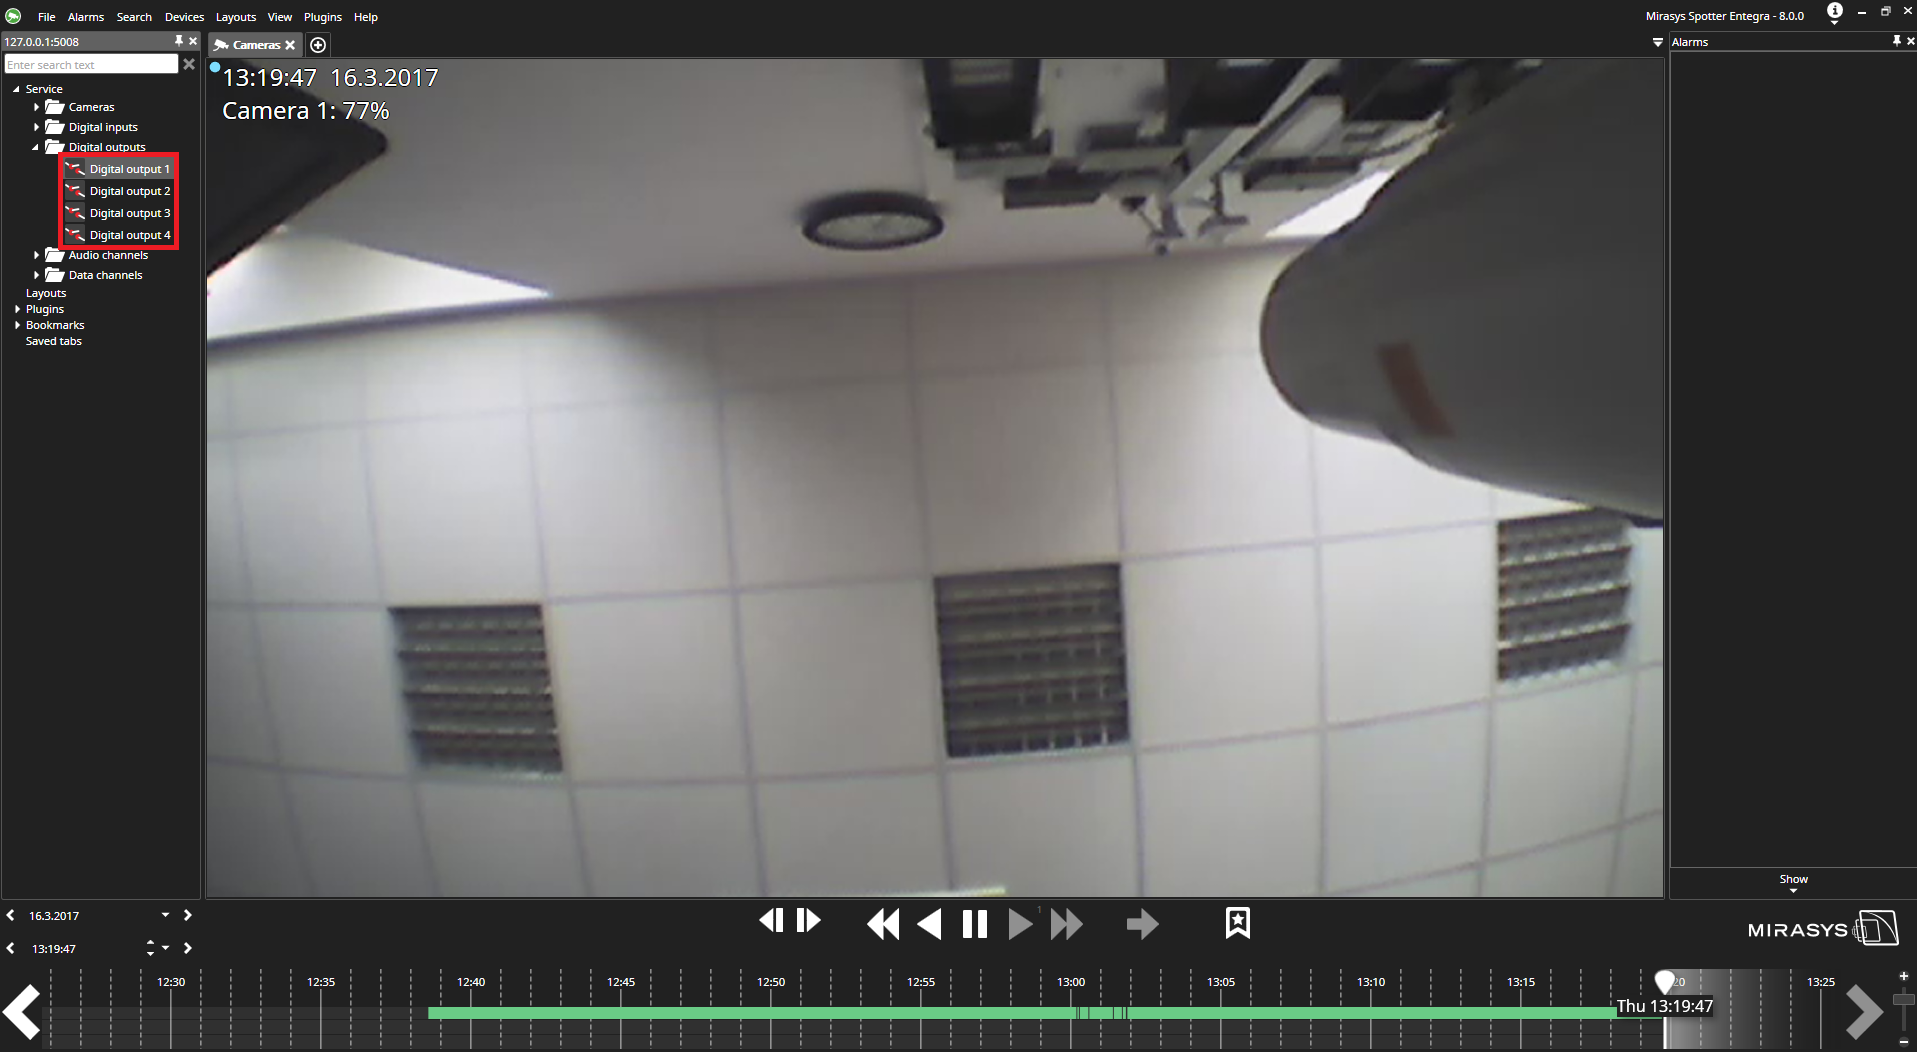
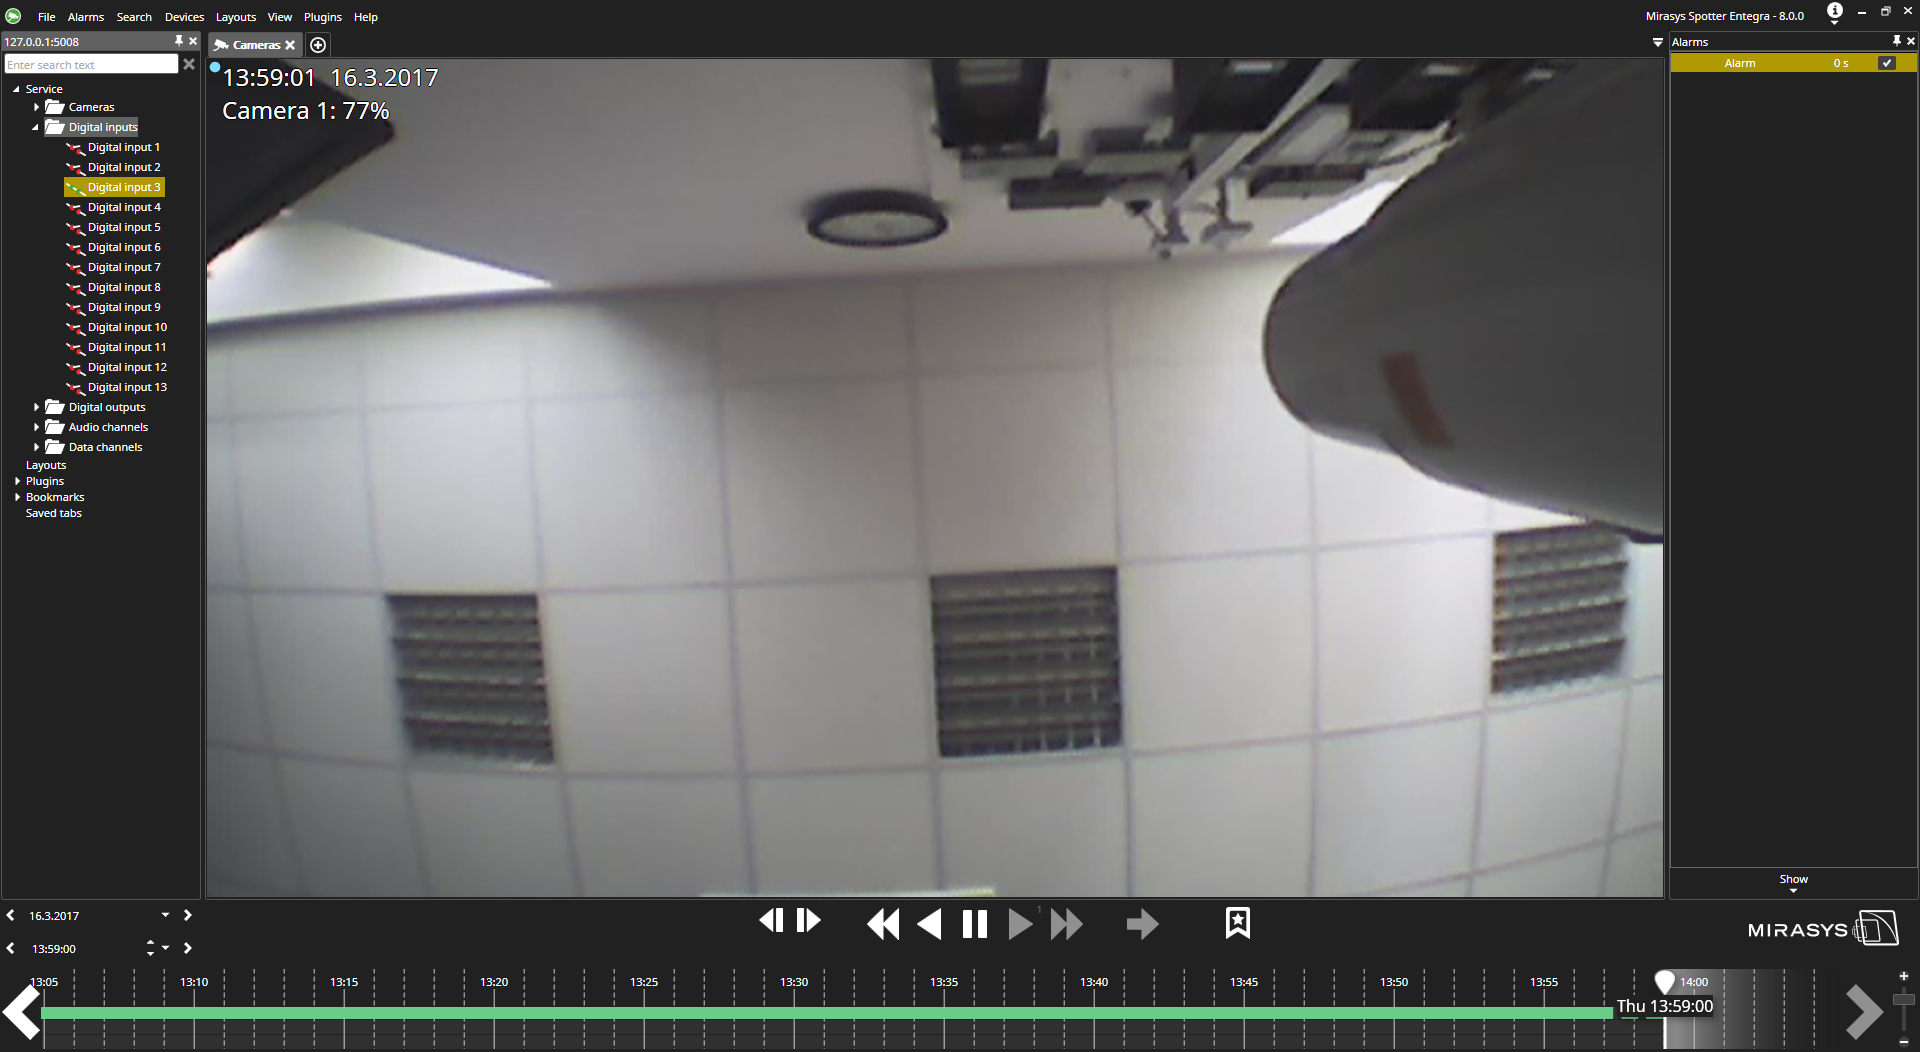
In the Spotter you should set outputs of 2N IP Intercom. After you add your camera, set one of Digital outputs 2N IP Intercom. ![]() indicates that Digital output is on.
indicates that Digital output is on. ![]() indicates that Digital output is off. A click on the icon turns it on or off.
indicates that Digital output is off. A click on the icon turns it on or off.
 |
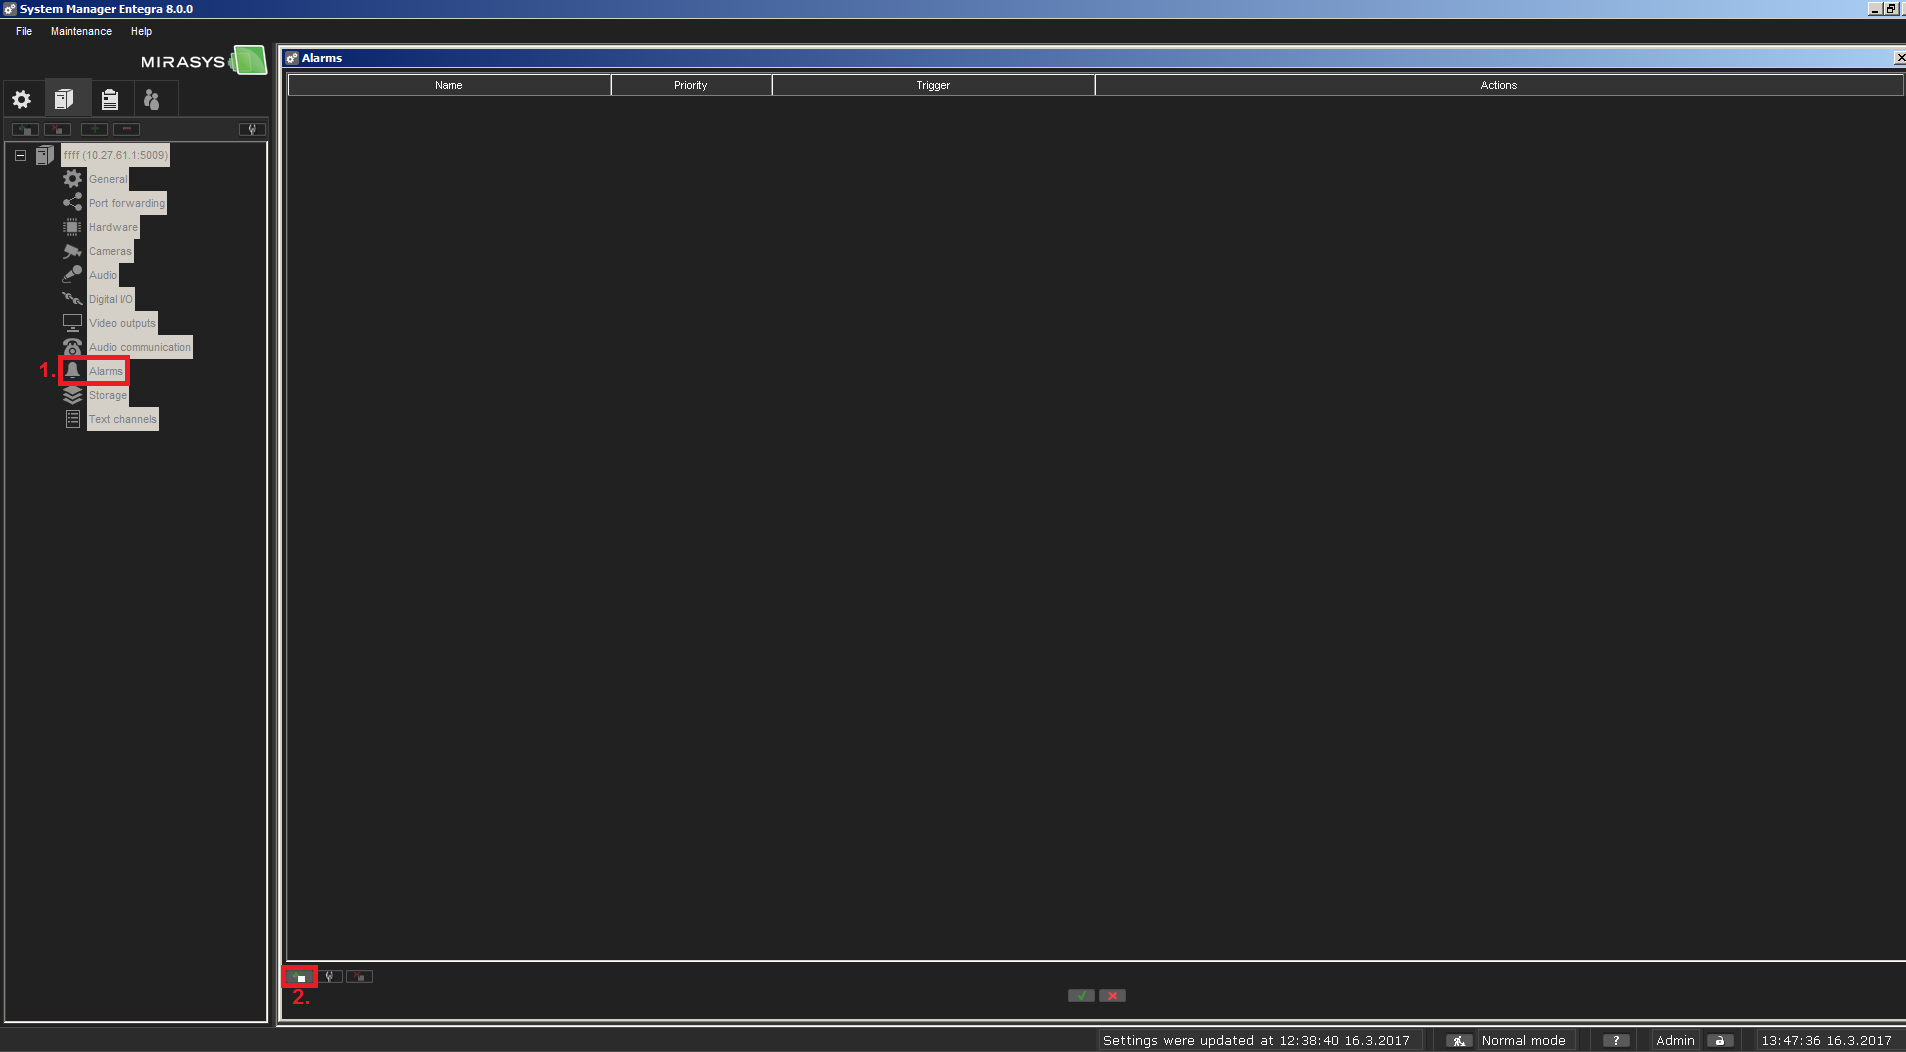
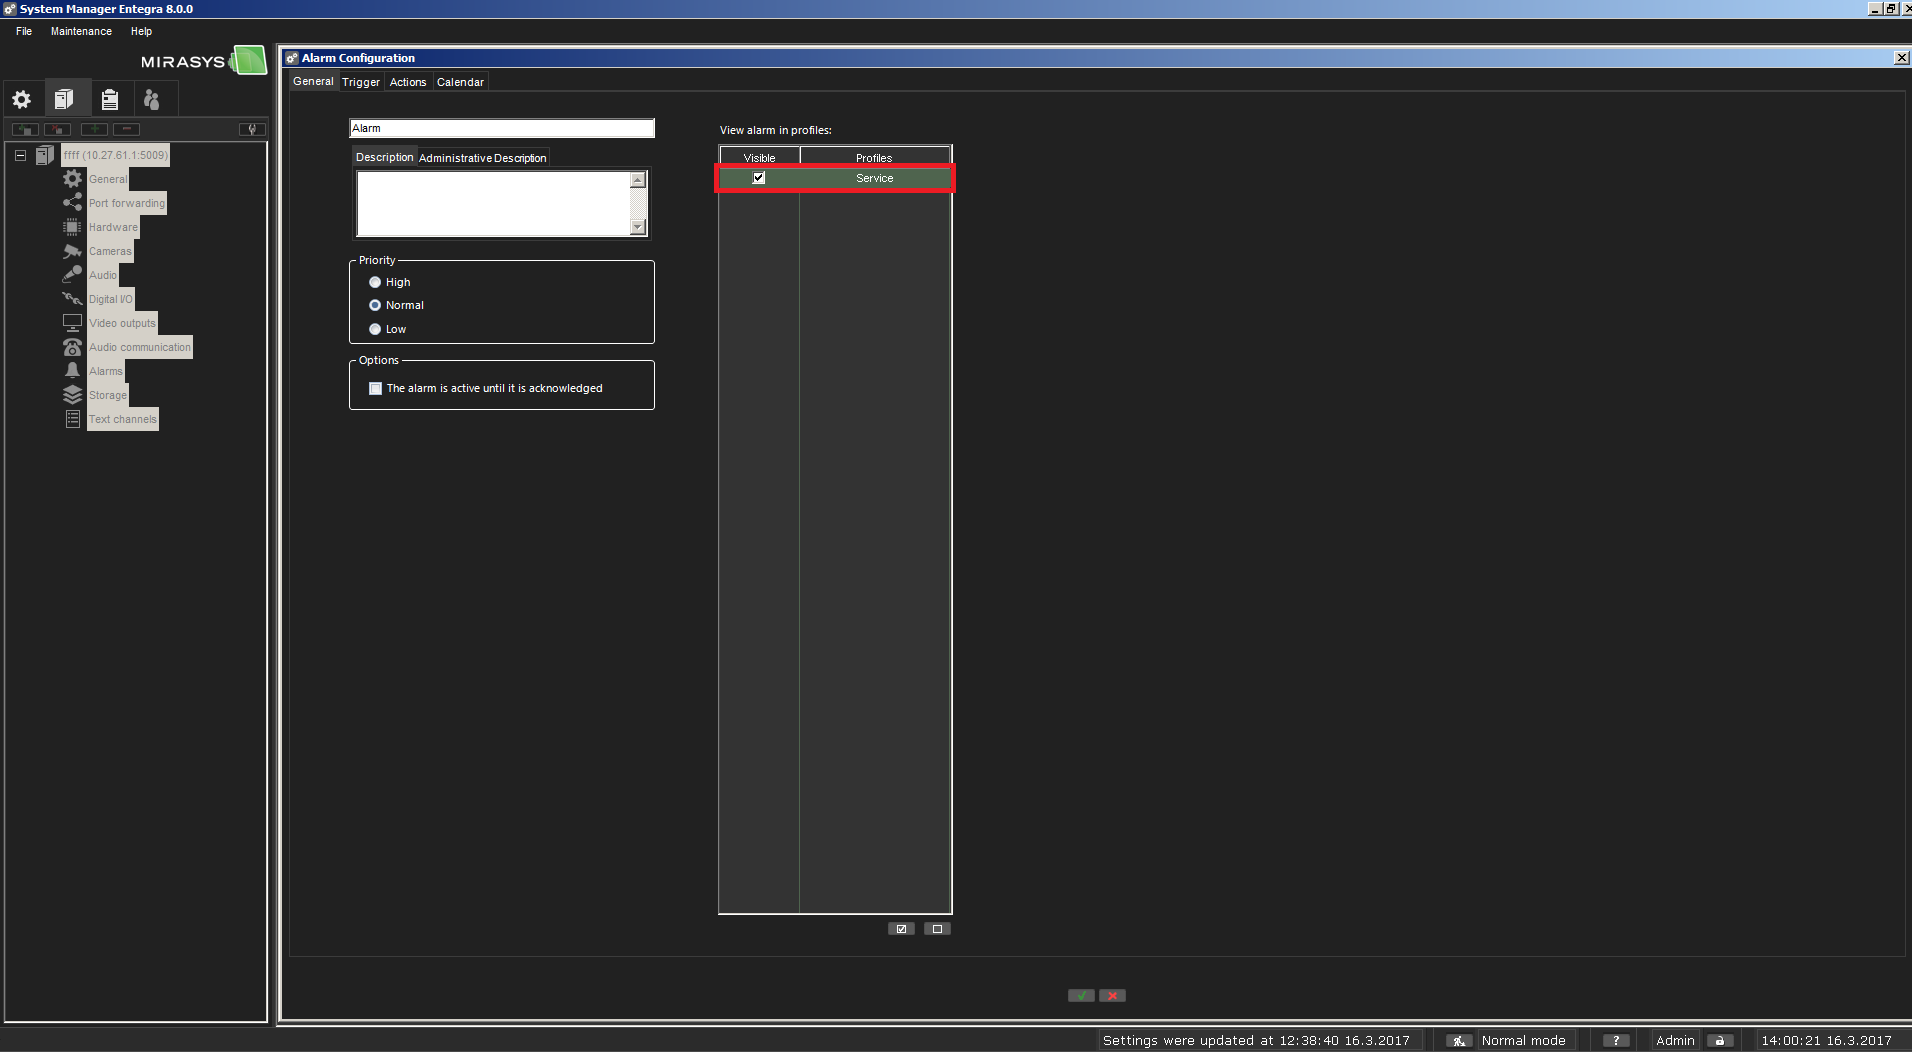
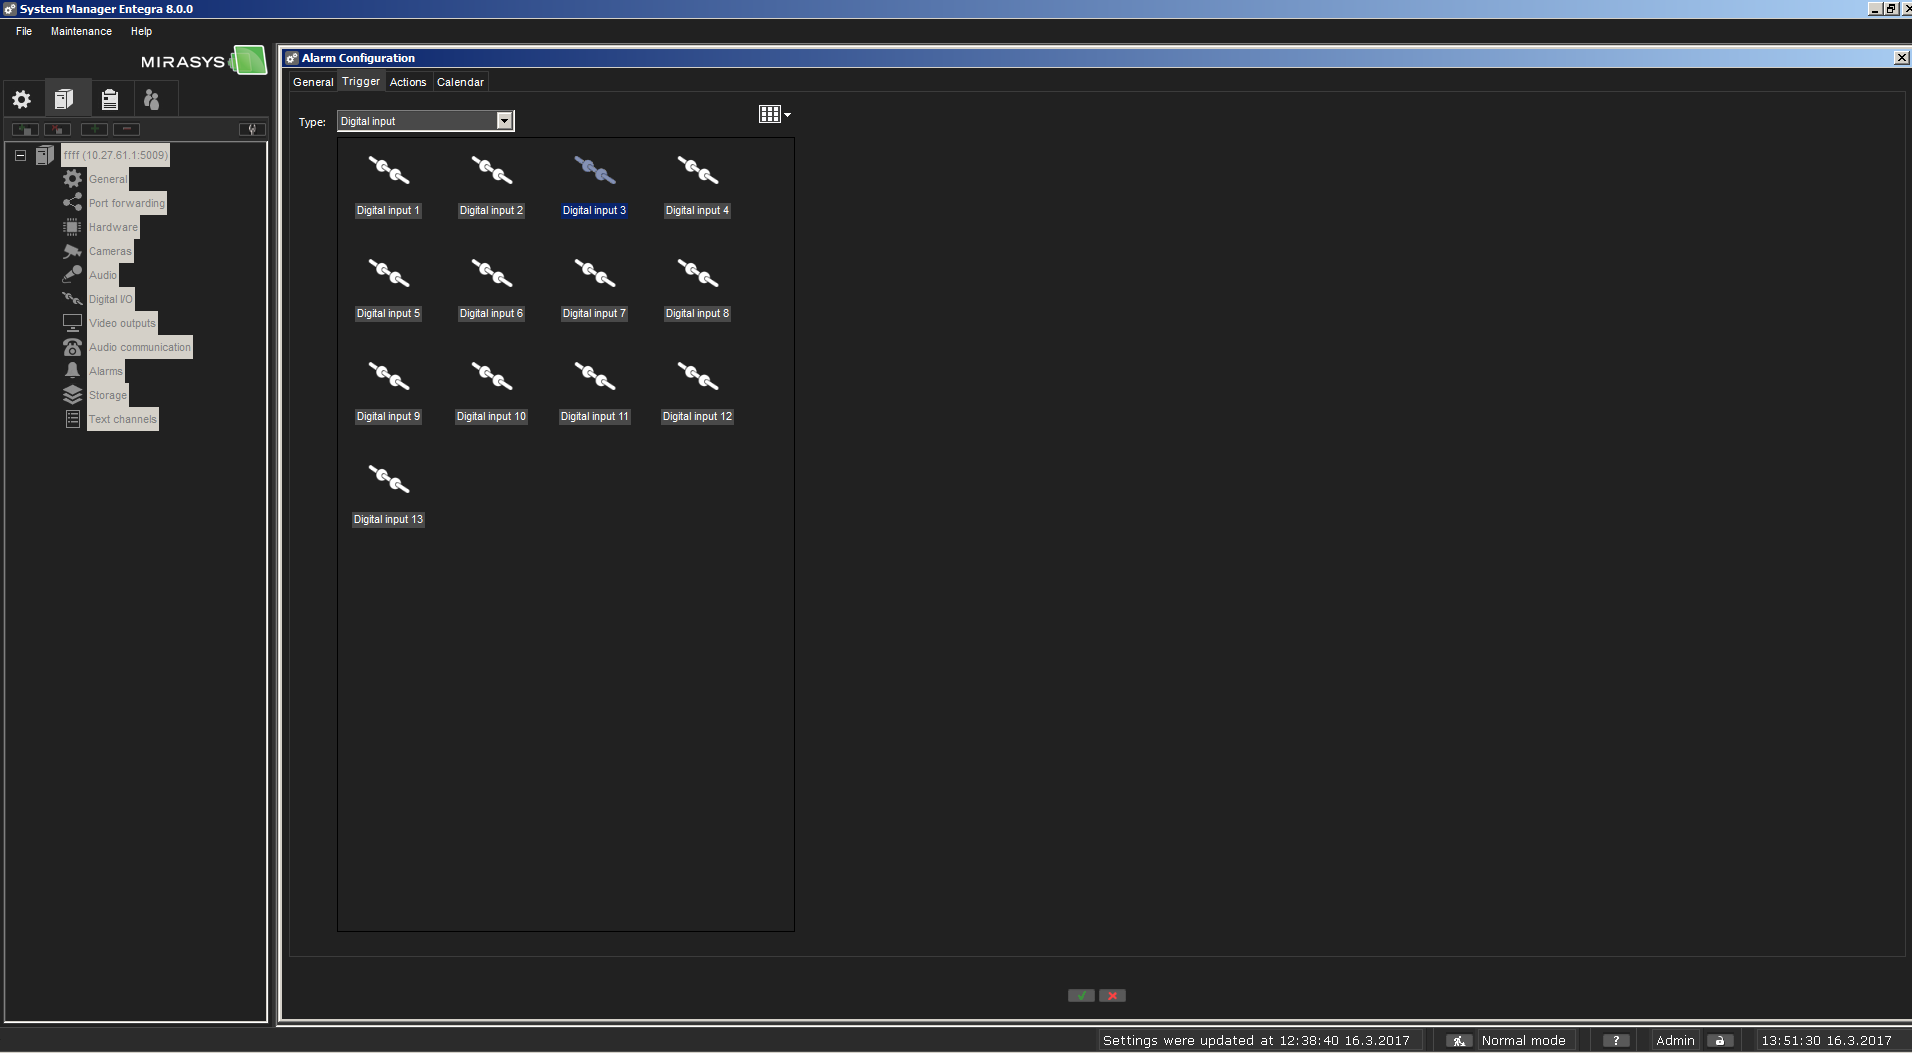
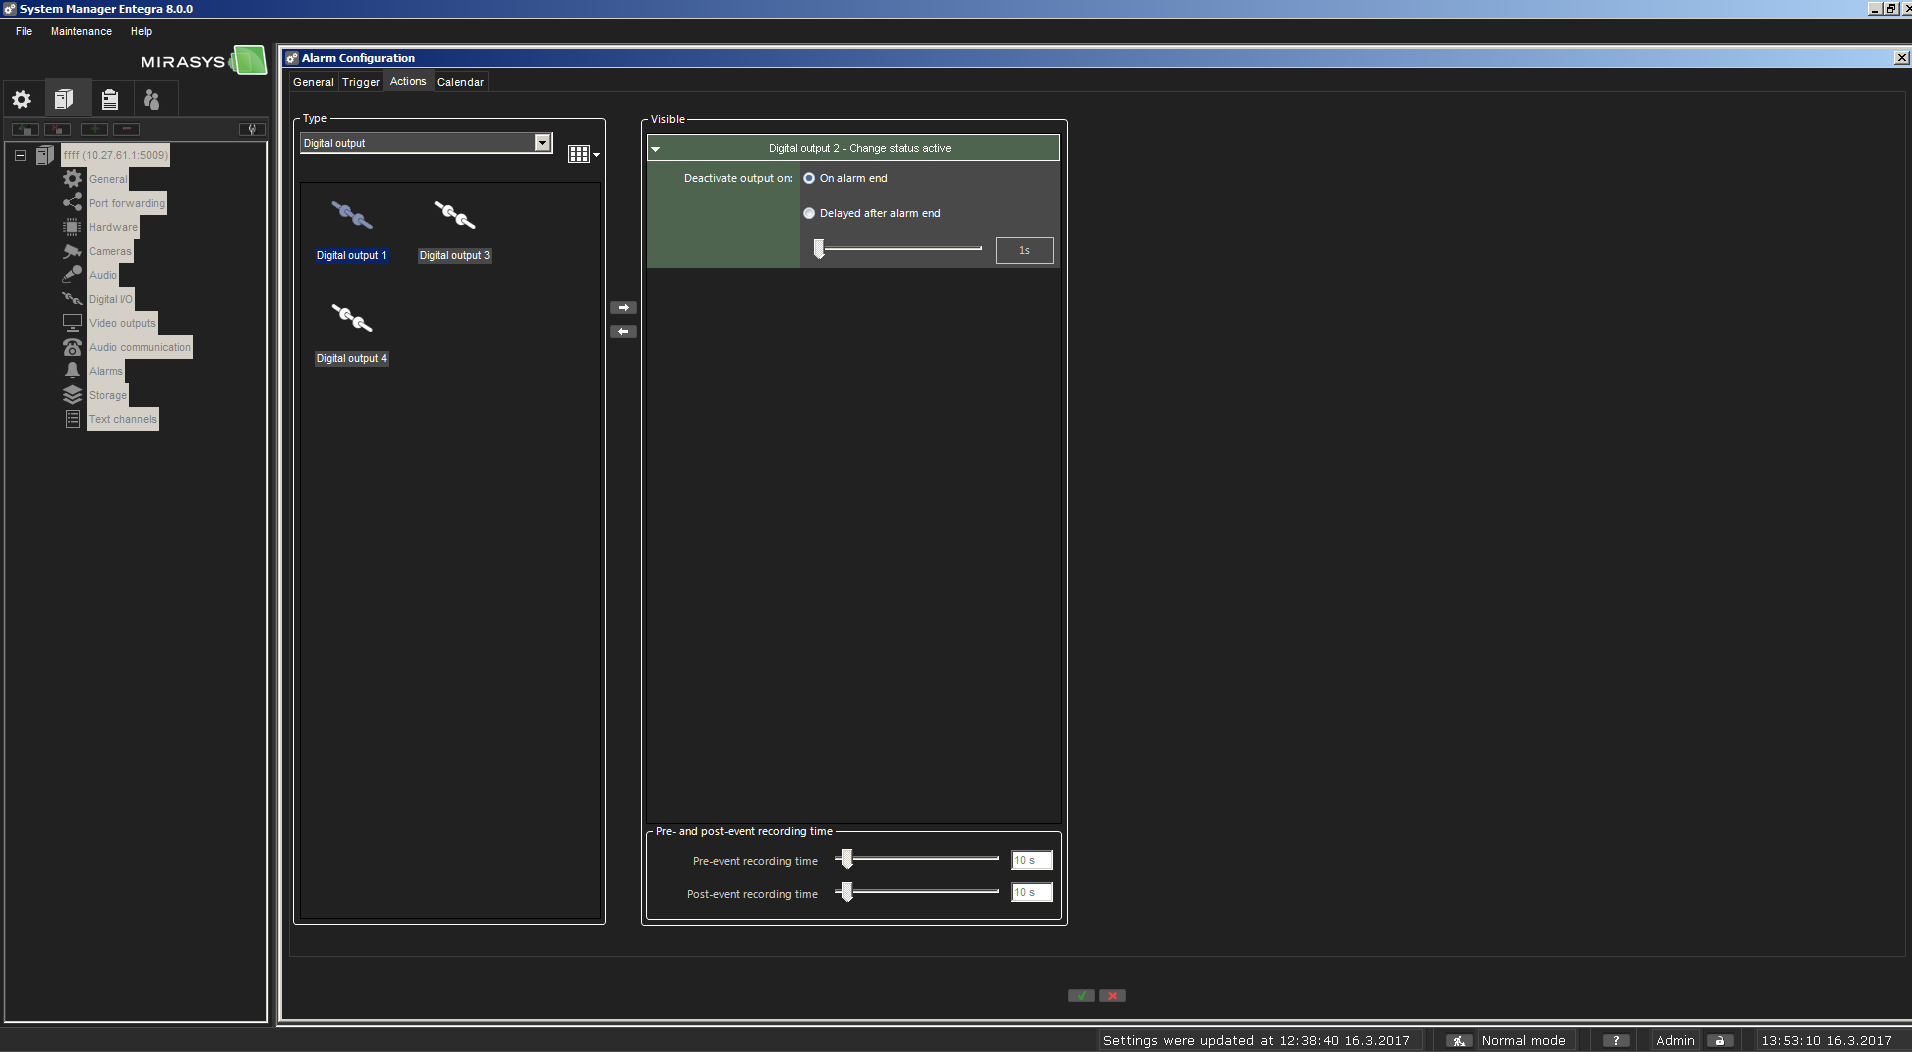
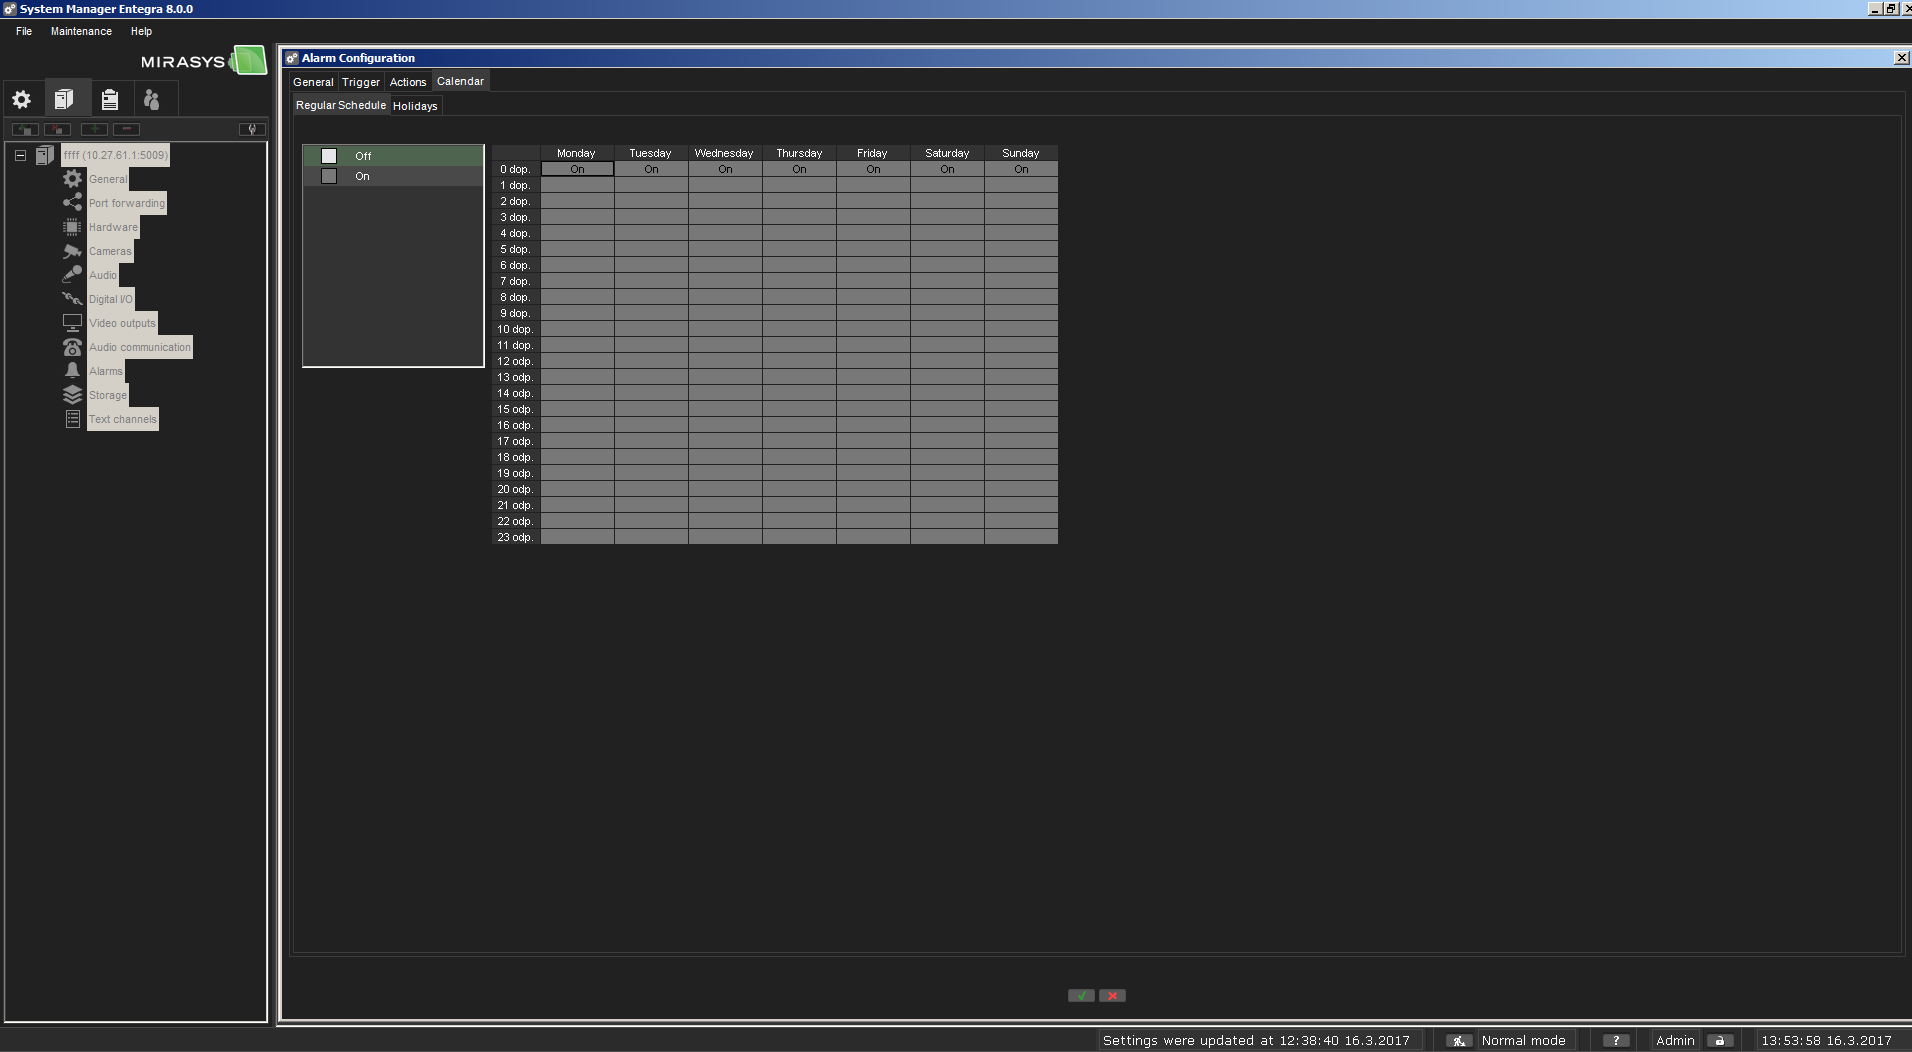
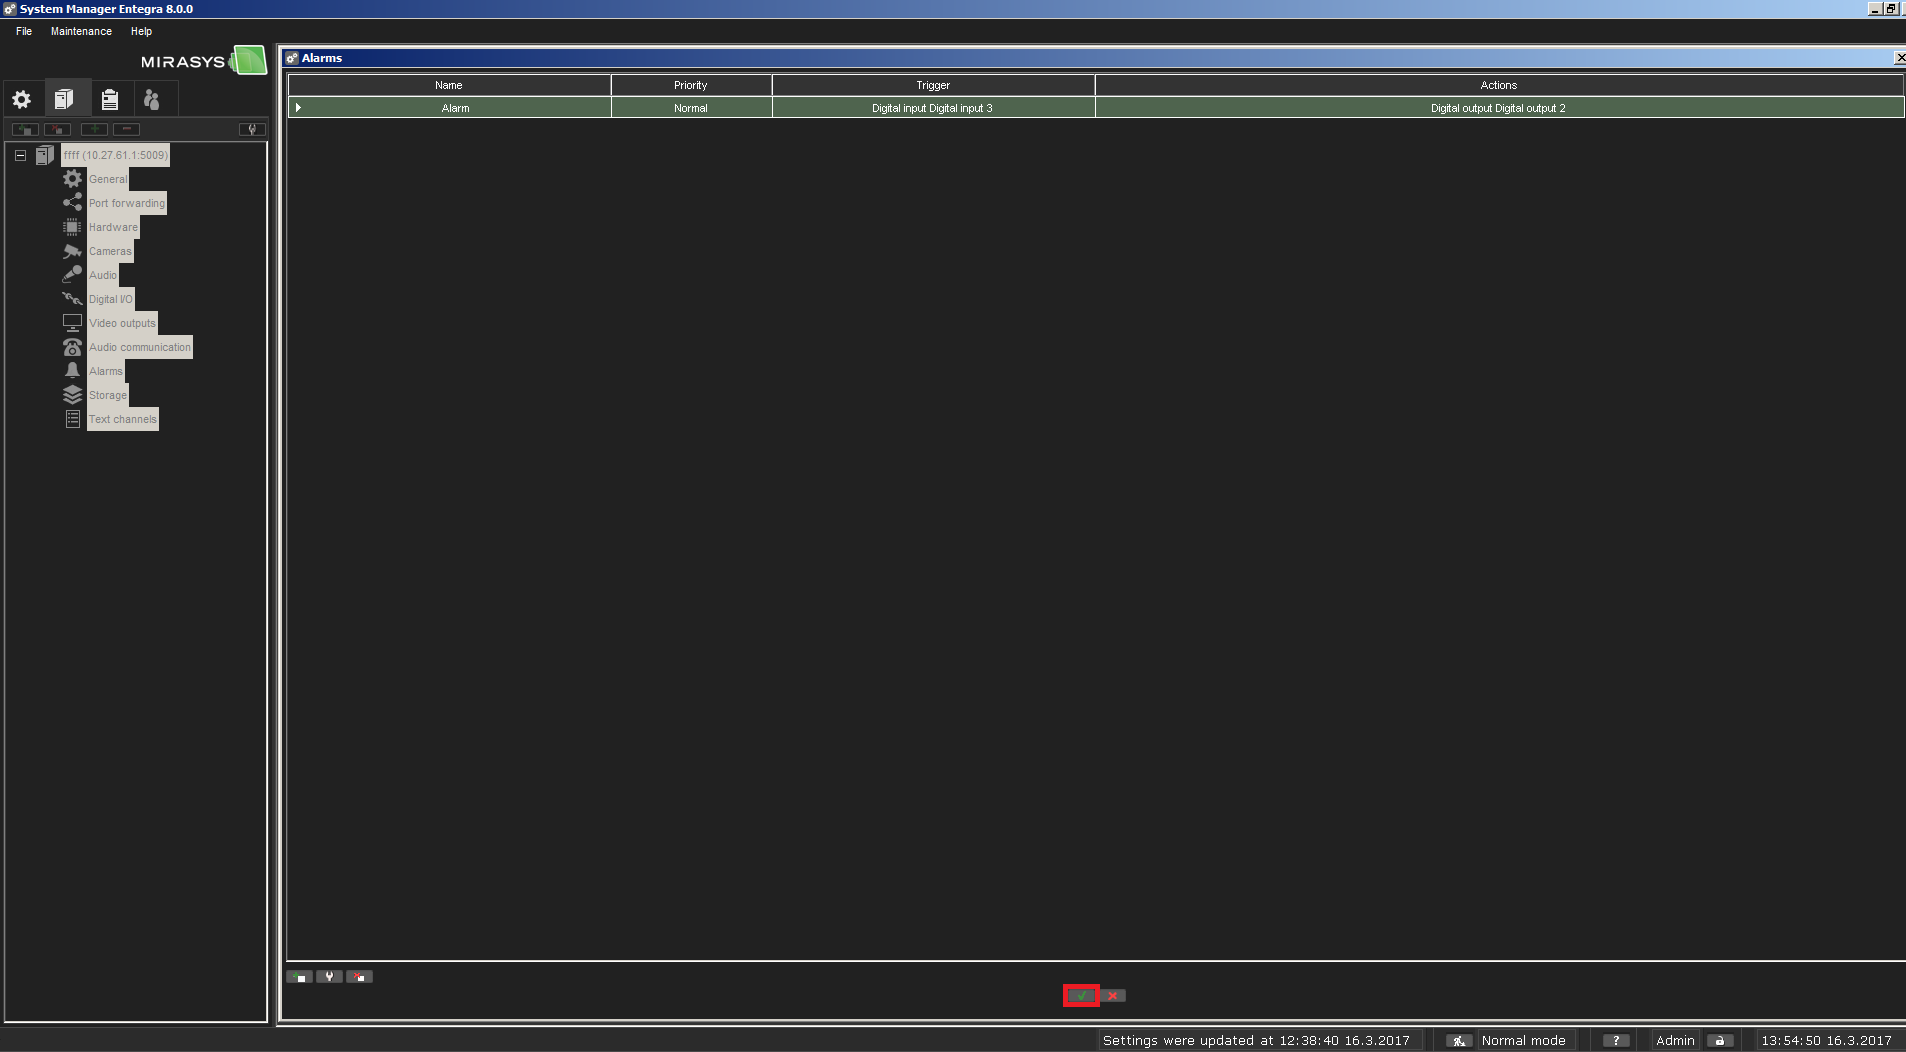
Open the Alarm page from the recorder menu. Click Add New Alarm.
 |
 |
 |
 |
 |
 |
 |
Version 7
Tested Functions
| Mirasys | 2N IP Intercom Version | Scan device | Video from 2N IP Intercom | Audio from 2N IP Intercom | Audio to 2N IP Intercom | Switch control | Events from 2N IP Intercom |
|---|---|---|---|---|---|---|---|
7.7.4 | 2.17.0.26.4 |
2N IP Intercom Settings
Enable parameter RTSP Server Enabled in menu Services / Streaming.
 |
 |
Tested Features
Double-click the shortcut icon DVMS System Manager on the desktop. The login screen is shown. Select the Master Recorder to which you want to connect to from the System address pull-down menu. Type your user name in the User name box, and your password in the Password box. Click Login. A progress bar is shown on the screen while the program loads. IP cameras can be configured through the Video tab of Hardware settings.
 |
 |
 |
Open the Cameras page from the recorder menu. In the Motion Detection tab, select the camera from the camera list. The General tab shows a summary of camera parameters in the upper part of the page. You can change the parameters in the lower part of the window. Set JPEG or H.264 as the codec for the camera. Click OK to exit the Camera Settings.
 |
 |
In the DVMS System Manager audio from 2N IP Intercom can be configured through the Audio Communication tab of Hardware settings. Set audio for communnication.
 |
 |
In the Spotter you should talk to 2N IP Intercom. After you add your camera, click Talk from bar of camera. And then you can talk and you can hear audio to 2N IP Intercom.
 |
In the Spotter you should set outputs of 2N IP Intercom. After you add your camera, set one of Digital outputs 2N IP Intercom. ![]() indicates that Digital output is on.
indicates that Digital output is on. ![]() indicates that Digital output is off. A click on the icon turns it on or off.
indicates that Digital output is off. A click on the icon turns it on or off.
 |
Used Symbols
![]() - Compatible
- Compatible
![]() - Work with limitation
- Work with limitation
![]() - Incompatible
- Incompatible