5.1 Installation and Login
After the installation is launched, the installation program will scan your PC for another 2N® Lift8 Service Tool version and ask you to uninstall the currently available version if identical with the new one. Use the system control panel Add or Remove programs to uninstall the existing product version for reinstallation or reconfiguration. If the versions are not identical, the original version will be uninstalled and a new application version will be installed. Then you will also be asked whether the configuration files should be removed and the whole application with a new, empty database should be installed.
Now the 2N® Lift8 Service Tool Setup Wizard has been launched. Follow the wizard instructions. Then select the installation location for the 2N® Lift8 Service Tool. C:\Program Files (x86)\2N TELEKOMUNIKACE\2N Lift8\ is used by default. Now the application will ask you to enable transmission of system data and software use surveys to help the 2N TELEKOMUNIKACE a.s. company improve the software quality, availability and performance. No confidential data shall be sent. You can participate in this effort voluntarily and cancel sending statistic data any time. Confirm or decline this cooperation and click Next to continue.
Now the wizard is ready to install the 2N® Lift8 Service Tool. Confirm user account administration notification to the Windows system if necessary. Another Start item and the application shortcut icon will be added automatically. Once installed, the application will start automatically.
Alternatively, use the command line for installation: select the installer file and define the manner and location parameters. See below for command explanation.
| Command | Description |
|---|---|
| /VERYSILENT | Installation runs on the background, no installer is open to the user. |
| /DIR="C:\..." | Set the installation location. |
| /NO-DRIVER=1 | No driver is installed for 2N® Lift8. |
| /LOG=file_name.txt | Create an installation course log to be displayed in the installer directory. |
|

Application Installation Command
Caution
- Make sure that the command line is started by admin. If it is started by a user, the editor authenticating window will pop up.
Warning
- There is an installer change in version 2.2.0. The installer is unable to remove the original application versions (up to 2.1.x) correctly and an installation error may occur. To avoid this, remove the original applications manually if you use versions lower than 2.2.0.
- Use the Start/Control panels/Programs/Uninstall program Windows menu to remove the application (this path applies to Windows 7 but can probably be used for other systems too). Select the application to be removed and click the right button to uninstall the program from your PC. Finally, you will be asked whether you really want to delete the existing configuration files. If you click NO, your configuration will be preserved.
Note
- The 2N® Lift8 Service Tool installation requires 500 MB of free disk space at least.
Now the 2N® Lift8 Service Tool is ready for use. Click the shortcut item on the desktop (see the figure below) or select the Start item to start the application.
 |
2N® Lift8 Service Tool Icon
After the application launch, the splashscreen gets displayed to inform you of the application manufacturer and current version. After the launch, you will be in the basic screen and Configuration / Parameters menu. Here an offline table of parameters can be prepared for you to export the data or view the diagnostic packages. Click Connect device to connect the CU in the Connect to device menu. Select the login mode: TCP or USB. TCP is selected by default. If you choose the Advanced settings, the list of all available connections to the 2N® Lift8 Central Unit will be displayed to the left in a clearly arranged tree structure. If you have installed the application for the first time, the default connection will be created automatically. This connection cannot be removed. Click New server and New group to create a tree structure of your own. The settings are saved by a successful CU connection. Select a connection and click Delete selected to remove a connection. Be sure to complete the connection parameters correctly to make the CU connection successful. Enter the connection name and the 2N® Lift8 Central Unit or 2N® Lift8 Server IP address in the public network. Use the DNS terms if available. Fill in the CU listening port (7007) or the Server port (7008). Ask your network administrator for the proper setting. Now enter your CU or Server Username and Password; see the figure below for an example. Select the connection from the CU list and press Connect or double click the selected CU with the left mouse button. The application will log you in to the 2N® Lift8 Central Unit. Take analogous steps to connect to the 2N® Lift8 Server. However, you cannot use double click in this case. Just select a connection and click Connect to server.
|
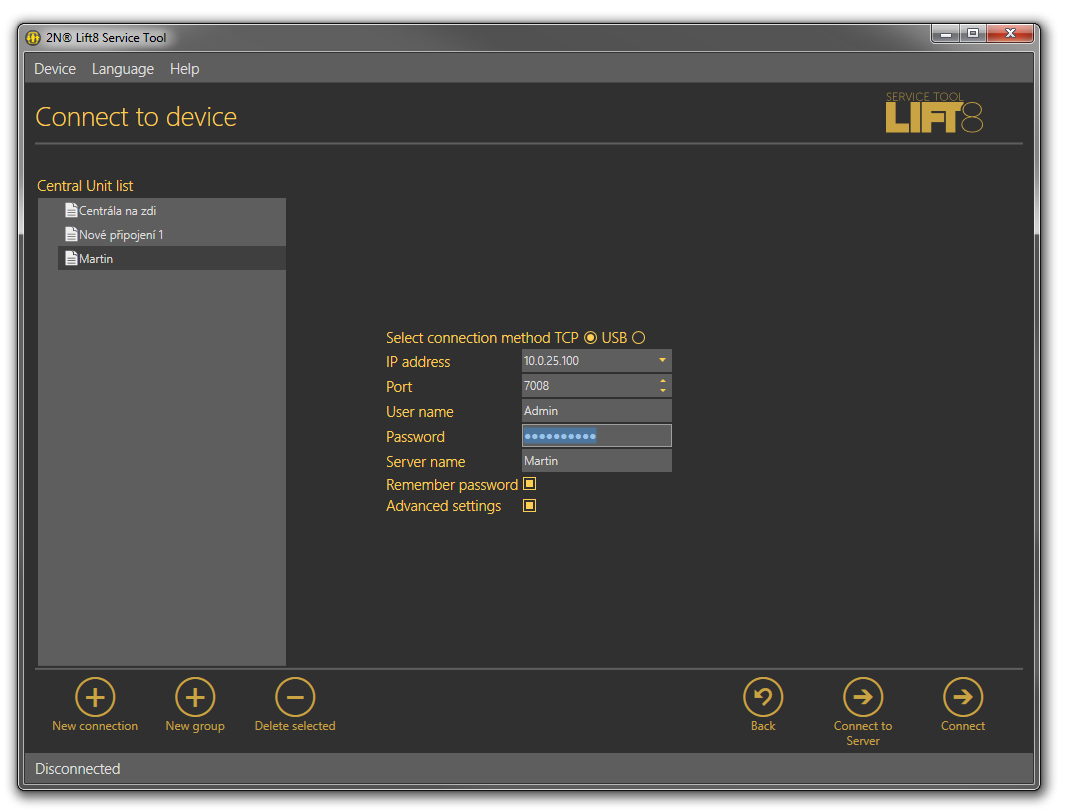
Application Window
Once connected to the Server, you can log in and go to the list of 2N® Lift8 Central Units connected to the Server. The 2N® Lift8 Central Unit list as configured on the given Server will be displayed including the following activity symbols: the red chain under the lift signals the Disconnected state between the Server and the Central Unit. The blue chain under the lift signals Connection established between the Server and the Central Unit and indicates that it is possible to get connected to the Central Unit. The green chain under the lift signals File transmission between the Server and the Central Unit. Click the Connect button or double click the selected unit to get connected to the CU.
|
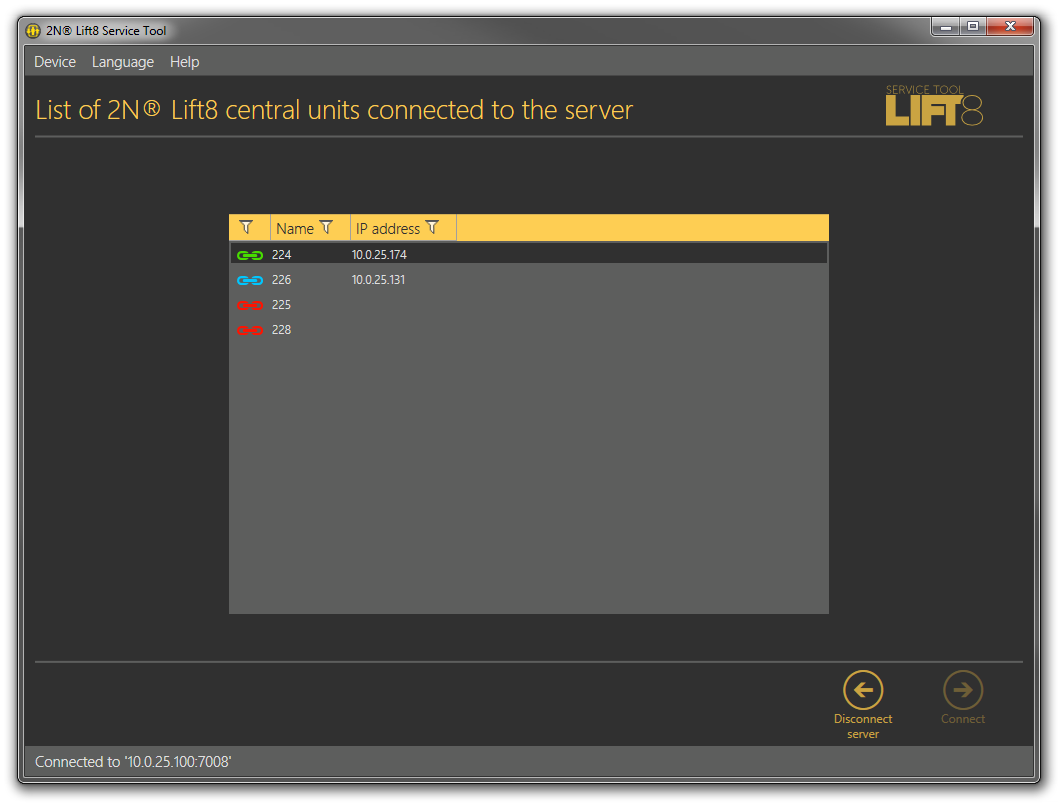
List of Central Units Connected to Server
If you use a USB cable for CU connection, select the USB connection type. The screen will change and the login name and password will only be visible. Enter the correct values. Refer to the text below for the default values. Now connect the CU and click Connect. The 2N® Lift8 Service Tool automatically finds the connected CU on the PC and starts downloading parameters and logs. Having completing the download, the 2N® Lift8 Service Tool is ready for work.
Warning
- Make sure that the USB port driver for the 2N® Lift8 Central Unit has been installed properly on the PC to avoid identification and login failures.
If a problem with non-compatible version of .NET occurs during installation, you should download the new .NETFX4.0 version from www.2n.com. You can use this link from the online manual.
Minimum operating system requirements: Windows Vista, 7, 8.
Tip
- Some Windows Vista versions may have problems while detecting a connected device. If a system message keeps announcing you that the device has not been recognised and driver installation has failed, follow the instructions below to solve the situation manually:
- Open the device manager and find the undetected hardware (marked with a yellow triangle).
- Display a menu for this device with the right mouse click and select Update driver.
- Click the option to find the driver in the PC.
- Click the option to select a driver from a list and select a 2N®Lift8 model instead of Complex USB device. Now the driver starts working and, whenever you connect the Central Unit to the same PC USB port, the device will be detected correctly.
- If there is no 2N® Lift8 selection, go one step back.
- Here enter the path to the driver file on the local disk and get the driver installed.
- The typical path is C:\Program Files (x86)\2N ... \ServiceTool\inf
Note
- Recommended hardware requirements
| OS | Microsoft Windows 10, Microsoft Windows 8 / 8.1 CZ, Microsoft Windows 7 SP1 CZ, Microsoft Windows Vista SP2 CZ |
|---|---|
| CPU | Equivalent Intel Quad Core i7 3.4 GHz |
| RAM | 8 GB |
| HDD | 500 GB |
| LAN | 100 Mbps Ethernet (LAN) |
| Other |
|
Caution
- Default values for CU connection:
- TCP
- Password: 2n
- Port: 7007
- USB
- Password: 2n