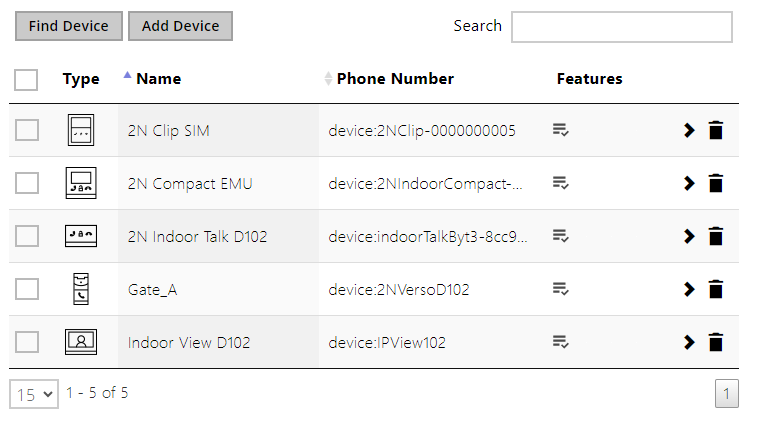
3.2.2.1 Devices
|
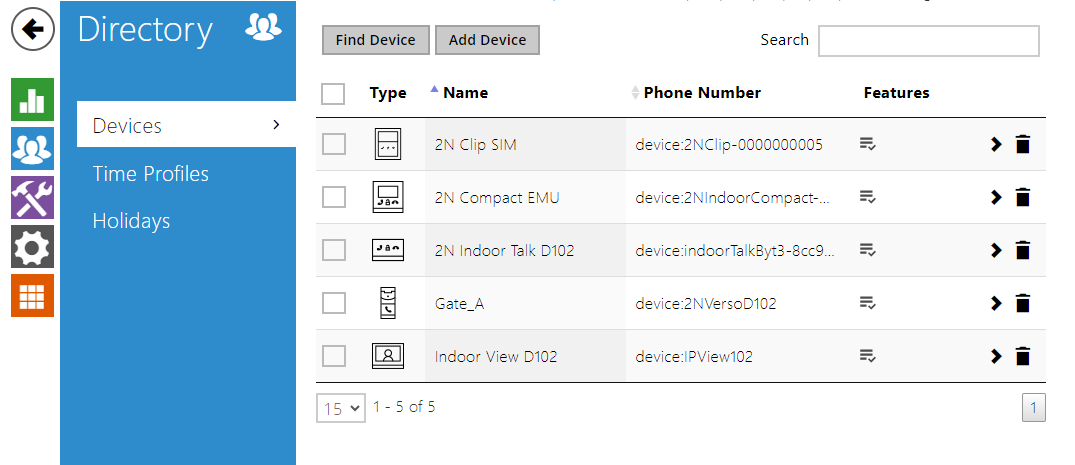
The Search function works as a fulltext search in names and phone numbers. It searches for all matches in the whole directory.
Press the button above the table to add a Device. Or, search a device in the LAN and then add the device as a new contact to the Directory. Click ![]() to show the device details.
to show the device details.
The ![]() icon helps remove a device from the list deleting all its data. You can arrange the list according to the name or feature (
icon helps remove a device from the list deleting all its data. You can arrange the list according to the name or feature (![]() indicates that the device may be displayed,
indicates that the device may be displayed, ![]() indicates that incoming calls are allowed to the device,
indicates that incoming calls are allowed to the device,  indicates the feature of the device to which the call started with a short call button press is created and
 ![]() indicates the feature of the device to which the alarm call started with a the doorbell button press is created). One list page can include 15, 25 or 50 devices.
indicates the feature of the device to which the alarm call started with a the doorbell button press is created). One list page can include 15, 25 or 50 devices.
 |
 |
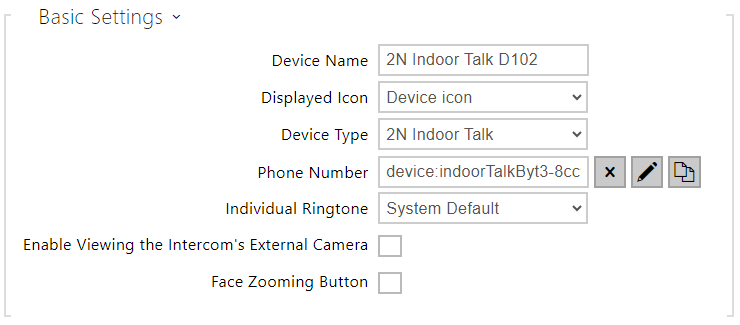
- Device Name – enter the device name for the selected Phone Book position. This parameter is optional and helps you find items in the Phone Book more easily.
Phone Number – set the phone number for the call to be directed to. Enter sip:[user_id@]domain[:port] for Direct SIP calling, e.g.: sip:200@192.168.22.15 or sip:name@yourcompany. Enter device:device_name for calls to the 2N® IP Mobile application. Set the device name in the mobile application. Enter/1 or/2 behind the phone number to specify which SIP account shall be used for outgoing calls (account 1 or 2). Enter /S or /N to force an encrypted or unencrypted call respectively. The account and encryption selections can be combined into the suffix /1S, for example.
Clickto edit the phone number details.
Call Type – set the scheme in the called destination URI. If you choose Without scheme, the URI is completed with the data from the SIP account settings. Further settings include direct SIP calls (sip:), 2N local calls (device:), Crestron calls (rava:) or calls with video management systems, e.g. AXIS Camera Station (vms:).
Destination – Set the other parts of the called destination URI. As a rule, it contains the number, IP address, domain, port or device identifier. Enter an asterisk (*) for calls to the VMS.
Preferred SIP Account – SIP account 1 or 2 is primarily used for calling.
Call Encryption – set mandatory call encryption or no encryption.
Door Opening – via callbacks.
- Individual Ringtone – set an individual ringtone for specific contacts to distinguish them better
 |
- Start call with a short press – a phone call to this device will be set up after a short press of the call button.
- Start call with a long press – a phone call to this device will be set up after a long press of the call button.
 |
- Start call with a dorbell button press – a phone call to this device will be set up after the call button is pressed. Set alarm call activation for the doorbell in the HW / Digital inputs / Doorbell button section.
 |
- Code after short press – code assigned to a short press of the unlock button. Used for remote unlocking of the entrance door, for example. Make sure that the code includes a minimum of two characters for door unlocking via a keypad and one character for door unlocking via DTMF. Four characters at least are recommended.
- Code after long press – code assigned to a long press of the unlock button. Used to remote unlocking of the entrance door, for example. Make sure that the code includes a minimum of two characters for door unlocking via a keypad and one character for door unlocking via DTMF. The supported characters also inlcude * or #. Four characters at least are recommended. Code after the long press works only during the call.