How to Set Static IP Address
2N® Access Commander (Linux based) is configured to obtain the IP address from the DHCP server by default. In case you have no DHCP server in your network or wish to assign the static IP address to the virtual server, please follow the steps described below.
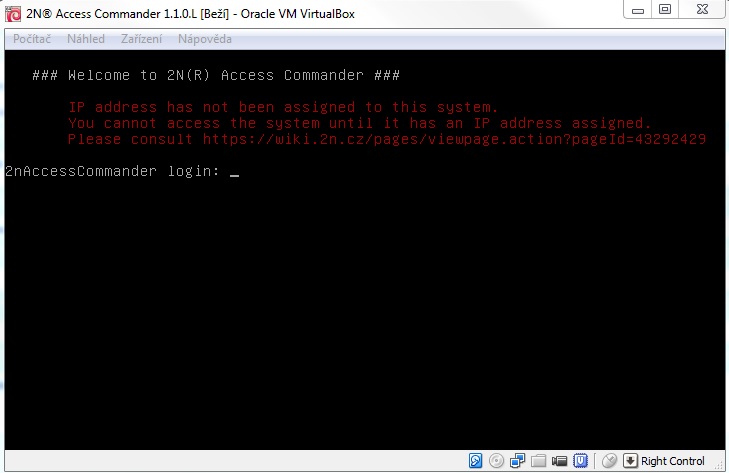
Run the virtual server with 2N® Access Commander and open the console. You should see the following message:
Note
- In case the IP address has been assigned to 2N® Access Commander and you want to access it remotely, you can use SSH connection. Any SSH client will work, we recommend you to use putty.
- Sign in with the following credentials:
- login name: root
- password: 2n
Edit /etc/network/interfaces using a text editor, for example "nano" or "mcedit"
To run the text editor enter one of the commands below:
mcedit /etc/network/interfaces
ornano /etc/network/interfaces
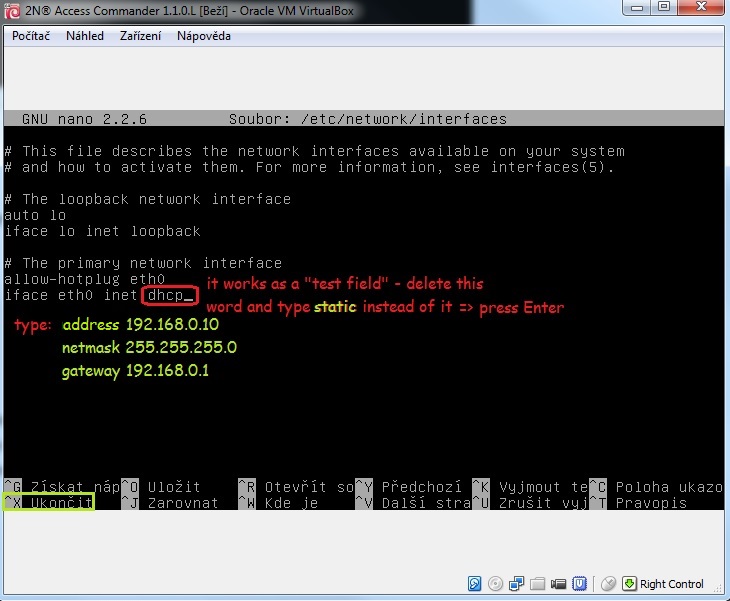
Search for a line containing "iface eth0 inet dhcp" and change it to (see the figure below):
iface eth0 inet static
address 192.168.0.10 – IP address
netmask 255.255.255.0 – subnet mask
gateway 192.168.0.1 – default gateway
- Save the changes:
- mcedit – press F10
- nano – press "ctrl+x" and then "y" to confirm
- Add DNS servers to /etc/resolv.conf using a text editor:
- Enter one of the commands below:
- mcedit /etc/resolv.conf or
- nano /etc/resolv.conf
- Enter one of the commands below:
- Add the following lines to the file:
- nameserver 8.8.8.8 – primary DNS server
- nameserver 8.8.4.4 – secondary DNS server
- Save the changes:
- mcedit – press F10
- nano – press "ctrl+x" and then "y" to confirm
Apply the changes either by restarting the virtual server or the networking service.
Use one of the commands below:
reboot – restart the virtual server or
service networking restart – restart just the networking service
Note
- If you are connected via SSH, you will be disconnected at this point.
Now that all the steps above have been taken, your 2N® Access Commander is configured successfully to use the static IP address.


