4.2 Users
User List
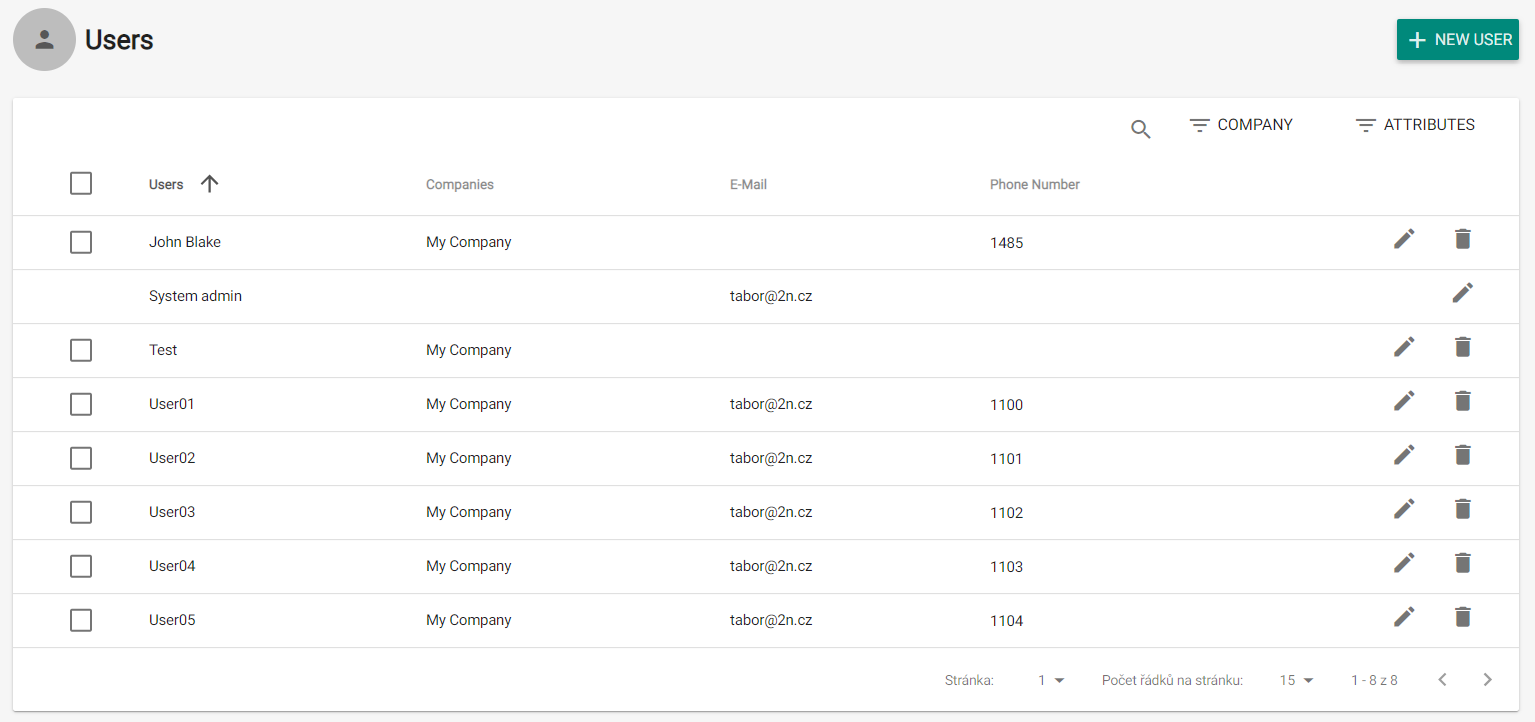
The user list shows all users added to 2N® Access Commander. You can filter users by companies or just find a user by its name, e-mail or phone number.
- Turn on user attendance monitoring
- Add user to group
- Bulk delete user
- Set access validity term
- Assign an access PIN code to the user(s) with no PIN/QR code assigned.
- Assign an access QR code to the user(s) with no PIN/QR code assigned.
- Assign a mobile key to the user(s) with no mobile key assigned.
Note
- Make sure that an e-mail address si completed for the user to be assigned an access code or mobile key.
Add user to 2N® Access Commander
- Select the Users card.
Select .
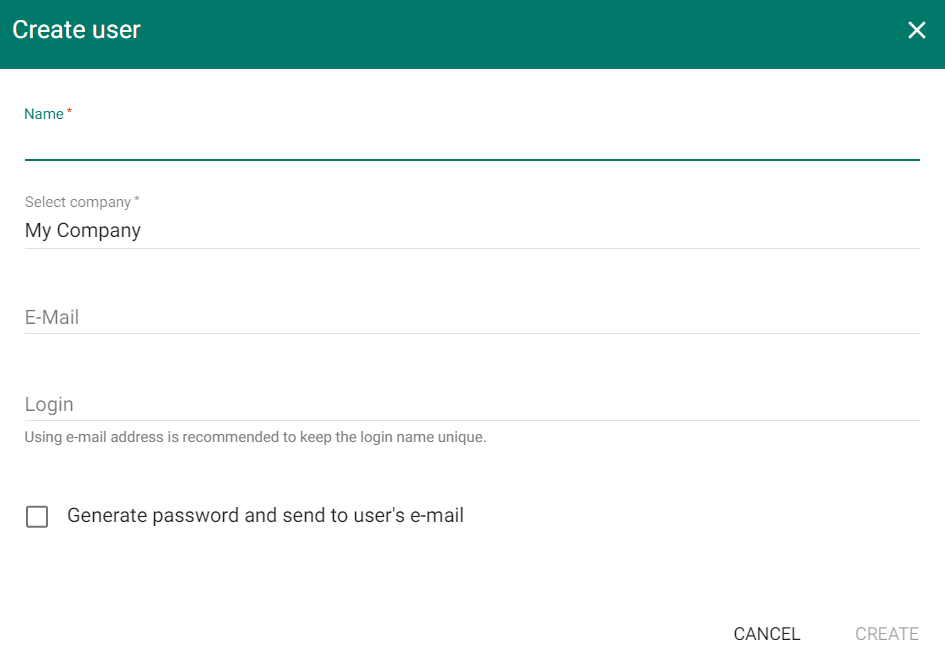
- Complete mandatory data: the new user’s Name and Company.
You can complete the user's e-mail address and create Login data and generate a password for the user.
Caution
- Make sure that the SMTP module is on to send login data e-mails to the users. Refer to 3.2 E-mail for SMTP settings.
Press Create.
Once added, the administrator is redirected to the user card and can be added to Groups and configured (Cards, Phone numbers, Switch codes...).
Use the user detail to set all user, user access and phone number parameters.
1. Account Settings
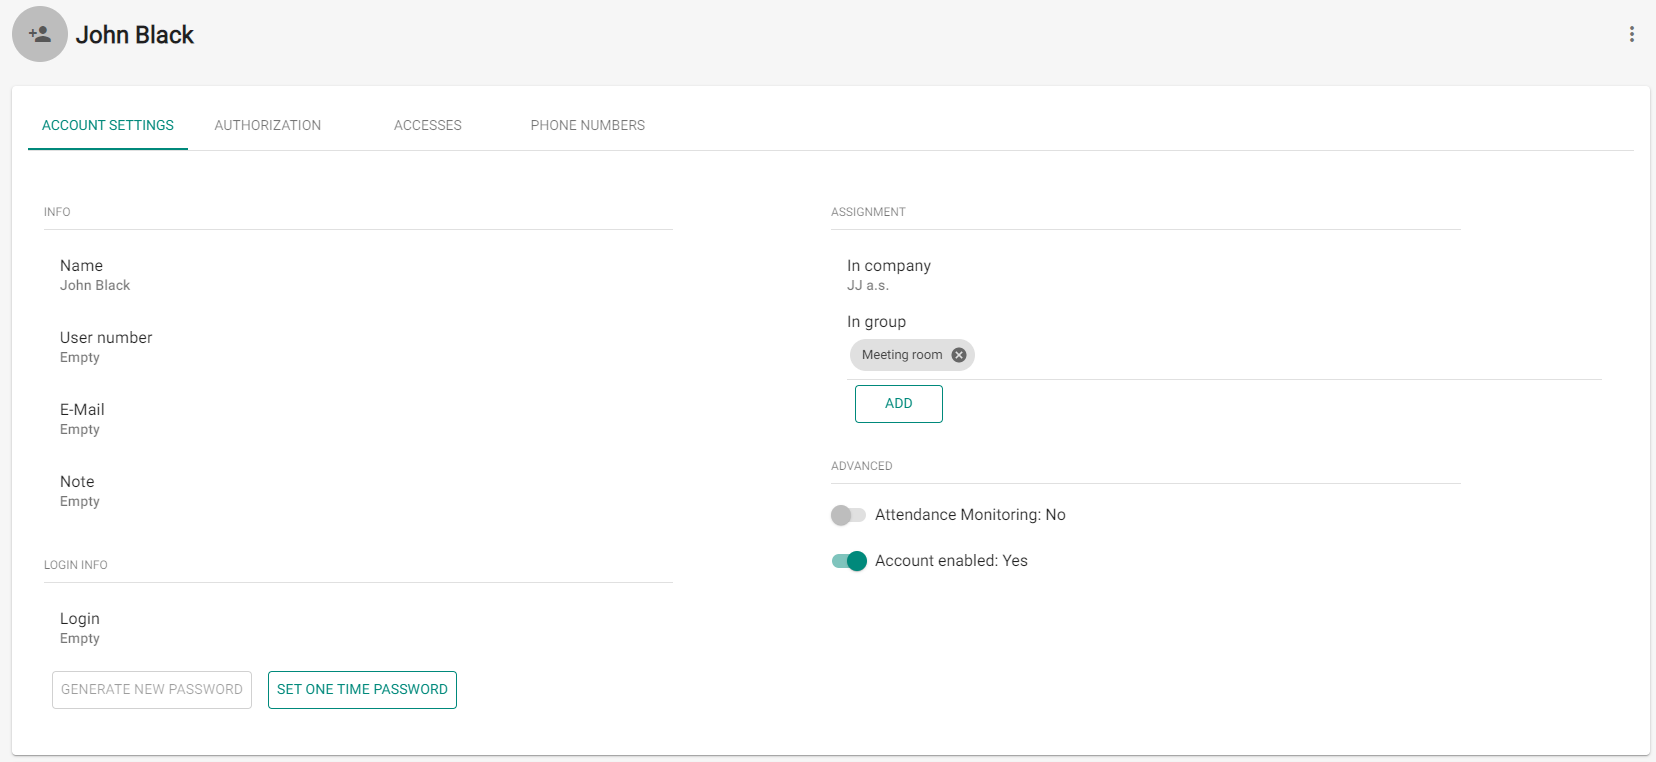
- Name – enter the user name for 2N® Access Commander and the 2N IP intercom.
- User number – use the number for external system administration.
- E-mail – enter the address to which 2N® Access Commander user account information shall be sent.
- Note – add optional notes.
- Login – set the user login name.
- Generate new password – send an e-mail to the user (provided the user e-mail address and login are completed) with a newly generated password. The user shall change this password upon its first login to 2N® Access Commander.
- Set one time password – set a one-time password just for the first login. Change the password after the first login.
- In company – display the company assignment.
- In group – display the group assignment. The user may be assigned to more groups than one within a company,
- Attendance Monitoring – make sure that the access card, Bluetooth authorization or fingerprint are set for the user to enable Attendance Monitoring.
- Account enabled – if the account is disabled, the user has no 2N® Access Commander login rights, no notifications are sent to the user, the user access to devices is deactivated and the user phone number cannot be called. Once the account reactivated, all the user actions are available to the full extent.
2. Authorization
- A user can be assigned user, attendance and access management authorizations:
Attendance management – an attendance manager can monitor and edit attendance and view the access log of assigned users.
Caution
- Attendance management is not possible without assigned groups.
Visitor management – a visitor manager can: create visitors in assigned companies and manage their membership in assigned groups, view the visitors’ access log.
Door control – the authorized user can: view the camera feed, open and lockdown assigned devices; view the devices’ access log, their states, and security events in the system log.
Caution
- Door control is not possible without assigned devices.
- User management – a user manager can: create and edit users and visitors; manage group membership in the manager’s company; view the users’ access and system log.
Access management – an access manager can: manage groups, time profiles, access rules and visitors in the manager’s company; view related changes in the system log and the company’s access log.
Administrator access – an administrator has full control over all companies.
3. Accesses
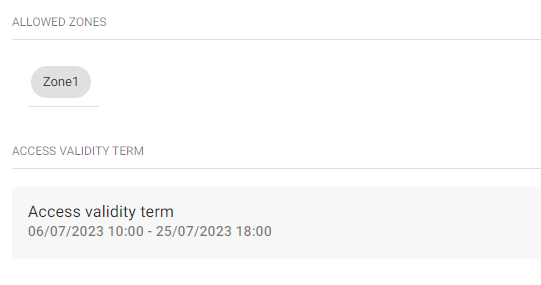
- Allowed zones – display the zones to which the user has access via the access rule.
- Access validity term – set the access rule validity. You can set from, to or both.
- Card – enable manual setting or automatic reading of the user card number.
- Identification number – set the user access card ID. The access card ID is a sequence of 6–32 characters of 0–9, A–F.
- Add – add a user card by tapping the card on a reader or entering the ID via the keypad. The ID must be a hexadecimal number consisting of 6 characters at least. Each user can be assigned up to two access cards.
- Virtual Card ID – set the user virtual access card ID. Each user can be assigned just one virtual card. The virtual card ID is a sequence of 6–32 characters of 0–9, A–F. The virtual card ID is used for user identification in devices connected via Wiegand.
Tip
- 13.56 MHz + 125 kHz USB RFID card reader (9137421E) – install the card reader driver. Download from 2N® Access Commander or www.2n.com.
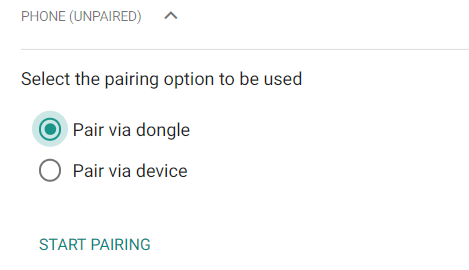
- Phone – refer to 4.2.1 Bluetooth for Bluetooth settings.
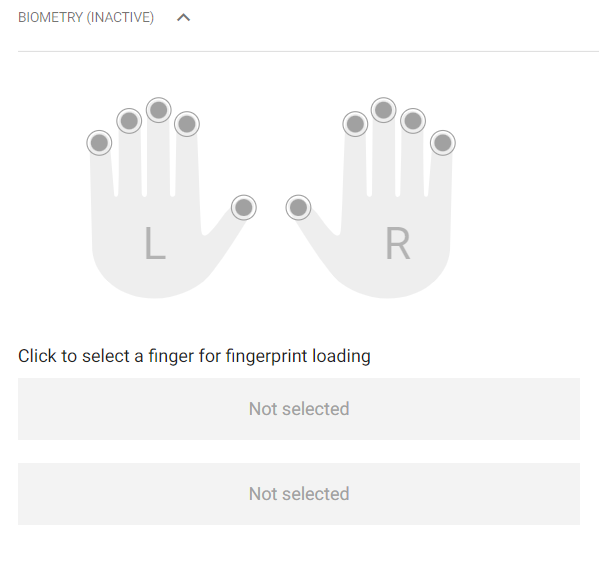
- Biometry – display the finger selecting window for fingerprint enrollment. Each user can enroll up to 2 fingerprints. Use an external fingerprint reader for enrollment. Make sure that the 2N® USB Driver is installed. Download it from 2N® Access Commander or www.2n.com. An uploaded user fingerprint can be used for the following actions:
- Open door
- Silent Alarm. Only if Open door is active.
- Automation F1 – the FingerEntered event is generated in Automation. F1 helps identify the fingerprint in Automation.
- Automation F2 – the FingerEntered event is generated in Automation. F2 helps identify the fingerprint in Automation.
Note
Fingerprint loading procedure:
- Select a finger and click it.
- The Fingerprint loading window is displayed.
- Put the selected finger on the reader (repeat 3 times upon request).
- You will be informed that your fingerprint has been scanned successfully after the third scanning.
- Click Create to complete the process.
- PIN / QR code – assign either a PIN code or a QR code for user access. A user cannot have both the codes simultaneously.
- + PIN – automatic generation of a 6-digit PIN.
- + QR – automatic generation of a QR code.
Note
- – show / hide the PIN code characters. Show the QR code including the printing / e-mail sending option.
- – edit the automatically generated PIN code. The PIN may contain 2–15 digits.
- – send the PIN / QR code by e-mail. Make sure that the user e-mail is completed before e-mailing the QR code.
- User codes – set the switch codes and user PINs.
Switch codes – set your own switch activation codes (door lock, e.g.). The switch code opens the door lock via a keypad like the DTMF code.
PIN code – set the user's personal numerical access code. The code must include two characters at least.
Note
- In case the Silent alarm is on, the codes must be every other digit in a sequence. For example: if the access code is 0000, then the silent alarm code is 0001. Make sure that the code length is the same, i.e. the silent alarm code is 0000 for the access code 9999 and so on.
- Car license plates – set the user car license plate number.
4. Phone Numbers
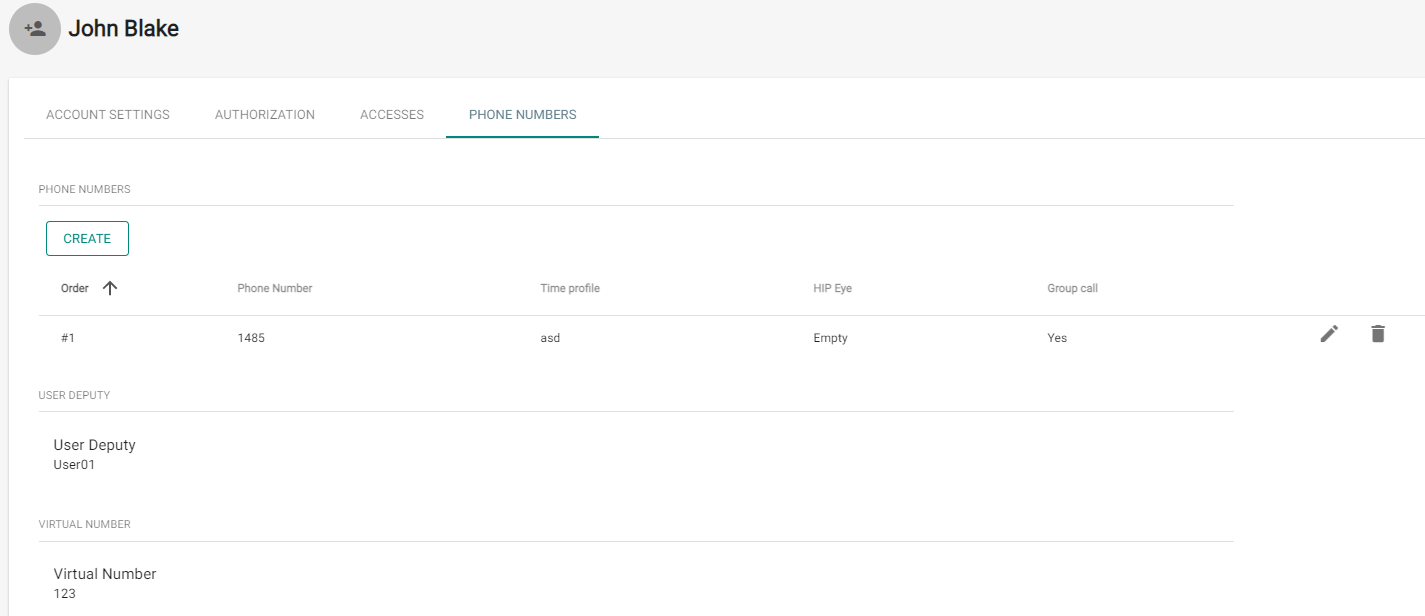
- CREATE – set the following parameters:
- the phone number sequence to be dialled first. If the first number is unavailable, the second, third... number is dialled and so on.
- the station phone number to which the call shall be routed.
- the time profile for phone number restrictions.
- IP Eye address – used by 2N® IP Eye for displaying a camera image window; useful for video phone users without displays.
- Group call, which means a simultaneous call to the next phone number; when the call is answered via one phone, the other phone will stop ringing.
- User Deputy – select the user from the list to be directed calls at in case the original user is unavailable.
- Virtual Number – set a number to be used for user calling via the numeric keypad. The number can have two to four digits. Virtual numbers are not associated with the user's own phone numbers. They can be part of another numbering plan, which is independent of phone numbers and can thus hide user phone numbers.
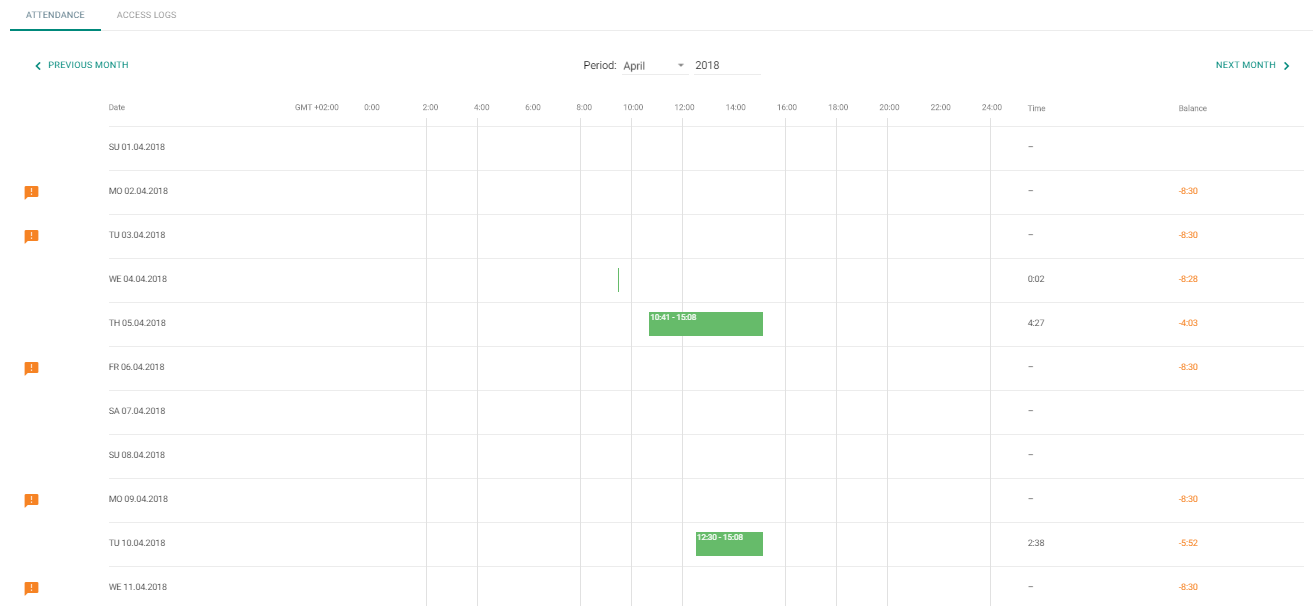
5. Attendance
Attendance data is displayed on the user detail.
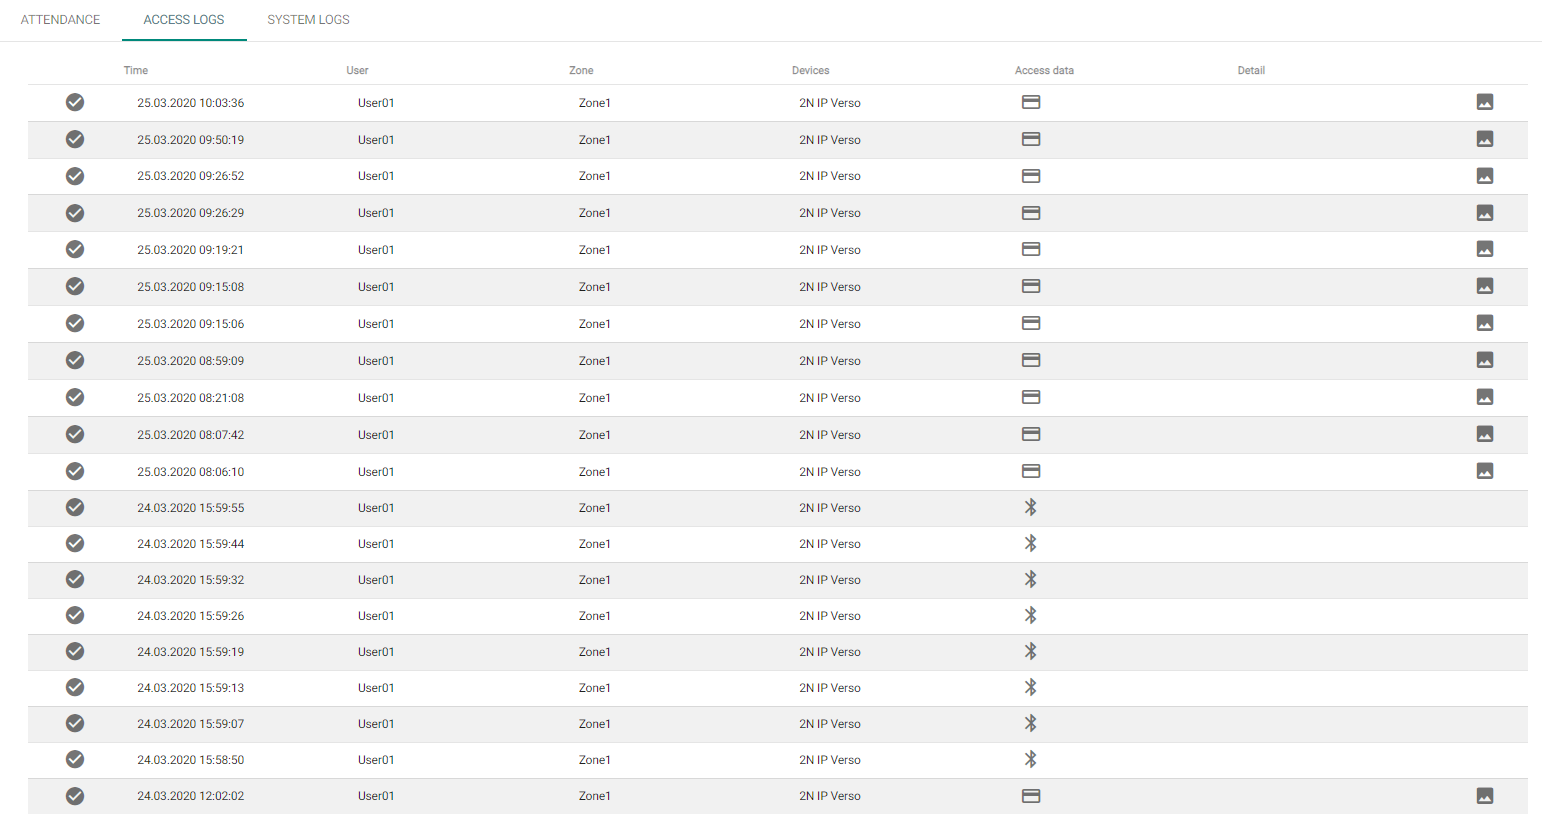
6. Access Logs
Filtered access logs. This tab shows you all the passages and keypad clicks on all the devices that are added to 2N® Access Commander.
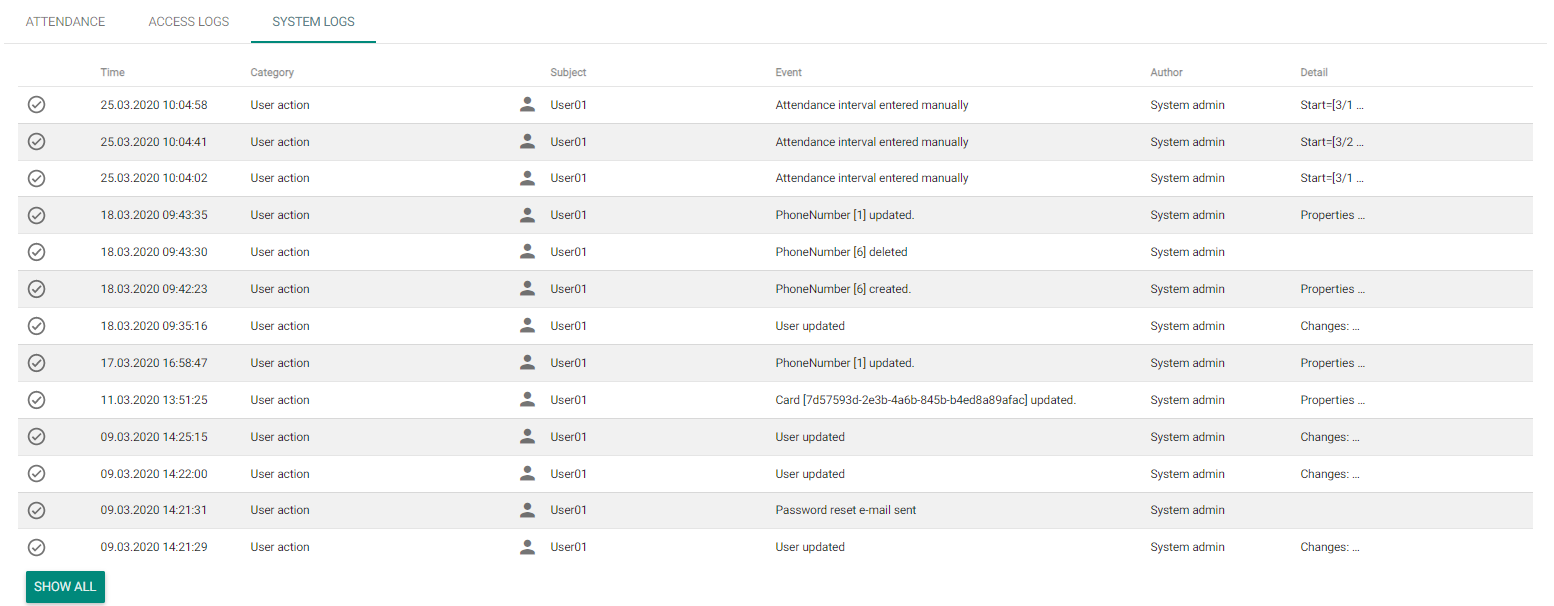
7. System Logs
The system logs include changes on the displayed user only.

