2. Express Wizard for Basic Settings
Web Configuration Interface Login
The 2N device is configured via a web configuration interface. You need to know the device IP address and domain name to get access. Make sure that the device is connected to the local IP network and properly powered.
Configuration using a domain name
Enter the domain name as hostname.local (e.g. 2NAccessUnitM-00000001.local) to connect to the device. The new device Hostname consists of the device name and serial number. See below for the device name formats in Hostname. The serial number is entered without hyphens. You can change Hostname in System > Network later.
| 2N Device | Device Name in Hostname |
|---|---|
| 2N Access Unit | 2NAccessUnit |
| 2N Access Unit 2.0 | 2NAccessUnit20 |
| 2N Access Unit M | 2NAccessUnitM |
| 2N Access Unit QR | 2NAccessUnitQR |
Login based on a domain name is advantageous if the dynamic IP address is used. While the dynamic IP address changes, the domain name remains the same. It is possible to generate certificates signed by a trusted certification authority for the domain name.
Login with IP address
Enter the IP address into your favourite browser. We recommend you to use the latest Chrome, Firefox or Internet Explorer (Edge) versions as the 2N device is not fully compatible with earlier browser versions.
Login details
Use the name "admin" and password "2n" (i.e. default reset password) for your first login to the configuration interface. We recommend you to change the default password upon your first login; refer to the Password parameter in the Services > Web Server menu. Remember the password well or put it down. It is because if you forget the password, you will have to reset the intercom to default values (refer to the respective Installation Manual) thus losing all your current configuration changes.
LAN Connection Setting (applies to 2N Access Unit, 2N Access Unit 2.0 a 2N Access Unit M)
Automatic IP address retrieval from the DHCP server is set by default in the device. Thus, if connected to a network in which a DHCP server configured to assign IP addresses to all new devices is available, the device will obtain an IP address from the DHCP server. The device IP address can be found in the DHCP server status (according to the MAC address given on the production plate), or will be communicated to you by the 2N device voice function; refer to the Installation Manual.
If there is no DHCP server in your LAN, set the 2N device to a static IP adress using the RESET button; refer to the respective Installation Manual. Your unit address will then be 192.168.1.100. Use it for the first login and then change it if necessary.
Firmware Update
We also recommend you to update your firmware upon the first login to the device. Refer to 2N.com for the latest firmware version. Press the Update Firmware button in the System > Maintenance menu to upload firmware. The device will get restarted upon upload and only then the updating process will be complete. The process takes about 1 minute.
Electric Lock Switching Settings
An electric door lock can be attached to the 2N access control units and controlled by a code from the numeric keypad. Connect the electric lock as instructed in the respective Installation Manual.
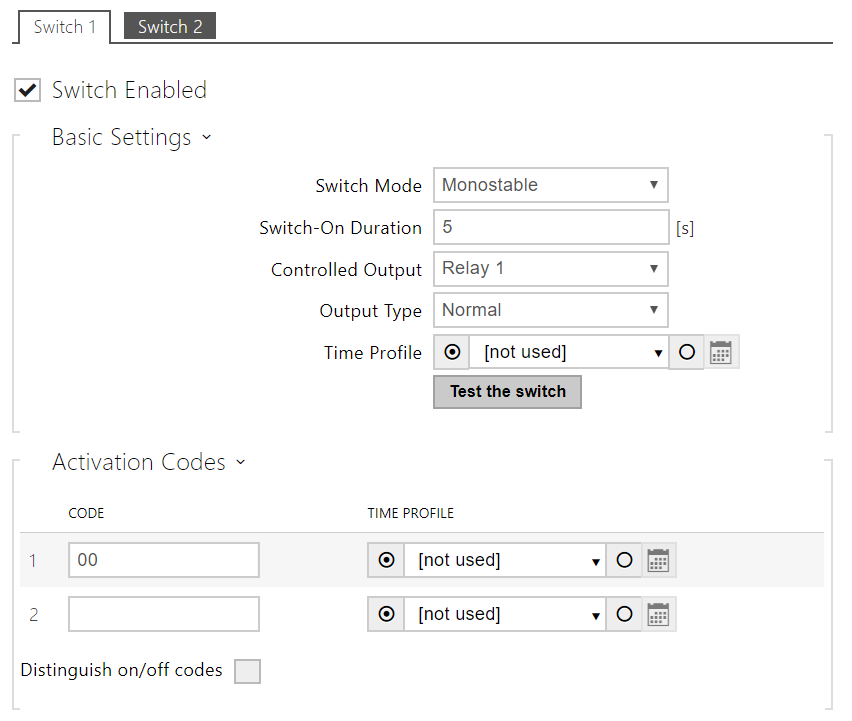 |
Enable the switch in the Switch Enabled parameter on the Hardware > Switches > Switch 1 tab, set the Controlled Output to the device output to which the electric door lock is connected. Now set one or more activation codes for the electric door lock switching.