CSV Import – How to import users and their details to 2N® Access Commander from a CSV file
2N® Access Commander allows uploading of users from a CSV file, including their contact and access (code and card number) details, so you can prepare a list of users, their cards, codes, etc. to a file and then upload them to Access Commander at once.
Requirments
- It is always recommended to use the current version of Access Commander to ensure full functionality and support of the latest firmware on the added devices
Technical Parameters
- This function allows the import of users only to the company, where the import will proceeded
- The function cannot delete users
- Require a license Advanced, Pro, or Pro Unlimited
- The following attributes can be imported in this way: User name, email, 3 telephone numbers, code, card number, groups, employee's ID.
STEP-BY-STEP GUIDE
Version 3.0+
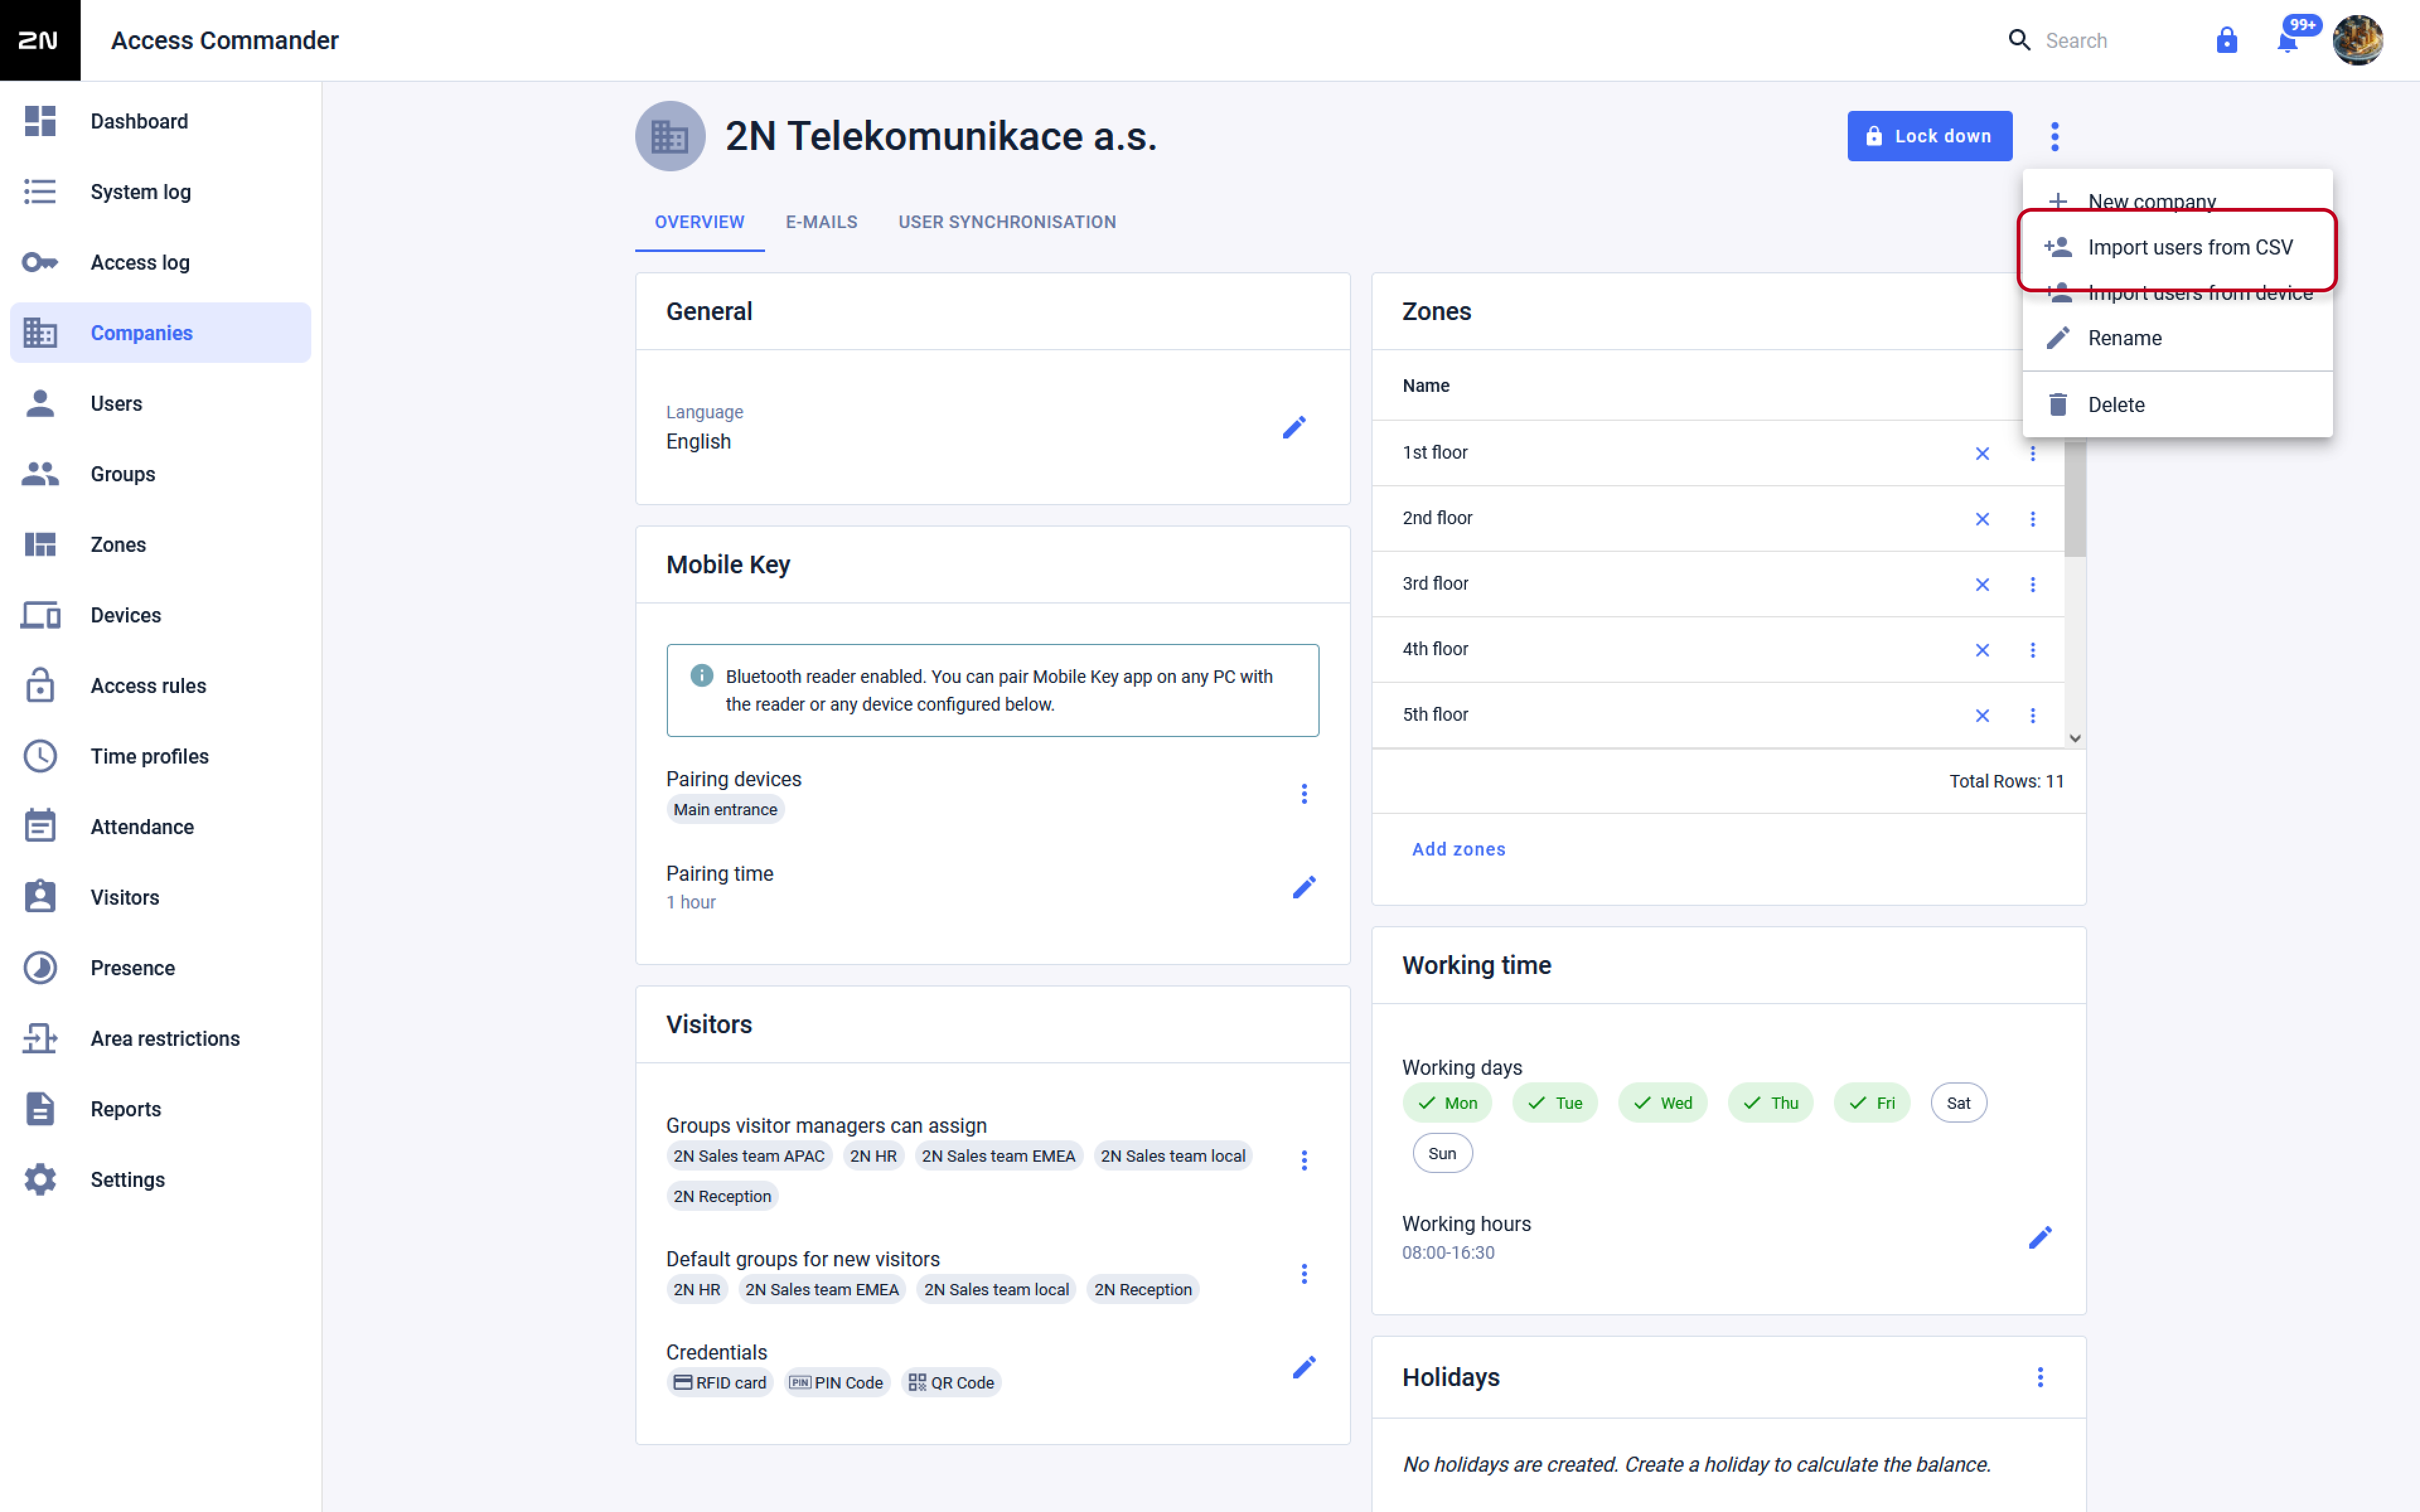
- In the Access Commander's web interface go to Settings → User Synchronisation.
Download the "sample CSV file" by clicking on the appropriate button and you can see how to enter the parameters

(comma separated, no spaces; in the case of an unused parameter, we simply do not write anything, so there will be more commas depending on how many parameters we omit (in line 1 we see the order of available parameters )).
The file can get corrupted if you save it the wrong way. It is necessary to save it in UTF-8 coding and with EOL conversion to UNIX!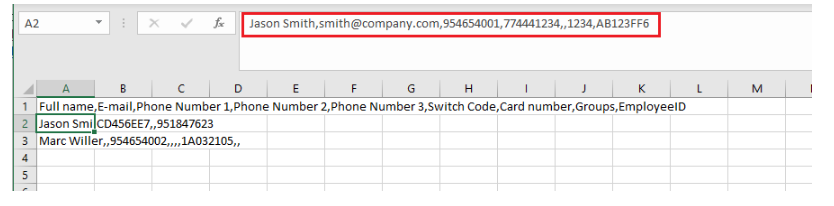
for better orientation in CVS file you can use a Visual Code, which will allow better orientation

Tip
In this way, instead of one, two card numbers can be uploaded to the user - in this case we do not write a comma between them, but a semicolon ";" .
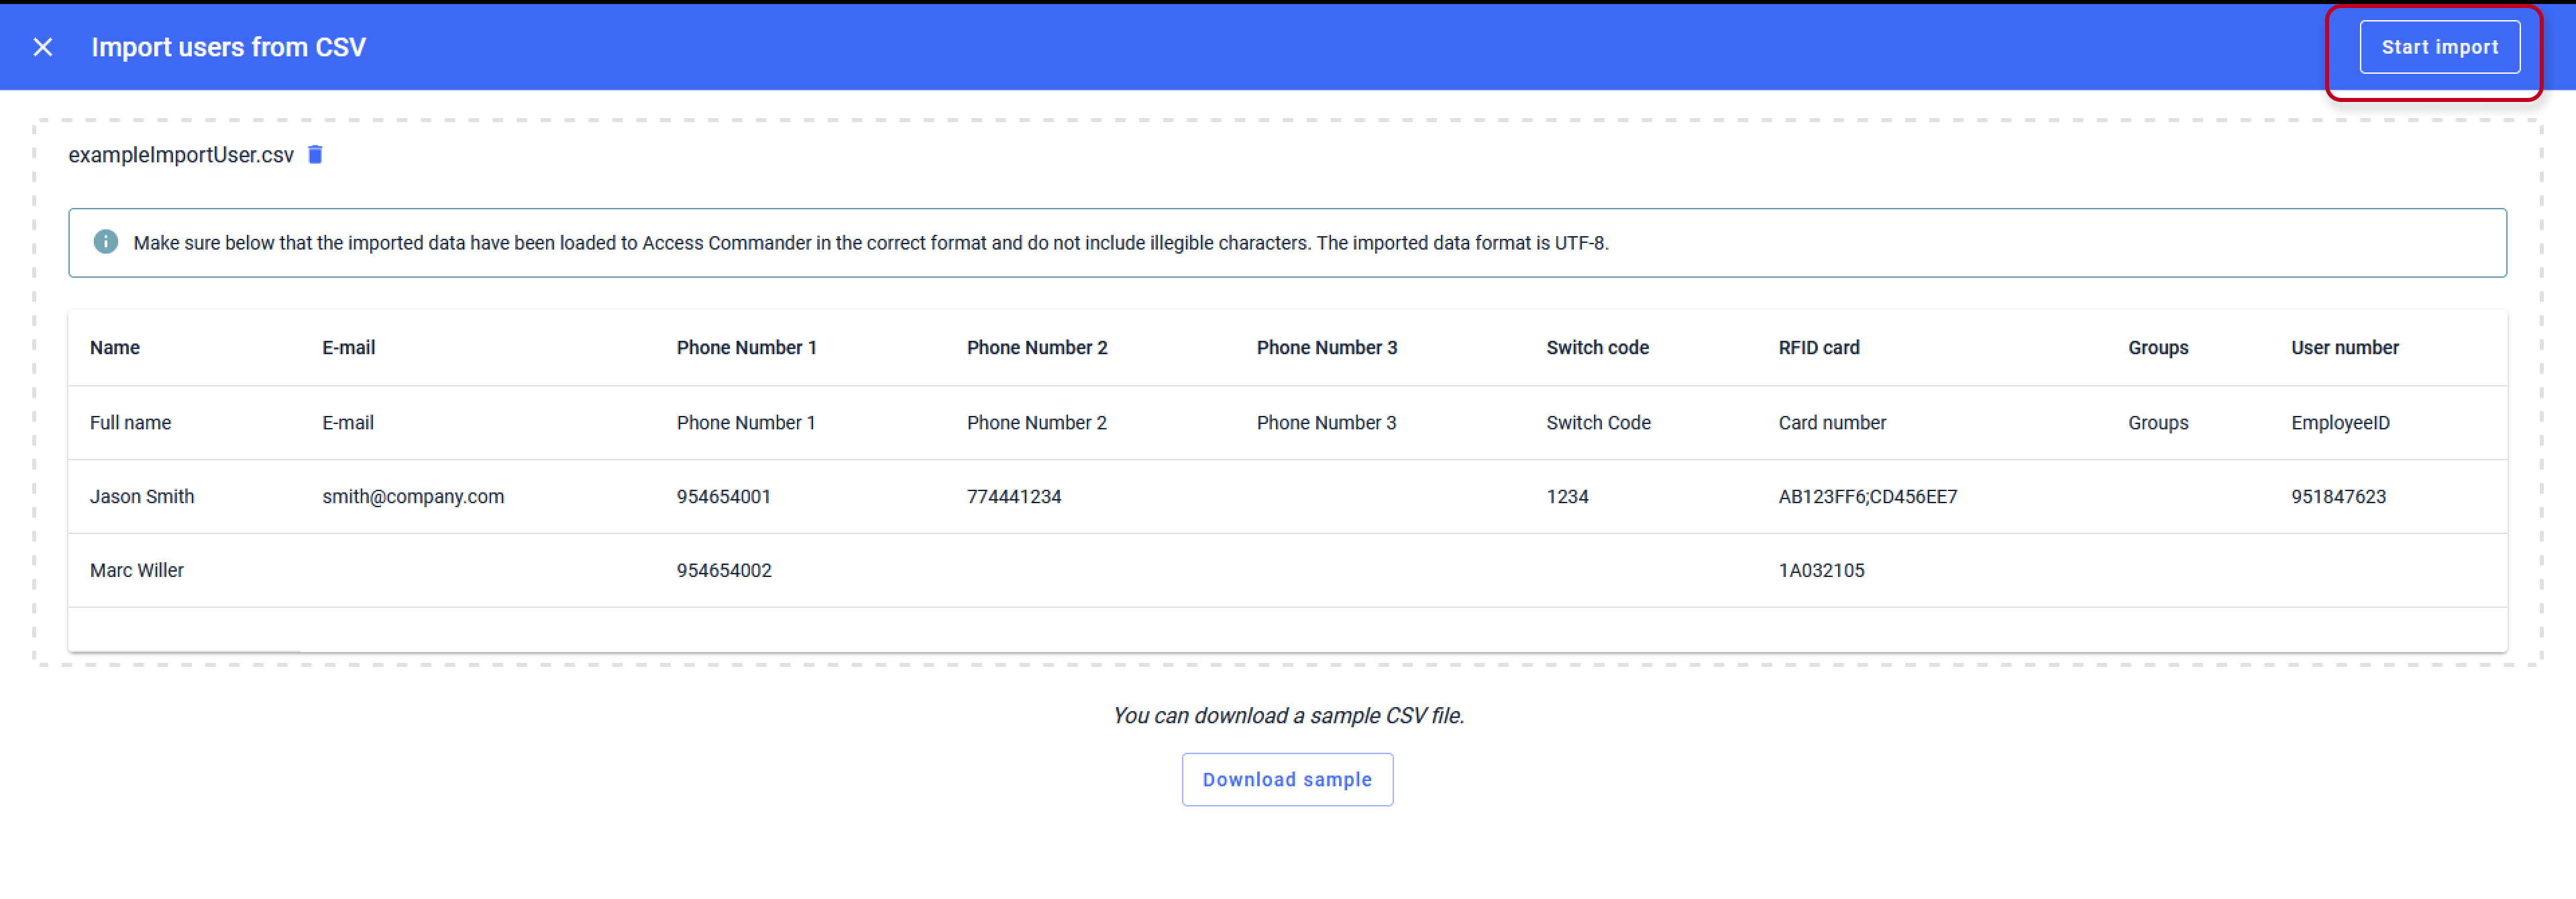
- Then let import your CSV file by clicking on the "Select file" button (see the red box on the image below left) and then select the CSV file from your directory (see the red box on the image below right)

- Confirm by clicking on "Start import".
If the data were written correctly, the users will be added to the "users" section of the Access Commander with the defined parameters.
Version 2.7 or older
- In the Access Commander's web interface go to Companies > given Company > Import Data.
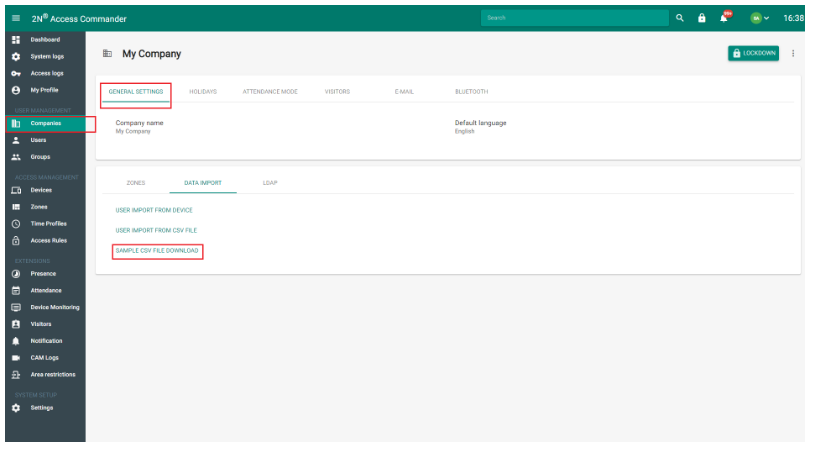
Download the "sample CSV file" by clicking on the appropriate button - see the red box on the image above - and you can see how to enter the parameters
(comma separated, no spaces; in the case of an unused parameter, we simply do not write anything, so there will be more commas depending on how many parameters we omit - see the red box on the image of the sample CSV file below (in line 1 we see the order of available parameters )).
The file can get corrupted if you save it the wrong way. It is necessary to save it in UTF-8 coding and with EOL conversion to UNIX!
for better orientation in CVS file you can use a Visual Code, which will allow better orientation
Tip
In this way, instead of one, two card numbers can be uploaded to the user - in this case we do not write a comma between them, but a semicolon ";" .
- Then let import your CSV file by clicking on the "User import from CSV file" button (see the red box on the image below left) and then select the CSV file from your directory (see the red box on the image below right)

confirm by clicking on "Import" below right (see the blue box on the image below right).
