Milestone - How to integrate 2N® Access Commander with the camera system Milestone XProtect?
2N® Access Commander can be integrated into the Milestone XProtect camera system using the 2N Plugin for XProtect Access tool.
It allows you to monitor events and control devices from 2N® Access Commander directly in the Milestone Xprotect Smart Client application.
For detailed information on how to work with the XProtect Access module, use the VMS documentation and the Milestone XProtect Smart Client software.
This article applies to the following products and licenses:
- 2N® Access Commander (version 2.0 or higher)
- "Access control door" license for Milestone Xprotect (information on added licenses can be seen in: Milestone XProtect Management Client > Basics > License Information)
- XProtect Access module - version 2018 or newer (XProtect Enterprise, Professional, Corporate, Express, Expert)
- 2N plugin for Xprotect Access (version 1.4.0.0)
- Enhanced Integration license should be installed on 2N IP Intercom to ensure faultless operation of the plugin (license is not required for 2N Access Unit)
If you are interested, these follow-up FAQs are available:
Topics:
Installation of the 2N Pluginu for XProtect Access
- Run the 2N Plugin for XProtect Access 1.3.0.0.exe installation file on the same computer where the XProtect Event Server service is active:
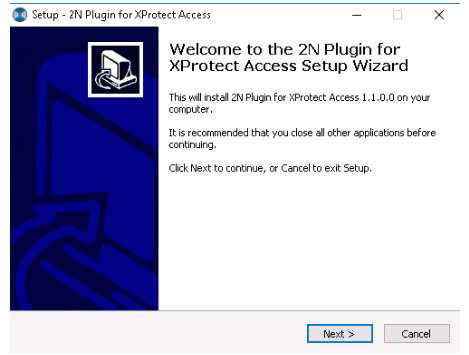
The installation program automatically detects the location (folder) of the XProtect Event Server and installs the plugin in the correct subfolders:

Finally, the installation file automatically restarts the service for the Xprotect Event server.
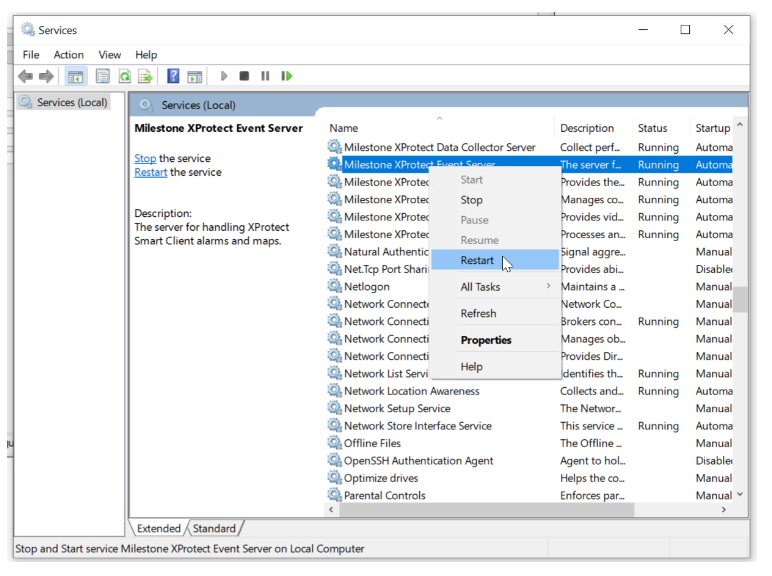
If this does not happen for any reason, you must restart the XProtect Event Server manually
using the Milestone XProtect Management Client, or using Windows services.
Configuration of XProtect Access
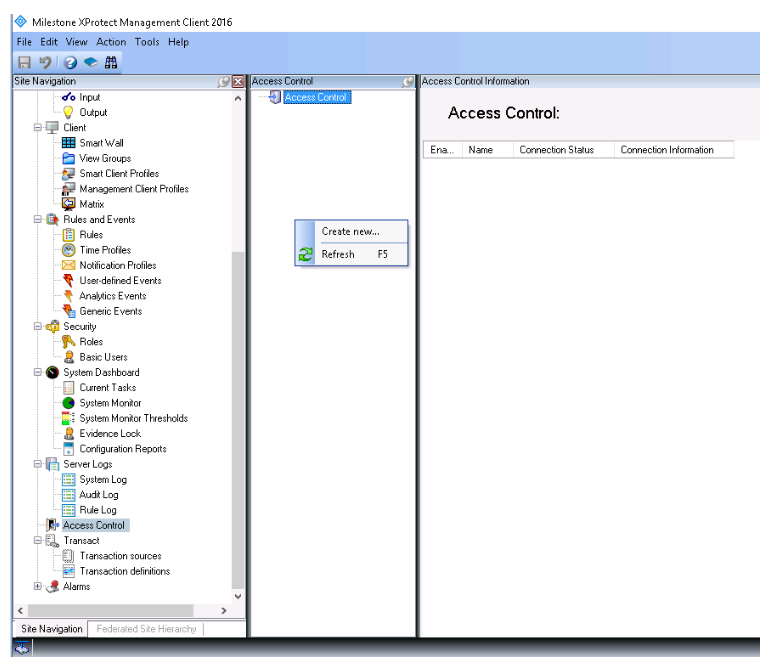
- Open the application Milestone XProtect Management Client.
Create a new integration by right-clicking on the Access Control section and selecting "Create new":
In the next step name the integration and select 2N Access Control as the "Integration plug-in", then other parameters will appear:

Fill in the given parameters and continue with the "Next" button.Parameter: Assignment: Name The name of the access system within the software Milestone XProtect. Address Network IP address of the 2N® Access Commander. Port Network port for the connection with 2N® Access Commander (default is 443). Username User name of the admin account in the 2N® Access Commander (default is "admin") Password Administrator's password in the 2N® Access Commander The XProtect Event Server will establish a connection with the 2N® Access Commander and load individual entities from the access system.
Milestone XProtect Management Client will then display a list of these downloaded entities from 2N® Access Commander - continue by clicking the "Next" button: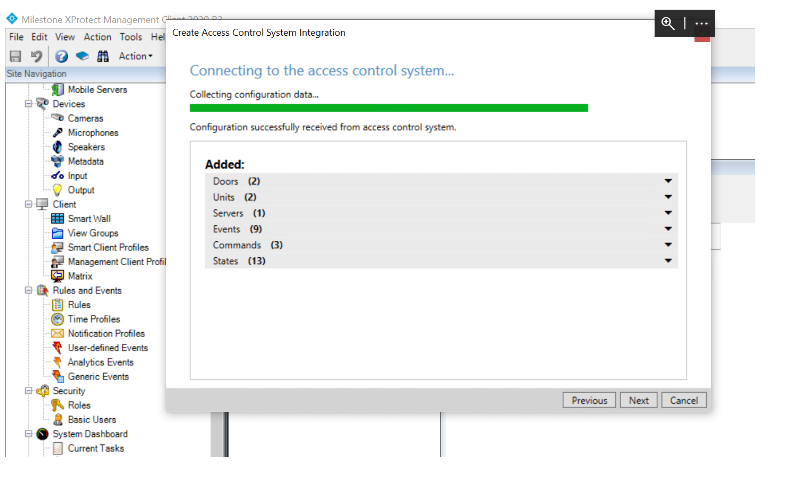
The "Associate Cameras" window will appear - we will now skip, as this can be done later and the procedure is below in this FAQ in the chapter "Adding Hardware".
So we click on "Next" and then a window will appear that we have successfully added the integration, which we close by clicking on the "Close" button.- This completes the initial configuration and the 2N plugin is active.
How to project changes made in 2N® Access Commander settings into the Milestone XProtect Access system
If changes are made in 2N® Access Commander, such as adding, removing or renaming a device, these changes must then be saved in the Xprotect Access module.
- Within Windows, restart Milestone XProtect Event Server in Services:
In the Milestone XProtect Management Client, in the Access Control section, double-click the integration in the right column
and on the General Settings tab then on "Refresh Configuration" (XProtect Event Server then reads the changes from 2N® Access Commander):
- Verify that the loaded changes match the actual configuration, and if so, confirm them by clicking "Apply":
How to remove 2N® Access Commander from Milestone Xprotect Access Control
If you only want to remove the created integration, in Milestone XProtect Management Client right-click on it and select "Delete" and then confirm:
To completely uninstall the plugin:
- Remove all settings from Milestone Xprotect related to integration with 2N® Access Commander.
- Uninstall 2N Plugin for XProtect Access from the computer where it was installed.
Adding hardware (not only camera)
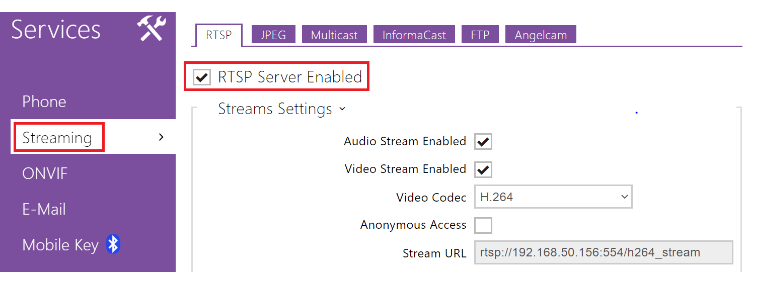
- In the web interface of the 2N IP Intercom go to the Services > Streaming section and enable the RTSP server:
- Go to the Milestone Xprotect Management Client application, Servers section, Recording Servers subsection, where you right-click
on the given server (PC) within "Recording Servers" in the next column and select the "Add Hardware" option: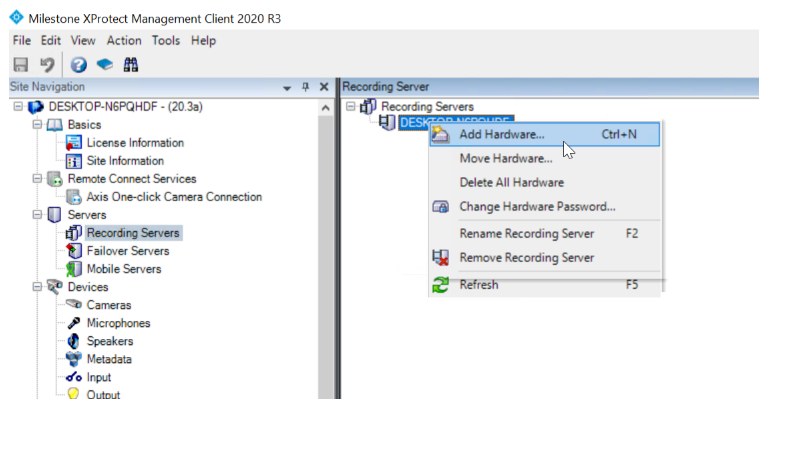
- Wizzard "Add Hardware" appears, where you select the "Express" option (for automatic detection of devices on the network) or "Manual" (for manual addition),
and click on "Next":
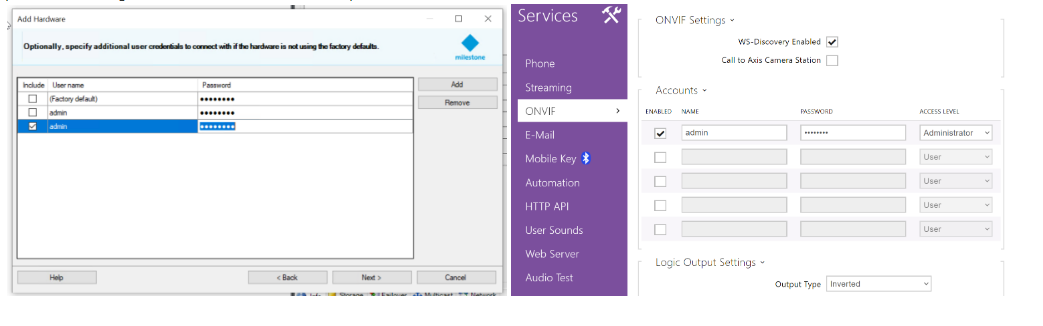
Then click on "Add" on the right and add the User name and Password corresponding to the Name and Password of the activated Onvif account on 2N IP Intercom - see the picture on the right (Enhanced Video license required on the intercom) - and click "Next" in the wizard:
In case of manual configuration - check the "ONVIF" option and click on "Next":
In case of manual configuration - fill in the IP address of the device to be added (and optionally check "Use HTTPS" for encrypted network communication) and click on "Next".
Use the "Add" button (right) to add another device at once: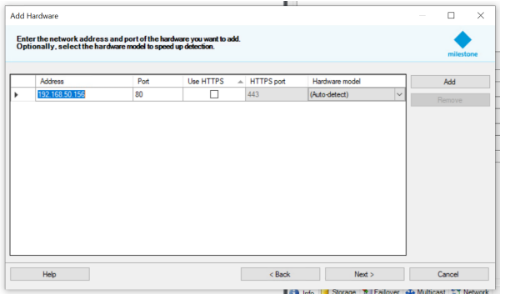
Now in each of the listed configuration modes - after clicking on the "Next" button (2x) for the device to be added, select,
whether you add a microphone, speaker, or logic inputs and outputs as the active device in addition to the camera. Click "Next" to continue: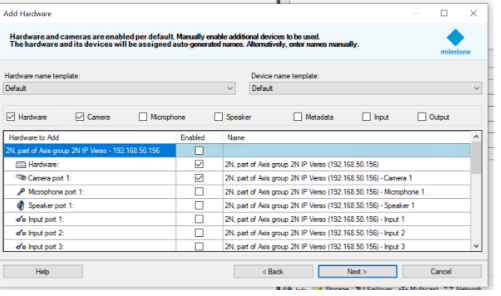
Click on the briefcase icon next to "Default camera group": And after clicking on the "plus" button at the bottom left, name the group in which the camera will be: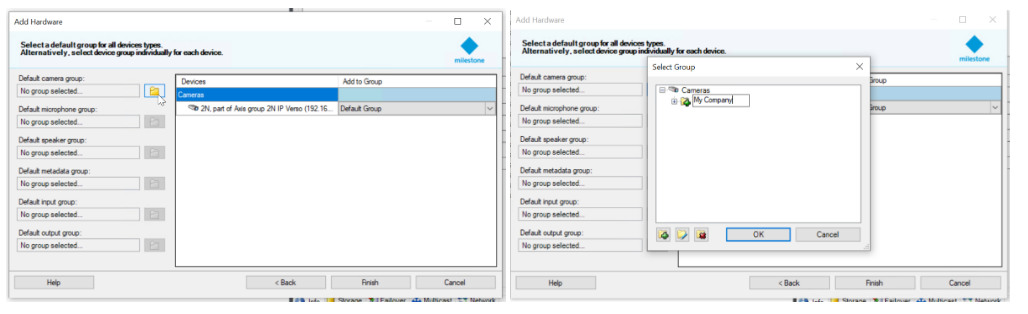
Confirm by clicking on "OK" and then on "Finish".
Similarly we may add other mentioned hardware in addition to the camera. - Go to the Access Control section > created integration with 2N® Access Commander > Doors and Associated Cameras tab > click on the selected unit
and find the added camera in the given folder on the right, which you drag with the mouse under the 2N unit - see the picture below.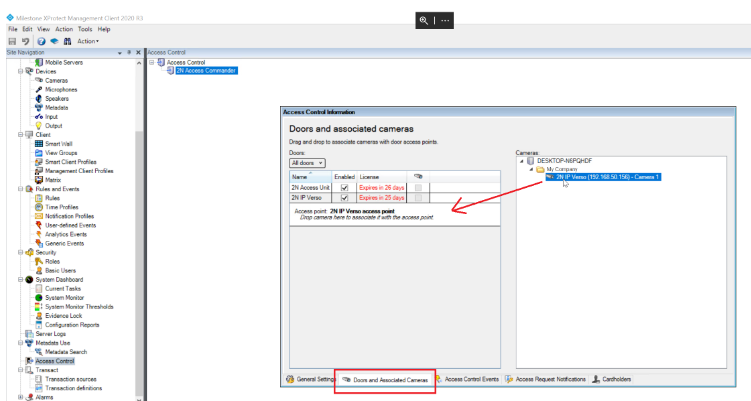
Click the disket icon in the upper left (within the Milestone XProtect Management Client) to save the changes. - Launch the Milestone XProtect Smart Client application, click on "Setup" on the top right, then add a new "view" on the left and click on "Setup" again:

- Click on the added "view", then on the camera in the group and drag it to the desired window:
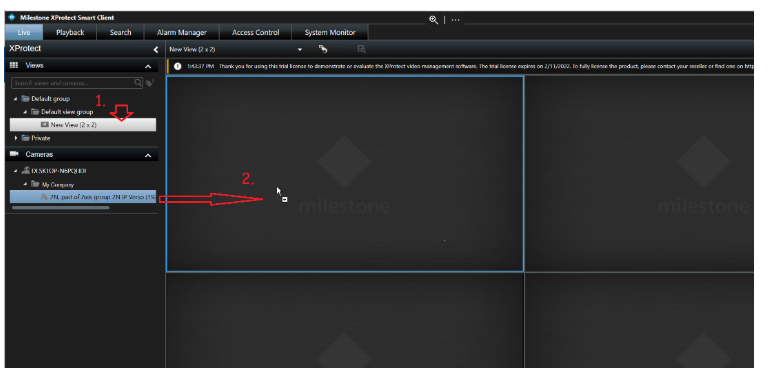
- Added:

Further procedure for general configuration can be found in our interoperability manual:
https://wiki.2n.cz/hip/inte/latest/en/8-vms/milestone-xprotect