QR codes - setting up an access using QR codes in 2N® Access Commander
QR codes feature prerequisites
You can use generated QR codes as an access credential in 2N® Access Commander. This feature is available for Users and Visitors.
Requirements & Ports
The version of 2N® Access Commander: 2.2+
The firmware version on 2N device: 2.34+
Supported 2N devices: 2N® IP Style
Version 3.0+
Creating a QR code for User
These are the steps in order to create a QR code for a user, as a form of access control.
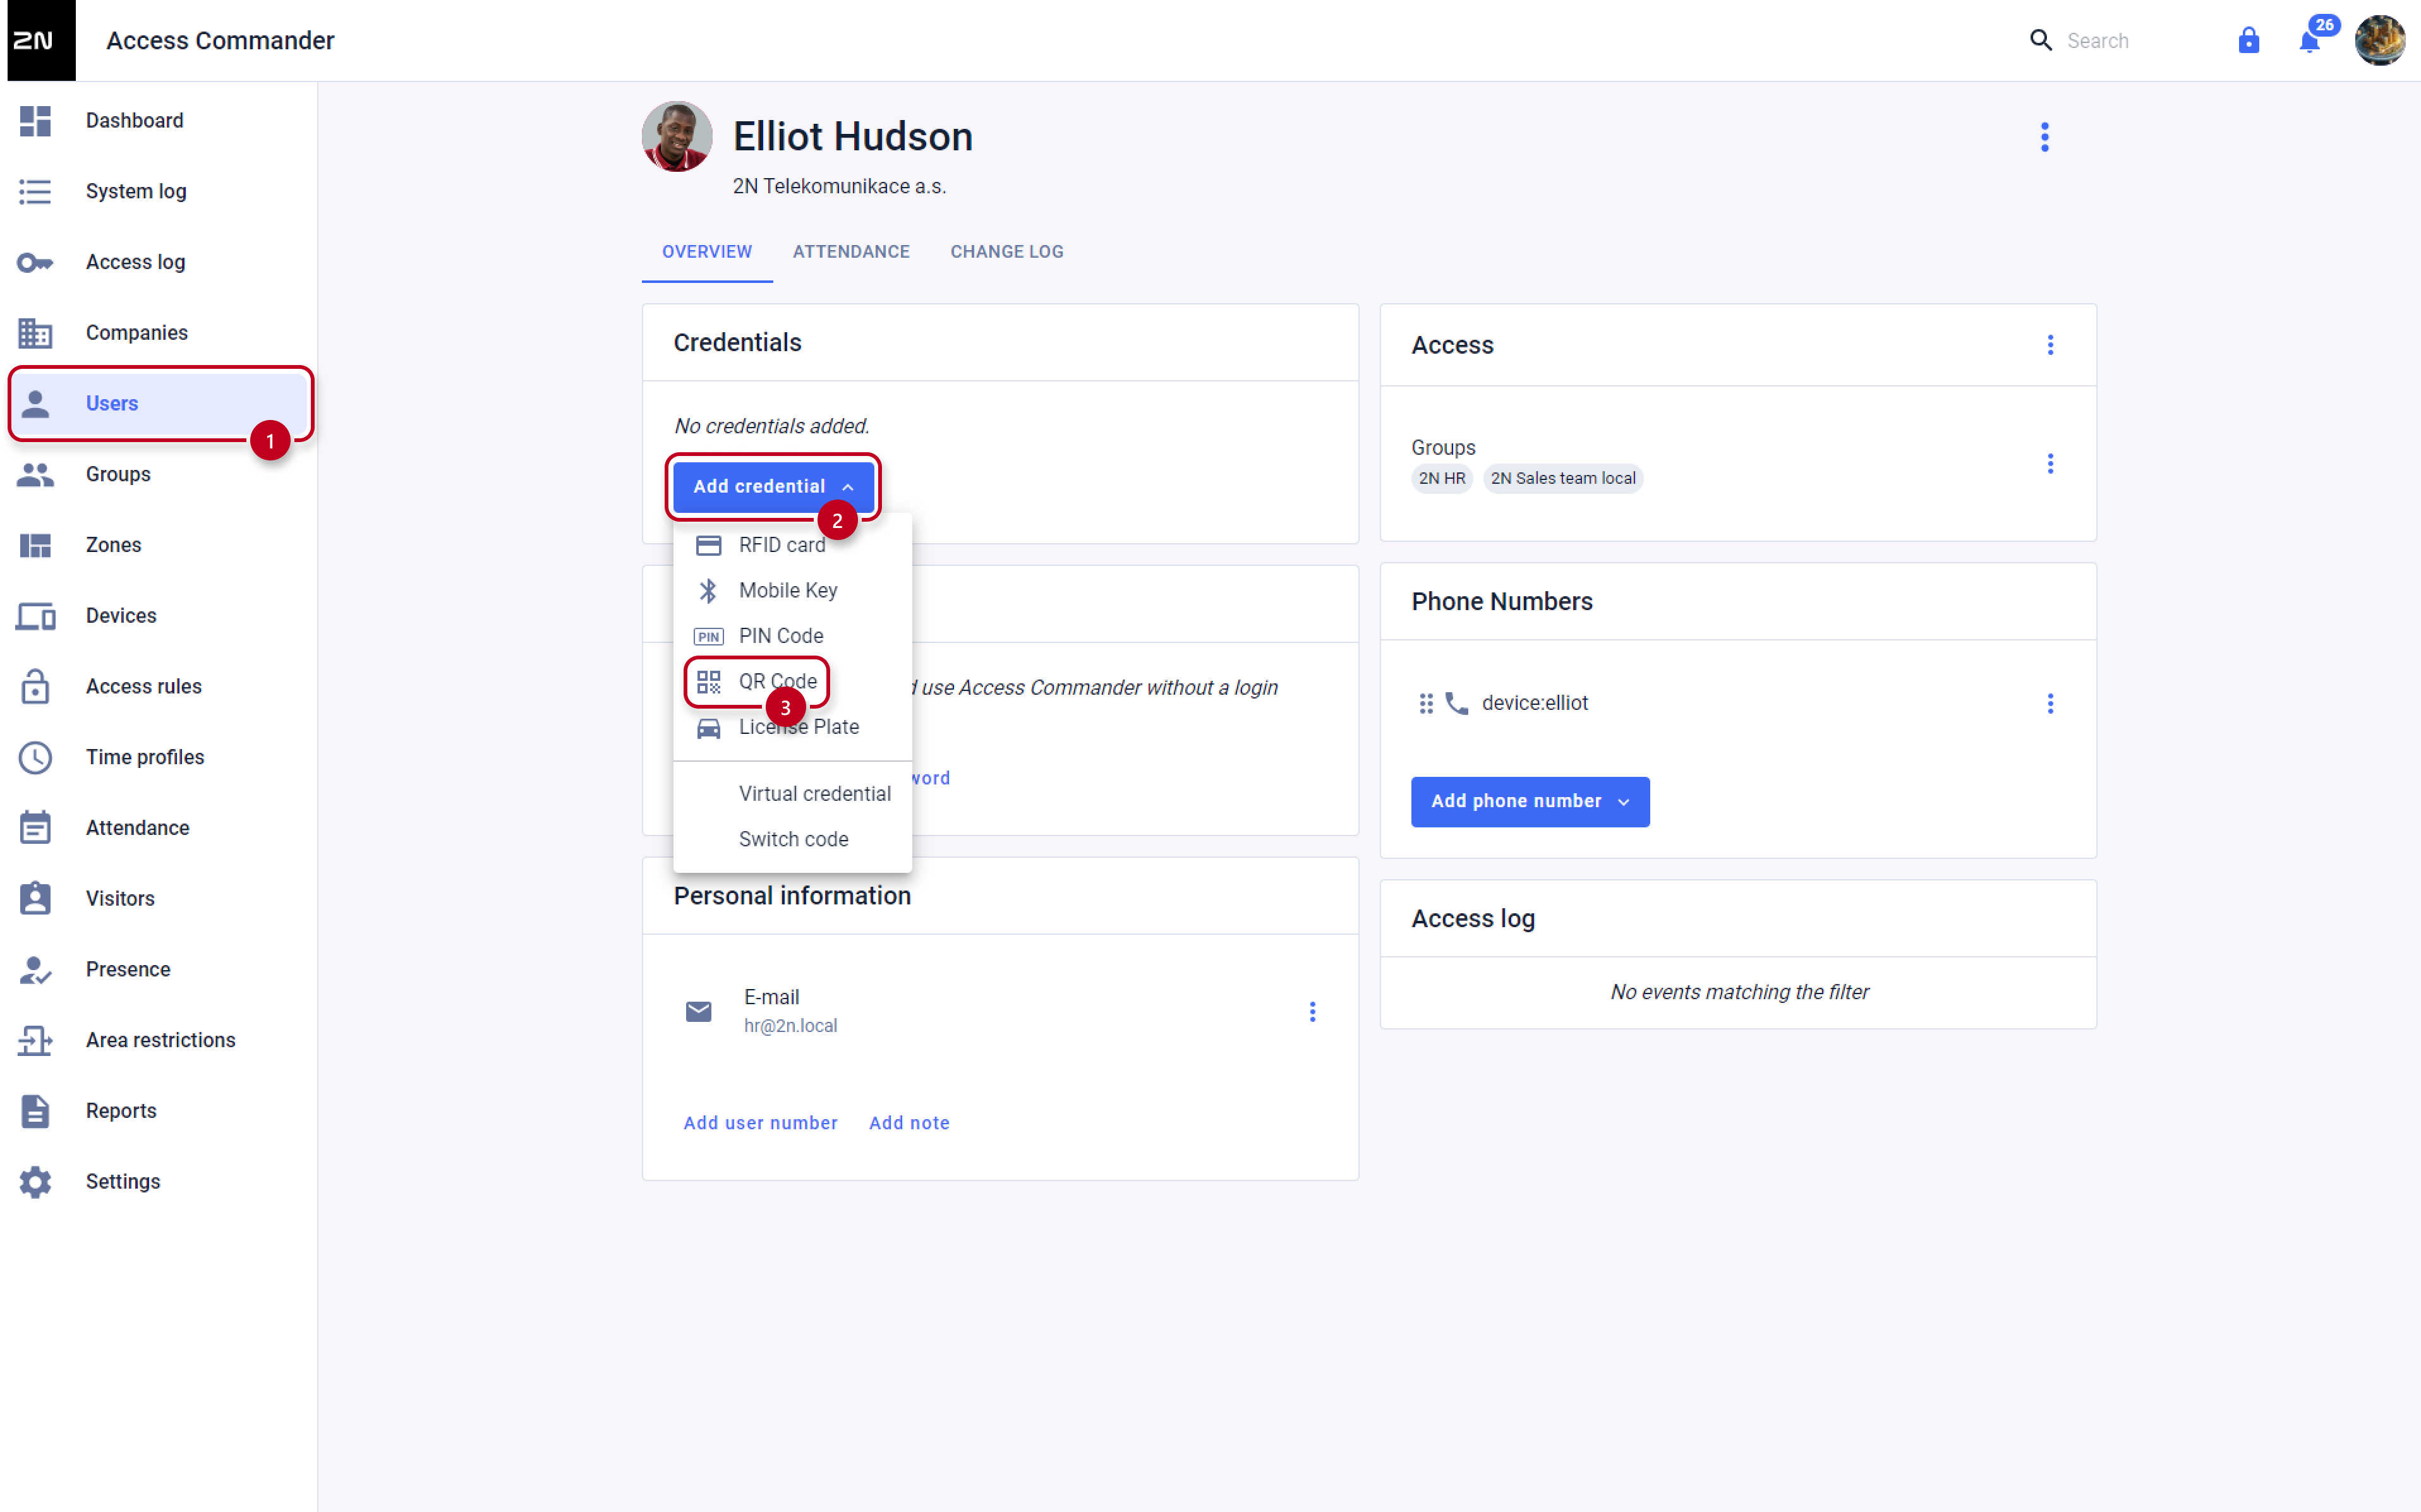
- Select the Users in the left-hand menu.
- Choose existing or create a new user.
- Click on "Add credential" a
- Select the QR option to generate the QR code.
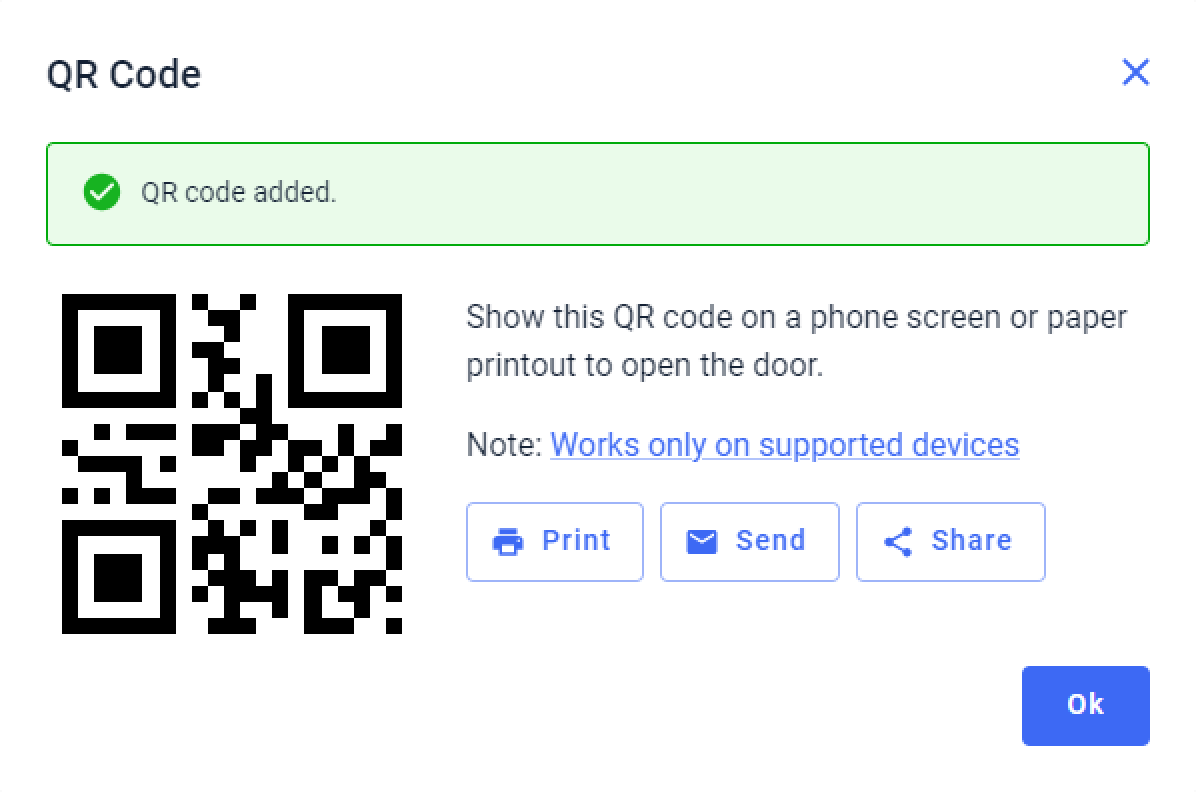
After adding the code it is possible to print, send or share the QR code.
Creating a QR code for Visitor
These are the steps in order to create a QR code for a visitor, as a form of access control.
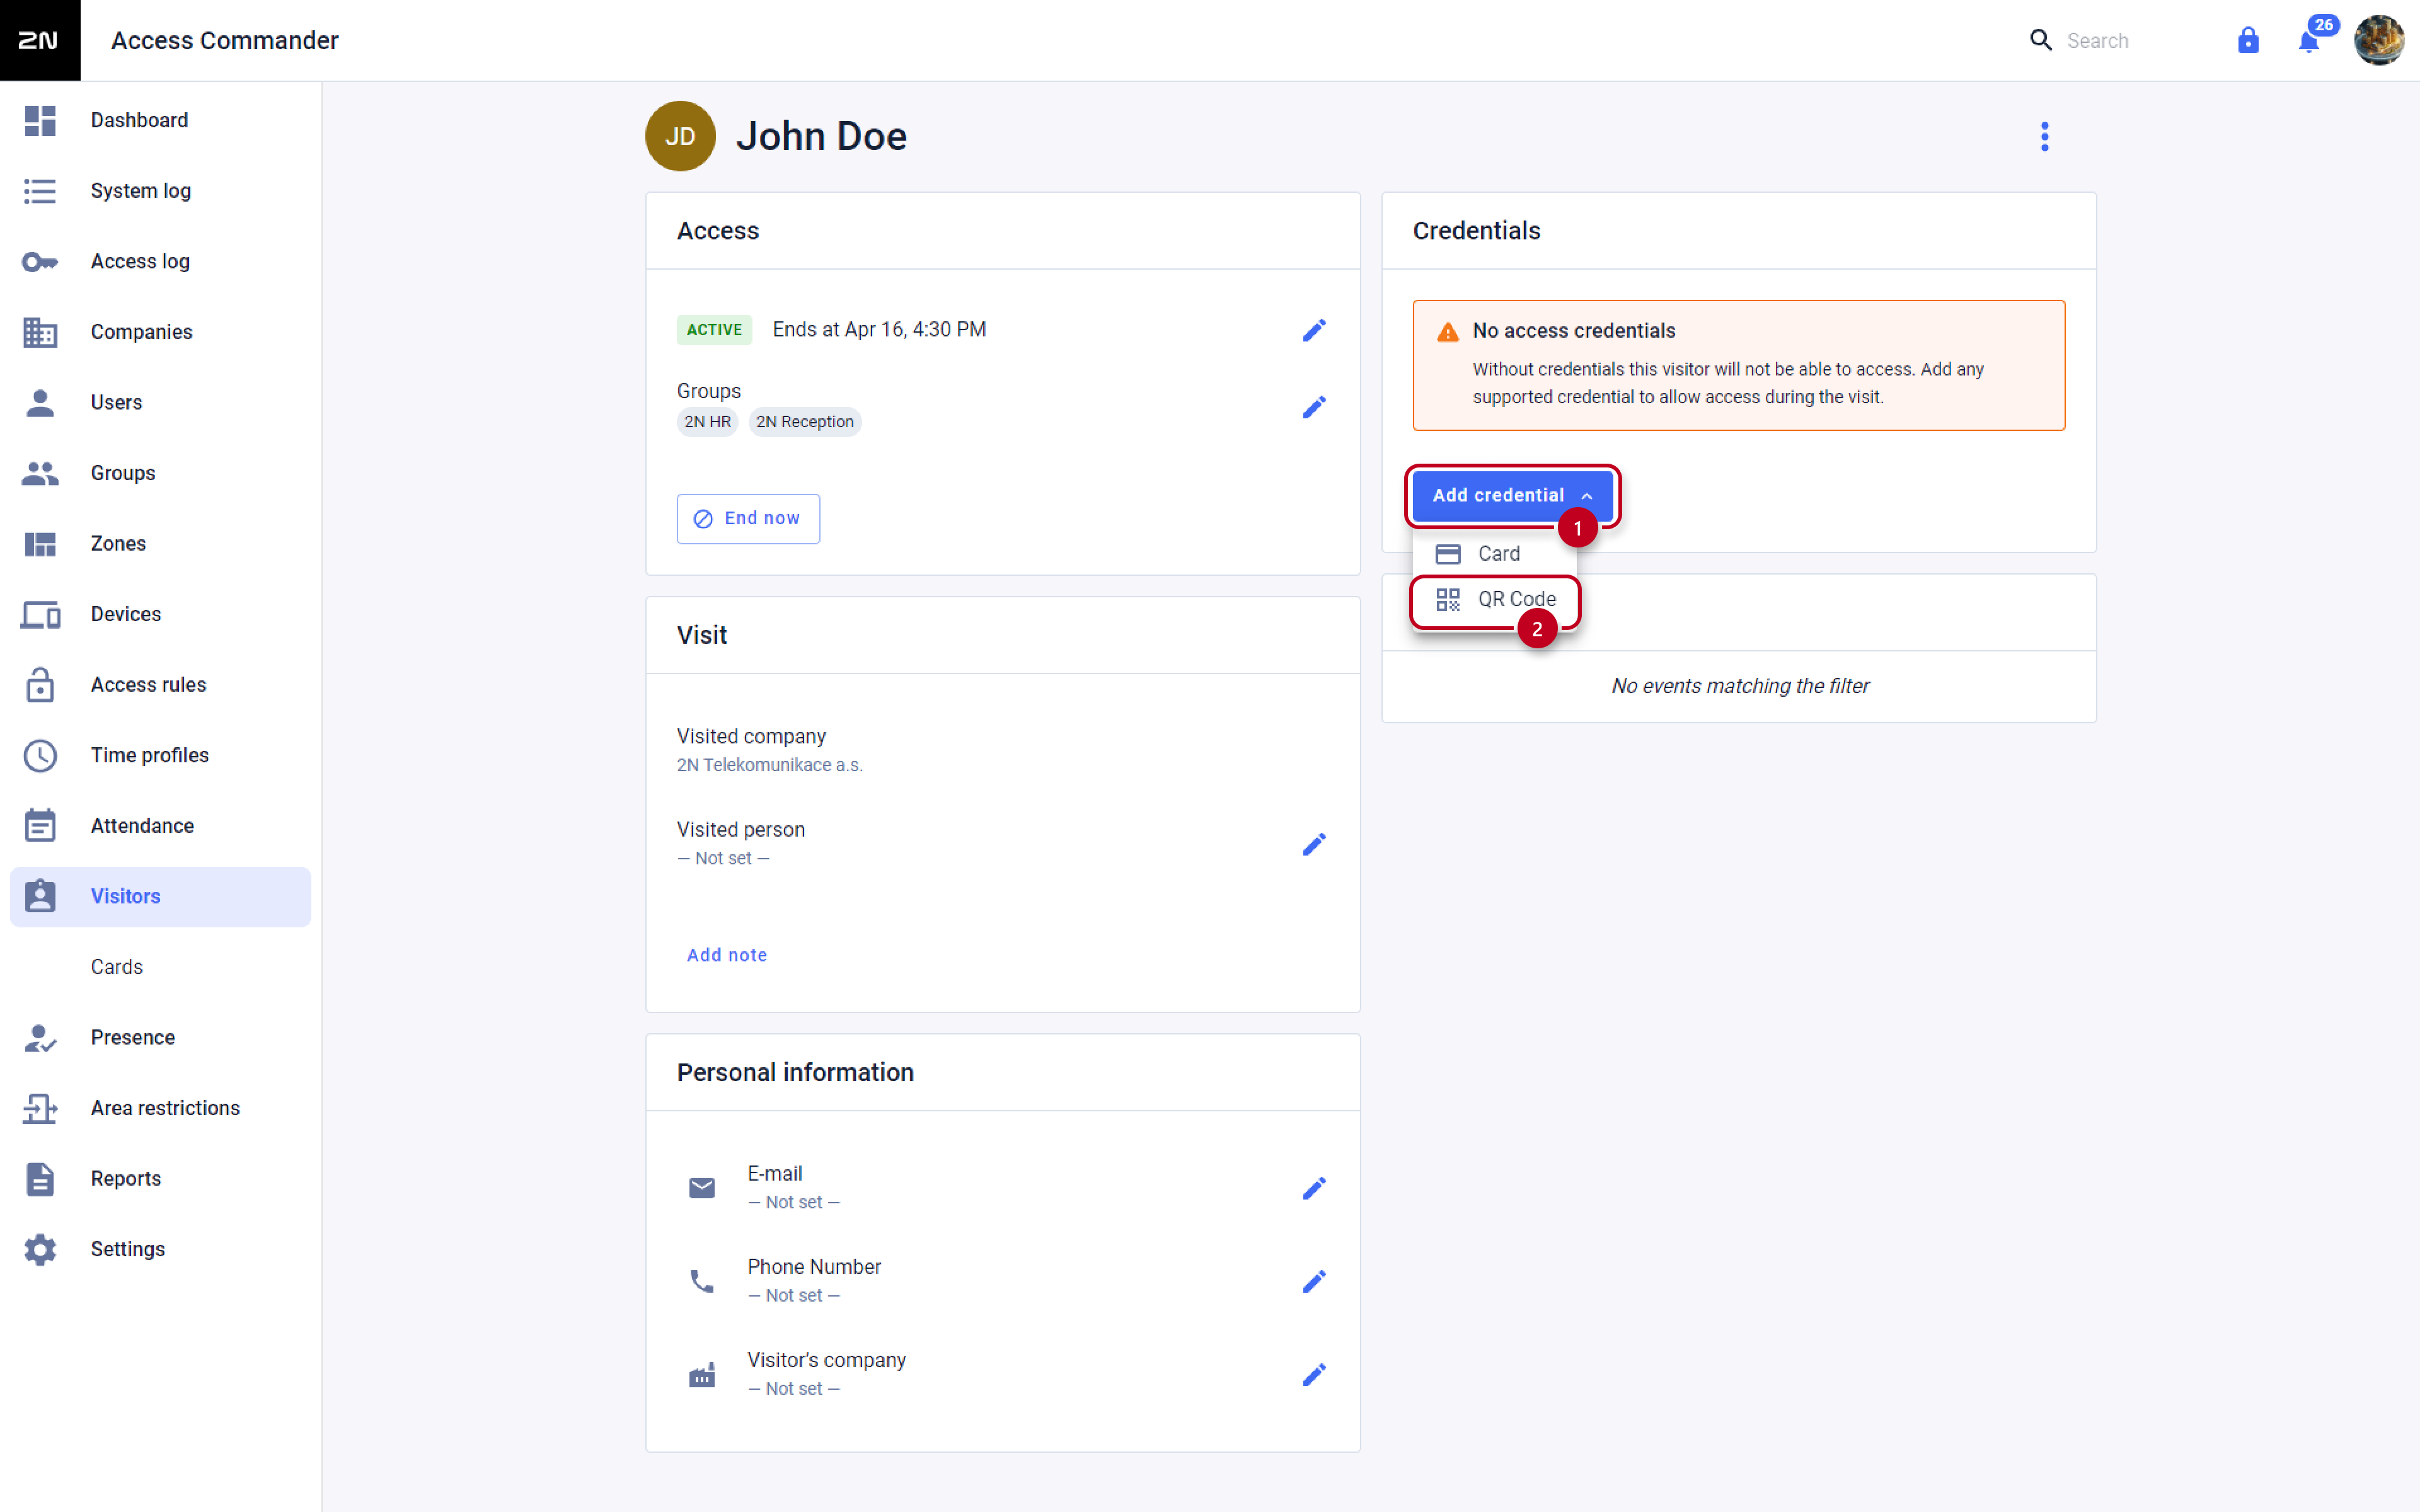
- Select the Visitors in the left-hand menu.
- Choose existing or create a new visitor (make sure visitor is not in expired state).
- Select the Add credential option and choose QR Code
Printing the QR code
If a customer wishes to have the QR code with him/her in the paper format, then please follow the steps below (after creating the QR code by the steps above).
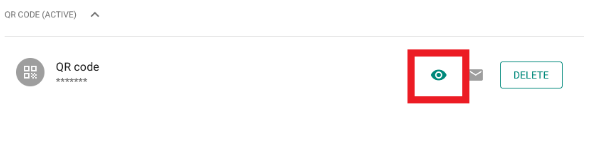
1. Select the eye icon on the right of the PIN / QR code access option:

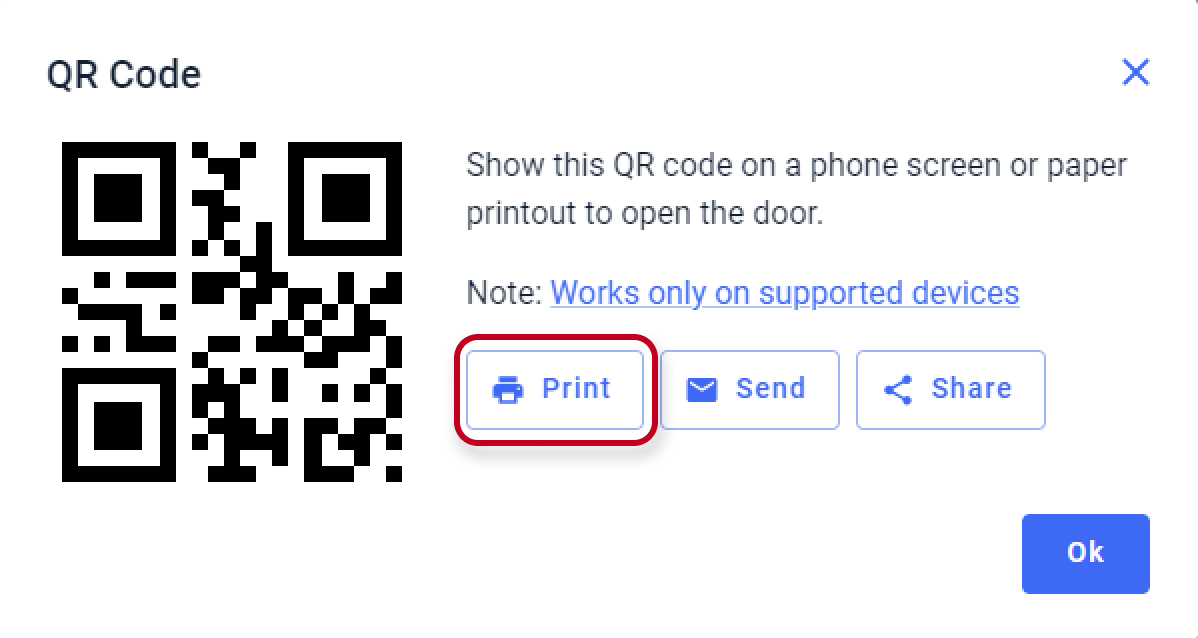
2. A pop-up window will appear with the QR code and an option to print it.
Select PRINT, which will take you to the print layout, and you can choose the size to print:
Sending the QR code via e-mail
If the customer wishes to have the QR code sent to his/her e-mail, then follow the steps below.
Click on the Eye button to show the QR code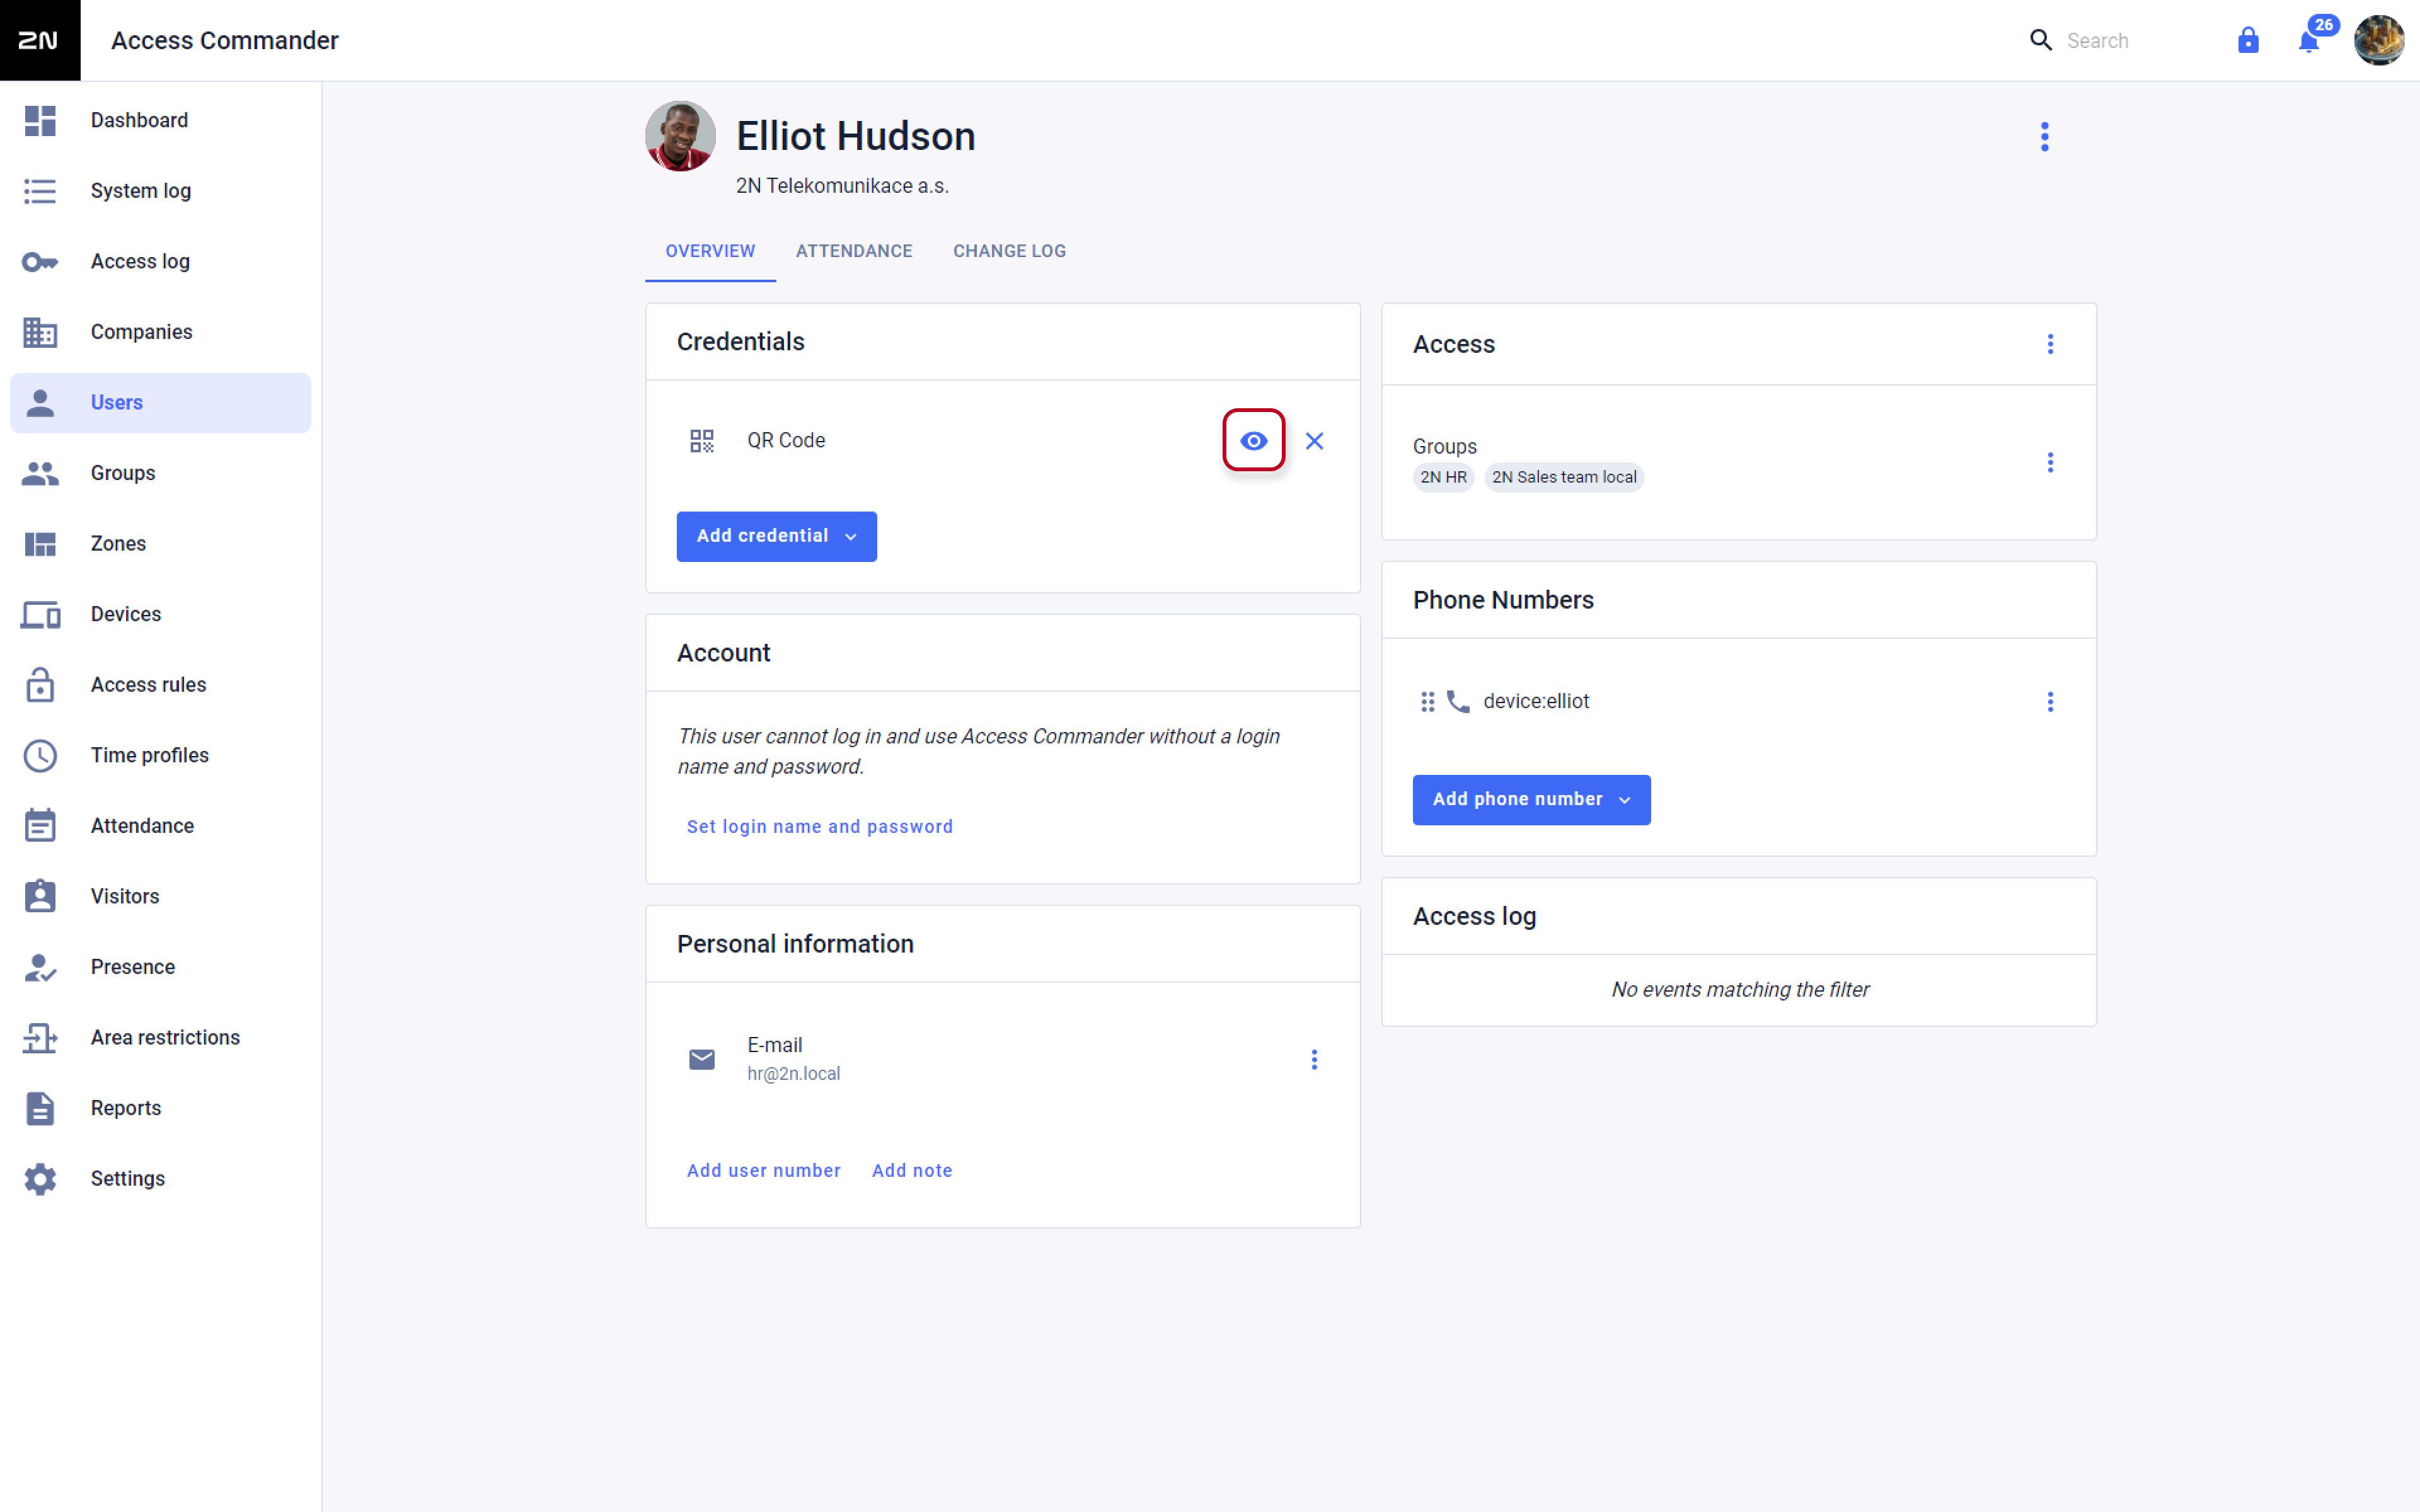
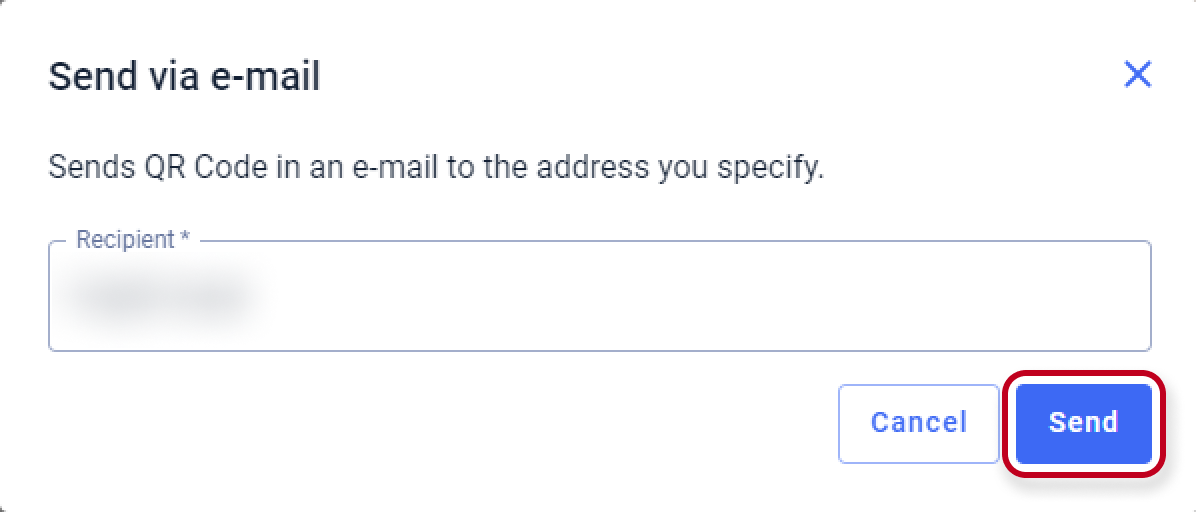
By clicking on "Send" you can fill in an email address to whcih the QR code will be sent:

If the user has an email address already added, it will fill in automatically. You can send the email by clicking on "Send".
The e-mail will be sent to the user's or visitor's email: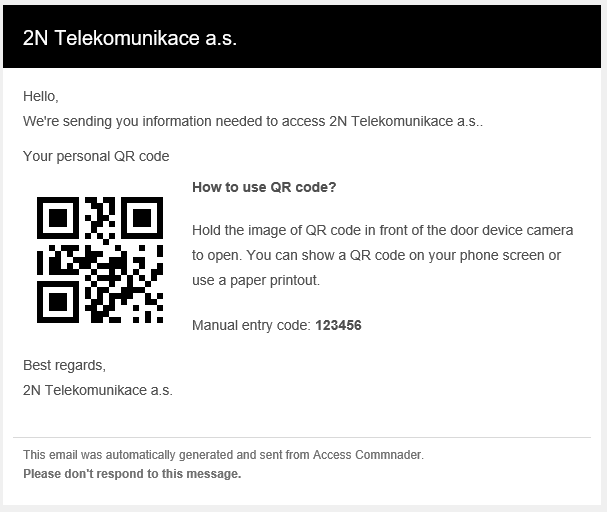
More information about E-mail and SMTP server configuration (in 2N® Access Commander) can be found here: https://wiki.2n.cz/acc/latest/en/3-nastaveni-systemu/3-2-e-mail
Version 2.7 or older
Creating a QR code for User
These are the steps in order to create a QR code for a user, as a form of access control.
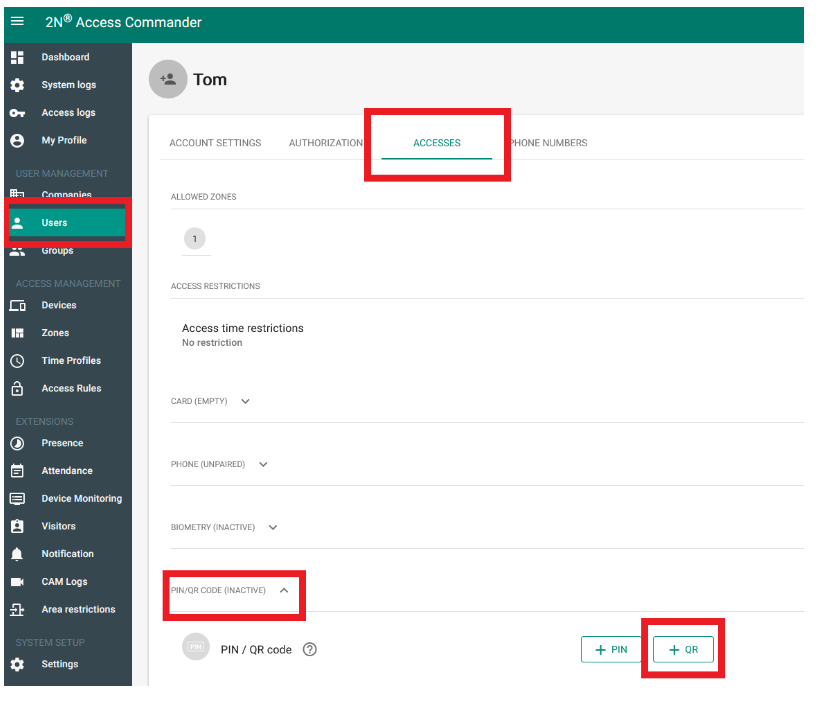
- Select the Users in the left-hand menu.
- Choose existing or create a new user.
- Click on the ACCESSES tab.
- Choose the PIN/QR CODE access option.
- Select the +QR option to generate the QR code.
Creating a QR code for Visitor
These are the steps in order to create a QR code for a visitor, as a form of access control.
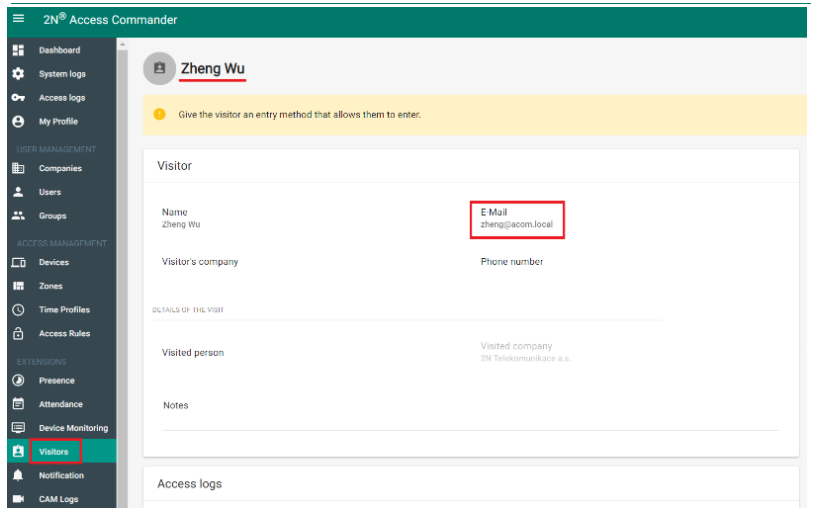
- Select the Visitors in the left-hand menu.
- Choose existing or create a new visitor (make sure visitor is not in expired state).
- Select the QR code generating option to generate the QR code.

Printing the QR code
If a customer wishes to have the QR code with him/her in the paper format, then please follow the steps below (after creating the QR code by the steps above).
1. Select the eye icon on the right of the PIN / QR code access option:
2. A pop-up window will appear with the QR code and an option to print it.
Select PRINT, which will take you to the print layout, and you can choose the size to print:

Sending the QR code via e-mail
If the customer wishes to have the QR code sent to his/her e-mail, then follow the steps below.
- In order to be able to send QR code to user (picture 1), or visitor (picture 2), via email, such user or visitor needs to have filled an e-mail address:

- Choose the mail icon:
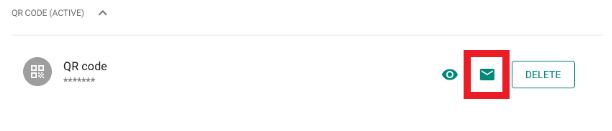
- Click on SEND:

- The e-mail will be sent to the user's or visitor's email:

More information about E-mail and SMTP server configuration (in 2N® Access Commander) can be found here: https://wiki.2n.cz/acc/latest/en/3-nastaveni-systemu/3-2-e-mail
Supported 2N device QR code
Supported 2N device will automatically have the QR code uploaded once the QR code is set up in the 2N® Access Commander.
The QR code will be shown as 10 to 15-digit PIN in the 2N device. To view the 10 to 15-digit PIN follow the guide below.
In order to enable the access via QR code, you need to set it in the 2N device first (Hardware > Door > Entry / Exit rules > QR code reading).
- In the web interface of the device go to Directory > Users > selected user and scroll down to User Codes:
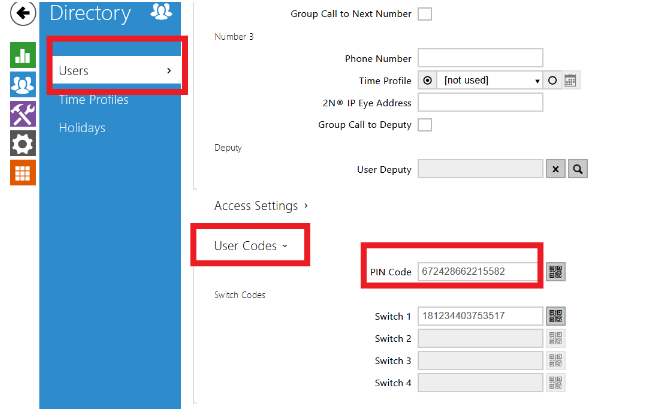
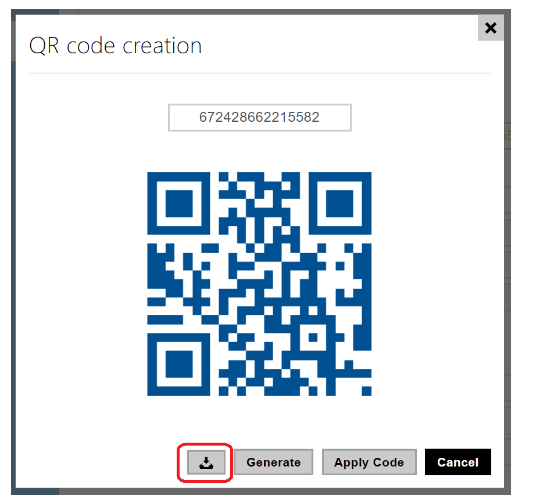
- If you want to download it or view the code click on the little QR code icon next to the PIN code and a pop-up window will appear.
This will let you download or even change the 10 to 15-digit PIN of the QR code: