SSH - How to connect over SSH to 2N® Access Commander
SSH is used to secure remote access to computer systems.
That's why we introduced a new layer of security by disabling SSH access by default since 2N® Access Commander 1.7 and enforcing the use of a stronger password when SSH is enabled. Therefore, if you need SSH access to 2N® Access Commander you need to enable SSH first. Since 2N® Access Commander 2.3 it is possible to enable the SSH from the web interface, but it can be set in the Linux GUI of the virtual machine or box as well.
This feature needs to be enabled to successfully import data between different installations of 2N® Access Commander on installation from which data are imported.
Web interface set up
Version 3.0+
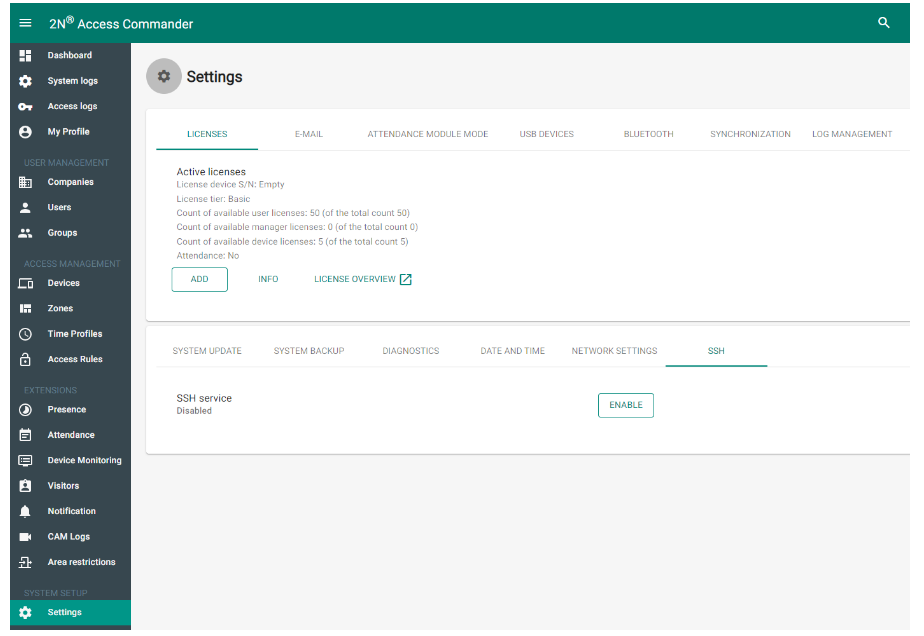
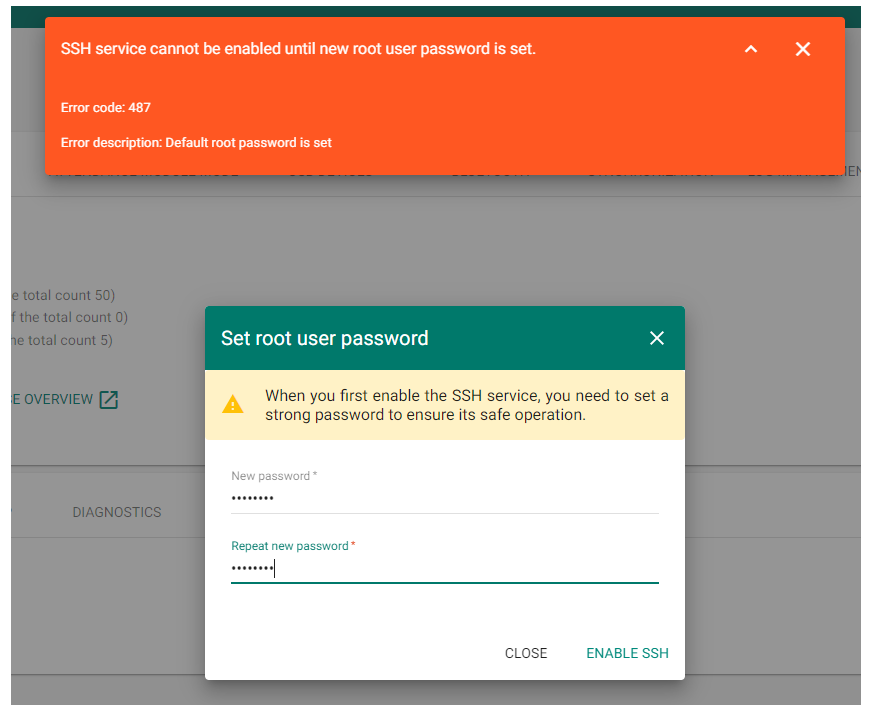
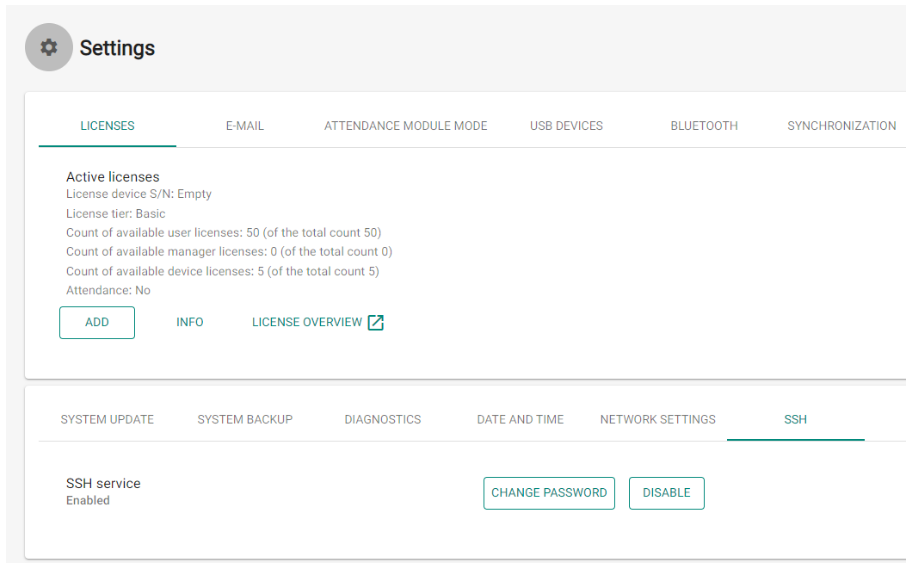
After you log in to the web interface of the 2N® Access Commander you can find the SSH setting in the bottom section of the Settings tab. The SSH is disabled by default so you need to enable it by clicking on the "Enable" button.
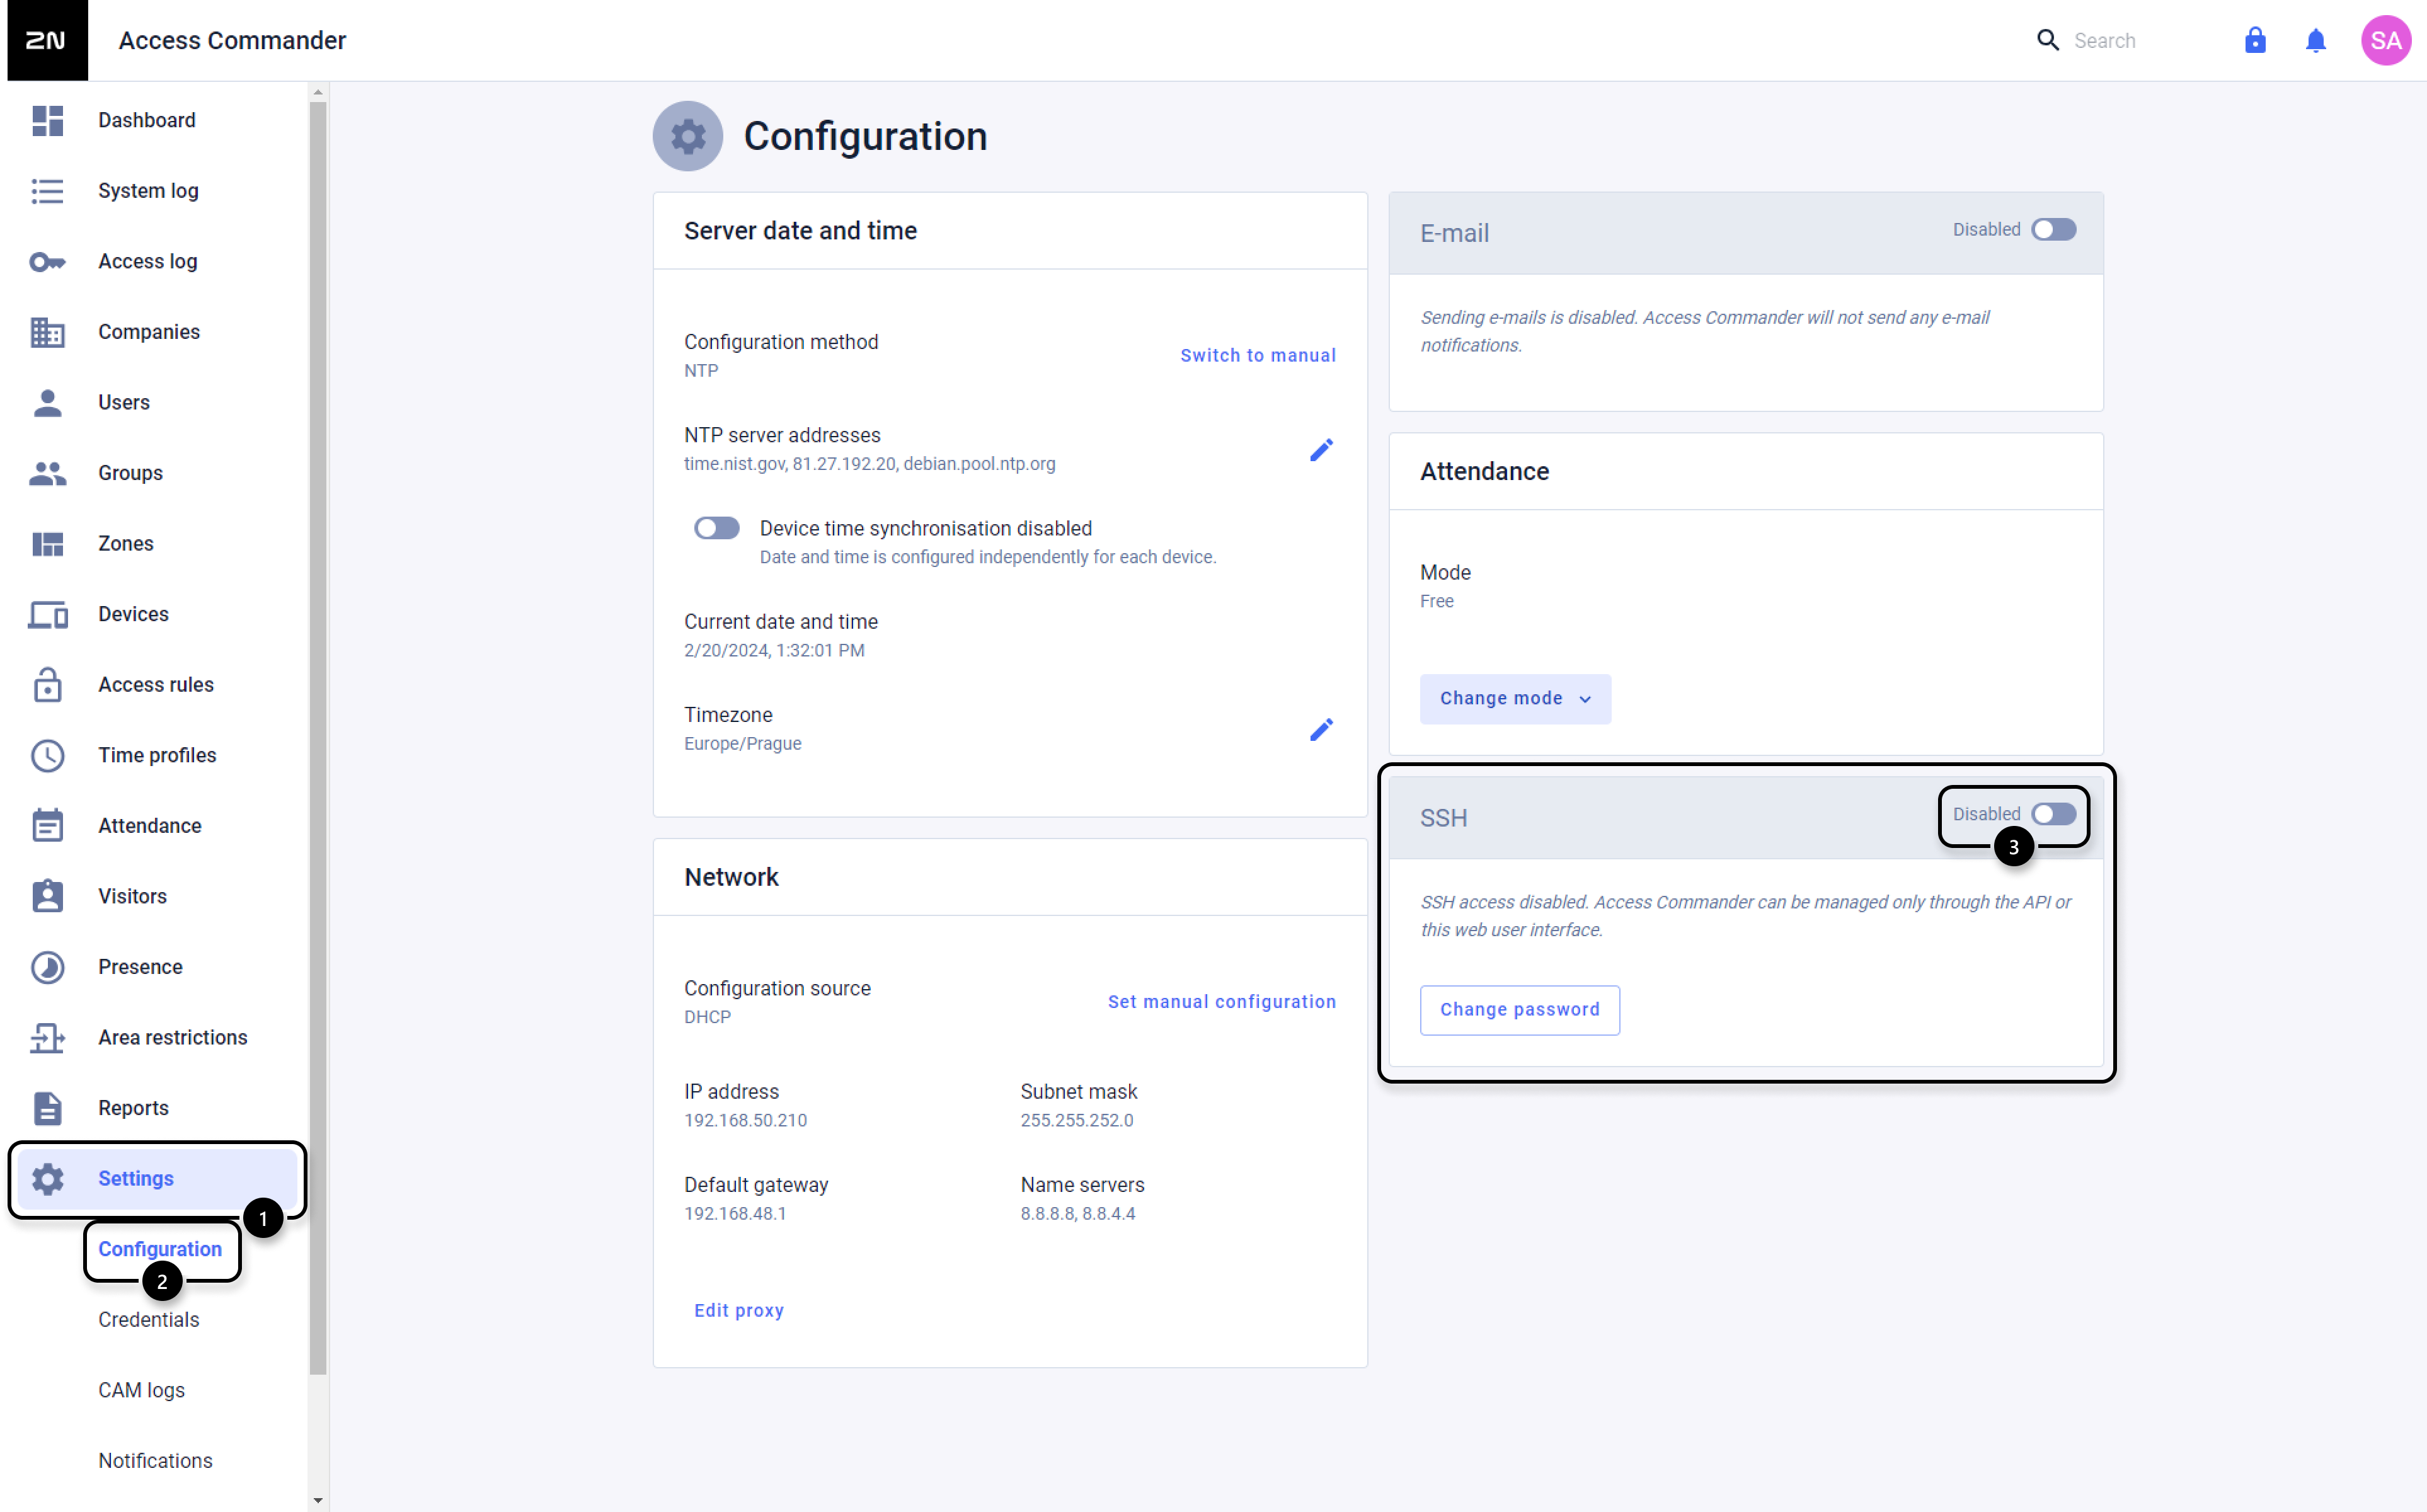
The SSH connection is secured with the root password to the Linux Console. After clicking on the "Enable" button you will be asked to change the default root password in case you have not done so in the Linux Console before.
After setting a new password the SSH connecting will be enabled. You can change the root password for Linux Console and SSH connection by clicking on the "Change password" button.

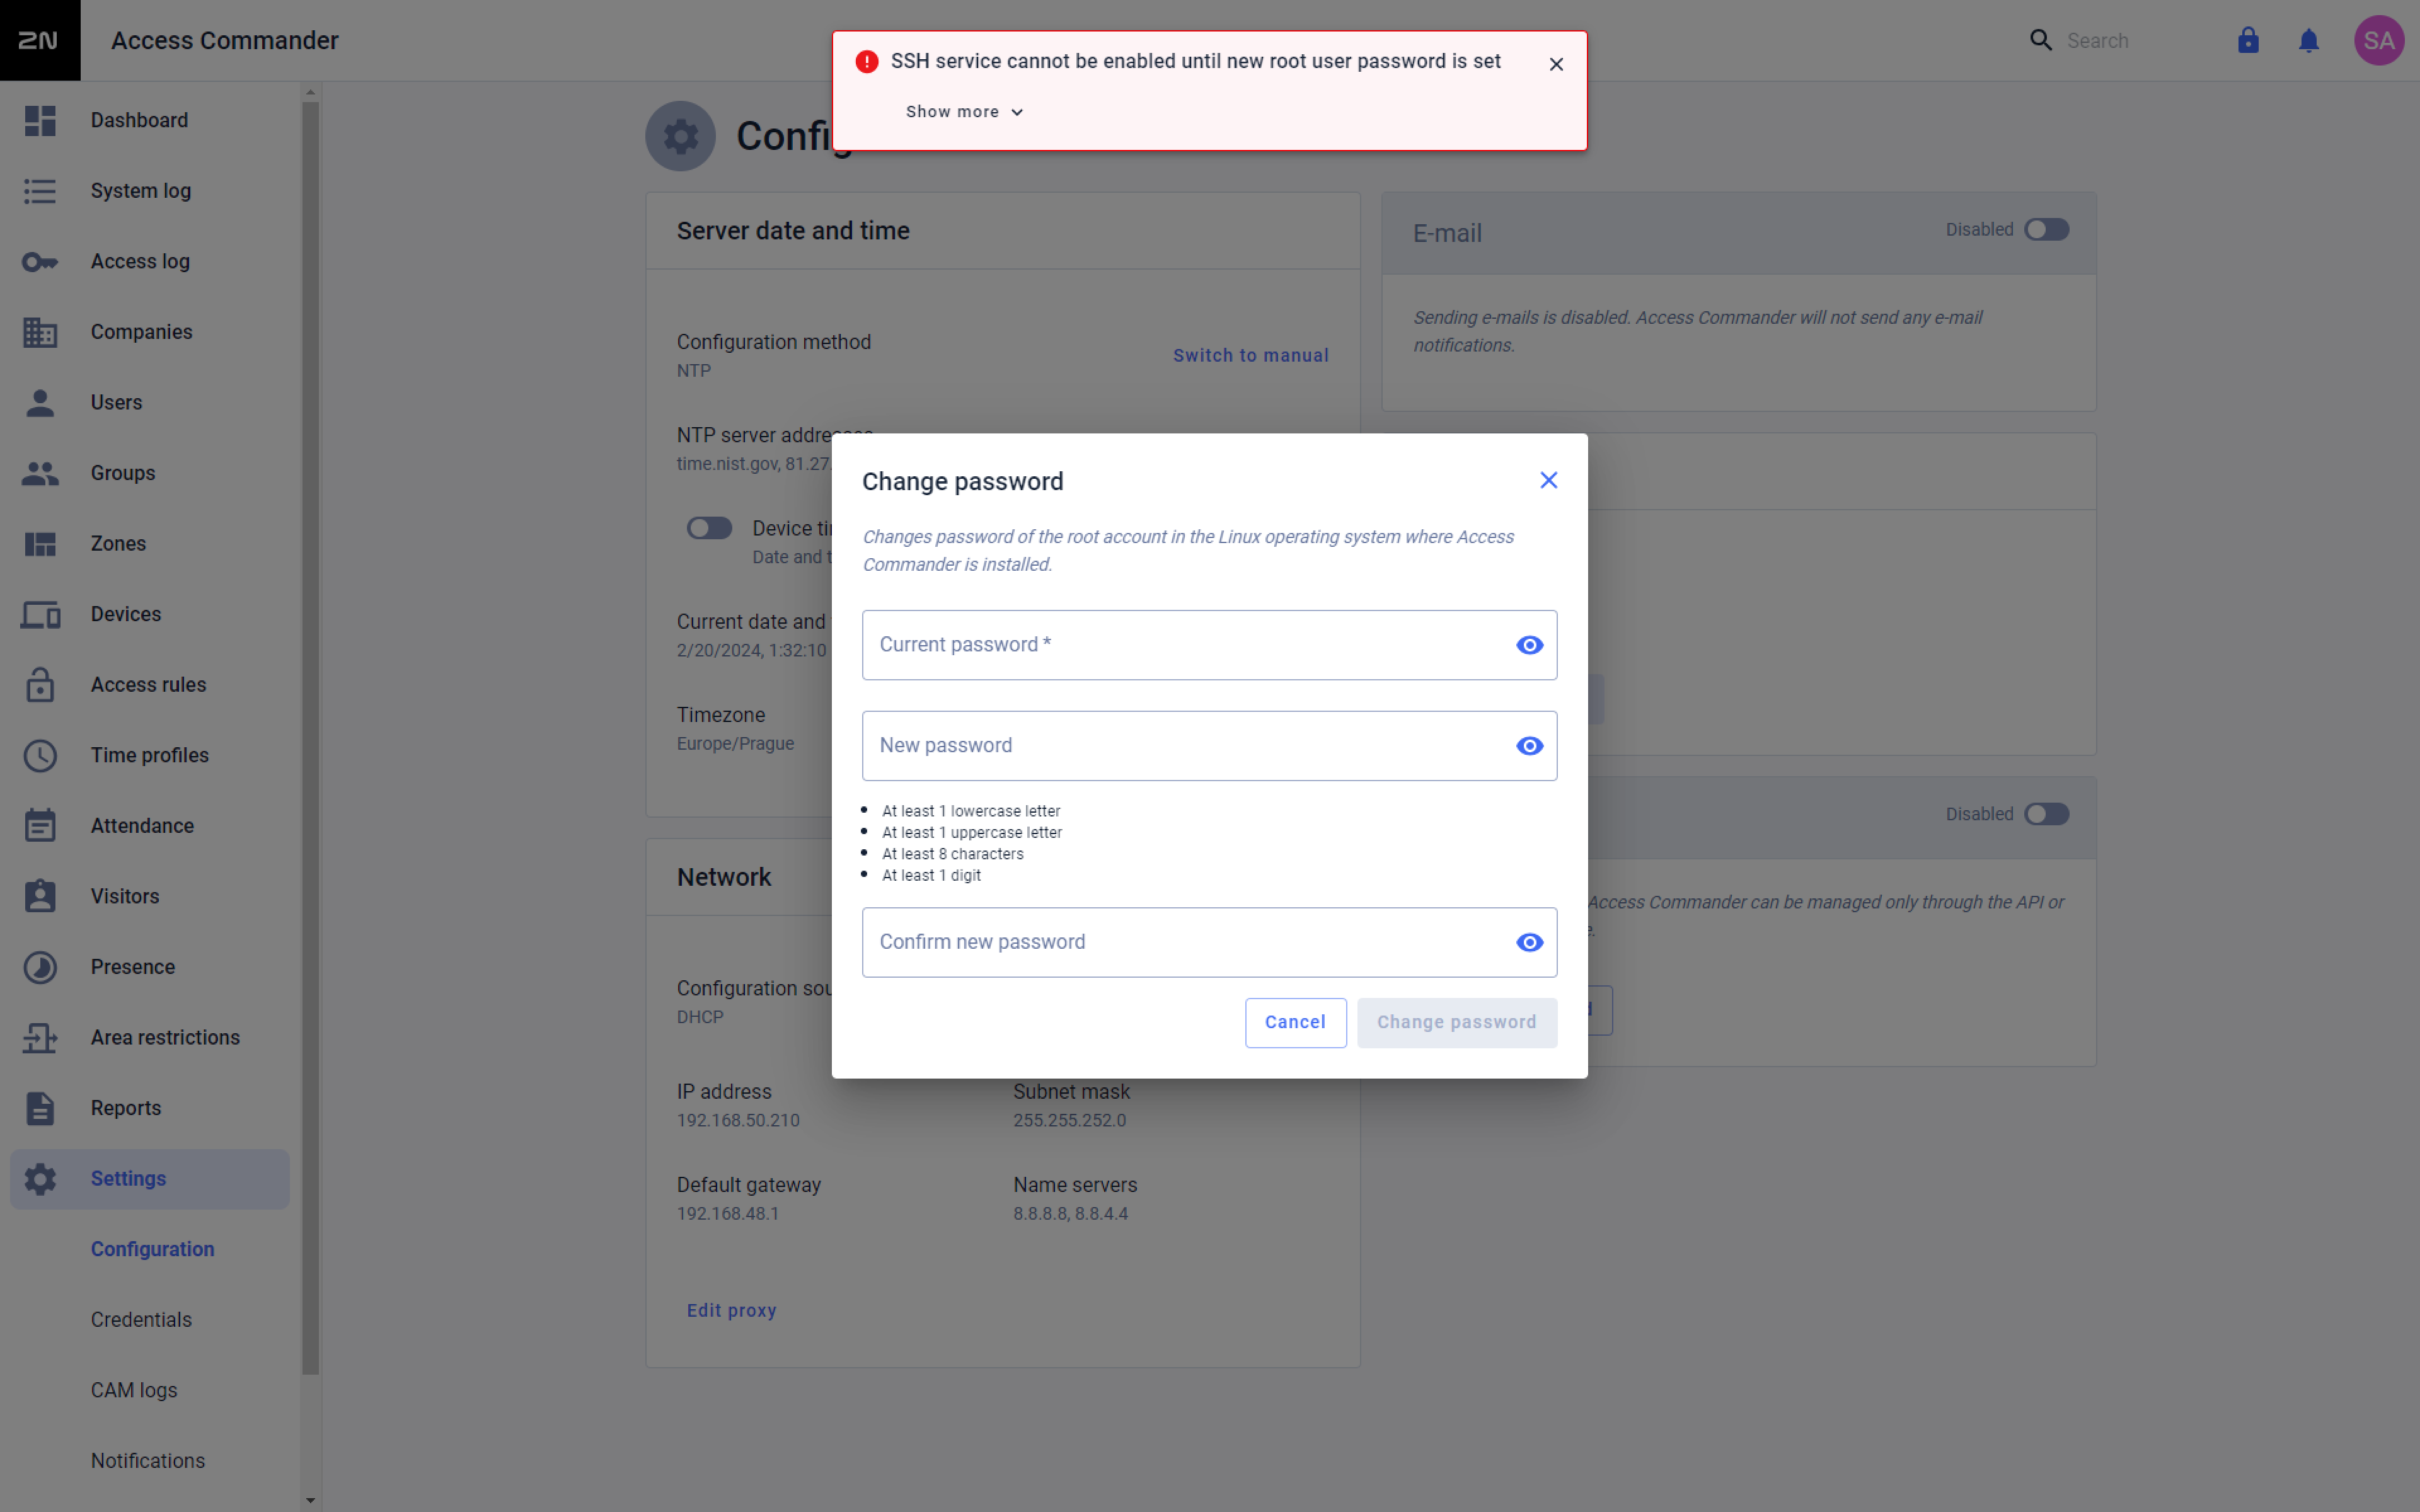
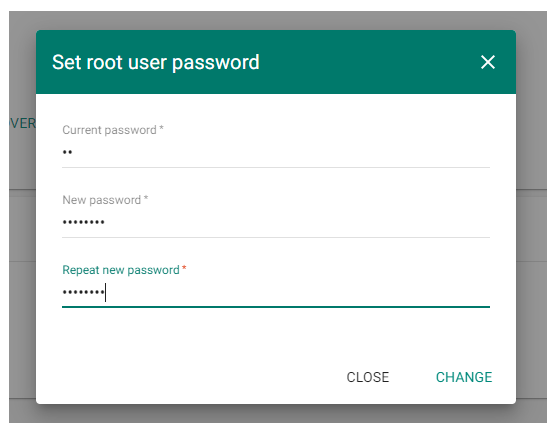
When clicking on the "Change password" button the "Set root user password" window will pop up and you will be asked to enter the current password, create a new one and repeat it for confirmation.

Now you will be able to connect to the 2N® Access Commander box or virtual machine by entering the IP address of the 2N® Access Commander to some SSH client with the set password. Here is an example with the MobaXterm SSH client.

Version 2.2 - 2.7.1
After you log in to the web interface of the 2N® Access Commander you can find the SSH setting in the bottom section of the Settings tab. The SSH is disabled by default so you need to enable it by clicking on the "Enable" button.
The SSH connection is secured with the root password to the Linux Console. After clicking on the "Enable" button you will be asked to change the default root password in case you have not done so in the Linux Console before.
After setting a new password the SSH connecting will be enabled. You can change the root password for Linux Console and SSH connection by clicking on the "Change password" button.
When clicking on the "Change password" button the "Set root user password" window will pop up and you will be asked to enter the current password, create a new one and repeat it for confirmation.
Now you will be able to connect to the 2N® Access Commander box or virtual machine by entering the IP address of the 2N® Access Commander to some SSH client with the set password. Here is an example with the MobaXterm SSH client.
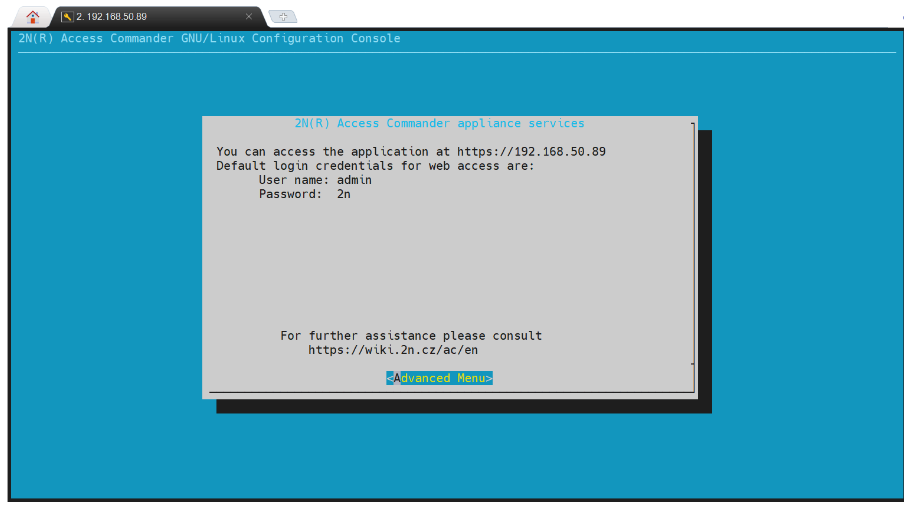
Linux Console set up
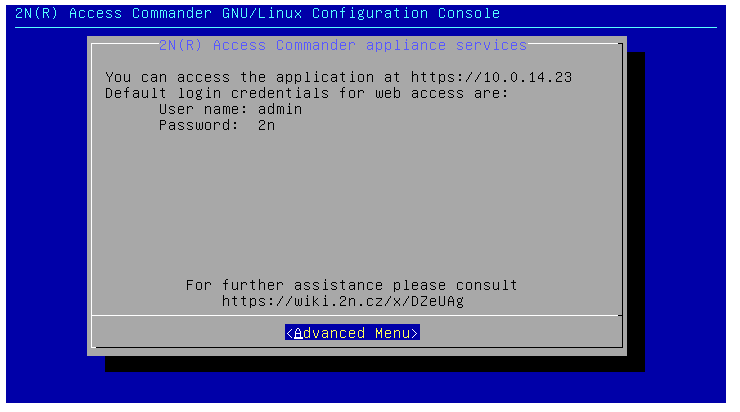
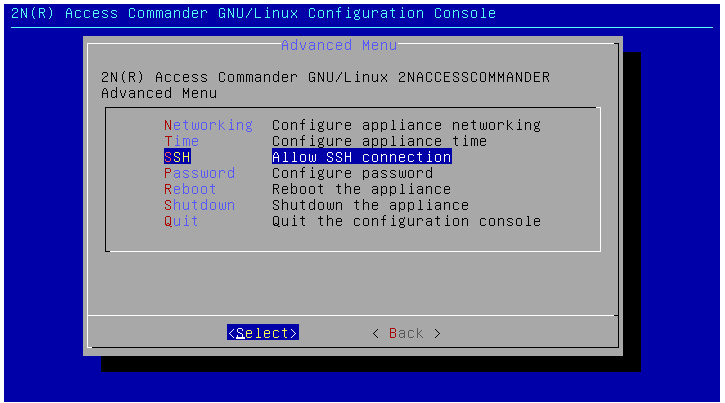
You need to reboot your virtual machine containing 2N® Access Commander if you updated through the web interface for the changes to take effect, then enter the <Advanced Menu>:
Continue to SSH Allow SSH connection:
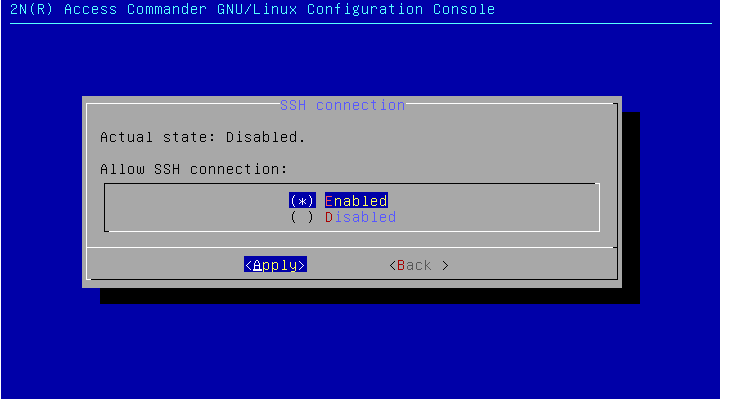
Go to ( ) Enabled, hit Space to tick it and then press <Apply>
This will take you to this screen where you have to enter a new stronger password, unless you already had one. Press <Select>
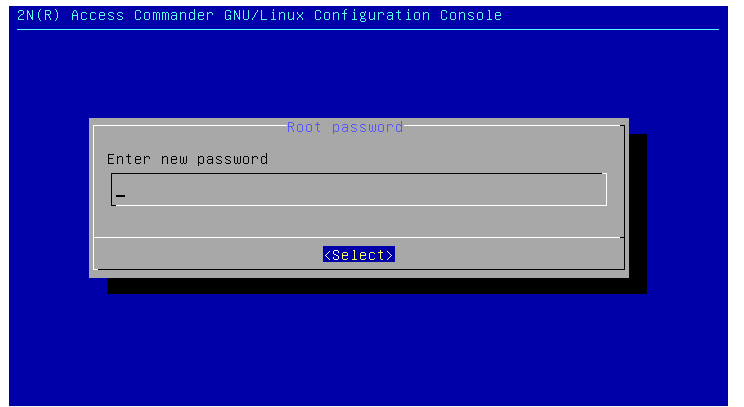
Enter it again to confirm, <Select>

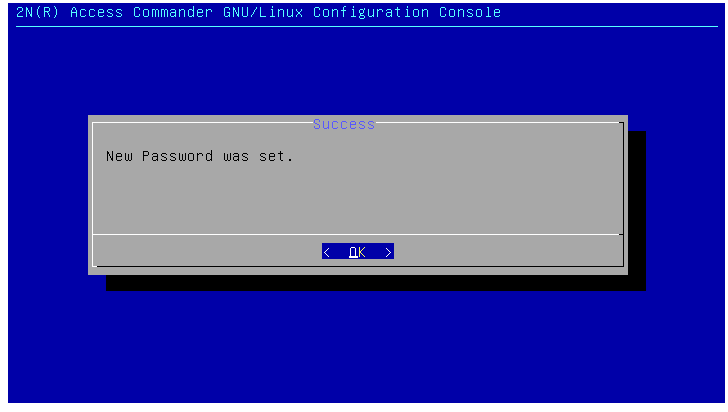
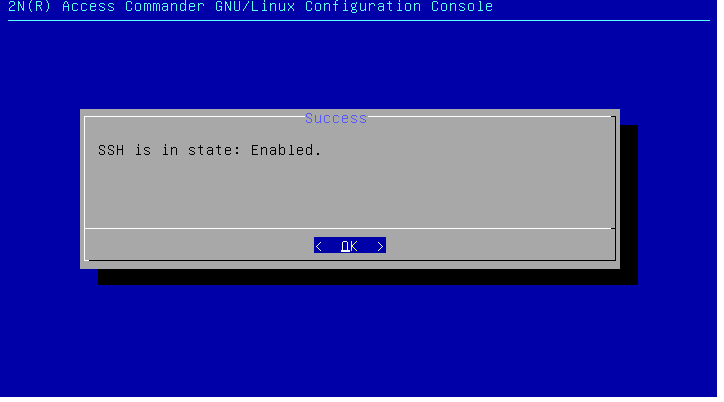
Confirmation window will pop up, press <OK>, then you'll be informed that SSH has been enabled <OK>
From here you can go <Back> to Advanced Menu.

SSH is now enabled and you can use software like PuTTY to configure and control 2N® Access Commander.