2N® Indoor Touch 2.0 - How to setup call from/to 2N IP Intercom?
The 2N® Indoor Touch 2.0 unit is designed for an audio and video communication with the 2N IP Intercom. You can see all intercoms connected to the LAN, you are able to accept incoming audio/video calls, make outgoing calls to 2N IP Intercom and also control locks connected to the intercom.
2N® IP intercom FW & license
It is strong recommended to use the latest FW version for 2N IP Intercom as available here.
The 2N® IP Mobile application ver.4 does not need Enhanced integration or Gold license for the 2N IP Intercom for door opening anymore.
How to configure 2N IP Intercom?
- for firmware 2.23.1 and older:
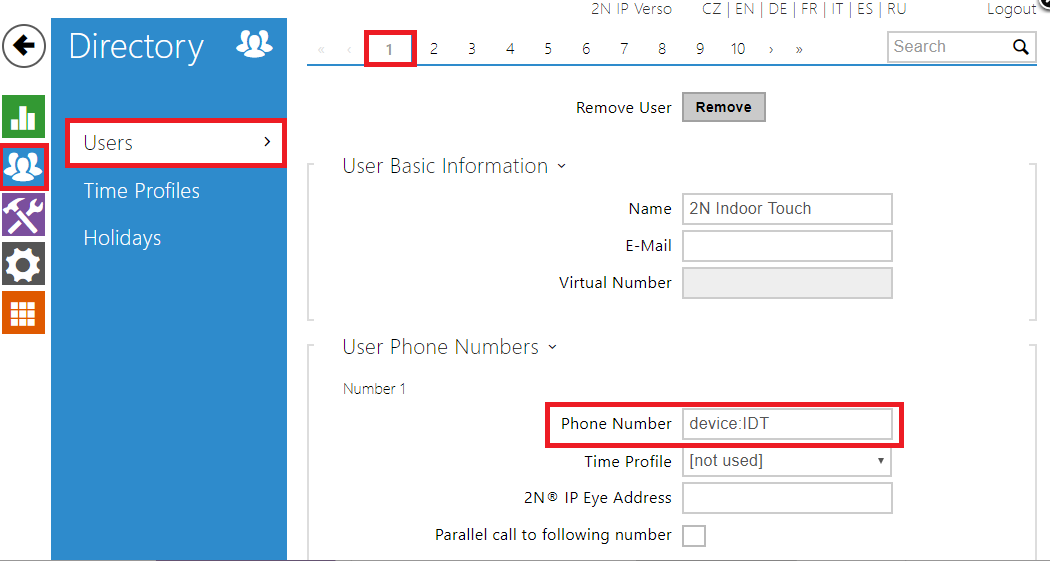
As a very first step go to the section "Directory – Users", enable the desired position in the Phonebook and set the "Phone Number" to be dialled once you press an appropriate button of the intercom. If you want to call to the 2N® IP Mobile (Intercoms) application running in the 2N® Indoor Touch 2.0 unit, the number has to be filled in a format: "device:name". In our example the device name “IDT” is being used, see please the picture below.
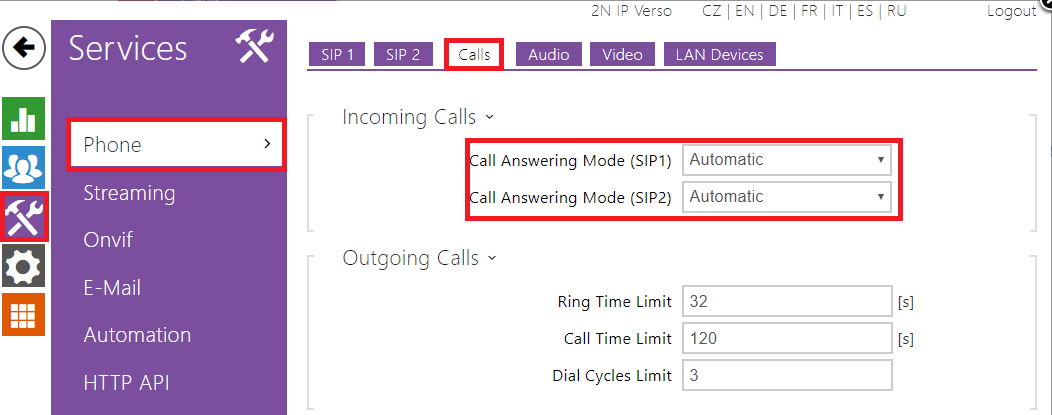
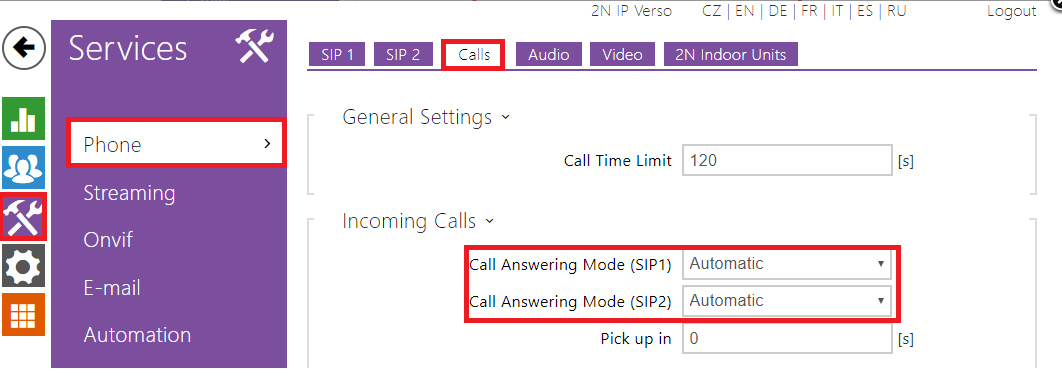
In the next step you can set the intercom to automatically pick up the incoming calls in order to easily reach it at any time. Go to the section ![]() "Services – Phone – Calls" and enable Automatic Pickup for incoming calls for both SIP1 and SIP2, see the picture below.
"Services – Phone – Calls" and enable Automatic Pickup for incoming calls for both SIP1 and SIP2, see the picture below.
 As a next step go to the section
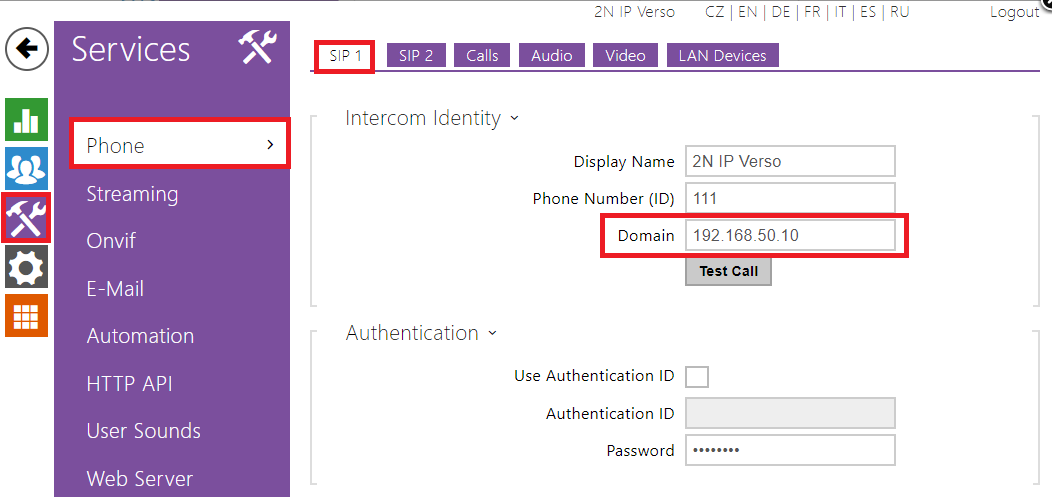
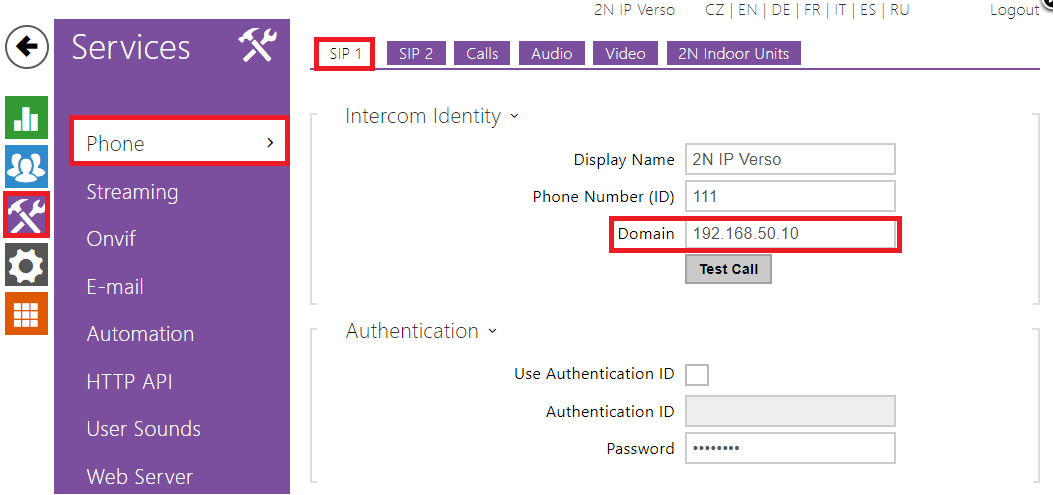
 ![]() "Services - Phone - SIP 1" and fill in the "Domain" field. For direct calls from the 2N IP Intercom to 2N® IP Mobile (Intercoms) application it is recommended to fill in the IP address of intercom as shown in the picture below (IP address of the intercom in this example is 192.168.50.10).
"Services - Phone - SIP 1" and fill in the "Domain" field. For direct calls from the 2N IP Intercom to 2N® IP Mobile (Intercoms) application it is recommended to fill in the IP address of intercom as shown in the picture below (IP address of the intercom in this example is 192.168.50.10).
- for firmware 2.24.0 and later:
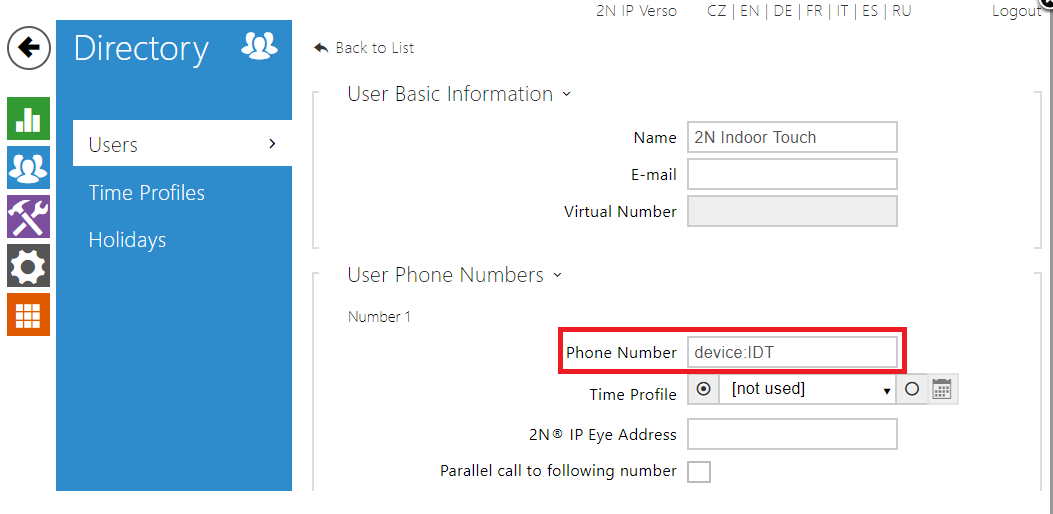
As a very first step go to the section "Directory – Users", create a new user and set the "Phone Number" to be dialled once you press an appropriate button of the intercom. If you want to call to the 2N® Indoor Touch 2.0 unit, the number has to be filled in a format: "device:name". In our example the device name “IDT” is being used, see please the picture below.
 In the next step you can set the intercom to automatically pick up the incoming calls in order to easily reach it at any time. Go to the section
 ![]() "Services – Phone – Calls" and enable Automatic Pickup for incoming calls for both SIP1 and SIP2, see the picture below.
"Services – Phone – Calls" and enable Automatic Pickup for incoming calls for both SIP1 and SIP2, see the picture below.
As a next step go to the section ![]() "Services - Phone - SIP 1" and fill in the "Domain" field. For direct calls from the 2N IP Intercom to 2N® IP Mobile (intercoms) application it is recommended to fill in the IP address of intercom as shown in the picture below (IP address of the intercom in this example is 192.168.50.10).
"Services - Phone - SIP 1" and fill in the "Domain" field. For direct calls from the 2N IP Intercom to 2N® IP Mobile (intercoms) application it is recommended to fill in the IP address of intercom as shown in the picture below (IP address of the intercom in this example is 192.168.50.10).
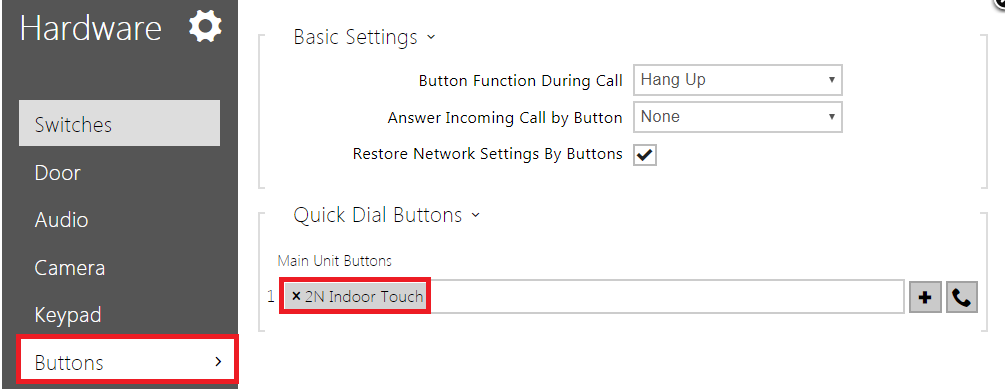
Last step is to assign newly created contact to quick dial button.
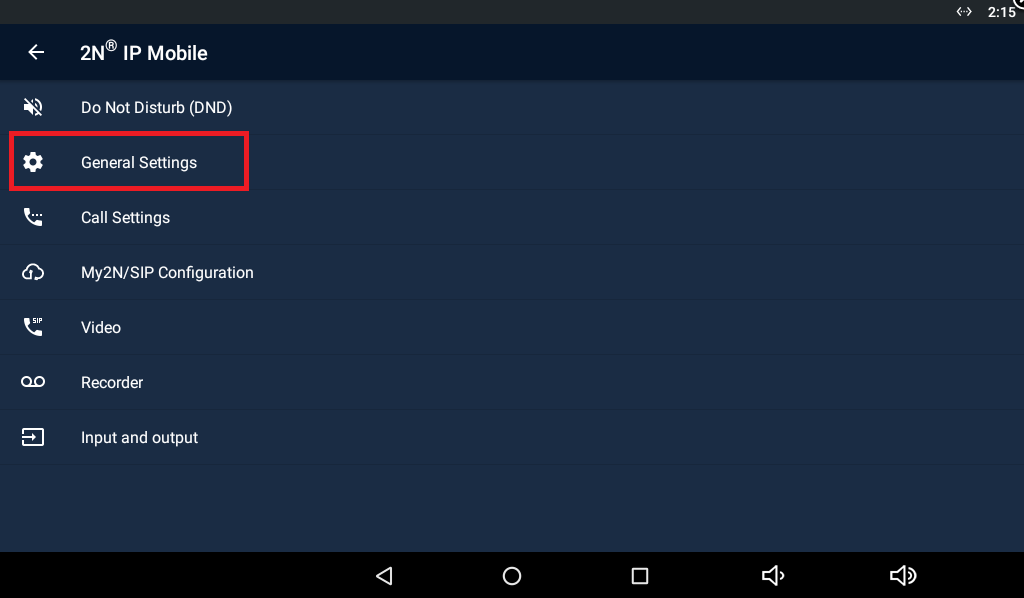
How to set 2N® Indoor Touch 2.0?
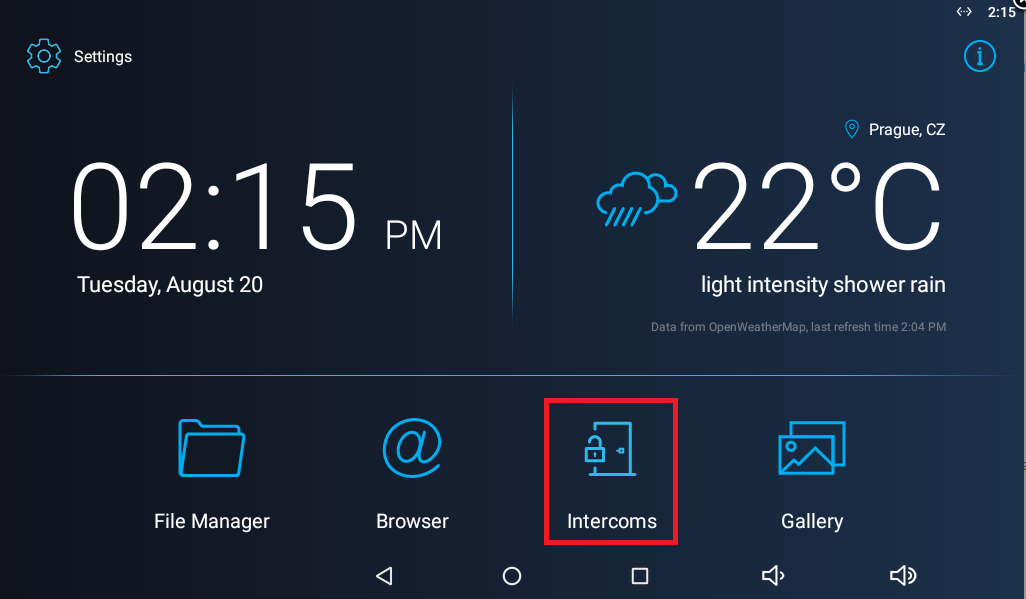
Once the 2N® Indoor Touch 2.0 is connected to the local network and powered (over PoE or using an external 12V DC/2A power supply) it will boot up and you see its initial screen (launcher). By clicking on the Intercoms application icon in the right upper corner you can open it and access its settings.
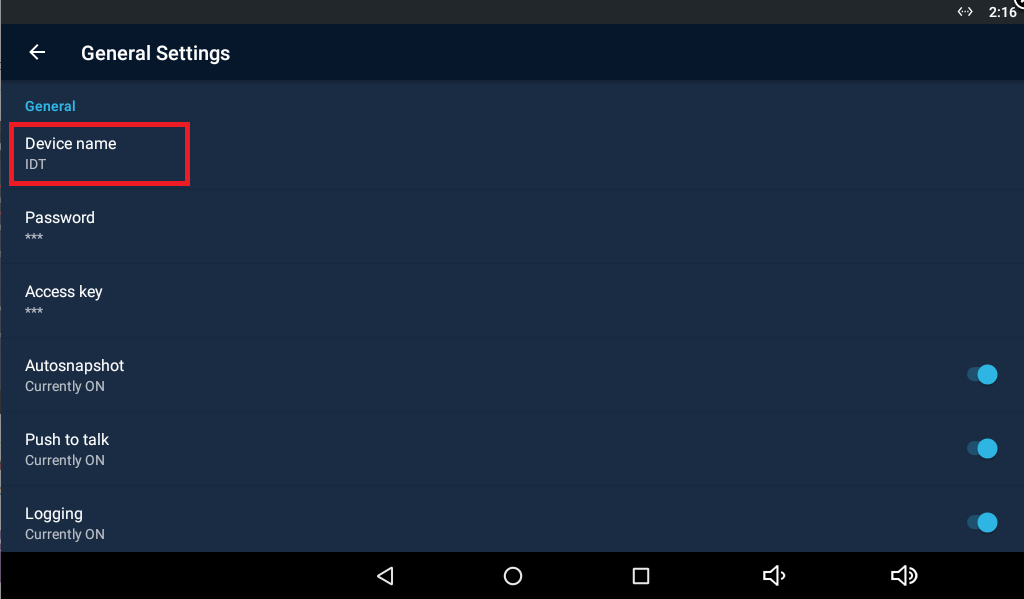
To be able to receive calls on the 2N® IP Mobile (Intercoms) you need to set the device name first. The device name is used by the intercom for the call routing instead of the IP address. Go to the section "Settings - Device name" and set the desired name, in our example we use "IDT", see the pictures below.
|
|
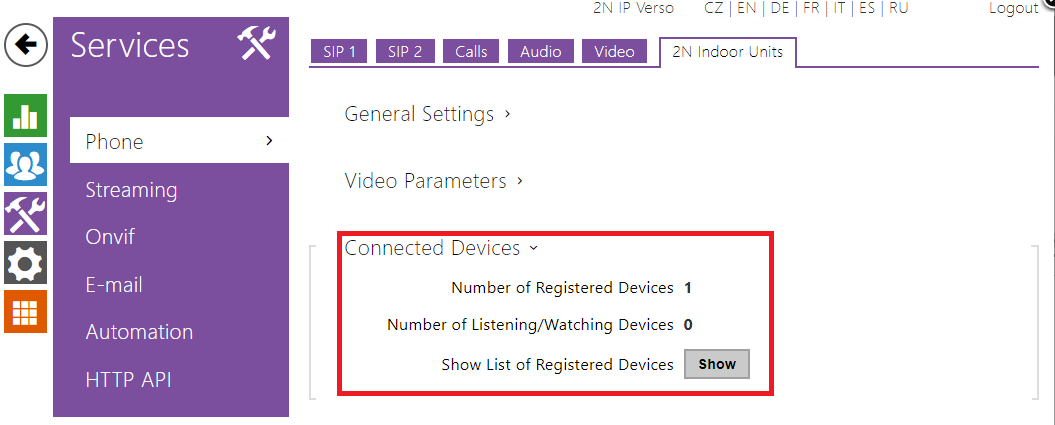
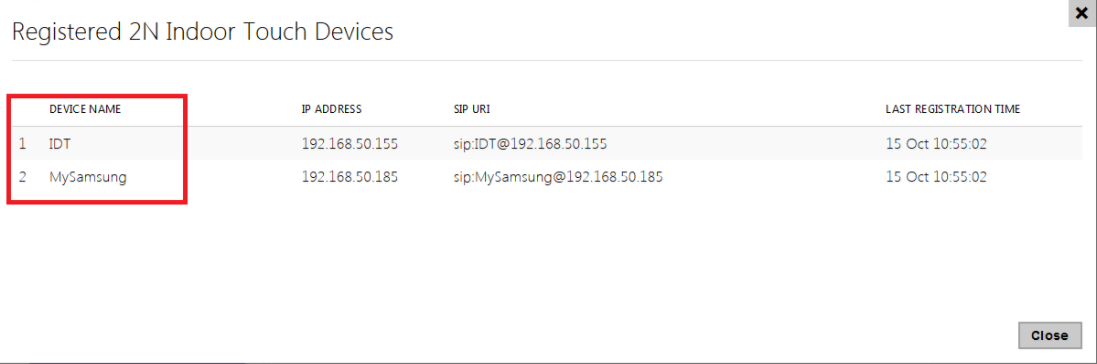
List of connected devices on 2N® Helios IP
A list of registered Device names can be easily viewed on the 2N IP Intercom in the menu Services - 2N® Indoor Touch 2.0, see the example below.
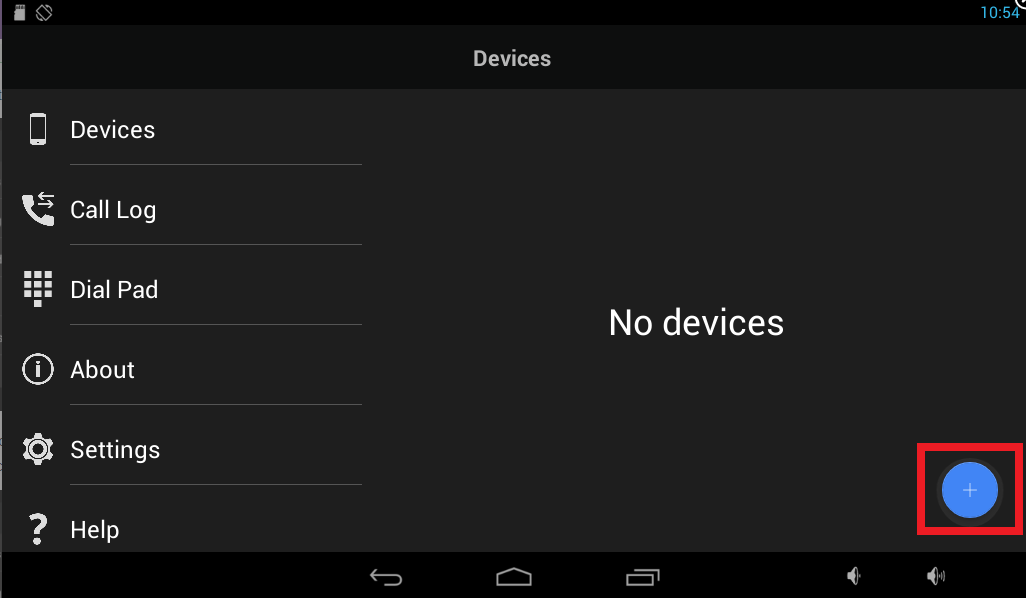
The application automatically scans your LAN network and looks for all connected 2N IP Intercoms. You can easily add them in the "Devices" section by clicking on the "+" button.
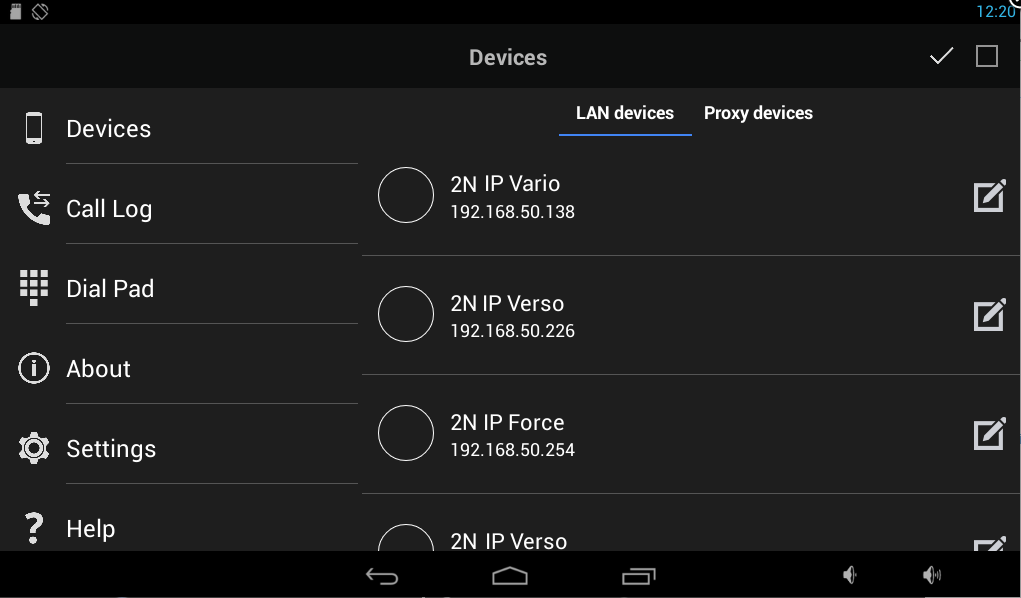
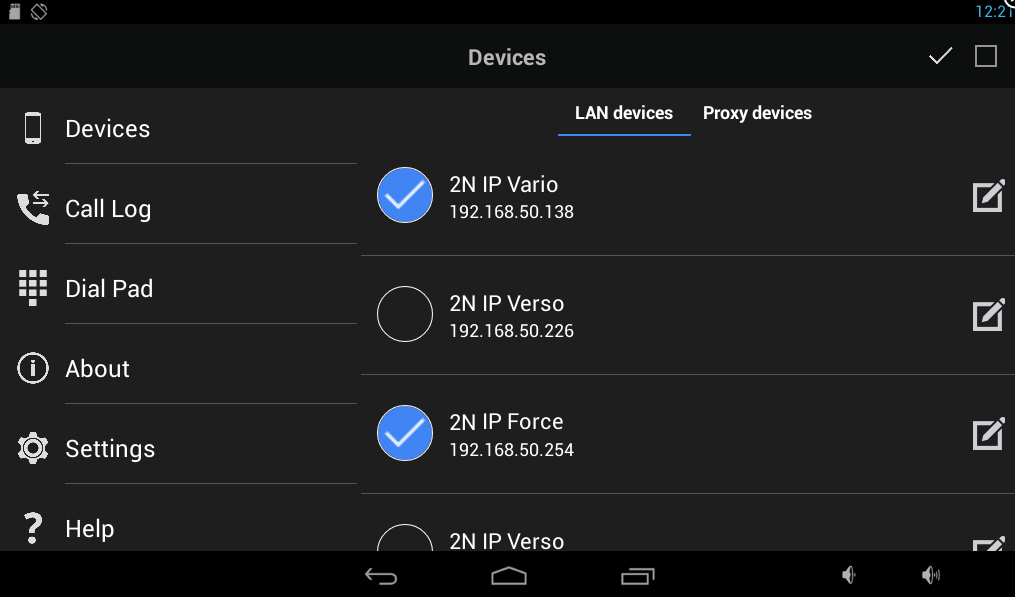
In the LAN devices list you can see all 2N IP Intercoms available. By clicking on the specific row you can add selected intercoms only, or by clicking on the checkbox in the right upper corner you can add all of them at once.

Display name change
By clicking on the pencil button you can also optionally change the display name for each 2N IP Intercom.


By clicking on the confirmation button ![]() you have just added the desired local devices to the list and the application is ready to call.
you have just added the desired local devices to the list and the application is ready to call.
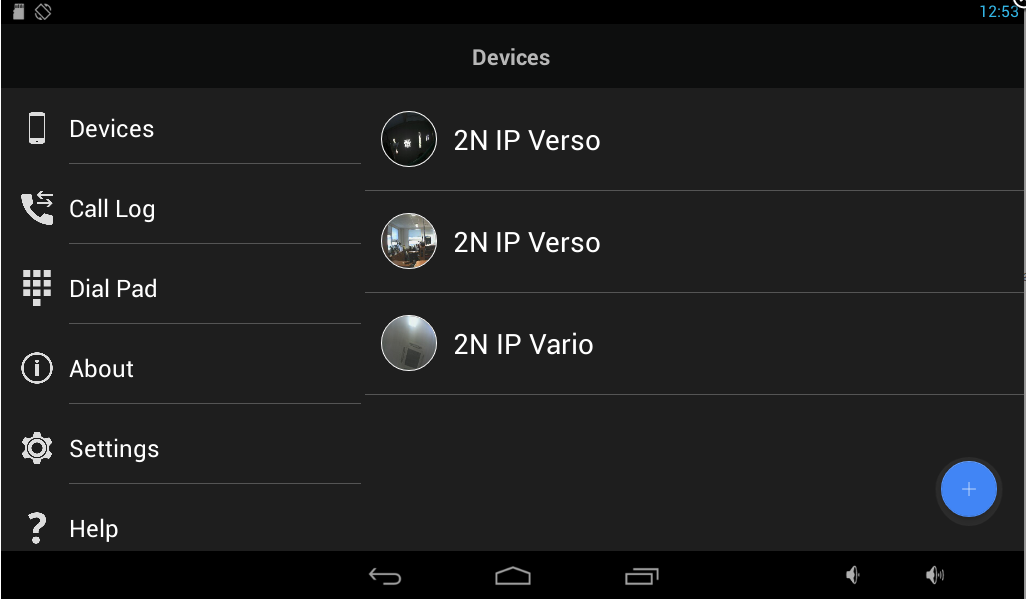 By selecting the desired 2N IP Intercom in the list of Devices you can watch the video stream, place a call, open the door lock, listen to the audio stream preview and also make an instant screenshot.

Door Lock details
The door lock can be triggered by the lock button at any time - during the preview or during an active call as well. If you would like to trigger some other lock than the default Lock 1, simply hold your finger on the lock icon for a while and all 4 locks will appear.
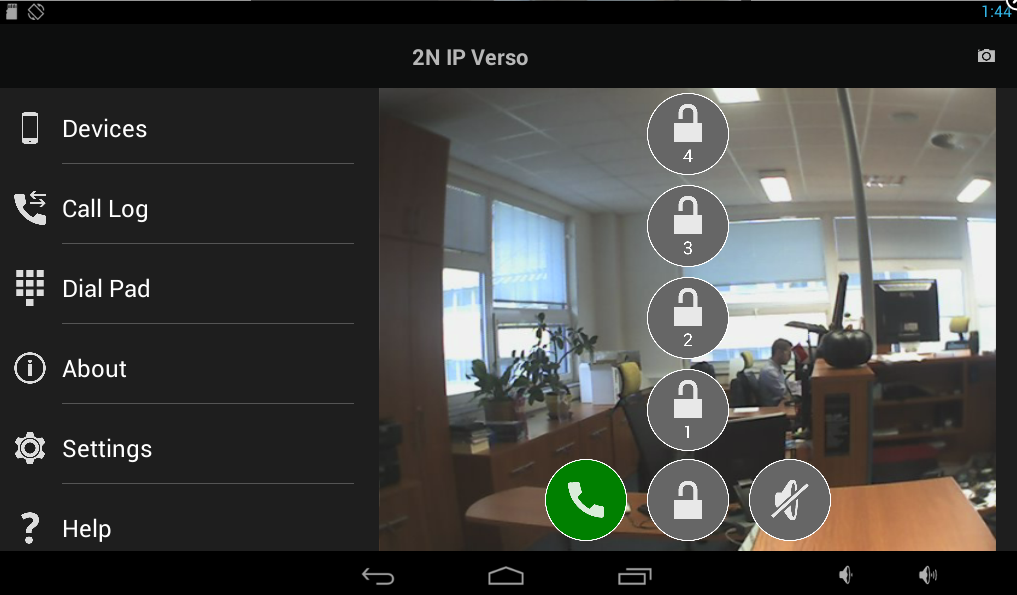

There is also no need to set any lock code, the communication with the 2N IP Intercom works on a proprietary HTTP command basis.
Network requirements
In order to perform correctly, all components are required to be interconnected over appropriate Ethernet/Wi-Fi network parts as described in this FAQ: What LAN/Wi-Fi infrastructure do I need?
Read it please very carefully to avoid any video blackout or audio/video delay issues. Thank you.