How to connect and configure a door contact to 2N IP Intercom
A door sensor can provide you information about the state of the door and provide some actions in particular situations, such as announcing an audio message when the door has been opened too long, also sending an email, call and more. Same can be configured in case of an unauthorized door opened.
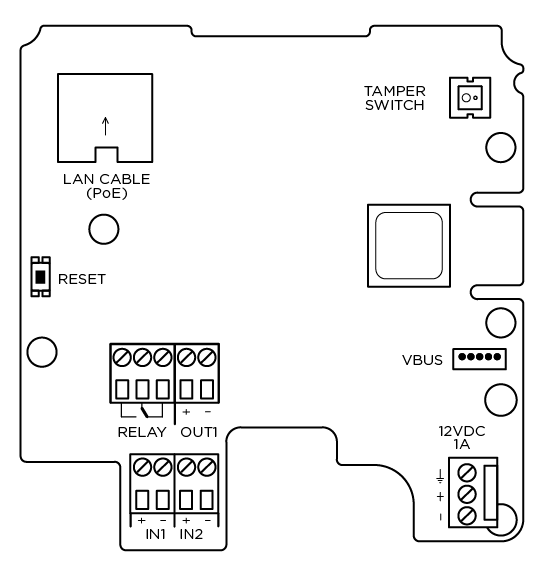
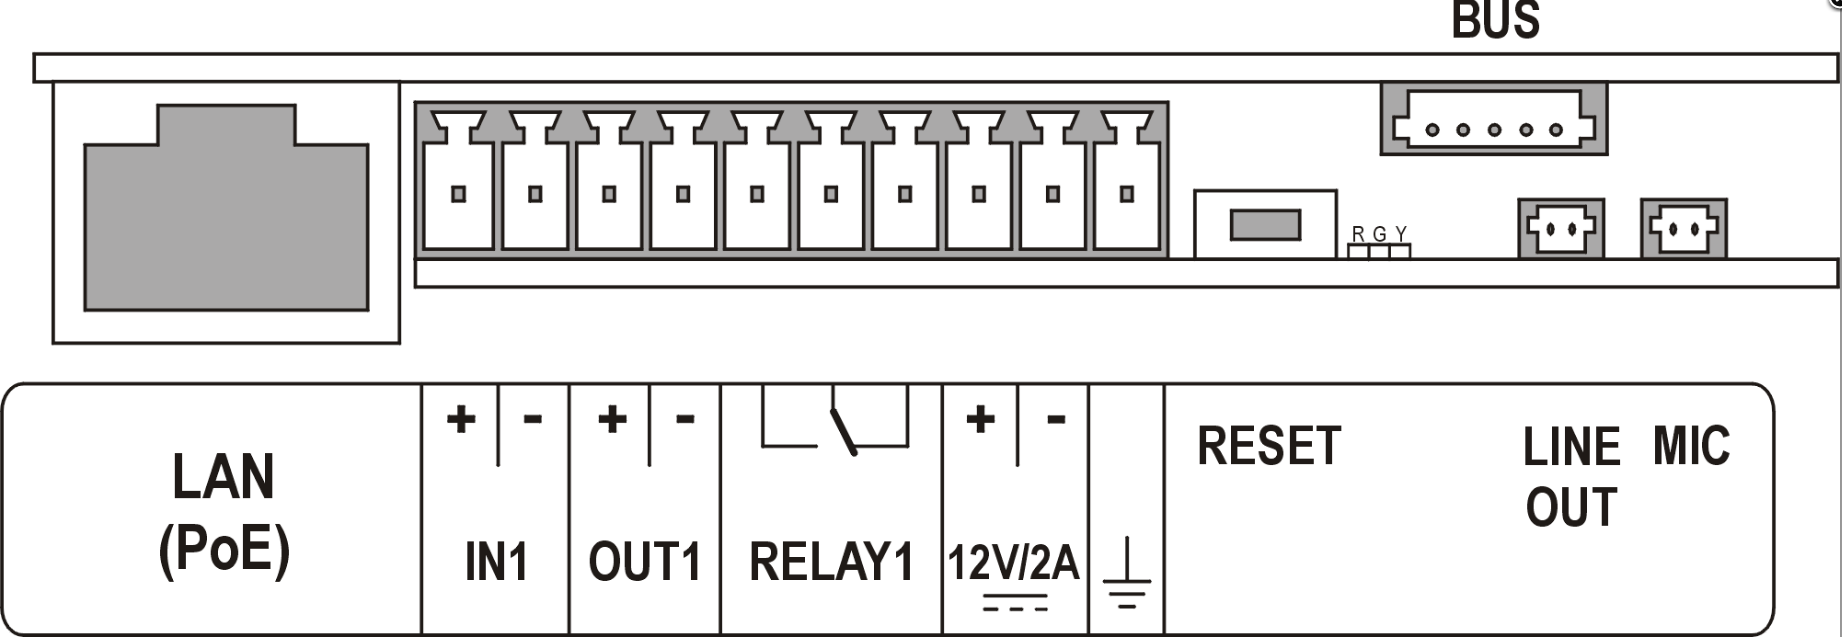
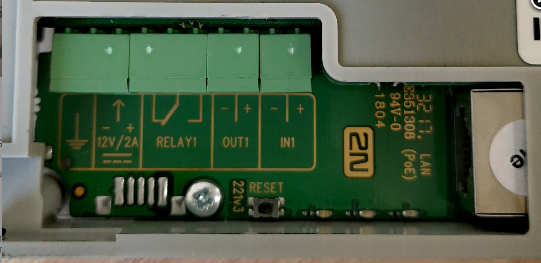
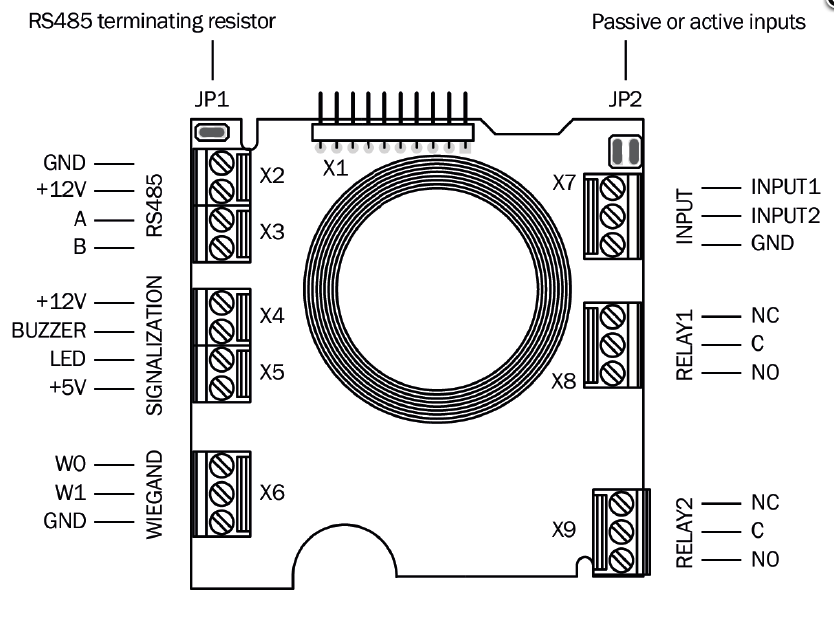
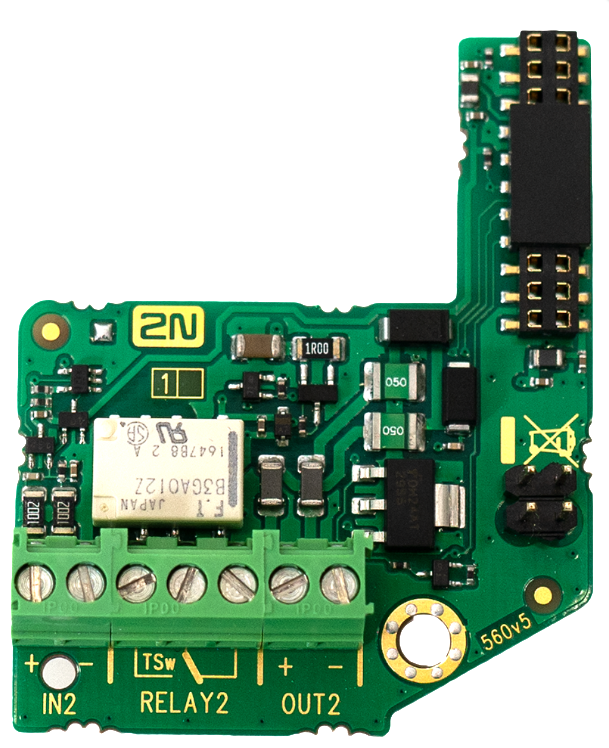
A door sensor can be connected to all 2N IP intercoms with the exception of IP Uni, to an input contact (Input1, Input2, Ext.In1, ...).
Connection of a door sensor:
First of all it is needed to connect the door sensor to the input of the 2N IP Intercom or 2N Access Unit.
For more information, refer to the section Requirements below.
How to assign and how to process the information from the door sensor:
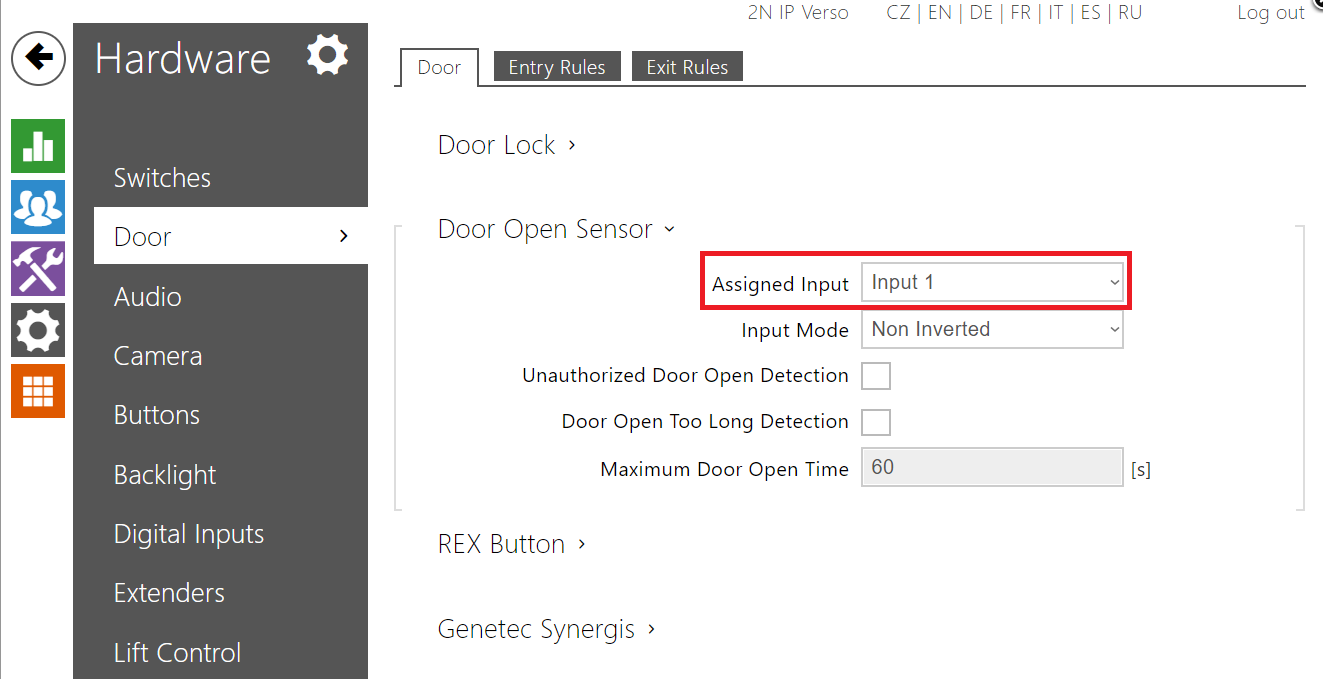
- Go to the section Hardware -> Door -> Door Open Sensor
- It is needed to assign the input to the door sensor in the section Hardware->Door->Door Open Sensor->Assigned Input
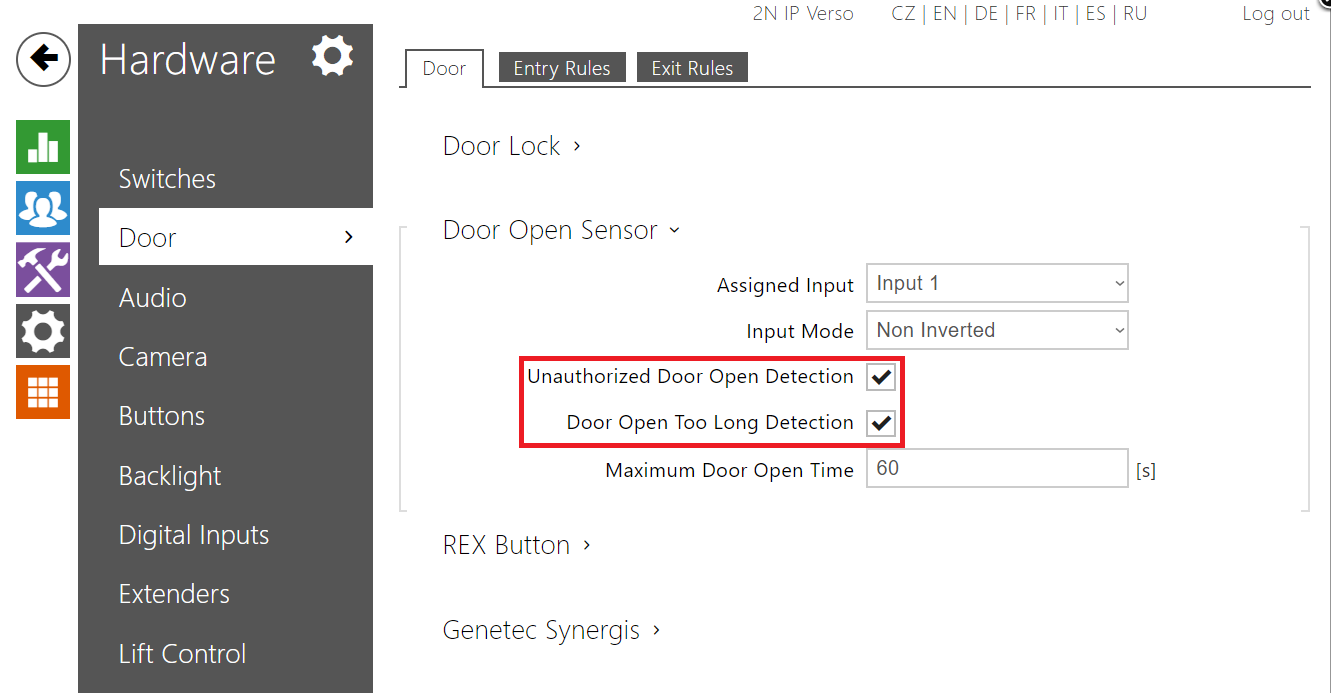
- Enable the check box (GOLD license is required) Door Opened Too Long or Unauthorized Door Open
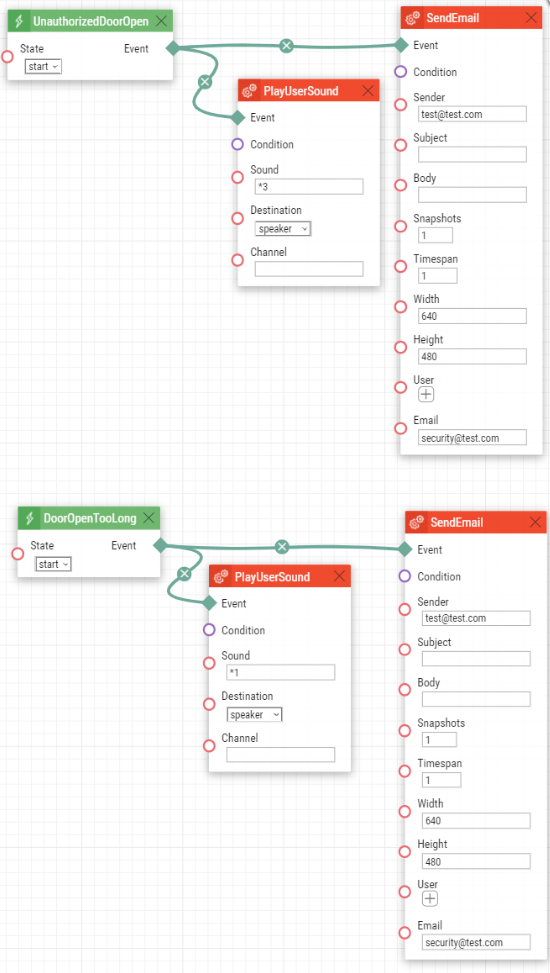
Automation (GOLD license required):
There are three event blocks in the automation related to the Door sensor. DoorOpened, DoorOpenedTooLong, UnauthorizedDoorOpened
Some automation examples:
Requirements:
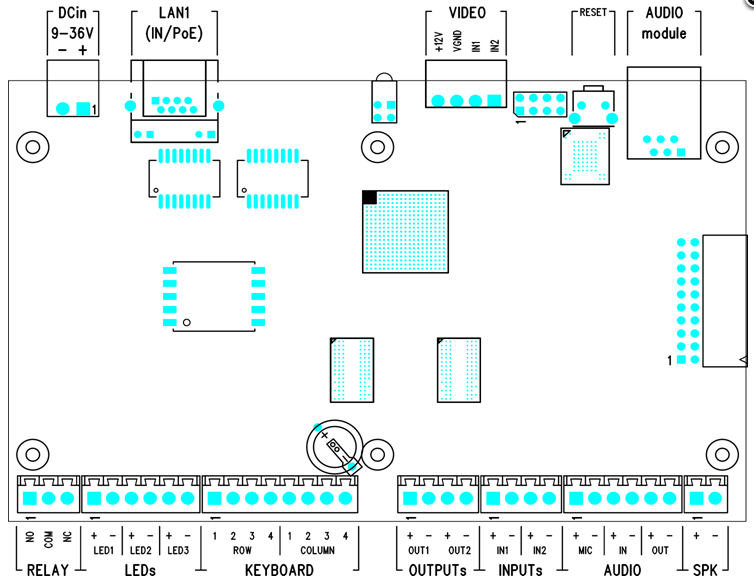
For 2N® IP/LTE Verso - an input is simply in the PCB. No special requirements. Additional inputs are available.
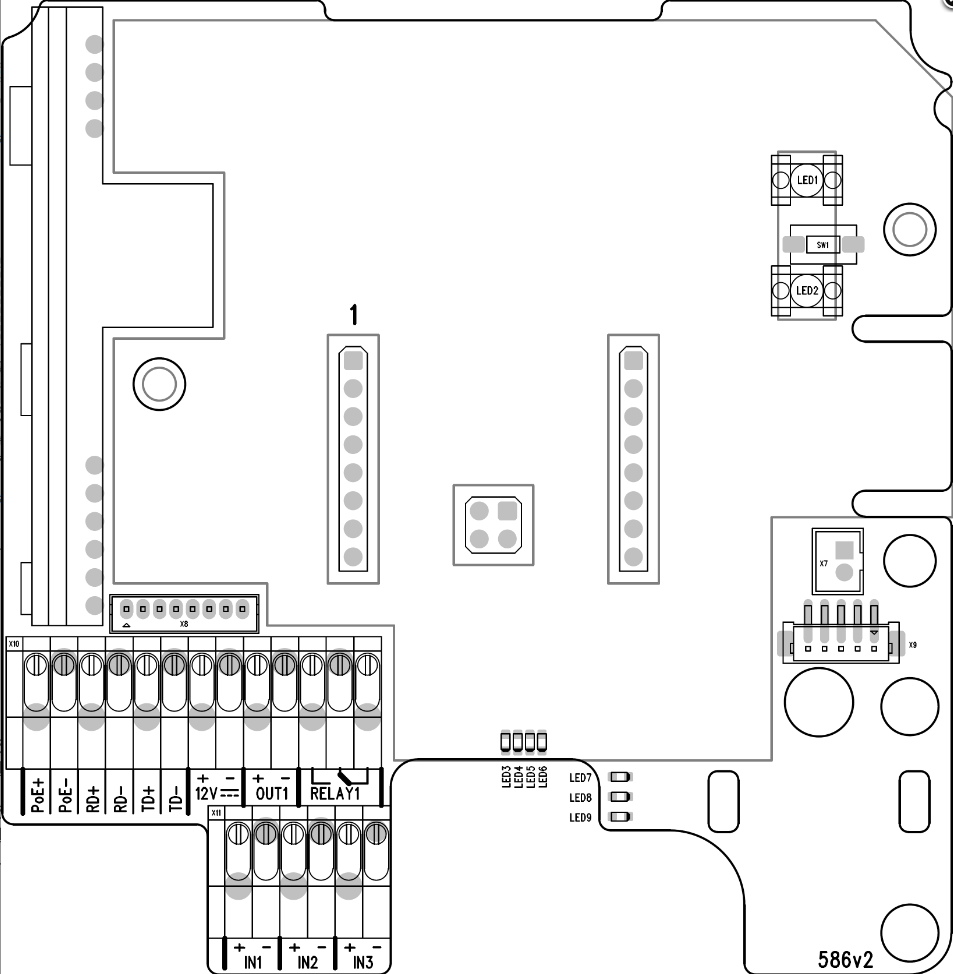
- 2N® IP Solo - an input is simply in the PCB.
- For 2N® IP Vario - a Card Reader 125kHz is required.
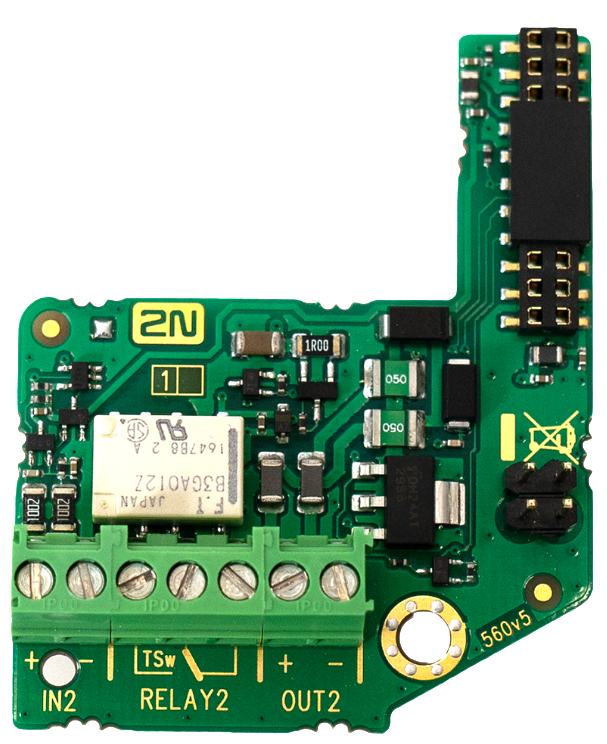
- For 2N® IP Force - an Additional Switch + Tamper or any ´type of a Card Reader is required.
- For 2N® IP Safety - an Additional Switch + Tamper is required.
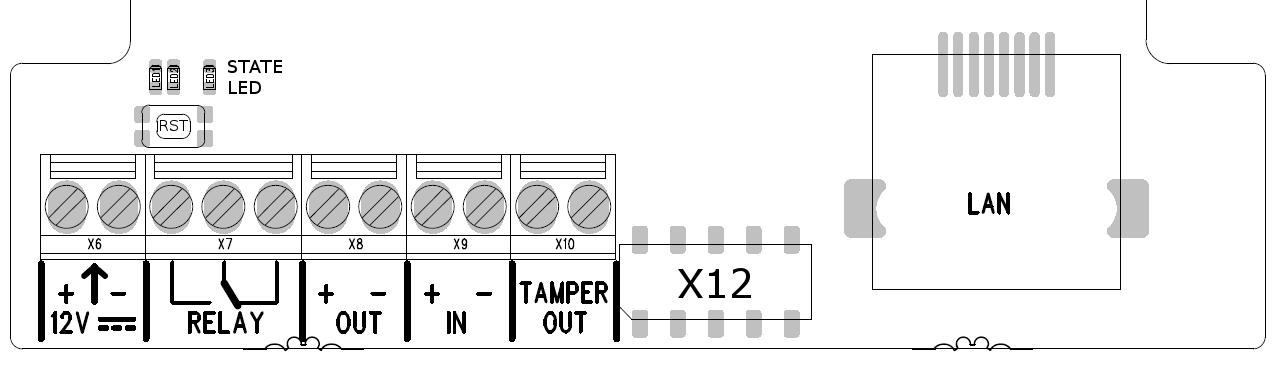
- For 2N® IP Base - an input is simply in the PCB. No special requirements.
- 2N® Audio/Video Kit – 2 input connectors are equipped. No special requirements.
- 2N® Access Unit - 3 input connectors are equipped. No special requirements.
- 2N® Access Unit 2.0 - 2 input connectors are equipped. No special requirements.