Vivotek video server - How to connect with 2N® Analog Intercom
As a very first step you have to make analogue camera work in the 2N® Analog Intercom unit. All steps which have to be followed are described in the installation manual for camera 9135200E in our 2N web page http://www.2n.cz/en/products/intercom-systems/analog-intercoms/helios/downloads/
Necessary steps in order to make camera work are:Select the camera mode and video cable type via jumpers (connector 17 - marked orange) . In the "Video on during call“ mode, the output is active when a call is being made to/from 2N® Analog Intercom. When the call is terminated, the video remains active for about 7 seconds and then switches off. Select the "Permanently on" mode for outdoor installations in order to avoid camera damage by air humidity. It is because the camera is heated during the operation and thus no moisture condensation can occur.
To terminal block 4,5 (connector 1 - marked red) has to be connected the DC12V power supply with arbitrary polarity. The power supply can feed the electric lock too.
On the terminal block 8,9 (connector 1 - marked green) is output for video signal which you need to bring to the input of Vivotek video server. The coaxial cable is connected with an internal conductor to +, with shielding to -.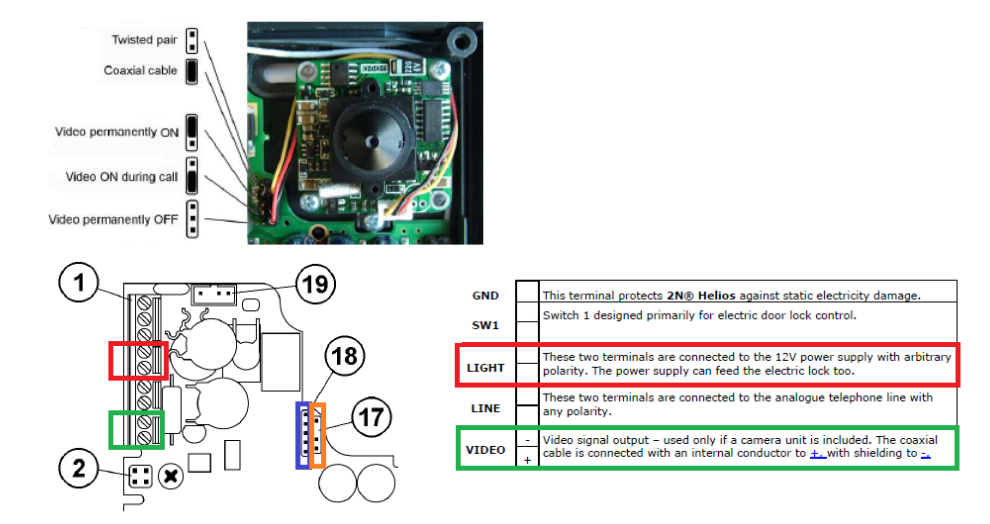
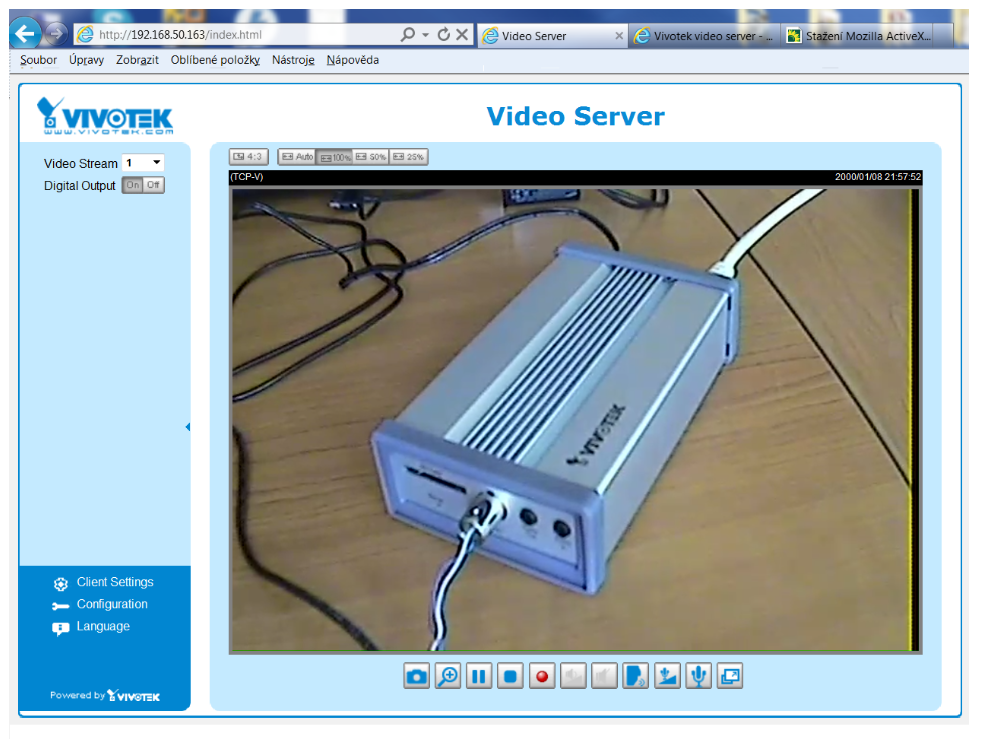
- Thanks to video records anybody is able to observe PC via the LAN, no SW installation is needed. Serves up to 10 PCs at the same time. The MPEG-4 compression ensures that the network load is approximately 10 times lower than uncompressed. The Internet can also be used for watchig the video. Quality/data flow control option. Free SW for intelligent recording of the video record into a PC (includes movement detection).
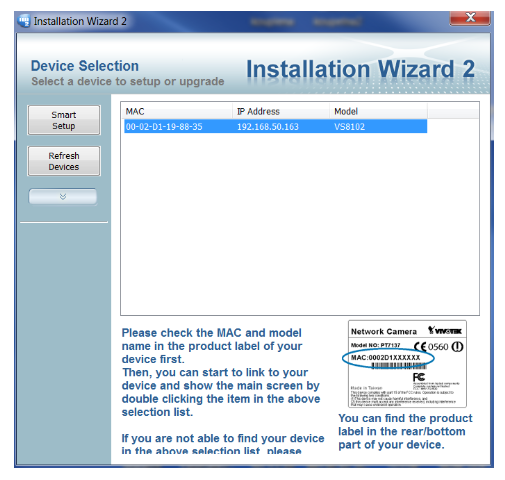
- Insert attached CD to your PC and thanks to "wizard installation guide" install Vivotek software over there.
- Then bring the signal from video output of 2N® Analog Intercom to input of Vivotek server. Connect Vivotek server to your LAN network and stream the video to the PC.