VLC Player - How to watch and record video from 2N IP Intercom
VLC Player - How to watch a video from 2N IP Intercom RTSP server
VLC Media Player is one of several programs which can be used for video recording from 2N IP Intercom. All necessary steps how to set VLC Media Player as well 2N IP Intercom are described below.
GOLD License required
2N IP Intercom settings (firmware 2.29)
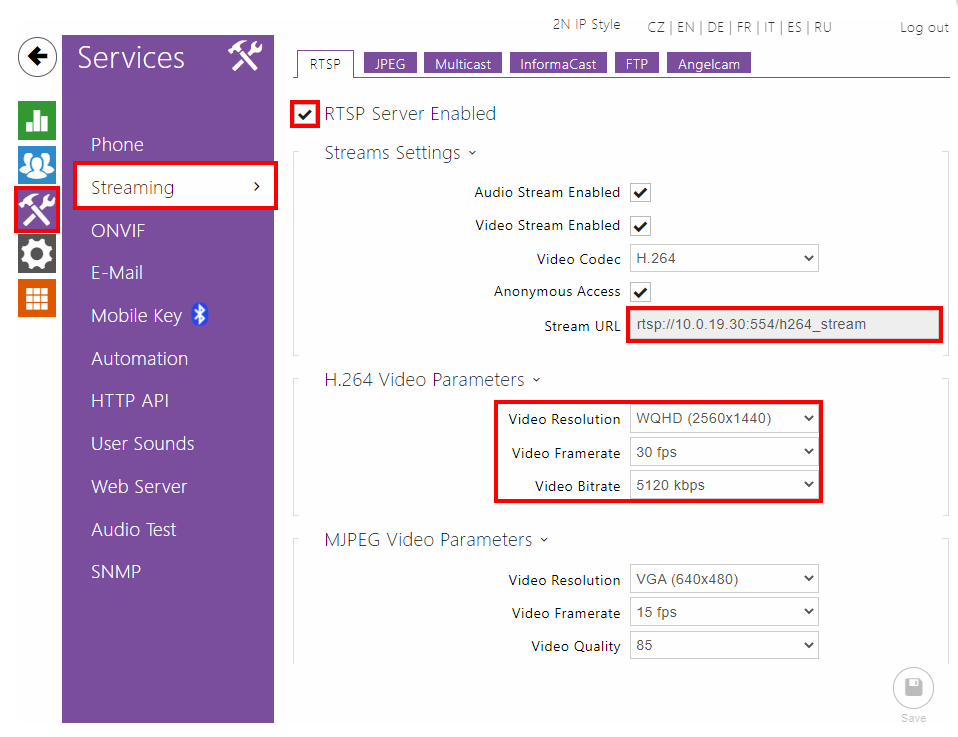
- First of all you have to enable RTSP server and enable video, audio or both – see picture below.
- If you do not fill in any IP address to "Authorised IP address" fields then you will be able to watch the stream from any IP address (from any PC)
- If you fill some IP address into "Authorised IP address" field then you will be able to watch the stream only from that IP address
- By default, RTSP stream is secured by ONVIF accounts. If you want to access it without password prompts, you may check Anonymous Access.
- Video resolution, frame rate, bitrate and size of video packets can be set as well - it is recommended to change it only if the video is not displayed correctly with default settings!

VLC media player settings (version 3.0.10 Vetinari)
- Open your VLC media player and click on the Media tab on the top left corner. After that choose Open Network Stream, go to section Network and fill in the stream URL from the 2N IP Intercom. Do not forget to use rtsp protocol.
All these steps are shown in the picture below.
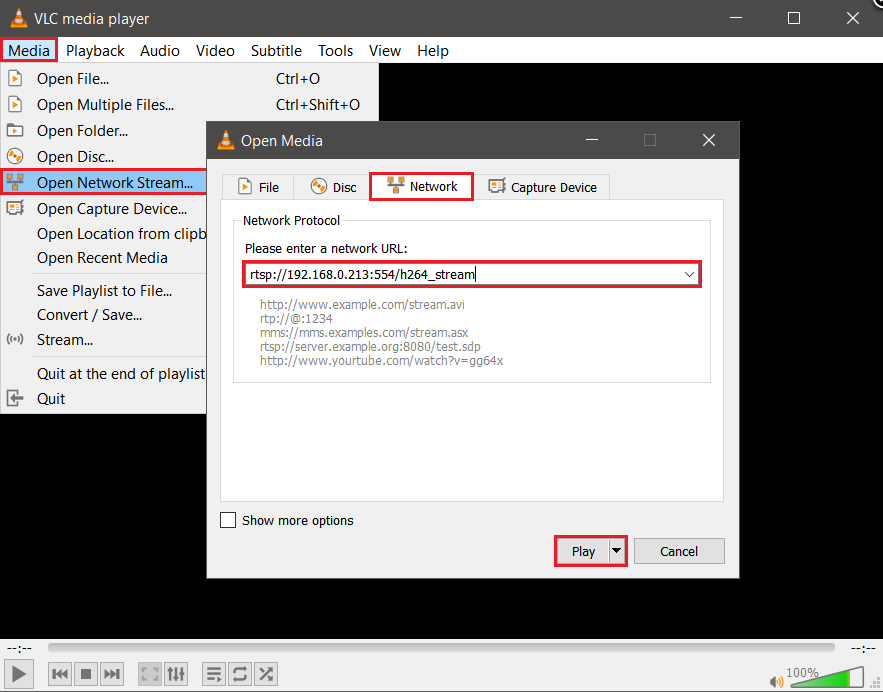
- Finally click on the Play button and the stream will start. You should see a stream in new window.

VLC Player - How to record video from 2N IP Intercom
VLC Media Player settings (version VLC 2.0.5 Twoflower):
Open your VLC Media Player and go to te section "Tools → Preferences". Check the settings of VLC for RTSP streaming in "Input & Codecs" tab - select RTP over RTSP (TCP) and "Save" it as shown in the picture below:

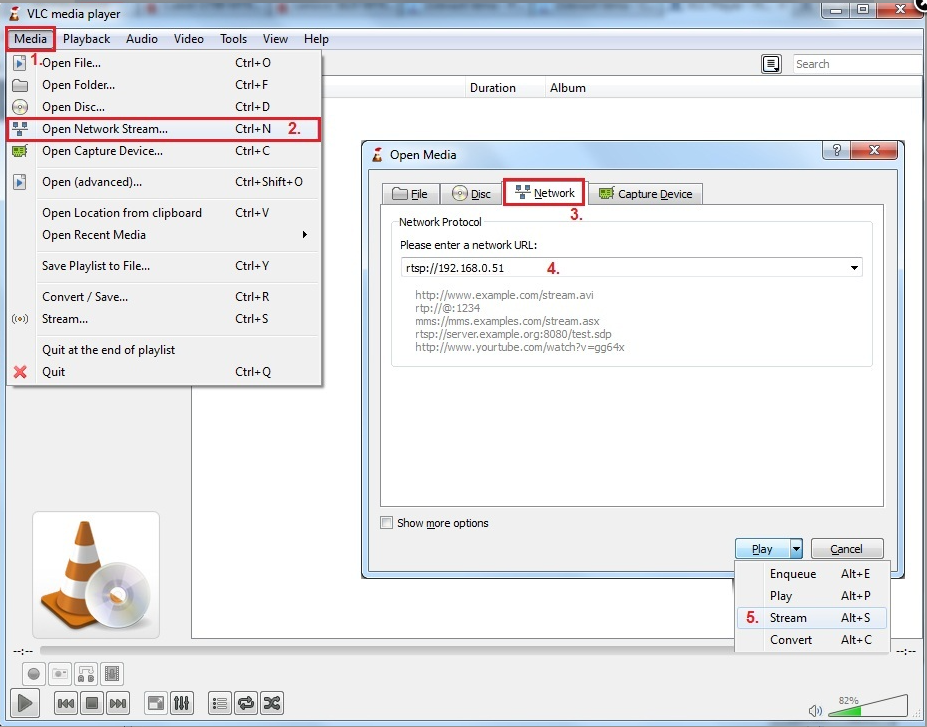
In the next step you have to go to section "Media → Open Network Stream" and fill the IP address of 2N IP Intercom in "Network" tab (the format is rtsp://IP_address as shown below). Then select a "Stream" option.
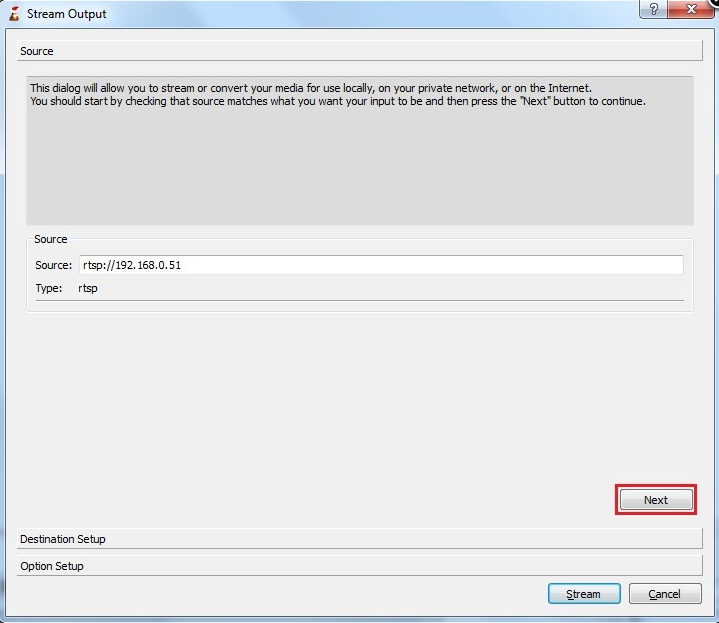
New window will appear in front of you - check the source IP address and click "Next".
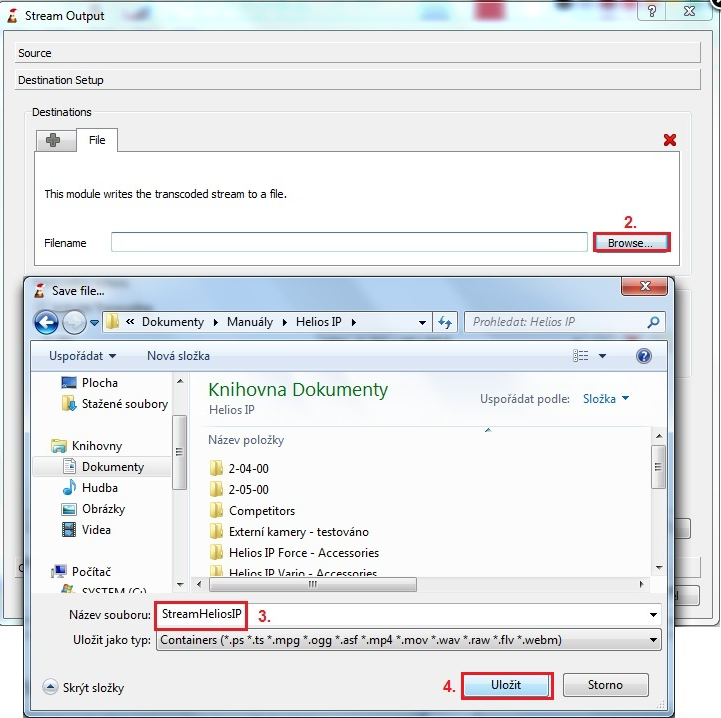
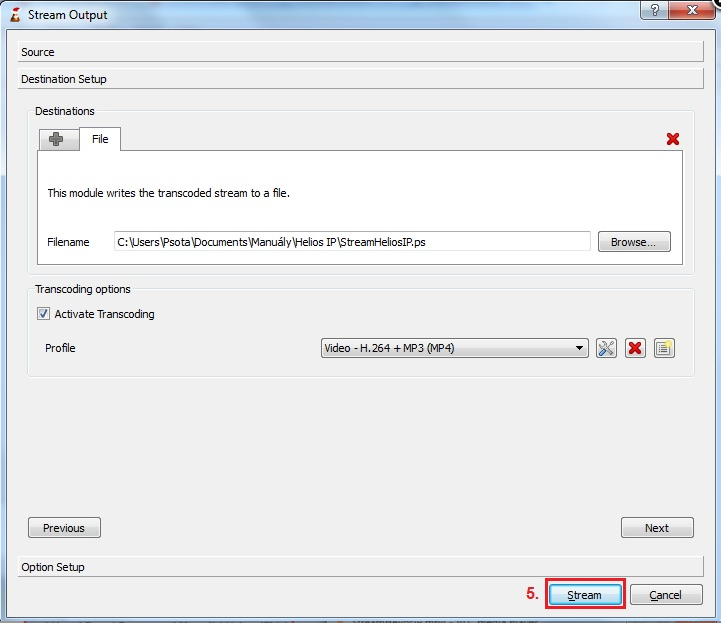
Now you have to add new destination (File) to which is video recorded. In next step choose the destination, fill in the file name and "Save" it. If you want to see the video during recording, please check "Display locally". If you wish to configure the final codec an output, you can do it by the "Activate trans coding", feel free to set it as you wish. Finally click on "Stream" button.

Recorded file should be saved in predefined path and once you open it you will see recorded video.

2N IP Intercom settings:
You have to enable RTSP server and also enable video, audio or both – see picture below.
Video resolution, frame rate, bitrate and size of video packets can be set as well - it is recommended to change it only if the video is not displayed correctly with default settings!