2N® Indoor Compact/Talk/View - How to add and configure the device with 2N® Mobile Video service
There are two modes of the SIP registration of the 2N® Indoor Compact unit to the My2N portal:
- Local - allows you to use the 2N® Indoor Compact in your local network. The reason why you can choose this mode is to make the configuration of the intercom easier so it is not necessary for you to disable the automatic configuration and you can just simply add the 2N® Indoor Compact in your local mode and the intercom will be configured automatically. In this mode, the 2N® Indoor Compact has to be placed in the same LAN as the intercom.
- Cloud - this mode allows you to make the calls from the 2N® Indoor Compact to the 2N® Mobile Video application and vice versa. You can use this mode in situations where the unit is placed in a different LAN than the intercom.
1. Local mode
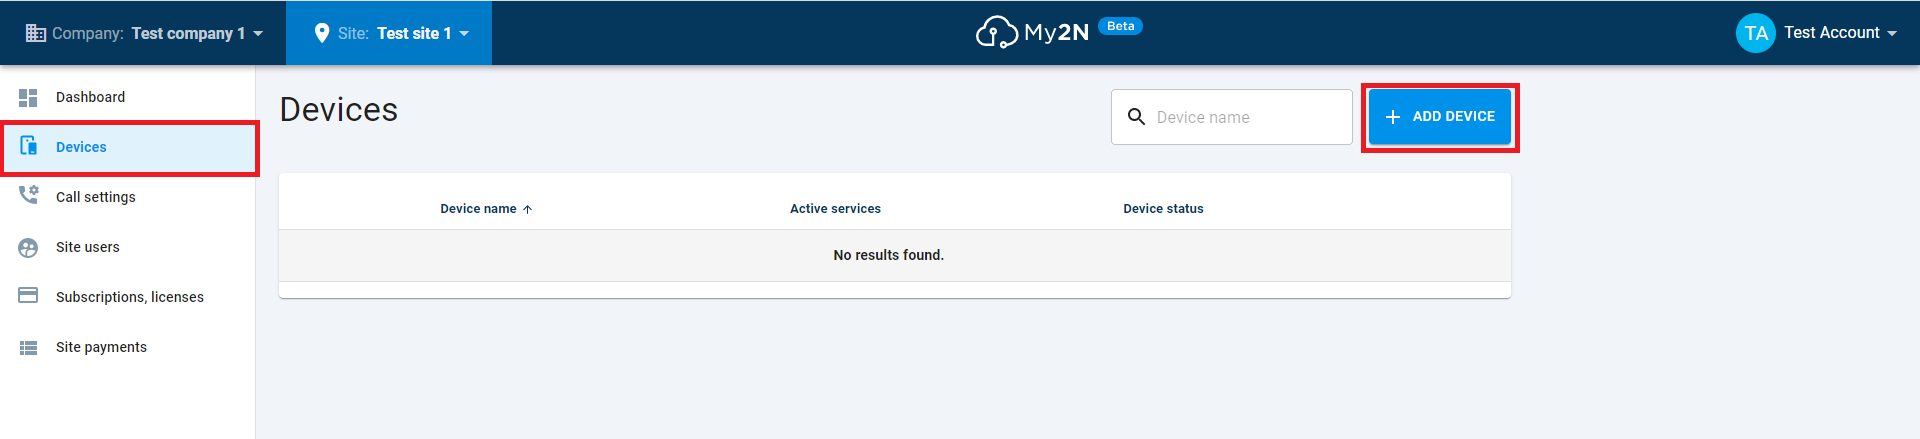
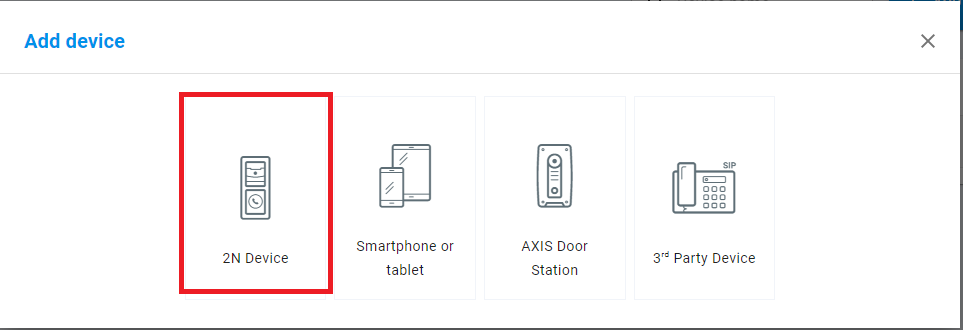
- You can add the 2N® Indoor Compact by clicking on the Devices button and then the ADD DEVICE button. Then choose 2N Device option.
In the next step you will be asked for putting of the serial number of the device, its My2N Security Code and you will name the device.
Finally you will confirm it by clicking on NEXT below right (and also on one upcoming window).

Security code
- Security code is included in the package with the device on the card.
Another way how you can obtain the security code is to go to the device setting section System - Auto Provisioning. - Note that security code is shown in the firmware version 2.26 and higher.

- You can also generate a new security code. If you do so, remember to verify the device's security code again in My2N.
Adding device to MY2N cloud without the security code
- Device can be added also without the security code by using MY2N ID. The procedure is exactly the same as described here.
- Name device - this is a name which will be shown in your My2N account (in this example the name of the device is Entry Hall)
- Security code is included in the package with the device on the card.
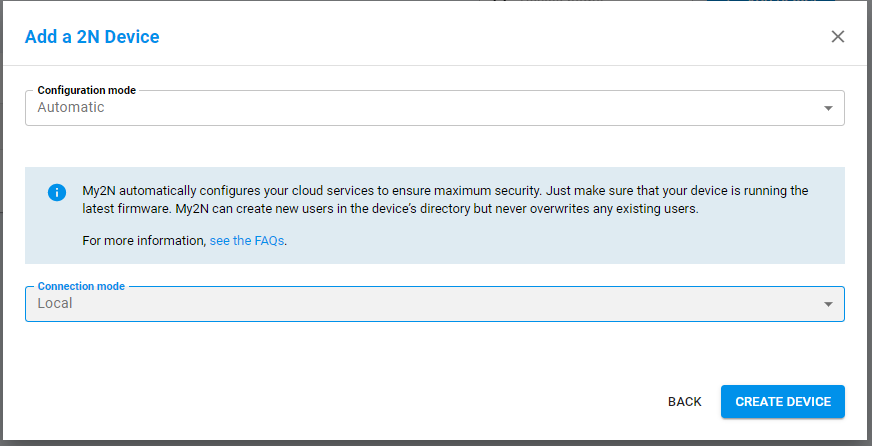
- Now you just need to choose between Automatic and Manual configuration mode and Local and Cloud connection mode (explained above) and click Create Device. Configuration modes are explained in the Cloud mode section below.
2. Cloud mode
You have two options how to set up your 2N® Indoor Compact. You can use automatic or manual configuration mode. Mode selection is available while adding device (see above) or you can change the mode in device details. You can open device details by clicking on the arrow, as highlighted below:
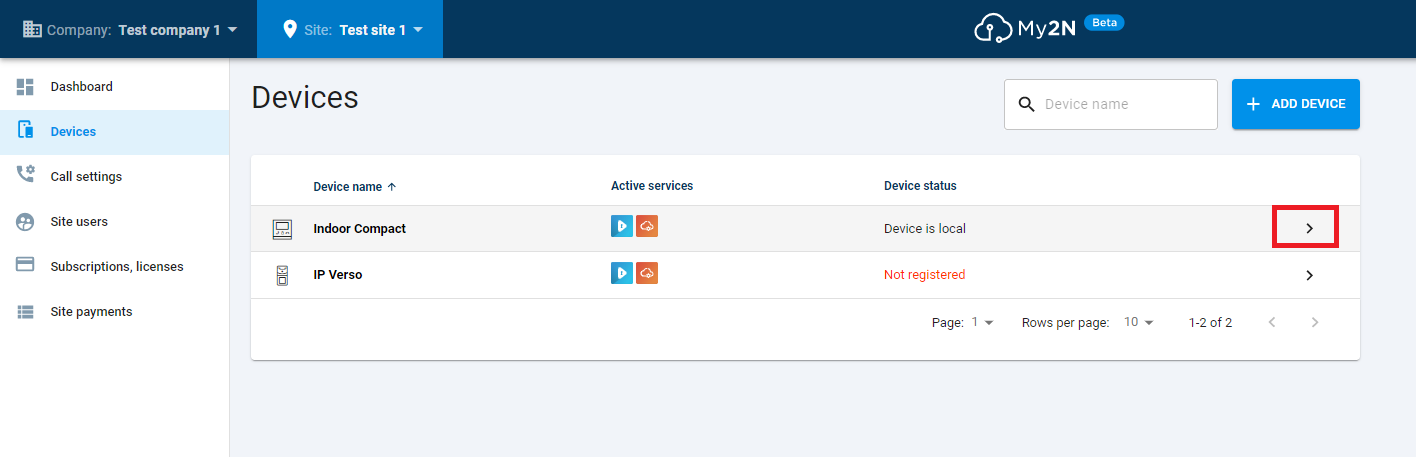
Figure 4
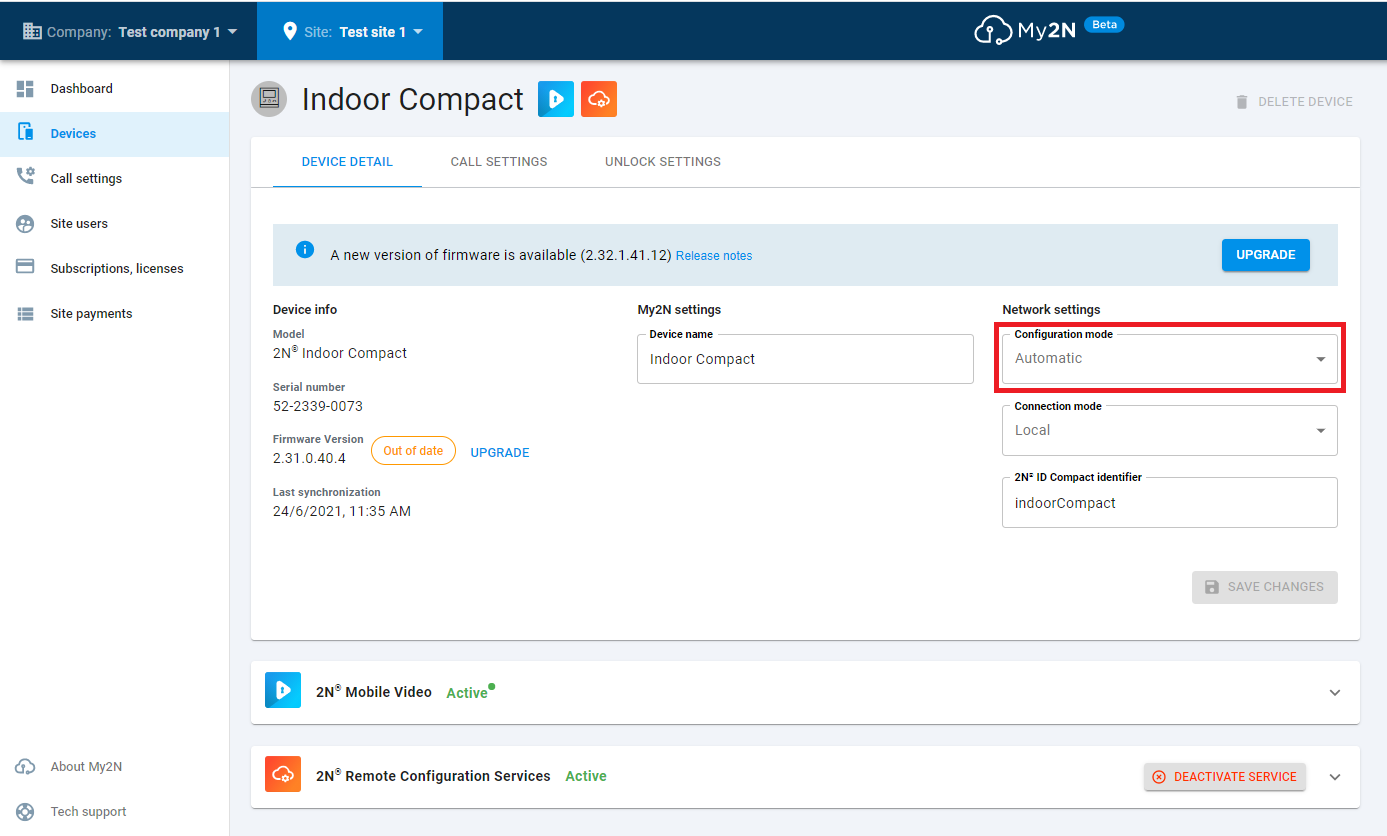
Figure 5
Automatic configuration
First option is an automatic configuration mode. This mode is used for comfortable configuration of your answering unit via My2N service. You are able to configure switch codes and dial button of the 2N® Indoor Compact. You just need to go to device details setting (Figure 4) and then to the Call settings section. You can simply choose the call destination, which will be assigned to calling button, from the list of the devices connected in your MY2N account.
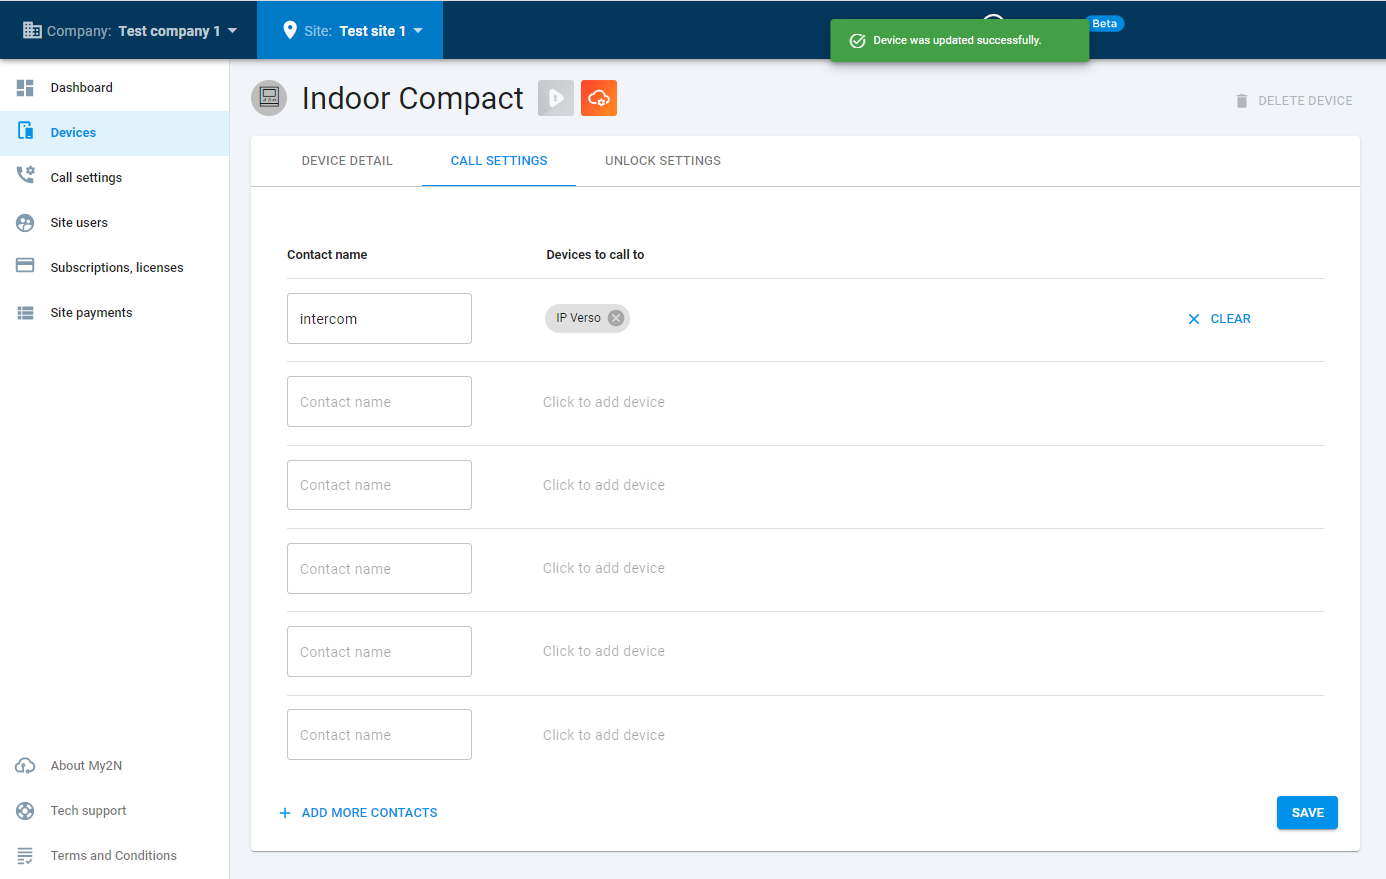
Figure 6
You can also change the unlock code sequence which is by default set to 00:
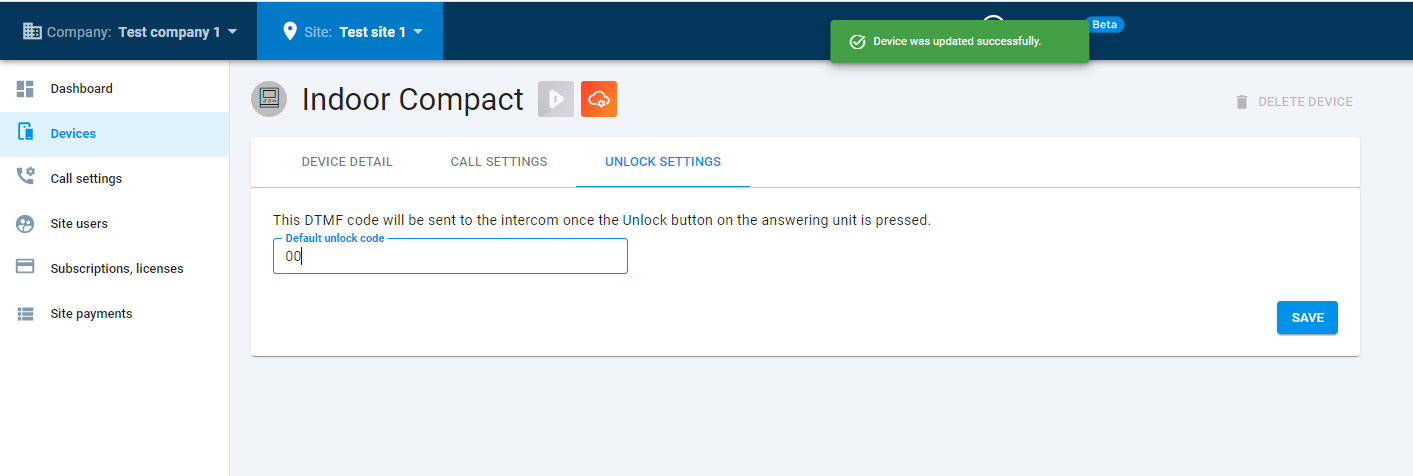
Figure 7
Manual configuration
Second mode is manual one. This means that you have to open web configuration interface of the 2N® Indoor Compact and set up all required parameters there. In this case you have to switch off the automatic mode (please refer to Figure 5).
1. You can specify the number to which the call should be established and SIP account which will be responsible for the forwarding of the call. The number of the device (Device ID) is shown in My2N portal Settings section. In this example the number is 4962898773 which is the ID of the registered Intercom. You can specify this number in the Directory menu section of the 2N® Indoor Compact. SIP account is defined by /2 parameter in the Phone number field. It is necessary to use SIP account number 2 for the proper function.
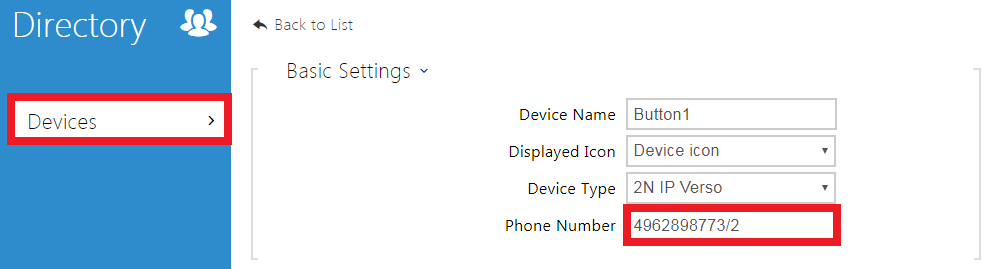
Figure 8
2. Secondly you have to adjust the settings in the section Services-Phone-SIP 2. Here you have to specify the following parameters:
- Phone Number (ID): ID of the intercom assigned by the My2N portal
- Domain: Domain name of the My2N service (proxy-x.my2n.com)
- Authentication: Authentication of your device
- Proxy Address: Domain name of the My2N service (proxy.my2n.com)
Proxy Port: Listening SIP port
SIP Port: TCP has to be used
Note
It is highly recommended to use SIP 2 account only, while registering the device to the My2N portal.
The SIP registration details can be obtained in the 2N® Indoor Compact device detail setting in your account (refer to Figure 4). In device detail, click on the arrow on the right to the "2N Mobile Video" section and then you will see the SIP Proxy credentials.
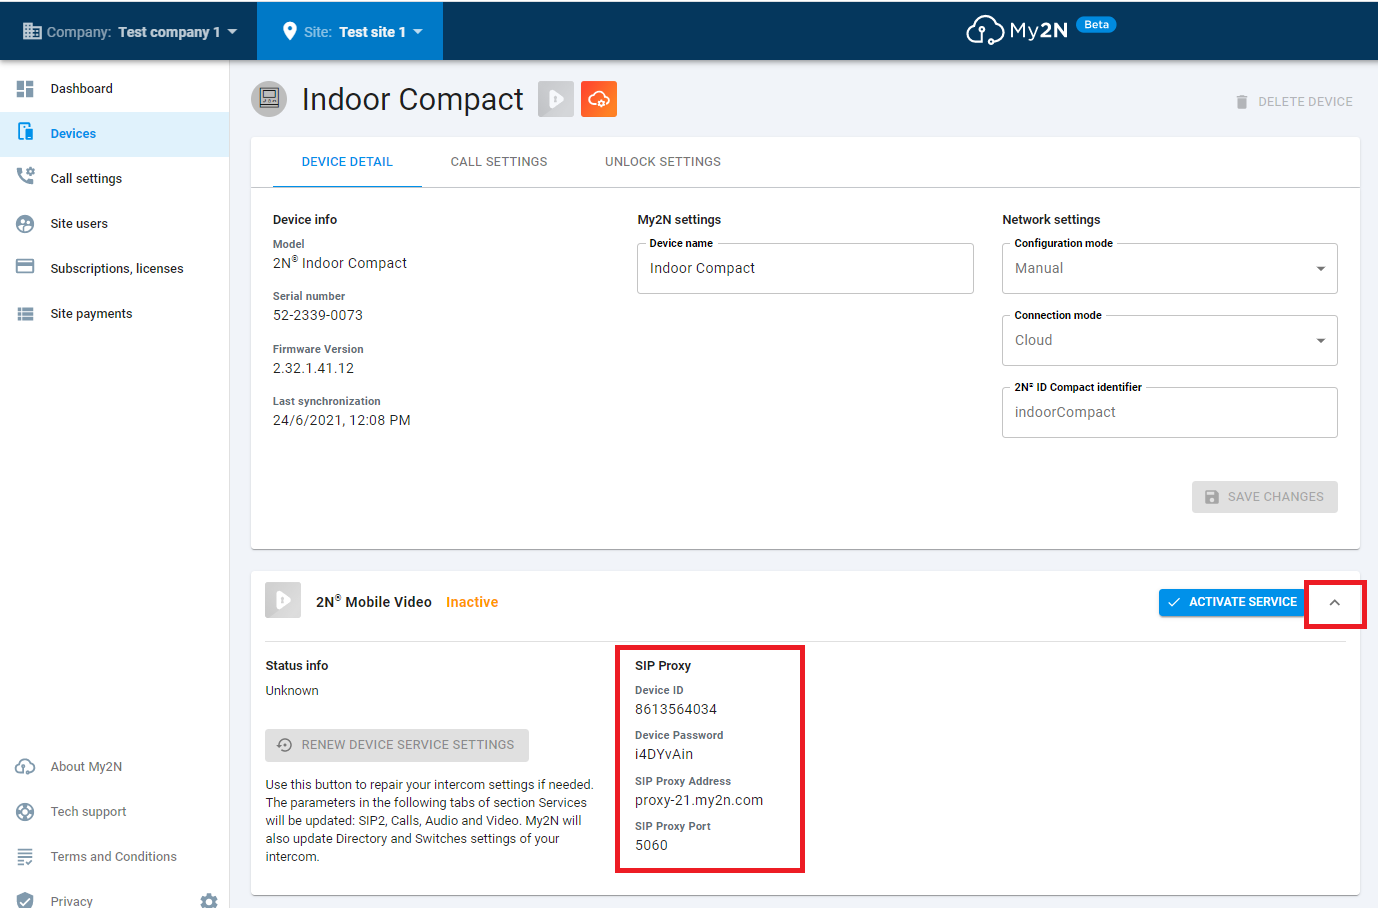
Figure: 9
You can simply configure these parameters in the intercom then:
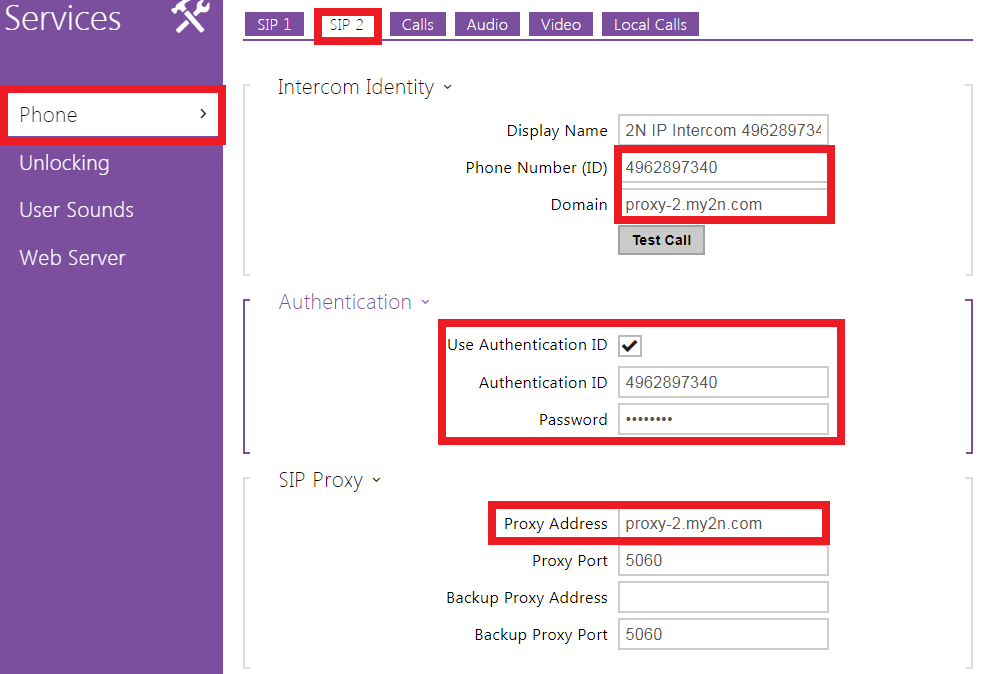
Figure: 10
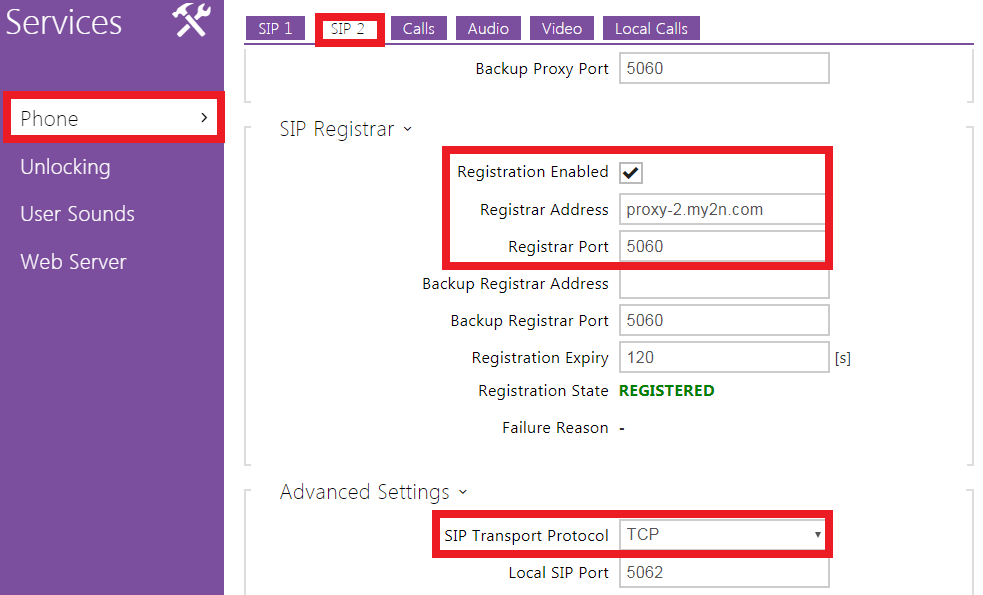
Figure 11
Successful registration is verified by the value: Registration State: REGISTERED.
3. Last step is to check the answering mode in the section Services - Phone - Calls, DTMF options in section Services - Phone - Audio and also unlocking code can be adjusted (Figure 14). Make sure that the same unlocking code is configured on the intercom side section Hardware - Switches - Activation codes.
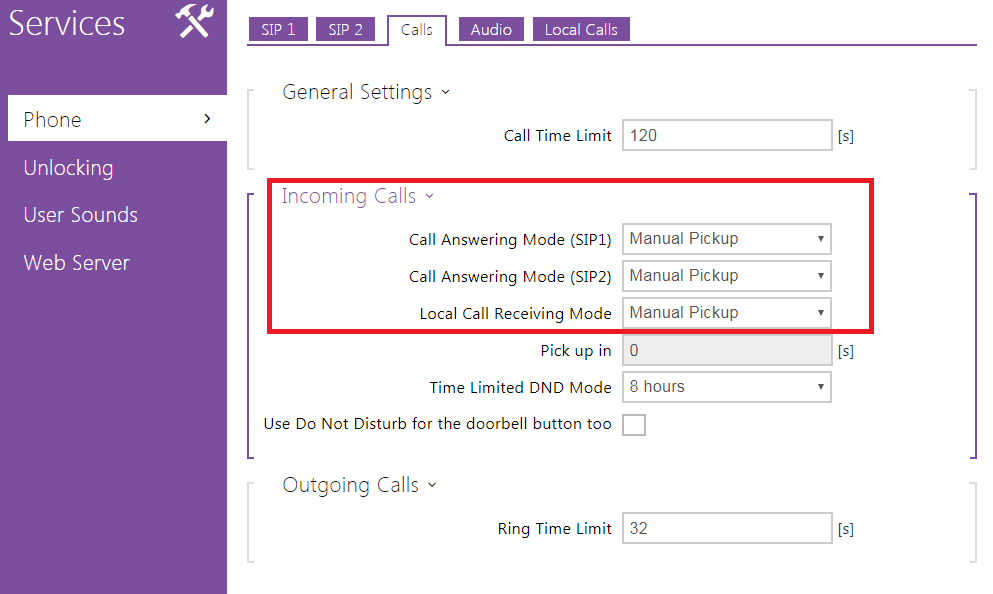
Figure 12
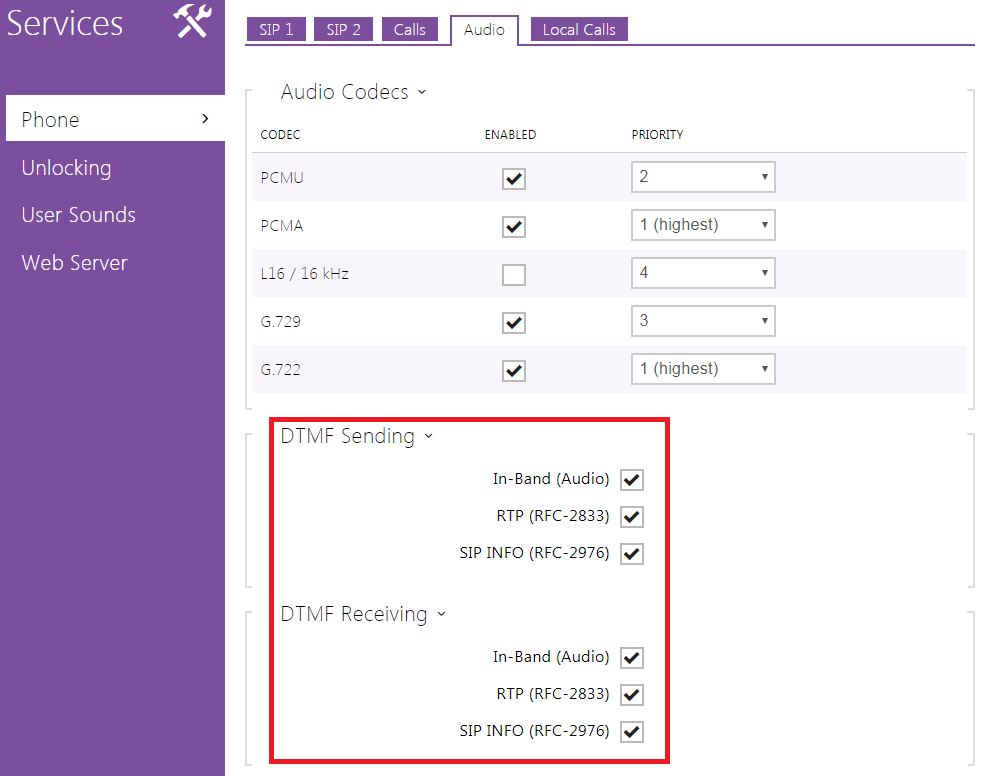
Figure 13
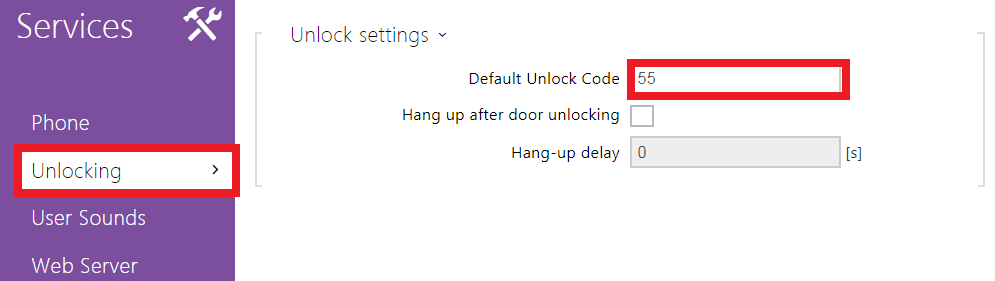 Figure 14