Avaya - How to interconnect with Avaya Aura Communication Manager using ISDN
Following FAQ page describes how a 2N® Stargate can be connected to Avaya Aura Communication Manager using ISDN.
If you are currently using firmware that is older than version 1.20 (1.19 and lower) please upgrade your firmware version or go here: old routing , where you will find FAQ on how to set this function in older FW version.
- Parameters of 2N® Stargate:
- IP address 10.10.16.2
- Incoming port: 5060
- Firmware: 1.17.0.20.2
- Avaya equipment parameters:
Avaya Aura® Communication Manager
version: R6.3 Build R016x.03.0.124.0
update: 03.0.124.0-20850
Avaya Aura® System Manager
version: R6.3 Build 6.3.0.8.5682-6.3.8.1814
update 6.3.3.5.1719
Avaya Aura® Session Manager
version: R6.3 Build 6.3.3.0.633004
- IP address: 10.10.16.214
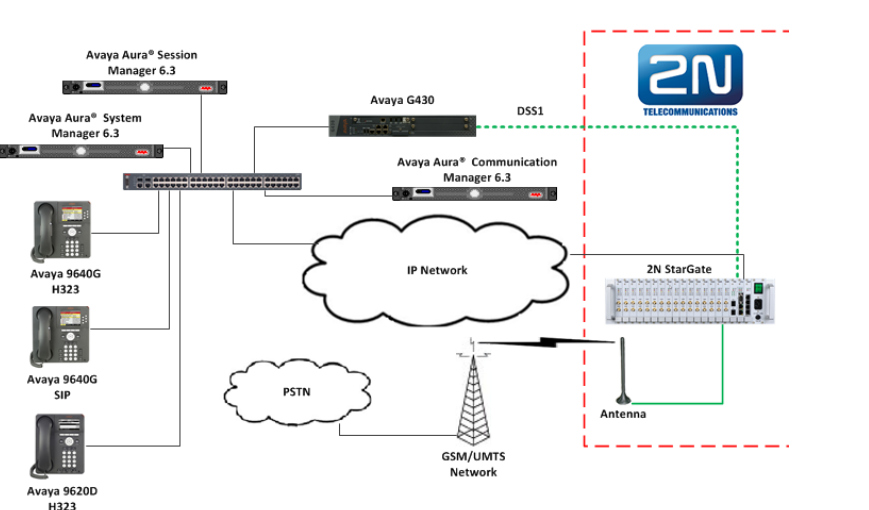
Scenario
- We have an IP network in which an Avaya solution (that consists of Communication Manager, System Manager, Session Manager and an Avaya G430 Gateway) and several SIP phones
- The Communication Manager is configured to communicate with 2N® Stargate via a DSS1 line on the Session Manager.
- The configuration would be as shown in the figure below.
2N® Stargate settings
Configuration of ISDN line
Log in to web interface of your gateway and go to part Gateway configuration -> ISDN parameters.
Under PRI mode selection choose mode PRI1 NT/M - PRI2 TE/S and click on Save icon in the bottom right corner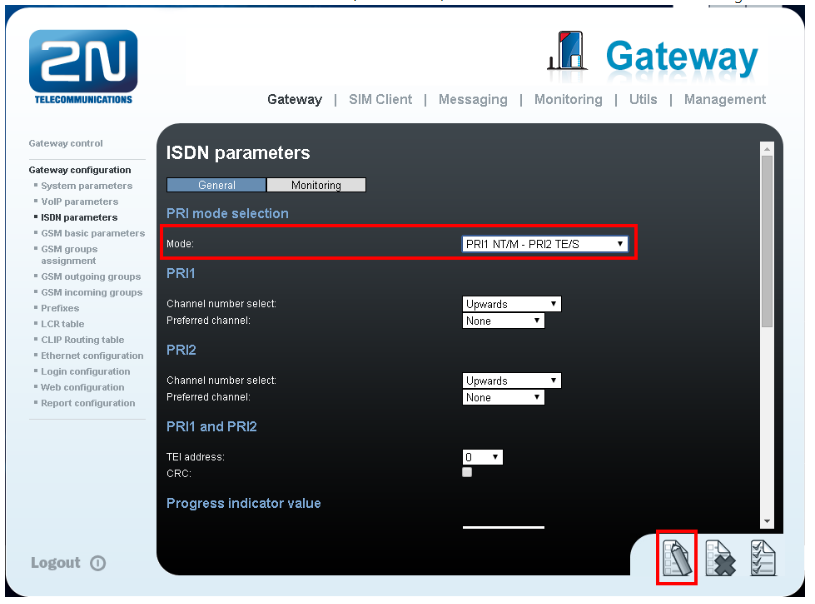
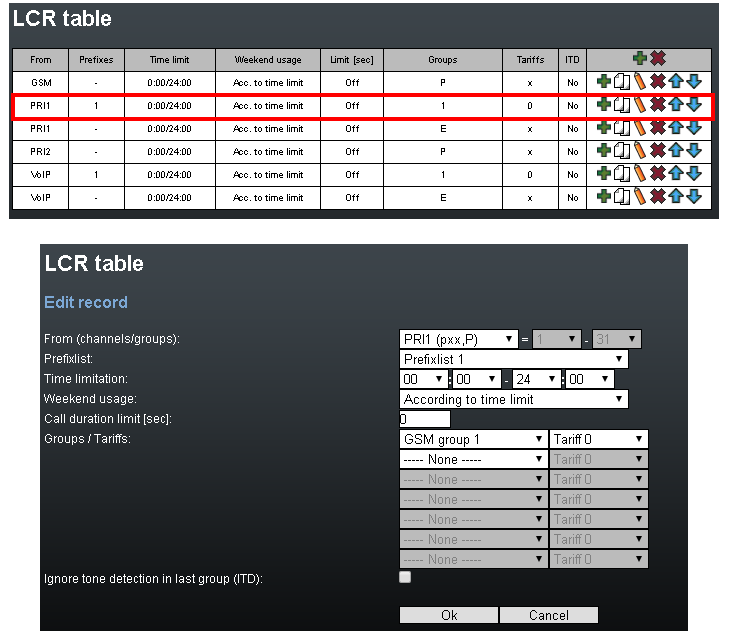
Configuration of the LCR (Least Cost Routing)
- In firmware 1.20 the LCR process has been changed, you can find more information about the change here:
Call routing - Changes in call routing in firmware 1.20+ compared to earlier versions on 2N® VoiceBlue Next
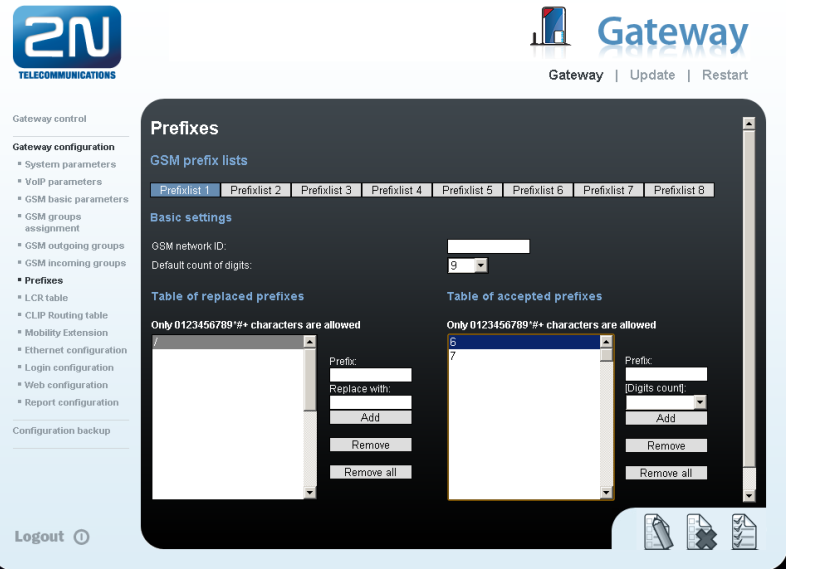
First thing you need to do is to configure Prefix list. You can find all necessary information on how to setup prefix list and LCR table on following FAQ:
Call routing - SIM selection based on called number
I am going to setup the prefixes on an example from our operator. The GSM operator is using prefixes 6 and 7 with a nine digits numbering plan. The setting is below.
- You need to create LCR rule for defined prefixes. In default LCR table is setup to send calls from ISDN to GSM. The dialled number must match prefix list 1.
- In firmware 1.20 the LCR process has been changed, you can find more information about the change here:
Configuration of GSM outgoing groups
You are able to set up different settings for each GSM group (CLIR, free minutes, virtual ring tone, roaming and others).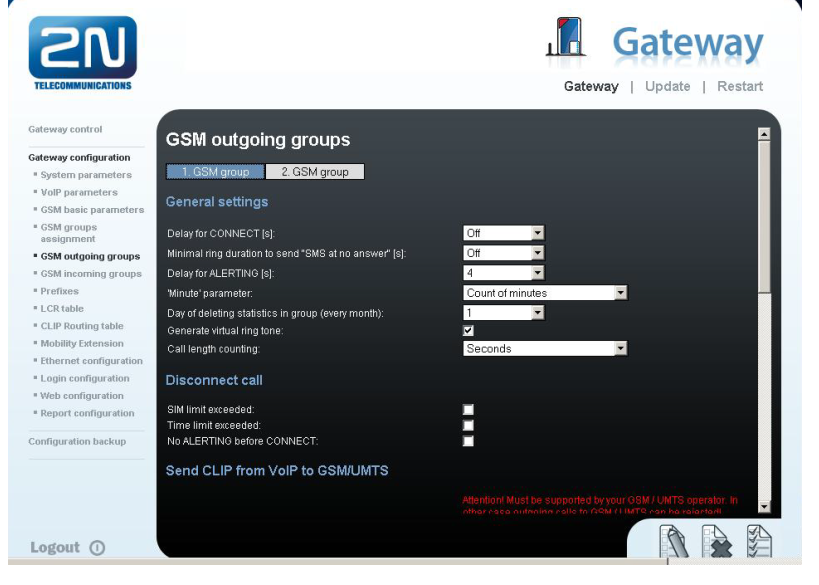
Incoming calls
For incoming calls you can define 32 groups (one for each module) with the different behaviour and assign them to the GSM modules. The settings are similar with GSM groups assignment for outgoing calls.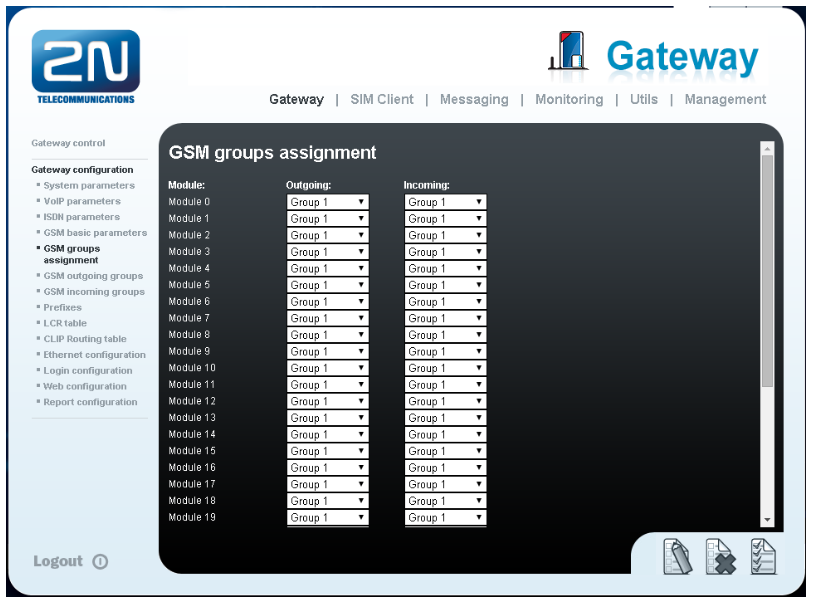
In GSM incoming groups you can define the behaviour for each GSM incoming group. Choose the mode to Reject, Ignore, Accept incoming calls or Callback.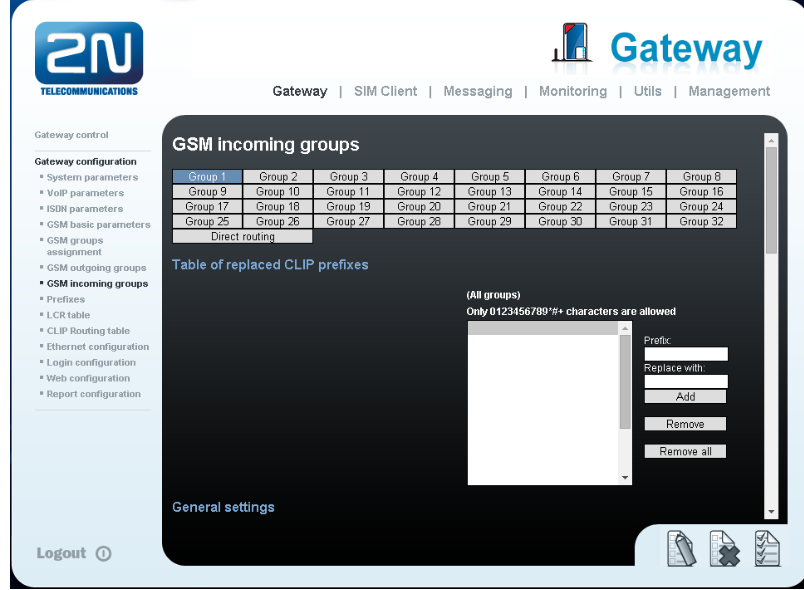
You can define the list of called numbers which will be automatically dialled after DTMF dialling timeout if the customer does not press any button within the specified time. From the configuration you can see 10 seconds for DTMF dialling and after that the call will be routed to the extension 100 (if you set up SIP proxy (GSM->IP) in VoIP parameters).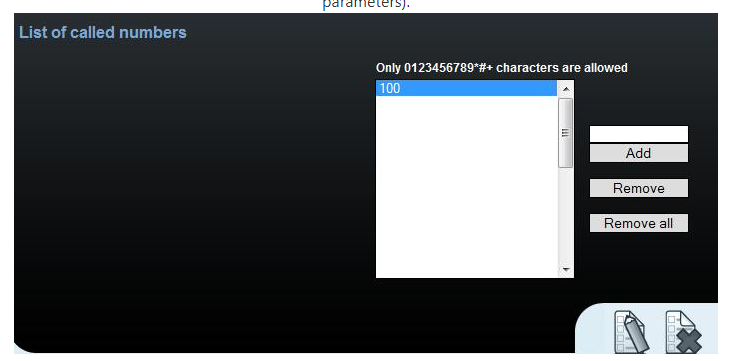
Avaya Aura® Communication Manager settings
Configurations of the Communication Manager illustrated in this section were all performed using Communication Manager’s SAT administration interface. It is implied a working system is already in place including a Node for the Session manager and procr.
Configure DS1 Circuit pack
Avaya G430 and DS1 Circuit pack should be installed and configured as an E1 QSIG. If you don't know how to install or configure them, please contact your Avaya support. Picture bellow shows configuration of DS1 interface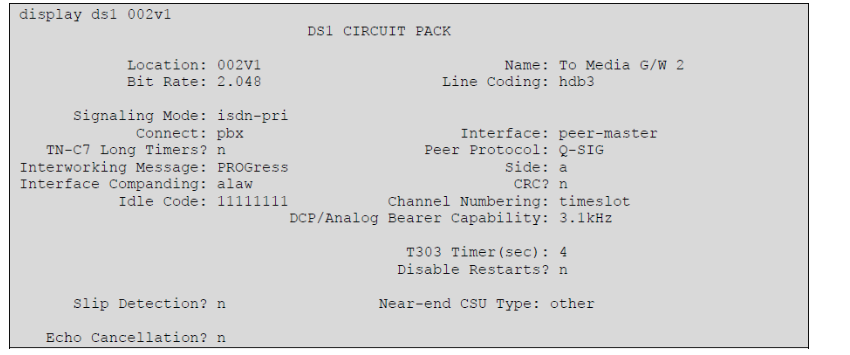
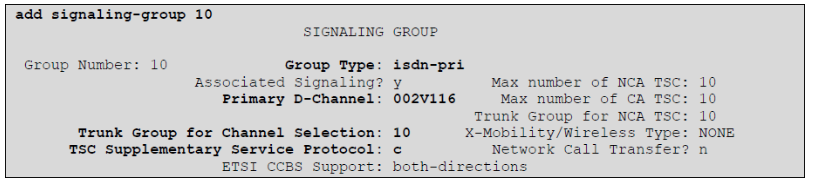
Configure of signalling-group
A signalling group is required before a trunk-group can be configured. Use the add signalling-group command followed by next available signalling-group number to configure the following:
Group Type: Enter isdn-pri
- Primary D-Channel: Enter 002V116 (this is the D-Channel associated with the DS1 Circuit Pack)
- Trunk Group for Channel Selection: Enter 10 (This will be the trunk-group used in next section, section 3)
- TSC Supplementary Service Protocol: Enter c (ETSI/DSS1)
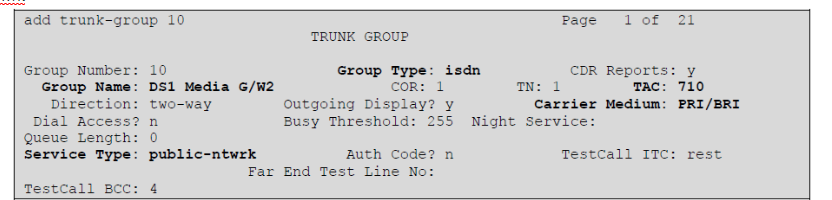
Configure Trunk group
Use the add trunk-group command followed by next available Group number and configure the following:
On Page 1Group Type: Enter isdn
- Group Name: Enter an informative name for the trunk i.e. DS1 Media G/W2
- TAC: Enter a TAC number i.e. 710
- Carrier Medium: Enter PRI/BRI
- Service Type: Enter public-ntwrk
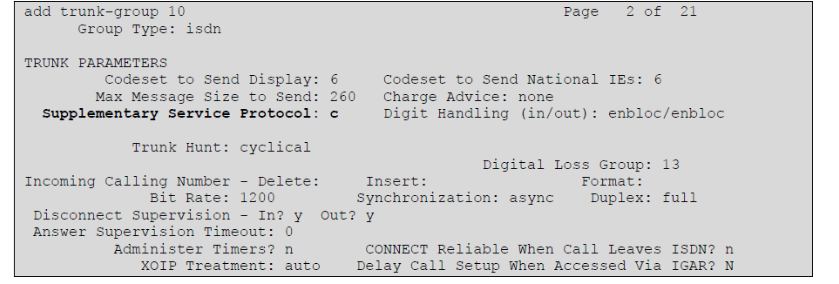
On page 2 enter: - Supplementary Service Protocol: Enter c (ETSI/DSS1)
If you would like to know more about how to configure your gateway, please look at www.faq.2n.cz or in the device manual at wiki.2n.cz